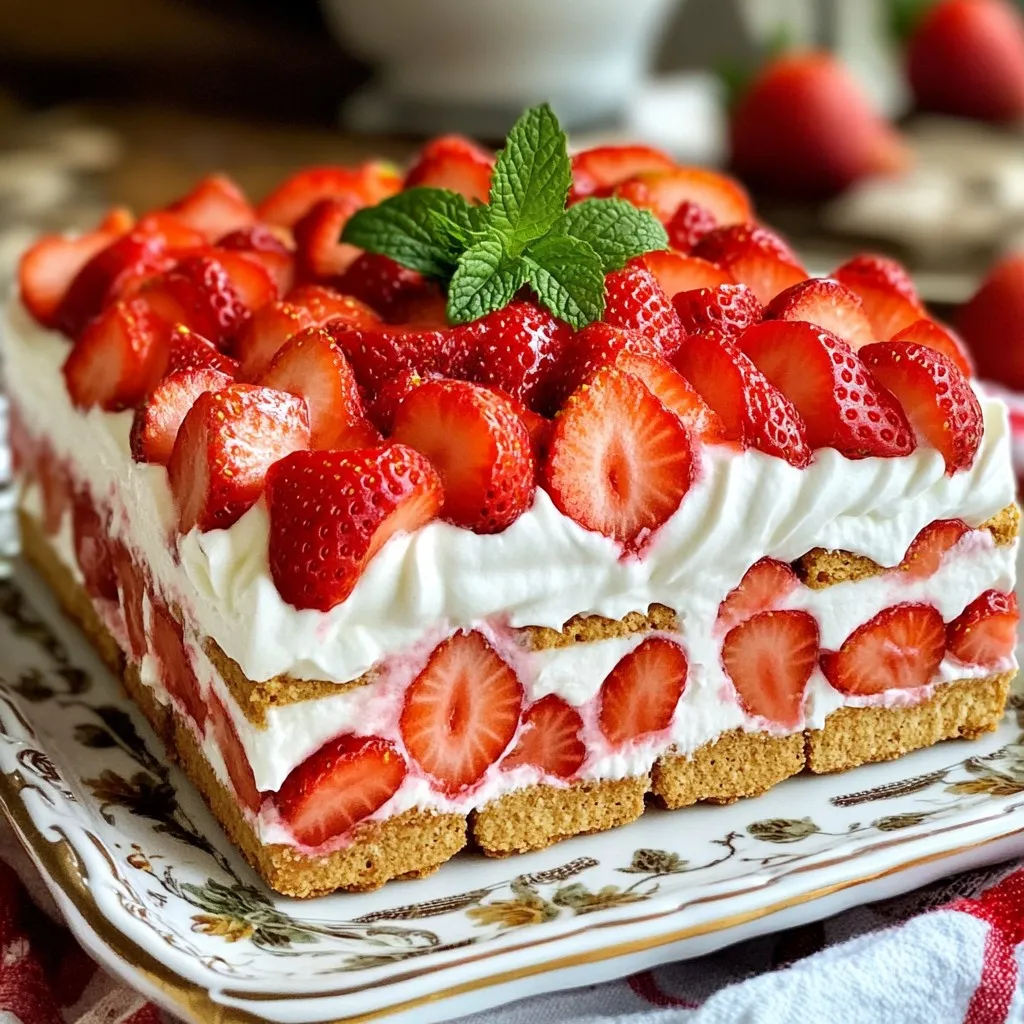
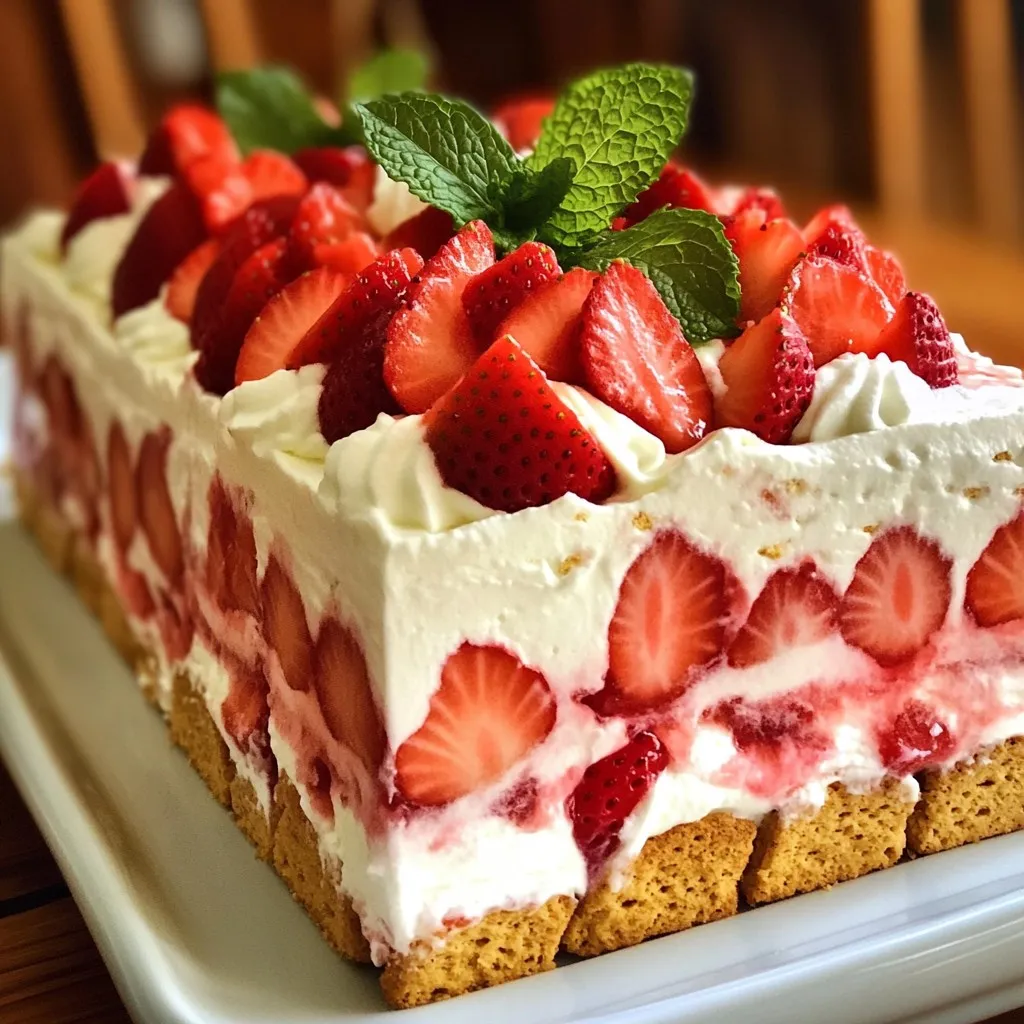
If you’re craving a sweet treat that is easy to make, look no further! This no-bake Strawberry Shortcake Icebox Cake is the perfect dessert for any occasion. Bursting with fresh strawberries, creamy layers, and crunchy graham crackers, it offers a delightful balance of flavors and textures. Join me as I guide you through a simple recipe that will impress your friends and family without the stress of baking. Let’s dive into this delicious creation!
Ingredients
Fresh Ingredients Needed
– 2 cups fresh strawberries
– 1/4 cup granulated sugar
– Fresh mint leaves for garnish (optional)
Creamy Components
– 1 cup heavy cream
– 1 cup cream cheese, softened
– 1/2 teaspoon vanilla extract
Base Layer
– 1 package (14 ounces) of graham crackers
Fresh strawberries shine in this recipe. They add bright color and sweet flavor. I choose ripe strawberries for the best taste. The granulated sugar helps soften them too. It brings out their natural juices. You can also toss in some fresh mint leaves for a pop of color.
Next, we need creamy components. Heavy cream is key for making fluffy layers. Cream cheese adds richness and a smooth texture. Don’t forget the vanilla extract; it enhances the flavor. Together, these ingredients create a light and dreamy filling.
Finally, we have the base layer. Graham crackers give structure and crunch. They soak up the cream and strawberry juices. This creates a delightful contrast in textures. You can use any brand you like, but choose a plain flavor for best results.
Now that we have all our ingredients, we are ready to create a no-bake delight!
Step-by-Step Instructions
Preparing the Strawberries
– Combine 2 cups of sliced strawberries with 1/4 cup of granulated sugar.
– Toss gently and let them sit for 10 to 15 minutes to macerate. This step helps the strawberries soften and release their sweet juices.
Making the Cream Mixture
– In a large bowl, whip 1 cup of heavy cream, 1 cup of softened cream cheese, and 1/2 teaspoon of vanilla extract.
– Use an electric mixer until soft peaks form. This mixture should be fluffy and well combined.
Assembling the Cake
– Take a 9×9 inch baking dish and spread a thin layer of the cream mixture on the bottom.
– Place a layer of graham crackers over the cream, covering the bottom completely.
– Spread some of the whipped cream mixture over the graham crackers, then add a layer of macerated strawberries on top.
– Repeat these layers: graham crackers, cream mixture, and strawberries until you reach the top.
– Finish with a layer of whipped cream on top.
– Cover the dish with plastic wrap and refrigerate for at least 4 hours or overnight. This allows the flavors to meld and the graham crackers to soften.
– When you’re ready to serve, cut the cake into squares and garnish with fresh mint leaves if desired.
Tips & Tricks
Perfecting the Whipped Cream
To get the right texture for whipped cream, start with cold heavy cream. Use a clean bowl and beaters. Whip the cream until soft peaks form. This means the cream holds its shape but is still soft. If you whip too long, it can turn into butter. To prevent this, watch it closely. Stop when it looks fluffy and smooth.
Serving Suggestions
Cutting the cake is easy. Use a sharp knife dipped in warm water to slice through. This helps make clean cuts. Serve each piece with a spoonful of strawberries on top. You can also add fresh mint leaves for a nice touch. They give a pop of color and flavor.
Make-Ahead Tips
You can prepare this cake in advance. Make it the day before you plan to serve it. It will taste great after chilling overnight. For best freshness, cover it tightly with plastic wrap. This keeps it moist and prevents it from absorbing odors. Store it in the fridge until you are ready to enjoy!
Variations
Fruit Alternatives
You can change up the fruit in this cake. Try using blueberries, peaches, or raspberries. Each fruit brings its own flavor and color. You can also use whatever is in season. Fresh, ripe fruit always tastes best. This way, you can enjoy a new flavor each time you make the cake.
Flavor Enhancements
Want to add a twist? You can add citrus zest, like lemon or orange, to the cream. This gives a bright flavor that pairs well with the fruit. You can also mix in some chocolate layers. Just melt some chocolate and swirl it into the cream. This creates a rich and tasty treat.
Dietary Adjustments
If you need to make this cake gluten-free, look for gluten-free graham crackers. They work well and taste great. For a vegan option, you can replace the cream cheese with a plant-based cream cheese. Use coconut cream instead of heavy cream for a lighter option. These simple swaps let everyone enjoy this delicious dessert.
Storage Info
Refrigeration Guidelines
Store the cake in the fridge for up to three days. To keep it fresh, cover the dish tightly with plastic wrap. This helps prevent the cake from drying out or absorbing other odors.
Freezing Instructions
Yes, you can freeze the icebox cake. Wrap it tightly in plastic wrap and then in aluminum foil. When you are ready to serve, thaw it in the fridge overnight. This keeps the texture nice and creamy.
Signs of Freshness
Check for any odd smells or changes in color. If the whipped cream looks runny or separates, it’s best to toss it. To extend shelf life, always cover the cake well and keep it chilled.
FAQs
Can I use frozen strawberries?
Yes, you can use frozen strawberries. They work well in this recipe. However, fresh strawberries give a better texture and flavor. Frozen strawberries may be softer and watery after thawing. If you choose frozen ones, let them thaw and drain excess juice. This helps keep the cake from getting soggy.
How long does it take for the cake to set?
The cake takes at least four hours to set. For best results, refrigerate it overnight. This time allows the graham crackers to soften. It also lets the flavors blend nicely. The longer it sits, the better the taste will be.
What can I substitute for cream cheese?
You can use mascarpone cheese as a substitute. Greek yogurt is another great option. Both will add creaminess without losing flavor. Just remember to adjust the sweetness if needed. These alternatives keep the cake light and delicious.
This blog post showed you how to make a delicious icebox cake. You learned about fresh ingredients, creamy components, and step-by-step instructions. We covered helpful tips, variations, and storage info to keep your cake fresh.
Remember, this dessert is easy to adjust based on your favorite fruits and flavors. With these guidelines, you can create a treat that’s perfect for any occasion. Enjoy making your own icebox cake and impress your friends and family with your skills!
