No-Bake Strawberry Cheesecake Jars Simple Delight

WANT TO SAVE THIS RECIPE?

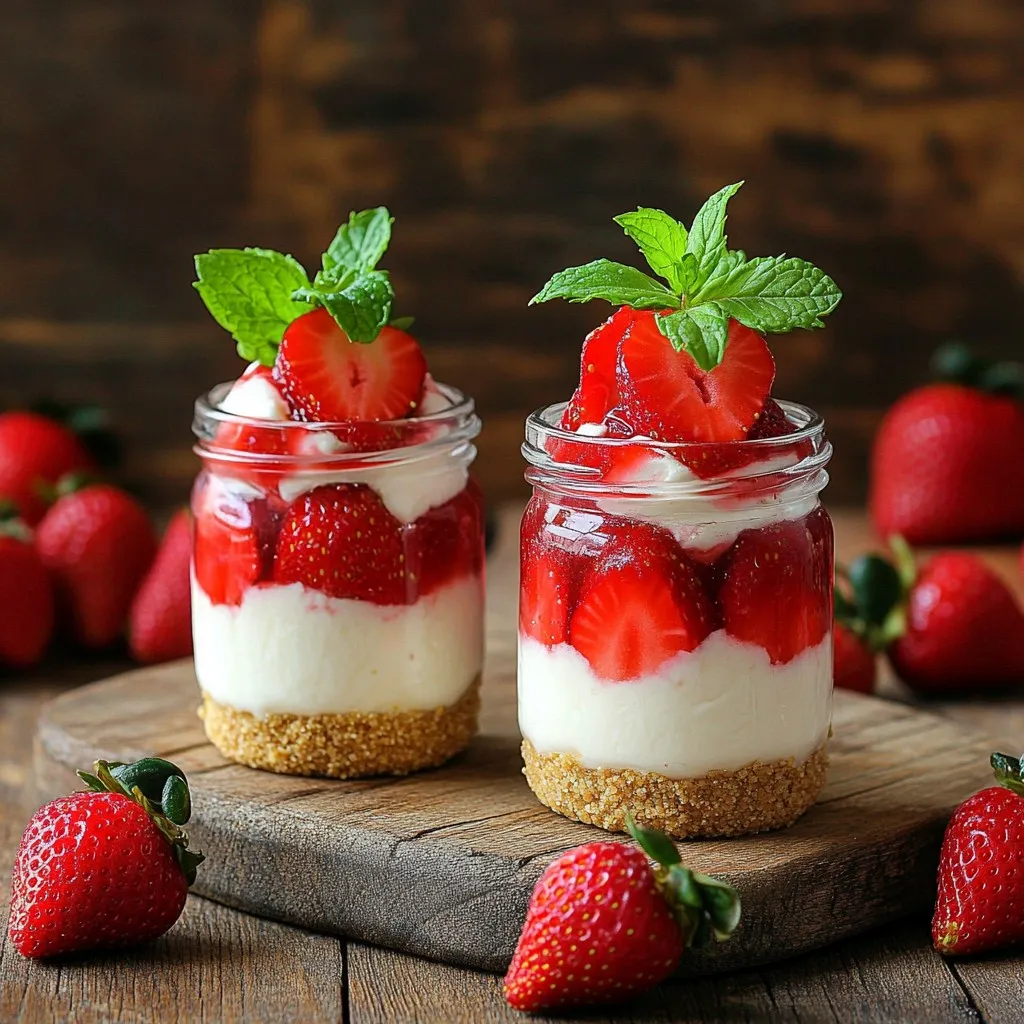
Welcome to a sweet escape! In this post, I’ll share my simple recipe for No-Bake Strawberry Cheesecake Jars. You’ll discover how easy it is to whip up a delightful treat without turning on the oven. With fresh strawberries and a creamy filling, this dessert satisfies your sweet tooth. Follow my step-by-step guide for perfect results, plus tips for fun variations and storage. Let’s get started on this delicious journey!

Ingredients

Essential Ingredients for No-Bake Strawberry Cheesecake Jars

To create your no-bake strawberry cheesecake jars, you need these key ingredients:

– 1 cup graham cracker crumbs

– 4 tablespoons melted butter

– 2 cups cream cheese, softened

– 1 cup powdered sugar

– 1 teaspoon vanilla extract

– 1 cup heavy whipping cream

– 2 cups fresh strawberries, hulled and sliced

– 2 tablespoons sugar (for strawberries)

– Fresh mint leaves (for garnish)

These ingredients work together to create a creamy, sweet, and fruity dessert. The graham cracker crumbs form the crust, while the cream cheese and heavy cream give the filling its rich texture.

Alternative Ingredients for Customization

You can customize your no-bake strawberry cheesecake jars with these alternative ingredients:

– Use crushed cookies instead of graham crackers for a different crust flavor.

– Replace cream cheese with mascarpone for a lighter texture.

– Swap strawberries for blueberries or raspberries for a berry mix.

– Try honey instead of sugar for a natural sweetness.

These options allow you to make the recipe your own. Play around with flavors and textures to find your favorite combination!

Recommended Utensils and Equipment

For this recipe, you will need a few essential utensils and equipment:

– Medium mixing bowl for the crust

– Large mixing bowl for the cream cheese filling

– Electric mixer or whisk for beating the cream cheese

– Rubber spatula for folding in whipped cream

– Small jars or glasses for serving

– Measuring cups and spoons for precise measurements

Having these items on hand will make your preparation smooth and enjoyable. You’ll be ready to whip up these delightful jars in no time!

Step-by-Step Instructions

Preparing the Graham Cracker Crust

First, grab a medium bowl. Add 1 cup of graham cracker crumbs and 4 tablespoons of melted butter. Mix it well. You want the crumbs to be fully coated. This step is key for a yummy crust. Next, divide the mixture into 4 small jars. Press it down firmly. Make sure it forms a nice, even layer at the bottom.

Making the Cream Cheese Filling

Now, take a large mixing bowl. Beat 2 cups of softened cream cheese with 1 cup of powdered sugar and 1 teaspoon of vanilla extract. Mix until it becomes smooth and creamy. This filling is what makes your cheesecake special. In a separate bowl, whip 1 cup of heavy whipping cream. Keep going until you see stiff peaks form. Gently fold this whipped cream into the cream cheese mixture. Be careful not to deflate the whipped cream. This keeps your filling light and airy.

Layering the Ingredients

It’s time to layer everything! Start by adding half of the cream cheese filling over the crust in each jar. Then, take 2 cups of fresh strawberries. Toss them with 2 tablespoons of sugar in a small bowl. Let them sit for about 10 minutes. This helps the strawberries become juicy. Spoon a layer of these strawberries over the cream cheese in each jar. Next, add the rest of the cream cheese mixture on top. Smooth it out with a spatula. Finally, add another layer of the juicy strawberries. Cover the jars with lids or plastic wrap. Refrigerate them for at least 4 hours. For the best taste, leave them overnight. Enjoy your delicious no-bake strawberry cheesecake jars!

Tips & Tricks

How to Achieve the Perfect Cheesecake Consistency

To get a smooth and creamy cheesecake, use softened cream cheese. Cold cream cheese makes lumps. Beat the cream cheese until it is light and fluffy. Mix it with powdered sugar and vanilla extract. Then, whip the heavy cream until it is stiff. Gently fold the whipped cream into the cream cheese. This keeps the mixture light and airy. Avoid over-mixing, as it can deflate the whipped cream. The right balance gives you a perfect cheesecake that melts in your mouth.

Garnishing Ideas for Presentation

Garnishing adds beauty to your cheesecake jars. Use fresh mint leaves for a pop of color. Whole strawberries around the jars create a rustic look. You can also drizzle some strawberry sauce on top. A sprinkle of graham cracker crumbs adds texture. These simple touches make your dessert look more appealing. A beautiful presentation makes it taste even better!

Time-Saving Tips for Quick Prep

Want to make these jars fast? Prepare your ingredients in advance. You can crush the graham crackers and store them in a bag. Whip the cream ahead of time and keep it in the fridge. You can also slice the strawberries early. Just toss them with sugar to keep them fresh. If you’re short on time, use a store-bought crust. These tips help you enjoy making this dessert without stress.

Variations

Different Berry Options

You can swap strawberries for other berries. Raspberries, blueberries, or blackberries work great. Use the same method for layering. Each berry brings its own flavor. Raspberries add a nice tartness, while blueberries give a sweet touch. Adjust the sugar based on the berry’s sweetness. This way, you can enjoy a fruity twist.

Gluten-Free Version

To make this dessert gluten-free, choose gluten-free graham crackers. They taste just like the regular ones. You can also use crushed nuts or oats. Mix them with melted butter for the crust. This version keeps the taste and texture you love. No one will know it’s gluten-free!

Adding a Chocolate Layer

Want to make it even richer? Add a chocolate layer! Melt some chocolate and let it cool slightly. Spread a layer of melted chocolate over the cream cheese mixture. You can use dark, milk, or white chocolate. This adds a delicious surprise in each bite. Chocolate and strawberries create a classic combo that everyone loves.

Storage Info

How to Properly Store No-Bake Strawberry Cheesecake Jars

To keep your no-bake strawberry cheesecake jars fresh, use airtight containers. Cover each jar tightly with a lid or plastic wrap. This helps stop air from getting in and keeps the flavors bright. Store them in the fridge. They will stay good for up to four days. If you plan to eat them later, don’t add the mint leaves until you are ready to serve.

Freezing Instructions for Longer Preservation

You can freeze these jars if you want to keep them longer. First, let the jars chill in the fridge for a few hours. After that, wrap each jar well in plastic wrap. Then, place them in a freezer bag. This will keep them safe from freezer burn. They can last for up to three months in the freezer. When you want to eat them, move the jars to the fridge to thaw overnight.

Shelf Life and Best Consumption Tips

The best time to enjoy your no-bake strawberry cheesecake jars is within four days of making them. The flavors taste fresh and delicious at this point. If you store them longer, the strawberries may lose their juicy texture. For the best taste, eat them cold straight from the fridge. This treat is perfect for summer days or special occasions.

FAQs

Can I use low-fat cream cheese?

Yes, you can use low-fat cream cheese. It will change the taste and texture slightly. The cheesecake may not be as rich, but it still works well. I recommend letting it soften fully before mixing. This helps it blend smoothly with the other ingredients.

How long can I keep the cheesecake jars in the fridge?

You can keep the jars in the fridge for up to 3 days. Make sure they are covered tightly. The flavors will blend and taste even better after a day. Just remember to add mint leaves right before serving for freshness.

Can I make these jars ahead of time?

Yes, you can make these jars ahead of time. Preparing them the night before is a great idea. This gives the cheesecake time to set and the strawberries to soak in their juices. Just store them in the fridge until you are ready to serve.

This guide covered how to create no-bake strawberry cheesecake jars. We explored essential and alternative ingredients, tools, and step-by-step instructions. You learned tips for texture, presentation, and time-saving methods. We also discussed tasty variations, storage tips, and answered common questions.

Now, you have the tools to make delicious, customizable cheesecake jars. Enjoy creating and sharing this delightful treat with others. Happy baking!

To create your no-bake strawberry cheesecake jars, you need these key ingredients: - 1 cup graham cracker crumbs - 4 tablespoons melted butter - 2 cups cream cheese, softened - 1 cup powdered sugar - 1 teaspoon vanilla extract - 1 cup heavy whipping cream - 2 cups fresh strawberries, hulled and sliced - 2 tablespoons sugar (for strawberries) - Fresh mint leaves (for garnish) These ingredients work together to create a creamy, sweet, and fruity dessert. The graham cracker crumbs form the crust, while the cream cheese and heavy cream give the filling its rich texture. You can customize your no-bake strawberry cheesecake jars with these alternative ingredients: - Use crushed cookies instead of graham crackers for a different crust flavor. - Replace cream cheese with mascarpone for a lighter texture. - Swap strawberries for blueberries or raspberries for a berry mix. - Try honey instead of sugar for a natural sweetness. These options allow you to make the recipe your own. Play around with flavors and textures to find your favorite combination! For this recipe, you will need a few essential utensils and equipment: - Medium mixing bowl for the crust - Large mixing bowl for the cream cheese filling - Electric mixer or whisk for beating the cream cheese - Rubber spatula for folding in whipped cream - Small jars or glasses for serving - Measuring cups and spoons for precise measurements Having these items on hand will make your preparation smooth and enjoyable. You’ll be ready to whip up these delightful jars in no time! First, grab a medium bowl. Add 1 cup of graham cracker crumbs and 4 tablespoons of melted butter. Mix it well. You want the crumbs to be fully coated. This step is key for a yummy crust. Next, divide the mixture into 4 small jars. Press it down firmly. Make sure it forms a nice, even layer at the bottom. Now, take a large mixing bowl. Beat 2 cups of softened cream cheese with 1 cup of powdered sugar and 1 teaspoon of vanilla extract. Mix until it becomes smooth and creamy. This filling is what makes your cheesecake special. In a separate bowl, whip 1 cup of heavy whipping cream. Keep going until you see stiff peaks form. Gently fold this whipped cream into the cream cheese mixture. Be careful not to deflate the whipped cream. This keeps your filling light and airy. It's time to layer everything! Start by adding half of the cream cheese filling over the crust in each jar. Then, take 2 cups of fresh strawberries. Toss them with 2 tablespoons of sugar in a small bowl. Let them sit for about 10 minutes. This helps the strawberries become juicy. Spoon a layer of these strawberries over the cream cheese in each jar. Next, add the rest of the cream cheese mixture on top. Smooth it out with a spatula. Finally, add another layer of the juicy strawberries. Cover the jars with lids or plastic wrap. Refrigerate them for at least 4 hours. For the best taste, leave them overnight. Enjoy your delicious no-bake strawberry cheesecake jars! To get a smooth and creamy cheesecake, use softened cream cheese. Cold cream cheese makes lumps. Beat the cream cheese until it is light and fluffy. Mix it with powdered sugar and vanilla extract. Then, whip the heavy cream until it is stiff. Gently fold the whipped cream into the cream cheese. This keeps the mixture light and airy. Avoid over-mixing, as it can deflate the whipped cream. The right balance gives you a perfect cheesecake that melts in your mouth. Garnishing adds beauty to your cheesecake jars. Use fresh mint leaves for a pop of color. Whole strawberries around the jars create a rustic look. You can also drizzle some strawberry sauce on top. A sprinkle of graham cracker crumbs adds texture. These simple touches make your dessert look more appealing. A beautiful presentation makes it taste even better! Want to make these jars fast? Prepare your ingredients in advance. You can crush the graham crackers and store them in a bag. Whip the cream ahead of time and keep it in the fridge. You can also slice the strawberries early. Just toss them with sugar to keep them fresh. If you’re short on time, use a store-bought crust. These tips help you enjoy making this dessert without stress. {{image_2}} You can swap strawberries for other berries. Raspberries, blueberries, or blackberries work great. Use the same method for layering. Each berry brings its own flavor. Raspberries add a nice tartness, while blueberries give a sweet touch. Adjust the sugar based on the berry's sweetness. This way, you can enjoy a fruity twist. To make this dessert gluten-free, choose gluten-free graham crackers. They taste just like the regular ones. You can also use crushed nuts or oats. Mix them with melted butter for the crust. This version keeps the taste and texture you love. No one will know it’s gluten-free! Want to make it even richer? Add a chocolate layer! Melt some chocolate and let it cool slightly. Spread a layer of melted chocolate over the cream cheese mixture. You can use dark, milk, or white chocolate. This adds a delicious surprise in each bite. Chocolate and strawberries create a classic combo that everyone loves. To keep your no-bake strawberry cheesecake jars fresh, use airtight containers. Cover each jar tightly with a lid or plastic wrap. This helps stop air from getting in and keeps the flavors bright. Store them in the fridge. They will stay good for up to four days. If you plan to eat them later, don’t add the mint leaves until you are ready to serve. You can freeze these jars if you want to keep them longer. First, let the jars chill in the fridge for a few hours. After that, wrap each jar well in plastic wrap. Then, place them in a freezer bag. This will keep them safe from freezer burn. They can last for up to three months in the freezer. When you want to eat them, move the jars to the fridge to thaw overnight. The best time to enjoy your no-bake strawberry cheesecake jars is within four days of making them. The flavors taste fresh and delicious at this point. If you store them longer, the strawberries may lose their juicy texture. For the best taste, eat them cold straight from the fridge. This treat is perfect for summer days or special occasions. Yes, you can use low-fat cream cheese. It will change the taste and texture slightly. The cheesecake may not be as rich, but it still works well. I recommend letting it soften fully before mixing. This helps it blend smoothly with the other ingredients. You can keep the jars in the fridge for up to 3 days. Make sure they are covered tightly. The flavors will blend and taste even better after a day. Just remember to add mint leaves right before serving for freshness. Yes, you can make these jars ahead of time. Preparing them the night before is a great idea. This gives the cheesecake time to set and the strawberries to soak in their juices. Just store them in the fridge until you are ready to serve. This guide covered how to create no-bake strawberry cheesecake jars. We explored essential and alternative ingredients, tools, and step-by-step instructions. You learned tips for texture, presentation, and time-saving methods. We also discussed tasty variations, storage tips, and answered common questions. Now, you have the tools to make delicious, customizable cheesecake jars. Enjoy creating and sharing this delightful treat with others. Happy baking!

No-Bake Strawberry Cheesecake Jars

Indulge in a deliciously easy dessert with these No-Bake Strawberry Cheesecake Jars! Perfect for warm days, these treats feature a creamy cheesecake layer, a crunchy graham cracker crust, and fresh, juicy strawberries. With just a few simple ingredients and minimal prep time, you can impress your guests or enjoy a sweet treat at home. Click through to explore this delightful recipe and start your no-bake adventure today!

Ingredients
  

1 cup graham cracker crumbs

4 tablespoons melted butter

2 cups cream cheese, softened

1 cup powdered sugar

1 teaspoon vanilla extract

1 cup heavy whipping cream

2 cups fresh strawberries, hulled and sliced

2 tablespoons sugar (for strawberries)

Fresh mint leaves (for garnish)

Instructions
 

In a medium bowl, combine the graham cracker crumbs and melted butter. Mix until the crumbs are fully coated.

    Divide the graham cracker mixture evenly among 4 small jars or glasses, pressing it down firmly to create the crust layer.

      In a large mixing bowl, beat the softened cream cheese, powdered sugar, and vanilla extract until smooth and creamy.

        In a separate bowl, whip the heavy cream until stiff peaks form. Gently fold the whipped cream into the cream cheese mixture until fully incorporated.

          Layer half of the cream cheese mixture over the graham cracker crust in each jar.

            In another small bowl, toss the sliced strawberries with 2 tablespoons of sugar, allowing them to macerate for about 10 minutes until juicy.

              Spoon a layer of the sugared strawberries over the cream cheese layer in each jar.

                Top with the remaining cream cheese mixture, smoothing it out with a spatula.

                  Add another layer of the macerated strawberries on top.

                    Cover the jars with lids or plastic wrap and refrigerate for at least 4 hours or overnight for the best taste.

                      Before serving, garnish each jar with fresh mint leaves for a touch of color and extra flavor.

                        Prep Time: 20 minutes | Total Time: 4 hours 20 minutes | Servings: 4

                          - Presentation Tips: Serve the jars on a wooden board surrounded by whole strawberries for a rustic look.

                            WANT TO SAVE THIS RECIPE?