Are you ready to whip up a delicious and easy meal? My savory Japanese Chicken Katsu Bowls are a must-try! This dish features crispy chicken, fluffy rice, and crunchy cabbage. With just a few simple ingredients and steps, you can make a fantastic meal that impresses everyone. Join me as we explore how to create this delightful dish right in your kitchen!
Ingredients
Main Ingredients
– 2 boneless, skinless chicken breasts
– Salt and pepper to taste
– 1/2 cup all-purpose flour
– 2 large eggs, beaten
– 1 cup panko breadcrumbs
– Vegetable oil for frying
– Tonkatsu sauce for drizzling
To make a great Chicken Katsu Bowl, start with fresh chicken breasts. They form the base of this dish. Panko breadcrumbs give the chicken its iconic crispy texture. The tonkatsu sauce adds a sweet and tangy finish.
For Serving
– 2 cups cooked white rice or sushi rice
– 1 cup shredded cabbage (green or purple)
Rice is the perfect canvas for your katsu. It soaks up flavor and keeps your meal filling. Shredded cabbage adds crunch and freshness. You can use green or purple cabbage based on your taste.
Optional Garnishes
– 1 avocado, sliced
– Pickled radish or ginger
Adding avocado provides creaminess. It balances the crispy chicken. Pickled radish or ginger adds a zesty kick. These garnishes will elevate your bowl and make it even more delightful.
Step-by-Step Instructions
Preparing the Chicken
To start, take your chicken breasts and place them between two sheets of plastic wrap. Use a meat mallet or a rolling pin to pound the chicken to an even thickness of about 1/2 inch. This helps the chicken cook evenly. After that, season both sides with salt and pepper. This simple step adds great flavor.
Breading Process
Next, set up your breading station. You need three shallow dishes. In the first dish, add 1/2 cup of all-purpose flour. In the second, beat two large eggs until smooth. In the third dish, pour 1 cup of panko breadcrumbs. Now it’s time to coat the chicken. First, dredge each chicken breast in the flour, shaking off any extra. Then, dip it into the eggs, making sure it’s fully coated. Finally, press the chicken into the panko breadcrumbs. Make sure to cover it well for that crispy texture.
Cooking Instructions
Now, heat about 1/2 inch of vegetable oil in a large skillet over medium-high heat. Once the oil is hot, carefully place the breaded chicken breasts into the skillet. Cook for about 4-5 minutes on each side. You want them to be golden brown and cooked through. The internal temperature should reach 165°F (74°C). When done, transfer the chicken to a paper towel-lined plate to drain any excess oil. After a couple of minutes, slice the chicken into strips.
Tips & Tricks
Perfecting Your Katsu
To ensure even cooking, always pound the chicken to about 1/2 inch thick. This step helps the chicken cook evenly. Use a meat mallet or a rolling pin for this. Season both sides with salt and pepper after pounding. This adds flavor throughout the meat.
For crispiness, use panko breadcrumbs. They are lighter and create a better crunch. Make sure to press the breadcrumbs firmly onto the chicken. This helps them stick during frying, leading to a golden, crispy crust.
Serving Suggestions
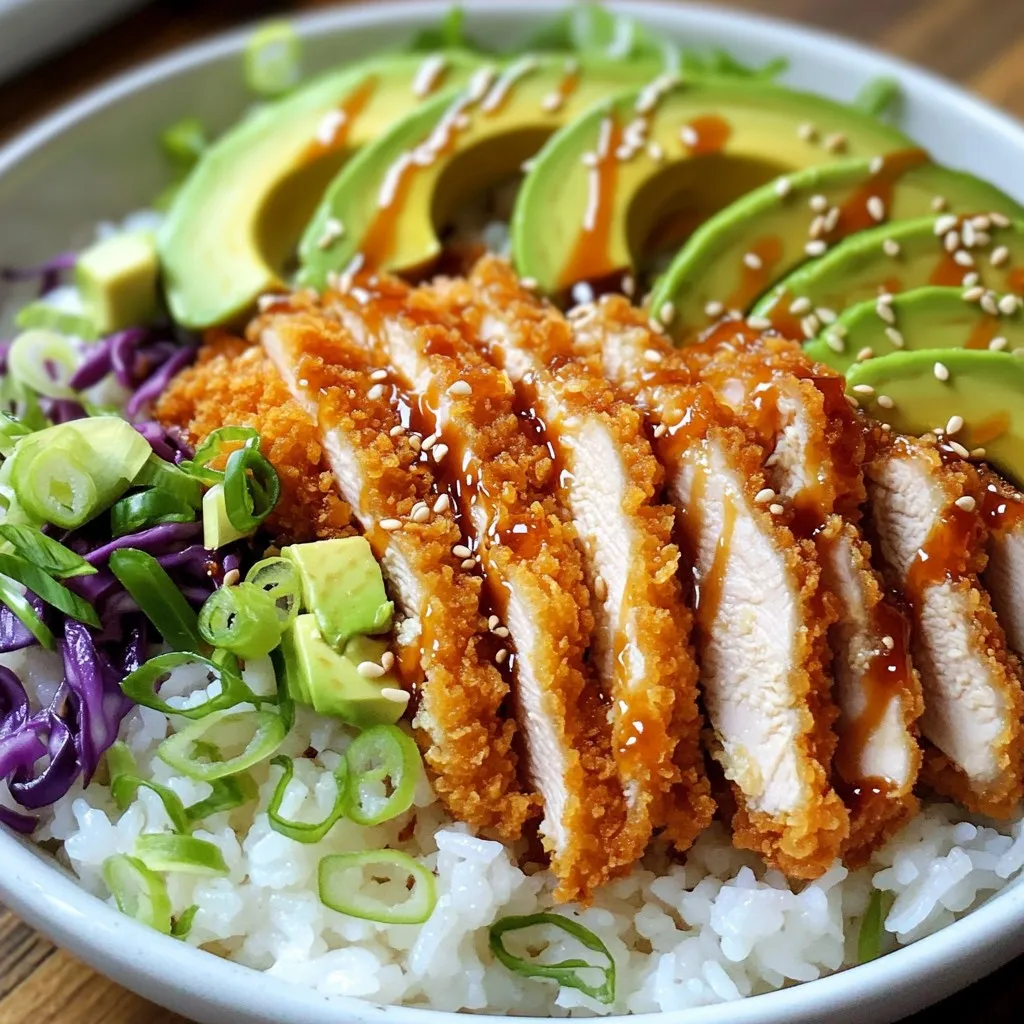
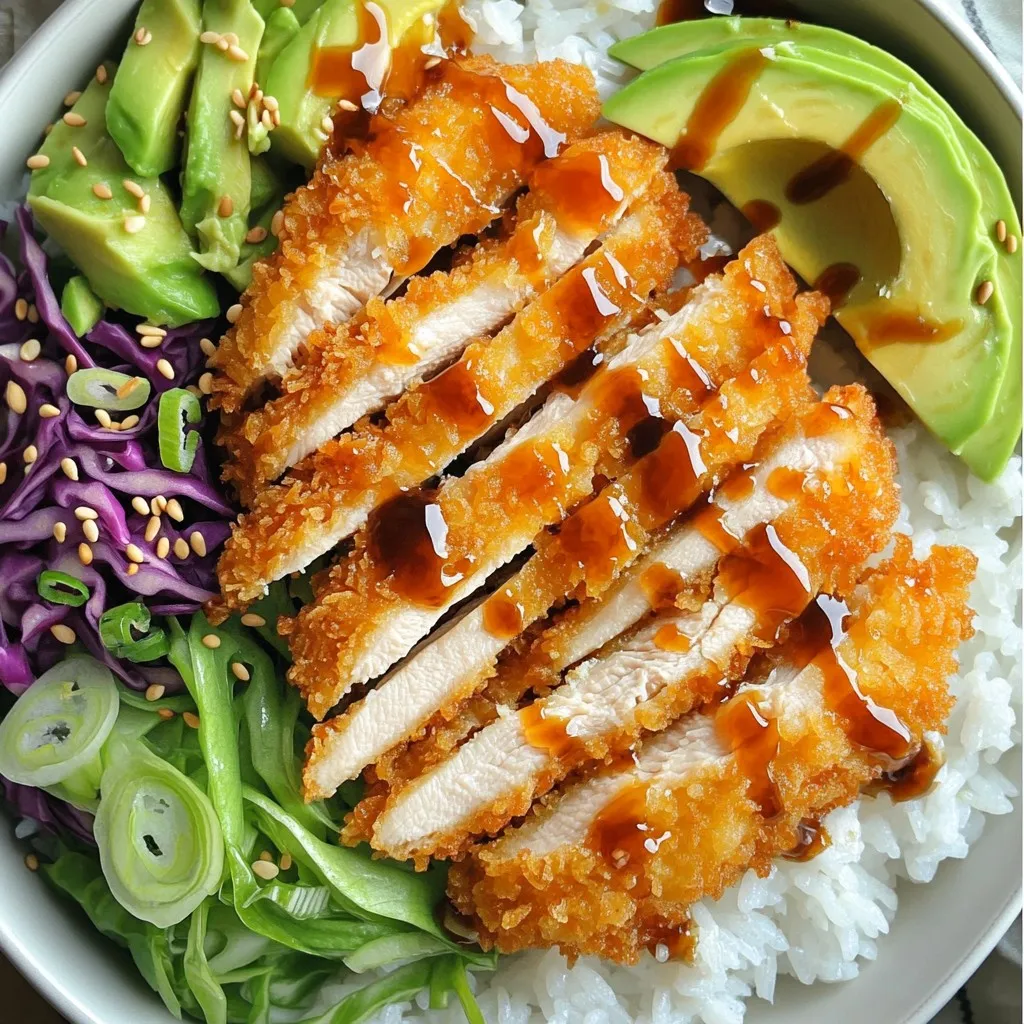
Layer your bowl starting with cooked white rice or sushi rice. This acts as a nice base. Next, add the sliced chicken katsu on top. Then, add shredded cabbage for crunch. Finally, garnish with sliced avocado and sprinkle sesame seeds and green onions on top.
A drizzle of tonkatsu sauce adds sweetness and depth. You can also include pickled radish or ginger on the side. These add a nice zing and balance the dish.
Kitchen Tools Required
For frying, a large skillet works best. A deep frying pan can also be used to keep the oil contained. Ensure it has high sides to prevent splattering.
You will need a meat mallet or rolling pin for pounding the chicken. These tools help you achieve that perfect thickness for even cooking.
Variations
Vegetarian Options
You can easily make a vegetarian version of chicken katsu. Try using eggplant or tofu instead of chicken.
– Eggplant: Slice it thick. Dip the slices in flour, eggs, and panko. Fry until golden brown. The eggplant absorbs flavors well.
– Tofu: Use firm or extra-firm tofu. Press it to remove excess water. Then, coat it the same way as chicken. Fry until crispy.
These options give you great texture and flavor. You still enjoy that tasty katsu experience.
Sauce Alternatives
The classic sauce for katsu is tonkatsu sauce, but you can switch it up.
– Homemade Tonkatsu Sauce: Mix ketchup, soy sauce, Worcestershire sauce, sugar, and mirin. Adjust the taste to your liking.
– Other Sauces to Try:
– Misoyaki: A sweet and savory sauce made from miso, sugar, and mirin.
– Teriyaki: A glaze made from soy sauce, sugar, and sake. It’s sticky and sweet.
These sauces add new flavors to your dish. Experiment and find your favorite!
Different Grain Bases
While white rice is a classic base for your katsu bowl, consider healthier options.
– Quinoa: This grain is high in protein. It adds a nice nutty flavor.
– Brown Rice: More fiber than white rice, brown rice is a great option. It supports a balanced diet.
These grain bases complement the katsu well. They also add extra nutrition to your meal.
Storage Info
How to Store Leftovers
To keep your chicken katsu fresh, store it in the fridge. Place the chicken in an airtight container. Make sure the container seals well to keep out air. You can also wrap the chicken tightly in plastic wrap. Store cooked rice and veggies in separate containers. This method helps keep everything fresh and tasty. Consume leftovers within three days for the best flavor.
Reheating Tips
Reheating chicken katsu can be simple. Use an oven or a skillet for the best results. If using an oven, preheat it to 375°F (190°C). Bake the chicken for about 10-15 minutes. This method helps keep the crust crispy. If using a skillet, heat a small amount of oil over medium heat. Place the chicken in the skillet for about 3-4 minutes on each side. Avoid using a microwave, as it can make the crust soggy.
Meal Prep Ideas
Meal prep can save you time. You can cook the chicken katsu ahead of time. Just store it as mentioned above. Also, cook your rice and store it in the fridge. For added convenience, you can chop the cabbage and slice the avocado ahead of time. If you want to freeze, place the chicken in a freezer bag. Squeeze out as much air as possible before sealing. Use the frozen chicken within three months for best taste.
FAQs
What is Chicken Katsu?
Chicken katsu is a popular Japanese dish. It features breaded and fried chicken cutlets. Traditionally, the chicken is pounded thin, coated in flour, eggs, and panko breadcrumbs. This gives it a crispy texture. Modern recipes may include different meats or even vegetables. Some cooks add spices or herbs to the breading for extra flavor. The dish is often served with tonkatsu sauce, a sweet and tangy sauce. It pairs well with rice and salad.
Can I make Chicken Katsu ahead of time?
Yes, you can make chicken katsu ahead of time. To prepare in advance, cook the chicken and then let it cool. Store the cooked chicken in an airtight container in the fridge. It will stay fresh for about three days. When serving, reheat it in the oven for crispiness. You can also slice the chicken and layer it on rice. Add fresh toppings just before serving. This keeps everything bright and delicious.
What sides pair well with Chicken Katsu?
Chicken katsu goes well with many sides. Here are some great options:
– Shredded cabbage: Adds a crunchy texture.
– White rice or sushi rice: A classic base for the dish.
– Avocado: Creamy and rich, it balances the crispy chicken.
– Pickled radish or ginger: Adds a nice tangy kick.
– Miso soup: Complements the meal with warmth and flavor.
These sides enhance the dish and provide a balanced meal. Enjoy exploring different pairings!
You learned how to make Chicken Katsu from start to finish. We covered the main ingredients, cooking steps, and serving ideas. Tips for crispiness and variations for different diets help you enjoy this dish.
Now you can create a wonderful meal with Chicken Katsu that impresses everyone. Don’t forget to store leftovers properly for later meals. Dive into this tasty recipe and share it with friends. Enjoy your cooking adventure!
