WANT TO SAVE THIS RECIPE?
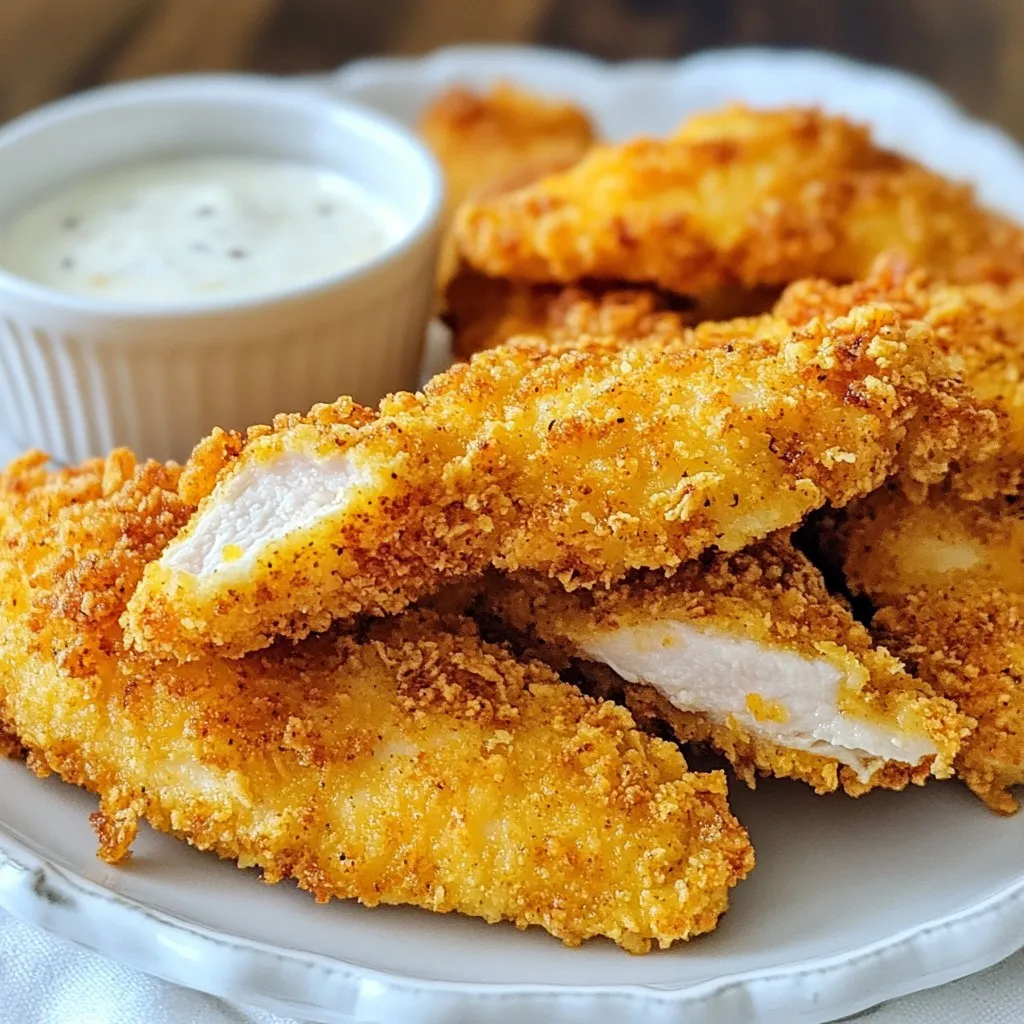
If you crave crispy homemade chicken tenders, you’re in the right place! I’ll share my secret tips for perfectly fried tenders that everyone will love. With the right ingredients, tools, and a simple step-by-step guide, you’ll impress your family and friends. Plus, I’ll cover variations and storage tips, so you can enjoy these tasty bites anytime. Let’s get frying and make some delicious memories together!
Why I Love This Recipe
- Easy to Prepare: This recipe requires minimal ingredients and straightforward steps, making it perfect for both beginners and seasoned cooks.
- Customizable Flavors: Adjust the spices and seasonings to suit your taste; add more heat or different herbs for a unique twist.
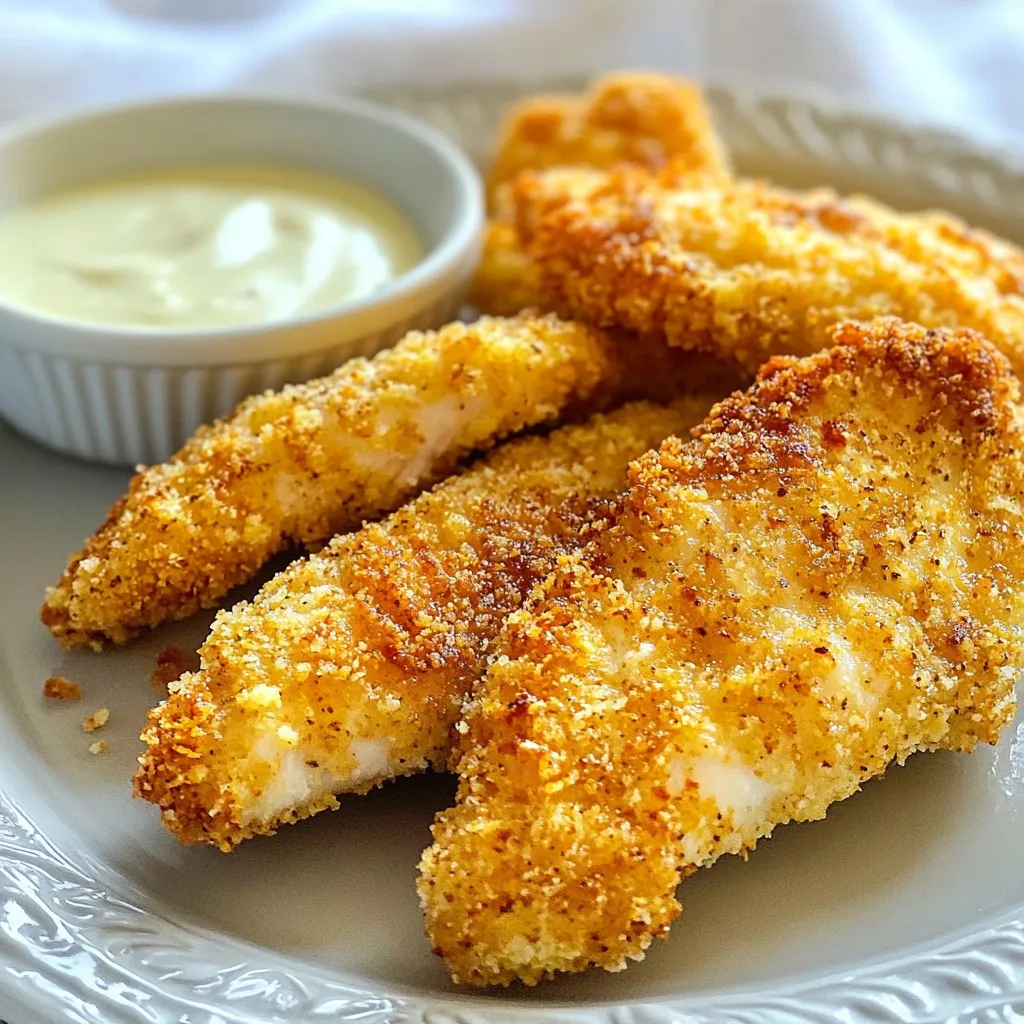
- Crispy Texture: The use of panko breadcrumbs ensures an extra crunchy exterior that contrasts beautifully with the tender chicken inside.
- Perfect for Any Occasion: These chicken tenders are great for family dinners, game days, or as a fun snack with dipping sauces.
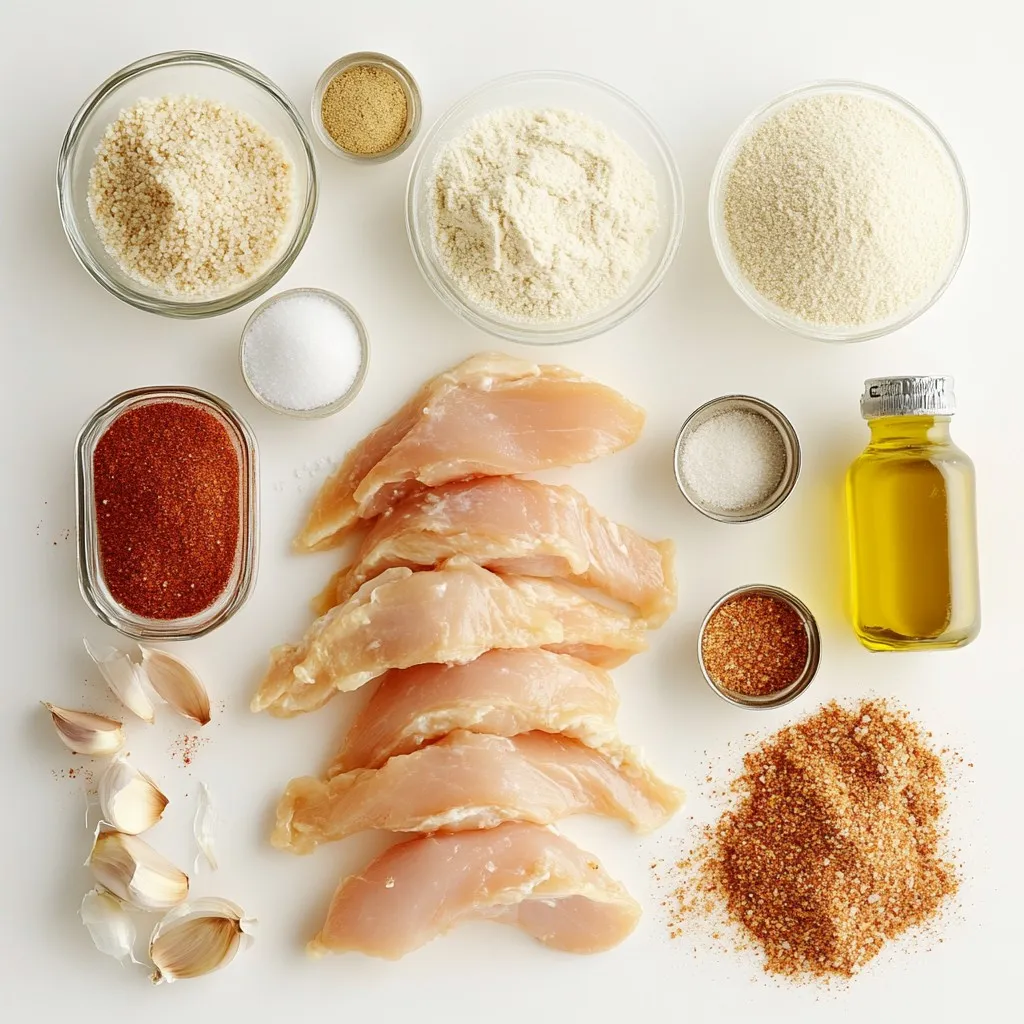
Ingredients
Main Ingredients List
– 1 pound chicken breast, cut into strips
– 1 cup buttermilk (or milk with 1 tbsp lemon juice)
– 1 cup all-purpose flour
– 1 cup breadcrumbs (preferably panko for extra crunch)
– 1 tablespoon garlic powder
– 1 tablespoon onion powder
– 1 teaspoon paprika
– 1 teaspoon salt
– 1/2 teaspoon black pepper
– 1/2 teaspoon cayenne pepper (optional for heat)
– Cooking oil (for frying)
Optional Ingredients for Extra Flavor
You can add zest to your chicken tenders with a few extra spices. Consider these options:
– 1 teaspoon dried herbs like thyme or oregano
– 1 tablespoon grated Parmesan cheese in the breadcrumb mix
– A splash of hot sauce in the buttermilk for spicy tenders
These additions can enhance the taste and make each bite exciting.
Essential Cooking Tools
To make these chicken tenders, you will need:
– Medium bowl for marinating
– Three shallow dishes for coating (one for flour, one for breadcrumbs, and one for seasonings)
– Tongs for handling chicken
– Large skillet for frying
– A wire rack for cooling
– Paper towels for draining
Having these tools ready will make your cooking process smooth and fun!
Step-by-Step Instructions
Marinating the Chicken
Marinating the chicken is key for flavor and tenderness. Start by cutting 1 pound of chicken breast into strips. Place the chicken in a medium bowl. Pour 1 cup of buttermilk over the chicken strips. If you don’t have buttermilk, mix 1 cup of milk with 1 tablespoon of lemon juice. Let the chicken marinate for at least 30 minutes. For more flavor, marinate it overnight in the fridge.
Preparing the Coating Station
Next, set up your coating station. You will need three shallow dishes. In the first dish, combine 1 cup of all-purpose flour with 1 tablespoon of garlic powder, 1 tablespoon of onion powder, 1 teaspoon of paprika, 1 teaspoon of salt, 1/2 teaspoon of black pepper, and 1/2 teaspoon of cayenne pepper if you like heat. In the second dish, place 1 cup of breadcrumbs. Panko breadcrumbs work best for extra crunch.
Coating the Chicken Strips
Now, it’s time to coat the chicken. Take the marinated chicken strips out of the buttermilk. Let the excess buttermilk drip off. Dredge each strip in the flour mixture, covering it completely. After that, dip it back in the buttermilk. Lastly, press the chicken into the breadcrumbs to ensure a thick coating. Place each coated strip on a wire rack. Repeat this for all the chicken strips.
Frying the Chicken Tenders
Heat a large skillet on medium heat. Add about 1/2 inch of cooking oil. You want the oil around 350°F or 175°C. Once hot, carefully add the breaded chicken tenders in batches. Make sure not to overcrowd the pan. Fry each side for about 4 to 5 minutes. You want them golden brown and cooked all the way through.
Draining and Serving
When the chicken tenders are done frying, use tongs to remove them from the oil. Place them on a plate lined with paper towels. This helps drain any extra oil. Serve the chicken tenders hot with your favorite dipping sauces like ranch, honey mustard, or barbecue sauce. Enjoy your crispy homemade chicken tenders!
Tips & Tricks
Achieving the Perfect Crispiness
To get that perfect crunch on your chicken tenders, follow these steps. First, marinate the chicken in buttermilk. This helps keep the meat moist and tender. The longer you marinate, the better. Aim for at least 30 minutes, or overnight for the best results.
Next, use a mixture of flour and breadcrumbs. For extra crunch, I suggest using panko breadcrumbs. They stay crispier than regular ones. When coating the chicken, make sure each piece is fully covered. Dredge in flour, dip in buttermilk, then press into breadcrumbs. This three-step process builds that irresistible crunch.
While frying, don’t overcrowd the pan. This lowers the oil temperature and can make your tenders soggy. Fry in batches, and keep the oil hot for that crispy finish.
Choosing the Right Type of Oil
Choosing the right oil is key to frying chicken tenders. I recommend oils with high smoke points, like canola, peanut, or vegetable oil. These oils heat well and create a nice, crisp crust. Avoid using olive oil as it burns easily and can change the flavor of your chicken.
Fill your skillet with about half an inch of oil. Heat it to around 350°F (175°C) before adding the chicken. This ensures a quick sear and helps lock in moisture.
Common Mistakes to Avoid
Here are some common mistakes to watch out for when making chicken tenders:
– Skipping the marinade: Don’t skip the buttermilk. It adds flavor and moisture.
– Not drying the chicken: Dry the chicken with paper towels before coating. This helps the coating stick better.
– Using cold oil: Always heat your oil first. Cold oil can lead to greasy chicken.
– Frying too many pieces at once: This lowers the oil temperature and leads to sogginess. Fry in small batches for the best texture.
– Not letting the tenders drain: After frying, place the tenders on paper towels. This removes excess oil and keeps them crispy.
Pro Tips
- Marinate Longer for More Flavor: For the best flavor, let the chicken marinate in buttermilk overnight. This not only tenderizes the meat but also deeply infuses it with flavor.
- Use Panko for Extra Crunch: Panko breadcrumbs create a lighter, crunchier coating compared to regular breadcrumbs. Consider using them for an irresistible texture.
- Don’t Overcrowd the Pan: Fry the chicken tenders in batches to avoid overcrowding the skillet. This ensures even cooking and that they get perfectly crispy.
- Check Oil Temperature: Use a thermometer to ensure your oil is at the right temperature (about 350°F or 175°C) before frying. This helps achieve that golden brown color and crispy texture.
Variations
Baked Crispy Chicken Tenders
You can make baked chicken tenders for a healthier option. Start by preheating your oven to 400°F (200°C). Prepare the chicken strips just like you do for frying. Instead of oil, spray a baking sheet with cooking spray. Place the coated chicken on the sheet and spray the tops lightly with oil. Bake for about 20-25 minutes, flipping halfway. You still get a crispy outer layer!
Healthier Ingredients Alternatives
Using healthier ingredients can make your chicken tenders lighter. Swap regular buttermilk for low-fat buttermilk or plain yogurt. You can also use whole wheat flour instead of all-purpose flour. For the breadcrumbs, try using whole grain options. These swaps keep flavor while making the dish better for you.
Gluten-Free Options
For gluten-free chicken tenders, use gluten-free breadcrumbs and flour. Almond flour or chickpea flour works great as a substitute. Check that your seasonings are gluten-free too. This way, you can enjoy crispy tenders without the gluten!
Storage Info
How to Store Leftovers
To keep your chicken tenders fresh, let them cool first. Place them in an airtight container. Store the container in the fridge. They will last for about three to four days. If you want to keep them longer, consider freezing them.
Reheating Tips
When you are ready to eat leftovers, the oven is best for reheating. Preheat your oven to 350°F (175°C). Place the chicken tenders on a baking sheet. Heat them for about 10 to 15 minutes. This keeps them crispy. You can also use a toaster oven. If you are in a hurry, a microwave works too. Just know the tenders may lose some crunch.
Freezing Chicken Tenders
To freeze chicken tenders, let them cool completely. Place them in a single layer on a baking sheet. Freeze them for about an hour until firm. Once solid, move them to a freezer bag. Remove as much air as possible. Label the bag with the date. They will stay good for about three months. When you are ready to cook them, do not thaw. Fry them straight from the freezer for perfect results.
FAQs
How long should I marinate the chicken?
You should marinate the chicken for at least 30 minutes. This time helps to tenderize the meat. For the best flavor, try to marinate overnight. This allows the buttermilk to soak in well. But be sure not to exceed 24 hours, as the chicken can become too soft.
Can I make chicken tenders in an air fryer?
Yes, you can make chicken tenders in an air fryer! Preheat the air fryer to 400°F (200°C). Place the coated chicken strips in a single layer in the basket. Cook them for about 10-12 minutes. Flip halfway through to ensure even cooking. They will still be crispy and delicious!
What dipping sauces pair well with chicken tenders?
Chicken tenders taste great with many dipping sauces. Here are some popular options:
– Ranch dressing
– Honey mustard
– Barbecue sauce
– Buffalo sauce
– Sweet and sour sauce
Feel free to mix and match based on your taste!
How can I keep my chicken tenders crispy after cooking?
To keep chicken tenders crispy, place them on a wire rack. This allows air to circulate and helps prevent sogginess. Avoid covering them with foil or a lid. If you need to keep them warm, set your oven to a low temperature and keep them on the rack inside.
Making chicken tenders is easy and fun. You learned about the key ingredients and the right tools. The step-by-step guide shows you how to marinate, coat, and fry chicken strips. Tips on crispiness and common mistakes help you succeed. You can also try variations like baked or gluten-free options. Store leftovers safely and reheat to keep them tasty. Now, you have all the tools to make great chicken tenders at home. Enjoy your cooking, and share these tips with friend
Crispy Homemade Chicken Tenders
Deliciously crispy chicken tenders, perfect for dipping.
Course Main Course
Cuisine American
Servings 4
Calories 350 kcal
- 1 pound chicken breast, cut into strips
- 1 cup buttermilk (or milk with 1 tbsp lemon juice)
- 1 cup all-purpose flour
- 1 cup breadcrumbs (preferably panko for extra crunch)
- 1 tablespoon garlic powder
- 1 tablespoon onion powder
- 1 teaspoon paprika
- 1 teaspoon salt
- 0.5 teaspoon black pepper
- 0.5 teaspoon cayenne pepper (optional for heat)
- as needed oil for frying
In a medium bowl, pour the buttermilk over the chicken strips. Allow them to marinate for at least 30 minutes (or up to overnight in the refrigerator) to tenderize and infuse flavor.
In three separate shallow dishes, prepare the flour, breadcrumb mixture, and seasonings. In the first dish, combine the flour, garlic powder, onion powder, paprika, salt, black pepper, and cayenne (if using). Mix well. In the second dish, place the breadcrumbs.
Remove the chicken from the buttermilk, allowing excess to drip off. First, dredge each strip in the flour mixture, coating completely. Next, dip it back in the buttermilk, then press into the breadcrumbs to ensure a good coating. Set aside on a wire rack. Repeat for all chicken strips.
In a large skillet, heat about 1/2 inch of oil over medium heat. Once hot (around 350°F or 175°C), carefully add the breaded chicken tenders in batches to avoid overcrowding. Fry for about 4-5 minutes per side, or until golden brown and cooked through.
Using tongs, remove the chicken tenders and place them on a plate lined with paper towels to drain any excess oil.
Serve hot with your favorite dipping sauces like ranch, honey mustard, or barbecue sauce.
For extra crunch, use panko breadcrumbs.
Keyword chicken, fried, homemade, tenders
WANT TO SAVE THIS RECIPE?