WANT TO SAVE THIS RECIPE?
If you love warm, buttery garlic knots, you’re in the right place! In this easy recipe guide, I’ll show you how to make these tasty treats at home. With simple ingredients and straightforward steps, you’ll impress your family and friends. Plus, I’ll share tips to perfect your knots and variations to suit your taste. Ready to dive into the world of homemade garlic knots? Let’s get started!
Why I Love This Recipe
- Irresistible Garlic Flavor: The combination of fresh garlic and herbs creates an aromatic experience that enhances the delightful breadiness of these knots.
- Easy to Make: This recipe is straightforward, making it perfect for beginners who want to impress their friends and family with homemade bread.
- Perfect for Any Occasion: Whether it’s a family dinner, a party, or game night, these garlic bliss knots are a crowd-pleaser that pairs well with various dishes.
- Customizable Toppings: Add your favorite toppings like cheese or herbs to make them uniquely yours, ensuring every batch can be a new adventure!
Ingredients
List of Ingredients
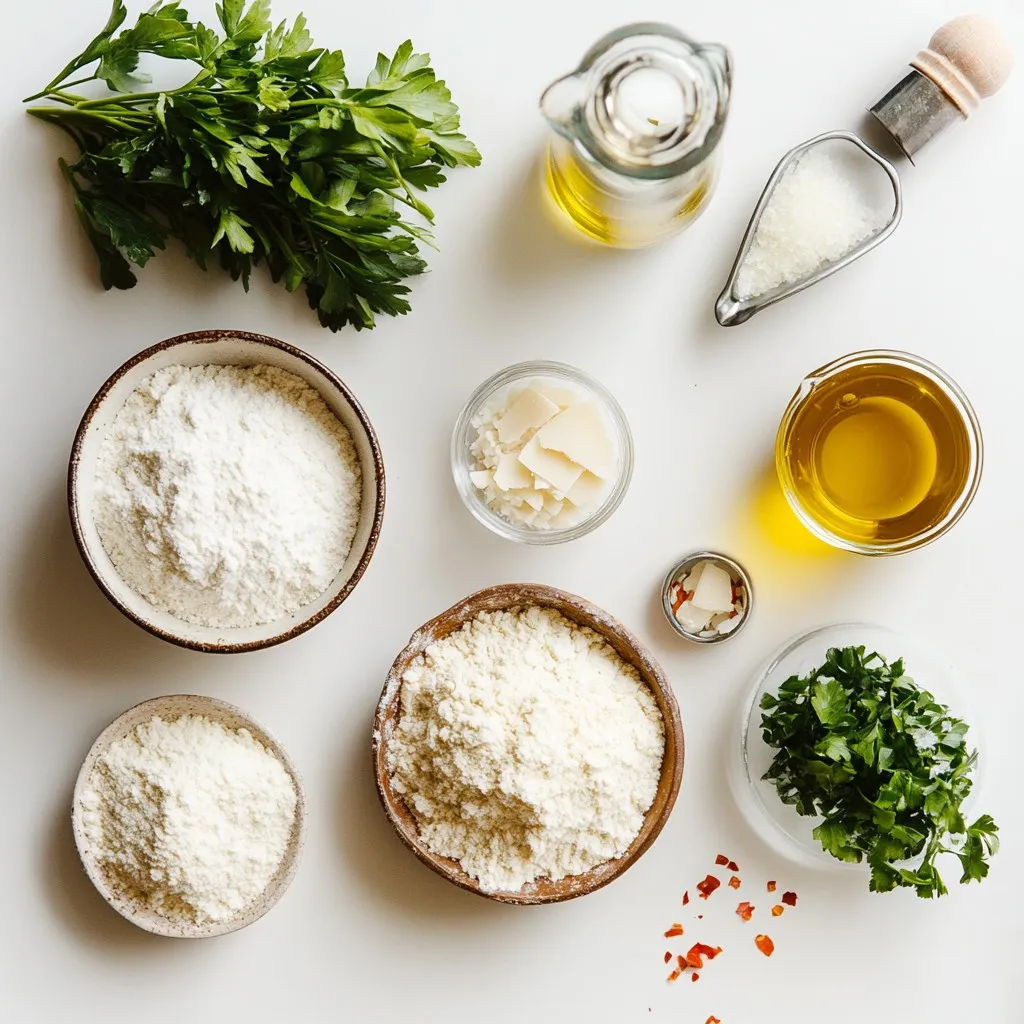
– 2 cups all-purpose flour
– 1 teaspoon instant yeast
– 3/4 teaspoon salt
– 1 teaspoon sugar
– 3/4 cup warm water (around 110°F)
– 3 tablespoons olive oil, divided
– 4 cloves garlic, minced
– 1 tablespoon fresh parsley, finely chopped
– 1/4 teaspoon red pepper flakes (optional)
– 1 tablespoon grated Parmesan cheese (optional)
– Extra flour for dusting
Measurements and Substitutions
When it comes to ingredients, precise measurements matter. Use a kitchen scale for the best results. If you need a gluten-free option, swap the all-purpose flour for a gluten-free blend. Instant yeast is my go-to for a quick rise, but you can use active dry yeast too. Just let it sit in warm water for about 5-10 minutes before mixing.
For olive oil, any light oil will work. If you want more garlic flavor, add extra minced garlic. Fresh herbs like basil or oregano can replace parsley. If you dislike spice, skip the red pepper flakes.
Essential Tools and Equipment
To make these garlic knots, you will need a few basic tools:
– Mixing bowls (one medium, one large)
– Wooden spoon or spatula
– Measuring cups and spoons
– A clean surface for kneading
– A rolling pin (optional)
– Baking sheet lined with parchment paper
– A damp cloth for covering the dough
These tools will help you create the perfect garlic knots. Enjoy the process, and don’t forget to have fun in the kitchen!
Step-by-Step Instructions
Preparing the Dough
To start, gather your ingredients. In a medium bowl, mix 1 teaspoon of instant yeast, 1 teaspoon of sugar, and 3/4 cup of warm water. Let it sit for about 5 minutes until it looks foamy. In a large bowl, whisk 2 cups of all-purpose flour and 3/4 teaspoon of salt. Once the yeast mix is ready, pour it into the flour mix, along with 1 tablespoon of olive oil. Stir with a wooden spoon until a dough forms.
Transfer the dough to a floured surface. Knead it for about 5-7 minutes until it feels smooth and elastic. Use extra flour if the dough sticks. Shape the dough into a ball, then place it in a greased bowl. Cover it with a damp cloth and let it rise in a warm place for about 1 hour. It should double in size.
Rising the Dough
Rising is key for soft and fluffy knots. The warmth helps yeast activate. Make sure your area is cozy, but not too hot. A good spot might be near a warm oven or on a sunny counter. After 1 hour, check your dough. It should look puffy and have doubled in size.
Forming and Baking the Knots
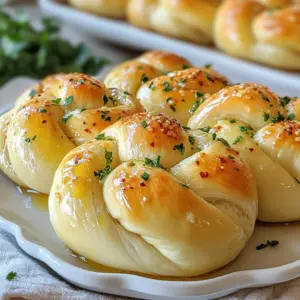
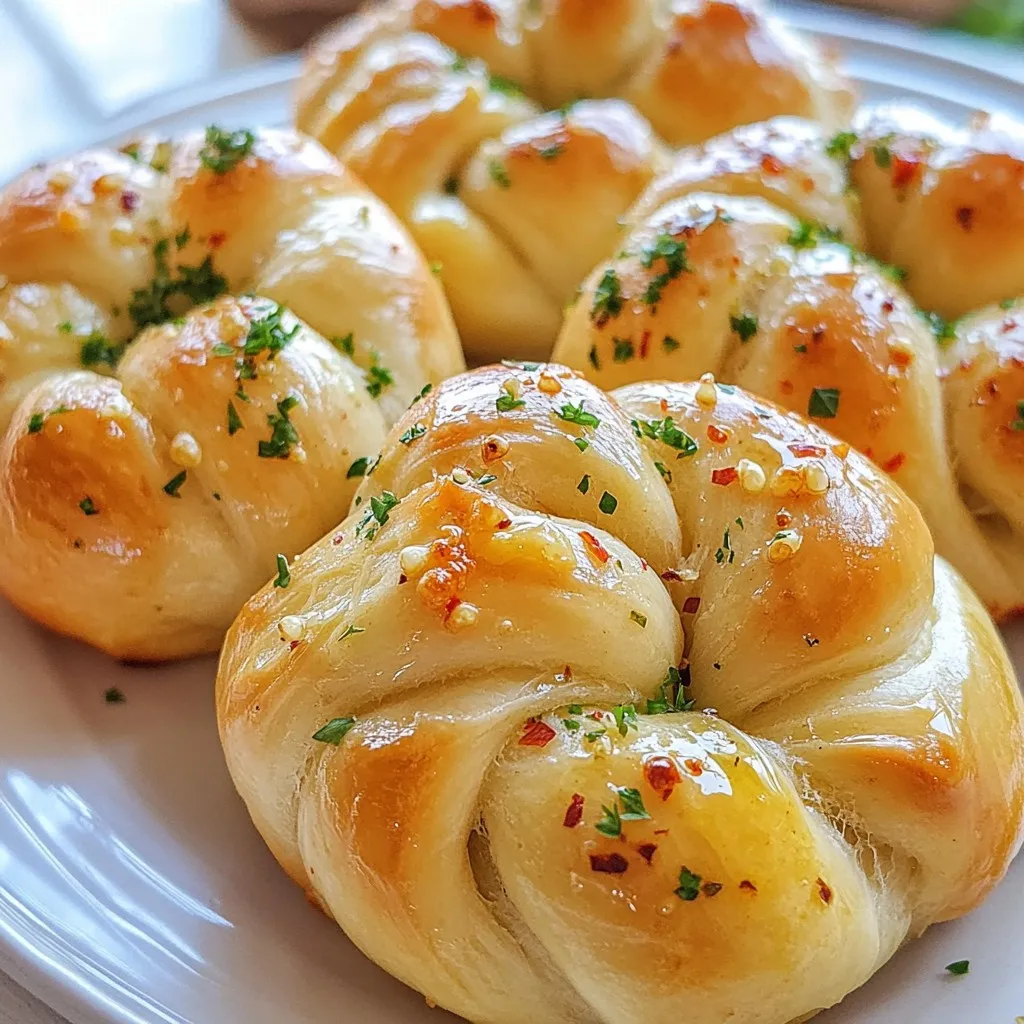
Once the dough has risen, punch it down gently. Divide it into 8 equal pieces. Roll each piece into a rope about 6 inches long. Tie each rope into a knot and tuck the ends underneath. Place the knots on a baking sheet lined with parchment paper.
In a small bowl, mix 4 minced garlic cloves, 2 tablespoons of olive oil, red pepper flakes, and chopped parsley. Brush this mix generously over each knot. If you like, sprinkle some grated Parmesan cheese on top.
Preheat your oven to 400°F (200°C). Bake the knots for 12-15 minutes until golden brown. Let them cool for a few minutes before serving. Enjoy your homemade garlic knots fresh and warm!
Tips & Tricks
Achieving the Perfect Texture
To get the best texture for your garlic knots, knead the dough well. Knead for about 5-7 minutes until it feels smooth. If the dough sticks, add a little flour. Letting the dough rise doubles its size. This step is key to light, fluffy knots.
Storing and Reheating Leftovers
If you have leftovers, store them in an airtight container. They stay fresh for up to two days. To reheat, place them in a preheated oven at 350°F for 5-7 minutes. This warms them up and keeps them soft. You can also microwave them but they might become chewy.
Common Mistakes to Avoid
A few common mistakes can ruin your garlic knots. First, don’t skip the rising time. If you rush it, the knots will be dense. Second, don’t add too much flour while kneading. This can make them tough. Lastly, brush the garlic oil on before baking for more flavor.
Pro Tips
- Use Fresh Garlic: Freshly minced garlic offers a more vibrant flavor compared to pre-minced options. This will elevate the taste of your Garlic Bliss Knots significantly.
- Let Dough Rise Properly: Ensure your dough is in a warm place to rise for the best texture. If your kitchen is cold, consider placing it in an oven with the light on to create warmth.
- Customize Your Toppings: Feel free to experiment with different herbs or cheeses. Adding herbs like rosemary or thyme can give your knots a unique twist.
- Brush with Garlic Oil: For extra flavor, brush the knots with the garlic oil mixture twice: once before baking and again right after they come out of the oven.
Variations
Different Flavors (e.g., herb-infused, cheese-stuffed)
You can easily change the flavor of your garlic knots. For a herb-infused twist, add dried oregano or basil to the dough. This adds a nice touch. If you love cheese, try adding mozzarella inside the knots. Just place a small piece of cheese in the center before tying the knot. This makes each bite a gooey delight!
Dietary Modifications (e.g., gluten-free, vegan options)
Making garlic knots gluten-free is simple. Use a gluten-free flour blend instead of all-purpose flour. Make sure the blend has a good structure for the dough. To make these knots vegan, swap the Parmesan cheese for a vegan version, or skip it altogether. You can also use a plant-based butter instead of olive oil for brushing if you prefer.
Seasonal Twists (e.g., adding pumpkin or herbs)
Seasonal changes can inspire new flavors. In the fall, adding pumpkin puree to the dough gives a sweet twist. It also adds moisture. During spring, fresh herbs like chives or dill can brighten the flavor. Just chop them finely and mix them into the dough for a fresh taste that matches the season.
Storage Info
How to Store Homemade Garlic Knots
To keep your homemade garlic knots fresh, let them cool completely. Then, place them in an airtight container. You can also wrap them tightly in plastic wrap. Store them at room temperature for up to two days. If you want to keep them longer, consider freezing.
Freezing Instructions
To freeze garlic knots, make sure they are fully cooled. Place them on a baking sheet in a single layer. Freeze for about an hour until solid. Then, transfer the knots to a freezer-safe bag. Remove as much air as possible. They will stay good for up to three months.
Best Ways to Reheat
To reheat your garlic knots, you have a few options. The oven is best for keeping them crispy. Preheat the oven to 350°F (175°C). Place the knots on a baking sheet and heat for about 10 minutes. You can also use a microwave. Heat them for 20-30 seconds, but they may lose some crispiness. Enjoy your garlic knots warm for the best taste!
FAQs
How long do garlic knots last?
Garlic knots stay fresh for about 2 to 3 days at room temperature. Keep them in a sealed bag or container. If you want them to last longer, store them in the fridge. They will last about a week in the fridge. However, the texture may change slightly.
Can I make the dough in advance?
Yes, you can make the dough ahead of time. After kneading, place it in a greased bowl. Cover it well with plastic wrap. You can keep it in the fridge for up to 24 hours. When ready to use, let it sit at room temperature for about 30 minutes before shaping. This helps the dough rise better.
What do I serve with garlic knots?
Garlic knots pair well with many dishes. Serve them with marinara sauce for dipping. They also go great with pasta or salad. For a fun twist, enjoy them with a cheesy garlic spread. These knots are a great side for any Italian meal.
You learned how to make garlic knots from scratch with simple steps. We covered the key ingredients, their measurements, and essential tools. I shared tips to get the perfect texture and avoid common mistakes. You can explore fun variations like herb-infused or gluten-free knots. Lastly, we discussed how to store and reheat leftovers.
Now you can impress anyone with these tasty and versatile treats. Enjoy making them your ow
Garlic Bliss Knots
Delicious knots made with garlic and olive oil, perfect as a side or appetizer.
Course Appetizer
Cuisine Italian
Servings 8
Calories 150 kcal
- 2 cups all-purpose flour
- 1 teaspoon instant yeast
- 3/4 teaspoon salt
- 1 teaspoon sugar
- 3/4 cup warm water (around 110°F)
- 3 tablespoons olive oil, divided
- 4 cloves garlic, minced
- 1 tablespoon fresh parsley, finely chopped
- 1/4 teaspoon red pepper flakes (optional)
- 1 tablespoon grated Parmesan cheese (optional)
- extra flour for dusting
In a medium bowl, combine the instant yeast, sugar, and warm water. Let it sit for about 5 minutes until foamy.
In a large mixing bowl, whisk together the flour and salt. Once the yeast mixture is ready, pour it into the flour mixture along with 1 tablespoon of olive oil.
Stir with a wooden spoon until a dough forms. Transfer the dough to a floured surface and knead for about 5-7 minutes until smooth and elastic. Add more flour as needed to prevent sticking.
Form the dough into a ball and place it in a lightly greased bowl. Cover with a damp cloth and let it rise in a warm place for about 1 hour or until doubled in size.
Preheat your oven to 400°F (200°C) and line a baking sheet with parchment paper.
Once the dough has risen, punch it down and divide it into 8 equal pieces. Roll each piece into a rope about 6 inches long. Tie each rope into a knot and tuck the ends underneath. Place them on the prepared baking sheet.
In a small bowl, mix together the minced garlic, remaining 2 tablespoons of olive oil, red pepper flakes, and chopped parsley. Brush this mixture generously over each knot.
Sprinkle Parmesan cheese over the knots if desired.
Bake for 12-15 minutes or until the knots are golden brown and cooked through.
Allow the knots to cool for a few minutes before serving.
Serve warm in a breadbasket lined with a kitchen cloth, garnished with additional parsley for a pop of color. Drizzle with leftover garlic oil for an enticing finish.
Keyword bread, garlic, knots
WANT TO SAVE THIS RECIPE?