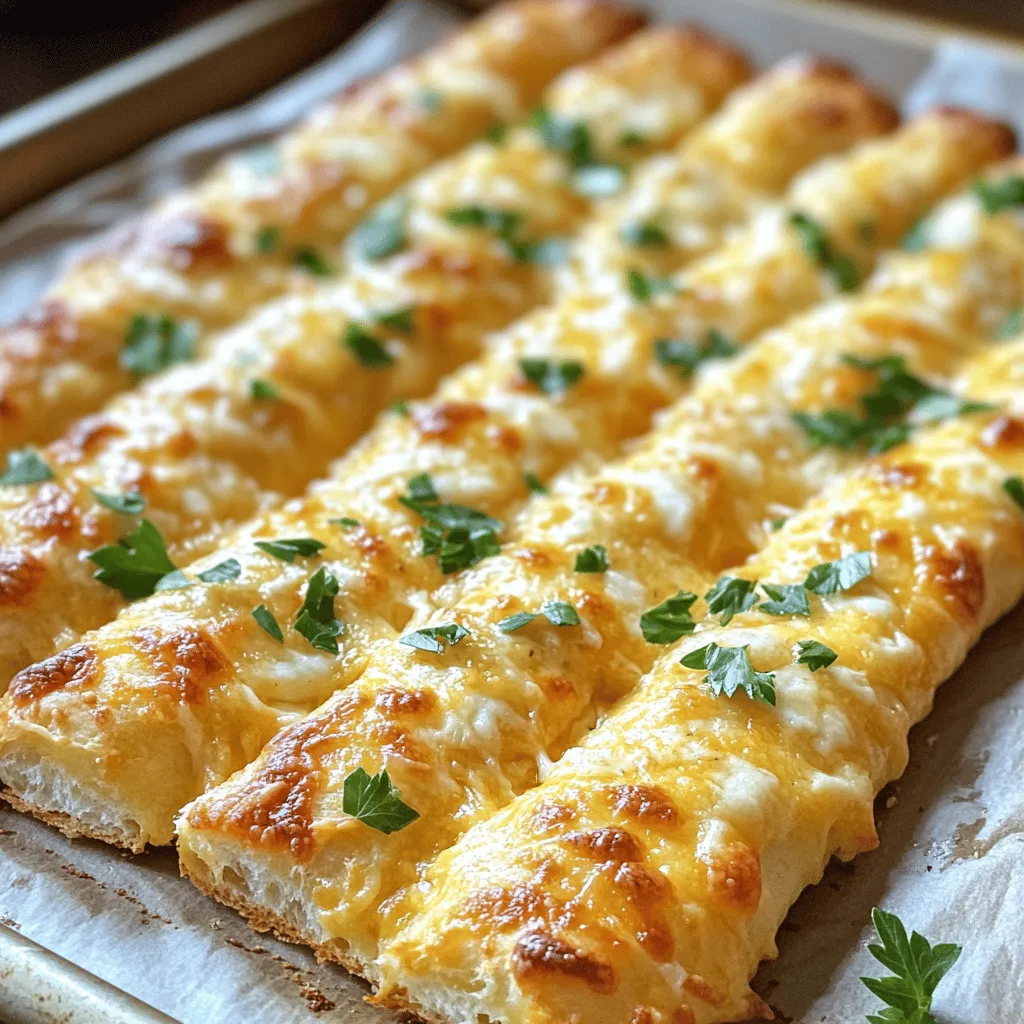
If you love cheesy garlic breadsticks, you’re in for a treat! This simple and delicious recipe will help you make mouthwatering sticks right at home. With just a few basic ingredients and straightforward steps, you’ll have the perfect pairing for any meal. Get ready to impress your family or friends with these tasty bites that will disappear fast! Let’s dive into the world of cheesy garlic bliss.
Ingredients
Detailed List of Ingredients
– All-purpose flour: This is the base of the dough. It gives the breadsticks structure and texture.
– Sugar and yeast: Sugar feeds the yeast. This helps the dough rise well. Use active dry yeast for the best results.
– Garlic and olive oil: Fresh garlic adds a rich flavor. Olive oil keeps the bread moist and tasty.
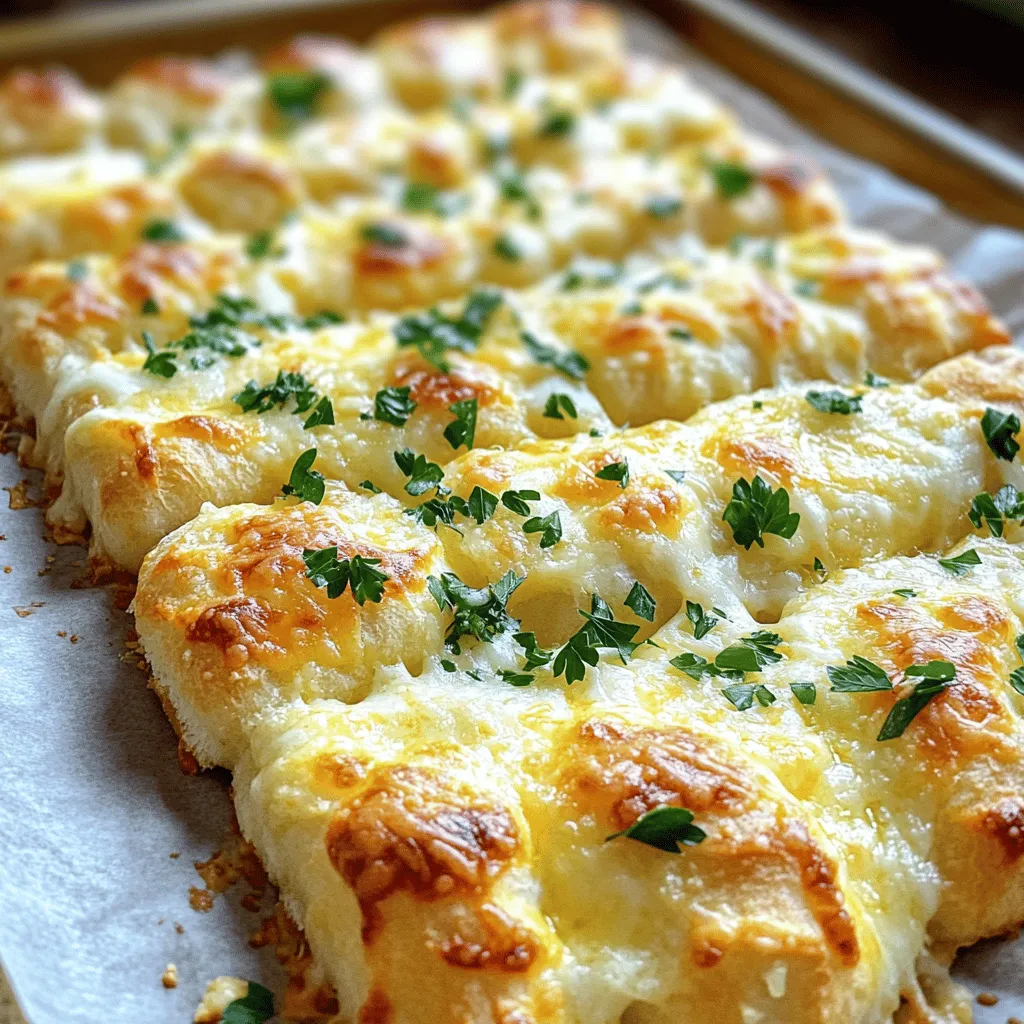
– Cheese varieties: I recommend mozzarella for melting and Parmesan for a sharp taste. Mix them for extra flavor!
– Optional seasonings: Italian seasoning and crushed red pepper flakes add a nice kick. You can adjust these to your taste.
These ingredients make your cheesy garlic breadsticks simple and delicious. For the full recipe, check the details above.
Step-by-Step Instructions
Preparing the Dough
– Activating the yeast: Start by taking a small bowl. Mix warm water with sugar. Sprinkle active dry yeast over the top. Let it sit for about 5 minutes. You want it to get frothy. This shows the yeast is active.
– Mixing dry ingredients: In a large bowl, combine all-purpose flour and salt. Make a well in the center. Add the frothy yeast mixture and olive oil. Stir it well until mixed.
– Kneading technique: Place the dough on a floured surface. Knead it for about 5 to 7 minutes. The dough should become smooth. After kneading, place it in a greased bowl. Cover with a cloth and let it rise. Find a warm spot and let it rise for 1 hour. It should double in size.
Shaping and Rolling
– Rolling out the dough: Once the dough has risen, punch it down gently. Place it on a floured surface. Roll it out into a rectangle, about 1/2 inch thick.
– Transferring to the baking sheet: Transfer your rolled-out dough onto a baking sheet. Use parchment paper to line the sheet.
Topping the Breadsticks
– Mixing garlic and seasoning: In a small bowl, mix minced garlic and Italian seasoning. Spread this mixture evenly over the dough.
– Adding cheese and optional ingredients: Sprinkle shredded mozzarella and grated Parmesan on top. For extra flavor, add crushed red pepper flakes if you like spice.
For the full recipe, check out the detailed instructions above.
Tips & Tricks
Achieving the Perfect Breadstick Texture
To make soft, chewy breadsticks, focus on the dough’s consistency. Your dough should be smooth and elastic. If it feels too sticky, add a bit more flour. If it’s dry, mix in a touch of warm water. Kneading helps develop gluten, which gives bread its structure. Aim to knead for about 5 to 7 minutes. This ensures good texture.
Rising is also key to great breadsticks. Place your dough in a warm spot, like near an oven. Cover it with a cloth to keep it warm and moist. Let it rise until it doubles in size. This can take about one hour. The longer you let it rise, the fluffier your breadsticks will be.
Flavor Enhancements
You can boost flavor by adding toppings. Try sprinkling garlic powder or herbs like oregano and basil. These add depth. Cheese lovers can mix different types of cheese. Cheddar or gouda can add a rich taste.
For a spicier kick, add crushed red pepper flakes. You can mix these into your garlic and seasoning blend. This makes each bite exciting. Adjust the amount based on your spice level. Enjoy experimenting!
For the complete recipe, check out the Full Recipe section.
Variations
Ingredient Swaps
Gluten-free option
You can make these cheesy garlic breadsticks gluten-free. Use a gluten-free flour blend instead of all-purpose flour. Make sure it includes xanthan gum for better texture. This swap helps everyone enjoy these tasty treats.
Different cheese combinations
Feel free to mix up the cheese. You can try cheddar, gouda, or even feta. Each cheese gives a unique flavor to the breadsticks. Experimenting with different cheeses can lead to tasty surprises.
Flavor Profiles
Herb-infused variations
Add herbs to the mix for extra flavor. Fresh basil, thyme, or rosemary works well. You can mix them into the garlic before spreading it on the dough. This addition makes your breadsticks taste fresh and bright.
Sweet vs. savory garlic breadsticks
You can also create sweet garlic breadsticks. Use a bit of honey or brown sugar in the dough. This twist adds a touch of sweetness and pairs well with cheese. It’s a fun way to change the usual savory flavor.
Remember, you can find the full recipe to guide you through each step!
Storage Info
Short-term Storage
To keep your cheesy garlic breadsticks fresh, store them in the fridge. Place them in an airtight container or wrap them tightly in plastic wrap. This helps prevent them from drying out. They will stay fresh for up to three days. When you’re ready to enjoy them, just reheat in the oven for a few minutes. This restores the crispiness and melts the cheese again.
Long-term Options
If you want to save your cheesy garlic breadsticks for later, freezing is a great option. Allow the breadsticks to cool completely after baking. Then, wrap each one in plastic wrap and place them in a freezer bag. You can freeze them for up to three months. When you crave a tasty snack, just pull one out, let it thaw, and reheat in the oven. This method keeps the flavor intact and makes for a quick meal.
FAQs
How do I make cheesy garlic breadsticks from scratch?
To make cheesy garlic breadsticks from scratch, start by mixing warm water and sugar. Add yeast and let it sit until frothy. In a bowl, mix flour and salt. Create a well, then pour in the yeast mixture and olive oil. Stir until it forms a dough. Knead the dough for about 5-7 minutes until smooth. Let it rise for one hour. Roll it out, add garlic, and top with mozzarella and Parmesan. Bake until golden. For the full recipe, check the earlier section.
Can I use store-bought dough?
Yes, you can use store-bought dough for a quick option. Just roll it out and follow the same steps for adding garlic and cheese. This saves time while still giving you that tasty breadstick flavor.
What is the best way to reheat leftover breadsticks?
To reheat leftover breadsticks, preheat your oven to 350°F. Place the breadsticks on a baking sheet lined with parchment paper. Bake for about 10 minutes. This keeps them crispy and warms the cheese. You can also use a microwave, but they may turn soft.
How long do cheesy garlic breadsticks last?
Cheesy garlic breadsticks last about 3-4 days in the fridge. Store them in an airtight container to keep them fresh. If you want them to last longer, consider freezing them.
Can I customize the cheese blend?
Absolutely! You can mix different cheeses based on your taste. Try adding cheddar, gouda, or even feta for a twist. Just remember that the meltability of cheese varies, so pick those that melt well for the best results.
Making cheesy garlic breadsticks is simple and fun. We covered all the ingredients, from flour to cheese and seasonings. I shared step-by-step instructions for making the dough, shaping it, and adding toppings. You learned tips to get that ideal texture and flavor variations to try.
Now, you can enjoy delicious breadsticks fresh from your kitchen. Whether you stick to the basics or mix in your favorites, your breadsticks will surely impress. Keep experimenting, and you will find the perfect recipe for your taste!
