Get ready to wow your taste buds with Garlic Butter Cheese Bombs! These tasty bites are stuffed with gooey cheese and bursting with flavor. They’re perfect for any occasion, whether as a snack or a side dish. In this post, I’ll guide you through the easy steps to make these delicious treats, share tips for perfection, and offer some fun variations. You won’t want to miss this cheesy delight!
Ingredients
Main Ingredients
– 1 can (16 oz) refrigerated biscuit dough
– 1 cup shredded mozzarella cheese
– 1/2 cup cream cheese, softened
– 1/4 cup unsalted butter, melted
– 4 cloves garlic, minced
Seasoning and Garnishes
– 1 tablespoon fresh parsley, chopped
– 1 teaspoon Italian seasoning
– 1/2 teaspoon salt
– 1/4 teaspoon black pepper
– Optional: pinch of red pepper flakes for heat
Equipment Needed
– Baking sheet
– Parchment paper
– Mixing bowls
– Brush for butter
Gather these ingredients for your Garlic Butter Cheese Bombs. The biscuit dough makes a soft outer layer. The mozzarella and cream cheese create a gooey center. You will love the garlic butter, which adds rich flavor. Fresh parsley and Italian seasoning enhance the taste. Feel free to adjust the spices to your liking.
For the best results, use a baking sheet lined with parchment paper. This helps to avoid sticking and makes cleanup easier. A mixing bowl will be handy for blending your cheese filling. Finally, a brush will help coat your cheese bombs in that delicious garlic butter.
The Full Recipe is simple and quick, perfect for a cozy night in or a gathering with friends. Just gather these ingredients, and you’ll be ready to create a tasty treat that everyone will love!
Step-by-Step Instructions
Preparation Phase
– Preheat your oven to 375°F (190°C). Line a baking sheet with parchment paper.
– In a small bowl, mix melted butter, minced garlic, and chopped parsley. Set this aside.
– In another bowl, combine shredded mozzarella and softened cream cheese. Add salt, pepper, and Italian seasoning. Mix well.
Assembling the Cheese Bombs
– Open the biscuit dough and separate it into individual biscuits. Roll each biscuit into a small circle in your palm.
– Place a generous spoonful of the cheese mixture in the center of each biscuit circle.
– Fold the edges of the biscuit over the cheese filling. Pinch to seal, forming a ball.
Baking Process
– Dip each cheese-filled biscuit ball into the garlic butter mixture. Make sure they are well coated.
– Place the coated cheese bombs on the prepared baking sheet, leaving space between them.
– Bake them for about 15-18 minutes until the tops are golden brown. Check for doneness by looking for that golden color.
For the full recipe, check the section above. Enjoy the steps, and let your kitchen fill with the amazing aroma of garlic and cheese!
Tips & Tricks
Perfecting the Cheese Bombs
To seal your dough well, pinch the edges tightly. This keeps the cheese filling inside. If you leave gaps, the cheese may leak out when baking. For even baking, place cheese bombs at least an inch apart. This allows hot air to flow around them. To achieve a golden crust, bake until they are a deep golden brown. This usually takes about 15 to 18 minutes. Keep an eye on them to avoid burning.
Flavor Enhancements
To boost flavor, try adding spices like garlic powder or onion powder. Fresh herbs like thyme or chives work great too. If you want cheese alternatives, use cheddar or pepper jack for a kick. For a fun twist, swap out regular biscuits for flaky or buttermilk versions. These give a nice texture and taste.
Serving Suggestions
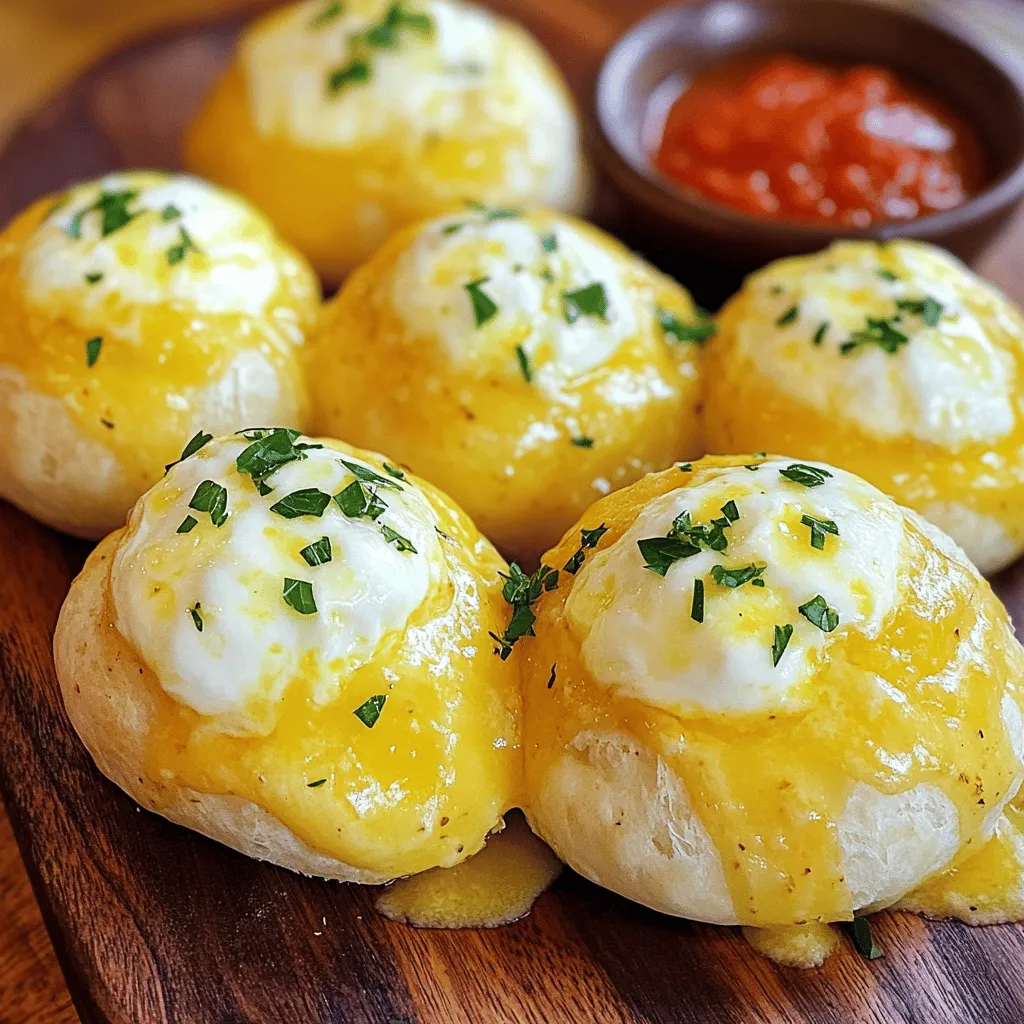
For a tasty presentation, serve cheese bombs warm on a bright platter. Garnish with extra parsley for a pop of color. Pair them with dips like marinara, ranch, or spicy salsa. They are also great with a fresh salad or soup. This makes for a balanced meal or a fun snack at gatherings.

Variations
Ingredient Swaps
You can play around with the cheese in Garlic Butter Cheese Bombs. Use cheddar for a sharp taste, or try pepper jack for a kick. Cream cheese gives a rich texture, but you might enjoy goat cheese for a tangy twist.
If you need a gluten-free option, swap the biscuit dough with gluten-free dough. Many stores offer this, making it easy to enjoy these treats without worry. You can also use a naan or flatbread as a base. This change will give your bombs a unique flavor.
Add vegetables like spinach or bell peppers for a fresh crunch. Diced jalapeños can spice things up. For meat lovers, cooked bacon or sausage makes a tasty addition. Just ensure you chop them small to fit inside the biscuit.
Cooking Method Alternatives
You can make these cheese bombs in an air fryer. Preheat the air fryer to 375°F (190°C). Cook for about 10-12 minutes, checking halfway through. The result will be crispy on the outside and gooey on the inside.
Grilling is another fun option. Form the cheese bombs and place them on skewers. Grill for about 8-10 minutes on medium heat. This method adds a smoky flavor that pairs well with the cheese.
If you’re short on time, try the stove-top method. Heat a skillet over medium heat. Place the cheese bombs in the skillet and cover with a lid. Cook for about 5-7 minutes per side until golden brown. This method is quick and gives a nice crust.
Seasonal Flavor Ideas
For holidays, you can make themed cheese bombs. Add cranberry sauce for a festive touch during Thanksgiving. In winter, mix in some nutmeg or cinnamon for warmth.
Incorporate spices like pumpkin spice for fall or peppermint for winter festivities. These flavors can make your cheese bombs feel special for any occasion.
For dessert-style bombs, use sweet cheeses. Try mixing cream cheese with chocolate or caramel. You can also add a hint of vanilla for extra sweetness. Serve these with a drizzle of chocolate sauce for a delightful treat.
For the full recipe, check the main article.
Storage Info
To Store
To keep your garlic butter cheese bombs fresh, place them in an airtight container. This helps keep moisture in and protects from odors in your fridge. They will last for about 3 to 4 days. If you want to keep them longer, freezing is a great option.
Reheating
To reheat, I recommend using an oven set to 350°F (175°C). Place the cheese bombs on a baking sheet for about 10 minutes. This method warms them through and keeps the outside crisp. You can also use a microwave, but it may make them a bit soft. For the best flavor, always reheat with a bit of garlic butter brushed on top.
Freezing
If you want to freeze garlic butter cheese bombs, let them cool completely first. Then, wrap each bomb tightly in plastic wrap. Place the wrapped bombs in a freezer bag or container. They will stay good for about 2 months. To thaw, move them to the fridge overnight. For reheating, use the same oven method as before. This keeps them tasty and fresh.
FAQs
What are Garlic Butter Cheese Bombs?
Garlic Butter Cheese Bombs are warm, cheesy bites wrapped in biscuit dough. They have a rich garlic butter flavor that makes them a perfect appetizer or snack. This dish likely comes from the popularity of stuffed bread rolls and has gained fame in many homes and restaurants.
Can I make these cheese bombs ahead of time?
Yes, you can prepare Garlic Butter Cheese Bombs ahead of time. Store the uncooked cheese bombs in the fridge for up to 24 hours. Just cover them well to keep them fresh. You can also freeze them for up to three months. Just thaw them in the fridge before baking.
How can I make them spicy?
To add spice, mix in some red pepper flakes into the cheese filling. You can also use pepper jack cheese for a kick. Serve your cheese bombs with spicy marinara or sriracha for dipping. These options will enhance the flavors and give you a nice heat.
What to do if my cheese bombs are too doughy?
If your cheese bombs seem doughy, check the baking time. They should bake until golden brown. Ensure the dough is sealed well to avoid excess moisture. If they are still too soft, try rolling them thinner next time for a better texture.
Are Garlic Butter Cheese Bombs suitable for dietary restrictions?
Yes, you can make vegetarian Garlic Butter Cheese Bombs by using only cheese and herbs. For gluten-free options, look for gluten-free biscuit dough or use a mix of almond flour and cheese. These adjustments allow everyone to enjoy this tasty treat.
In this post, we explored how to make delicious Garlic Butter Cheese Bombs using simple ingredients and step-by-step instructions. You learned about key ingredients, helpful tips, and fun variations.
These bombs are perfect for any gathering or a cozy night in. Experiment with the tips provided to make them your own. Whether you’re a novice or an expert, these cheese bombs are sure to impress your friends and family. Enjoy your cooking!
