![To make a great birthday snack board, you need some key ingredients. Here’s what I recommend: - 1 cup assorted nuts (almonds, cashews, walnuts) - 1 cup bite-sized cheeses (cheddar, gouda, mozzarella) - 1 cup fresh fruits (grapes, strawberries, apple slices) - 1 cup colorful vegetables (carrot sticks, cucumber slices, bell pepper strips) - 1/2 cup hummus or dip (roasted red pepper hummus or tzatziki) - 1 pack of assorted crackers - 1/2 cup dark chocolate squares or chocolate-covered pretzels - Edible flowers (optional, for garnish) These items create a tasty mix. They are easy to find. They also add color and fun to your board. Want to take your snack board up a notch? Here are some fun ideas: - Dried fruits like apricots or cranberries for sweetness - Spiced nuts for a crunchy kick - Various dips, like guacamole or ranch, for more options - Fresh herbs like basil or mint for a pop of flavor These extras can make your board more exciting. Feel free to mix and match based on what you like. Choosing quality ingredients makes a big difference. Here are my tips: - Look for nuts that are fresh and unsalted. - Choose cheeses that are creamy and flavorful. - Select ripe fruits; they should smell sweet and juicy. - Pick fresh vegetables that are crisp and colorful. High-quality ingredients make the board taste better. They also look more appealing. If you want to create the best birthday snack board, remember these points. Check out the Full Recipe for all the details! Start with a large wooden or ceramic board. This will be your base. Make sure it's clean and dry. You want a strong surface to hold your snacks. Lay it out on a table where guests can easily reach it. Begin by placing bite-sized cheeses in groups around the board. Space them out for a nice look. Next, fill gaps with assorted nuts. Let some spill over for a fun vibe. Now, add fresh fruits like grapes and strawberries. Cluster them to create color pops. For veggies, arrange carrot sticks and cucumber slices in groups. You can even stand them in small jars to make them stand tall. Now, serve hummus or dip in a small bowl. Place it in the center for easy access. Stack assorted crackers in small piles around the board. This gives guests plenty of choices. Finally, sprinkle dark chocolate squares or chocolate-covered pretzels around the edges for a sweet treat. Garnish the board with a few edible flowers. This adds a festive touch. Remember to think about colors. Arrange them so no two similar colors are beside each other. This makes the board more inviting and fun. You can prepare this board in just 20 minutes. Check out the Full Recipe for more details on ingredients and serving suggestions. Start by mixing sweet, salty, and creamy. This gives each bite a fun twist. Pair crunchy vegetables with smooth dips for a nice contrast. For example, combine fresh fruits with creamy cheese. This adds depth to your board. Use a mix of nuts for crunch and a hint of salt. This balance will keep everyone happy and wanting more. Colors make your board pop! Use bright fruits like grapes and strawberries. Pair them with vibrant veggies like bell pepper strips. Arrange colors in a rainbow pattern or group similar shades together. This makes the board look fun and inviting. Don't forget to add edible flowers for a cheerful touch. They make everything feel more festive! When serving, keep it simple and fun. Use small plates for guests to grab snacks easily. Consider adding labels to show what each item is. This is useful for those with allergies or specific tastes. Encourage your guests to explore different flavors. You can even suggest fun pairings, like cheese with fruit or nuts with chocolate. For the full recipe, check out the details above. {{image_2}} A sweet snack board brings joy with candies, fruits, and desserts. You can include chocolate-covered strawberries or mini cupcakes. Consider adding sweet dips like chocolate sauce or caramel. They make each bite a treat. On the other hand, a savory board delights with cheeses, meats, and olives. Use different cheeses and cured meats for variety. Add dips like guacamole or ranch. Each item can pair well with crackers. Sweet and savory boards offer something for everyone. Make your board shine with seasonal themes. For spring, use pastel colors and fresh flowers. Add colorful fruits like berries and melons. In fall, think pumpkins and apples. Use warm spices and cozy flavors. A winter board can feature holiday treats like gingerbread cookies and spiced nuts. For summer, think bright colors with fresh veggies and fruity drinks. Seasonal boards keep your snack game fresh and fun. Kid-friendly boards should be colorful and playful. Include fun snacks like gummy bears, popcorn, and animal-shaped sandwiches. Use bright plates and fun themes, like a cartoon character. Adult boards can focus on gourmet options. Think artisan cheeses, olives, and charcuterie. You might add wine pairings or craft beer for an extra touch. Each theme allows you to create a unique experience. These variations make your birthday snack board a hit for all ages. For a full recipe, check out the details above. After your celebration, you may have leftovers. Store them in airtight containers. This keeps moisture out and keeps snacks fresh. Use separate containers for fruits, vegetables, and dips. This prevents sogginess and keeps flavors intact. To maintain freshness, store cheeses and meats in the fridge. Wrap them in wax paper or parchment. This allows them to breathe while staying moist. Keep nuts in a cool, dry place. If they feel soft, they may have absorbed moisture. For next-day enjoyment, take out the items from the fridge. Lay them out on a fresh board. You can recreate the fun look or mix it up! Serve dips in fresh bowls and add new fruits if desired. This makes it feel special again. For the full recipe and ideas, check out the complete guide! You can easily customize a snack board to fit dietary needs. Start by asking guests about their allergies or dietary choices. For gluten-free diets, use gluten-free crackers or veggies. If someone is vegan, replace cheese with plant-based options. You can use fruits, nuts, and dips that fit all diets. Consider adding more colorful veggies for crunch. Drinks can enhance the fun of your snack board. Sparkling water with fruit slices is a fresh choice. Lemonade or iced tea adds a sweet touch. For adults, light wines or cocktails work well. Keep flavors simple to match the snack board's variety. Always have drinks served cold for the best taste. Yes, you can prep many items ahead of time. Wash and cut fruits and veggies a day before. Store them in airtight containers in the fridge. You can also portion out nuts and cheese, making it easy to assemble later. Just wait to add dips and crackers until closer to serving. This keeps everything fresh and tasty. Follow the [Full Recipe] for a delicious birthday snack board that will impress! Creating a birthday snack board is fun and simple. We covered essential ingredients, preparation, and fun tips. You can make it colorful and tasty with just a few steps. Remember to balance flavors and textures for the best experience. Don’t forget to store leftovers properly for next time. With these ideas, your snack board will be a hit. Enjoy making and sharing these tasty treats at your next celebration!](https://tossedrecipes.com/wp-content/uploads/2025/05/fc94983c-99eb-4d20-9878-55cf3babfef6.webp)
Are you ready to elevate your birthday celebrations? A Birthday Snack Board is a fun way to serve snacks for guests of all ages. With vibrant colors and tasty treats, it’s a feast for the eyes and palate! In this article, I’ll share delightful ideas, step-by-step tips, and creative variations to make your snack board shine. Let’s create a memorable birthday experience that everyone will love!
Ingredients for a Birthday Snack Board
List of Essentials
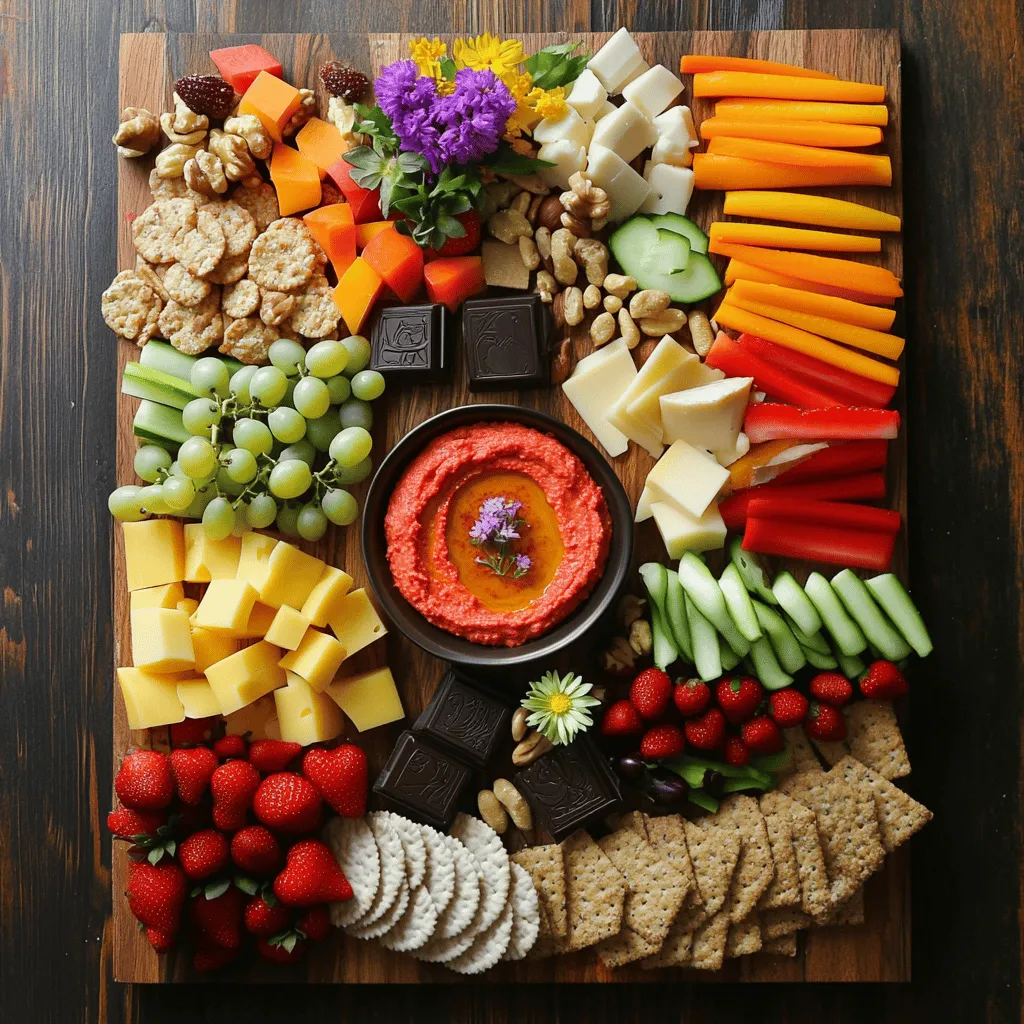
To make a great birthday snack board, you need some key ingredients. Here’s what I recommend:
– 1 cup assorted nuts (almonds, cashews, walnuts)
– 1 cup bite-sized cheeses (cheddar, gouda, mozzarella)
– 1 cup fresh fruits (grapes, strawberries, apple slices)
– 1 cup colorful vegetables (carrot sticks, cucumber slices, bell pepper strips)
– 1/2 cup hummus or dip (roasted red pepper hummus or tzatziki)
– 1 pack of assorted crackers
– 1/2 cup dark chocolate squares or chocolate-covered pretzels
– Edible flowers (optional, for garnish)
These items create a tasty mix. They are easy to find. They also add color and fun to your board.
Optional Items for Enhanced Flavor
Want to take your snack board up a notch? Here are some fun ideas:
– Dried fruits like apricots or cranberries for sweetness
– Spiced nuts for a crunchy kick
– Various dips, like guacamole or ranch, for more options
– Fresh herbs like basil or mint for a pop of flavor
These extras can make your board more exciting. Feel free to mix and match based on what you like.
Suggestions for High-Quality Ingredients
Choosing quality ingredients makes a big difference. Here are my tips:
– Look for nuts that are fresh and unsalted.
– Choose cheeses that are creamy and flavorful.
– Select ripe fruits; they should smell sweet and juicy.
– Pick fresh vegetables that are crisp and colorful.
High-quality ingredients make the board taste better. They also look more appealing. If you want to create the best birthday snack board, remember these points. Check out the Full Recipe for all the details!
Step-by-Step Instructions
Preparation of the Board
Start with a large wooden or ceramic board. This will be your base. Make sure it’s clean and dry. You want a strong surface to hold your snacks. Lay it out on a table where guests can easily reach it.
Arranging Various Snack Elements
Begin by placing bite-sized cheeses in groups around the board. Space them out for a nice look. Next, fill gaps with assorted nuts. Let some spill over for a fun vibe. Now, add fresh fruits like grapes and strawberries. Cluster them to create color pops. For veggies, arrange carrot sticks and cucumber slices in groups. You can even stand them in small jars to make them stand tall.
Now, serve hummus or dip in a small bowl. Place it in the center for easy access. Stack assorted crackers in small piles around the board. This gives guests plenty of choices. Finally, sprinkle dark chocolate squares or chocolate-covered pretzels around the edges for a sweet treat.
Final Touches for Visual Appeal
Garnish the board with a few edible flowers. This adds a festive touch. Remember to think about colors. Arrange them so no two similar colors are beside each other. This makes the board more inviting and fun.
You can prepare this board in just 20 minutes. Check out the Full Recipe for more details on ingredients and serving suggestions.
Tips & Tricks for the Perfect Snack Board
Balancing Flavors and Textures
Start by mixing sweet, salty, and creamy. This gives each bite a fun twist. Pair crunchy vegetables with smooth dips for a nice contrast. For example, combine fresh fruits with creamy cheese. This adds depth to your board. Use a mix of nuts for crunch and a hint of salt. This balance will keep everyone happy and wanting more.
Color Coordination Techniques
Colors make your board pop! Use bright fruits like grapes and strawberries. Pair them with vibrant veggies like bell pepper strips. Arrange colors in a rainbow pattern or group similar shades together. This makes the board look fun and inviting. Don’t forget to add edible flowers for a cheerful touch. They make everything feel more festive!
Suggestions for Hosting and Serving
When serving, keep it simple and fun. Use small plates for guests to grab snacks easily. Consider adding labels to show what each item is. This is useful for those with allergies or specific tastes. Encourage your guests to explore different flavors. You can even suggest fun pairings, like cheese with fruit or nuts with chocolate. For the full recipe, check out the details above.
Variations for Themed Birthday Snack Boards
Sweet vs. Savory Snack Boards
A sweet snack board brings joy with candies, fruits, and desserts. You can include chocolate-covered strawberries or mini cupcakes. Consider adding sweet dips like chocolate sauce or caramel. They make each bite a treat.
On the other hand, a savory board delights with cheeses, meats, and olives. Use different cheeses and cured meats for variety. Add dips like guacamole or ranch. Each item can pair well with crackers. Sweet and savory boards offer something for everyone.
Seasonal and Holiday-Inspired Ideas
Make your board shine with seasonal themes. For spring, use pastel colors and fresh flowers. Add colorful fruits like berries and melons. In fall, think pumpkins and apples. Use warm spices and cozy flavors. A winter board can feature holiday treats like gingerbread cookies and spiced nuts. For summer, think bright colors with fresh veggies and fruity drinks. Seasonal boards keep your snack game fresh and fun.
Kid-Friendly vs. Adult Themes
Kid-friendly boards should be colorful and playful. Include fun snacks like gummy bears, popcorn, and animal-shaped sandwiches. Use bright plates and fun themes, like a cartoon character.
Adult boards can focus on gourmet options. Think artisan cheeses, olives, and charcuterie. You might add wine pairings or craft beer for an extra touch. Each theme allows you to create a unique experience.
These variations make your birthday snack board a hit for all ages. For a full recipe, check out the details above.
Storage Information for Leftovers
Proper Storage Techniques
After your celebration, you may have leftovers. Store them in airtight containers. This keeps moisture out and keeps snacks fresh. Use separate containers for fruits, vegetables, and dips. This prevents sogginess and keeps flavors intact.
Best Practices for Freshness
To maintain freshness, store cheeses and meats in the fridge. Wrap them in wax paper or parchment. This allows them to breathe while staying moist. Keep nuts in a cool, dry place. If they feel soft, they may have absorbed moisture.
Reassembly Tips for Next-Day Enjoyment
For next-day enjoyment, take out the items from the fridge. Lay them out on a fresh board. You can recreate the fun look or mix it up! Serve dips in fresh bowls and add new fruits if desired. This makes it feel special again. For the full recipe and ideas, check out the complete guide!
FAQs About Birthday Snack Boards
How to customize a snack board for dietary restrictions?
You can easily customize a snack board to fit dietary needs. Start by asking guests about their allergies or dietary choices. For gluten-free diets, use gluten-free crackers or veggies. If someone is vegan, replace cheese with plant-based options. You can use fruits, nuts, and dips that fit all diets. Consider adding more colorful veggies for crunch.
What drinks pair well with a birthday snack board?
Drinks can enhance the fun of your snack board. Sparkling water with fruit slices is a fresh choice. Lemonade or iced tea adds a sweet touch. For adults, light wines or cocktails work well. Keep flavors simple to match the snack board’s variety. Always have drinks served cold for the best taste.
Can I prepare items in advance for the board?
Yes, you can prep many items ahead of time. Wash and cut fruits and veggies a day before. Store them in airtight containers in the fridge. You can also portion out nuts and cheese, making it easy to assemble later. Just wait to add dips and crackers until closer to serving. This keeps everything fresh and tasty.
Follow the [Full Recipe] for a delicious birthday snack board that will impress!
Creating a birthday snack board is fun and simple. We covered essential ingredients, preparation, and fun tips. You can make it colorful and tasty with just a few steps. Remember to balance flavors and textures for the best experience. Don’t forget to store leftovers properly for next time. With these ideas, your snack board will be a hit. Enjoy making and sharing these tasty treats at your next celebration!
![To make a great birthday snack board, you need some key ingredients. Here’s what I recommend: - 1 cup assorted nuts (almonds, cashews, walnuts) - 1 cup bite-sized cheeses (cheddar, gouda, mozzarella) - 1 cup fresh fruits (grapes, strawberries, apple slices) - 1 cup colorful vegetables (carrot sticks, cucumber slices, bell pepper strips) - 1/2 cup hummus or dip (roasted red pepper hummus or tzatziki) - 1 pack of assorted crackers - 1/2 cup dark chocolate squares or chocolate-covered pretzels - Edible flowers (optional, for garnish) These items create a tasty mix. They are easy to find. They also add color and fun to your board. Want to take your snack board up a notch? Here are some fun ideas: - Dried fruits like apricots or cranberries for sweetness - Spiced nuts for a crunchy kick - Various dips, like guacamole or ranch, for more options - Fresh herbs like basil or mint for a pop of flavor These extras can make your board more exciting. Feel free to mix and match based on what you like. Choosing quality ingredients makes a big difference. Here are my tips: - Look for nuts that are fresh and unsalted. - Choose cheeses that are creamy and flavorful. - Select ripe fruits; they should smell sweet and juicy. - Pick fresh vegetables that are crisp and colorful. High-quality ingredients make the board taste better. They also look more appealing. If you want to create the best birthday snack board, remember these points. Check out the Full Recipe for all the details! Start with a large wooden or ceramic board. This will be your base. Make sure it's clean and dry. You want a strong surface to hold your snacks. Lay it out on a table where guests can easily reach it. Begin by placing bite-sized cheeses in groups around the board. Space them out for a nice look. Next, fill gaps with assorted nuts. Let some spill over for a fun vibe. Now, add fresh fruits like grapes and strawberries. Cluster them to create color pops. For veggies, arrange carrot sticks and cucumber slices in groups. You can even stand them in small jars to make them stand tall. Now, serve hummus or dip in a small bowl. Place it in the center for easy access. Stack assorted crackers in small piles around the board. This gives guests plenty of choices. Finally, sprinkle dark chocolate squares or chocolate-covered pretzels around the edges for a sweet treat. Garnish the board with a few edible flowers. This adds a festive touch. Remember to think about colors. Arrange them so no two similar colors are beside each other. This makes the board more inviting and fun. You can prepare this board in just 20 minutes. Check out the Full Recipe for more details on ingredients and serving suggestions. Start by mixing sweet, salty, and creamy. This gives each bite a fun twist. Pair crunchy vegetables with smooth dips for a nice contrast. For example, combine fresh fruits with creamy cheese. This adds depth to your board. Use a mix of nuts for crunch and a hint of salt. This balance will keep everyone happy and wanting more. Colors make your board pop! Use bright fruits like grapes and strawberries. Pair them with vibrant veggies like bell pepper strips. Arrange colors in a rainbow pattern or group similar shades together. This makes the board look fun and inviting. Don't forget to add edible flowers for a cheerful touch. They make everything feel more festive! When serving, keep it simple and fun. Use small plates for guests to grab snacks easily. Consider adding labels to show what each item is. This is useful for those with allergies or specific tastes. Encourage your guests to explore different flavors. You can even suggest fun pairings, like cheese with fruit or nuts with chocolate. For the full recipe, check out the details above. {{image_2}} A sweet snack board brings joy with candies, fruits, and desserts. You can include chocolate-covered strawberries or mini cupcakes. Consider adding sweet dips like chocolate sauce or caramel. They make each bite a treat. On the other hand, a savory board delights with cheeses, meats, and olives. Use different cheeses and cured meats for variety. Add dips like guacamole or ranch. Each item can pair well with crackers. Sweet and savory boards offer something for everyone. Make your board shine with seasonal themes. For spring, use pastel colors and fresh flowers. Add colorful fruits like berries and melons. In fall, think pumpkins and apples. Use warm spices and cozy flavors. A winter board can feature holiday treats like gingerbread cookies and spiced nuts. For summer, think bright colors with fresh veggies and fruity drinks. Seasonal boards keep your snack game fresh and fun. Kid-friendly boards should be colorful and playful. Include fun snacks like gummy bears, popcorn, and animal-shaped sandwiches. Use bright plates and fun themes, like a cartoon character. Adult boards can focus on gourmet options. Think artisan cheeses, olives, and charcuterie. You might add wine pairings or craft beer for an extra touch. Each theme allows you to create a unique experience. These variations make your birthday snack board a hit for all ages. For a full recipe, check out the details above. After your celebration, you may have leftovers. Store them in airtight containers. This keeps moisture out and keeps snacks fresh. Use separate containers for fruits, vegetables, and dips. This prevents sogginess and keeps flavors intact. To maintain freshness, store cheeses and meats in the fridge. Wrap them in wax paper or parchment. This allows them to breathe while staying moist. Keep nuts in a cool, dry place. If they feel soft, they may have absorbed moisture. For next-day enjoyment, take out the items from the fridge. Lay them out on a fresh board. You can recreate the fun look or mix it up! Serve dips in fresh bowls and add new fruits if desired. This makes it feel special again. For the full recipe and ideas, check out the complete guide! You can easily customize a snack board to fit dietary needs. Start by asking guests about their allergies or dietary choices. For gluten-free diets, use gluten-free crackers or veggies. If someone is vegan, replace cheese with plant-based options. You can use fruits, nuts, and dips that fit all diets. Consider adding more colorful veggies for crunch. Drinks can enhance the fun of your snack board. Sparkling water with fruit slices is a fresh choice. Lemonade or iced tea adds a sweet touch. For adults, light wines or cocktails work well. Keep flavors simple to match the snack board's variety. Always have drinks served cold for the best taste. Yes, you can prep many items ahead of time. Wash and cut fruits and veggies a day before. Store them in airtight containers in the fridge. You can also portion out nuts and cheese, making it easy to assemble later. Just wait to add dips and crackers until closer to serving. This keeps everything fresh and tasty. Follow the [Full Recipe] for a delicious birthday snack board that will impress! Creating a birthday snack board is fun and simple. We covered essential ingredients, preparation, and fun tips. You can make it colorful and tasty with just a few steps. Remember to balance flavors and textures for the best experience. Don’t forget to store leftovers properly for next time. With these ideas, your snack board will be a hit. Enjoy making and sharing these tasty treats at your next celebration!](https://tossedrecipes.com/wp-content/uploads/2025/05/fc94983c-99eb-4d20-9878-55cf3babfef6-300x300.webp)