Craving a snack that’s both crunchy and healthy? You’re in the right place! Crispy Baked Zucchini Chips are simple to make and perfect for satisfying your munchies. With just a few fresh ingredients and some seasoning, you can create a delightful treat that beats any store-bought chip. Let’s dive into the easy recipe and tips to make your zucchini chips an absolute hit!
Ingredients
Required Ingredients for Crispy Baked Zucchini Chips
– 2 medium zucchinis
– 1 cup breadcrumbs (panko preferred for extra crunch)
– 1/2 cup grated Parmesan cheese
Seasoning Ingredients
– 1 teaspoon garlic powder
– 1 teaspoon onion powder
– 1/2 teaspoon smoked paprika
– 1/2 teaspoon salt
– 1/4 teaspoon black pepper
Other Essentials
– 2 large eggs
– Olive oil spray
To make crispy baked zucchini chips, gather these ingredients. The zucchinis become the star of this snack. I love using medium zucchinis because they have the right amount of water and flavor. The panko breadcrumbs give a delightful crunch. Parmesan cheese adds a rich taste that makes the chips irresistible.
For seasoning, I use garlic and onion powder. They bring out the natural sweetness of the zucchini. Smoked paprika adds a nice touch of warmth. Salt and black pepper enhance the flavors, making each chip pop.
You will also need eggs. They help the breadcrumbs stick to the zucchini slices. Finally, olive oil spray gives the chips that golden color and crispiness.
This simple list of ingredients makes it easy to create a healthy snack delight. Check out the Full Recipe for detailed steps on how to bring these chips to life!
Step-by-Step Instructions
Preparation Steps
1. Preheat your oven to 225°F (110°C). This low heat helps the chips crisp up nicely.
2. Line two baking sheets with parchment paper. This makes for easy cleanup and prevents sticking.
3. Wash and dry the zucchinis. Slice them thinly, about 1/8 inch thick. A mandoline works great for even slices.
Mixing Ingredients
1. In a mixing bowl, whisk the two large eggs until they are well beaten.
2. In another bowl, mix the breadcrumbs, grated Parmesan cheese, garlic powder, onion powder, smoked paprika, salt, and black pepper. This blend adds great flavor to the chips.
Coating and Baking
1. Dip each zucchini slice into the beaten eggs. Let the excess egg drip off before moving to the next step.
2. Coat the zucchini slices with the breadcrumb mixture. Press gently to make sure the crumbs stick well.
3. Place the coated zucchini slices in a single layer on the baking sheets. Avoid overlapping them for even baking.
4. Spray the slices lightly with olive oil spray. This helps them achieve a golden, crispy finish.
5. Bake in the preheated oven for about 2 hours. Flip them halfway through to ensure they cook evenly. Keep a close eye on them towards the end to prevent burning.
These steps create a delightful, healthy snack that is fun to make and even better to eat. For the complete recipe, refer to the Full Recipe section.
Tips & Tricks
Achieving the Perfect Crispiness
To get your zucchini chips super crispy, slice them evenly. Thin slices, about 1/8 inch thick, cook better. A mandoline or sharp knife works great for this. I prefer using panko breadcrumbs. They add that extra crunch that makes these chips special. The texture difference is noticeable and very enjoyable.
Common Mistakes to Avoid
One common mistake is overcrowding the baking sheets. When you place too many chips close together, they steam instead of crisp. Give them space! Another mistake is not flipping the chips halfway through baking. Flipping helps both sides cook evenly. Remember to check them often, especially towards the end.
Serving Suggestions
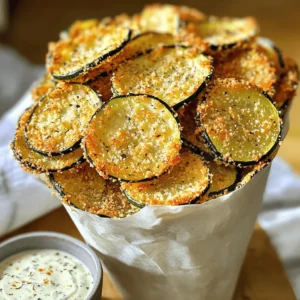
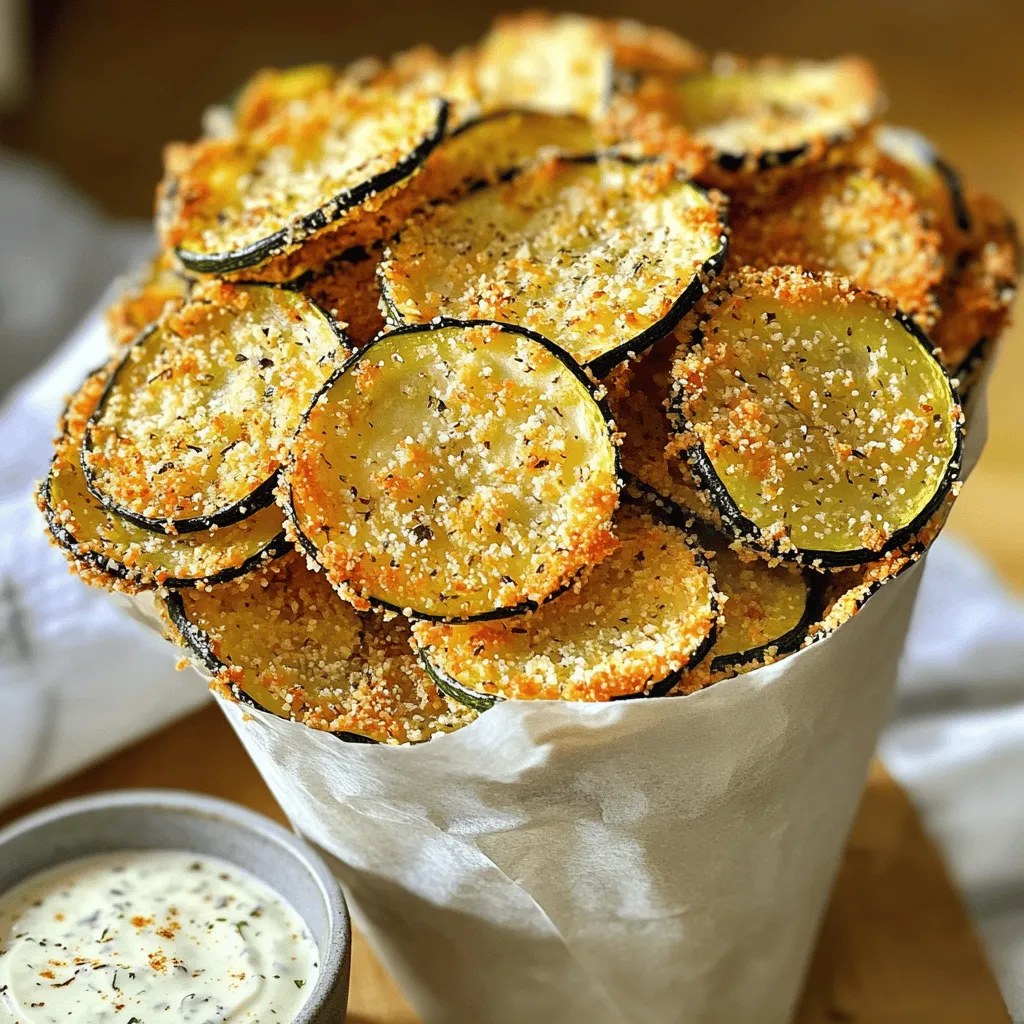
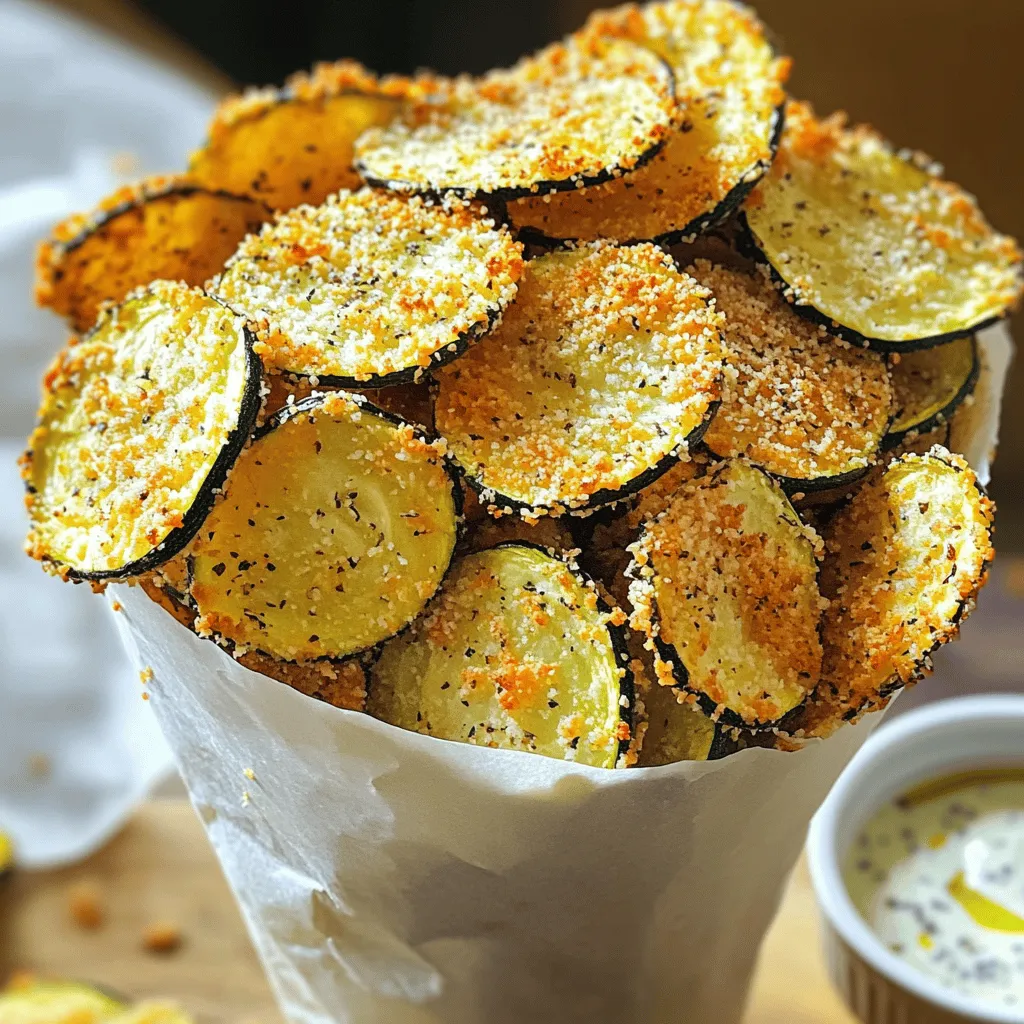
You can get creative with how you serve your zucchini chips. Try placing them in a cone made from parchment paper. This adds a fun touch! Pair them with dips like homemade ranch or marinara sauce. The right dip can enhance the flavor and make each bite even better. Enjoy your crispy snack!
Variations
Flavor Variations
You can make your crispy baked zucchini chips even more tasty. Try adding herbs. Italian seasoning or oregano works well. These herbs add nice flavors that brighten up the chips. You can also experiment with different cheese types. Instead of Parmesan, use cheddar or mozzarella for a unique twist. Each cheese gives a different taste, which keeps things fun.
Gluten-Free Alternatives
If you need a gluten-free option, I have a great tip. Substitute the breadcrumbs with almond flour. Almond flour gives a nice crunch and works well with zucchini. Plus, it keeps the chips gluten-free. Just make sure to adjust the seasoning to match your taste.
Oven vs. Air Fryer
You can cook these chips in an air fryer too. It saves time and can make them even crispier. To adapt the recipe for an air fryer, set it to 375°F (190°C). Place the zucchini slices in a single layer in the basket. Cook them for about 15-20 minutes. Shake the basket halfway through to ensure they cook evenly. This method gives you a quick and delicious snack! For the full recipe, check out the entire article.
Storage Info
Storing Leftovers
To keep your chips crispy, store them in an airtight container. Avoid using plastic bags. The air can make them soft. Instead, use a glass jar or a metal tin. Place a paper towel in the bottom to absorb moisture. This helps keep your zucchini chips fresh. You can store them for up to five days.
Reheating Tips
To re-crisp your zucchini chips, preheat your oven to 350°F (175°C). Spread the chips on a baking sheet in a single layer. Bake for about 5 to 10 minutes. This will bring back their crunch. You can also use an air fryer for a quicker option. Set it to 350°F (175°C) and heat for about 3 to 5 minutes.
Freezing for Later
To freeze your zucchini chips, first let them cool completely. Then, arrange them in a single layer on a baking sheet. Place the sheet in the freezer for about an hour. After they’re frozen, transfer the chips to a freezer-safe bag. Remove as much air as possible before sealing. They can last up to three months. To thaw, just leave them at room temperature for a bit before reheating.
FAQs
How do I make crispy baked zucchini chips?
To make crispy baked zucchini chips, start by preheating your oven to 225°F (110°C). Line two baking sheets with parchment paper. Wash and dry two medium zucchinis, then slice them thinly, about 1/8 inch thick. In one bowl, whisk two large eggs. In another bowl, mix 1 cup of breadcrumbs, 1/2 cup of grated Parmesan cheese, 1 teaspoon of garlic powder, 1 teaspoon of onion powder, 1/2 teaspoon of smoked paprika, 1/2 teaspoon of salt, and 1/4 teaspoon of black pepper. Dip each zucchini slice into the beaten eggs, letting the excess drip off, then coat with the breadcrumb mix. Place them in a single layer on the baking sheets. Spray lightly with olive oil spray. Bake for about 2 hours, flipping halfway through until golden and crispy.
Can I use other vegetables?
Yes, you can use other vegetables! Sweet potatoes, carrots, and beets work well. Cut them into thin slices, just like the zucchini. Adjust cooking time as needed, since some veggies may take longer to crisp up. Experiment with different flavors and textures to find your favorite combinations.
How long do baked zucchini chips last?
Baked zucchini chips usually last about 3 to 4 days when stored in an airtight container. Keep them at room temperature to maintain their crunch. If you notice them getting soft, you can re-crisp them in the oven for a few minutes. Avoid storing them in the fridge, as moisture will make them soggy.
Are baked zucchini chips a healthy snack?
Baked zucchini chips are a great healthy snack! They are lower in calories than regular chips and rich in vitamins. One medium zucchini has about 33 calories and lots of fiber, which helps keep you full. With the addition of whole ingredients like breadcrumbs and cheese, you get some protein too. Enjoy these chips guilt-free!
Crispy baked zucchini chips are easy to make and fun to eat. We covered the key ingredients, simple steps, and tips for the best crunch. Remember, even slicing and panko breadcrumbs are key. Experiment with flavors and serve with tasty dips. You can store leftovers for later, too. Enjoy your healthy snack!