Chocolate Covered Caramel Apple Slices Delicious Treat

WANT TO SAVE THIS RECIPE?

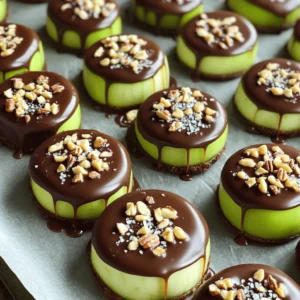
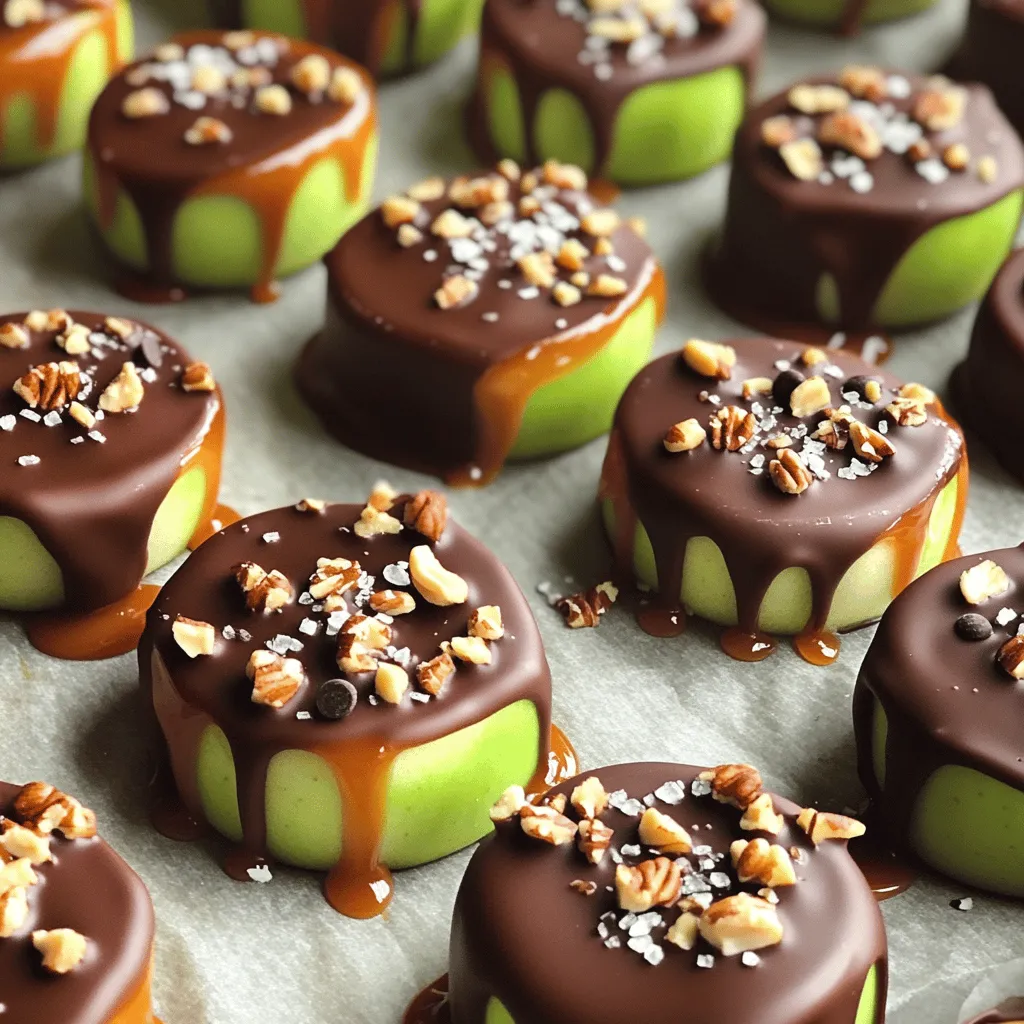
Are you craving a sweet treat that’s both fun to make and delicious? Chocolate-covered caramel apple slices offer the perfect blend of flavors and textures. With just a few simple ingredients and steps, you can impress your friends and family with this delightful dessert. Plus, I’ll share tips and tricks to make your slices look as good as they taste. Let’s dive in and satisfy that sweet tooth together!

Ingredients

Here are the ingredients you will need for chocolate covered caramel apple slices:

– 2 large apples (Granny Smith or Honeycrisp)

– 1 cup caramel candies or homemade caramel sauce

– 1 tablespoon heavy cream (for melting caramel)

– 1 cup dark chocolate chips or milk chocolate

– 1 teaspoon coconut oil (to smooth out chocolate)

– Sea salt (for sprinkling on top)

– Optional toppings: crushed nuts or mini chocolate chips

These ingredients come together to create a sweet, crunchy treat. I love using Granny Smith apples for their tartness. It pairs well with the sweet caramel and chocolate. Honeycrisp apples also work great if you prefer a sweeter bite.

The caramel adds a chewy texture that contrasts beautifully with the crisp apple. You can use store-bought caramel candies for ease or whip up your own homemade caramel sauce if you wish.

When it comes to chocolate, dark chocolate adds depth, while milk chocolate is creamier and sweeter. The coconut oil helps the chocolate melt smoothly.

The sea salt is key. A sprinkle on top enhances the flavors and adds a gourmet touch. If you want to mix things up, consider adding crushed nuts or mini chocolate chips as fun toppings.

Having these ingredients ready will set you up for success in making this delicious treat. For the full recipe, check out the details above.

Step-by-Step Instructions

Preparation of Apples

– Wash and dry apples. Use fresh apples for the best taste.

– Slice apples into ½-inch thick rounds. Make sure the slices are even.

– Remove the core from each slice. This step makes them easier to eat.

Melting the Caramel

– Combine caramel candies and heavy cream in a bowl. This mix helps the caramel melt smoothly.

– Microwave in intervals until smooth. Stir well between each interval to avoid lumps.

Coating and Setting Caramel

– Dip apple slices in melted caramel. Make sure to coat them evenly.

– Place on parchment-lined baking sheet. This keeps them from sticking.

– Refrigerate to set. Let them chill for about 15-20 minutes.

Melting the Chocolate

– Melt dark chocolate chips with coconut oil. The coconut oil helps the chocolate stay smooth.

– Stir until smooth. You want a nice, creamy consistency.

Dipping and Topping

– Dip caramel-coated slices in chocolate. Allow the excess to drip off.

– Sprinkle with sea salt and optional toppings. You can add crushed nuts or mini chocolate chips.

– Return to refrigerator to harden. Chill for another 10-15 minutes.

For the full recipe, check the details above. Enjoy making this sweet treat!

Tips & Tricks

Choosing the Best Apples

When picking apples, I suggest using Granny Smith or Honeycrisp. These varieties balance sweet and tart flavors well. They also hold up nicely when dipped in caramel and chocolate. Freshness is key. Look for apples that are firm and shiny. Avoid any with bruises or soft spots. Fresh apples make a big difference in taste.

Ensuring a Smooth Melt

Melting caramel and chocolate can be tricky. To melt caramel, combine the candies with heavy cream in a microwave-safe bowl. Microwave in 30-second intervals. Stir after each interval to ensure it melts evenly. For chocolate, add a teaspoon of coconut oil. This helps make it smooth and shiny. Again, microwave in 30-second bursts, stirring often. This way, you avoid burning or clumping.

Presentation Ideas

For parties, serve these treats on a colorful platter. You can also stick a wooden skewer into each slice for easy eating. Drizzle some extra melted chocolate on top for flair. If you’re feeling creative, use crushed nuts or mini chocolate chips as toppings. These make the slices look fun and inviting.

Variations

Alternative Coatings

You can switch up the chocolate on your apple slices. Try using white chocolate or milk chocolate instead of dark chocolate. Each type offers a unique taste. Flavored chocolate is another fun option. Look for chocolate with hints of raspberry, mint, or even orange. These flavors add a twist that is sure to impress.

Seasonal Additions

Toppings can match the seasons. For example, use colorful sprinkles for holidays like Halloween or Christmas. You can also add crushed candy canes for a festive look in winter. Fresh fruits can work well too. Slices of strawberries or bananas are great choices that pair nicely with apples.

Dietary Adjustments

If you want gluten-free options, use gluten-free caramel. Many brands offer this type. For vegan alternatives, choose plant-based chocolate and caramel. There are many great brands that make these products. They taste just as good, so everyone can enjoy this treat! To find the full recipe, check the section above.

Storage Info

How to Store Leftover Slices

To keep your chocolate-covered caramel apple slices fresh, store them in the fridge. Place the slices in an airtight container. This helps prevent them from drying out. You can also use parchment paper between layers to avoid sticking. This simple step keeps your dessert looking great.

Freezing Chocolate Covered Caramel Apple Slices

If you want to save some for later, freezing works well. First, let the slices cool completely. Then, place them in a single layer on a baking sheet. Freeze them for about two hours. Once frozen, transfer the slices to a freezer bag. Be sure to remove excess air. This helps keep them fresh longer. When ready to eat, thaw the slices in the fridge overnight. This way, they will maintain their tasty texture.

Shelf Life

In the fridge, these slices last about 5 days. Keep an eye out for signs of spoilage. If the chocolate looks dull or the caramel feels sticky, it’s time to toss them. Always trust your senses when it comes to food safety. Enjoy your delicious treat while it’s fresh!

FAQs

Can I use other fruits instead of apples?

Yes, you can! Some great choices are pears, bananas, or strawberries. These fruits also work well with caramel and chocolate. Pears offer a soft bite, while bananas add a creamy texture. Strawberries bring a bright, fresh taste. You can try any fruit you like!

How do I prevent the caramel from hardening too quickly?

To keep your caramel smooth, work at low heat. Use a heavy pot to melt the caramel slowly. Stir often to avoid burning. If it starts to harden, add a splash of cream to loosen it up. This keeps it creamy for dipping.

Where can I buy chocolate-covered caramel apple slices?

You can find them in many stores or online. Check your local grocery store or specialty candy shops. Online retailers like Amazon often carry popular brands. Look for brands that focus on quality ingredients for the best taste.

Can I make this recipe in advance?

Absolutely! You can prep the apple slices and store them in the fridge. Just wrap them well to keep them fresh. You can also make the caramel and chocolate ahead of time. Just reheat them gently before using. This way, you can enjoy your treat at any time!

You learned how to make delicious chocolate-covered caramel apple slices. We covered ingredients, preparation, and tips to make them perfect. You can use different toppings and variations for every season. Store any leftovers wisely for later enjoyment.

These treats are fun and easy to make. Whether for a party or a snack, they impress everyone. Enjoy making these with family and friends, and don’t forget to get creative!

Here are the ingredients you will need for chocolate covered caramel apple slices: - 2 large apples (Granny Smith or Honeycrisp) - 1 cup caramel candies or homemade caramel sauce - 1 tablespoon heavy cream (for melting caramel) - 1 cup dark chocolate chips or milk chocolate - 1 teaspoon coconut oil (to smooth out chocolate) - Sea salt (for sprinkling on top) - Optional toppings: crushed nuts or mini chocolate chips These ingredients come together to create a sweet, crunchy treat. I love using Granny Smith apples for their tartness. It pairs well with the sweet caramel and chocolate. Honeycrisp apples also work great if you prefer a sweeter bite. The caramel adds a chewy texture that contrasts beautifully with the crisp apple. You can use store-bought caramel candies for ease or whip up your own homemade caramel sauce if you wish. When it comes to chocolate, dark chocolate adds depth, while milk chocolate is creamier and sweeter. The coconut oil helps the chocolate melt smoothly. The sea salt is key. A sprinkle on top enhances the flavors and adds a gourmet touch. If you want to mix things up, consider adding crushed nuts or mini chocolate chips as fun toppings. Having these ingredients ready will set you up for success in making this delicious treat. For the full recipe, check out the details above. - Wash and dry apples. Use fresh apples for the best taste. - Slice apples into ½-inch thick rounds. Make sure the slices are even. - Remove the core from each slice. This step makes them easier to eat. - Combine caramel candies and heavy cream in a bowl. This mix helps the caramel melt smoothly. - Microwave in intervals until smooth. Stir well between each interval to avoid lumps. - Dip apple slices in melted caramel. Make sure to coat them evenly. - Place on parchment-lined baking sheet. This keeps them from sticking. - Refrigerate to set. Let them chill for about 15-20 minutes. - Melt dark chocolate chips with coconut oil. The coconut oil helps the chocolate stay smooth. - Stir until smooth. You want a nice, creamy consistency. - Dip caramel-coated slices in chocolate. Allow the excess to drip off. - Sprinkle with sea salt and optional toppings. You can add crushed nuts or mini chocolate chips. - Return to refrigerator to harden. Chill for another 10-15 minutes. For the full recipe, check the details above. Enjoy making this sweet treat! When picking apples, I suggest using Granny Smith or Honeycrisp. These varieties balance sweet and tart flavors well. They also hold up nicely when dipped in caramel and chocolate. Freshness is key. Look for apples that are firm and shiny. Avoid any with bruises or soft spots. Fresh apples make a big difference in taste. Melting caramel and chocolate can be tricky. To melt caramel, combine the candies with heavy cream in a microwave-safe bowl. Microwave in 30-second intervals. Stir after each interval to ensure it melts evenly. For chocolate, add a teaspoon of coconut oil. This helps make it smooth and shiny. Again, microwave in 30-second bursts, stirring often. This way, you avoid burning or clumping. For parties, serve these treats on a colorful platter. You can also stick a wooden skewer into each slice for easy eating. Drizzle some extra melted chocolate on top for flair. If you're feeling creative, use crushed nuts or mini chocolate chips as toppings. These make the slices look fun and inviting. {{image_2}} You can switch up the chocolate on your apple slices. Try using white chocolate or milk chocolate instead of dark chocolate. Each type offers a unique taste. Flavored chocolate is another fun option. Look for chocolate with hints of raspberry, mint, or even orange. These flavors add a twist that is sure to impress. Toppings can match the seasons. For example, use colorful sprinkles for holidays like Halloween or Christmas. You can also add crushed candy canes for a festive look in winter. Fresh fruits can work well too. Slices of strawberries or bananas are great choices that pair nicely with apples. If you want gluten-free options, use gluten-free caramel. Many brands offer this type. For vegan alternatives, choose plant-based chocolate and caramel. There are many great brands that make these products. They taste just as good, so everyone can enjoy this treat! To find the full recipe, check the section above. To keep your chocolate-covered caramel apple slices fresh, store them in the fridge. Place the slices in an airtight container. This helps prevent them from drying out. You can also use parchment paper between layers to avoid sticking. This simple step keeps your dessert looking great. If you want to save some for later, freezing works well. First, let the slices cool completely. Then, place them in a single layer on a baking sheet. Freeze them for about two hours. Once frozen, transfer the slices to a freezer bag. Be sure to remove excess air. This helps keep them fresh longer. When ready to eat, thaw the slices in the fridge overnight. This way, they will maintain their tasty texture. In the fridge, these slices last about 5 days. Keep an eye out for signs of spoilage. If the chocolate looks dull or the caramel feels sticky, it’s time to toss them. Always trust your senses when it comes to food safety. Enjoy your delicious treat while it's fresh! Yes, you can! Some great choices are pears, bananas, or strawberries. These fruits also work well with caramel and chocolate. Pears offer a soft bite, while bananas add a creamy texture. Strawberries bring a bright, fresh taste. You can try any fruit you like! To keep your caramel smooth, work at low heat. Use a heavy pot to melt the caramel slowly. Stir often to avoid burning. If it starts to harden, add a splash of cream to loosen it up. This keeps it creamy for dipping. You can find them in many stores or online. Check your local grocery store or specialty candy shops. Online retailers like Amazon often carry popular brands. Look for brands that focus on quality ingredients for the best taste. Absolutely! You can prep the apple slices and store them in the fridge. Just wrap them well to keep them fresh. You can also make the caramel and chocolate ahead of time. Just reheat them gently before using. This way, you can enjoy your treat at any time! You learned how to make delicious chocolate-covered caramel apple slices. We covered ingredients, preparation, and tips to make them perfect. You can use different toppings and variations for every season. Store any leftovers wisely for later enjoyment. These treats are fun and easy to make. Whether for a party or a snack, they impress everyone. Enjoy making these with family and friends, and don’t forget to get creative!

Chocolate Covered Caramel Apple Slices

Indulge in the perfect treat with these delicious chocolate covered caramel apple slices! This easy recipe guides you through the steps to create sweet and satisfying apple snacks that are perfect for any occasion. With just a few ingredients like fresh apples, caramel, and rich chocolate, you'll impress your family and friends. Click to discover how to make these delightful treats and elevate your dessert game today!

Ingredients
  

2 large apples (Granny Smith or Honeycrisp work well)

1 cup caramel candies (or homemade caramel sauce)

1 tablespoon heavy cream (for melting caramel)

1 cup dark chocolate chips (or milk chocolate if preferred)

1 teaspoon coconut oil (to smooth out chocolate)

Sea salt (for sprinkling on top)

Optional: crushed nuts or mini chocolate chips for topping

Instructions
 

Start by washing and drying the apples thoroughly. Slice each apple into ½-inch thick rounds, removing the core as you go.

    In a microwave-safe bowl, combine the caramel candies with the heavy cream. Microwave in 30-second intervals, stirring in between, until fully melted and smooth.

      Dip each apple slice into the melted caramel, ensuring it's coated evenly. Use a fork or a toothpick to help lift the apple slice out of the caramel. Allow excess caramel to drip off, then place the slices on a parchment-lined baking sheet.

        Place the caramel-coated apple slices in the refrigerator for about 15-20 minutes, allowing the caramel to set.

          Meanwhile, prepare the chocolate by melting the dark chocolate chips with the coconut oil in a microwave-safe bowl. Again, microwave in 30-second intervals, stirring until smooth and fully melted.

            Once the caramel on the apple slices has set, dip each slice into the melted chocolate, allowing the excess to drip off. Place them back on the parchment-lined baking sheet.

              While the chocolate is still warm, sprinkle a little sea salt on top of each slice. If desired, you can also add crushed nuts or mini chocolate chips at this point for added crunch and flavor.

                Return the chocolate-covered apple slices to the refrigerator for another 10-15 minutes to allow the chocolate to harden completely.

                  Serve the apple slices chilled or at room temperature, and enjoy this delightful treat!

                    Prep Time: 15 minutes | Total Time: 45 minutes | Servings: 4

                      WANT TO SAVE THIS RECIPE?