
Craving a sweet treat that’s both easy and delicious? Look no further than my No-Bake Oreo Cheesecake Bars! This simple recipe combines creamy cheesecake with crunchy Oreo goodness, making it perfect for any occasion. You won’t need an oven or fancy skills; just a few ingredients and tools. I’ll guide you step-by-step to create a dessert everyone will love. Let’s get started on your new favorite recipe!
Ingredients
Essential Ingredients
– 24 Oreo cookies (for the crust and topping)
– 1/4 cup unsalted butter, melted
– 16 oz cream cheese, softened
– 1 cup powdered sugar
– 1 teaspoon vanilla extract
– 1 cup heavy whipping cream
– 1/4 cup chocolate sauce (optional)
Recommended Tools
– Food processor
– 9×9 inch square baking dish
– Electric mixer
– Mixing bowls
Gathering the right ingredients is key to making the best No-Bake Oreo Cheesecake Bars. You’ll need 24 Oreo cookies, which give the crust a rich flavor. Make sure to have some extra Oreos for topping. The butter binds the cookie crumbs into a solid base. Use unsalted butter for the best taste.
Next, grab 16 ounces of softened cream cheese. This makes the filling creamy and smooth. You’ll also need 1 cup of powdered sugar. It sweetens the mixture without being grainy. A teaspoon of vanilla extract adds a nice touch of flavor.
Don’t forget about the heavy whipping cream! You need 1 cup. This cream helps the cheesecake become light and fluffy. If you want an extra touch, you can have 1/4 cup of chocolate sauce for drizzling on top.
For tools, a food processor is a must. It crushes the Oreos quickly. A 9×9 inch square baking dish makes for easy assembly. An electric mixer helps you whip the cream cheese and sugar well. Mixing bowls are essential for separating your ingredients.
With these ingredients and tools, you’re ready to make a delicious treat!
Step-by-Step Instructions
Preparing the Crust
– Crush the Oreos into fine crumbs.
– Combine Oreo crumbs with melted butter and mix.
To start, grab your food processor. Toss in the 24 Oreos. Pulse until you have fine crumbs. This will form a tasty base for your cheesecake. Next, melt 1/4 cup of unsalted butter. Pour this over your crushed Oreos. Mix well until the crumbs are moistened. You want a sandy texture that holds together.
Making the Filling
– Beat cream cheese until smooth.
– Gradually add powdered sugar and vanilla, mix thoroughly.
Now, take 16 ounces of softened cream cheese. Use an electric mixer to beat it until it’s smooth. This step is key for a creamy filling. Slowly add in 1 cup of powdered sugar. Add 1 teaspoon of vanilla extract too. Mix until everything blends perfectly. You’ll have a sweet, creamy mixture ready for the next step.
Whipping the Cream
– Whip heavy cream until stiff peaks form.
– Fold whipped cream into the cream cheese mixture gently.
In a separate bowl, pour in 1 cup of heavy whipping cream. Whip it with a mixer until you see stiff peaks. This makes your cheesecake light and fluffy. Now, gently fold this whipped cream into your cream cheese mixture. Be careful not to over-mix. You want to keep that fluffy texture.
Assembling the Cheesecake Bars
– Layer the filling over the prepared crust.
– Add crushed Oreos and chocolate drizzle on top.
Take your crust from the fridge. Pour the cream cheese filling over it. Use a spatula to spread it evenly. Then, crush a few extra Oreos and sprinkle them on top. If you like, drizzle 1/4 cup of chocolate sauce over the bars for extra flavor.
Chilling
– Cover and refrigerate for at least 4 hours.
Cover your dish with plastic wrap. Place it in the refrigerator for at least 4 hours. This step is important for the cheesecake to set properly.
Serving
– Cut into bars and serve chilled.
Once chilled, take the cheesecake out. Use a sharp knife to cut it into bars. Make sure to serve them cold for the best taste. Enjoy every creamy, crunchy bite!
Tips & Tricks
Achieving the Best Texture
To get the best texture for your cheesecake bars, start with room temperature cream cheese. Cold cream cheese mixes poorly. It can lead to lumps in your filling. Let the cream cheese sit out for about 30 minutes before mixing.
Whipping the cream is just as important. Use an electric mixer to whip the cream until stiff peaks form. This step gives the cheesecake a light and airy feel. Be sure not to overwhip, or you might end up with butter instead of cream.
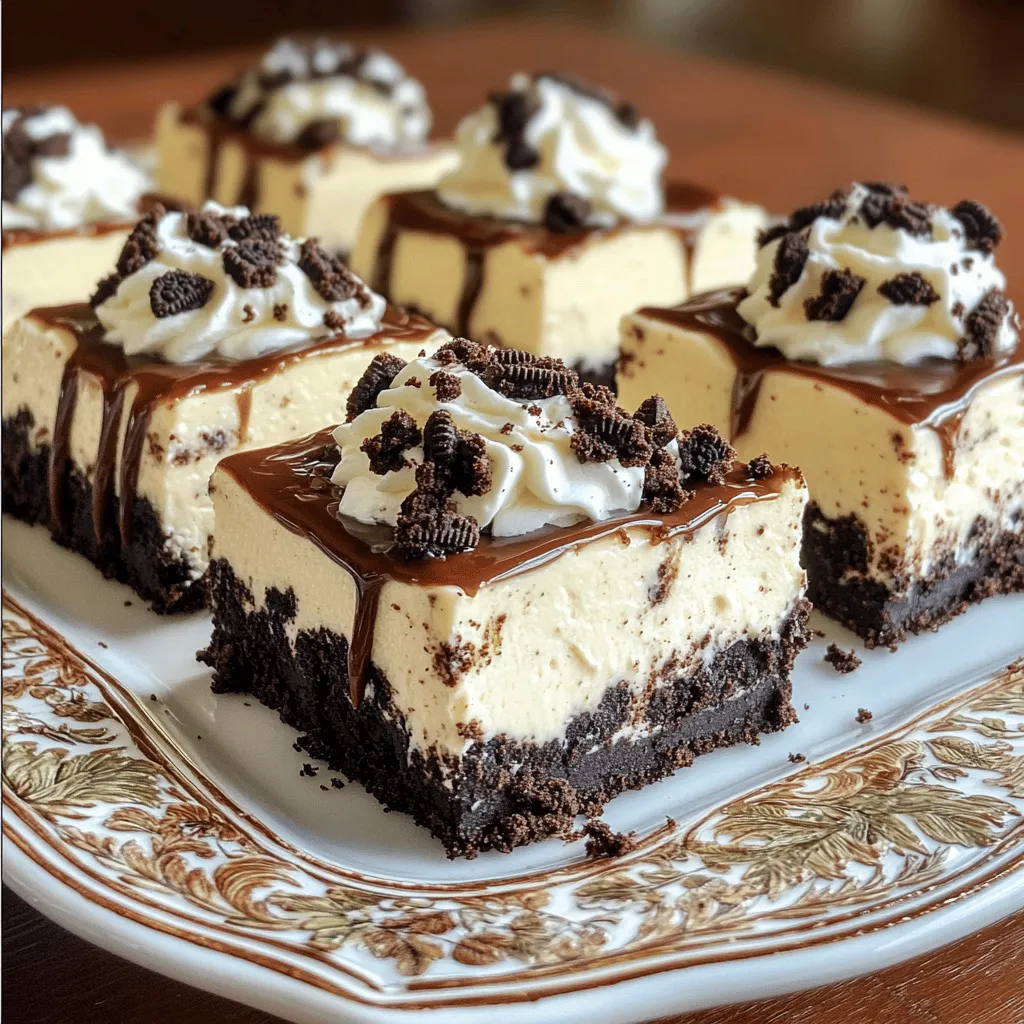
Presentation Tips
For a stunning presentation, serve the cheesecake bars on a nice platter. Cut them into even squares for a clean look. Top each piece with a dollop of whipped cream and a sprinkle of crushed Oreos. This adds color and texture, making them more appealing. If you want to be fancy, drizzle some chocolate sauce on top.
Common Mistakes to Avoid
One common mistake is overmixing the filling. This can lead to a dense texture, which is not what you want. Mix just until combined to keep it fluffy.
Another mistake is under-chilling the bars. They need at least 4 hours in the fridge to set properly. If you cut them too soon, they will be messy and won’t hold their shape. Make sure to wait!
Variations
Chocolate Oreo Cheesecake Bars
To make chocolate Oreo cheesecake bars, add melted chocolate to the filling. Start by melting 4 ounces of semi-sweet chocolate. Let it cool for a few minutes. Then, mix it in with the cream cheese before adding the sugar. This gives your dessert a rich, chocolatey taste. You can also sprinkle chocolate chips on top for extra texture.
Adding Flavorings
You can change the flavor with different extracts. Almond extract adds a nice nutty taste. Just use 1/2 teaspoon instead of vanilla. If you like mint, try 1/2 teaspoon of mint extract. This gives a fresh twist. You can even mix in some lemon zest for a bright flavor. Be creative and find your favorite!
Healthier Options
If you want a lighter version, use low-fat cream cheese. You can also swap in Greek yogurt for a tangy touch. Replace half the cream cheese with Greek yogurt for fewer calories. This keeps the creamy texture while cutting some fat. Another option is to use less sugar and add fresh fruit for sweetness. Enjoy your tasty treat with a bit less guilt!
Storage Info
Storing Leftovers
To keep your cheesecake bars fresh, store them in an airtight container. I suggest cutting them into bars before storing. This way, you can grab a piece easily. Place a layer of parchment paper between the bars to stop sticking. This simple step helps maintain their shape and texture.
Freezing Guidance
You can freeze these cheesecake bars for up to three months. Wrap them tightly in plastic wrap, then place them in a freezer bag. To thaw, put them in the fridge overnight. This method keeps them tasty and smooth. Avoid thawing at room temperature, as it can make them watery.
Shelf Life
In the fridge, these cheesecake bars last about one week. After that, they may lose some taste and texture. Always check for any changes in smell or color before eating. Enjoy your delicious treats while they are fresh!
FAQs
Can I use another type of cookie for the crust?
Yes, you can! Here are some great options:
– Chocolate sandwich cookies: They offer a similar taste to Oreos.
– Graham crackers: A classic choice that adds a nice crunch.
– Vanilla wafers: These give a lighter flavor and a fun twist.
– Digestive biscuits: They add a slightly different texture and taste.
Feel free to experiment with different cookies to find your favorite!
How long do these cheesecake bars need to chill?
I recommend chilling the cheesecake bars for at least 4 hours. This time allows the filling to set properly. For best results, you can chill them overnight. The longer they chill, the firmer and better they taste!
Do I need to use heavy cream?
No, you don’t have to use heavy cream. Here are some alternatives:
– Whipping cream: This works well and gives a rich flavor.
– Coconut cream: A great dairy-free option that adds a nice taste.
– Half-and-half: This can be whipped, though it may not be as thick.
Using these alternatives will still help you create a creamy filling!
This blog post shared a simple recipe for Oreo cheesecake bars. You learned about key ingredients, like cream cheese and Oreos, and tools you’ll need. I outlined how to prepare the crust, make the filling, and whip the cream. Tips helped achieve the best texture, avoid mistakes, and add tasty variations. Remember to store leftovers properly for freshness. Whether you enjoy the classic recipe or explore variations, these cheesecake bars are a fun treat. Dive into making them and enjoy a delicious dessert!
