5-Minute Cucumber Snack Refreshing and Easy Recipe
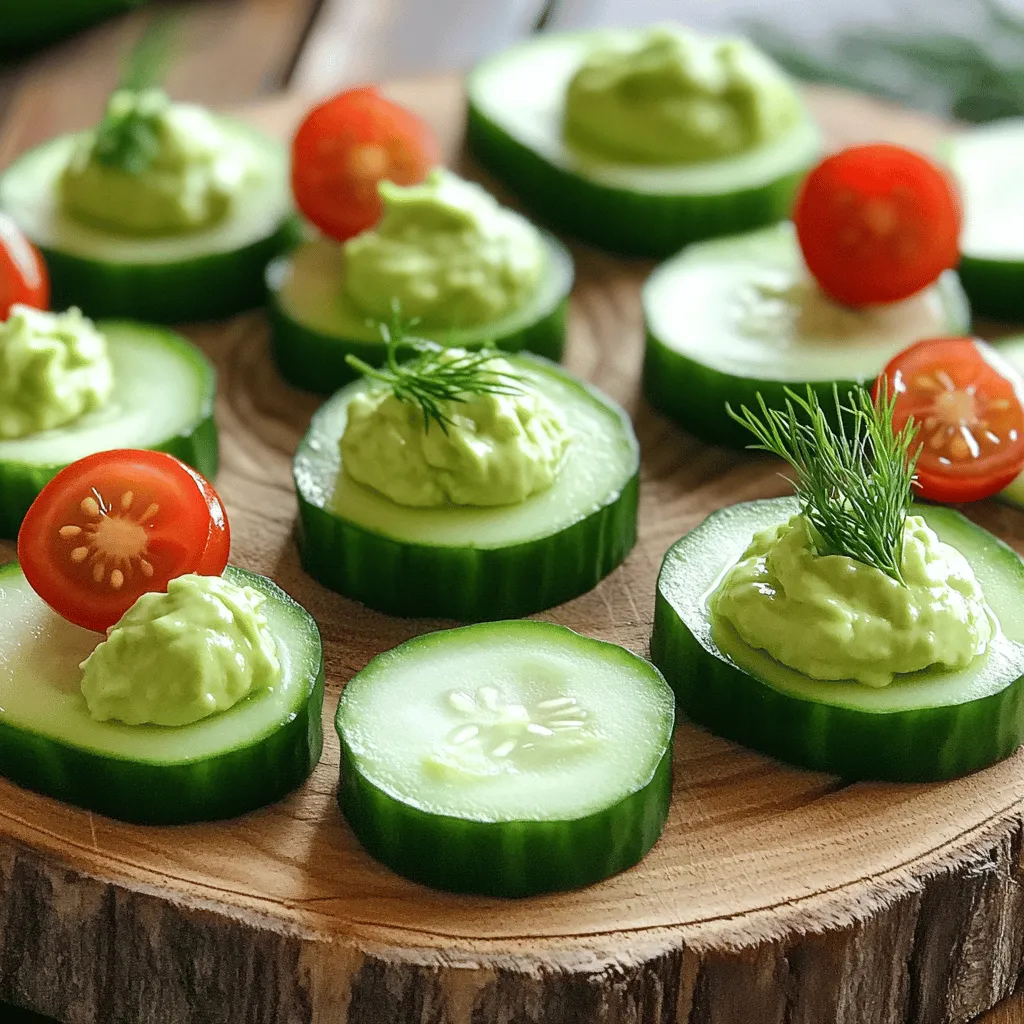
Looking for a quick and tasty treat? My 5-Minute Cucumber Snack is perfect for you! With just a few fresh ingredients, you’ll create a light and delicious bite that’s great …
Looking for a quick and tasty treat? My 5-Minute Cucumber Snack is perfect for you! With just a few fresh ingredients, you’ll create a light and delicious bite that’s great …
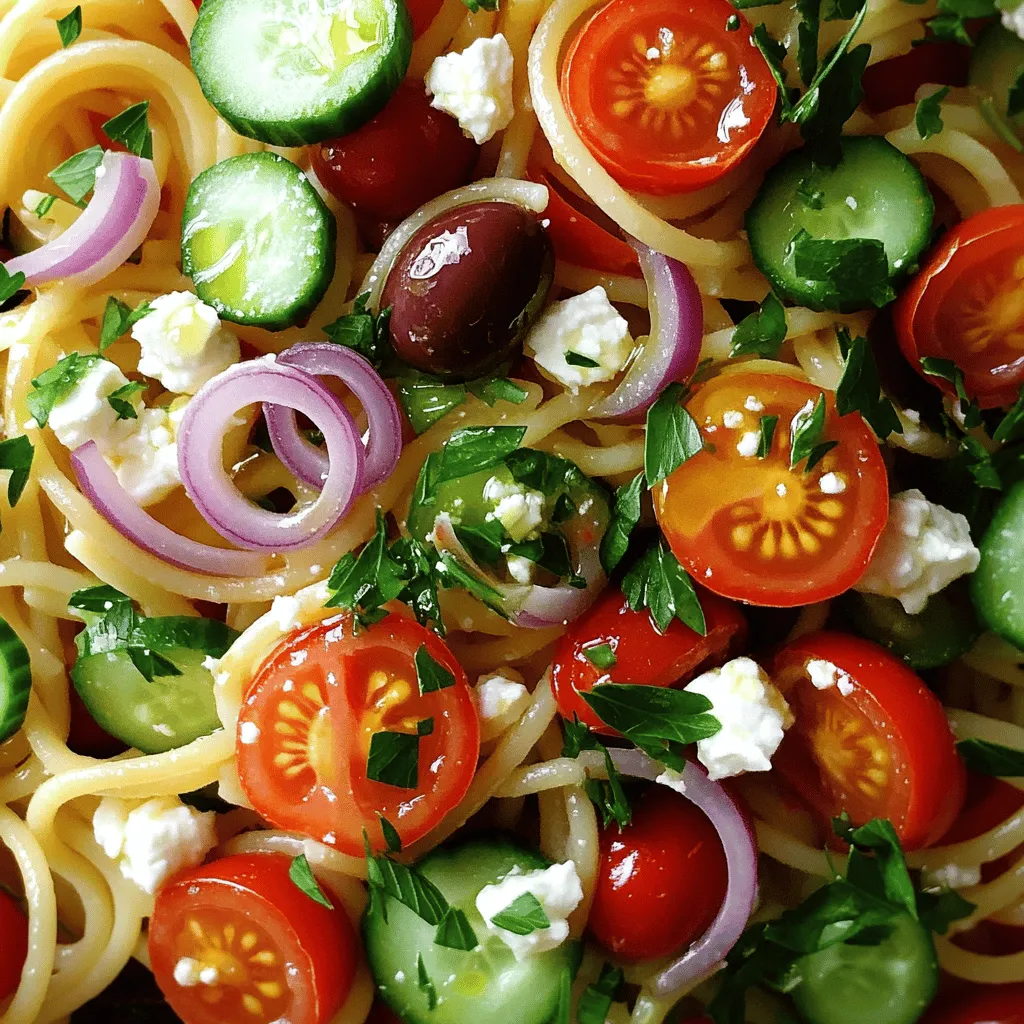
Looking for a bright and tasty dish for summer? My Spaghetti Salad brings all the fresh flavors you crave. With colorful veggies, rich dressings, and tons of mix-in options, this …

Are you ready to elevate your dinner game with a dish that’s both easy and delicious? My Baked Chicken Parmesan recipe promises rich flavors and a crispy coating, all from …

Ready to delight your taste buds? My Greek Turkey Meatballs recipe offers a simple, flavorful twist on a classic favorite. Packed with fresh herbs, spices, and delicious cheese, these meatballs …
. To keep your stuffed peppers fresh, store any leftovers in an airtight container. Refrigerate them within two hours of cooking. They will stay good for up to three days. If you want to save them longer, freeze the peppers. Wrap each one in plastic wrap and then place them in a freezer-safe bag or container. They can last for up to three months in the freezer. When you're ready to enjoy your stuffed peppers again, you have a few options. The best method is to reheat them in the oven. Preheat your oven to 350°F (175°C). Place the peppers in a baking dish and cover with foil. Heat them for about 20 minutes, or until they are hot throughout. You can also use the microwave for a quick option. Place a pepper on a microwave-safe plate, cover it, and heat for 2-3 minutes. Check to ensure it's hot all the way through. Making stuffed peppers ahead of time is easy and fun. You can prepare the filling a day in advance. Cook the ground turkey and mix in all the ingredients. Store this mixture in the fridge. When you're ready, stuff the peppers and bake them. This saves time on busy days. You can also make a big batch and freeze them. Just follow the storing tips above. Then, you can enjoy a healthy meal anytime! For the full recipe, check out the Turkey Fiesta Stuffed Peppers. Yes, you can make this recipe ahead of time. Prepare the stuffed peppers but do not bake them. Cover the baking dish tightly and store it in the fridge for up to 24 hours. When ready to bake, add about 10 minutes to the cooking time. If you want to freeze them, wrap each pepper in plastic wrap and place them in a freezer bag. They can last up to three months in the freezer. Thaw them in the fridge overnight before baking. If you want to swap quinoa, there are several great options. You could use brown rice, couscous, or farro. For a low-carb choice, try cauliflower rice. Each option gives a different flavor and texture. Choose what you enjoy most or what you have at home. Ground turkey is safe to eat when it reaches an internal temperature of 165°F (74°C). The meat should be no longer pink and the juices should run clear. Use a meat thermometer to check the temperature. If you do not have one, you can cut into the meat to check for any pink color. Always prioritize food safety. Yes, this recipe can be gluten-free. All the main ingredients, like ground turkey and bell peppers, are gluten-free. Just ensure the canned beans and diced tomatoes do not contain gluten. You can also use gluten-free quinoa or rice. Always check labels to be safe. Stuffed peppers offer a tasty way to enjoy healthy meals. We discussed key ingredients like ground turkey, bell peppers, and flavorful seasonings. I shared step-by-step instructions to make cooking easy. Tips and variations help you customize your dish. Proper storage and reheating methods keep leftovers fresh and delicious. Overall, this recipe fits well into meal prep while being flexible and fun. Enjoy making these stuffed peppers!](https://tossedrecipes.com/wp-content/uploads/2025/06/d14d7a24-2bb4-4b4a-88bd-295267c79331.webp)
Are you ready to whip up a delicious and healthy meal? Ground Turkey and Peppers is your new go-to dish! Packed with flavor and nutrients, this recipe is not just …

Are you ready to transform your breakfast routine? This Blueberry Buttermilk Pancake Casserole is rich, fluffy, and oh-so-delicious! Imagine biting into layers of pancake goodness, bursting with fresh blueberries. Whether …

Craving a sweet treat that’s easy to make? You’re in the right place! These Chocolate Chip Cheesecake Bars blend creamy cheesecake goodness with rich chocolate chips for an easy dessert …
![- 4 salmon fillets - 1/2 cup teriyaki sauce - Juice of 1 orange - Zest of 1 orange - 2 tablespoons fresh ginger, grated - 2 cloves garlic, minced - 2 tablespoons honey - 1 tablespoon sesame oil - 1 tablespoon olive oil - 1/4 teaspoon black pepper - 1/4 cup green onions, sliced (for garnish) - Sesame seeds (for garnish) - Chili flakes for heat - Fresh herbs, such as cilantro or parsley Each serving of Orange Teriyaki Salmon has about 350 calories. The dish is rich in key vitamins and nutrients. You get protein from salmon, vitamin C from orange juice, and healthy fats from sesame oil. The ginger and garlic add more health benefits, like aiding digestion and boosting immunity. This blend of flavors and nutrients makes it a smart choice for any meal. For the complete cooking guide, check out the Full Recipe. To start, gather your marinade ingredients. You will need teriyaki sauce, orange juice, orange zest, grated ginger, minced garlic, honey, sesame oil, and black pepper. In a medium bowl, whisk these together until well mixed. This step is key to getting a great flavor. If you want the best taste, use fresh ginger and freshly squeezed orange juice. The more fresh, the better! Now, let’s marinate the salmon. Place the salmon fillets in a shallow dish or a zip-top bag. Pour the marinade over the salmon, ensuring each piece is coated. Cover and refrigerate for at least 30 minutes. If you have time, marinate for up to one hour. This helps the salmon absorb all those tasty flavors. Remember to flip the salmon once if you can, to ensure even marination. You can cook your salmon in different ways. If you want to grill it, preheat the grill to medium-high heat. Lightly oil the grates to prevent sticking. Grill the salmon for 5-7 minutes on each side. The salmon should flake easily with a fork when done. If you prefer baking, preheat your oven to 400°F (200°C). Line a baking sheet with parchment paper. Bake the salmon for 12-15 minutes. Brush with the reserved marinade halfway through for extra flavor. For both methods, let the salmon rest for a couple of minutes after cooking. This helps keep it juicy. Enjoy your meal with steamed rice or roasted veggies! For the full recipe, check out the complete guide. To know when salmon is perfectly cooked, look for its color. The flesh should be opaque and flake easily with a fork. You can also check the internal temperature. It should be around 145°F (63°C). Avoid common mistakes like overcooking. Salmon can dry out quickly, so keep an eye on it. If you’re grilling, use a timer. It should take about 5-7 minutes per side. For baking, aim for 12-15 minutes. You can adjust the sweetness or zest of your salmon. For a sweeter taste, add more honey or orange juice. If you want more zest, add extra orange zest or a bit of lime juice. To add depth, try different sauces. Soy sauce or a dash of sriracha can bring a nice twist. You might also blend in sesame oil for more richness. Serving and plating can elevate your dish. Try serving the salmon on a bed of rice or greens. You can also arrange it with colorful vegetables. For garnishing, sliced green onions and sesame seeds add a nice touch. A few orange slices on the side can brighten the plate. Make sure to keep everything neat for visual appeal. For a stunning look, drizzle extra teriyaki sauce on top. For the complete Orange Teriyaki Salmon recipe, check out [Full Recipe]. {{image_2}} You can use an Instant Pot or air fryer for this dish. Both methods save time and keep the salmon juicy. For the Instant Pot, cook on high for 3 minutes with a quick release. For the air fryer, set it to 375°F and cook for 10-12 minutes. You can also try other types of fish. Tilapia, trout, or cod work well with the same marinade. Each fish adds a unique twist to the dish. If you need a gluten-free option, use tamari instead of regular teriyaki sauce. This switch keeps the flavors intact while meeting dietary needs. For a low-calorie version, reduce the oil in the marinade. You can also substitute honey with a sugar-free sweetener. This keeps the sweetness while cutting calories. To switch up the flavor, add citrus variations like lime or lemon. These fruits brighten the dish and add a different zing. You can also incorporate spices or herbs. Try adding a pinch of chili flakes for heat or fresh herbs like cilantro for a fresh touch. These small changes can make your meal exciting and new. Remember to check out the Full Recipe for all the details! To keep your Orange Teriyaki Salmon fresh, store it well. If you have leftovers, refrigerate them right away. Use an airtight container to keep moisture in and air out. Cooked salmon stays good in the fridge for up to three days. If you have raw salmon, keep it in its original packaging or place it in a resealable bag. Raw salmon is best used within two days. Freezing salmon is easy and keeps it fresh. To freeze, wrap the salmon tightly in plastic wrap, then place it in a freezer bag. Remove as much air as you can before sealing. This method helps avoid freezer burn. Frozen salmon can last up to three months. To thaw, move the salmon from the freezer to the fridge the night before you cook it. For quicker thawing, place the sealed salmon in cold water for about an hour. Reheating salmon can be tricky. You want to avoid drying it out. The best way to reheat is in the oven. Preheat your oven to 275°F (135°C). Place the salmon on a baking sheet and cover it with foil. Heat it for 10 to 15 minutes until warm. You can also use a microwave, but be careful. Heat it in short bursts of 30 seconds. This keeps it moist and tasty. You can enjoy Orange Teriyaki Salmon with many tasty sides. Here are some great options: - Steamed rice - Quinoa - Roasted vegetables - Stir-fried greens - Asian-style slaw These sides balance the rich flavors of the salmon. Pairing rice helps soak up the tasty teriyaki sauce. Roasted vegetables add both color and nutrients. For a crunchy twist, serve with a slaw that has a citrus dressing. This brings out the fresh orange notes in the dish. Yes, you can use canned salmon, but there are pros and cons. Pros: - Canned salmon is convenient and ready to use. - It often costs less than fresh salmon. - It has a long shelf life. Cons: - Canned salmon can have a softer texture. - It may lack the fresh taste you get from grilling or baking. If you choose canned salmon, drain it well. You can mix it with the marinade, but be gentle when handling. This way, you can still enjoy that zesty teriyaki flavor. You can store leftover Orange Teriyaki Salmon in the fridge for up to three days. Here are some tips for safety: - Place the salmon in an airtight container. - Keep it in the fridge at 40°F (4°C) or below. Signs of spoilage: - Off smell - Slimy texture - Change in color If you notice any of these signs, it's best to discard the salmon. Enjoy your leftovers safely! This article covered how to prepare a delicious Orange Teriyaki Salmon dish. You learned the key ingredients, cooking techniques, and expert tips for perfect results. Remember, marinating the salmon is crucial for flavor. Try different methods and variations to suit your taste. Storing and reheating tips help maintain quality. Enjoy your cooking journey with this vibrant recipe!](https://tossedrecipes.com/wp-content/uploads/2025/06/9984da87-171f-4fcc-b3f3-91eb62a2bc58.webp)
Looking for a dish that’s both tasty and easy? You’ve found it! My Orange Teriyaki Salmon recipe brings vibrant flavors to your kitchen in just a few steps. With simple …

Are you looking for a quick and easy snack that packs a protein punch? With just four simple ingredients, you can whip up delicious protein bars that are perfect for …
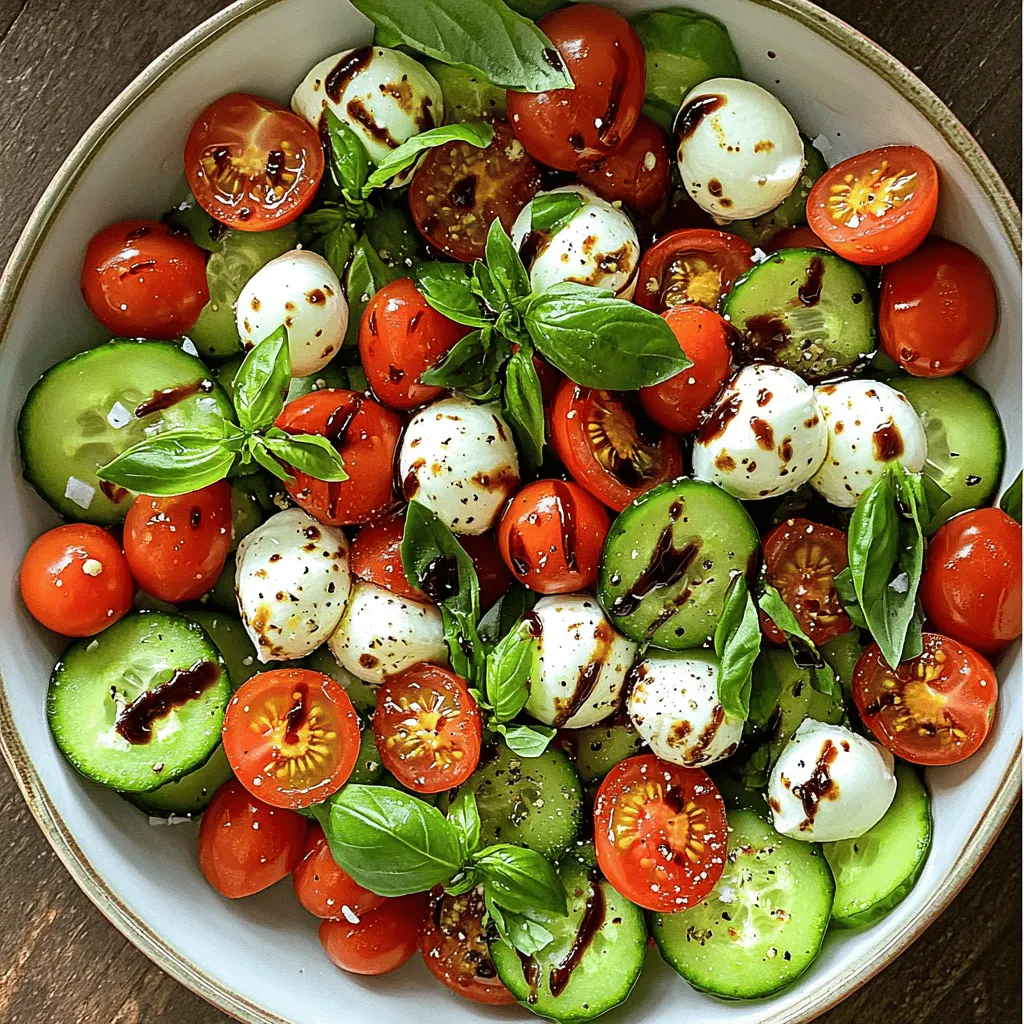
Looking for a fresh twist on a classic dish? My Easy Cucumber Caprese Salad is here to impress! This light and tasty recipe combines crisp cucumbers, juicy tomatoes, and creamy …