Healthy & Easy Pesto Chicken Salad Fresh and Tasty Dish
![To make a delicious Healthy Pesto Chicken Salad, gather these simple ingredients: - 2 cups cooked chicken breast, shredded - 1/2 cup basil pesto (store-bought or homemade) - 1 cup cherry tomatoes, halved - 1 cucumber, diced - 1/4 cup red onion, finely chopped - 1/4 cup feta cheese, crumbled - 2 cups mixed greens or spinach - 1 tablespoon lemon juice - Salt and pepper to taste This salad is more than tasty. It is packed with nutrition: - Cooked chicken breast: This is a great source of lean protein. It helps build and repair muscles. - Basil pesto: Made from fresh basil, it has healthy fats from olive oil and nuts. This helps with heart health. - Cherry tomatoes: These are rich in vitamins A and C. They also contain antioxidants that support skin health. - Cucumber: High in water, cucumber keeps you hydrated. It also adds crunch and fiber to the salad. - Red onion: This adds flavor and is rich in antioxidants. It can help lower blood pressure and improve heart health. - Feta cheese: This cheese adds a creamy texture. It is lower in fat than many cheeses, making it a good choice. - Mixed greens or spinach: These leafy greens are full of vitamins and minerals. They support overall health and digestion. If you have dietary restrictions or preferences, you can swap some ingredients: - Chicken: Try using turkey or tofu for a vegetarian option. - Pesto: Use a nut-free pesto if you have nut allergies. You can also make a spinach or arugula pesto. - Feta cheese: Substitute with goat cheese or leave it out for a dairy-free option. - Mixed greens: If you dislike mixed greens, use kale or arugula for a different taste. - Lemon juice: If you prefer, vinegar can replace lemon juice for a tangy kick. Feel free to mix and match these options to fit your needs! For the full recipe, check out the earlier section. To make the Healthy & Easy Pesto Chicken Salad, start with the chicken. Use 2 cups of cooked chicken breast. Shred it into bite-sized pieces. Then, grab a large mixing bowl. Add the shredded chicken and 1/2 cup of basil pesto. Mix them well. Make sure the chicken gets fully coated in pesto. Next, prepare the veggies. Cut 1 cup of cherry tomatoes in half. Dice 1 cucumber into small pieces. Chop 1/4 cup of red onion finely. Add these veggies to the bowl with chicken. Gently fold them in. Be careful not to mash the tomatoes. Finally, crumble 1/4 cup of feta cheese on top. Add 1 tablespoon of lemon juice for a fresh taste. Season with salt and pepper to your liking. Mix everything well, and your salad is almost ready! When mixing, use a spatula or a large spoon. These tools help prevent breaking the chicken or veggies. Start by mixing the chicken and pesto. Once they are combined, gently add the vegetables. This way, you keep the salad looking nice. If you find your salad too thick, add a splash of olive oil. This can help make it creamy. Be sure to taste as you go. Adjust the salt, pepper, and lemon juice to suit your taste buds. To serve, lay down a bed of mixed greens or spinach on each plate. Use about 2 cups of greens. Then, top each plate with the pesto chicken salad mixture. Make sure to pile it high for a nice look. If you want to impress, drizzle a little extra pesto or olive oil on top. A sprig of fresh basil can also add a pop of color. This makes it not just tasty but also beautiful. Enjoy your Healthy & Easy Pesto Chicken Salad! For the complete recipe, check out the Full Recipe. When cooking chicken for this salad, I recommend using boneless chicken breasts. They cook evenly and shred easily. Here’s how I do it: - Boil: Place the chicken in a pot of boiling water. Cook for about 15-20 minutes until it’s no longer pink. - Cool: Let the chicken cool for a few minutes before shredding. This helps keep it juicy. - Shred: Use two forks to pull apart the chicken. It should come apart easily. Leftover pesto chicken salad can last in the fridge for three days. Store it in an airtight container. Here’s how to keep it fresh: - Keep it cold: Place it in the fridge right after serving. - Avoid moisture: If you add extra ingredients, do so just before eating. This keeps everything crisp. - Check before eating: Always smell and look at the salad before serving leftovers. To make your pesto chicken salad even better, consider these tips: - Add nuts: Chopped walnuts or pine nuts give a nice crunch. - Try different cheeses: Swap feta for goat cheese for a creamier texture. - Mix in fruits: Sliced apples or grapes can add sweetness. - Use fresh herbs: Basil or parsley can brighten up the dish. Feel free to explore these options to make your pesto chicken salad unique! For the full recipe, check out the details above. {{image_2}} You can switch up the protein in this salad. Try using turkey instead of chicken. Turkey has a great flavor and is lean. If you want a plant-based option, use tofu. Press the tofu to remove water, then cube it. Sauté it with some olive oil and a little salt for more taste. Pesto is tasty, but you can mix it up. Use a yogurt-based dressing for a creamy twist. A balsamic vinaigrette adds a nice zing. You can also blend in some lemon juice or garlic for extra flavor. These options help keep things fun and fresh. Adding seasonal veggies can boost the salad's taste and color. In spring, toss in some asparagus or radishes. Summer is great for sweet corn and bell peppers. In fall, try roasted squash or beets. Lastly, winter greens like kale or Brussels sprouts add crunch. These fresh veggies make your salad even more delicious. For the full recipe, check out the Healthy & Easy Pesto Chicken Salad. To store leftover pesto chicken salad, place it in an airtight container. This keeps the salad fresh and prevents strong smells from other foods. You should eat the salad within three days for the best taste. If you notice any change in color or smell, throw it away. Freezing chicken salad is not the best option. The texture of the chicken and veggies may change when thawed. If you must freeze, use a freezer-safe container. Keep it for up to a month. When you’re ready to eat it, thaw it in the fridge overnight. Choose containers made of glass or BPA-free plastic. Glass containers are easy to clean and do not stain. Plastic containers are lightweight and portable. Make sure they have tight lids to keep air out. This helps your salad stay fresh longer. For the best results, store the salad in the fridge right after you make it. For full details on making the salad, check the Full Recipe. Healthy Pesto Chicken Salad can last up to three days in the fridge. Make sure to keep it in an airtight container. The flavors may deepen over time, but the salad is best enjoyed fresh. If you see any signs of spoilage, it’s best to toss it. Yes, you can make this salad ahead of time. I recommend preparing the chicken and pesto mixture, then storing it separately from the greens. This way, the greens stay crisp. When you’re ready to eat, combine them for a fresh taste. You can serve Pesto Chicken Salad in many ways. Here are a few ideas: - On a bed of greens: This keeps it light and fresh. - In a wrap: Use a tortilla for a tasty lunch option. - As a sandwich: Spread it between slices of bread for a hearty meal. - With crackers: Serve it as a dip for a fun snack. These ideas help make your meal exciting and enjoyable. For the complete recipe, check out the [Full Recipe]. You now know how to make a tasty and healthy pesto chicken salad. We’ve covered key ingredients, their benefits, and suggested swaps for diets. You have step-by-step instructions to make the process easy. I shared tips to cook and store your salad well. You can vary the recipe with different proteins and dressings. Use this knowledge to create a bright, fresh dish. Enjoy your meals and share them with friends!](https://tossedrecipes.com/wp-content/uploads/2025/06/532bba5e-e114-41c9-a13d-59a0267d3a0a.webp)
Looking for a fresh and tasty dish that’s both healthy and easy to make? You’ve found it! This Healthy & Easy Pesto Chicken Salad is packed with flavor and nutrients. …
Looking for a fresh and tasty dish that’s both healthy and easy to make? You’ve found it! This Healthy & Easy Pesto Chicken Salad is packed with flavor and nutrients. …
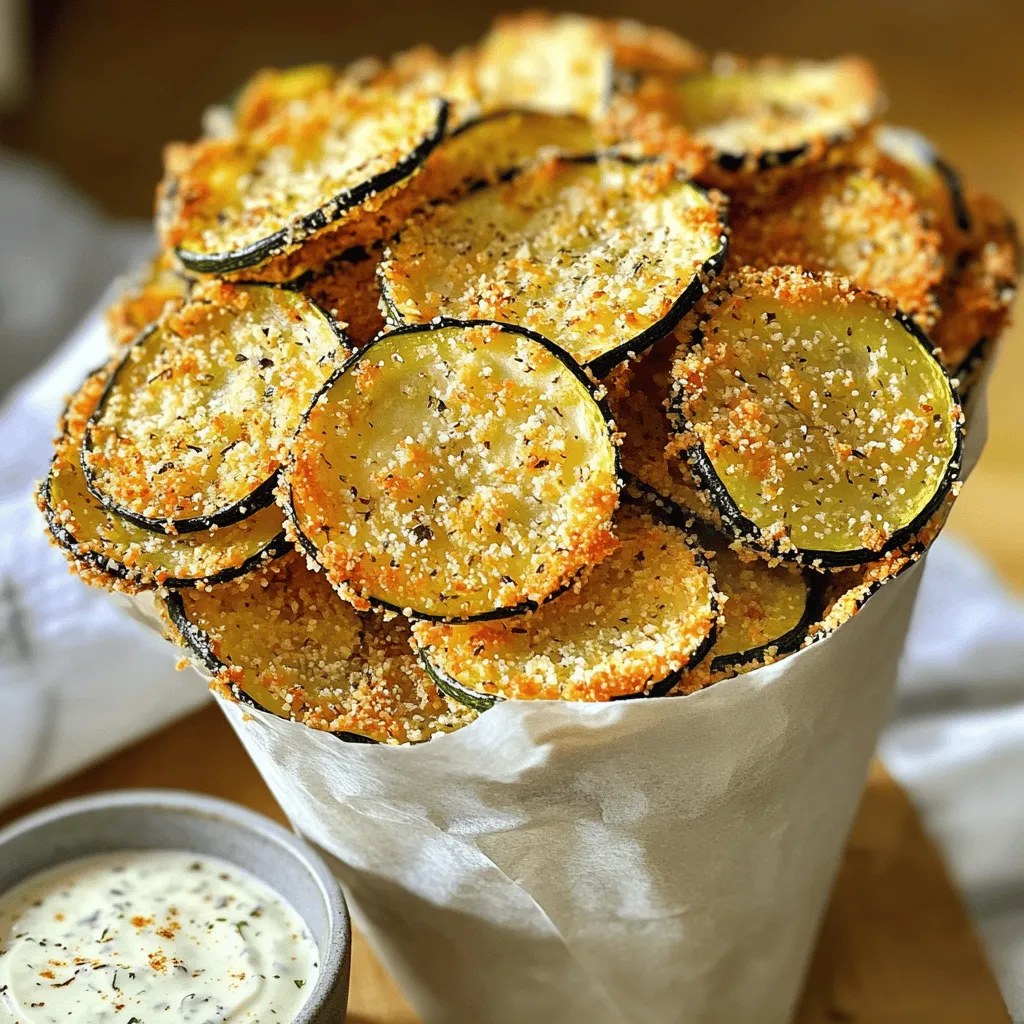
Craving a snack that’s both crunchy and healthy? You’re in the right place! Crispy Baked Zucchini Chips are simple to make and perfect for satisfying your munchies. With just a …
![- 300g pasta (fettuccine or tagliatelle) - 3 leeks, cleaned and thinly sliced - 250g mushrooms (cremini or button), sliced - 2 tablespoons olive oil - 2 cloves garlic, minced - 1 cup vegetable broth - 200g Gruyere cheese, grated - 1/2 cup heavy cream - Salt and pepper to taste - Fresh thyme leaves and parsley for garnish When I cook caramelized leek and mushroom Gruyere pasta, I focus on using fresh ingredients. The leeks add a sweet depth to the dish. Slicing them thinly helps them caramelize evenly. Mushrooms, whether cremini or button, lend a rich flavor. For the dairy, Gruyere cheese melts beautifully. It gives this pasta a creamy, decadent texture. Heavy cream rounds out the sauce, making it luscious and satisfying. I like to use fresh thyme and parsley as garnishes for a pop of color and freshness. For your cooking convenience, this recipe uses common pantry items. You will find that the balance of flavors creates a delightful experience. If you want the full recipe, check out the [Full Recipe]. Cook your pasta in a large pot of salted boiling water. Follow the package instructions until the pasta is al dente. Drain the pasta and set it aside. Remember to reserve about 1/2 cup of that pasta water for later. In a large skillet, heat olive oil over medium heat. Add the sliced leeks and a pinch of salt. Cook them for about 10 to 15 minutes, stirring often. You want them soft and caramelized. Next, add the sliced mushrooms to the skillet. Cook for another 5 to 7 minutes, until the mushrooms are soft and have released their moisture. Now it's time to add flavor. Add minced garlic and fresh thyme to the skillet. Cook for another minute, just until fragrant. Then, pour in the vegetable broth. Bring this mixture to a simmer and let it reduce slightly for about 3 to 4 minutes. Lower the heat and stir in heavy cream and half of the grated Gruyere cheese. Mix until the cheese melts and the sauce combines well. Season with salt and pepper to taste. If your sauce seems too thick, add a splash of the reserved pasta water to reach your desired consistency. Finally, add the cooked pasta to the skillet. Toss it gently in the sauce until well coated. Sprinkle the remaining Gruyere cheese on top and stir until it melts. For the full recipe, check out the detailed steps above! - How to achieve perfectly soft leeks: Start with clean leeks. Slice them thinly. Heat olive oil in a skillet over medium heat. Add a pinch of salt. Cook for about 10-15 minutes. Stir them often until they turn golden brown. This brings out their natural sweetness. - Tips for cooking mushrooms correctly: Use fresh mushrooms for the best taste. Clean them gently with a damp cloth. Slice them evenly to ensure they cook at the same rate. Add them to the skillet after the leeks. Cook for 5-7 minutes until they are soft. This helps them release moisture and blend well with the leeks. - Suggested herbs to complement the dish: Thyme is a great choice. Its earthy flavor pairs well with leeks and mushrooms. You can also try adding rosemary or parsley for a fresh twist. A sprinkle of oregano can add depth too. - Recommended cheeses for variations: Gruyere is rich and creamy. But you can substitute it with fontina or mozzarella. For a sharper taste, try aged cheddar or gouda. Each cheese brings its unique flavor to the pasta. - Best serving dishes for pasta: Shallow bowls work best for pasta. They allow the sauce to spread evenly. Serve individual portions for a nice touch. - Garnishing techniques for visual appeal: Fresh parsley adds a beautiful green touch. You can also sprinkle extra cheese on top. A few thyme leaves will give a pop of color too. Always serve with love; it makes the dish shine! {{image_2}} You can boost this dish with protein. Try adding grilled chicken or shrimp for a hearty meal. Simply cook the protein separately, then mix it in before serving. If you prefer a vegetarian option, lentils are a fantastic choice. They add both protein and a nice texture. Cook them until tender, then fold them into your pasta for a wholesome touch. Want to switch things up? Experimenting with different cheeses can create new flavors. Try using aged cheddar or goat cheese for a twist. If you like some heat, adding red pepper flakes can elevate the dish. Just sprinkle a bit while cooking the leeks and mushrooms. This small change can make a big difference in taste. Need a gluten-free choice? You can use gluten-free pasta alternatives like rice or quinoa pasta. They cook well and pair nicely with the sauce. Also, make sure to check your broth and sauces. Some contain gluten, so look for gluten-free versions. This way, everyone can enjoy your creamy pasta dish. To store leftovers in the fridge, let the pasta cool first. Place it in an airtight container. This keeps the flavors fresh. I suggest using glass or plastic containers with tight lids. These containers help avoid spills and keep your fridge tidy. Your pasta will stay good for about 3 days. To freeze the dish, first cool it completely. Then, portion it into freezer-safe bags or containers. Squeeze out excess air to prevent freezer burn. When you want to eat it, thaw it in the fridge overnight. For best texture, reheat it gently on the stove with a splash of broth or water. This keeps the sauce creamy. For reheating pasta, I prefer using the stove. Place your pasta in a skillet over low heat. Add a little vegetable broth or water to keep it from drying out. Stir gently until heated through. Avoid using the microwave if you can. It can make the pasta mushy. Enjoy your meal just as delicious as when you first made it! Caramelized leek and mushroom pasta lasts about 3 to 5 days in the fridge. Store it in an airtight container to keep it fresh. Look for signs of spoilage, like an off smell or mold. If it has these signs, it’s best to toss it. Yes, you can make this recipe ahead of time. You can cook the pasta and sauce separately. Store each in the fridge. When ready to eat, just heat them together in a skillet. This keeps the pasta from getting mushy. If you don’t have Gruyere cheese, don’t worry! Here are some great substitutes: - Swiss cheese - Fontina cheese - Gouda cheese - Havarti cheese Each of these cheeses melts well and adds a nice flavor to the dish. Feel free to experiment! This dish combines leeks, mushrooms, and creamy Gruyere for flavor. You learned how to cook the pasta and create a rich sauce. The tips show you how to enhance taste and present it well. You can also explore variations with proteins and cheeses. Storing leftovers and reheating them correctly keeps the dish tasty. Enjoy trying this recipe and making it your own! It's simple, satisfying, and perfect for sharing.](https://tossedrecipes.com/wp-content/uploads/2025/06/c3c948e8-5efe-4e08-85fd-ab53e196181b.webp)
Welcome to a pasta lover’s dream! In this recipe, you’ll discover how to make Caramelized Leek and Mushroom Gruyere Pasta that bursts with flavor. The blend of sweet leeks, earthy …
![- 2 cups cooked jasmine rice - 1 lb chicken breast, cut into bite-sized pieces - 1 cup fresh pineapple, diced - 1 red bell pepper, diced - 1 onion, diced - 3 cloves garlic, minced - 1 tablespoon ginger, grated - 1/4 cup soy sauce - 2 tablespoons honey - 1 tablespoon rice vinegar - 1 tablespoon cornstarch mixed with 2 tablespoons water - 2 tablespoons sesame oil - 1/4 teaspoon black pepper The ingredients in Sweet and Savory Pineapple Chicken and Rice create a perfect balance. You have the soft jasmine rice that soaks up all the flavors. The chicken adds protein, and the fresh pineapple gives a sweet punch. The red bell pepper and onion add crunch and color. Garlic and ginger bring warmth and depth. The soy sauce and honey blend well, creating a nice sauce that ties everything together. I love using fresh ingredients because they make the dish pop. You can even try adding more pineapple for extra sweetness! If you like heat, a pinch of chili powder works wonders too. This recipe is all about mixing flavors and textures. You can find the full recipe below to get started on this delight! - Heat sesame oil in a large skillet or wok over medium-high heat. - Sauté diced onion, garlic, and ginger for 2-3 minutes. Start by heating the sesame oil. This oil gives our dish a lovely nutty flavor. Use a large skillet or wok for even cooking. Once the oil warms, add the diced onion, minced garlic, and grated ginger. This mix adds a great aroma and flavor. Stir it for about 2-3 minutes until the onion turns soft and clear. - Add chicken pieces, season with black pepper, and cook until browned (6-8 minutes). - Incorporate diced red bell pepper and pineapple, cooking for an additional 3-4 minutes. Next, toss in the chicken pieces. Season them with black pepper for a hint of spice. Cook the chicken for about 6-8 minutes. You want it browned and fully cooked. After that, add the diced red bell pepper and fresh pineapple. Cook this mix for another 3-4 minutes. The bell pepper will soften, and the pineapple will become juicy. - Mix soy sauce, honey, and rice vinegar, pour over the chicken and pineapple mixture. - Thicken sauce with cornstarch-water mixture, stirring until it thickens (about 2 minutes). Now, we make the sauce. In a bowl, mix the soy sauce, honey, and rice vinegar. Pour this over the chicken and pineapple mix. Let it simmer gently. Then, take your cornstarch and water mixture. Add it to the skillet to thicken the sauce. Stir until it thickens, which should take about 2 minutes. - Add cooked jasmine rice, tossing to combine all ingredients. - Serve and enjoy fresh! Finally, add the cooked jasmine rice to your skillet. Toss everything together gently. This way, the rice soaks up the sweet and savory sauce. Once mixed, serve it hot. Enjoy your delicious Sweet and Savory Pineapple Chicken and Rice! For the full recipe, check out the complete guide. - Ensure chicken is fully cooked before serving. This keeps your meal safe and tasty. - Adjust cooking time based on chicken cut size. Thicker pieces take longer to cook. - Add more pineapple for sweetness or a dash of chili powder for heat. This gives your dish a fun twist. - Experiment with different vegetables like snap peas or carrots. They add color and crunch to the meal. - Pair with lime wedges for an extra zesty kick. The lime juice brightens all the flavors. - Use fresh herbs like cilantro or green onions for garnish. They add freshness and a pop of color. For the full recipe, check [Full Recipe]. {{image_2}} You can switch things up by using different proteins. Substitute chicken breast with shrimp or tofu. Both add unique tastes and textures. Shrimp cooks fast and gives a nice ocean flavor. Tofu soaks up the sauce well and is great for plant-based diets. You can also use diced pork for a unique flavor twist. Pork adds a savory depth that pairs wonderfully with pineapple. If you want a healthier option, replace jasmine rice with brown rice or cauliflower rice. Brown rice offers more fiber and a nutty taste. Cauliflower rice is low-carb and absorbs flavors well. Quinoa is another great choice. It’s protein-rich and has a slightly crunchy texture that adds fun to your dish. You can try different sauces for a fresh twist. Use teriyaki sauce instead of soy sauce for a sweeter flavor. It balances well with the pineapple's sweetness. If you want a creamier sauce, add coconut milk. This gives a tropical vibe and makes the dish richer. For the full recipe, check out the complete guide on Sweet and Savory Pineapple Chicken and Rice. Store any leftovers in an airtight container. This keeps the food fresh for up to 3 days. When you want to eat it, reheat thoroughly before consuming. You can freeze this dish for up to 2 months. Use freezer-safe containers to prevent freezer burn. To enjoy later, thaw it in the fridge overnight before reheating. Reheat in the microwave or on the stovetop. If you use the stovetop, add a splash of water. This helps keep the dish moist and tasty. Yes, canned pineapple works as a convenient substitute; just drain excess juice. Canned pineapple often has a sweeter taste, which can enhance the dish. When using it, be mindful of the added sugars in the syrup. This swap saves time and still gives you that sweet and tangy flavor. Absolutely! It stores well and can be easily divided into meal prep containers. I love making this dish ahead of time. You can enjoy it for lunch or dinner throughout the week. Just store the chicken and rice in separate containers to keep them fresh. Reheat before serving for the best taste. Pair it with a simple salad or steamed vegetables for a balanced meal. A light green salad with vinaigrette adds freshness. You can also include some steamed broccoli or snap peas. These options add color and nutrients to your plate. For a fun twist, try adding lime wedges for a zesty kick! This blog post covered a tasty Sweet and Savory Pineapple Chicken and Rice recipe. We detailed main ingredients and shared step-by-step instructions. We also provided tips for enhancing flavor and suggested fun variations. Now, you can enjoy a delicious dish that is easy to make. Experiment with ingredients and make it your own. Happy cooking!](https://tossedrecipes.com/wp-content/uploads/2025/06/97df231c-76dc-4e62-8a2d-d394dcc99c7b.webp)
Get ready to elevate your dinner game with my Sweet and Savory Pineapple Chicken and Rice Delight! This dish combines tender chicken, juicy pineapple, and fluffy jasmine rice in a …
![To make this easy white chicken chili, you will need: - 1 pound cooked chicken breast, shredded - 1 can (15 oz) white beans, drained and rinsed - 1 can (4 oz) diced green chilies - 1 medium onion, diced - 2 cloves garlic, minced - 4 cups chicken broth - 1 teaspoon ground cumin - 1 teaspoon chili powder - ½ teaspoon oregano - 1 cup heavy cream (or coconut milk for a lighter version) - 1 cup corn (fresh or frozen) - Salt and pepper to taste - Fresh cilantro, chopped (for garnish) - Lime wedges (for serving) When making chili, feel free to swap some ingredients. - Chicken: You can use rotisserie chicken for added flavor and ease. - Beans: Great Northern beans or navy beans work well if you can't find white beans. - Green chilies: If you want a milder chili, use less or skip them. - Cream: For a lighter dish, coconut milk gives a nice touch without dairy. - Corn: Fresh corn adds sweetness, but frozen corn is just as good. Choosing fresh ingredients makes your chili taste better. Here are some tips: - Chicken: Look for pink, moist chicken without any strange odors. - Beans: Choose cans with no dents or rust, and check the expiry date. - Onion and Garlic: Pick firm onions and garlic bulbs with tight skins. - Corn: If using fresh corn, select ears with bright green husks. These tips set you up for a tasty and satisfying white chicken chili. For the full recipe, you can check out the details above. First, gather all your ingredients. You will need: - 1 pound cooked chicken breast, shredded - 1 can (15 oz) white beans, drained and rinsed - 1 can (4 oz) diced green chilies - 1 medium onion, diced - 2 cloves garlic, minced - 4 cups chicken broth - 1 teaspoon ground cumin - 1 teaspoon chili powder - ½ teaspoon oregano - 1 cup heavy cream (or coconut milk for a lighter version) - 1 cup corn (fresh or frozen) - Salt and pepper to taste - Fresh cilantro, chopped (for garnish) - Lime wedges (for serving) Next, chop the onion and mince the garlic. This will add great flavor to your chili. 1. In a large pot, heat a splash of olive oil over medium heat. Add the diced onions and sauté them until they turn translucent. This takes about 5 minutes. 2. Stir in the minced garlic and cook for an extra minute. You want it to smell great! 3. Add the shredded chicken, white beans, green chilies, corn, chicken broth, cumin, chili powder, and oregano to the pot. Stir everything together. 4. Bring the mixture to a simmer. Let it cook for about 20 minutes. This helps all the flavors mix well. 5. Reduce the heat to low, then stir in the heavy cream. Heat it through for about 5 minutes, but do not let it boil. 6. Season with salt and pepper. Taste it and adjust if needed. 7. Serve hot. Garnish with chopped cilantro and lime wedges for a fresh touch. To check if your chili is ready, look for a thick and creamy texture. The chicken should be heated through and the vegetables tender. You can taste it to make sure the flavors are just right. If you want more spice, you can add extra chili powder. Enjoy your easy white chicken chili! For a detailed recipe, check the Full Recipe. To make the best white chicken chili, start with the right pot. A large pot helps the ingredients cook evenly. Heat a splash of olive oil over medium heat. Sauté the onions until they turn soft and clear. Then, add garlic for a warm flavor. Mixing in the chicken and beans gives a great base. Let it simmer gently. This helps all the flavors blend well together. One common mistake is cooking on too high heat. This can burn your garlic and ruin the taste. Another error is not seasoning enough. Always taste your chili as you cook. Adjust the salt and pepper to make it just right. Lastly, don’t skip the heavy cream. It adds a creamy texture that makes the chili rich and satisfying. To boost the flavor, try adding lime juice just before serving. It brightens the dish. Fresh cilantro on top adds a nice touch, too. If you like some heat, sprinkle in some cayenne pepper or hot sauce. For a different texture, toss in some fresh corn or diced bell peppers. These additions make the chili pop! For the full recipe, check out the [Full Recipe]. {{image_2}} If you love heat, try adding jalapeños. Fresh or pickled jalapeños bring a zesty kick. You can also use hotter peppers like serranos or habaneros. Just adjust the amount based on your taste. Another option is to add a splash of hot sauce. This adds flavor and extra spice. To make a vegetarian version, swap the chicken for more beans. Use black beans or kidney beans for added texture. You can also add veggies like zucchini or bell peppers. For a vegan option, replace heavy cream with coconut milk. This keeps the chili creamy while making it plant-based. Feel free to get creative with your chili. You can add corn for sweetness and crunch. Roasted garlic gives a rich flavor that enhances every bite. For a smoky taste, add smoked paprika. Fresh herbs like oregano or thyme can elevate the flavor too. Don't hesitate to mix in different beans or even quinoa for added protein. For a complete guide, check the Full Recipe. After you enjoy your white chicken chili, let it cool first. Store it in an airtight container. This keeps flavors fresh and helps prevent spills. You can keep it in the fridge for up to three days. Make sure to label the container with the date. This way, you know when it was made. When you want to warm up your chili, take it out of the fridge. Pour it into a pot. Heat it on medium until it is hot all the way through. Stir it often to avoid sticking. You can also use a microwave. Place it in a microwave-safe bowl and cover it. Heat in short bursts, stirring in between, until hot. If you want to keep your chili longer, freezing is a great option. Make sure it cools completely before freezing. Use freezer-safe containers or bags. Leave some space at the top, as liquids expand when frozen. Your chili can last for up to three months in the freezer. When you're ready to eat it, thaw it overnight in the fridge before reheating. Check out the Full Recipe for more details on this delicious dish! You can use cooked turkey for a tasty swap. If you want a vegetarian option, try using mushrooms or jackfruit. Both options will add a nice texture and flavor to your chili. Yes, you can! For a slow cooker, cook on low for 6 to 8 hours. For an Instant Pot, set it to high pressure for 10 minutes. Both methods will give you a warm and hearty meal. White chicken chili lasts about 3 to 4 days in the fridge. Store it in a sealed container to keep it fresh. Always check for any off smells before eating. I love adding fresh cilantro, diced avocado, and lime wedges. You can also sprinkle some cheese or crushed tortilla chips for added crunch. These toppings bring extra flavor and make the dish even better. Yes, this recipe is gluten-free! All the ingredients listed, like chicken broth and spices, are safe for gluten-free diets. Always check labels to be sure your products are gluten-free. You can enjoy this chili worry-free! For the complete recipe, check the Full Recipe section to get started on your delicious dish. You learned about making easy white chicken chili. We covered key ingredients, cooking steps, and helpful tips. You now know how to enhance flavors, avoid common mistakes, and explore variations like spicy or vegetarian options. Plus, you have storage tips to keep your chili fresh. Enjoy this warm dish and make it your own. Whether you share it or keep it all, it’s sure to please!](https://tossedrecipes.com/wp-content/uploads/2025/06/4cd2e17d-89fe-49b3-b2c0-9524b906ec5b.webp)
Are you ready to whip up a cozy meal that’s both easy and delicious? This Easy White Chicken Chili is just what you need! Packed with flavor and simple to …
![- Chicken breasts - Cherry tomatoes - Fresh mozzarella - Fresh basil leaves To make Grilled Chicken Caprese, you need just a few key ingredients. Chicken breasts serve as the main protein. I love using boneless and skinless chicken for a tender bite. Cherry tomatoes add a burst of color and flavor. Fresh mozzarella brings creaminess and richness to the dish. Finally, fresh basil leaves give a fragrant touch. - Olive oil - Garlic - Salt and pepper The marinade is simple but powerful. Olive oil helps keep the chicken moist. Garlic adds depth and a savory note. Salt and pepper bring out all the flavors. Together, these ingredients create a tasty base for your chicken. - Balsamic glaze - Additional herbs For extra flair, consider adding balsamic glaze. It adds sweetness and tang. You can also sprinkle on additional herbs if you like. Thyme or parsley would work well. These toppings elevate the dish and make it special. For the full recipe, check out [Full Recipe]. - Preheat the grill Start by preheating your grill to medium-high heat. This step is key for perfect grilling. - Prepare the marinade In a small bowl, mix together 2 tablespoons of olive oil, 2 cloves of minced garlic, and some salt and pepper. This marinade adds flavor to the chicken. Coat the chicken breasts with the marinade. Let them sit for about 15 minutes. This allows the flavors to soak in. - Grilling the chicken Place the marinated chicken on the grill. Cook for 6-7 minutes on each side. Use a meat thermometer to check. The chicken should reach 165°F (75°C). This ensures it's cooked through and safe to eat. - Resting the chicken After grilling, remove the chicken from the grill. Let it rest for a couple of minutes. This helps the juices settle in, making the chicken more juicy and tender. - Layering ingredients Slice the grilled chicken and place it on a serving platter. Next, layer the sliced fresh mozzarella and halved cherry tomatoes evenly over the chicken. This creates a colorful and tasty display. - Garnishing the dish Top your dish with fresh basil leaves. Drizzle balsamic glaze over everything for that sweet and tangy flavor. Serve your Grilled Chicken Caprese right away for the best taste. Enjoy this flavorful and healthy meal! For the complete recipe, check out the Full Recipe. To get perfect grill marks, apply oil to the grill grates before cooking. This helps prevent the chicken from sticking. Place the chicken on the grill at a 45-degree angle. Flip the chicken after a few minutes for those nice lines. To check if your chicken is done, use a meat thermometer. The safe internal temperature is 165°F (75°C). If you don’t have a thermometer, cut into the thickest part. The meat should be white and the juices clear. To add more flavor, try using Italian herbs like oregano and thyme. A sprinkle of red pepper flakes adds a nice kick. For a twist, mix in lemon zest or a bit of smoked paprika. For sides, a fresh green salad pairs well. You can also serve it with garlic bread or grilled veggies. These sides balance the rich flavors of the chicken and mozzarella. For serving, arrange the chicken on a large platter. Layer the mozzarella and tomatoes on top for a colorful look. Scatter fresh basil leaves around the dish for a pop of green. When plating, keep it simple. Use a white plate to make the colors stand out. Drizzle some balsamic glaze over the chicken for shine and extra flavor. This dish not only tastes great but also looks stunning on the table. For the full experience, check out the Full Recipe. {{image_2}} You can easily change ingredients in Grilled Chicken Caprese. If you want a different protein, try turkey or tofu. Both options are tasty and keep the dish healthy. For cheese, fresh mozzarella is classic, but you can use burrata or feta. Each cheese adds its unique taste. You can spice up the dish with extra flavors. Adding Italian herbs like oregano or thyme can boost the taste. A pinch of red pepper flakes gives a nice kick. You can also try different dressings. A lemon vinaigrette or pesto can change the dish completely. These dressings add freshness and zing. Grilled Chicken Caprese is versatile. You can turn it into a salad by adding mixed greens. Just chop the grilled chicken and toss it with greens, tomatoes, and cheese. Another option is making a grilled chicken sandwich. Use crusty bread or a bun, and layer the grilled chicken with mozzarella, tomatoes, and basil. It's a quick meal that packs flavor. For the complete guide, check out the Full Recipe. To store leftovers, place the chicken in an airtight container. Make sure it cools first. You can keep it in the fridge for 3 to 4 days. This helps keep the chicken fresh and safe to eat. The best way to reheat grilled chicken is in the oven. Preheat it to 350°F (175°C). Place the chicken on a baking sheet and cover it with foil. This keeps it moist. Heat for about 10 to 15 minutes, or until warm. You can also use a microwave. Just heat it in short bursts to avoid drying it out. You can freeze cooked chicken if you want to save it for later. Wrap it tightly in plastic wrap or foil. Then, place it in a freezer bag. This keeps it fresh for up to 3 months. When you’re ready to eat, move it to the fridge to thaw overnight. Avoid thawing at room temperature to keep it safe. Grilled Chicken Caprese is a tasty dish. It features grilled chicken with fresh tomatoes, mozzarella, and basil. This meal combines flavors from Italy. The balsamic glaze adds a sweet touch. The dish is colorful and healthy. You can enjoy it hot or cold. Yes, you can use skin-on chicken. It adds extra flavor and moisture. Just cook it a little longer. Make sure the inside reaches 165°F (75°C). The skin will get crispy and delicious. This change can make the dish even better. Cook chicken for 6-7 minutes on each side. You want a nice grill mark. The total cooking time is about 12-14 minutes. Always check the internal temperature. It must reach 165°F (75°C) for safe eating. You can serve many sides with this dish. Here are some ideas: - Garlic bread - Mixed green salad - Quinoa or rice - Grilled vegetables These options will enhance your meal. They add flavor and texture. To meal prep Grilled Chicken Caprese, follow these steps: - Cook extra chicken and let it cool. - Store in containers with tomatoes and cheese. - Keep basil and glaze separate. When ready to eat, just assemble your meal. This makes lunch or dinner easy and quick. Don't forget the full recipe for more details! Grilled Chicken Caprese combines great flavors and fresh ingredients. We covered the must-have items, like chicken, mozzarella, and basil, alongside a simple marinade. You also learned the step-by-step method to grill and assemble this dish perfectly. Don’t forget the tips for flavor and presentation to impress your guests. With endless variations and easy storage options, this meal fits any occasion. Enjoy making your own tasty Grilled Chicken Caprese!](https://tossedrecipes.com/wp-content/uploads/2025/06/b960a66c-5796-4da9-873b-817f5e283ad5.webp)
Looking for a meal that’s both flavorful and healthy? Grilled Chicken Caprese is your answer! This dish combines juicy chicken, fresh mozzarella, ripe cherry tomatoes, and fragrant basil for a …
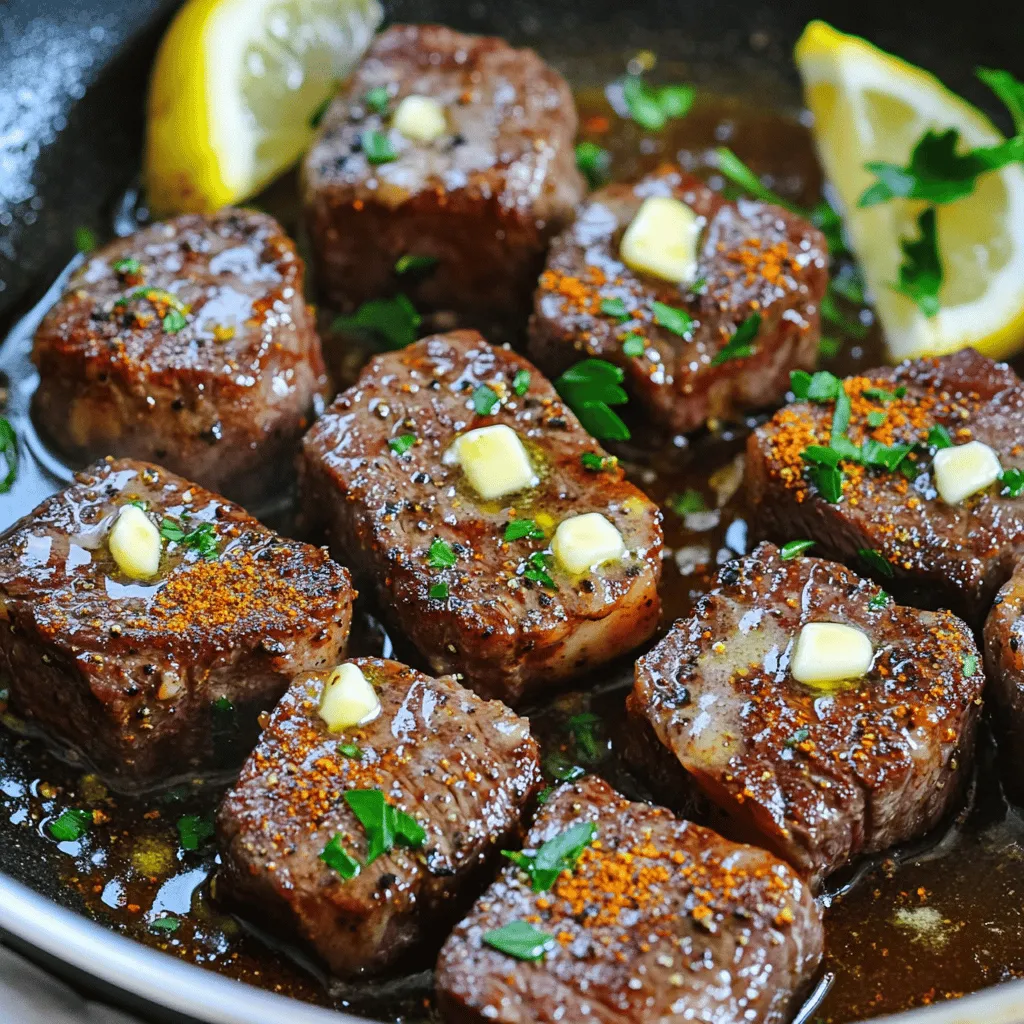
Are you ready to take your dinner game up a notch? Cajun Garlic Butter Steak Bites are the perfect blend of spice and flavor, making a quick meal that impresses. …
![- 3 ripe bananas, mashed - 1/2 cup honey - 1/4 cup unsalted butter, melted - 1 large egg, beaten - 1 teaspoon pure vanilla extract - 1 teaspoon baking soda - 1/2 teaspoon salt - 1 1/2 cups all-purpose flour - 1/2 teaspoon ground cinnamon (optional) - 1/2 cup chopped walnuts or pecans (optional) You can adjust this recipe for different serving sizes. If you want a smaller loaf, halve the ingredients. For a larger loaf, simply double them. You can also swap honey for other sweeteners like maple syrup or agave nectar. Each will add a unique touch to the flavor. When choosing bananas, look for ones that are very ripe. Spots on the skin mean they are sweet and easier to mash. For honey, choose raw or local honey for the best flavor. Always use pure vanilla extract for a rich taste. Avoid imitation vanilla; it lacks depth. 1. Preheat the oven and prepare the loaf pan: Start by setting your oven to 350°F (175°C). This is the perfect temperature for baking. Grease a 9x5-inch loaf pan. You can also line it with parchment paper. This will help you remove the bread easily later. 2. Mashing the bananas: Take your ripe bananas and place them in a large bowl. Use a fork to mash them until they are smooth. The riper the bananas, the sweeter your bread will be. This step is fun and helps release the natural sugars. 1. Combining wet ingredients: In the bowl with the mashed bananas, add 1/2 cup of honey and 1/4 cup of melted unsalted butter. Stir these together until they blend well. Next, mix in 1 large beaten egg and 1 teaspoon of pure vanilla extract. Keep stirring until everything is fully combined. 2. Incorporating dry ingredients properly: In a separate bowl, whisk together 1 teaspoon of baking soda, 1/2 teaspoon of salt, and 1 1/2 cups of all-purpose flour. If you like, add 1/2 teaspoon of ground cinnamon here. Gradually fold this dry mix into the banana mixture. Be careful not to overmix; you want it just combined. 1. Baking time and temperature: Pour your batter into the prepared loaf pan. Smooth the top with a spatula. Place it in the oven and bake for 50 to 60 minutes. 2. Knowing when it's done: The bread is ready when a toothpick inserted in the center comes out clean. If you see any batter on the toothpick, give it more time. Once it’s done, let it cool in the pan for about 10 minutes. Then, transfer it to a wire rack to cool completely. Enjoy this delightful and simple recipe for Honey Vanilla Banana Bread! For the complete details, check the Full Recipe. To avoid common mistakes, make sure your bananas are very ripe. Brown spots on the peel show they are sweet. If you mix too much, your bread will be tough. Combine wet and dry ingredients gently. Use a spatula to fold them together. To perfect the texture and moisture, add the right amount of honey. Honey helps keep the bread moist. If you want a lighter crumb, add a little more flour. Be careful not to pack the flour down. Use a spoon to scoop and level it. For presentation ideas, serve slices on a pretty plate. A drizzle of honey on top looks great. You can also add a dollop of butter. For extra flair, garnish with sliced bananas or a sprinkle of cinnamon. When pairing with toppings or spreads, try cream cheese or nut butter. Both pair well with the sweetness of honey and bananas. You can even add a bit of jam if you like. To store leftover banana bread, wrap it in plastic wrap. You can also use a zip-top bag. This keeps it fresh for several days. If you want to store it longer, freeze it. Just slice it first, so you can take out one piece at a time. For reheating, use a toaster oven or microwave. If using a microwave, heat for only 10-15 seconds. This keeps it soft and warm without drying it out. Enjoy your Honey Vanilla Banana Bread fresh! For the [Full Recipe], check the ingredients and instructions above. {{image_2}} You can easily change the taste of your Honey Vanilla Banana Bread. One popular option is adding chocolate chips. Just fold in about 1/2 cup of semi-sweet or dark chocolate chips to the batter. This sweet touch makes the bread even more delightful. Another great idea is to incorporate spices. Ground cinnamon adds warmth and depth. You can also try nutmeg or a dash of allspice for a unique twist. Each spice brings a new flavor layer to your banana bread. If you need a gluten-free option, swap the all-purpose flour for gluten-free flour. Many blends work well. Just check the package for the right measurements. For a vegan version, replace the egg with a flax egg. To make a flax egg, mix one tablespoon of ground flaxseed with three tablespoons of water. Let it sit for a few minutes to thicken. You can also substitute honey with maple syrup. This keeps the sweetness while making it plant-based. Adding different nuts or seeds can give your banana bread a nice crunch. Walnuts or pecans are classic choices. Try sunflower seeds or pumpkin seeds for a new texture. Dried fruits are another fun option. Raisins, cranberries, or chopped dates add sweetness and chew. They also pair well with the banana flavor and make each slice exciting. For the full recipe, check out the detailed steps provided above. To keep your banana bread fresh, you can store it at room temperature. Wrap it in plastic wrap or place it in an airtight container. This keeps it moist. If you live in a warm area, the fridge is better. The cold helps stop spoilage. Use a glass or plastic container with a tight lid for the best results. Freezing banana bread is simple. First, let the bread cool completely. Then, wrap it tightly in plastic wrap. This keeps out air and moisture. Place it in a freezer bag or container for extra protection. When you want to eat it, take it out and let it thaw on the counter. For faster thawing, slice the bread before freezing. Banana bread lasts about 3-4 days at room temperature. In the fridge, it can last up to a week. If frozen, it stays good for about 3 months. Always check for any signs of spoilage, like a bad smell or mold. Enjoy your Honey Vanilla Banana Bread fresh and tasty! What is the best way to ripen bananas for the recipe? To ripen bananas quickly, place them in a brown paper bag. The bag traps ethylene gas, speeding up ripening. You can also add an apple to boost the effect. Keep the bag at room temperature for a day or two. Can I use frozen bananas for this bread? Yes, you can use frozen bananas. Just thaw them first. Drain any excess liquid before mashing. Frozen bananas may add more moisture, so adjust flour if needed. They will still give you that sweet, banana flavor. Why did my banana bread sink in the middle? Banana bread may sink due to too much liquid or underbaking. Make sure to measure your ingredients accurately. Always check if the bread is fully baked by using a toothpick. If it comes out clean, it’s done. How can I make my banana bread more flavorful? You can enhance flavor by adding spices like cinnamon or nutmeg. Consider using vanilla bean paste instead of extract for a bolder taste. Adding chopped nuts or dark chocolate can also bring depth to the flavor. Can I substitute honey with maple syrup? Yes, maple syrup can replace honey. It will change the flavor slightly but will still be delicious. Use the same amount as the honey in the recipe. What if I don't have ripe bananas? If you lack ripe bananas, you can bake unripe ones. Place them in a 300°F oven for 15-20 minutes. Let them cool before peeling and mashing. This method will soften them to use in your recipe. For the full recipe, check out the details above. You learned how to make delicious honey vanilla banana bread. We covered key ingredients, preparation steps, and tips for baking. You also explored variations and storage options to keep your bread fresh. Remember, the right bananas and honey make a big difference. Enjoy experimenting with flavors and customizing your loaf. This recipe is not just easy; it’s also a chance to make something special. Happy baking!](https://tossedrecipes.com/wp-content/uploads/2025/06/a9560f8a-d039-4eb5-bfce-9e1944373477.webp)
Are you ready to bake something delightful? This Honey Vanilla Banana Bread recipe is both easy and delicious. With just a few key ingredients, you can create a treat that …
![- 4 boneless, skinless chicken thighs - 1 cup buttermilk (or milk with 1 tbsp vinegar for a substitute) - 1 cup panko breadcrumbs - 1/2 cup all-purpose flour - 1 teaspoon garlic powder - 1 teaspoon onion powder - 1 teaspoon smoked paprika - 1 teaspoon cayenne pepper (adjust to taste) - Salt and pepper to taste - 1/4 cup honey - 2 tablespoons hot sauce (like Sriracha or your choice) - 1 tablespoon apple cider vinegar - Fresh parsley for garnish (optional) Getting these ingredients ready is key for perfect Baked Crunchy Hot Honey Chicken. First, I love using boneless, skinless chicken thighs. They stay juicy and tender. Buttermilk is my secret for a rich flavor. If you don’t have it, mix milk with vinegar as a substitute. Next, the dry coating mixture makes the chicken crunchy. Panko breadcrumbs give that extra crisp. Combine them with all-purpose flour for the best texture. Now, let’s talk about the seasoning. Garlic powder, onion powder, and smoked paprika bring depth of flavor. Cayenne pepper adds heat, which you can adjust based on your taste. Don't forget salt and pepper; they enhance all the flavors. Lastly, the hot honey sauce is what ties it all together. Honey gives sweetness, while hot sauce adds a kick. Apple cider vinegar balances the sweetness. You can sprinkle fresh parsley on top for a pop of color and flavor. With these ingredients, you are all set to make a delicious meal. For the complete recipe, check the Full Recipe. - Combine Marinade Ingredients Start by mixing buttermilk, garlic powder, onion powder, smoked paprika, cayenne pepper, salt, and pepper in a bowl. This blend gives the chicken a rich flavor. - Soaking Time for Enhanced Flavor Place the chicken thighs in the marinade. Cover the bowl and refrigerate for at least one hour. For the best taste, marinate overnight. The longer it soaks, the better the flavor. - Preheating the Oven Preheat your oven to 400°F (200°C). A hot oven helps the chicken cook evenly and get that crispy finish. - Creating the Breading Mixture In a shallow dish, combine panko breadcrumbs, all-purpose flour, and a pinch of salt and pepper. Mix these ingredients well. This mixture gives the chicken its crunchy coating. - Dredging the Chicken Take the chicken out of the marinade, letting the extra drip off. Dredge each piece in the breadcrumb mixture. Make sure every side is well coated for maximum crunch. - Placing Chicken for Optimal Crispiness Arrange the breaded chicken on a wire rack set over a baking sheet. This allows air to circulate around the chicken, making it extra crispy while baking. - Mixing Ingredients in Saucepan In a small saucepan over medium heat, mix honey, hot sauce, and apple cider vinegar. Stir the ingredients well to combine them. - Simmering Time for Sauce Thickening Bring the mixture to a gentle simmer for about 2-3 minutes. This helps the sauce thicken nicely. Remove from heat once it reaches your desired consistency. - Glazing the Baked Chicken After baking, drizzle the hot honey sauce over the chicken. Toss gently to coat each piece evenly. This adds a sweet and spicy kick. - Garnishing and Plating the Dish Transfer the chicken to a serving platter. If you like, sprinkle fresh parsley on top for color and flavor. Serve with extra hot honey for dipping. Enjoy this delicious meal! For the full recipe, refer to the earlier sections. To get that perfect crunch, you need to coat the chicken well. Start by marinating the chicken in buttermilk. This helps the breading stick. Use a mix of panko breadcrumbs and flour for the coating. Panko gives more crunch than regular breadcrumbs. When you bread the chicken, press the mixture on firmly. This ensures a thick coating. Using a wire rack is key for crispiness. Place the breaded chicken on the rack over a baking sheet. This allows air to flow all around the chicken as it bakes. It helps the coating get golden brown and crispy. If you skip the rack, the bottom can get soggy. Adjusting the spice level is easy. If you like heat, you can add more cayenne pepper. Start with a teaspoon, then taste the marinade. You can always add more if needed. If cayenne is too spicy, try a milder pepper. Paprika can add flavor without too much heat. You can also swap out hot sauces. Sriracha is a great choice, but so is Frank’s or your favorite brand. Each hot sauce has a unique taste. Experiment to find your ideal blend. When serving, think about sides. Baked crunchy hot honey chicken pairs well with coleslaw or roasted veggies. The coolness of coleslaw balances the heat. You can also serve it with rice or mashed potatoes for a hearty meal. Dipping sauces can add fun. Try ranch, blue cheese, or more hot honey on the side. These add extra flavor and let each person customize their dish. For an extra touch, sprinkle fresh parsley on top for color. For the full recipe, check back to ensure you have all the details! {{image_2}} You can switch up the protein in this recipe. If you prefer chicken breasts, use them instead of thighs. They will still turn out juicy and full of flavor. Just make sure to adjust your cooking time. Breasts often cook faster than thighs. Aim for about 20-25 minutes in the oven. If you're looking for a meatless option, try tofu or cauliflower. For tofu, press it to remove excess moisture. Cut it into bite-sized pieces and marinate just like the chicken. For cauliflower, cut it into florets. Both options will soak up the marinade well and add a lovely crunch when baked. To elevate the flavor, think about adding sesame or ginger. Sesame seeds add a nice crunch and nutty taste. You can sprinkle them on top before baking. Ginger brings a warm, spicy note that pairs well with honey. Add a teaspoon of grated ginger to the marinade for a fresh kick. Don’t forget herbs! Fresh herbs like thyme or rosemary can add depth. For a twist, try adding cilantro for a bright flavor. You can mix them into the marinade or sprinkle them on top before serving. If you need a gluten-free option, swap all-purpose flour for a gluten-free mix. You can also use gluten-free panko breadcrumbs. These changes will keep the crunch without gluten. For those on a low-carb diet, try using crushed pork rinds instead of panko. They will give you that crunch you crave without the carbs. You can also skip the honey and hot sauce if you want to cut sugar. Instead, use a sugar-free hot sauce and adjust the spices for your taste. The complete recipe can help you create your perfect version! To keep your Baked Crunchy Hot Honey Chicken fresh, place it in an airtight container. Make sure you let the chicken cool to room temperature first. This helps prevent moisture buildup. Store it in the fridge. It will stay good for up to three days. If you want to keep it longer, consider freezing it. For freezing, wrap the chicken tightly in plastic wrap, then place it in a freezer bag. It can last up to three months in the freezer. When reheating, you want to keep that crunch. Preheat your oven to 375°F (190°C). Place the chicken on a wire rack over a baking sheet. This allows air to circulate and keeps the coating crisp. Heat for about 10-15 minutes, checking that it’s warmed through. For the hot honey sauce, use a small saucepan. Heat it over low flame, stirring often. You can add a splash of water if it seems too thick. This will help restore its smooth texture. Drizzle it over the chicken right before serving for that sweet and spicy kick! You should marinate the chicken for at least one hour. If you have time, go for overnight. This longer soak lets the flavors mix well. The buttermilk helps make the chicken tender and juicy. You can bake the chicken without a wire rack. However, using one helps the chicken stay crispy. If you don’t have a rack, place the chicken directly on a baking sheet. Just flip the chicken halfway through baking to help it crisp up. If you lack a spice, don’t worry. You can swap in what you have. For example, if you don’t have smoked paprika, regular paprika works fine. Just remember, spices add flavor, so use what you enjoy! Yes, you can prepare parts of this dish ahead. Marinate the chicken the night before. You can even bread the chicken and refrigerate it until you are ready to bake. Just allow it to sit at room temperature for about 15 minutes before cooking. To make the sauce less spicy, reduce the hot sauce amount. You can also add more honey for sweetness. For more heat, add extra cayenne or hot sauce until it suits your taste. Adjust until you find your perfect balance! For the full recipe, check [Full Recipe]. In this post, we covered how to make Baked Crunchy Hot Honey Chicken. We explored ingredients like chicken thighs, buttermilk, and panko breadcrumbs, which add great flavor and texture. I shared step-by-step instructions to marinate, bread, and bake for that perfect crunch. You learned tips for customizing spice levels and making dietary adaptations. Now, you can enjoy each bite, knowing you created something delicious. Experiment with variations and make this dish your own!](https://tossedrecipes.com/wp-content/uploads/2025/06/0439f93d-1a37-4ef4-812d-128aa859233d.webp)
Get ready to dive into the mouthwatering world of Baked Crunchy Hot Honey Chicken! This dish delivers crispy chicken thighs coated in a blend of spices and finished with a …

Are you ready for a delicious twist on fall baking? These flourless pumpkin muffins are not only healthy but also incredibly simple to make. With just a few wholesome ingredients …