Skip to content
Tossed Recipes
  • Home
  • Appetizers
  • Desserts
  • Salads
  • Breakfast
  • Dinner
  • Privacy Policy
  • Contact
  • About

Chef Jamie

One-Skillet Ground Beef and Potatoes Simple Meal

June 9, 2025 by Chef Jamie
- 1 pound ground beef - 4 medium potatoes, diced - 1 medium onion, finely chopped - 2 cloves garlic, minced - 1 teaspoon smoked paprika - 1 teaspoon dried oregano - ½ teaspoon cayenne pepper (optional for spice) - 2 cups beef broth - 1 cup frozen peas - 2 tablespoons olive oil The main ingredients in this dish create a strong base of flavor. Ground beef brings richness and proteins. Potatoes add heartiness and comfort. Onions and garlic enhance the taste, making it savory. The seasonings are key to boosting the dish's profile. Smoked paprika gives a warm, smoky flavor that is hard to resist. Dried oregano adds an herbaceous touch, while cayenne pepper can add heat if you like spice. You also need some additional ingredients to round out the meal. Beef broth adds moisture and depth. Frozen peas offer a pop of color and sweetness. Olive oil is essential for sautéing the onions and garlic. This One-Skillet Ground Beef and Potatoes recipe is simple yet satisfying. You can find the Full Recipe to get started right away! Sautéing the onion and garlic Start by heating 2 tablespoons of olive oil in a large skillet over medium heat. Add 1 finely chopped onion. Cook for about 3 to 4 minutes until it turns soft and clear. Next, add 2 minced garlic cloves. Stir for 1 minute until it smells great, but be careful not to burn it. Browning the ground beef Now, raise the heat a bit. Add 1 pound of ground beef to the skillet. Sprinkle salt, pepper, 1 teaspoon of smoked paprika, and 1 teaspoon of dried oregano over the beef. If you like spice, add ½ teaspoon of cayenne pepper. Cook for about 5 to 7 minutes. Break the beef into small pieces as it cooks until it turns brown. Adding potatoes and broth Once the beef is browned, add 4 diced medium potatoes to the skillet. Stir to mix everything well. Pour in 2 cups of beef broth. Make sure the potatoes are almost covered. If they need more broth, add a little extra. Simmering and covering Bring the mixture to a gentle simmer. Cover the skillet with a lid and cook for 15 to 20 minutes. Stir it occasionally. You want the potatoes to be tender and cooked through. Incorporating peas In the last few minutes, add 1 cup of frozen peas to the skillet. Stir them in, and let them heat through. Adjusting seasoning and resting time Taste your dish and add more salt or pepper if needed. Once done, remove the skillet from the heat. Let it rest for about 5 minutes. This waiting time helps the flavors mix well. Now, you can serve your meal hot, garnished with chopped fresh parsley for a lovely finish. For more details, check the Full Recipe. How to avoid soggy potatoes To keep potatoes firm, cut them into even pieces. This helps them cook evenly. Cook them in the skillet with enough broth, but not too much. Stir them occasionally to prevent sticking. If they seem soggy, increase the heat slightly. Best practices for browning beef Start with a hot skillet and use enough oil. This helps the beef sear nicely. Don't overcrowd the pan; this releases steam and prevents browning. Break the beef into small bits as it cooks. This gives you a nice, even color and texture. What to serve alongside This dish pairs well with a simple salad or crusty bread. A side of steamed broccoli or green beans adds color and nutrients. You can also serve it with a dollop of sour cream for creaminess. Garnishing options Chopped parsley adds a fresh touch. You can also sprinkle some cheese on top for extra flavor. A squeeze of lemon juice brightens the dish and adds zest. Recommended skillet type A large cast-iron skillet works best. It retains heat and gives a nice sear. A non-stick skillet is also a good choice for easy cleanup. Must-have kitchen tools You will need a sharp knife and cutting board for prep. A spatula helps you stir and serve. Keep measuring spoons handy for accurate seasoning. Don’t forget a lid for the skillet to trap steam while cooking. {{image_2}} You can use different meats in this recipe. Ground turkey or chicken works well. You can also try ground lamb for a richer taste. For a lighter option, use lean ground beef. If you want a sweet twist, swap regular potatoes for sweet potatoes. They add color and nutrition. Sweet potatoes also bring a creamy texture when cooked. Just cut them into similar-sized pieces for even cooking. Adding veggies boosts flavor and nutrition. Bell peppers add sweetness and crunch. Chop them and toss them in with the onions. You can also add carrots for a bit of sweetness. Slice them thinly so they cook fast. Want more greens? Spinach or kale can be great choices. Toss in a handful when you add the peas. They wilt nicely and add a fresh taste. To change up the taste, drizzle in some BBQ sauce. It adds a smoky sweetness. You can also sprinkle cheese on top. Cheddar or mozzarella melts well and tastes great. Herbs and spices can give your dish a personal touch. Try adding basil or thyme for a fresh flavor. A pinch of cumin can add warmth and depth. Adjust these to your taste for a dish that feels unique. For the full recipe, check out the One-Skillet Ground Beef and Potatoes Delight. To keep your One-Skillet Ground Beef and Potatoes fresh, use airtight containers. Glass or plastic containers work well. Make sure to cool the dish to room temperature before sealing. This prevents steam from building up, which can lead to sogginess. Store the leftovers in the fridge for up to 3 days. If you want to save some for later, freezing is a great choice. Let the dish cool completely first. Then, place it in freezer-safe bags or containers. Remove as much air as possible before sealing. This helps prevent freezer burn. You can freeze it for up to 3 months. Label the bags with the date so you know when to use them. To reheat your skillet meal, take it out of the fridge or freezer. If frozen, let it thaw in the fridge overnight. For stovetop reheating, place it in a skillet over low heat. Stir often to heat evenly. You can also reheat it in the microwave. Use a microwave-safe bowl and cover it with a lid or plastic wrap. Heat in short bursts, stirring in between, until warm. Enjoy your meal just like when it was fresh! It takes about 40 minutes to cook this dish. You spend 10 minutes prepping the ingredients and 30 minutes cooking. The potatoes need around 15-20 minutes to become tender. Cooking time can change based on your stove and skillet size. Yes, you can use ground turkey. It gives a lighter taste and is a healthier option. The cooking time stays about the same. Just ensure you season it well. Ground turkey can be less fatty, so you might want to add a bit more olive oil. If you don’t have beef broth, use chicken broth or vegetable broth. Water is also an option, but it might lack flavor. To boost taste, add soy sauce or Worcestershire sauce. This will help keep your dish rich and savory. This guide shows how to make a tasty One-Skillet Ground Beef and Potatoes meal. You start with key ingredients like beef, potatoes, and seasonings. Then, follow simple steps to prepare and cook. Use tips to perfect the dish and consider fun variations. Store leftovers properly to enjoy later. Overall, this meal is easy, quick, and full of flavor. Try it for your next dinner. You won't regret it!

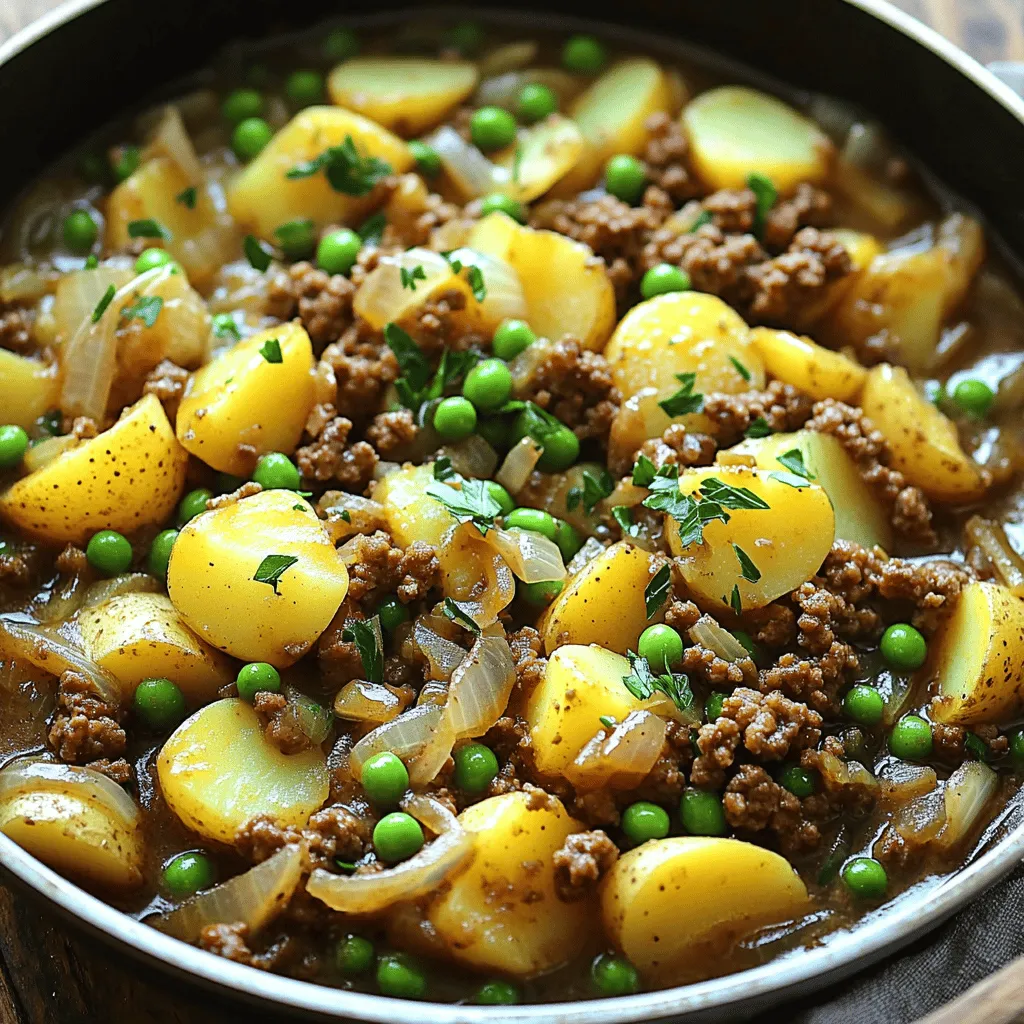
Looking for an easy weeknight meal? One-Skillet Ground Beef and Potatoes is the answer! This dish is simple yet full of flavor. With just a few ingredients like ground beef, …

Read more

Categories Dinner

Savory Steak, Avocado, and Roasted Corn Bowl Recipe

June 9, 2025 by Chef Jamie
- 1 lb flank steak - 2 ripe avocados, sliced - 1 can (15 oz) corn, drained - 1 red bell pepper, diced - 1 small red onion, chopped - 2 tablespoons olive oil - 2 tablespoons taco seasoning - 1 lime, juiced - Fresh cilantro, chopped (for garnish) - Salt and pepper to taste - Cooked quinoa - Brown rice When choosing your ingredients, freshness matters. For the flank steak, choose one with a nice red color. The avocados should be ripe but firm to the touch. Remember, ripe avocados make a creamy addition to your bowl. You can use canned corn for ease, but roasting it makes a big difference. It adds a sweet, smoky flavor. For the base, both quinoa and brown rice are great. Quinoa has a nutty taste, while brown rice is hearty and filling. Using fresh herbs like cilantro brings brightness to the dish. Also, lime juice adds a tangy kick that enhances all flavors. For the best taste, season each component well. This will create layers of flavor in your bowl. If you like, you can find the full recipe [here](Full Recipe). Enjoy crafting this delicious and colorful dish! 1. First, preheat your oven to 400°F (200°C). This step is key for roasting the corn and bell pepper just right. 2. Next, season the flank steak. Use taco seasoning, salt, and pepper. Rub it on all sides, ensuring each bite has flavor. 1. Spread the drained corn and diced red bell pepper on a baking sheet. This helps them roast evenly. 2. Drizzle with 1 tablespoon of olive oil. Sprinkle with salt to enhance the taste. Bake for 15-20 minutes. You want the corn to get slightly charred and the bell pepper tender. 1. While the corn roasts, heat the remaining tablespoon of olive oil in a skillet over medium-high heat. 2. Once hot, add the flank steak. Sear for 4-5 minutes on each side for medium-rare. Adjust the time for your preferred doneness. 3. After cooking, let the steak rest for a few minutes. This step keeps it juicy. Then, slice thinly against the grain. 1. Start with a layer of cooked quinoa or brown rice as your base. This adds a nice texture. 2. Next, top with sliced steak, the roasted corn mixture, and avocado slices. 3. For the final touch, garnish with chopped fresh cilantro. An extra squeeze of lime juice adds freshness. If you want detailed cooking steps, check the Full Recipe. Enjoy your delicious creation! To enhance the taste, adjust the taco seasoning. Add more or less based on your spice level. For a tangy twist, marinate the steak. Use lime juice and olive oil to create a simple marinade. Let it sit for about 30 minutes for the best flavor. For even cooking, use a skillet with a heavy bottom. This helps the heat spread evenly. Sear the steak in batches if you have a large piece. A meat thermometer can help you check the doneness. Aim for 130°F for medium-rare. You will also need some essential tools. A sharp knife is key for slicing the steak. Use a cutting board that won’t slip. A baking sheet is great for roasting corn and peppers. For plating, use large, shallow bowls. Start with a base of quinoa or rice. Place the corn mixture on one side. Add the steak slices next to it. Finally, arrange the avocado slices on top. To make it pop, sprinkle fresh cilantro over everything. Adding lime wedges on the side gives a nice touch. This not only looks good but also adds extra flavor when served. For more details, check the full recipe. {{image_2}} If you want to change the flavors, swap out the avocado. Try using hummus or a creamy yogurt. Both options bring a different taste and texture. You can also change the protein. Instead of steak, try chicken or shrimp. Both cook quickly and add great flavor. Just season them like you do the steak for the best results. Looking to spice things up? Add jalapeños or a dash of hot sauce. These will give your bowl a nice kick. You can also add more veggies. Try diced tomatoes, shredded carrots, or even spinach. They add color and nutrition. Plus, they make the bowl even more fun to eat. For a gluten-free dish, make sure your taco seasoning is gluten-free. Most store-bought options are safe, but check the label. If you want a vegan or vegetarian version, skip the steak. Use black beans or lentils as your protein. They are filling and tasty. You can also add more avocado or a scoop of guacamole for creaminess. Explore these variations to make the perfect bowl just for you. Check out the Full Recipe for more ideas! After cooking, let your steak, avocado, and roasted corn bowl cool down. Store it in the fridge within two hours to keep it safe. Use airtight containers to keep the flavors fresh. The bowl lasts for about three days in the refrigerator. You can freeze the steak and corn mixture if you want to save it longer. Place them in freezer-safe bags or containers. Remove as much air as possible to prevent freezer burn. They can last up to three months in the freezer. To reheat, let it thaw in the fridge overnight. Then, warm it in a skillet over low heat or in the microwave until hot. Making these bowls ahead of time is easy and saves you effort. You can prepare the steak, corn, and quinoa or rice a few days in advance. Keep each ingredient separate to maintain freshness. Use glass or BPA-free plastic containers for storage. These containers help keep the food fresh and make it easy to grab and go. For the best taste, assemble the bowls just before eating. This way, your avocado stays fresh and green, and everything tastes great! For the full recipe, check out the details above. What cut of steak is best for this recipe? I recommend flank steak. It is lean, flavorful, and cooks well. It also slices nicely against the grain, making it tender. If you prefer, you can also use sirloin or ribeye for a richer taste. Can I use canned corn instead of fresh? Yes, you can use canned corn. Just drain it well before roasting. Canned corn is convenient and still adds great flavor to the dish. How long should I cook the steak for medium or well-done? For medium-rare, cook the flank steak for about 4-5 minutes per side. For medium, increase this to 6-7 minutes per side. If you prefer well-done, aim for 8-10 minutes per side. Always check the internal temperature for accuracy. What's the recommended roasting time for corn? Roast the corn for 15-20 minutes at 400°F (200°C). You want it to be slightly charred and tender. This enhances the flavor of the corn and bell pepper. What side dishes complement this bowl? This bowl pairs well with a simple green salad or tortilla chips. You can also serve it with a side of black beans for extra protein and fiber. How can I turn this into a meal prep option? To meal prep, cook everything in advance and store it in separate containers. This makes it easy to grab and go. You can layer the ingredients in a jar or bowl for quick meals during the week. This blog outlined a delicious recipe with flank steak, ripe avocados, and roasted corn. We covered how to season and prepare each ingredient for the best flavor. I shared cooking tips and tricks for great results, plus ideas for variations. Remember, you can swap ingredients or adjust flavors to fit your taste. With these tips, your meal will impress everyone. Now, it’s time to dive in and enjoy your tasty creation!

Are you ready to elevate your dinner game? This Savory Steak, Avocado, and Roasted Corn Bowl is packed with flavor and texture! Using flank steak, ripe avocados, and sweet roasted …

Read more

Categories Dinner

Louisiana Voodoo Fries Flavorful and Fun Recipe

June 9, 2025 by Chef Jamie
To make Louisiana Voodoo Fries, gather these key items: - 4 large russet potatoes - 1 tablespoon cornstarch - 2 tablespoons olive oil - 1 teaspoon garlic powder - 1 teaspoon paprika - 1 teaspoon Cajun seasoning - 1/2 teaspoon cayenne pepper (adjust for spice level) - Salt and pepper to taste - 1 cup shredded pepper jack cheese - 1/2 cup sliced green onions - 1/2 cup sour cream (optional) - 1/4 cup chopped fresh cilantro (for garnish) You can switch things up with these optional items: - Additional spices like onion powder or chili flakes - Different cheese like cheddar or mozzarella - Fresh herbs like parsley or chives If you need swaps, here’s what you can use: - Sweet potatoes instead of russet potatoes for a sweeter taste - Any oil like canola or avocado oil in place of olive oil - For a dairy-free option, use vegan cheese or omit it These ingredients create a rich and bold flavor in your Louisiana Voodoo Fries. Be sure to check the [Full Recipe] for detailed steps to bring all these flavors together! Start by washing the russet potatoes. Peel them to get rid of the skin. Cut the potatoes into thin, even fries. This helps them cook evenly. Soak the cut fries in cold water for at least 30 minutes. This step removes extra starch, which helps them get crispy. Once the fries have soaked, drain the water. Pat the fries dry with paper towels. This is key for crispiness. In a large bowl, toss the dried fries with cornstarch. Make sure every fry is well-coated. Drizzle olive oil over the fries. Then, add garlic powder, paprika, Cajun seasoning, cayenne pepper, salt, and pepper. Toss everything until the fries are fully coated with spices. Preheat your oven to 425°F (220°C). Spread the seasoned fries in a single layer on a lined baking sheet. This prevents sticking and makes cleanup easy. Bake for 25-30 minutes. Flip the fries halfway through for even cooking. They should turn golden and crispy. Once done baking, remove them from the oven. Sprinkle shredded pepper jack cheese over the hot fries. Return the fries to the oven for 5 more minutes, or until the cheese melts. Remove the fries and top with sliced green onions and cilantro. Serve with sour cream on the side if you like. Enjoy your tasty Louisiana Voodoo Fries! For the full recipe, check the details above. To get those fries crispy, start by soaking the cut potatoes. This step removes extra starch. Soak them in cold water for 30 minutes. After soaking, dry them well with paper towels. A dry surface helps the fries crisp up nicely. Toss the fries in cornstarch before seasoning. This makes them even crunchier when baked. You can control the heat in your Louisiana Voodoo Fries. Start with just a pinch of cayenne pepper. If you like it hotter, add more to taste. You can also swap the Cajun seasoning for other spices you enjoy. Just remember to taste as you go. Adjust the spices to fit your palate and those of your guests. Serve your Louisiana Voodoo Fries with a side of sour cream. This cool dip balances the spice. You can also add extra toppings like sliced jalapeños or more green onions. For a fun twist, pair the fries with a tangy dipping sauce. The Full Recipe gives you all the steps to create this tasty dish. Enjoy these fries as a snack, side, or even a main dish! {{image_2}} If you want a vegetarian version, skip the cheese. Use a plant-based cheese or no cheese at all. You can also add more vegetables. Try adding roasted bell peppers or jalapeños for extra flavor. These veggies bring a nice crunch and color to the dish. You can change the toppings to fit your taste. Try adding black beans for protein. They add a nice texture and a bit of earthiness. You could also use guacamole instead of sour cream for a fresh twist. For a bit of sweetness, add some roasted corn. It pairs well with the spicy fries! Think about mixing cultures! You can make a taco-inspired version. Add taco meat, diced tomatoes, and a drizzle of salsa. Or go Italian and top with marinara sauce and mozzarella cheese. This will give you a fun pizza fry. The options are endless, and they all taste great. You can mix and match to create your own unique dish. Enjoy your culinary journey with Louisiana Voodoo Fries! After enjoying your Louisiana Voodoo Fries, you may have some left. Place them in an airtight container. Store them in the fridge for up to three days. This helps keep them fresh and tasty. To reheat, the oven is your best friend. Preheat your oven to 375°F (190°C). Spread the fries on a baking sheet. Bake for about 10-15 minutes until they are hot and crispy again. You can also use an air fryer for a quicker option. Heat them at 350°F (175°C) for about 5-7 minutes. You can freeze Voodoo Fries too! First, let them cool completely. Spread them in a single layer on a baking sheet. Freeze for 1-2 hours until firm. Then, transfer them to a freezer bag. They can last up to two months in the freezer. When ready to eat, bake from frozen. Increase the baking time to ensure they heat through. For the best results, use the Full Recipe for fresh fries. Louisiana Voodoo Fries are a tasty dish that combines crispy fries with bold flavors. They start with fried potatoes. Then, they get coated in spices like garlic powder, paprika, and Cajun seasoning. The dish tops off with melted pepper jack cheese and fresh green onions. You can also add cilantro for a fresh touch. It's all about layers of flavor that create a fun and satisfying meal. You can find great Louisiana Voodoo Fries in many places. Look for Cajun or Creole restaurants, especially in Louisiana. Food trucks often serve delicious versions too. Some bars and pubs have them as a fun appetizer. If you can't find them nearby, making them at home is easy with the Full Recipe! To make your Louisiana Voodoo Fries spicy, add more cayenne pepper. Start with a little, then taste and adjust. You can also mix in some hot sauce into the seasoning. Another option is to use spicy cheese, like jalapeño jack. These simple tweaks can bring out the heat while keeping the great flavors. Experiment until you find your perfect spice level! In this article, we covered how to make Louisiana Voodoo Fries. We discussed key ingredients, optional add-ins, and better ways to use them. You learned to bake perfect fries and achieve crispiness. We shared tips for spice levels and flavor boosts. Remember, you can store leftovers or freeze extra fries. Experiment with variations and enjoy! Making fries can be fun, tasty, and easy.

If you crave a fun and flavorful snack, Louisiana Voodoo Fries are a must-try! This dish packs a punch with tasty spices and crispy potatoes. In this post, I’ll guide …

Read more

Categories Appetizers

Best Recipe For No Bake Banana Pudding Cheesecake Delight

June 9, 2025 by Chef Jamie
To make the best no-bake banana pudding cheesecake, gather these items: - 1 cup graham cracker crumbs - 1/4 cup unsalted butter, melted - 2 cups cream cheese, softened - 1 cup powdered sugar - 1 teaspoon vanilla extract - 2 cups heavy whipping cream - 2 ripe bananas, sliced - 1 package (3.4 oz) instant vanilla pudding mix - 2 cups milk - 1 teaspoon lemon juice - Whipped cream, for topping - Additional banana slices and vanilla wafer cookies, for garnish You can also try adding a pinch of cinnamon for warmth. Some like to include peanut butter for a rich twist. Having the right tools makes cooking easier. Here are the essentials you'll need: - 9-inch springform pan - Mixing bowls (various sizes) - Electric mixer - Whisk - Spatula - Measuring cups and spoons For brands, I recommend using Wilton for pans and Pyrex for mixing bowls. These brands last well and work effectively. First, gather your graham cracker crumbs and melted butter. In a bowl, mix these two until the crumbs soak up all the butter. This step is key for a tasty base. Next, press the crumb mixture firmly into the bottom of a 9-inch springform pan. Make sure it’s even. Now, chill the crust in the fridge while you prepare the filling. In a large bowl, beat the softened cream cheese using an electric mixer. Mix until it becomes smooth and creamy. Gradually add the powdered sugar and vanilla extract. Keep mixing until everything blends well. In another bowl, whip the heavy cream until it forms stiff peaks. This fluffy cream adds lightness. Carefully fold the whipped cream into the cream cheese mixture. Do this gently to keep it airy. Take a medium bowl and whisk the instant vanilla pudding mix with milk. Mix until smooth. Let it sit for about five minutes. This helps it thicken up. After it thickens, fold the pudding into the cheesecake filling. Take your banana slices and add lemon juice to keep them fresh. Gently mix them into the cheesecake mixture to avoid breaking them apart. Now, pour the cheesecake filling over the chilled crust. Use a spatula to smooth it out evenly. It should look nice and neat. Cover the pan with plastic wrap. Chill the cheesecake in the fridge for at least four hours. This helps it set. Once set, remove it from the fridge and release the springform pan. Top it with whipped cream, extra banana slices, and vanilla wafer cookies for an eye-catching finish. For the full recipe, check the link. Enjoy your delicious creation! To make your cheesecake smooth, use room temperature ingredients. Cold cream cheese can be lumpy. Let it sit out for about 30 minutes before mixing. When you whip the cream, use a cold bowl and beaters. This helps create fluffy peaks. Whip until stiff peaks form, but don’t over-whip. Lemon juice is your best friend here. It helps keep bananas from turning brown. Just sprinkle a little on the sliced bananas before adding them to your cheesecake. If you don't have lemon juice, you can use orange juice or even a bit of vinegar as alternatives. Garnishing your cheesecake makes it look great. Add whipped cream on top for extra creaminess. You can also add more banana slices and vanilla wafer cookies for a nice crunch. For drinks, pair it with sweet iced tea or a light sparkling water. My favorite is a nice cup of coffee on the side. {{image_2}} You can make this no-bake banana pudding cheesecake even more fun with flavors. Adding chocolate gives a rich twist. Just fold in melted chocolate or chocolate pudding mix. If you love peanut butter, mix in some creamy peanut butter. It pairs well with bananas and adds a new layer of taste. Also, you can switch up the pudding flavors. Try chocolate or butterscotch for a different vibe. Each option brings a new taste profile to the cheesecake. If you need a gluten-free dessert, fear not! You can easily swap out regular graham crackers for gluten-free ones. Many brands offer tasty gluten-free options that work just as well. If you want a different crust, try crushed almonds or gluten-free cookies. Both options will make a delightful base for your cheesecake. Making this cheesecake dairy-free is simple too. Use dairy-free cream cheese and coconut cream instead of heavy cream. These swaps keep the texture creamy and delicious. If you're watching your sugar intake, you can reduce the powdered sugar. Or, use a sugar substitute like stevia or monk fruit. This way, you can enjoy a sweet treat without the extra sugar. To keep your no-bake banana pudding cheesecake fresh, choose the right containers. A springform pan is great for storing. If you need to transfer it, use an airtight container. Wrap your cheesecake tightly in plastic wrap for best results. This helps keep it moist and tasty. Make sure to place it in the fridge. The ideal temperature is around 35°F (1.6°C). It will stay fresh for about 5 days. If you want to save your cheesecake for later, you can freeze it. First, let the cheesecake set in the fridge for at least 4 hours. Once it's firm, wrap it well. Use plastic wrap and then aluminum foil to prevent freezer burn. You can freeze it for up to 2 months. When you are ready to enjoy it, take the cheesecake out of the freezer. Place it in the fridge overnight to thaw. This keeps the texture smooth. After it’s thawed, you can top it with whipped cream and banana slices for serving. Enjoy your delicious treat! The cheesecake needs to chill for at least 4 hours. This helps it firm up nicely. For the best results, I recommend overnight chilling. This allows all the flavors to blend well. Yes, you can use fresh bananas! They add a nice texture and flavor. However, pudding is thicker and creamier. If you use fresh bananas, slice them right before serving. This keeps them from browning. You can get creative with toppings! Here are a few ideas: - Crushed vanilla wafer cookies for crunch. - Chocolate shavings for a rich flavor. - Chopped nuts like walnuts or pecans. - Fresh berries for a fruity twist. Serve the cheesecake with a drizzle of caramel or chocolate sauce. This adds a fun touch. You can also layer some toppings in the cheesecake for added flavor. Explore different combinations to find your favorite! For the full recipe, check out the Full Recipe link. You now have a full guide to making a delicious cheesecake with bananas. We covered ingredients, tools, and step-by-step instructions, making it easy for you to follow. The tips and variations will help you customize your dessert. With these insights, you can create a cheesecake that suits any taste. Enjoy experimenting with flavors and share your creations with friends and family. Remember, each bite should be a delight!

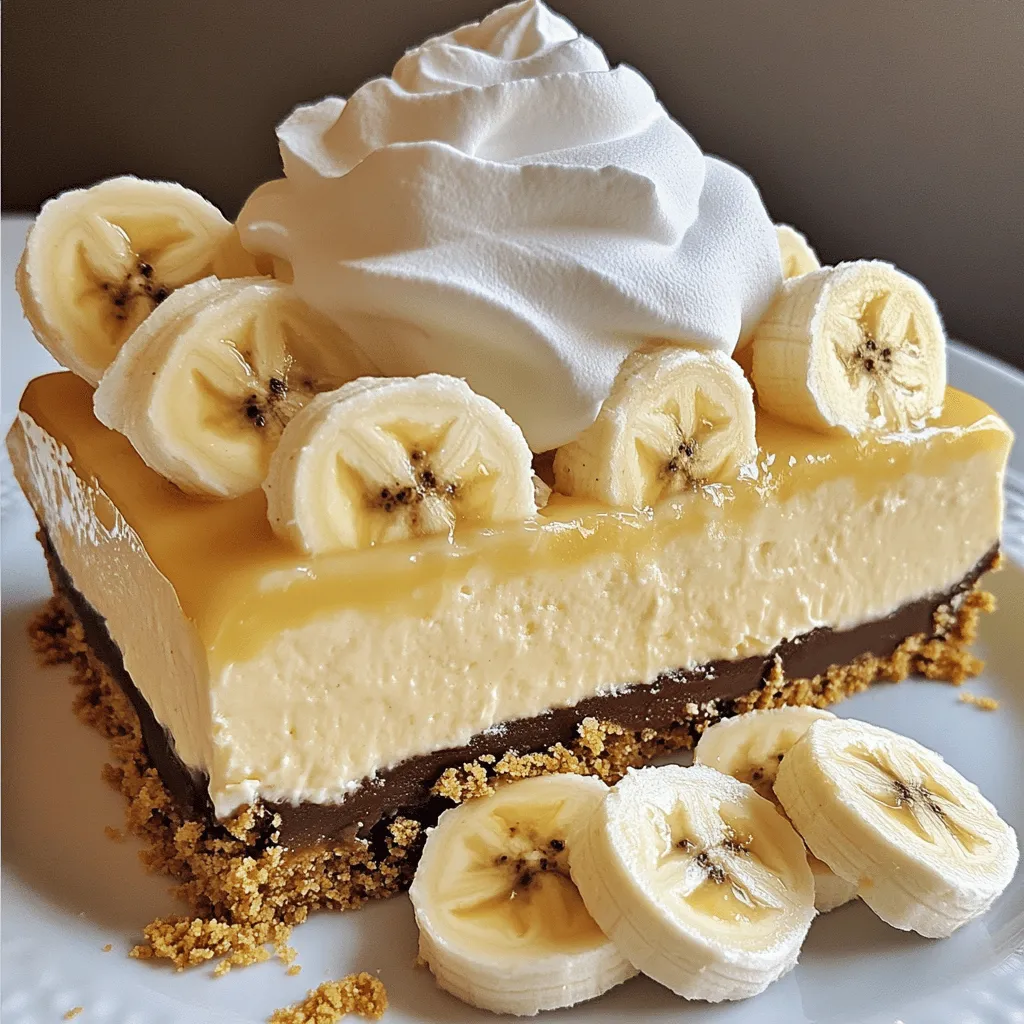
Are you ready to wow your family and friends with an easy dessert? Today, I’m sharing my best recipe for a no-bake banana pudding cheesecake delight! With simple ingredients and …

Read more

Categories Desserts

Honey Sriracha Salmon Bowls Flavorful and Easy Meal

June 9, 2025 by Chef Jamie
To create the perfect Honey Sriracha Salmon Bowls, you need a few key ingredients. Here’s what you will need: - 2 salmon fillets - 2 tablespoons honey - 2 tablespoons Sriracha sauce - 1 tablespoon soy sauce - 1 teaspoon sesame oil - 1 cup jasmine rice - 2 cups water - 1 cup broccoli florets - 1 red bell pepper, thinly sliced - 1 avocado, sliced - 2 green onions, chopped - Sesame seeds for garnish - Salt and pepper to taste These ingredients come together to make a meal that is both tasty and easy to prepare. The salmon brings protein and healthy fats, while the honey and Sriracha mix adds a sweet and spicy kick. Jasmine rice serves as a soft base for the bowls. The fresh vegetables, like broccoli and red bell pepper, provide crunch and color. Finally, avocado and green onions add freshness and flair. For a complete guide, check the Full Recipe. First, make the honey Sriracha glaze. In a small bowl, whisk together 2 tablespoons of honey, 2 tablespoons of Sriracha sauce, 1 tablespoon of soy sauce, and 1 teaspoon of sesame oil. Add salt and pepper to taste. This mix adds a sweet and spicy kick. Next, preheat the oven to 375°F (190°C). The heat helps the salmon cook evenly. Now, brush the salmon fillets with the glaze. Place them on a lined baking sheet. Make sure to cover them well. This will create a tasty crust. Start by rinsing the jasmine rice. Place it in a sieve and run cold water over it. This removes excess starch. Rinse until the water runs clear. In a medium saucepan, combine 1 cup of rinsed rice with 2 cups of water. Bring it to a boil. Once it boils, reduce the heat to low. Cover the pot and let it cook for 15 minutes. Fluff the rice with a fork when done. For the broccoli florets, use a steamer basket over simmering water. Steam for about 4-5 minutes until they are tender-crisp. You can also use the microwave. Place the broccoli in a microwave-safe dish. Cover it with a damp paper towel and microwave for 2 minutes. If you want to mix it up, use other veggies like snap peas or carrots. Now, let’s put it all together! Start with a scoop of jasmine rice at the bottom of each bowl. On top of the rice, place a salmon fillet. Next, add the steamed broccoli, sliced red bell pepper, and avocado. Drizzle any leftover honey Sriracha sauce over everything. Finally, sprinkle with chopped green onions and sesame seeds for a nice touch. Enjoy your colorful and tasty Honey Sriracha Salmon Bowls! For the complete recipe, check out the Full Recipe. To ensure perfectly cooked salmon, start with fresh fillets. Look for a bright color and no fishy smell. Preheat your oven to 375°F. This is just right for baking. Brush the honey Sriracha glaze on the salmon. Bake for 12-15 minutes. The salmon should easily flake with a fork when done. If you prefer crispy skin, broil it for the last 2 minutes. For fluffy jasmine rice, rinse it under cold water. This removes excess starch and prevents clumping. Use a ratio of 1 cup rice to 2 cups water. Bring it to a boil, then lower the heat. Cover and let it simmer for 15 minutes. After cooking, fluff the rice with a fork gently. This adds air and keeps it light. To arrange the bowls for visual appeal, start with the rice as a base. Place it in the center of the bowl. Next, add the salmon fillet on one side. Arrange the broccoli and sliced red bell pepper on the other side. This creates a colorful display. For garnishing, use sliced avocado and chopped green onions. Sprinkle sesame seeds on top for crunch. You can also add a drizzle of the remaining honey Sriracha sauce. This adds flavor and looks great. Serve the bowls in deep dishes to highlight the vibrant colors. {{image_2}} You can easily swap salmon for other proteins. Chicken works great with the same honey Sriracha sauce. Just grill or bake chicken breast until it’s cooked through. Tofu is a fantastic vegan option. Use firm tofu and marinate it in the sauce before cooking. Want to mix things up? Try adding teriyaki sauce for a sweet twist. You can also use garlic or ginger in your sauce for extra flavor. Adjust the spice by adding more Sriracha or even some chili flakes if you like heat. Pair your Honey Sriracha Salmon Bowls with fresh cucumber salad or roasted sweet potatoes. These sides add nutrition and color. For drinks, iced green tea or a light white wine matches well with the spicy-sweet flavors. To keep your Honey Sriracha Salmon Bowls fresh, store leftovers correctly. First, let the bowls cool down to room temperature. Then, place them in airtight containers. This helps lock in flavors and prevent spoilage. - Use glass containers for safe storage. They are durable and help maintain taste. - If you only have plastic, make sure it is BPA-free and airtight. - Avoid stacking too many layers in one container. This can lead to sogginess. When it’s time to reheat, you have a couple of options: the microwave or the oven. Each method works well, but they each have their pros and cons. - Microwave: This is quick and easy. Place your bowl in the microwave and cover it loosely. Heat in short bursts, stirring in between to ensure even heating. - Oven: This method takes longer but keeps the texture better. Preheat your oven to 350°F (175°C). Place the bowl on a baking sheet and cover it with foil. Bake for about 10-15 minutes, or until warmed through. To maintain texture, avoid overheating. This keeps your salmon flaky and your veggies crisp. You want to enjoy every bite just like when you first made it! The salmon takes about 12 to 15 minutes to bake. You should check if it flakes easily with a fork. This shows it's done. The cooking time may change based on the oven's heat and the thickness of the fillets. Yes, you can make the honey Sriracha sauce ahead of time. Mix the honey, Sriracha, soy sauce, and sesame oil in a bowl. Store it in the fridge for a few days. This makes meal prep easier and saves time. If you don't have Sriracha, you can use other hot sauces. Try chili garlic sauce or sambal oelek. These sauces will give you a nice heat and flavor. You can also mix chili powder with honey for a milder option. The recipe can be made gluten-free. Use gluten-free soy sauce in place of regular soy sauce. All other ingredients are naturally gluten-free. This way, everyone can enjoy this tasty meal. For the Full Recipe, please refer to the earlier sections. This blog post covered how to make a tasty salmon bowl. You learned what ingredients to use, like salmon, honey, and veggies. I shared step-by-step instructions, from prepping the salmon to steaming broccoli. You got cooking and presentation tips for the best results. We also discussed variations, like using chicken or tofu, and how to store leftovers. Now, you can make a healthy and fun salmon bowl at home. Each bite is sure to impress! Enjoy creating and sharing this delicious meal.

Want a tasty meal that’s easy to make? Dive into my Honey Sriracha Salmon Bowls! This dish combines sweet and spicy flavors with fresh veggies and fluffy jasmine rice for …

Read more

Categories Dinner

Garlic Shrimp Crostini with Avocado Delight

June 9, 2025 by Chef Jamie
- 1 baguette, sliced into 1/2 inch pieces - 1 pound shrimp, peeled and deveined - 4 cloves garlic, minced - 1 avocado, pitted and diced - 2 tablespoons olive oil, plus more for drizzling - 1 tablespoon fresh lemon juice - 1 teaspoon red pepper flakes (optional) - Salt and pepper to taste - Fresh parsley, chopped for garnish Gather these fresh ingredients for the best flavor. The baguette gives a crunchy base. The shrimp should be fresh or thawed. Fresh garlic adds a strong taste. Avocado brings creaminess, while lemon juice offers brightness. Red pepper flakes add spice, but only if you want. Finally, parsley gives a nice finish. - Calories per serving: About 200 - Macronutrients breakdown: - Protein: 15g - Fats: 10g - Carbohydrates: 20g This dish is not just tasty; it’s also nutritious. Each serving gives a good amount of protein from the shrimp. The healthy fats come from the avocado and olive oil. Carbohydrates in the baguette provide energy. This balance makes it a great choice for a snack or light meal. To start, you need a fresh baguette. Slice it into 1/2 inch pieces. Lay the slices flat on a baking sheet. Brush each slice with a little olive oil. This helps them toast nicely. Place the baking sheet in the oven set at 400°F (200°C). Toast the bread for about 5-7 minutes. Look for a golden brown color. Once toasted, take them out and let them cool slightly. Now, let’s cook the shrimp. Heat 2 tablespoons of olive oil in a large skillet over medium heat. Add 4 cloves of minced garlic. Sauté this for about 1 minute. The garlic should smell great! Next, add the peeled and deveined shrimp. Season them with salt, pepper, and red pepper flakes if you want some heat. Cook the shrimp for 2-3 minutes on each side. You want them pink and opaque. Once done, remove the skillet from the heat. Drizzle with fresh lemon juice to brighten the flavor. Now, it’s time to put it all together. Take your toasted baguette slices. Spread a layer of mashed avocado on each piece. Mash the avocado in a bowl and season it with salt and pepper. Top the avocado with a generous amount of the garlic shrimp. Make sure each crostini has enough shrimp. Finally, sprinkle some chopped fresh parsley on top for a pop of color. This adds a fresh taste, too. For the full recipe, check the section above. Enjoy your delicious garlic shrimp crostini! If you want to switch things up, consider these easy swaps: - Shrimp: You can use scallops or cooked crab instead. They both add great flavor. - Baguette: Try using gluten-free bread or pita chips. Both options work well for crostini. These changes will give you new tastes while keeping the dish simple. Overcooked shrimp can ruin your dish. Here’s how to prevent that: - Cook Time: Keep an eye on the clock. Cook shrimp for 2-3 minutes on each side. They turn pink and opaque when done. - Heat Level: Use medium heat. This helps cook shrimp evenly without burning them. By watching the time and heat, you’ll achieve perfect shrimp every time. Garlic shrimp crostini taste great on their own, but you can pair them with: - Salads: A fresh green salad adds crunch and balances the dish. - Dips: Serve with a zesty salsa or a light yogurt dip for extra flavor. These pairings enhance your meal and offer more variety at the table. Enjoy exploring different combinations! {{image_2}} You can add fun toppings to your crostini. Cheese and herbs work great. Try crumbled feta or goat cheese for a creamy touch. Fresh basil or cilantro adds a nice herbal note. You can also sprinkle some grated Parmesan on top for a salty kick. Mixing flavors helps make each bite exciting. If you want a gluten-free option, use gluten-free bread. There are many tasty kinds available now. For a vegan version, swap shrimp for roasted chickpeas or mushrooms. Both options give a great texture and flavor. You can also use a plant-based spread for the avocado layer. Adjusting the recipe for larger groups is easy. For more servings, double the ingredients. You can also make smaller crostini by slicing the baguette thinner. This way, everyone can enjoy a bite-sized treat. If you have a big crowd, consider making a buffet-style setup. Let guests build their own crostini with different toppings. This creates a fun, interactive meal. For the full recipe, check out the details above! To store leftovers, place the crostini in an airtight container. Keep it in the fridge for up to three days. The shrimp and avocado can be stored separately to keep them fresh. Make sure to cover the avocado with plastic wrap to prevent browning. If you want to keep crostini components longer, freezing is a great option. You can freeze the toasted baguette slices. Place them in a freezer bag, and squeeze out the air. For the shrimp, cook it first and then cool it down. Store the shrimp in a separate airtight container. They can last up to three months in the freezer. Just remember to label the bags with the date. To reheat, use your oven for the baguette slices. Preheat it to 350°F (175°C) and bake for about 5 minutes. This keeps them crispy. For the shrimp, heat them in a skillet over medium heat. This method helps to keep their flavor and texture. Avoid the microwave, as it can make the shrimp rubbery. Yes, you can prep some parts ahead. You can cook the shrimp and store them in the fridge. The shrimp taste great for up to two days. Make sure to let them cool before storing. You can also slice the baguette and prepare the avocado. Just mash the avocado fresh before serving, so it stays green and tasty. Use fresh or frozen shrimp that are peeled and deveined. I prefer medium or large shrimp for a good bite. Look for shrimp labeled "wild-caught" for the best flavor. Fresh shrimp should smell like the ocean, not fishy. If you buy frozen shrimp, make sure they are completely thawed before cooking. To kick up the heat, add more red pepper flakes when cooking. You can also sprinkle some hot sauce on top before serving. Jalapeños or diced chili peppers are another great way to add spice. Just remember to taste as you go, so you don’t make it too hot for your guests. This blog post covered a simple and tasty garlic shrimp crostini recipe. You learned about the key ingredients and their nutritional details. I shared step-by-step instructions on prepping the baguette, cooking the shrimp, and assembling the dish. Tips for substitutions and cooking methods helped you make the recipe your own. You can also adjust serving sizes and store leftovers with ease. Enjoy making this delightful dish that suits different diets. It's perfect for gatherings or a cozy night in. Cooking can be fun and easy with the right guidance!

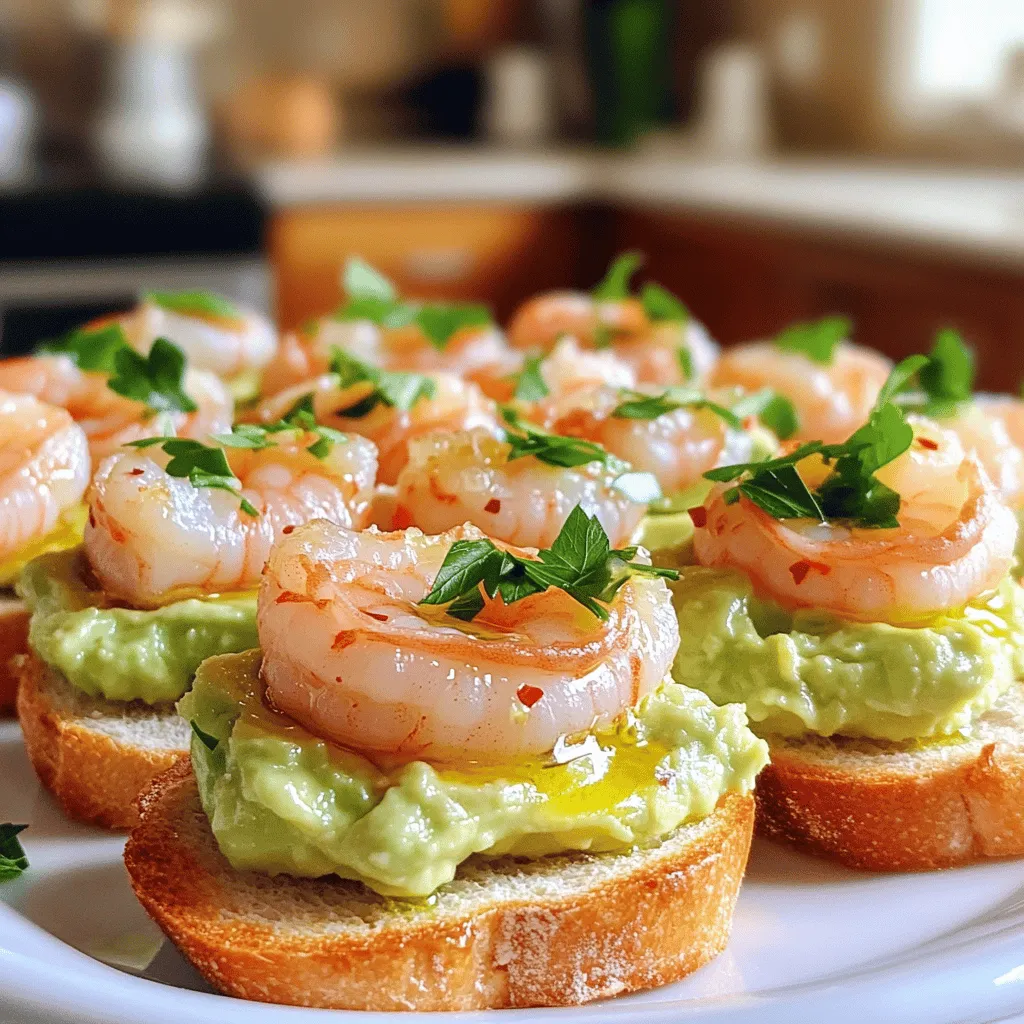
Are you ready to impress your guests with a tasty appetizer? My Garlic Shrimp Crostini with Avocado Delight is a simple, yet delicious dish that combines garlic shrimp and creamy …

Read more

Categories Appetizers

Mini Lemon Raspberry Cheesecakes Delightful Sweet Treat

June 8, 2025 by Chef Jamie
To make these tasty mini cheesecakes, gather these ingredients: - 1 cup graham cracker crumbs - 4 tablespoons unsalted butter, melted - 1/4 cup granulated sugar - 2 (8 oz) packages cream cheese, softened - 1/2 cup sour cream - 2/3 cup granulated sugar - 2 large eggs - 1/4 cup fresh lemon juice - Zest of 1 lemon - 1 cup fresh raspberries - Additional raspberries and lemon zest for garnish Using high-quality ingredients makes a big difference. Choose fresh raspberries, as they add vibrant flavor. Opt for full-fat cream cheese for a rich, creamy texture. Fresh lemons yield the best juice and zest. Using unsalted butter allows you to control the sweetness. Organic ingredients can elevate taste and support sustainable farming. You can easily swap ingredients to fit dietary needs. For a gluten-free option, use gluten-free graham crackers. If you're dairy-free, try coconut cream or a vegan cream cheese. To make it lower in sugar, use a sugar substitute like stevia or erythritol. Always check labels for allergens when choosing substitutions. For egg-free cheesecakes, use flaxseed meal or chia seeds mixed with water to mimic eggs. Creating delicious mini lemon raspberry cheesecakes is fun and flexible. For the full recipe, refer back to the ingredients list! To make the crust, start by preheating your oven to 325°F (160°C). Grab a muffin tin and line it with cupcake liners. In a medium bowl, mix together 1 cup of graham cracker crumbs, 4 tablespoons of melted unsalted butter, and 1/4 cup of granulated sugar. Stir until the crumbs are well coated with the butter. Now, take this crumb mixture and press it firmly into the bottom of each lined muffin cup. Aim for a nice, even layer. Bake the crusts for 7 to 8 minutes, until they turn lightly golden. Once baked, remove them from the oven and let them cool slightly while you prepare the filling. In a large mixing bowl, add 2 packages of softened cream cheese. Use an electric mixer to beat it until smooth and creamy. Next, add 1/2 cup of sour cream, 2/3 cup of sugar, 2 large eggs, 1/4 cup of fresh lemon juice, and the zest of 1 lemon. Mix until everything is well combined and smooth. Scrape down the sides of the bowl as needed. Now, gently fold in 1 cup of fresh raspberries. Be careful not to crush them too much; we want those lovely bursts of flavor in each bite! Pour the cream cheese mixture over the cooled crusts in the muffin tin. Fill each cup about 3/4 full. Place the muffin tin back in the oven and bake for 15 to 20 minutes. You want the edges to be set, but the centers should still jiggle a bit. After baking, turn off the oven and crack the door open. Let the cheesecakes cool in the oven for an additional 10 minutes. This helps prevent cracks. Once cooled, remove them from the oven and let them cool completely at room temperature. Finally, refrigerate the cheesecakes for at least 2 hours, or even overnight if you can wait! For the full recipe, check out the details above. Enjoy making these delightful mini lemon raspberry cheesecakes! To get the best texture in your mini lemon raspberry cheesecakes, always use softened cream cheese. This helps you mix it smoothly with other ingredients. Make sure to beat the mixture until it is creamy. This step is key! Also, remember to fold in the raspberries gently. You want them to stay whole for a nice bite. One common mistake is overmixing the batter after adding eggs. This can cause cracks when baking. Another mistake is not letting the cheesecakes cool gradually. Cracking can happen if you move them to the fridge too soon. Lastly, be careful not to overbake. The centers should jiggle a bit when you take them out. For a beautiful presentation, add fresh raspberries and lemon zest on top. This gives a nice pop of color. You can also serve them on a pretty plate or a cake stand. If you're feeling creative, drizzle a lemon glaze over them for added sweetness. These little tricks make your mini cheesecakes look as great as they taste! For the full recipe, click [Full Recipe]. {{image_2}} You can change the fruit in these mini cheesecakes. Fresh strawberries or blueberries work great. Chop the strawberries into small pieces and fold them in like the raspberries. Blueberries can stay whole for a nice burst of flavor. You can mix fruits too. This will give you new tastes and colors. To make this recipe vegan, use plant-based cream cheese. Brands like Tofutti or Kite Hill are good choices. Replace sour cream with coconut cream for a rich taste. Use flax eggs instead of regular eggs. Mix one tablespoon of ground flaxseed with three tablespoons of water. Let it sit for a few minutes to thicken. This will help bind the mixture. You can also switch up the crust. Use chocolate graham crackers for a rich flavor. Crush them the same way you do regular graham crackers. For a nut-based crust, use ground almonds or pecans. Mix them with melted coconut oil for a gluten-free option. Each crust will change the taste and feel of your mini cheesecakes. For the complete recipe, check the Full Recipe provided earlier. To keep your mini lemon raspberry cheesecakes fresh, use an airtight container. Place parchment paper between layers if stacking. This helps avoid sticking. Store them in the fridge right after they cool. They taste best cold and firm. When stored correctly, these mini cheesecakes last about 5 days in the fridge. After that, they may lose flavor and texture. Always check for any signs of spoilage before eating. If they look or smell off, it's best to toss them. You can freeze mini cheesecakes for longer storage. Place them in a single layer on a baking sheet. Freeze until solid, then transfer to an airtight container. They can last up to 2 months in the freezer. To eat, thaw them in the fridge overnight. This keeps them creamy and delicious. For the full recipe, check out the complete guide provided earlier. Yes, you can make these mini cheesecakes ahead. They chill well in the fridge. I often prepare them a day in advance. This extra chill time enhances the flavor. Just cover them tightly with plastic wrap. When serving, you can add fresh raspberries and lemon zest. To make larger cheesecakes, you can double the recipe. Use a 9-inch springform pan instead of muffin tins. Adjust the baking time as well. A larger cheesecake may need 30 to 40 minutes in the oven. Check for doneness by gently shaking the pan. The center should still jiggle a bit but not be liquid. To prevent cracks, avoid overmixing the batter. Mix until just combined. Also, bake at a lower temperature. A gentle bake helps it set slowly. Cracking can also happen if the cheesecake cools too fast. I recommend cracking the oven door after baking. Letting it cool slowly helps keep it smooth. You learned how to make Mini Lemon Raspberry Cheesecakes from start to finish. We covered the ingredients, step-by-step instructions, helpful tips, and fun variations. You can adapt the recipe to fit your needs and preferences. Remember to store your cheesecakes properly for the best taste. These treats are easy to make and fun to share. Enjoy impressing friends and family with your tasty creations!

Craving a sweet treat that’s both refreshing and easy to make? My Mini Lemon Raspberry Cheesecakes are the perfect solution! With their creamy filling and zesty lemon flavor, these bites …

Read more

Categories Desserts

Best Blueberry Yogurt Recipe Simple and Delicious Treat

June 8, 2025 by Chef Jamie
- 2 cups plain Greek yogurt - 1 cup fresh blueberries - 1/4 cup honey (or maple syrup for a vegan option) - 1/2 teaspoon vanilla extract - 1/4 cup granola (use your favorite variety) - 1 tablespoon lemon juice - Mint leaves, for garnish When making blueberry yogurt, quality ingredients matter. Start with plain Greek yogurt. It gives a creamy base. Fresh blueberries are key for flavor. They add a burst of sweetness. Honey or maple syrup brings in a natural sweetness. This choice makes it perfect for all diets. Add a hint of vanilla extract. It enhances the yogurt's flavor. Granola offers a satisfying crunch. Use your favorite type for the best taste. A splash of lemon juice brightens the blueberries. It adds a zest that balances the sweetness. Finally, mint leaves can make it look pretty. They also add a fresh note. I love this recipe because it is simple. You can mix and match the ingredients. You can also customize it to fit your taste. Whether you want something sweet or tart, you can adjust it. You can find the Full Recipe for a complete guide. This yogurt treat is not only tasty but also a healthy choice. 1. Mixing yogurt and sweetener: Start with 2 cups of plain Greek yogurt. In a medium bowl, add 1/4 cup of honey or maple syrup. This adds sweetness. Then, pour in 1/2 teaspoon of vanilla extract. Mix well until smooth and creamy. 2. Tossing blueberries with lemon juice: Take 1 cup of fresh blueberries in another bowl. Drizzle 1 tablespoon of lemon juice over them. Toss gently. This step boosts the blueberry flavor and adds a zest. 3. Layering the parfait: Grab a serving glass or bowl. Begin with a spoonful of the sweetened yogurt at the bottom. Next, add a layer of the lemony blueberries. Sprinkle 1/4 cup of granola on top for crunch. Repeat these layers until you finish the ingredients. End with yogurt on top. For a pretty touch, add a few fresh blueberries and a mint leaf. - Best practices for serving the parfait: Serve this parfait right away. It tastes best fresh. If you need to prepare it ahead, keep the layers separate until serving. - Tips for presentation: Use clear glasses to show off the layers. You can also drizzle a bit of honey on top for shine. A sprig of mint adds color and freshness. - Ideal accompaniments: Pair this parfait with a side of nuts for extra crunch. A cup of herbal tea or coffee works well too. If you like, add a small bowl of extra berries for a fun touch. For more details, check out the Full Recipe. To elevate your blueberry yogurt, try using flavored yogurt options. Honey vanilla or blueberry yogurt can add depth. You can also mix in spices or extracts. A pinch of cinnamon or a drop of almond extract works wonders. These small changes can make your treat even better. The right granola makes a big difference in your parfait. Look for granola with nuts or seeds. It adds crunch and extra flavor. If you want something different, try toasted coconut or crushed nuts. Both give a unique twist to your yogurt layers. This blueberry yogurt parfait is not just tasty; it's also good for you. Greek yogurt is high in protein and helps with gut health. Blueberries are packed with vitamins and antioxidants. They support heart health and boost your immune system. Honey or maple syrup adds natural sweetness, so you skip refined sugars. This treat is a simple way to enjoy great flavors while staying healthy. {{image_2}} You can mix it up with different fruits. Use seasonal fruits to change the flavor. In winter, try adding oranges or pomegranates. In summer, peaches or strawberries work great. Berry blends can also add fun. Mix blueberries with raspberries or blackberries for a colorful look. If you want a vegan option, swap the honey for maple syrup. Use coconut yogurt to keep it creamy. For gluten-free needs, make sure your granola is certified gluten-free. You can also skip the granola for a lighter treat. Adding spices can really boost the taste. A sprinkle of cinnamon or nutmeg gives a warm feel. You can also try other sweeteners like agave syrup or stevia. These swaps let you customize the parfait to fit your taste. To keep your blueberry yogurt fresh, store it in the fridge. Place it in an airtight container. This helps to lock in moisture and flavor. Always use clean utensils to scoop out yogurt. This prevents bacteria from getting in. If you want to save some for later, try freezing yogurt parfaits. Layer the yogurt, blueberries, and granola in a freezer-safe container. Leave some space at the top, as yogurt expands when frozen. When you want to eat it, just thaw it in the fridge overnight. Homemade blueberry yogurt can last about five days in the fridge. Make sure to check it regularly. Look for any changes in smell or texture. If it smells sour or has a watery layer, it's time to toss it out. Signs of spoilage include mold or off colors. If you see any of these, do not eat it. Always prioritize your health and safety when enjoying your delicious blueberry yogurt. How to make blueberry yogurt from scratch? To make blueberry yogurt, you need a few key ingredients. Start with plain yogurt. Add fresh blueberries, honey, and a splash of vanilla. Mix it all together in a bowl. For a smoother texture, blend the mix until you reach your preferred consistency. That’s it! You can adjust the sweetness to your liking. Can I use frozen blueberries? Yes, you can use frozen blueberries! They work just as well as fresh ones. Just remember they will be softer when thawed. Toss them in a bowl with lemon juice before adding them to your yogurt. This will help bring out their flavor. How long does homemade yogurt stay fresh? Homemade yogurt can last about one week in the fridge. Make sure to store it in an airtight container. Always check for signs of spoilage, like an off smell or discoloration, before eating. Why is my yogurt too runny? If your yogurt is too runny, it might need more time to set. Ensure you use a good quality yogurt starter. You can also strain the yogurt through a cheesecloth or coffee filter to remove excess liquid. This will help achieve a thicker texture. How to fix overly sweet yogurt? To fix overly sweet yogurt, add a bit of plain yogurt to balance the sweetness. Mixing in some fresh fruit can also help cut down the sweetness while adding flavor. What is a good serving size for yogurt parfaits? A good serving size for yogurt parfaits is about one cup. This provides a nice balance of yogurt, fruit, and granola. It’s enough for a satisfying snack or light breakfast. Can this recipe be scaled for larger gatherings? Yes, you can easily scale this recipe for larger gatherings. Just multiply the ingredients by the number of servings you need. You can serve it in a large bowl or individual cups for guests to enjoy. This article covered how to make a delicious yogurt parfait. We talked about ingredients like Greek yogurt, fresh blueberries, and granola. You learned the steps to mix and layer your parfait. I also shared serving tips and ways to change up the flavors. In summary, yogurt parfaits are tasty and healthy. They offer many options for creativity and fun in your kitchen. Enjoy making your parfaits and sharing them with others!

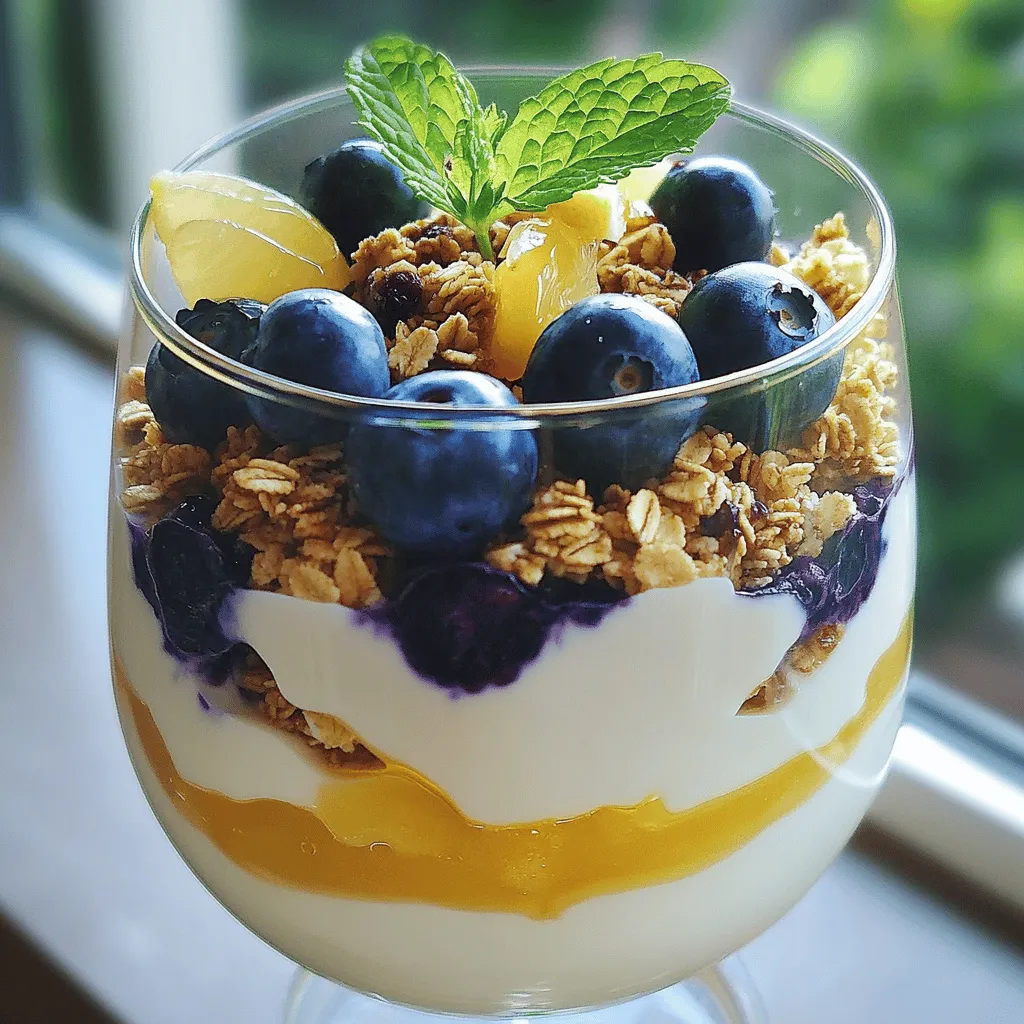
Craving a tasty treat that’s healthy and easy to make? My Best Blueberry Yogurt Recipe is the answer! With creamy Greek yogurt and fresh blueberries, you can whip up a …

Read more

Categories Desserts

Quick Cowboy Butter Chicken Linguine Recipe Delight

June 8, 2025 by Chef Jamie
To make Quick Cowboy Butter Chicken Linguine, you need simple yet tasty ingredients. Here’s what you’ll need: - 300g linguine pasta - 2 chicken breasts, diced - 4 tablespoons unsalted butter - 2 cloves garlic, minced - 1 teaspoon smoked paprika - 1 teaspoon chili powder - 1 teaspoon dried oregano - 1 red bell pepper, sliced - 1 cup corn kernels (fresh or frozen) - 1/2 cup chicken broth - Salt and pepper to taste - Fresh parsley, chopped (for garnish) - Freshly grated Parmesan cheese (optional) When picking your ingredients, focus on fresh and high-quality items. Fresh chicken and colorful veggies add great taste and texture. Using unsalted butter allows you to control the salt. You can find the full recipe online to guide you through every step. To start, boil a large pot of salted water. I add about a tablespoon of salt for flavor. Once the water is bubbling, add 300g of linguine pasta. Cook according to the package until it is al dente, which usually takes about 8-10 minutes. It's crucial to reserve 1/2 cup of the pasta water before draining. This starchy water helps the sauce stick later and adds creaminess. While the pasta cooks, heat a large skillet over medium heat. Melt 2 tablespoons of unsalted butter in the skillet. Next, add 2 diced chicken breasts. Season with salt, pepper, 1 teaspoon smoked paprika, 1 teaspoon chili powder, and 1 teaspoon dried oregano. Cook the chicken for 5-7 minutes until it turns golden brown and is fully cooked. You can check doneness by cutting a piece. The inside should be white, not pink. Now, I sauté the flavor. Add 2 minced cloves of garlic and 1 sliced red bell pepper to the skillet. Sauté for about 2-3 minutes until the peppers soften. Then, add 1 cup of corn kernels and 1/2 cup of chicken broth. Let this simmer for another 2-3 minutes, so all the flavors blend. Finally, toss in the drained linguine, along with the reserved pasta water. Add the remaining 2 tablespoons of butter, stirring until it melts and coats everything well. Taste and adjust seasoning if needed. For a delightful finish, plate the linguine and garnish with fresh parsley and Parmesan cheese if you like. This Quick Cowboy Butter Chicken Linguine is now ready to enjoy! To make Quick Cowboy Butter Chicken Linguine even better, you can tweak the seasonings. If you like heat, add more chili powder. For a smoky taste, try extra smoked paprika. A splash of lemon juice adds a fresh kick, balancing the flavors nicely. Using the right cooking techniques also matters. Sear the chicken over medium heat. This gives it a nice crust and locks in moisture. When adding garlic, make sure not to burn it. This keeps your dish bright and tasty. I love time-saving hacks in the kitchen. One great tip is to prep your ingredients ahead of time. Chop your chicken and veggies early in the day. This way, when you cook, everything is ready to go. Another quick tip is to use a large pot for boiling pasta. This helps the pasta cook evenly. When you drain it, don’t forget to save some pasta water. It’s a secret weapon for making the sauce creamy and rich. With these tips and tricks, you’ll make this dish a winner every time! For the complete recipe, check out the Full Recipe. {{image_2}} You can switch up the protein in this dish. If you want a beefy taste, try diced steak. Cook it the same way as the chicken. For a lighter option, shrimp works great too. Just sauté it for a few minutes until pink. If you prefer meat-free meals, use tofu or chickpeas. Both options add protein and flavor. Cube the tofu and cook it until golden. For chickpeas, add them along with the corn for a hearty twist. Preparing this dish ahead of time saves you time later. Cook the linguine, chicken, and veggies as directed. Store them in separate containers in the fridge. This way, you can mix everything together when you're ready to eat. It stays fresh for about three days. For side dishes, consider a simple salad or garlic bread. These pair well and add a nice crunch to your meal. If you want a healthier side, try steamed broccoli or green beans. They are easy to make and taste great with this pasta. To keep your Quick Cowboy Butter Chicken Linguine fresh, use an airtight container. This method prevents air from spoiling the meal. Always let the pasta cool down before sealing it. You can store it in the fridge for up to three days. If you won’t eat it soon, consider freezing it. It can last in the freezer for about one month. When reheating pasta, your goal is to maintain its taste and texture. Start by adding a splash of water or broth to the pasta. This helps prevent it from drying out. Use a microwave or stovetop for reheating. If using the microwave, cover the container to keep moisture in. Heat for short bursts, stirring in between to warm evenly. If using the stovetop, warm it gently over low heat, stirring often. Enjoy the full flavors of your Quick Cowboy Butter Chicken Linguine again! For the full recipe, check above. To make this recipe gluten-free, swap linguine for gluten-free pasta. Many brands offer great options. Just check the package for cooking times. Gluten-free pasta cooks differently, so keep an eye on it. This way, you can still enjoy the rich flavors without gluten. Yes, you can use frozen chicken! Thaw it first in the fridge. This will help it cook evenly. If you need to cook it from frozen, add extra time. Make sure the chicken reaches a safe internal temperature of 165°F. This ensures it’s safe to eat and tender. You have many options to replace linguine. Here are some great alternatives: - Fettuccine: Wider noodles that hold sauce well. - Penne: Tubes that trap bits of chicken and sauce. - Zucchini noodles: A low-carb choice that’s fresh and tasty. - Spaghetti: A classic pasta that works with any sauce. Choose what you like best! Each type will bring its own unique texture and taste to the dish. This post covered easy cooking steps for a tasty pasta dish. You learned about each ingredient and why they matter. I shared tips to boost flavors and save time in the kitchen. You also found ways to vary the recipe with different proteins. Finally, I explained how to store and reheat your delicious meal. Cooking should be fun and simple. I hope these ideas help you create something great in your kitchen. Enjoy your cooking!

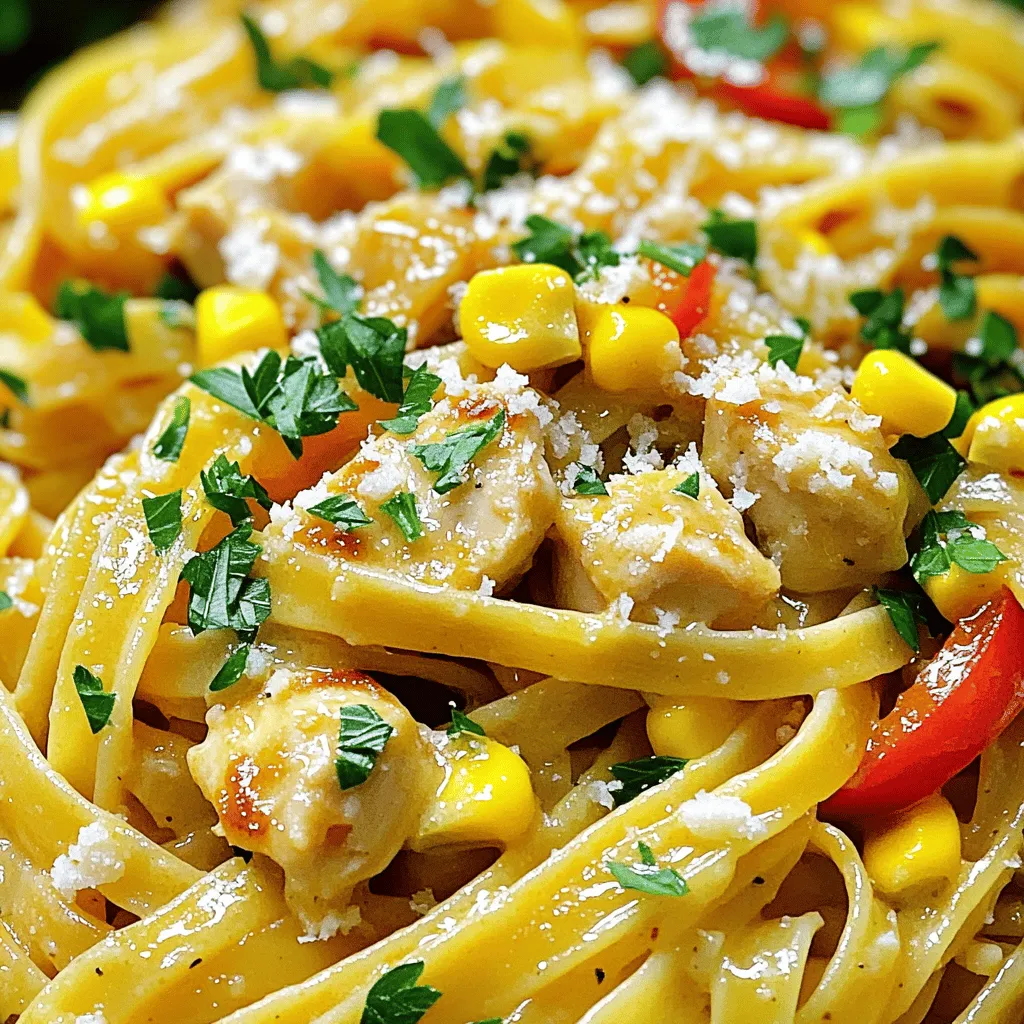
Craving a quick, hearty meal? The Quick Cowboy Butter Chicken Linguine Recipe Delight is here to save the day! In just a few simple steps, you can whip up a …

Read more

Categories Dinner

Ground Beef Enchilada Soup Flavorful Comfort Dish

June 8, 2025 by Chef Jamie
When making Ground Beef Enchilada Soup, having the right ingredients is key. This soup is hearty, warm, and full of flavor. Here’s what you need: - 1 lb ground beef - 1 medium onion, diced - 2 cloves garlic, minced - 1 can (15 oz) diced tomatoes - 1 can (15 oz) black beans, rinsed and drained - 1 can (15 oz) corn, drained - 2 cups beef broth - 1 can (10 oz) enchilada sauce - 1 tablespoon chili powder - 1 teaspoon cumin - Salt and pepper, to taste - 1 cup shredded cheddar cheese - 1 avocado, diced - Fresh cilantro, for garnish - Tortilla chips, for serving Each ingredient adds its own special touch. The ground beef gives a rich flavor. The onion and garlic bring a nice aroma. Diced tomatoes add juiciness, while black beans and corn provide texture and nutrition. Beef broth and enchilada sauce create a tasty base. Chili powder and cumin give the soup its warmth and depth. I suggest using fresh ingredients when possible. They elevate the dish and make it more vibrant. For the best taste, don’t skip the toppings. Shredded cheese, diced avocado, and cilantro make this soup feel special. You can find the full recipe for Ground Beef Enchilada Soup in the link above. Enjoy creating this delicious comfort dish! - Step 1: Sauté onions and garlic Start by heating a tablespoon of oil in a large pot over medium heat. Add the diced onion and minced garlic. Sauté them until the onions turn clear, about 3 to 5 minutes. This step builds the base flavor for the soup. - Step 2: Brown the ground beef Next, add 1 pound of ground beef to the pot. Use a spoon to break it apart. Cook it until it is no longer pink, which takes about 7 to 10 minutes. Be sure to drain any extra fat. This ensures the soup stays rich but not greasy. - Step 3: Combine all ingredients Now, stir in the can of diced tomatoes, black beans, corn, beef broth, and enchilada sauce. These ingredients create a tasty and hearty mix for your soup. - Step 4: Season and simmer Add chili powder, cumin, and a pinch of salt and pepper. Bring the soup to a low boil, then reduce the heat to let it simmer. Simmer for about 20 minutes. This allows all the flavors to mingle and develop. - Step 5: Final touches before serving After simmering, taste the soup. Adjust the seasoning if needed. Serve the soup hot in bowls. Top each serving with shredded cheddar cheese, diced avocado, and fresh cilantro. Don’t forget the tortilla chips on the side for that perfect crunch. This easy method gives you a heartwarming bowl of Ground Beef Enchilada Soup that everyone will love. For more details, check out the Full Recipe. To make your Ground Beef Enchilada Soup even better, I have some simple tips. - Use fresh herbs for added aroma: Fresh cilantro or parsley can brighten the soup. Just chop and sprinkle some on top before serving. - Adjust spice levels to preference: If you like it spicy, add some diced jalapeños or extra chili powder. For milder flavors, cut back on the spices. - Incorporate additional veggies for nutrition: Try adding bell peppers, zucchini, or corn. These not only boost nutrition but also add texture and color. When it comes to serving this soup, a few sides can really make it shine. - Recommended side dishes: A simple green salad with lime vinaigrette pairs nicely. You can also serve it with warm, crusty bread for dipping. - Perfect accompaniments for the soup: Top your soup with shredded cheese, diced avocado, and tortilla chips. These toppings add creaminess and crunch, making every bite special. For the full recipe, check out the [Full Recipe](#). {{image_2}} You can easily swap ingredients to fit your taste. Here are a couple of great ideas: - Substitute ground turkey or chicken: This makes the soup leaner and lighter. It still tastes great. - Use vegetable broth for a vegetarian option: This keeps the soup full of flavor while being meat-free. These swaps give your soup a fresh twist, making it fun to try new things. If you love bold flavors, consider these options: - Add jalapeños for heat: This gives the soup a spicy kick. Adjust the amount based on your spice level. - Include different types of beans: You can use pinto beans, kidney beans, or even chickpeas. Each type brings its own taste and texture. By mixing in these variations, you can create a soup that is uniquely yours. Try these ideas to make your Ground Beef Enchilada Soup even more exciting. Check out the Full Recipe for more tips! To keep your Ground Beef Enchilada Soup fresh, store it in the fridge. - Refrigeration tips: Place the soup in an airtight container. It can last for about three to four days. Make sure to cool it to room temperature before sealing. This helps prevent condensation inside the container. - Freezing guidelines: If you want to keep it longer, freeze the soup. Use freezer-safe containers or bags. The soup can last for up to three months in the freezer. When you freeze, leave some space at the top of the container. This allows for expansion as it freezes. Reheating your soup is easy. You want it hot and tasty again. - Best methods for reheating the soup: The best way to reheat is on the stove. Pour the soup into a pot and heat over medium heat. Stir often until it bubbles. You can also use the microwave. Place your soup in a microwave-safe bowl. Heat it on high for two to three minutes. Stop and stir halfway through. This ensures it heats evenly. For best results, always check that it’s hot throughout before serving. How can I make Ground Beef Enchilada Soup spicier? To make your soup spicier, add diced jalapeños or red pepper flakes. You can also increase the chili powder. Start small, then taste as you go. This way, you get the heat you want without going overboard. Can I make this recipe in a slow cooker? Yes, you can! Brown the ground beef and onions first. Then, add all the ingredients to the slow cooker. Cook on low for six to eight hours. It will still taste great and be super easy. How long does the soup last in the fridge? Ground Beef Enchilada Soup will last about three to four days in the fridge. Store it in an airtight container to keep it fresh. If you want to keep it longer, consider freezing it. Can I use canned enchilada sauce instead of homemade? Absolutely! Canned enchilada sauce is a great time-saver. Just check the label for added ingredients. Some brands can be more flavorful than others, so choose one you like. Is Ground Beef Enchilada Soup healthy? Yes, it can be healthy! It has lean ground beef, beans, and veggies. You can also modify the recipe for even healthier options. Use low-sodium broth and skip the cheese if you want. What can I serve with Ground Beef Enchilada Soup? Serve it with tortilla chips for crunch, or a fresh salad on the side. You could also offer some warm bread or cornbread for a cozy meal. For the full recipe, check out the details above. You now have a complete guide for making Ground Beef Enchilada Soup. We covered the key ingredients, step-by-step preparation, and helpful tips to enhance flavor. Don't forget the variations that can keep your meals exciting. Proper storage ensures you enjoy every last drop. Remember, cooking can be fun and easy with the right tools and knowledge. Enjoy sharing this warming dish with friends and family!

If you’re craving a hearty dish that warms the soul, Ground Beef Enchilada Soup is your answer. This easy, flavorful recipe mixes tender beef with zesty spices and fresh veggies. …

Read more

Categories Dinner
Older posts
Newer posts
← Previous Page1 … Page104 Page105 Page106 … Page134 Next →

TOSSED RECIPES

Simple meals, bold taste. Quick recipes made for real life — always fresh, always delicious. 🌿🍴

PAGES

Home About Contact Privacy Policy Terms & Conditions Cookie Policy GDPR Policy Copyright Policy Disclaimer

CATEGORIES

Appetizers Desserts Salads Breakfast Dinner

Contact

  • Pinterest
  • Mail
Copyright © 2026 Tossed Recipes. All rights reserved.