20-Minute Mini Lemon Blueberry Cheesecakes Delight
![To make the 20-Minute Mini Lemon Blueberry Cheesecakes, gather these simple ingredients: - 1 cup graham cracker crumbs - 4 tablespoons unsalted butter, melted - 8 oz cream cheese, softened - 1/2 cup powdered sugar - 1 teaspoon vanilla extract - 1 tablespoon lemon juice - Zest of 1 lemon - 1 cup fresh blueberries - Optional: Fresh mint leaves for garnish Each ingredient plays a key role in creating the perfect balance of flavors. The graham cracker crumbs form a sweet and crunchy base. They pair perfectly with the creamy filling. The butter adds richness, helping the crust hold together. Cream cheese is the star of the cheesecake. It gives a rich and smooth texture. The powdered sugar sweetens the mix just right. Vanilla extract adds depth of flavor. Lemon juice and zest brighten everything up with a zesty kick. Fresh blueberries add a burst of sweetness and color. They contrast nicely with the tart lemon. The optional mint leaves can make your dessert look even prettier. They also add a fresh aroma. This ingredient list makes it easy for you to create a delightful dessert in just 20 minutes. For the full recipe, check out the details above! 1. Preheat your oven to 350°F (175°C). This ensures the crust bakes evenly. 2. Grab a medium bowl. Mix 1 cup of graham cracker crumbs with 4 tablespoons of melted butter. Stir until it looks like wet sand. 3. Line a muffin tin with cupcake liners. Press about 1 tablespoon of the crumb mixture into each liner. Make it firm and even. Bake for 5 minutes. Then, take them out and let them cool. 1. In a large bowl, beat 8 oz of softened cream cheese with an electric mixer. Mix until it is creamy and smooth, with no lumps. 2. Gradually add in 1/2 cup of powdered sugar. Keep mixing until it blends in well. 3. Add 1 teaspoon of vanilla extract, 1 tablespoon of lemon juice, and the zest of 1 lemon. Beat this mixture until it is fluffy. 4. Carefully fold in 1 cup of fresh blueberries. Be gentle so you don’t break them. 1. Spoon the creamy cheesecake filling over the cooled crusts in the muffin tin. Fill each liner nearly to the top. 2. Place the mini cheesecakes in the refrigerator. Let them chill for at least 10 minutes. This helps them set nicely. You can find the full recipe to explore more details and tips. Enjoy making these delightful mini lemon blueberry cheesecakes! To get the best texture for your mini lemon blueberry cheesecakes, start with softened cream cheese. Softening cream cheese makes it easier to blend. This helps you avoid lumps in your filling. Let it sit at room temperature for about 30 minutes before mixing. When folding in the blueberries, be gentle. Use a spatula to lift and turn the mixture. This way, the blueberries stay whole and vibrant. If you stir too hard, they can break apart. To make your cheesecakes look amazing, serve them chilled. Top each cheesecake with a few extra blueberries. Add a sprig of mint for a pop of color. This makes your dessert not just tasty but pretty too! For leftovers, store them in an airtight container. They stay fresh in the fridge for up to three days. If you want to keep them longer, you can freeze them. Just wrap each one in plastic wrap, then place them in a container. This keeps them safe from freezer burn. For the full recipe, check out [Full Recipe]. {{image_2}} You can have fun with these mini cheesecakes by changing the flavors. For instance, try using strawberries or raspberries instead of blueberries. Fresh strawberries add a sweet touch, while raspberries bring a tart flavor. Both fruits pair well with the creamy cheesecake base. Another great option is to swap lemon for lime. Lime gives a bright and zesty twist to the recipe. It offers a fresh taste that is perfect for summer. Just use the same amount of lime juice and zest as you would lemon. Your guests will love this fun and tasty change. If you need a gluten-free option for the crust, use gluten-free graham crackers. They work just as well, and you can enjoy the same great taste without any gluten. Simply crush them as you would with regular graham crackers. For a healthier choice, consider using sugar alternatives. Products like erythritol or stevia can replace powdered sugar. This keeps sweetness but cuts down on calories. Just be sure to use the right amount, as these substitutes can vary in sweetness. You can now enjoy these mini cheesecakes while sticking to your dietary needs. To keep your mini lemon blueberry cheesecakes fresh, proper storage is key. - Refrigeration: Place the cheesecakes in an airtight container. This helps maintain their creamy texture. Store them in the fridge for up to five days. Just make sure they are fully chilled before sealing. - Freezing: If you want to save some for later, freezing works well. Wrap each cheesecake in plastic wrap, then put them in a freezer-safe bag. They can last up to three months frozen. When ready to eat, thaw them in the fridge overnight. How long do these mini cheesecakes last in the fridge? If stored correctly, they stay fresh for about five days. Watch for signs of spoilage. If you see any mold, or the cheesecake smells off, it's best to toss them. Always trust your senses! Fresh cheesecakes should smell sweet and tangy, not sour. For the full recipe, check out the section above. Yes, you can make these cheesecakes ahead of time. Prepare them a day before serving. Just keep them in the fridge. This gives the flavors time to blend well. If you want to prepare the crust early, you can do that too. Just store it in an airtight container until you're ready to use it. This way, you save time on the day of your event. The mini cheesecakes need at least 10 minutes in the fridge to set. For the best results, I suggest chilling them for about 30 minutes. This extra time helps them firm up nicely. A longer chill also improves the taste. Serve them cold for that perfect bite! Yes, you can easily double or halve this recipe. If you double it, use a larger muffin tin or bake in batches. Halving the recipe is also simple. Just divide the ingredients by two. This way, you can adjust to your needs without losing flavor. Use the Full Recipe as a guide for any changes. These mini cheesecakes are a fun and tasty treat. You learned about the key ingredients, the step-by-step process, and helpful tips. You can customize them with different fruits or adjust for dietary needs. Remember to store them properly for the best taste and freshness. These cheesecakes are simple to make and sure to please everyone. Enjoy your delicious creation, and don’t be afraid to get creative with flavors!](https://tossedrecipes.com/wp-content/uploads/2025/06/4df1ac9c-7cb4-4e66-8e10-e9321537538b.webp)
If you’re craving a sweet treat that’s quick and easy, these 20-Minute Mini Lemon Blueberry Cheesecakes are for you! With just a handful of simple ingredients, you can whip up …
If you’re craving a sweet treat that’s quick and easy, these 20-Minute Mini Lemon Blueberry Cheesecakes are for you! With just a handful of simple ingredients, you can whip up …
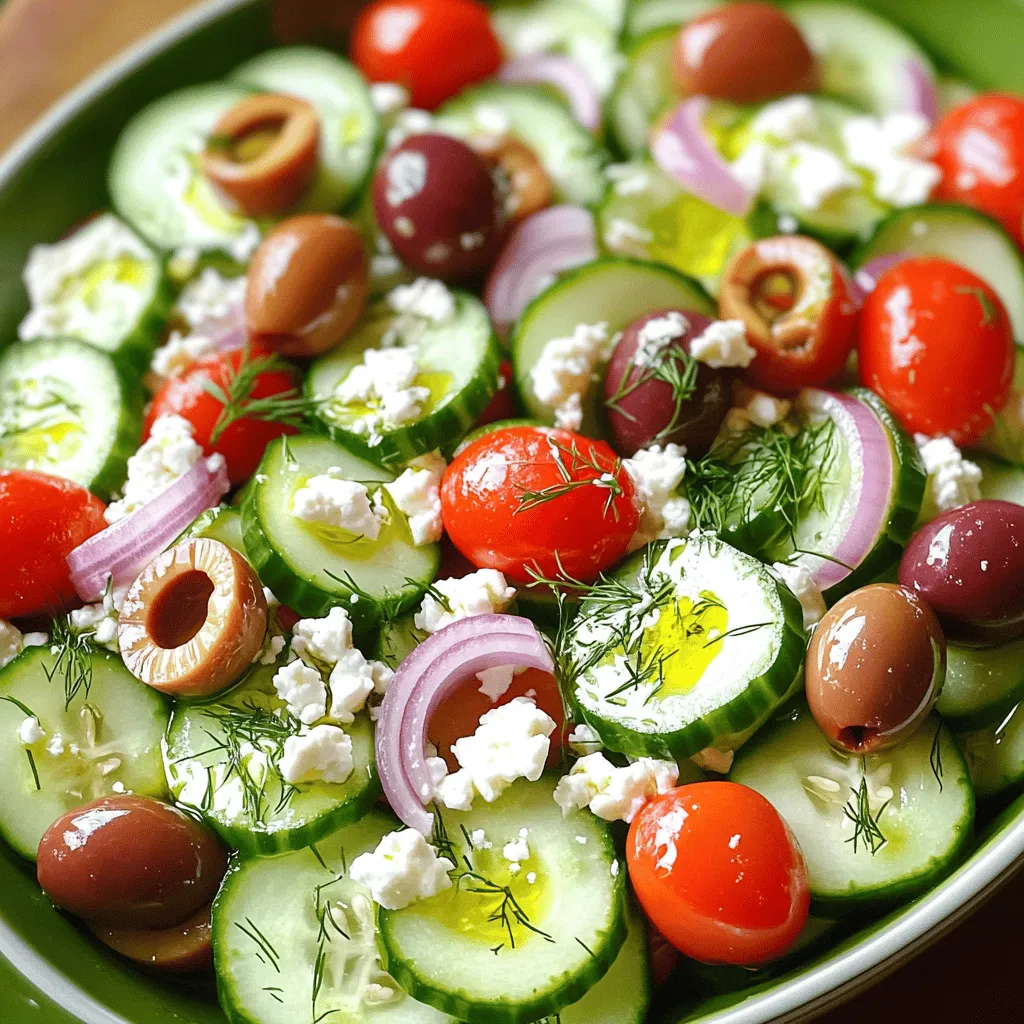
Are you ready to dive into a refreshing dish that bursts with flavor? Cucumber Feta Salad is your go-to option for a light meal or a side. Packed with crisp …
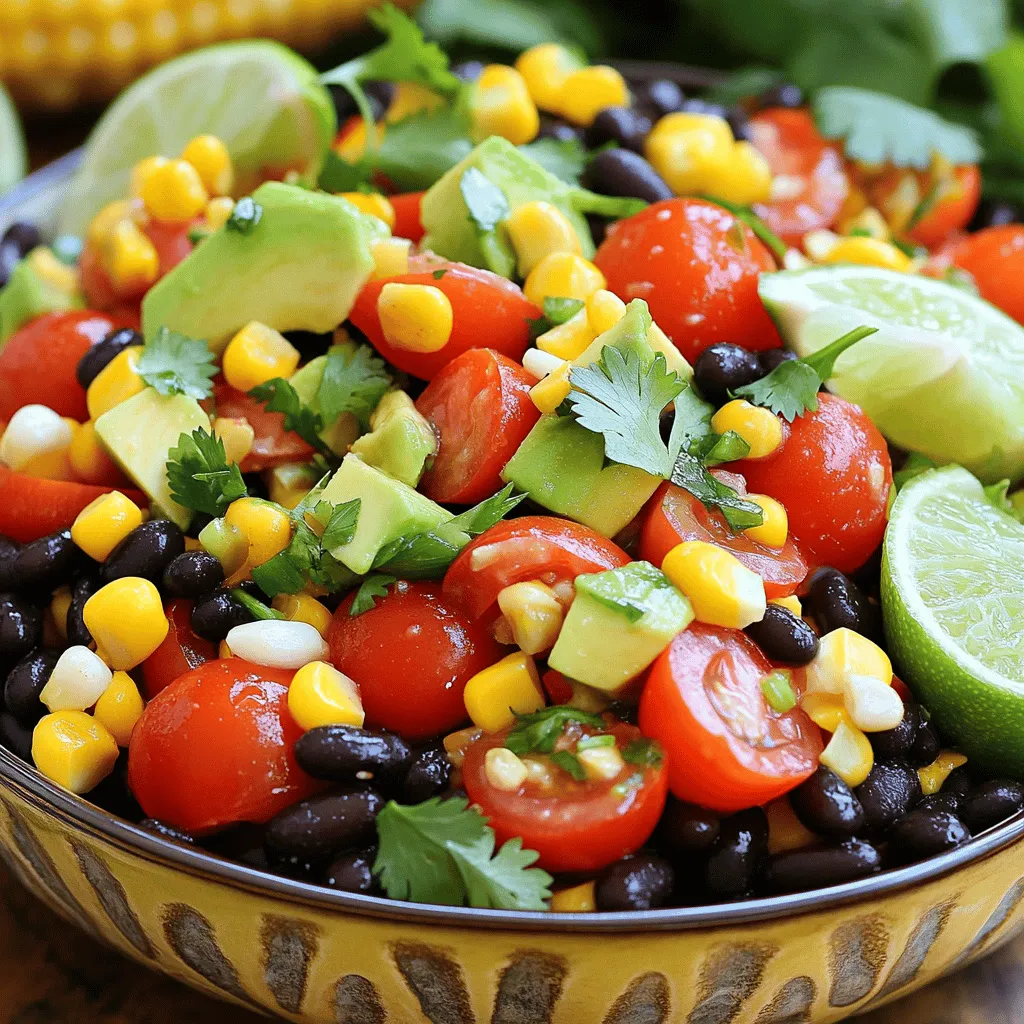
Cowboy Caviar is a fun and colorful dish perfect for any gathering. Packed with black beans, fresh veggies, and zesty lime, this recipe is as healthy as it is tasty. …
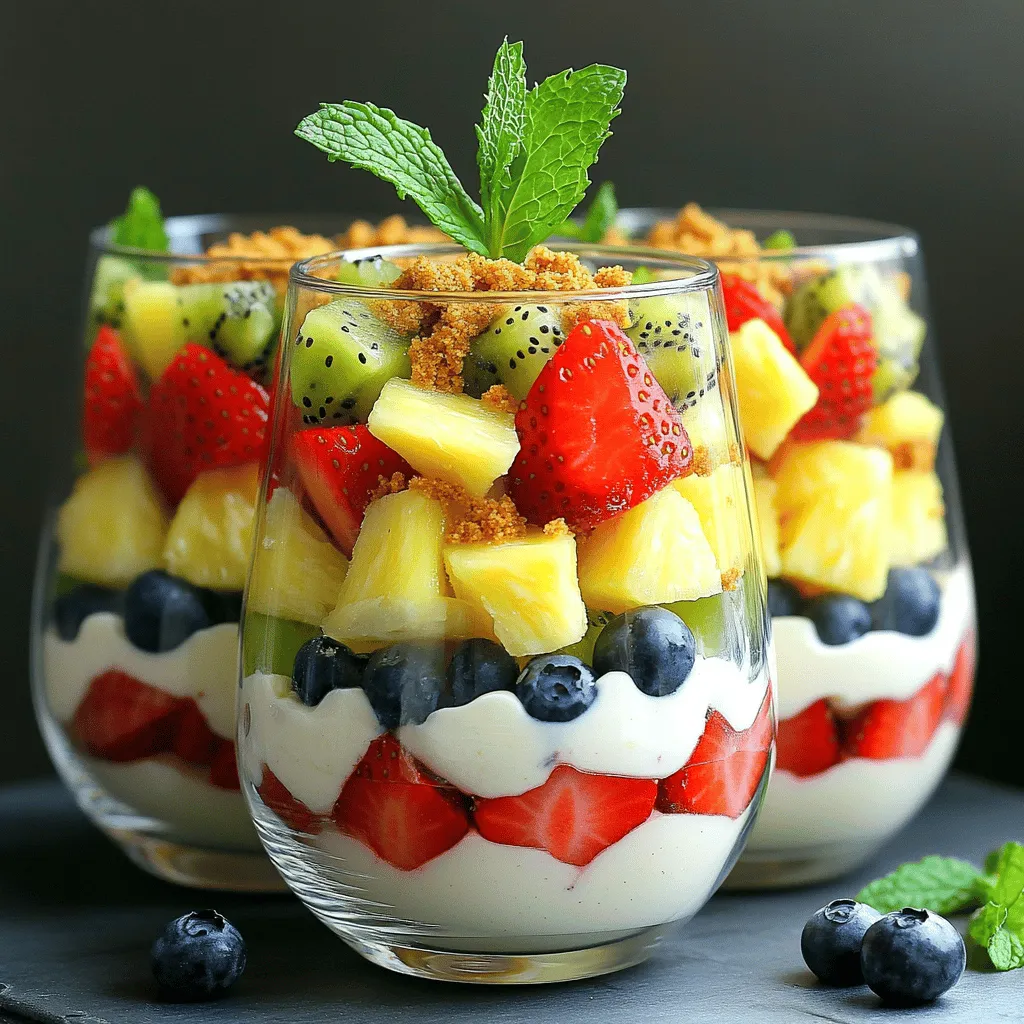
Dive into a world of fresh flavors with my Cheesecake Fruit Salad recipe! This delightful dish brings the creamy taste of cheesecake together with vibrant fruits. Perfect for gatherings or …

Looking for a quick, yummy treat to cool off this summer? This Fruit Salad with Cool Whip is your answer! Mixing fresh fruits with a light, sweet topping brings a …
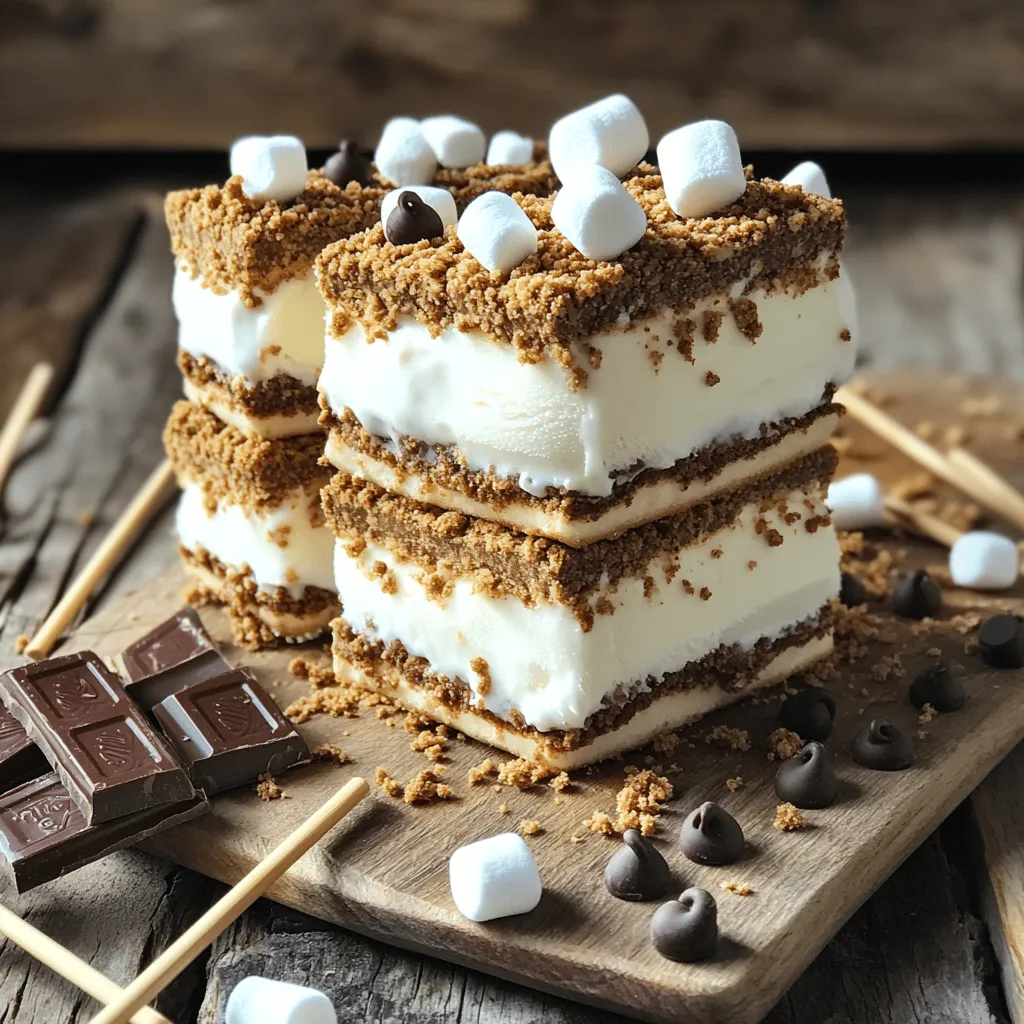
Looking for a fun and tasty treat? You’re in the right place! Frozen s’more sandwiches are a great way to enjoy a classic campfire dessert anytime. With just a few …
![- 1 large head of cauliflower - 1 cup marinara sauce - 1 cup shredded mozzarella cheese - 1/2 cup grated Parmesan cheese - 1 teaspoon garlic powder - 1 teaspoon onion powder - 1 teaspoon Italian seasoning - 1/2 teaspoon red pepper flakes (optional) - Salt and pepper to taste - Fresh basil leaves for garnish Baked Cauliflower Parmesan shines with its simple ingredients. The main star is the cauliflower. Choose a large head for a hearty dish. I love using fresh cauliflower. It gives the best flavor and texture. Next, you need marinara sauce. A cup is the perfect amount to coat the cauliflower. I recommend using your favorite store-bought brand. Homemade can work too, but store-bought saves time. Cheese is key! You'll want one cup of shredded mozzarella and half a cup of grated Parmesan. The mozzarella adds a melty texture, while Parmesan gives a sharp bite. Together, they create a rich layer of flavor. For seasoning, keep it simple. Garlic powder, onion powder, and Italian seasoning bring out the best in cauliflower. A bit of red pepper flakes adds heat if you like spice. Don't forget salt and pepper! These enhance all the flavors. Lastly, fresh basil leaves make a lovely garnish. They add color and freshness to your dish. For the complete recipe, check out the [Full Recipe]. - Preheat the oven to 400°F (200°C). - Prepare a baking dish by greasing it with olive oil or non-stick spray. First, we want to get the oven nice and hot. This step helps the cauliflower cook evenly. Greasing the dish will prevent sticking. You can use a brush or your hands to spread the oil. - Toss cauliflower florets with seasonings in a mixing bowl. - Ensure the cauliflower is evenly coated. Next, take your cauliflower florets and put them in a large mixing bowl. Add garlic powder, onion powder, Italian seasoning, red pepper flakes, salt, and pepper. Mix well. You want every floret to be coated with the spices. This adds flavor and makes each bite delicious. - Spread seasoned cauliflower in the baking dish and bake for 20 minutes. - Add marinara sauce and top with mozzarella and Parmesan cheese. - Bake for an additional 15-20 minutes until cheese is melted and bubbly. Now, spread your seasoned cauliflower in the greased baking dish. Bake it for 20 minutes. This step softens the cauliflower. After that, pour marinara sauce over the cooked cauliflower. Next, sprinkle mozzarella and Parmesan cheese on top. Make sure to cover it well. Return it to the oven for another 15 to 20 minutes. The cheese should be melted and bubbly. Once it's done, you can take it out. If you want, add some fresh basil leaves on top. For the full recipe, check out the details shared earlier. To get the best texture and flavor, start with fresh cauliflower. Choose a large head with firm florets. Cut the cauliflower into even pieces for uniform cooking. This helps all the pieces cook at the same rate. When seasoning, taste as you go. You can add more salt or spices to match your taste. If you love garlic, increase the garlic powder. For a touch of heat, add more red pepper flakes. Remember, balance is key! Baked Cauliflower Parmesan shines when paired with a fresh salad. A simple arugula or spinach salad works great. You can also serve it with crusty bread to soak up the sauce. For presentation, use individual bowls. This makes each serving special. Top with extra Parmesan and fresh basil leaves for color and flavor. One common mistake is overcooking or undercooking the cauliflower. Overcooked florets turn mushy. Aim for a tender texture but keep some bite. Another mistake is not using enough seasoning or cheese. Under-seasoning can lead to bland bites. Don’t be shy to layer on the cheese; it adds richness and flavor. {{image_2}} You can easily make this dish gluten-free. Just swap the store-bought marinara sauce for a homemade version. Use fresh tomatoes, garlic, and herbs. Cook it down until thick. This way, you control the ingredients and flavors. You also avoid any hidden gluten in store sauces. For a vegan take, replace the cheese with vegan cheese options. Look for brands that melt well. You can also use a plant-based marinara. Many brands offer tasty sauces made from veggies and spices. This keeps the dish creamy without any dairy. Want to boost nutrition? Add other veggies or proteins. Spinach or mushrooms work great here. You can also mix in cooked lentils or chickpeas for protein. This way, you get a complete meal in one dish. The flavors blend nicely, making it even tastier. To keep your Baked Cauliflower Parmesan fresh, place leftovers in an airtight container. Make sure to cool the dish to room temperature first. Store it in the fridge for up to three days. This helps retain its flavor and texture. When reheating, I recommend using the oven. Preheat it to 350°F (175°C). Place the dish in an oven-safe container. Cover it with foil to keep moisture in. Heat for about 15-20 minutes until warm. This method keeps the cheese nice and gooey without drying it out. You can freeze Baked Cauliflower Parmesan for later. First, let it cool completely. Cut it into portions and wrap each piece tightly in plastic wrap. Then, place the wrapped pieces in a freezer bag. Label the bag with the date. To thaw, place it in the fridge overnight. Reheat it in the oven as mentioned before. This keeps the dish tasty even after freezing. For the full recipe, check out the main article. Yes, you can use frozen cauliflower. It saves prep time. However, frozen cauliflower has more moisture. This can make your dish a bit watery. To fix this, bake the cauliflower longer. Check for tenderness and cook until it is golden. To spice it up, add more red pepper flakes. You can also mix in some chopped jalapeños. For an extra kick, try a dash of hot sauce in the marinara. These options let you adjust the heat to your taste. This dish pairs well with many sides. Serve it with a fresh salad for crunch. Garlic bread or crusty rolls complement the cheese nicely. For drinks, a light white wine is perfect. You can also try sparkling water with lemon for a refreshing touch. Baked Cauliflower Parmesan makes a tasty dish with simple steps. We covered the key ingredients, seasoning, and baking process. Remember to adjust the flavors to fit your taste. Pair it with fresh sides for a full meal. Avoid common mistakes to make it perfect. Don't forget to try fun variations, like vegan options. Store any leftovers well, so they stay fresh. Enjoy experimenting with your own twists on this recipe and share it with others!](https://tossedrecipes.com/wp-content/uploads/2025/06/b2b7bfbe-da99-466a-9d2a-0f55fd63b7a0.webp)
Are you ready to savor a cheesy delight that will have everyone asking for seconds? Baked Cauliflower Parmesan combines tender cauliflower with rich marinara and gooey cheese, creating a dish …
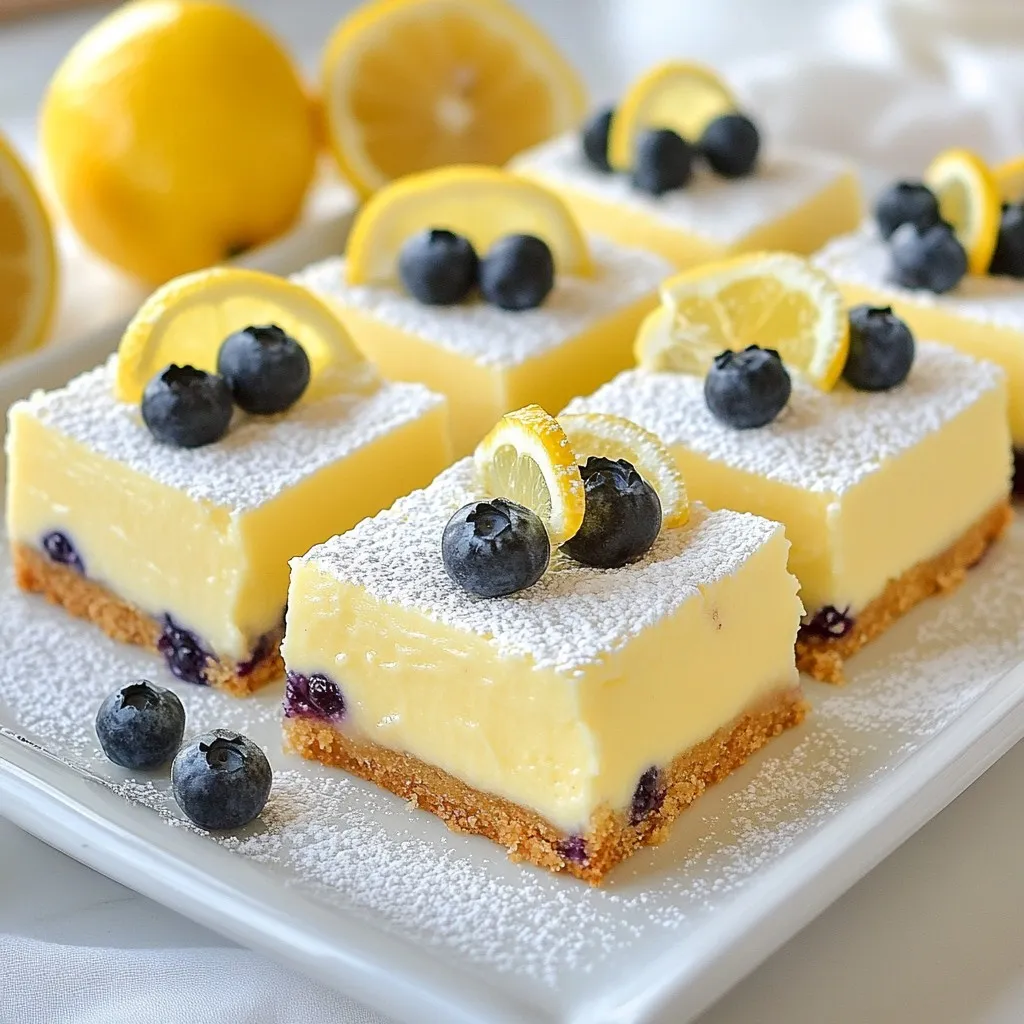
Looking for a sweet treat that’s both tasty and simple? You’re in the right place! These Lemon Blueberry Cheesecake Bars blend refreshing lemon and juicy blueberries into a creamy dessert …
![- 2 slices thick-cut bread (recommended: sourdough or ciabatta) - 1 cup cooked shredded chicken - 1/4 cup buffalo sauce - 1 cup shredded sharp cheddar cheese - 1/4 cup softened cream cheese - 2 tablespoons butter - Optional: 1/4 cup blue cheese crumbles - Optional: sliced green onions for garnish You need thick-cut bread to hold all the tasty layers. Sourdough or ciabatta works best. You want a good crunch when you bite in. Next, cooked shredded chicken brings the heartiness. Mix this with buffalo sauce for that spicy kick. You can adjust the buffalo sauce to your taste. Sharp cheddar cheese adds a rich flavor and melts perfectly. Cream cheese gives a creamy texture. It balances the heat from the buffalo sauce. Butter is crucial for that golden crust. If you like blue cheese, add it for extra flavor. Sliced green onions make a great garnish. They add a fresh touch and color. For the full recipe, follow the instructions carefully to create this mouthwatering sandwich! 1. Combine shredded chicken with buffalo sauce: Start by taking your cooked chicken and shredding it into small pieces. In a bowl, mix the shredded chicken with buffalo sauce. Stir well until each piece is coated. You can adjust the amount of sauce based on your taste. If you like it spicier, feel free to add more! 2. Mix cream cheese with shredded cheddar: In a separate bowl, add the softened cream cheese. Blend it with half of the shredded cheddar cheese. Mix until you get a smooth and creamy texture. This mixture will add richness to your sandwich. 1. Butter the skillet and assemble the sandwich: Heat a skillet over medium heat. Add one tablespoon of butter and let it melt. Take two slices of your thick-cut bread. Spread the cream cheese and cheddar mixture on one side of each slice. On one slice, layer the buffalo chicken mixture evenly. Then, sprinkle the rest of the shredded cheddar on top. If you love blue cheese, add some crumbles now. 2. Cook the sandwich to achieve a golden crust: Place the second slice of bread on top, with the cream cheese side facing down. Carefully place the sandwich in the hot skillet. Cook for 3-4 minutes on one side. Flip the sandwich and add the remaining butter to the pan. Cook the other side for another 3-4 minutes. You want both sides to be crispy and golden brown, with the cheese melted inside. - Tips for slicing and garnishing for presentation: Once your sandwich is ready, let it cool for a minute. Use a sharp knife to slice it in half. For a nice touch, sprinkle some sliced green onions on top for color. - Suggestions for side dishes to pair with the sandwich: This sandwich goes great with a fresh salad or some crispy potato chips. You could also serve it with carrot sticks or celery for a classic buffalo dip vibe. For the complete recipe, check out the [Full Recipe]. To make the best grilled cheese, choose your bread wisely. Thick-cut sourdough or ciabatta works best. These breads hold up to the filling and get nice and crispy when grilled. For even melting of cheese, use a mix of cheeses. Sharp cheddar is great for flavor, but mixing in cream cheese helps it melt smoothly. Spread the cream cheese mixture evenly to ensure a creamy texture in every bite. You can easily adjust the heat of your buffalo sauce. Start with 1/4 cup of sauce, then add more if you want it spicier. Taste as you go to find your perfect balance. If you want a change, consider alternative sauces. Ranch or BBQ sauce can replace buffalo sauce for different flavors. You can also mix sauces for a unique twist. To store leftovers, wrap your sandwich in foil or plastic wrap. Keep it in the fridge for up to three days. When reheating, use a skillet on low heat. This keeps the bread crispy and warms the filling evenly. Cook for about 5-7 minutes on each side. Enjoy your delicious sandwich with the same great taste as when it was fresh! {{image_2}} You can change your Buffalo Chicken Grilled Cheese to make it even better. Try using different cheeses. Pepper jack adds a nice kick, while mozzarella gives a creamy touch. You can also add vegetables. Spinach brings freshness, and jalapeños add heat. If you need gluten-free options, use gluten-free bread. Many brands offer tasty choices. You can also swap chicken for plant-based alternatives. Shredded jackfruit or tofu works well. These swaps keep the flavor but fit different diets. Cooks around the world add their flair to this sandwich. You might find versions inspired by Mexican or Italian flavors. Some local restaurants add unique twists. They might include special sauces or different spices. Each version shows how versatile this dish can be. For the full recipe with all the details, check out the [Full Recipe]. To keep your Buffalo Chicken Grilled Cheese fresh, wrap it tightly in plastic wrap or foil. This helps prevent it from drying out. You can also place it in an airtight container. Storing it this way keeps the flavors intact and the bread from getting soggy. In the refrigerator, your sandwich will stay good for about 3 days. If you want to freeze your Buffalo Chicken Grilled Cheese, here’s how. First, let the sandwich cool completely. Next, wrap it tightly in plastic wrap or aluminum foil. You can also use a freezer bag, squeezing out as much air as you can. Make sure to label it with the date. This method keeps it safe for around 2 months. When you’re ready to eat your frozen sandwich, take it out of the freezer. Let it thaw in the fridge overnight for the best results. To reheat, place it in a skillet over medium heat. Cook for about 5-7 minutes on each side until it's hot and crispy again. Enjoy your tasty sandwich just like fresh! Making this sandwich takes about 20 minutes. You need 10 minutes to prep and another 10 minutes to cook. It’s quick and easy! Yes, you can prep the chicken and cheese mix ahead of time. Store it in the fridge for up to two days. When you’re ready to eat, just assemble and cook the sandwich. For reheating, use a skillet on low heat. This keeps the bread crispy. Pair this sandwich with crunchy sides like carrot sticks or celery. You can also serve it with chips or a fresh salad. For drinks, try soda, lemonades, or a cold beer for a nice touch. To add more heat, use a spicier buffalo sauce. You can mix in some chopped jalapeños or crushed red pepper flakes. For a kick, try adding pepper jack cheese! This makes each bite extra zesty. Buffalo Chicken Grilled Cheese brings bold flavors and sharp cheese. We discussed easy steps to make it: mixing chicken with buffalo sauce, cheese blends, and cooking tips. You can customize it with toppings, tweak the heat, or adjust for dietary needs. Storing and reheating your leftovers is simple too. This dish is a fun twist on grilled cheese, perfect for any meal. Enjoy trying variations and sharing with friends. Dive into your kitchen and make this tasty sandwich today!](https://tossedrecipes.com/wp-content/uploads/2025/06/dbd43ec2-e631-4f32-a703-459b32537300.webp)
If you’re craving a sandwich that packs a punch, you’ve come to the right place! This Buffalo Chicken Grilled Cheese is an amazing mix of gooey cheese and spicy chicken …
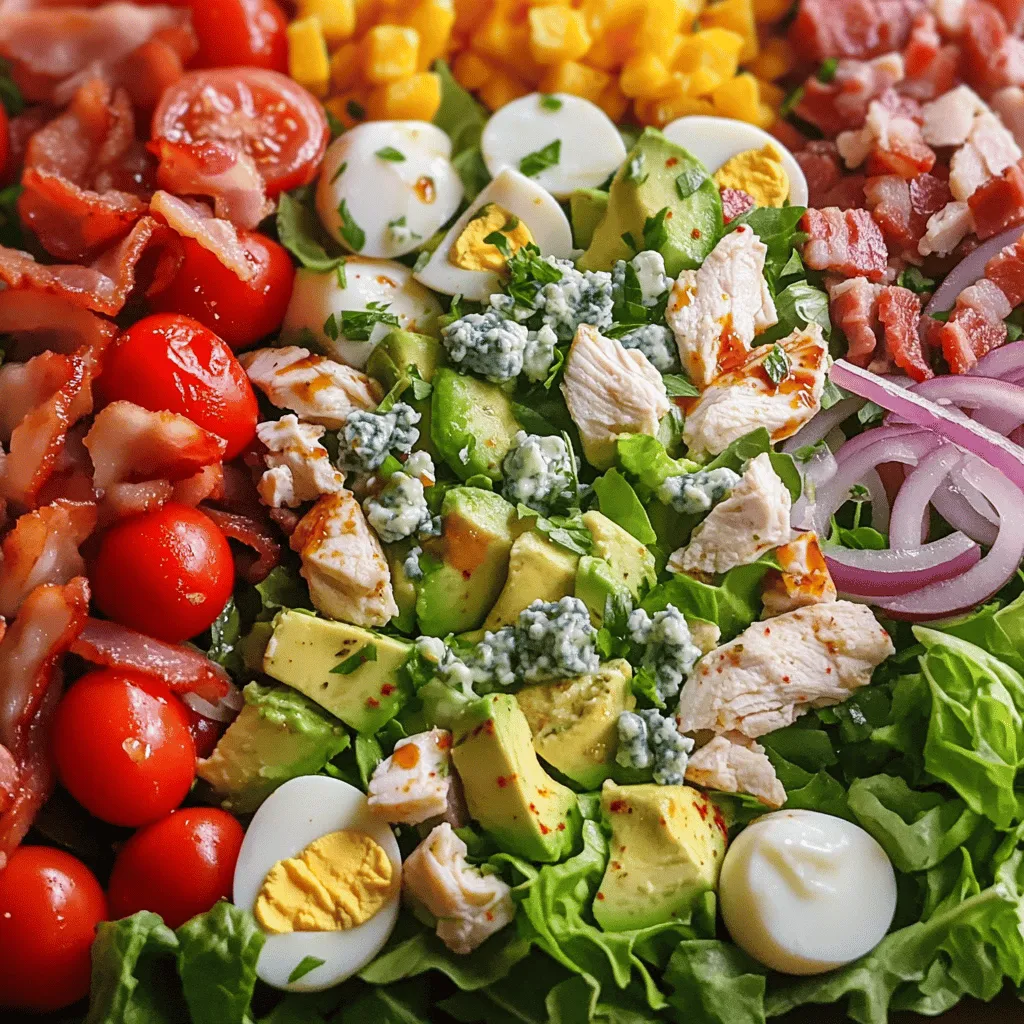
Are you ready to whip up a fresh and flavorful Cobb salad? This delightful dish combines crisp romaine, juicy tomatoes, creamy avocado, and smoky bacon—making it a perfect meal any …