Buffalo Cauliflower Wings Crispy and Flavorful Treat
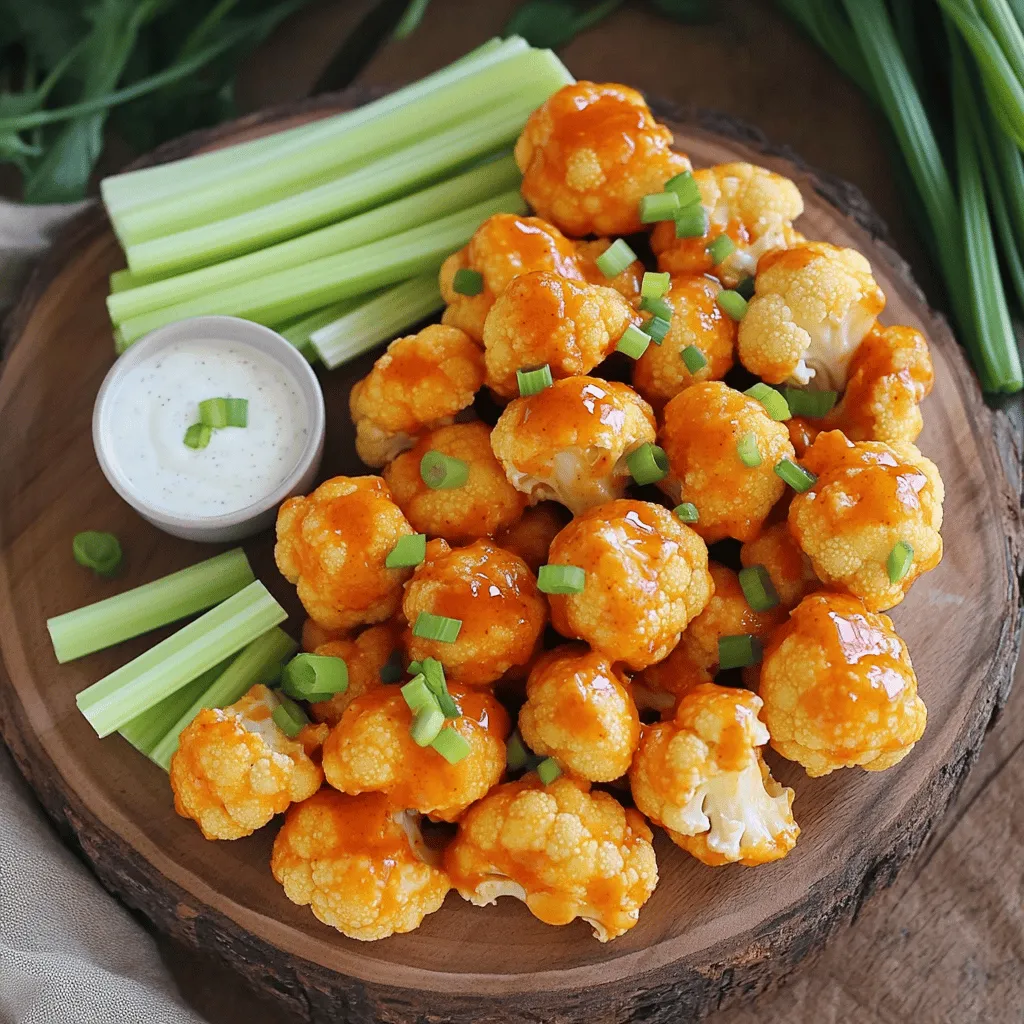
Are you ready to indulge in a tasty treat? Buffalo Cauliflower Wings are crispy, bold, and bursting with flavor. Whether you’re a vegan or simply love veggies, this dish will …
Are you ready to indulge in a tasty treat? Buffalo Cauliflower Wings are crispy, bold, and bursting with flavor. Whether you’re a vegan or simply love veggies, this dish will …

Looking for a tasty veggie snack that’s easy to make? Garlic Parmesan Broccoli Bites are your perfect solution! Packed with fresh broccoli, savory cheese, and a hint of garlic, these …
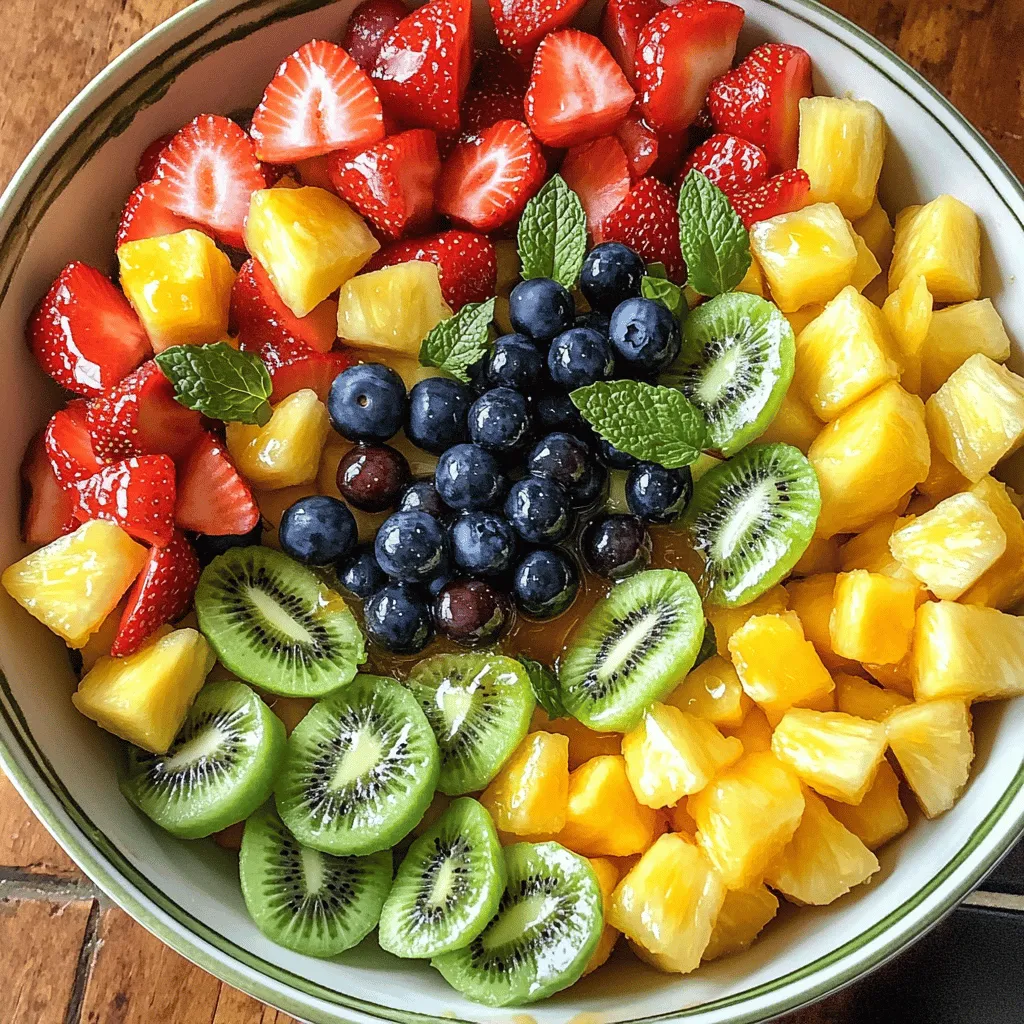
Looking for a fun and tasty dish to impress your guests? This Fruit Salad for A Crowd is a refreshing party delight that will bring smiles all around. With vibrant …
![To make Hawaiian Cheesecake Salad, you need these key ingredients: - 8 oz cream cheese, softened - 1/2 cup granulated sugar - 1 teaspoon vanilla extract - 1 cup crushed pineapple, drained - 1 cup mini marshmallows - 1 cup coconut flakes - 1/2 cup chopped pecans or walnuts (optional) - 1/2 cup whipped cream (for topping) Each ingredient plays a role in creating that creamy, sweet, and tropical flavor. The cream cheese gives it a rich base. The sugar and vanilla add sweetness. Pineapple brings juicy freshness, while marshmallows and coconut give it a fun texture. You can customize your salad with these optional add-ins: - Chopped fresh fruit like bananas or mangoes - A splash of pineapple juice for more flavor - Different nuts such as almonds or macadamia nuts These add-ins can enhance the taste and make the salad more unique. You can mix and match based on what you like best. If you need to make substitutions, here are some ideas: - Use Greek yogurt instead of cream cheese for a lighter option. - Swap granulated sugar for honey or maple syrup. - If you don’t have coconut flakes, try crushed graham crackers. These swaps can keep the essence of the salad while fitting your needs or preferences. Always feel free to get creative! You can find the full recipe for Hawaiian Cheesecake Salad in other sections of this article. To start, gather all your ingredients. You need cream cheese, sugar, vanilla, crushed pineapple, mini marshmallows, coconut flakes, nuts, and whipped cream. Make sure the cream cheese is soft. This makes it easy to mix. You can prepare this salad in just 15 minutes. 1. In a large bowl, beat the softened cream cheese. Use an electric mixer to make it smooth. 2. Gradually add the sugar. Keep mixing until everything blends well. 3. Next, stir in the vanilla extract. Mix again until combined. 4. Gently fold in the drained crushed pineapple. This adds a nice tropical flavor. 5. Now, add the mini marshmallows and coconut flakes. If you like nuts, add them too. 6. Fold everything together carefully. You want it well mixed but not overdone. 1. Transfer the mixture into a serving dish or cups. This makes it easy for serving. 2. Top the salad with whipped cream. This adds a nice touch. 3. Chill the salad in the fridge for at least 1 hour. This helps the flavors blend. 4. Serve it cold. Enjoy this tasty Hawaiian Cheesecake Salad! For more details, check the Full Recipe. To get a creamy and smooth texture in your Hawaiian cheesecake salad, you need soft cream cheese. Start by letting it sit out for 30 minutes. This helps it mix better. Use an electric mixer to beat the cream cheese until it's fluffy. Gradually add in the sugar. Mixing slowly keeps air in the mix, which gives you lightness. When you fold in the fruit and marshmallows, be gentle. This keeps the mixture airy. Serving your Hawaiian cheesecake salad in fun ways makes it more exciting. Use clear cups to show off the layers. You can also use a large bowl for a family-style serving. When you serve, top each cup with whipped cream. Add a sprinkle of coconut flakes and a slice of pineapple to make it look pretty. If you want to be fancy, you can even add a cherry on top! One big mistake is not draining the pineapple well. If you skip this, the salad gets watery. Another mistake is over-mixing when adding the fruit. This can make the salad heavy and less fluffy. Be careful with the sugar too; too much can make it too sweet. Finally, don’t skip the chilling step. Letting it chill for at least one hour helps the flavors blend nicely. For the full recipe, check out the details above. {{image_2}} You can change the fruit in your Hawaiian Cheesecake Salad to fit your taste. Try adding diced mango, kiwi, or even banana. These fruits give a fresh, tropical twist that pairs well with the creamy base. You can also mix in berries for a pop of color. Each fruit adds its own flavor and texture, making your salad unique every time. If you want to switch up the nuts, consider using macadamia nuts or almonds. These nuts add a crunchy texture that contrasts nicely with the creaminess of the salad. You could also leave out the nuts for a nut-free option. For toppings, try adding fresh fruit slices or a drizzle of chocolate syrup. These changes let you customize each serving. The sweetness of your salad can be adjusted easily. If you prefer it less sweet, reduce the sugar to a quarter cup. You can also use honey or maple syrup as a natural sweetener. Just be careful with the amount, as these options can be sweeter than granulated sugar. Taste the mixture before chilling to find the perfect balance that suits your palate. Store any leftovers in an airtight container. This keeps the salad fresh and tasty. If you use a bowl, cover it tightly with plastic wrap. Make sure not to let air in. Refrigeration is the best choice for Hawaiian Cheesecake Salad. Freezing can change the texture. The cream cheese may become grainy when thawed. For best results, keep it in the fridge. When stored properly, the salad lasts about three to four days in the fridge. Keep an eye on it for any signs of spoilage. If it smells off or looks strange, toss it out. Enjoy the fresh taste while you can! For the full recipe, check out [Full Recipe]. Hawaiian Cheesecake Salad is a sweet, creamy treat. It mixes cream cheese, pineapple, and coconut. This salad has a tropical taste that feels like a vacation on a plate. You can enjoy it as a dessert or a fun side dish. The soft texture and fruity flavors make it a crowd-pleaser. You can serve it chilled, making it refreshing on warm days. If you want the full recipe, check it out [here](#). Yes, you can make this salad ahead of time. It tastes even better when it sits. I recommend chilling it for at least one hour before serving. If you make it the day before, that works too. Just cover it well in the fridge. This lets all the flavors blend nicely. It’s perfect for parties or family gatherings. If you want a substitute for cream cheese, try Greek yogurt. It gives a nice creamy texture and tangy flavor. You can also use mascarpone cheese for a richer taste. For a lighter option, consider whipped topping. Just keep in mind that each substitute changes the flavor a bit. Experiment to find what you like best! Hawaiian Cheesecake Salad is easy and fun to make. You learned about its key ingredients, optional add-ins, and substitutions. The step-by-step instructions covered mixing and chilling. I shared tips to ensure the best texture and common mistakes to avoid. You can also explore tasty variations and how to store leftovers properly. Overall, this dish is perfect for any gathering. Enjoy creating your unique version of this tropical delight!](https://tossedrecipes.com/wp-content/uploads/2025/05/86d856ed-6fbd-4e26-8b1c-9fdca7dbe390.webp)
Looking for a fun and tasty dessert? You’ve come to the right place! This Hawaiian Cheesecake Salad is simple to make, and it’s packed with sweet, tropical flavors. Whether you’re …
![- 1 cup mini marshmallows - 1 cup shredded coconut - 1 cup canned mandarin oranges, drained - 1 cup pineapple tidbits, drained - 1 cup fresh strawberries, hulled and sliced - ½ cup chopped walnuts or pecans - 1 cup whipped cream or cool whip - 1 tablespoon honey (optional) - ¼ teaspoon vanilla extract Gather these ingredients before you start. Each one adds flavor and texture. The mini marshmallows give sweetness and a soft bite. Shredded coconut adds a chewy texture and tropical taste. Canned mandarin oranges and pineapple tidbits bring juicy bursts of flavor. Fresh strawberries add a bright, sweet touch. Choose walnuts or pecans based on your taste. They add a nice crunch. Whipped cream or cool whip gives a light, creamy finish. You can sweeten it more with honey and vanilla extract. Using these fresh and canned fruits makes this dish easy. You can find everything at your local store. This recipe invites everyone to enjoy a sweet treat. For the full recipe, follow the instructions carefully to make this delightful Ambrosia Salad. - Step 1: Combine fruit and marshmallows Start by taking a large mixing bowl. Add the mini marshmallows, shredded coconut, mandarin oranges, pineapple tidbits, and sliced strawberries. Mix gently to blend the flavors. This step makes your salad colorful and fun! - Step 2: Add nuts to the mixture Next, fold in the chopped walnuts or pecans. Stir until the nuts are spread evenly throughout the fruit and marshmallow mix. Nuts add a nice crunch to the salad. - Step 3: Prepare whipped cream mixture In another bowl, mix the whipped cream or cool whip. If you like, add honey and vanilla extract for extra flavor. Stir until well combined. This mixture makes the salad creamy and sweet. - Step 4: Combine all ingredients Now, gently fold the whipped cream mixture into the fruit and nut mix. Be careful not to crush the fruit. You want everything coated well and looking lovely. - Step 5: Refrigerate for flavor melding Cover your bowl with plastic wrap. Place it in the fridge for at least one hour. This helps the flavors mix and improves the taste. - Step 6: Final adjustments and serving Before serving, give the salad a gentle stir. Taste it and adjust the sweetness if needed. You can add more honey if you like it sweeter. Now, it’s ready to impress your guests! Enjoy this delightful Ambrosia Salad from the Full Recipe, and savor each bite of this classic dish! - Choosing the best fruits for flavor To make a great Ambrosia Salad, you need fresh and tasty fruits. Use sweet mandarin oranges and ripe strawberries. Pineapple adds a nice zing. Choose fruits that are in season for the best taste. - Tips for achieving the right texture A good salad has both creaminess and crunch. Marshmallows and whipped cream give it a soft feel. Add nuts for a crunchy bite. Make sure to chop nuts small enough to mix well but big enough to enjoy. - How to adequately fold ingredients Folding is key for mixing without mashing the fruit. Use a spatula and gently lift the mixture from the bottom. Turn it over slowly while mixing. This keeps your fruits whole and pretty. - Ideal serving vessels A clear glass bowl is perfect for serving. It shows off the bright colors of the salad. You can also use individual cups for a fun twist. This makes serving easy at parties. - Garnishing for visual appeal Garnish your salad with extra coconut on top. Add a few whole strawberries to make it pop. A sprig of mint can also add a nice touch. - Pairing with main dishes Ambrosia Salad is great next to grilled meats. It complements rich dishes like ham or chicken. Serve it at BBQs or family gatherings for a refreshing side. Explore the [Full Recipe] for more ways to enjoy this delightful dish. {{image_2}} You can make Ambrosia Salad even more exciting by adding different fruits. Try using mango, kiwi, or even pomegranate seeds. These fruits bring unique flavors and colors to the dish. If you want a dairy-free or vegan option, you can swap the whipped cream for coconut cream or a vegan whipped topping. This change keeps the salad creamy without using dairy. For a twist, consider adding a pinch of cinnamon or nutmeg. These spices can give your salad a warm, cozy flavor. In the summer, use fresh berries like blueberries or raspberries. They add a burst of flavor and color that feels refreshing. During the holidays, you can add diced apples or pears. Mixing in some dried cranberries can also create a festive vibe. These seasonal fruits make your Ambrosia Salad perfect for any gathering. For the Full Recipe, follow the exact steps to create a delightful dish that you can customize all year round! To keep your Ambrosia Salad fresh, store any leftovers in a sealed container. I recommend using glass or plastic containers with tight lids. These types of containers help prevent air from getting in and keep the salad crisp. If you plan to serve it later, avoid mixing in the whipped cream until just before serving. This keeps the salad light and fluffy. You should refrigerate your Ambrosia Salad right after making it. It stays good for about three days in the fridge. Always check for signs of spoilage before eating. Look for any changes in color or smell. If it smells off or looks slimy, it’s best to throw it away. Always remember to enjoy your Ambrosia Salad at its best! What is the history of Ambrosia Salad? Ambrosia Salad has roots in the southern United States. It became popular in the 19th century. The name "Ambrosia" means food of the gods. This dish often includes fruits, nuts, and cream. It reflects a mix of cultures and flavors. Can I make Ambrosia Salad in advance? Yes, you can make Ambrosia Salad ahead of time. Prepare it a few hours before serving. This allows the flavors to blend well. Just keep it in the fridge until you serve it. What are some common substitutions in this recipe? You can swap fruits based on what you like. Use grapes or banana instead of strawberries. For nuts, try almonds or sunflower seeds. Yogurt can replace whipped cream for a lighter version. Is Ambrosia Salad healthy? Ambrosia Salad can be a healthy treat. It contains fruits that offer vitamins and fiber. However, it also has sugar and cream. Enjoy it in moderation for a balanced diet. How to make Ambrosia Salad without marshmallows? To make Ambrosia Salad without marshmallows, use extra fruit instead. You can add chopped apples or pears for crunch. A bit of yogurt or whipped cream can keep it creamy. What fruits are traditionally used in Ambrosia Salad? Traditional fruits in Ambrosia Salad include oranges, pineapples, and coconuts. You often see cherries and grapes as well. Choose fruits you enjoy for a personal touch. Can Ambrosia Salad be frozen? Freezing Ambrosia Salad is not recommended. The fruit can become mushy when thawed. It’s best enjoyed fresh after mixing. This blog post covered how to make Ambrosia Salad. We explored the key ingredients you need. You learned step-by-step instructions for preparing the dish. Plus, I shared tips to enhance flavors and textures. We also discussed variations and storage methods. In the end, Ambrosia Salad is fun and versatile. It’s perfect for any gathering or meal. Enjoy your creation and share it with others. You’ll love how easy it is to make and customize!](https://tossedrecipes.com/wp-content/uploads/2025/05/752e5a5d-6401-400f-b4c8-1593f1209e73.webp)
Welcome to your go-to guide for making Ambrosia Salad! This simple recipe blends fruits, nuts, and sweetness into a dish everyone will love. I’ll walk you through the easy ingredients …

Looking for a bold snack to spice up your next gathering? These Spicy Chili Garlic Deviled Eggs are just what you need! With the perfect blend of creamy, zesty, and …

Looking to make a quick and tasty meal? Air fryer salmon is your answer! This dish is crispy and full of flavor. I’ll guide you through each step, from selecting …
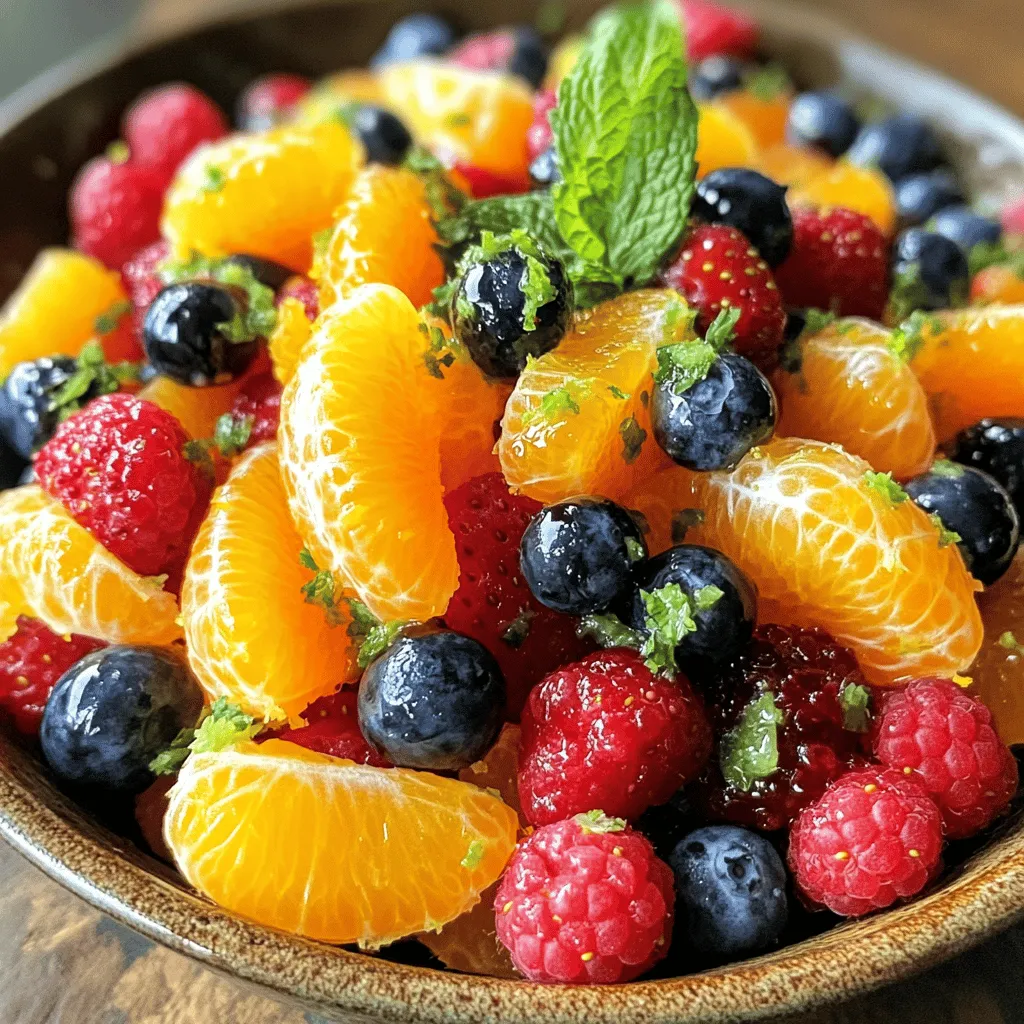
Looking for a refreshing treat? I’ve got the perfect recipe for you: Orange Berry Fruit Salad! This colorful mix of oranges and berries is easy to make and packed with …

Craving a fun and tasty appetizer? Look no further than Bang Bang Cauliflower! This dish is crispy, spicy, and simply irresistible. I’ll guide you through making this delightful snack, perfect …
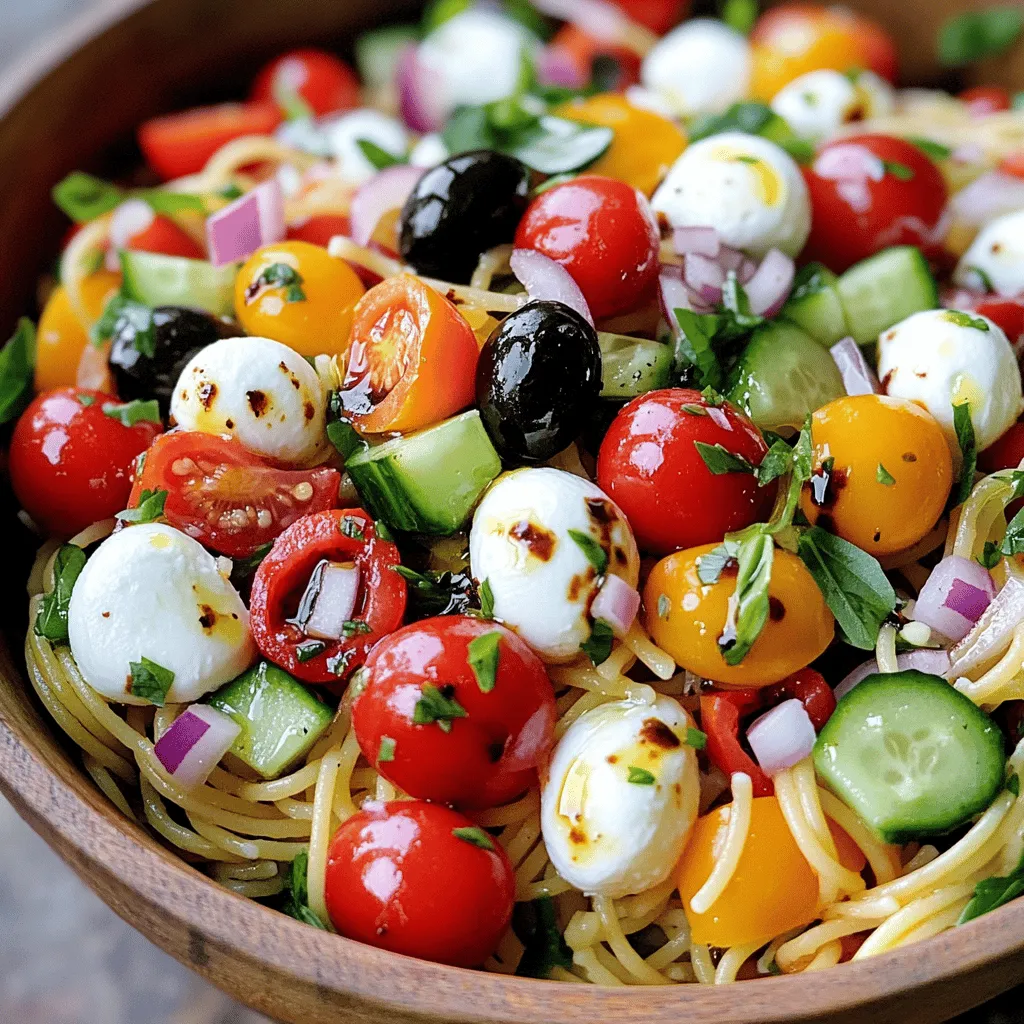
Are you ready to enjoy a meal that bursts with flavor and is easy to make? My Savory Spaghetti Salad is the perfect blend of fresh veggies, creamy mozzarella, and …