Skip to content
Tossed Recipes
  • Home
  • Appetizers
  • Desserts
  • Salads
  • Breakfast
  • Dinner
  • Privacy Policy
  • Contact
  • About

Chef Jamie

Oreo No-Bake Cheesecake Cups Easy Dessert Delight

May 28, 2025 by Chef Jamie
- 1 package (14-16 Oreo cookies, crushed) - 4 tablespoons unsalted butter, melted - 16 ounces cream cheese, softened - 1 cup powdered sugar - 1 teaspoon vanilla extract - 2 cups heavy whipping cream - 12 Oreo cookies, finely crushed for topping - Chocolate syrup (optional for drizzling) - Mixing bowls - Hand mixer - Measuring cups and spoons - Individual cups or jars Gather these ingredients before you start. Each item plays a vital role in creating your Oreo no-bake cheesecake cups. The crushed Oreos provide a rich, chocolatey crust. The cream cheese gives the filling that creamy texture we love. You will need to melt the butter. This helps the cookie crumbs stick together. Make sure the cream cheese is softened. It blends easier and makes the filling smooth. The heavy cream is key for that light, fluffy texture. For the best results, use a hand mixer. It makes it easy to beat the cream cheese and whip the cream. Individual cups or jars are great for serving. They make each dessert look lovely and ready to enjoy. If you want to add a twist, consider the optional chocolate syrup. It makes a great drizzle and adds extra sweetness. Trust me, these little details can elevate your dessert. For the full recipe, check out the complete guide. Enjoy the fun of making this easy dessert delight! To start, gather your crushed Oreo cookies and melted butter. In a medium bowl, combine them well. You want the crumbs fully coated in butter. Next, divide this mixture into individual cups or jars. Press the crumbs down gently to create a solid base. This crust sets the stage for your cheesecake filling. Now, let’s make the filling. In a large mixing bowl, beat the softened cream cheese with a hand mixer. Your goal is to have it smooth and creamy. Slowly add the powdered sugar and vanilla extract. Keep mixing until everything is well blended. This step is key for a sweet, rich flavor. Once your crust is ready, remove the cups from the fridge. Spoon the cheesecake filling over the crust, filling each cup nearly to the top. This creates a lovely layer of creamy goodness. Finish off by sprinkling finely crushed Oreo cookies on top. This adds texture and extra Oreo flavor. Now, it’s time to chill. Cover the cups and place them in the fridge for at least 4 hours. This helps the filling set perfectly. For a fun twist, consider drizzling chocolate syrup just before you serve. It adds a delicious touch that everyone will love. Enjoy the tasty treat! For the full recipe, check out the [Full Recipe]. To get the best cheesecake, you must start with softened cream cheese. If it's too cold, it will not mix well. You want a smooth and creamy mixture. When you whip the heavy cream, make sure to get stiff peaks. Then, gently fold the whipped cream into the cream cheese mixture. This keeps it light and fluffy. A beautiful dessert is a joy to see. Use garnishes like a dollop of whipped cream and a half Oreo on top of each cup. This adds a nice touch. For serving, place the cups on a decorative platter. This makes your dessert stand out even more. If you find the cheesecake too sweet, you can adjust it. Simply lower the amount of powdered sugar. Taste as you go. You can also use less sweet toppings, like fresh fruit or dark chocolate. This way, you can create a balance that suits your taste. {{image_2}} You can change the flavor of your cheesecake cups easily. Try adding a tablespoon of cocoa powder for a richer taste. This small addition can give you a chocolate twist that is hard to resist! You can also experiment with flavored extracts. Almond extract can bring a nice nutty flavor to your cups. Just a little can make a big difference. Toppings can change the whole look and taste of your dessert. Instead of just using more Oreos, you can use crushed candies or fresh fruit. Think about strawberries or raspberries for a fruity touch. Drizzling caramel or berry sauce on top can add a sweet, sticky element. This gives your cheesecake cups a fun and unique style. If you need gluten-free options, it’s easy to adapt this recipe. Simply substitute regular Oreos with gluten-free versions. These cookies taste just as good and keep the right texture. For drizzling, you can use gluten-free melted chocolate. This way, everyone can enjoy these tasty treats without worry. For the full recipe, check the detailed instructions above. Keep your Oreo no-bake cheesecake cups covered in the refrigerator. They stay fresh for up to 3 days. Use an airtight container to keep them safe from other smells. This way, you enjoy every last bite of that creamy goodness. Can the cheesecake cups be frozen? Yes, you can! They freeze well for up to 2 months. To enjoy them later, just thaw in the fridge before serving. This keeps the texture smooth and creamy, just like when you made them fresh. Yes, but it may alter the texture slightly. Low-fat cream cheese can make the filling less rich. If you want a lighter dessert, this is a good choice. They are best consumed within 3 days if stored properly. Keep them in the fridge, covered well. This helps maintain their fresh taste and creamy texture. Yes, substitute dairy ingredients with non-dairy equivalents. Use vegan cream cheese and non-dairy whipped cream. This way, you can enjoy these delicious cups without dairy! This blog post shared a simple recipe for delicious Oreo cheesecake cups. We covered the ingredients, equipment, and easy step-by-step instructions. You learned tips for perfecting texture, presentation ideas, and ways to reduce sweetness. I introduced tasty variations, including alternative toppings and gluten-free options. Finally, we discussed storage tips to keep your treats fresh. Enjoy making these cups for your next gathering. They are sure to impress!

If you’re craving a sweet treat without the fuss, you’re in luck! These Oreo No-Bake Cheesecake Cups are easy to make and oh-so-delicious. I’ll guide you through each step, from …

Read more

Categories Desserts

Pineapple Chicken & Rice Skillet Flavorful One-Pan Meal

January 12, 2026May 28, 2025 by Chef Jamie
To make Pineapple Chicken & Rice Skillet, gather these items: - 1 lb boneless, skinless chicken thighs, cut into bite-sized pieces - 1 cup jasmine rice - 1 can (14 oz) pineapple chunks in juice, drained (reserve the juice) - 1/2 cup bell pepper, diced (any color) - 1/2 cup onion, chopped - 2 cloves garlic, minced - 1 tablespoon soy sauce - 1 tablespoon olive oil - 1 teaspoon ginger, grated - 1/2 teaspoon black pepper - 1/2 teaspoon salt - 1/4 teaspoon red pepper flakes (optional, for heat) - 2 green onions, sliced (for garnish) You can swap ingredients to suit your taste or what you have at home. - Chicken: Use boneless, skinless chicken breasts if you prefer. - Rice: Substitute jasmine rice with basmati or brown rice. - Pineapple: Fresh pineapple can replace canned for a vibrant flavor. - Bell Pepper: Choose any color or use zucchini for a different taste. - Soy Sauce: Use tamari for a gluten-free option. - Ginger: Ground ginger works if you don’t have fresh. Measuring ingredients correctly helps your dish turn out great. - For chicken, cut pieces uniformly for even cooking. - Use a dry measuring cup for rice; fill it without packing down. - When measuring liquid, use a liquid measuring cup for accuracy. - Fresh ginger can be tricky to measure; use a microplane for easy grating. - Keep a teaspoon handy for quick measurement of spices. By following these tips, you can ensure your Pineapple Chicken & Rice Skillet is tasty and well-balanced. {{ingredient_image_1}} To make Pineapple Chicken & Rice Skillet, start by heating olive oil in a large skillet over medium heat. Add chopped onion and diced bell pepper. Sauté them for 3-4 minutes until they soften. Next, stir in minced garlic and grated ginger. Cook for one more minute until you smell the aroma. Now, add the chicken pieces to the skillet. Season with salt, black pepper, and red pepper flakes if you want some heat. Cook the chicken for 5-7 minutes, stirring often, until it's browned and fully cooked. Once the chicken is ready, mix in the jasmine rice. Stir it well to blend with the chicken and veggies. Pour in the reserved pineapple juice, along with 1 3/4 cups of water and soy sauce. Stir again to combine everything. Bring the mixture to a light simmer. Cover the skillet with a lid and let it cook for about 15 minutes. This will help the rice absorb the liquid and become tender. After the rice is cooked, gently fold in the pineapple chunks. Cover the skillet again and let it sit for another 5 minutes. This warms the pineapple. When ready, fluff the rice with a fork and taste it. Adjust any seasoning if needed. Finally, serve hot, topped with sliced green onions for a fresh touch. Sautéing helps bring out the flavors in the onion and bell pepper. It creates a sweet base for the dish. Stirring the chicken often ensures even cooking and browning. Adding the rice before the liquids allows it to soak up flavors during cooking. Covering the skillet traps steam. This cooks the rice perfectly and keeps it moist. Folding in pineapple chunks at the end warms them without cooking them too much. - Use fresh ginger for a brighter taste. - Choose ripe pineapple for natural sweetness. - Adjust the red pepper flakes to control the heat. - Let the dish sit after cooking for more flavor blending. - Garnish with green onions for a fresh crunch. These tips will help you create a delicious and vibrant meal that your family will love. One mistake is not cutting the chicken evenly. If the pieces are too big, they won't cook well. Another mistake is not measuring the water. Too much water makes the rice mushy. Not stirring enough can lead to rice sticking. Also, don’t skip the garlic and ginger. They add a lot of flavor. To cook the rice just right, rinse it first. Rinsing removes extra starch, making it less sticky. Use a ratio of 1 cup rice to 1.75 cups water. This helps the rice absorb enough liquid without being watery. Stir the rice gently when you first add it. Then, cover the skillet and avoid lifting the lid. This keeps the steam in, cooking the rice evenly. You need a large skillet for this recipe. A lid for the skillet is key to trap steam. Use a cutting board and a sharp knife for prepping the chicken and veggies. A measuring cup for the rice and water is also helpful. A spatula or wooden spoon will help you stir the ingredients as they cook. Pro Tips Marinate the Chicken: For extra flavor, consider marinating the chicken thighs in soy sauce and ginger for at least 30 minutes before cooking. This will enhance the overall taste of the dish. Use Fresh Pineapple: If possible, use fresh pineapple instead of canned for a more vibrant flavor and texture. Fresh pineapple can brighten the dish and add a natural sweetness. Adjust the Spice Level: If you prefer a spicier dish, feel free to increase the amount of red pepper flakes or add a dash of hot sauce to the skillet while cooking. Let it Rest: After cooking, let the skillet sit covered for a few minutes before serving. This allows the flavors to meld and the rice to finish cooking perfectly. {{image_2}} You can switch up the chicken for other proteins. Try shrimp, pork, or tofu. Each option gives a new taste. For veggies, use snap peas, carrots, or broccoli. These add color and crunch. Feel free to mix and match to find your favorite combo. You can make this dish in an Instant Pot for a quick meal. Just use the same ingredients but change the steps. Sauté the onion and bell pepper first. Then, add the chicken and cook for about 5 minutes. Next, add the rice, water, and juice. Seal the lid and cook on high for 10 minutes. Let it naturally release pressure. This method saves time and keeps the flavors locked in. Make this dish your own by adding global flavors. Try adding curry powder for an Indian twist. For a Mexican flair, use cumin and lime juice. You can also add soy sauce and sesame oil for an Asian taste. Changing the spices and sauces gives your meal a whole new vibe. Explore different tastes and find what you love! To keep your Pineapple Chicken & Rice Skillet fresh, let it cool first. Transfer the leftovers to an airtight container. Store it in the fridge. It will last for up to three days. If you want to keep it longer, freezing is a great option. When you're ready to eat the leftovers, there are a few ways to reheat. You can use the microwave for quick heating. Place the dish in a microwave-safe bowl. Cover it with a damp paper towel. Heat in short bursts until it’s warm. You can also reheat on the stove. Add a splash of water and heat on low. Stir often to avoid sticking. To freeze your Pineapple Chicken & Rice Skillet, portion it into freezer-safe containers. Make sure to leave some space at the top for expansion. Seal tightly and label with the date. It can be frozen for up to three months. When you're ready to eat, thaw it overnight in the fridge before reheating. This keeps the flavors intact. Pineapple Chicken & Rice Skillet lasts about 3 to 4 days in the fridge. Make sure to store it in an airtight container. This keeps the dish fresh and safe to eat. The flavors will blend even more after a day. You might find it tastes even better! Yes, you can make this dish ahead of time. Cook it fully, then cool it before placing it in the fridge. This makes it easy to reheat later. Just remember to store it properly. This meal is great for meal prep or busy weeknights! Pineapple Chicken & Rice Skillet pairs well with several sides. Here are some ideas: - Steamed broccoli for a healthy crunch - A fresh green salad for added veggies - Crispy egg rolls for a fun twist - A side of fruit salad to keep the tropical vibe These options will add color and flavor to your meal! In this article, we covered all you need for Pineapple Chicken & Rice Skillet. You learned about ingredients, cooking steps, and ways to avoid mistakes. I shared tips for flavor and different serving options. Remember, you can store leftovers well and even freeze them. My final thought: This dish is easy and fun to make. Enjoy cooking and tasting your own version of this meal!

Ready for a fun dinner that sings with flavor? My Pineapple Chicken & Rice Skillet is your ticket to a vibrant, one-pan meal that’s quick and easy! Just imagine tender …

Read more

Categories Dinner

Ingredient Cajun Chicken Pasta Quick and Tasty Meal

November 11, 2025May 27, 2025 by Chef Jamie
You need two boneless, skinless chicken breasts. Slice them into strips for easy cooking. Next, use two tablespoons of Cajun seasoning. This spice mix gives the dish a bold kick. Toss the chicken strips with the seasoning until they are well coated. This step is key to a flavorful meal. For the pasta, I prefer eight ounces of fettuccine. Cook it according to the package instructions until it's al dente. You will also need one cup of heavy cream. This makes the sauce rich and creamy. Chop up one cup of cherry tomatoes and set them aside. Use a bell pepper, either red or yellow, and slice it. Dice one small onion and mince two cloves of garlic. These veggies add color and taste. Lastly, grab one cup of spinach leaves. They wilt nicely into the sauce. For garnishing, have fresh parsley ready and some grated Parmesan cheese. These add a tasty finish to your dish. {{ingredient_image_1}} Start by slicing the chicken breasts into strips. Take a bowl and add the Cajun seasoning. Toss the chicken in the bowl until it is well-coated. This adds a great flavor to your dish. Next, fill a large pot with water and add a pinch of salt. Bring the water to a boil. Once it boils, add the fettuccine pasta. Cook it according to the package instructions until it's al dente. After cooking, drain the pasta and set it aside. Now, grab a large skillet and heat 2 tablespoons of olive oil over medium-high heat. Once hot, add the seasoned chicken strips. Cook them for about 5-6 minutes. Make sure they are browned and cooked through. Remove the chicken from the skillet and set it aside. In the same skillet, add one more tablespoon of olive oil. Toss in the diced onion, sliced bell pepper, and minced garlic. Sauté these veggies for about 3-4 minutes until they soften. This will bring out their natural sweetness. After the veggies are soft, lower the heat to medium-low. Pour in the heavy cream and mix it well. Add the halved cherry tomatoes and spinach. Cook for about 2 minutes until the spinach wilts. Now, return the chicken to the skillet. Add the cooked fettuccine and gently toss everything together. Make sure the pasta is well-coated with the creamy sauce. Season with salt and pepper to taste. Your Cajun chicken pasta is now ready to enjoy! To make your Cajun chicken pop, focus on the seasoning. Use two tablespoons of Cajun seasoning for two chicken breasts. Coat the chicken strips well. You want every bite to have flavor. If you like more heat, add a pinch of cayenne pepper. Taste as you go to find your perfect balance. Cooking pasta correctly is key for texture. Bring a large pot of salted water to a boil. Add the fettuccine and cook until al dente, about 8 to 10 minutes. Al dente means the pasta should be firm, not mushy. Drain the pasta and set it aside but don’t rinse it. This keeps the starch that helps the sauce cling. If you have leftovers, store them right to keep them fresh. Let the pasta cool down first. Then, place it in an airtight container. It will last in the fridge for up to three days. To reheat, use a skillet over low heat with a splash of cream to revive the sauce. Enjoy your meal again without losing flavor! Pro Tips Perfectly Cooked Pasta: Always cook pasta until al dente for the best texture. It will continue to cook slightly when mixed with the sauce. Customize Your Spice Level: Adjust the amount of Cajun seasoning to suit your preference. For a milder dish, reduce the seasoning or use a milder blend. Fresh Ingredients Matter: Use fresh vegetables and herbs when possible for the best flavor. Fresh spinach and ripe tomatoes make a significant difference. Let It Rest: After cooking, let the dish rest for a few minutes before serving. This helps the flavors meld together. {{image_2}} You can swap out chicken for many proteins. Shrimp works well. Just add them to the skillet after the veggies. Cook until they turn pink. You can also use sausage for a heartier dish. Slice it up and sauté it with the chicken. For a lighter option, try using tofu. It soaks up flavors well. If you want a meatless dish, make some easy swaps. Use mushrooms instead of chicken for a savory taste. Zucchini noodles can replace pasta for a low-carb meal. You can add extra veggies like bell peppers and carrots to give it a boost. Spinach and cherry tomatoes still fit perfectly in this mix. The cream sauce can change based on your taste. For a tangy kick, add lemon juice and zest. A touch of garlic powder can enhance the flavor too. If you want a smoky taste, smoked paprika is a great choice. For a lighter sauce, use half-and-half instead of heavy cream. This keeps the dish creamy but not too rich. Store any leftover Cajun chicken pasta in an airtight container. This keeps it fresh and safe to eat. You can refrigerate it for up to three days. When ready to eat, check for any changes in smell or color. If everything looks good, it's ready to go! You can freeze Cajun chicken pasta for longer storage. First, let the pasta cool completely. Then, place it in a freezer-safe container or bag. Remove as much air as possible to prevent freezer burn. It will last up to three months in the freezer. When you're ready to enjoy it, thaw overnight in the fridge. Reheat the pasta on the stovetop for the best taste. Add a splash of cream or water to keep it moist. Heat over medium-low, stirring often until warmed through. You can also use the microwave. Place it in a microwave-safe bowl and cover with a damp paper towel. Heat in 30-second intervals, stirring in between, until hot. Enjoy your meal just like the first time! Yes, you can make Cajun chicken pasta ahead of time. Cook it, cool it, and store it in the fridge. Just keep the sauce and pasta separate until you heat it up again. This helps keep the pasta from getting mushy. When you want to eat, reheat it on the stove or in the microwave. Add a splash of cream to bring back the sauce's richness. If you want a lighter option, use half-and-half instead of heavy cream. You can also use coconut milk for a dairy-free choice. Another option is to blend silken tofu with a little water for a smooth texture. Each option changes the flavor slightly, so pick what suits your taste. To tone down the heat, use less Cajun seasoning. You can also add more cream or milk to balance the spice. Adding sweet bell peppers or tomatoes can help, too. They add sweetness and reduce the spicy taste. Enjoy your meal without the burn! Cajun Chicken Pasta combines savory chicken, flavorful spices, and rich cream. You learned how to prepare it step-by-step and master key tips. Remember to store leftovers well for later meals. Feel free to get creative with proteins or make it vegetarian. Enjoy your cooking and taste this delight!

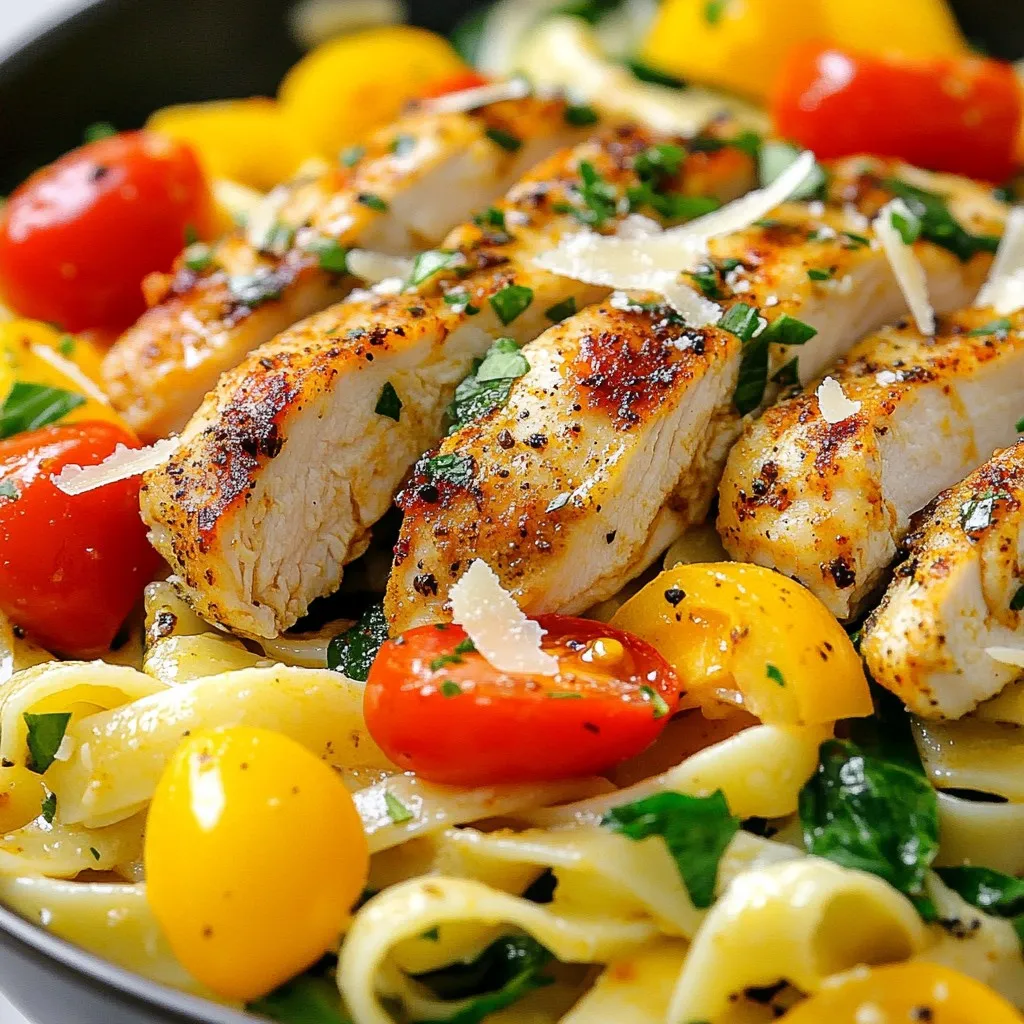
Looking for a quick and tasty meal? Cajun Chicken Pasta might be your new go-to! With tender chicken, flavorful spices, and creamy sauce, this dish is a delight. I’ll guide …

Read more

Categories Dinner

Blueberry Peach Feta Salad Fresh and Flavorful Delight

May 27, 2025 by Chef Jamie
- Baby spinach - Ripe peaches - Fresh blueberries - Red onion When making the Blueberry Peach Feta Salad, fresh produce is key. Start with baby spinach. This leafy green adds a nice crunch and is packed with vitamins. Next, use ripe peaches. Their sweet flavor pairs well with the tangy feta. Fresh blueberries are a must, too. They bring a burst of juicy flavor. Lastly, include red onion. It adds a bit of sharpness to balance the sweetness. - Feta cheese - Pecans For the creamy element, feta cheese is perfect. Its salty flavor contrasts beautifully with the sweet fruits. I like to crumble it over the salad to spread the taste evenly. Pecans add a delightful crunch. Their nutty flavor complements the other ingredients and adds a nice texture. - Balsamic vinegar - Olive oil - Honey - Salt and pepper The dressing is where the magic happens. Start with balsamic vinegar. It brings a sweet and tangy taste to the salad. Olive oil adds richness and helps blend the flavors well. Honey is a great touch, adding a subtle sweetness. Finally, season with salt and pepper to taste. This simple dressing ties all the flavors together perfectly. For the full recipe, check out the detailed steps included. To make the dressing, I start with a small bowl. I add balsamic vinegar, olive oil, honey, salt, and pepper. Then, I whisk all the ingredients together. This step is important for blending the flavors. You want a smooth and tasty dressing. The sweetness of honey balances the tang of vinegar. Next, I grab a large salad bowl. I begin by adding fresh baby spinach as the base. This green adds color and nutrition. Then, I layer the salad with ripe peach slices. The peaches bring a juicy sweetness. After that, I sprinkle fresh blueberries over the top. Their burst of flavor adds a nice touch. Finally, I crumble feta cheese on the salad. This creamy cheese adds a salty contrast. Now for the final touches! I add thinly sliced red onion for a bit of sharpness. Then, I toss in the roughly chopped pecans for crunch. These nuts add texture and flavor. Next, I drizzle the prepared dressing over the salad. I make sure to cover everything evenly. Lastly, I toss the salad gently. This helps combine all the ingredients without squishing the fruit. I taste the salad and adjust the seasoning if needed. For the full recipe, check out the detailed steps and enjoy! Serve your salad in individual bowls for a nice touch. This makes each serving special. You can add a few extra blueberries and a sprinkle of feta on top. This garnishing adds color and makes the dish look great. To keep your salad fresh, choose ripe peaches and blueberries. Look for peaches that are slightly soft to the touch. They should smell sweet and fragrant. For blueberries, pick ones that are firm and dark blue. Avoid any that are mushy or shriveled. Fresh fruit makes a big difference in taste. You can customize the dressing to fit your taste. If you want more sweetness, add a bit more honey. For a tangier taste, increase the balsamic vinegar. You can also add herbs like basil or mint to give it a fresh twist. Mix and match until you find your favorite flavor. For the full recipe, check out the Blueberry Peach Feta Salad. {{image_2}} When summer fades and fall arrives, you can change the fruit in your salad. In summer, ripe peaches and fresh blueberries shine bright. As fall comes, switch to crisp apples and juicy pears. Both options keep your salad fresh and tasty all year long. You can also add nuts or seeds for a crunch. This change adds depth and new flavors to your dish. Not everyone can enjoy feta cheese. For a vegan option, simply leave out the feta. You can replace it with avocado for creaminess. This keeps the salad rich and delicious. If you need a gluten-free dish, rest easy. All ingredients in this salad are naturally gluten-free. Just ensure any added dressings are also gluten-free. This salad is versatile. You can add other fruits to make it your own. Strawberries and raspberries are great choices. They add a tartness that balances the sweet peaches and blueberries. Try mixing in these fruits for a colorful and tasty twist. Each fruit brings its own unique flavor, making every bite exciting. Store any leftover Blueberry Peach Feta Salad in an airtight container. This keeps the salad fresh. Make sure to add the dressing only when ready to eat. This keeps the greens crisp and tasty. In the fridge, the salad lasts about three days. The fruit may get soft after a day or two. Check for freshness before you eat it. If the salad looks or smells off, it's best to toss it. You can prep the salad in advance to save time. Wash and slice the peaches and blueberries a day ahead. Store them in separate containers. You can also mix the dressing and keep it in the fridge. Just remember to add everything together when you are ready to serve. This keeps the salad fresh and flavorful. For the full recipe, check out the Blueberry Peach Feta Salad 🥗 recipe above. You can prep the ingredients a day before. Keep the spinach separate. Slice the peaches and store them in lemon juice to stop browning. Rinse and dry the blueberries. Crumble the feta cheese and store it in an airtight container. You can also mix the dressing and keep it in the fridge. When ready to serve, combine everything in a bowl and drizzle the dressing. This way, your salad stays fresh and crisp. If you want a different cheese, try goat cheese or ricotta. For dairy-free options, use vegan feta or nut cheese. You can also skip cheese altogether for a lighter salad. Each option adds a unique flavor to the dish, so choose what you like best. You can use frozen blueberries, but they will change the salad's texture. They may be softer and juicier than fresh ones. If you use them, let them thaw in the fridge first. This helps keep the salad from getting too watery. The flavor will still be good, but fresh blueberries are best for crunch. You can try a honey mustard dressing for a sweet twist. A yogurt-based dressing adds creaminess. For a citrus flavor, mix orange juice and olive oil. A spicy vinaigrette can also give a kick. Feel free to experiment with what you have on hand to find your favorite. Check out the Full Recipe for the original dressing idea. This blog post covers a delicious Blueberry Peach Feta Salad. We explored fresh ingredients like baby spinach, ripe peaches, and blueberries. I shared steps to prepare the dressing and assemble the salad, plus tips to ensure freshness. You learned about variations for different diets and how to store leftovers. Embrace creativity with your salad-making, and don’t hesitate to adjust flavors. Enjoy fresh meals that nourish your body, no matter the season.

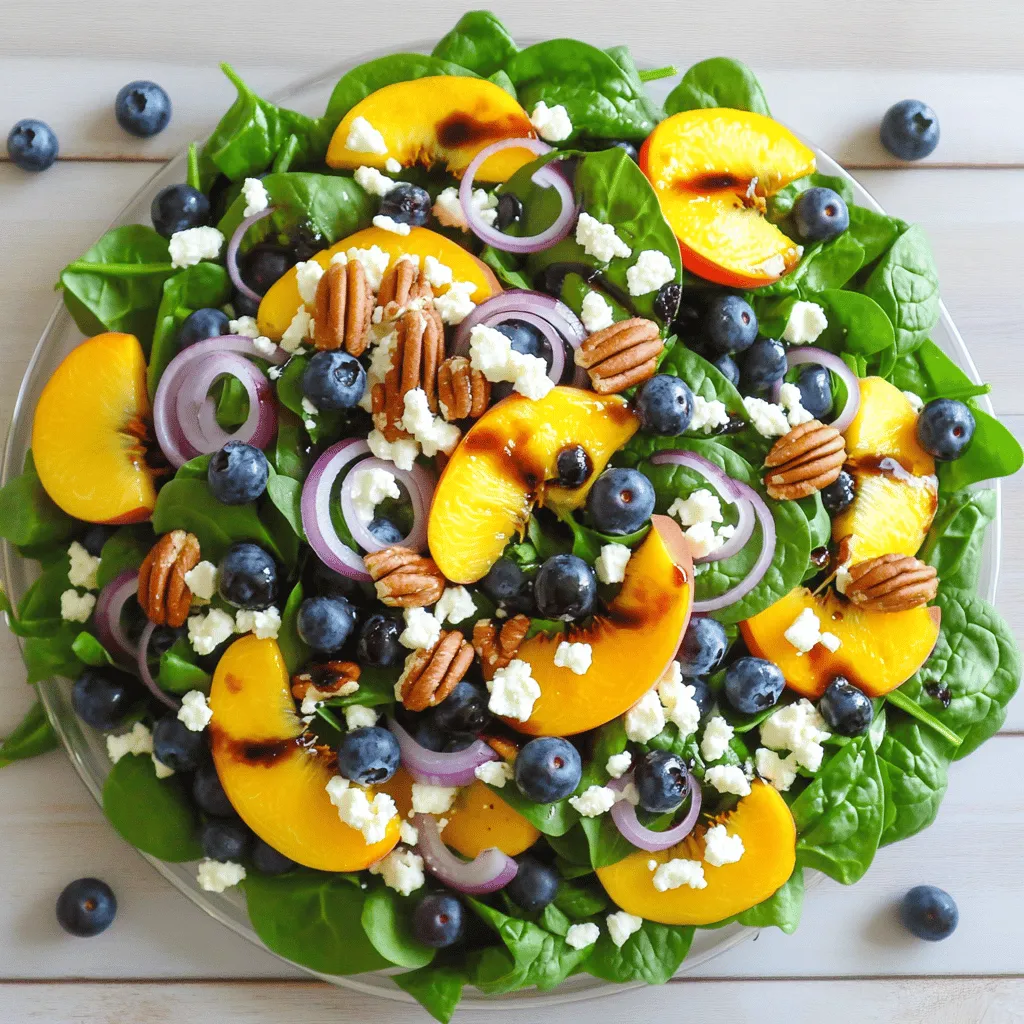
Are you ready for a fresh and tasty treat? This Blueberry Peach Feta Salad combines sweet peaches and juicy blueberries with creamy feta for a perfect mix. Think of baby …

Read more

Categories Salads

Honey Peach Cream Cheese Cupcakes Delightful Treat

May 27, 2025 by Chef Jamie
These cupcakes need fresh flavors. Here’s what you will need: - 1 ½ cups all-purpose flour - 1 cup granulated sugar - ½ teaspoon baking powder - ½ teaspoon baking soda - ¼ teaspoon salt - ½ cup unsalted butter, softened - 2 large eggs - 1 teaspoon vanilla extract - ½ cup sour cream - 1 cup fresh peaches, diced - 4 oz cream cheese, softened - ⅓ cup honey - 1 teaspoon ground cinnamon Each ingredient plays a role. The flour gives structure. The sugar adds sweetness. Butter brings moisture and richness. Eggs help bind everything together. The peaches provide a juicy burst. If you need to change some ingredients, here are some ideas: - Use whole wheat flour for a healthier choice. - Swap granulated sugar for brown sugar for a richer taste. - You can use Greek yogurt instead of sour cream. - If you do not have fresh peaches, canned peaches work too. Make sure to adjust the amounts if you change any item. The texture might change, but the taste will still be delightful. To make your cupcakes even more special, consider these garnishes: - A slice of fresh peach on top. - A drizzle of honey for extra sweetness. - A sprinkle of ground cinnamon for a warm spice note. These small touches add beauty and flavor. They make your Honey Peach Cream Cheese Cupcakes shine even more. Enjoy every bite! For the full recipe, check the details above. First, preheat your oven to 350°F (175°C). This step is key for even baking. Next, take a 12-cup muffin tin and line it with cupcake liners. This makes for easy removal and clean-up after baking. In a large mixing bowl, combine the dry ingredients. Whisk together 1 ½ cups of all-purpose flour, ½ teaspoon baking powder, ½ teaspoon baking soda, and ¼ teaspoon salt. This mix gives the cupcakes their structure. Set this bowl aside for later use. Now, take another bowl for the wet ingredients. Start by creaming ½ cup of softened butter and 1 cup of granulated sugar. Use an electric mixer on medium speed. Mix for about 3-4 minutes until the mixture looks light and fluffy. This step adds air, which helps make the cupcakes rise. Next, add 2 large eggs, one at a time, mixing well after each. Then, mix in 1 teaspoon of vanilla extract and ½ cup of sour cream. Blend until smooth. Gradually add the dry mix to the wet mix. Stir until just combined. Be careful not to over-mix; this keeps the cupcakes light. Gently fold in 1 cup of diced peaches and a sprinkle of 1 teaspoon ground cinnamon. Use a spatula to make sure they are even. Fill each cupcake liner about 2/3 full with the batter. Bake in the preheated oven for 18-20 minutes. To check if they are done, insert a toothpick in the center. It should come out clean. Once baked, let them cool before adding frosting. For the full recipe, check below. To make your cupcakes light and fluffy, start with room temperature butter and eggs. This helps them blend well. When you cream the butter and sugar, mix until it is pale and fluffy. This can take about 3-4 minutes. Avoid over-mixing the batter after adding flour. Just mix until everything is combined. This keeps the cupcakes tender. When adding peaches, be gentle. Use a spatula to fold them in. This keeps the peaches from breaking apart. If you want a peachy surprise in every bite, make sure they are evenly spread. Don't stir too hard; you want to keep that fluffy batter intact. For the frosting, use softened cream cheese. This makes it smooth and easy to spread. Mix the cream cheese and honey until creamy. If you want a thicker frosting, add more cream cheese. For a fun twist, add a pinch of cinnamon to the mix. It pairs well with the peach flavor. Once the cupcakes cool, frost them generously. You can use a piping bag for a fancy look. For the best taste, frost just before serving. Check out the Full Recipe for more tips! {{image_2}} You can add fun flavors to your cupcakes. Nuts like walnuts or pecans bring a nice crunch. Spices like nutmeg or ginger can add warmth and depth. Try mixing in chocolate chips for a sweet twist. Each addition can change the flavor and texture. Experiment until you find your favorite combo! The honey cream cheese frosting is tasty, but feel free to mix it up. Whipped cream gives a light, airy touch. You can also use flavored creams, like vanilla or almond, to enhance the taste. For a fruity twist, try adding peach puree to your frosting. Each option opens up new flavor paths. You can make these cupcakes fit different diets. For gluten-free cupcakes, swap all-purpose flour with a gluten-free blend. Make sure the blend has a good structure for baking. If you need a vegan option, replace eggs with flax eggs or applesauce. Use vegan butter and cream cheese for the frosting. These tweaks keep flavor while meeting your needs. For the Full Recipe, check out the steps to make these delightful treats! To keep your leftover Honey Peach Cream Cheese Cupcakes fresh, store them in an airtight container. This helps lock in moisture. You can keep them at room temperature for one day. If you need more time, place them in the fridge for up to five days. Just remember, the frosting may firm up in the fridge. If you have extra cupcakes, freezing is a great option. First, let the cupcakes cool completely. Then, wrap each cupcake tightly in plastic wrap. Place them in a freezer-safe bag or container. You can freeze them for up to three months. To enjoy, thaw them overnight in the fridge before serving. Frosted cupcakes need special care. To keep your frosted Honey Peach Cream Cheese Cupcakes fresh, store them in the fridge. Use an airtight container to avoid drying. If you want to freeze frosted cupcakes, place them in the freezer for a few hours until the frosting sets. After that, wrap them carefully, as mentioned above. This way, your cupcakes stay tasty and pretty! To make your cupcakes sweeter, you can add more honey or sugar. Try using 1/3 cup of honey in the cream cheese frosting. You can also sprinkle extra sugar on top, right before baking. This extra touch caramelizes and gives a nice crunch. Yes, you can use canned peaches. Just make sure to drain them well. Canned peaches can be softer, so chop them into small pieces. This will help them blend in better with the batter. Fresh peaches do have a brighter flavor, so keep that in mind. For decoration, pipe the honey cream cheese frosting high on each cupcake. You can add a slice of fresh peach on top. A drizzle of honey adds shine and taste. For a fun touch, sprinkle some cinnamon on top for warmth and flavor. These cupcakes stay fresh for about 3 to 4 days in the fridge. Keep them in an airtight container to keep them moist. If you want to keep them longer, you can freeze them. Just place them in a freezer-safe container or wrap them well. For the full recipe, check out the ingredients and instructions above. It’s simple and fun to make! You learned how to make Honey Peach Cream Cheese Cupcakes. We covered ingredients, measurements, and tips for baking. I shared ways to store your treats and answered some common questions. These cupcakes are delicious and versatile. You can mix flavors and adjust for dietary needs. With practice, you'll perfect this sweet treat. Enjoy baking, and share them with friends!

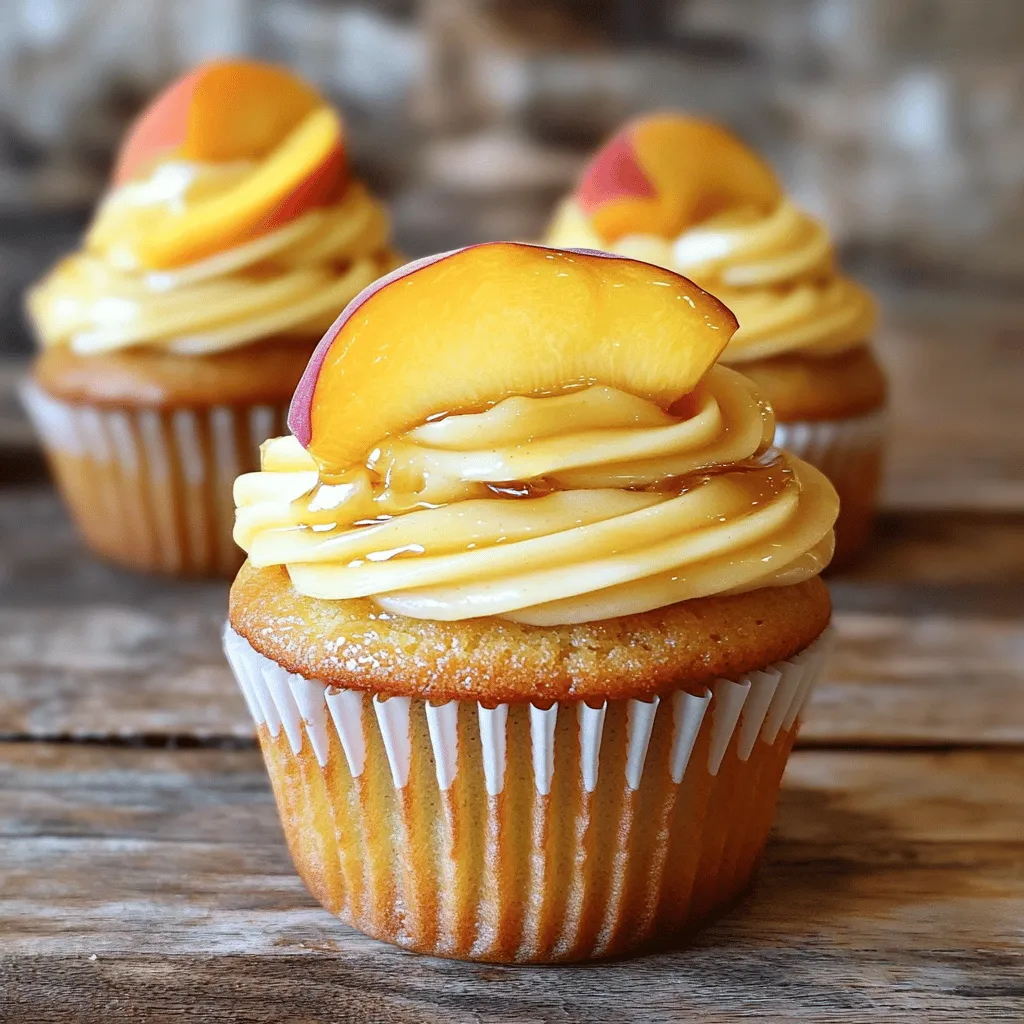
Get ready to indulge in a flavor explosion! My Honey Peach Cream Cheese Cupcakes are a delightful treat perfect for any celebration. These sweet, fluffy cupcakes blend ripe peaches with …

Read more

Categories Desserts

Birthday Snack Board Delightful and Fun Ideas

May 27, 2025 by Chef Jamie
To make a great birthday snack board, you need some key ingredients. Here’s what I recommend: - 1 cup assorted nuts (almonds, cashews, walnuts) - 1 cup bite-sized cheeses (cheddar, gouda, mozzarella) - 1 cup fresh fruits (grapes, strawberries, apple slices) - 1 cup colorful vegetables (carrot sticks, cucumber slices, bell pepper strips) - 1/2 cup hummus or dip (roasted red pepper hummus or tzatziki) - 1 pack of assorted crackers - 1/2 cup dark chocolate squares or chocolate-covered pretzels - Edible flowers (optional, for garnish) These items create a tasty mix. They are easy to find. They also add color and fun to your board. Want to take your snack board up a notch? Here are some fun ideas: - Dried fruits like apricots or cranberries for sweetness - Spiced nuts for a crunchy kick - Various dips, like guacamole or ranch, for more options - Fresh herbs like basil or mint for a pop of flavor These extras can make your board more exciting. Feel free to mix and match based on what you like. Choosing quality ingredients makes a big difference. Here are my tips: - Look for nuts that are fresh and unsalted. - Choose cheeses that are creamy and flavorful. - Select ripe fruits; they should smell sweet and juicy. - Pick fresh vegetables that are crisp and colorful. High-quality ingredients make the board taste better. They also look more appealing. If you want to create the best birthday snack board, remember these points. Check out the Full Recipe for all the details! Start with a large wooden or ceramic board. This will be your base. Make sure it's clean and dry. You want a strong surface to hold your snacks. Lay it out on a table where guests can easily reach it. Begin by placing bite-sized cheeses in groups around the board. Space them out for a nice look. Next, fill gaps with assorted nuts. Let some spill over for a fun vibe. Now, add fresh fruits like grapes and strawberries. Cluster them to create color pops. For veggies, arrange carrot sticks and cucumber slices in groups. You can even stand them in small jars to make them stand tall. Now, serve hummus or dip in a small bowl. Place it in the center for easy access. Stack assorted crackers in small piles around the board. This gives guests plenty of choices. Finally, sprinkle dark chocolate squares or chocolate-covered pretzels around the edges for a sweet treat. Garnish the board with a few edible flowers. This adds a festive touch. Remember to think about colors. Arrange them so no two similar colors are beside each other. This makes the board more inviting and fun. You can prepare this board in just 20 minutes. Check out the Full Recipe for more details on ingredients and serving suggestions. Start by mixing sweet, salty, and creamy. This gives each bite a fun twist. Pair crunchy vegetables with smooth dips for a nice contrast. For example, combine fresh fruits with creamy cheese. This adds depth to your board. Use a mix of nuts for crunch and a hint of salt. This balance will keep everyone happy and wanting more. Colors make your board pop! Use bright fruits like grapes and strawberries. Pair them with vibrant veggies like bell pepper strips. Arrange colors in a rainbow pattern or group similar shades together. This makes the board look fun and inviting. Don't forget to add edible flowers for a cheerful touch. They make everything feel more festive! When serving, keep it simple and fun. Use small plates for guests to grab snacks easily. Consider adding labels to show what each item is. This is useful for those with allergies or specific tastes. Encourage your guests to explore different flavors. You can even suggest fun pairings, like cheese with fruit or nuts with chocolate. For the full recipe, check out the details above. {{image_2}} A sweet snack board brings joy with candies, fruits, and desserts. You can include chocolate-covered strawberries or mini cupcakes. Consider adding sweet dips like chocolate sauce or caramel. They make each bite a treat. On the other hand, a savory board delights with cheeses, meats, and olives. Use different cheeses and cured meats for variety. Add dips like guacamole or ranch. Each item can pair well with crackers. Sweet and savory boards offer something for everyone. Make your board shine with seasonal themes. For spring, use pastel colors and fresh flowers. Add colorful fruits like berries and melons. In fall, think pumpkins and apples. Use warm spices and cozy flavors. A winter board can feature holiday treats like gingerbread cookies and spiced nuts. For summer, think bright colors with fresh veggies and fruity drinks. Seasonal boards keep your snack game fresh and fun. Kid-friendly boards should be colorful and playful. Include fun snacks like gummy bears, popcorn, and animal-shaped sandwiches. Use bright plates and fun themes, like a cartoon character. Adult boards can focus on gourmet options. Think artisan cheeses, olives, and charcuterie. You might add wine pairings or craft beer for an extra touch. Each theme allows you to create a unique experience. These variations make your birthday snack board a hit for all ages. For a full recipe, check out the details above. After your celebration, you may have leftovers. Store them in airtight containers. This keeps moisture out and keeps snacks fresh. Use separate containers for fruits, vegetables, and dips. This prevents sogginess and keeps flavors intact. To maintain freshness, store cheeses and meats in the fridge. Wrap them in wax paper or parchment. This allows them to breathe while staying moist. Keep nuts in a cool, dry place. If they feel soft, they may have absorbed moisture. For next-day enjoyment, take out the items from the fridge. Lay them out on a fresh board. You can recreate the fun look or mix it up! Serve dips in fresh bowls and add new fruits if desired. This makes it feel special again. For the full recipe and ideas, check out the complete guide! You can easily customize a snack board to fit dietary needs. Start by asking guests about their allergies or dietary choices. For gluten-free diets, use gluten-free crackers or veggies. If someone is vegan, replace cheese with plant-based options. You can use fruits, nuts, and dips that fit all diets. Consider adding more colorful veggies for crunch. Drinks can enhance the fun of your snack board. Sparkling water with fruit slices is a fresh choice. Lemonade or iced tea adds a sweet touch. For adults, light wines or cocktails work well. Keep flavors simple to match the snack board's variety. Always have drinks served cold for the best taste. Yes, you can prep many items ahead of time. Wash and cut fruits and veggies a day before. Store them in airtight containers in the fridge. You can also portion out nuts and cheese, making it easy to assemble later. Just wait to add dips and crackers until closer to serving. This keeps everything fresh and tasty. Follow the [Full Recipe] for a delicious birthday snack board that will impress! Creating a birthday snack board is fun and simple. We covered essential ingredients, preparation, and fun tips. You can make it colorful and tasty with just a few steps. Remember to balance flavors and textures for the best experience. Don’t forget to store leftovers properly for next time. With these ideas, your snack board will be a hit. Enjoy making and sharing these tasty treats at your next celebration!

Are you ready to elevate your birthday celebrations? A Birthday Snack Board is a fun way to serve snacks for guests of all ages. With vibrant colors and tasty treats, …

Read more

Categories Appetizers

Grilled Mexican Shrimp Salad Flavorful and Fresh Dish

May 27, 2025 by Chef Jamie
For this tasty grilled Mexican shrimp salad, you need the following main ingredients: - 1 pound large shrimp, peeled and deveined - 4 cups mixed salad greens (like arugula, spinach, and romaine) - 1 cup cherry tomatoes, halved - 1 avocado, diced - 1 cup corn kernels, fresh or frozen (thawed) - 1/4 red onion, thinly sliced - 1/4 cup fresh cilantro, chopped These fresh ingredients form the base of your salad, making it colorful and nutritious. The right spices and seasonings bring your shrimp to life. You will need: - 1 teaspoon smoked paprika - 1 teaspoon ground cumin - 1 teaspoon garlic powder - 1 teaspoon chili powder - Salt and pepper to taste These spices add depth and flavor to the shrimp, making each bite exciting. To customize your salad, consider these optional add-ins: - Sliced jalapeños for a spicy kick - Additional herbs like parsley or chives Adding these extras can enhance flavor and give your salad a personal touch. For the complete recipe, check the Full Recipe section. To make this dish, start by marinating the shrimp. In a bowl, mix olive oil, smoked paprika, ground cumin, garlic powder, chili powder, salt, and pepper. This mix gives the shrimp great flavor. Add the shrimp to the bowl. Toss them well until they are fully coated in the spice mix. Let the shrimp sit for 15 to 20 minutes. This helps the flavors soak in. Next, thread the marinated shrimp onto skewers. I recommend using metal skewers. They hold the shrimp well and are easy to clean. Now, it's time to grill. Preheat your grill to medium-high heat. A hot grill cooks the shrimp quickly and keeps them juicy. Place the skewers on the grill. Cook the shrimp for 2 to 3 minutes on each side. You want them to turn pink and firm. Once done, remove them from the grill and set them aside. While the shrimp cools, assemble the salad. In a large bowl, combine mixed salad greens, cherry tomatoes, diced avocado, corn, sliced red onion, and chopped cilantro. Squeeze the juice of two limes over the salad. This adds a fresh taste and helps the flavors pop. Toss gently to mix everything well. Finally, top the salad with your grilled shrimp. If you like heat, add sliced jalapeños on top. Enjoy your vibrant, healthy meal! For the full recipe, check the instructions above. To get your shrimp just right, cook them for about 2-3 minutes on each side. Watch them closely. Overcooking makes them tough. You want them pink and firm. Use metal skewers for best results. They heat up well and keep shrimp in place. If you use wooden skewers, soak them in water for 30 minutes first. This prevents burning on the grill. Add toppings to make the salad pop. Fresh mango or diced pineapple brings sweetness. A sprinkle of feta cheese adds creaminess. You can also use sliced jalapeños for heat. Adjust spice levels to suit your taste. If you want more kick, add extra chili powder or hot sauce. Pair this salad with tortilla chips or grilled corn on the side. You can also enjoy it with a refreshing drink like limeade. Store leftovers in an airtight container. Keep shrimp and salad separate to maintain freshness. This way, your meal stays tasty for up to two days. For complete cooking instructions, check the Full Recipe. {{image_2}} You can easily swap shrimp for other proteins. Chicken or tofu work well too. This lets you cater to different tastes. For greens, try kale or mixed salad greens. These choices add different textures. You can also mix in other veggies like bell peppers or cucumbers. They add crunch and color. Homemade vinaigrettes are simple to make. Just mix olive oil, lime juice, and a pinch of salt. You can also try a creamy dressing. Greek yogurt with lime is a tasty option. This gives your salad a rich flavor. Experiment with different herbs in your dressings. Cilantro or parsley can give a fresh twist. Want more heat? Add chili flakes or cayenne pepper. This will make your salad stand out. You can also try different spice blends. A taco seasoning mix can work great. Mixing flavors can give you a new favorite. Don't be afraid to get creative with spices! Store the salad and shrimp separately. This helps keep the salad fresh longer. Put the shrimp in an airtight container. You can keep it in the fridge for up to three days. The salad will last about two days. Make sure to check for freshness before eating. You can freeze shrimp for later use. First, cook the shrimp fully, then cool them down. Place them in a freezer bag and remove as much air as possible. They will stay good for up to three months. For salad ingredients, avoid freezing. Freezing can change the texture of greens and tomatoes. Instead, prepare salad ingredients fresh when ready to eat. To reheat grilled shrimp, place them on a skillet over medium heat. Cook for about two minutes on each side. This keeps them juicy and tasty. Before serving the salad, refresh it. Add a little lime juice and toss gently. This brings back its fresh flavor. Enjoy your vibrant dish with these tips! For the full recipe, check out the details above. You can use either fresh or frozen shrimp. Fresh shrimp has a sweet taste and nice texture. Look for shrimp that smells like the ocean, not fishy. If you choose frozen shrimp, buy high-quality ones. Thaw them in the fridge overnight for best results. Both types work well in this grilled Mexican shrimp salad. Yes, you can prep this salad ahead of time. Cook the shrimp and store it in the fridge. The shrimp stays good for up to two days. Prepare the salad without the dressing. Mix the greens, tomatoes, corn, and avocado in a bowl. Keep the dressing separate until you are ready to serve. This keeps everything fresh and tasty. Want some heat? Add sliced jalapeños on top. You can also mix in some hot sauce. Another option is to use more chili powder in the shrimp marinade. If you like it really spicy, try adding diced serrano peppers. Adjust the heat level to match your taste. Enjoy the kick! This blog post helps you create a tasty grilled shrimp salad. You learned about main ingredients and great spices. I shared tips on grilling shrimp and assembling the salad just right. You discovered fun variations to change up the dish. Finally, I explained how to store leftovers for later use. Enjoy cooking your shrimp salad! With these tips, you can impress anyone at your next meal.

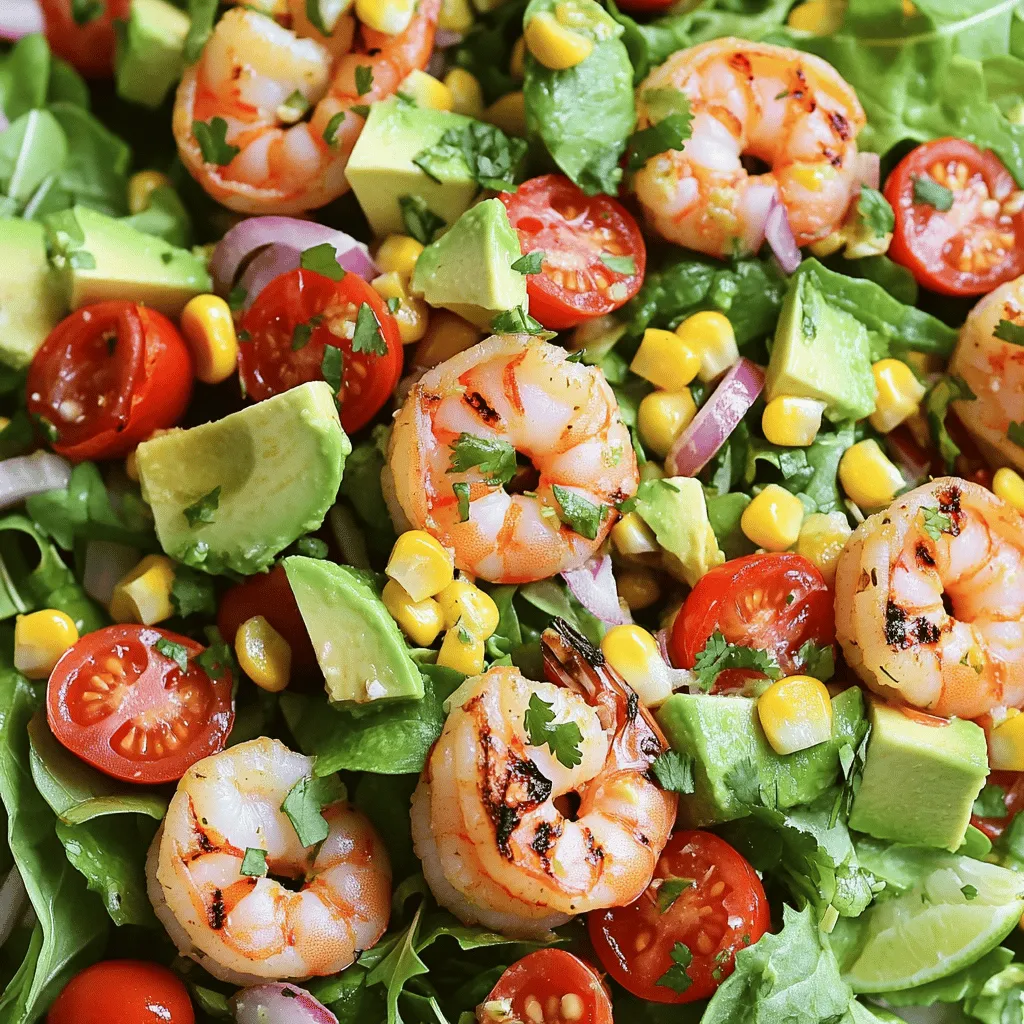
Are you ready to enjoy a burst of flavor with a fresh and vibrant Grilled Mexican Shrimp Salad? This dish combines large shrimp, crisp greens, and fresh veggies, all topped …

Read more

Categories Salads

Triple Chocolate Mousse Cake Decadent and Rich Dessert

May 27, 2025 by Chef Jamie
To make the perfect chocolate cake base, gather these simple ingredients: - 1 cup all-purpose flour - 1 cup granulated sugar - 1/2 cup unsweetened cocoa powder - 1/2 teaspoon baking powder - 1/2 teaspoon baking soda - 1/4 teaspoon salt - 1/2 cup unsalted butter, melted - 2 large eggs - 1/2 cup whole milk - 1 teaspoon vanilla extract These ingredients come together to create a rich and moist base. The cocoa powder gives it that deep chocolate flavor. The mousse layers are the stars of this cake. You will need: - 4 ounces dark chocolate (70% cocoa), chopped - 4 ounces milk chocolate, chopped - 4 ounces white chocolate, chopped - 3 cups heavy whipping cream - 3 tablespoons powdered sugar - 1 teaspoon vanilla extract Each chocolate layer brings its unique taste. The dark chocolate is bold, while the milk chocolate is creamy. The white chocolate adds sweetness and lightness. To make your cake look even better, consider these garnish options: - Chocolate shavings or curls - Whipped cream (optional) - Fresh berries (optional) These garnishes not only add beauty but also extra flavor. Fresh berries can cut through the richness. You can find the full recipe for this delightful treat with all the steps to make it perfect. Start by preheating your oven to 350°F (175°C). Grease and flour a 9-inch round cake pan. In a big bowl, mix the flour, sugar, cocoa powder, baking powder, baking soda, and salt. This blend gives your cake a rich chocolate taste. In another bowl, combine melted butter, eggs, milk, and vanilla. Mix the wet ingredients into the dry ones until they just come together. Don’t overmix! Pour this batter into your prepared pan. Bake for 25 to 30 minutes. To check if it's done, insert a toothpick. If it comes out clean, your cake is ready. Let it cool completely before moving on. For the dark chocolate mousse, place your dark chocolate in a bowl over simmering water. This method helps it melt smoothly. Stir until it’s fully melted. In a separate bowl, whip 1 cup of heavy cream until it forms soft peaks. Add 1 tablespoon of powdered sugar and the vanilla extract. Gently fold the whipped cream into the melted chocolate. Be careful not to deflate the cream. Once mixed, set it aside in the refrigerator to firm up. After your cake has cooled, place it on a serving plate. Start with the dark chocolate mousse. Spoon it over the top and spread it evenly. Next, layer the milk chocolate mousse on top. Finally, add the white chocolate mousse. Each layer adds a different flavor and texture. Refrigerate the cake for at least 4 hours, or overnight if you can wait. This chilling time lets all the layers set perfectly. When ready, garnish with chocolate shavings or curls, fresh berries, and whipped cream if you like. This cake is sure to impress at any gathering. For the complete recipe, check the [Full Recipe]. To get the best mousse texture, use cold cream. Cold cream whips better and faster. Start by whipping each cream until soft peaks form. Be gentle when folding the chocolate into the cream. This keeps the mousse light and airy. If you overmix, the mousse will be dense. Chill each layer before adding the next. This helps the layers stay separate and firm. When baking the cake, use room temperature ingredients. This helps them mix well. Grease and flour your cake pan to avoid sticking. Check your cake at the 25-minute mark. Use a toothpick to test doneness. If it comes out clean, your cake is ready. Let the cake cool completely in the pan before removing it. This prevents breakage and keeps the shape. For a stunning presentation, use a cake stand. Add a touch of elegance when serving. Decorate the top with chocolate shavings or curls. Fresh berries add color and flavor. You can also pipe some whipped cream for a fancy look. Slice the cake with a warm knife for clean edges. Serve with a side of extra berries or whipped cream for fun! {{image_2}} You can easily change the flavors in your triple chocolate mousse cake. Try adding a splash of espresso to the chocolate mousse. This gives it a rich coffee flavor. You can also use flavored extracts, like almond or orange, in the mousse layers. This small change makes a big impact. If you love fruit, mix in some pureed raspberries or strawberries. They add a refreshing twist to the cake. Want a lighter version? Swap the heavy cream for coconut cream. It still gives a rich texture but with fewer calories. You can also use unsweetened applesauce instead of some butter in the cake base. This keeps moisture while cutting fat. Use dark chocolate with a higher cocoa content. It has less sugar and more health benefits. These substitutions keep the taste while making it better for you. Get creative with your garnishes! Instead of chocolate shavings, try crushed nuts. Almonds or hazelnuts add a nice crunch. You can also use mint leaves for a fresh look. Fresh fruit like berries or sliced kiwi brightens up the dessert. You could drizzle some caramel or chocolate sauce over the top for extra sweetness. Each garnish can change the look and feel of your cake. For the Full Recipe, check out the main article. Enjoy experimenting with these fun variations! To keep your Triple Chocolate Mousse Cake fresh, store it in the fridge. Place it in an airtight container. This helps to lock in moisture and flavor. If you can, cover the top with plastic wrap. This avoids any unwanted odors from other foods. When stored properly, this cake lasts about 3 to 4 days in the fridge. After that, the mousse layers may start to lose their fluffiness. If you notice any changes in texture or smell, it’s best to discard it. Yes, you can freeze this cake! First, let it cool completely. Cut it into slices for easier thawing later. Wrap each slice tightly in plastic wrap. Then, place them in a freezer-safe bag or container. This keeps the cake fresh for up to 2 months. When you're ready to enjoy, thaw it in the fridge overnight. For all the details on making this dessert, check the Full Recipe. Yes, you can use different types of chocolate. Each type gives a unique taste. Dark chocolate adds deep flavor, while milk chocolate offers sweetness. White chocolate brings creaminess. Feel free to mix or match! Just keep the same amounts for each type. This flexibility allows you to personalize your cake. To check if the cake is done, use a toothpick. Insert it into the center of the cake. If it comes out clean, the cake is ready. If it has wet batter on it, bake a little longer. The edges should slightly pull away from the pan. This tells you the cake is cooked through. Yes, you can make this dessert in advance. The cake and mousse layers store well. Make the cake and mousse a day ahead. Just assemble them before serving. Refrigerate the cake to keep it fresh. This gives the flavors more time to blend, enhancing the taste. You’ll impress your guests with this make-ahead treat! For the detailed recipe, check the Full Recipe. This blog post covered how to create a rich chocolate mousse cake. We explored the key ingredients, steps, and expert tips to get the best results. You learned how to prepare the cake base, make the mousse, and assemble it all. Plus, we shared storage tips and ways to enhance the flavors. The tips will help you enjoy your cake longer. Use these ideas to impress friends and family. Now, get baking and savor every bite of your sweet creation!

If you crave a rich dessert that delights at every bite, the Triple Chocolate Mousse Cake is for you. I will guide you through each step, from baking the chocolate …

Read more

Categories Desserts

Birria Enchiladas Savory and Flavorful Delight

May 27, 2025 by Chef Jamie
To make tasty birria enchiladas, gather these key items: - 2 cups cooked birria meat (beef or goat), shredded - 8 medium corn tortillas - 1 cup birria broth - 1 cup shredded mozzarella or queso Oaxaca cheese - 1 medium onion, finely chopped - 1 cup fresh cilantro, chopped - 1/2 cup sour cream or Mexican crema - 1 tablespoon olive oil - Salt and pepper to taste - Slices of radish and lime wedges for garnish These ingredients bring rich flavors to the dish. The birria meat is the star here, and it adds depth and warmth. You can make your birria enchiladas more special with these toppings: - Avocado slices - Diced green onions - Pickled jalapeños - Extra cheese Feel free to mix and match. Adding these can give your dish a fresh twist and more color. Pair your birria enchiladas with these sides for a complete meal: - Mexican rice - Refried beans - A light salad with lime dressing These sides complement the enchiladas well. They also help balance the rich flavors, making your meal even more satisfying. For the full recipe, check out the link to make your cooking experience smooth and enjoyable! To start, gather your tools and ingredients. You will need a large skillet, a baking dish, and a mixing bowl. Make sure your oven is preheated to 350°F (175°C). This step sets you up for success. 1. In your skillet, heat 1 tablespoon of olive oil over medium heat. Add the finely chopped onion. Sauté it for about 3-4 minutes until it turns soft and clear. 2. In a bowl, combine 2 cups of shredded birria meat with salt and pepper to taste. Mix well to ensure every bite is flavorful. 3. Now, take each of the 8 corn tortillas and dip them in the warm birria broth. This softens the tortillas and adds flavor. 4. Place a good amount of the seasoned birria meat in each tortilla. Add a sprinkle of cheese and some chopped cilantro. 5. Roll each tortilla tightly and place them seam side down in your baking dish. 6. Pour the remaining birria broth evenly over the enchiladas. Top with more cheese for a melty finish. 1. Cover your baking dish with aluminum foil. Bake for 20 minutes. 2. After that, take off the foil and bake for another 10 minutes. You want the cheese to be bubbly and slightly golden. 3. Once done, take the enchiladas out and let them cool for a few minutes. 4. Serve them warm. Garnish with sour cream or Mexican crema, fresh cilantro, radish slices, and lime wedges for a fresh touch. These steps make birria enchiladas a savory and flavorful delight. Enjoy every bite! For a detailed look at all the ingredients and instructions, check out the Full Recipe. To make the best birria enchiladas, start with fresh tortillas. Heat them briefly in warm birria broth. This step makes them soft and easy to roll. Use just the right amount of filling. Too much can break the tortilla. Roll them tightly and place them seam side down. This helps them hold their shape. One mistake is not warming the tortillas. They can crack if you skip this step. Another error is overfilling. Stick to a small amount of meat and cheese. This keeps your enchiladas intact. Also, don’t forget to cover them while baking. This ensures even cooking and melting cheese. To boost flavors, add spices to your meat mix. A touch of cumin or smoked paprika works well. You can also mix some lime juice into the broth. This adds a nice zest. For garnishing, use fresh cilantro and radishes. They give a crunchy contrast and look vibrant. If you like heat, add sliced jalapeños. Enjoy the layers of flavor in every bite! {{image_2}} Birria enchiladas are truly versatile. You can use beef, goat, or lamb for your dish. Each meat brings its own flavor. Beef offers a rich taste, while goat gives a unique twist. Lamb adds a nice, tender bite. Choose the meat that you enjoy the most. You can easily make birria enchiladas vegetarian or vegan. Use jackfruit or mushrooms as a meat substitute. Both options soak up flavors well. For a vegan twist, use plant-based cheese. You can also add beans for protein. These choices keep the dish hearty and satisfying. Toppings can take your birria enchiladas to new heights. Try adding avocado slices or pickled onions for a fresh crunch. You can also sprinkle crumbled queso fresco on top. Fresh herbs like cilantro or parsley add a burst of flavor. Lime wedges give a zesty kick. Don't hesitate to mix and match your favorite toppings to create a dish that's uniquely yours. For more details, check the Full Recipe. To store your leftover enchiladas, first let them cool. Place them in an airtight container. Make sure to keep them in the fridge. They stay fresh for up to three days. If you want to enjoy them later, freezing is a great option. When freezing enchiladas, wrap them tightly in plastic wrap. You can also use aluminum foil for extra protection. Place them in a freezer-safe bag or container. This way, they won't get freezer burn. You can freeze them for up to three months. Always label the container with the date. To reheat frozen enchiladas, first, thaw them in the fridge overnight. Preheat your oven to 350°F (175°C). Place the enchiladas in a baking dish. Add a splash of birria broth to keep them moist. Cover with foil and bake for 20 minutes. Remove the foil and bake for another 10 minutes. Your enchiladas will be warm and ready to serve! Birria enchiladas come from Mexico. They blend rich flavors from Jalisco. Birria is a stew, often made with goat or beef. People serve it at special events and gatherings. Enchiladas are another classic dish, filled with various ingredients. Combining these dishes creates a unique and tasty meal. Yes, you can use store-bought birria. It saves time and makes cooking easier. Choose a good quality brand for the best flavor. Just make sure it is tender and flavorful. This way, you can enjoy delicious enchiladas without much hassle. Birria is a stew, while enchiladas are rolled tortillas filled with ingredients. Birria has a rich, spicy broth, often made with meat. Enchiladas are usually filled with meats, cheese, or beans, and then topped with sauce. Both dishes bring unique flavors to the table, making them special in their own right. Birria enchiladas combine bold flavors and easy steps to prepare. We explored key ingredients and step-by-step cooking methods. Remember the tips for perfecting your dish and avoiding common mistakes. You can also try different meats or make them vegetarian. Store leftovers properly to enjoy them later. I hope you feel confident to make these delicious enchiladas. Enjoy cooking!

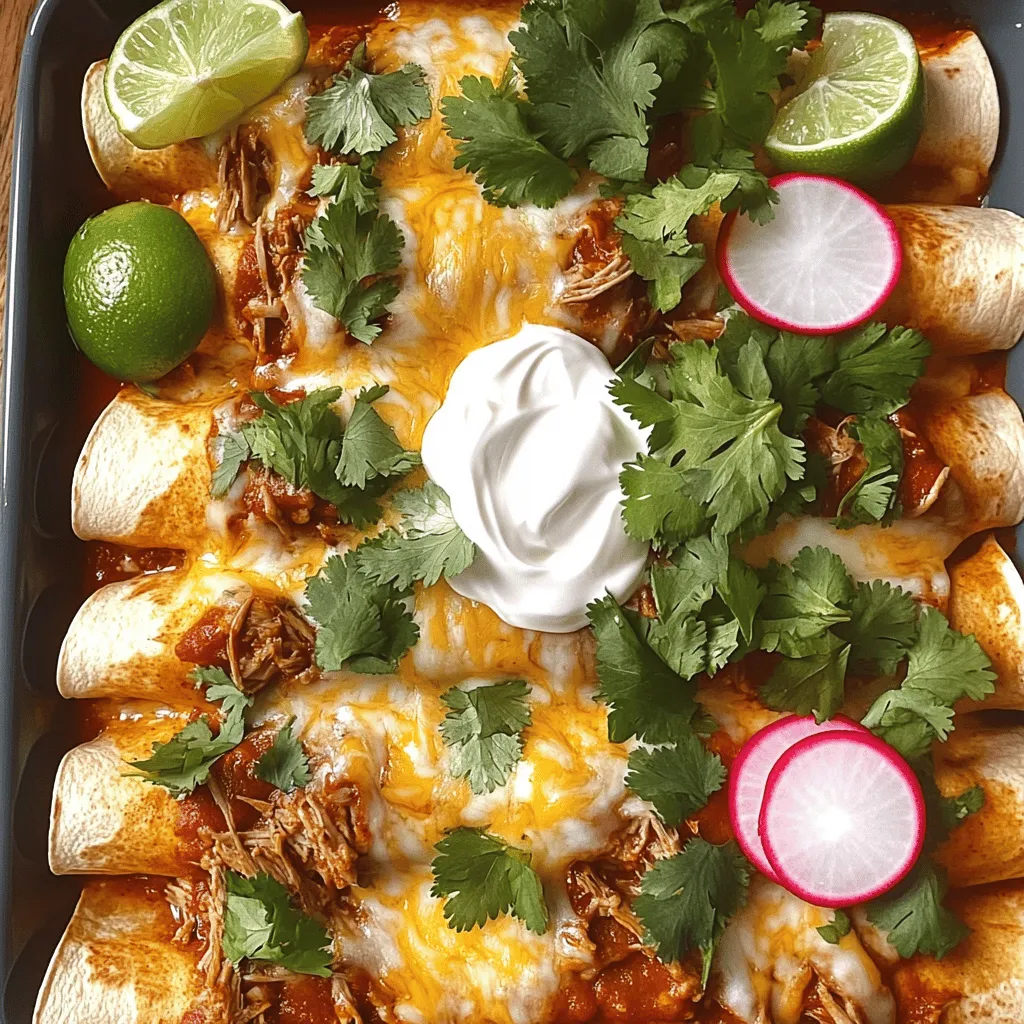
Are you ready to savor a dish that bursts with flavor? Birria enchiladas are the perfect blend of tender meat and zesty spices, wrapped in warm tortillas. In this guide, …

Read more

Categories Dinner

Cheesesteak Tortellini Flavorful and Easy Recipe

May 27, 2025 by Chef Jamie
- Cheese tortellini - Ribeye steak - Onion and bell pepper - Garlic and provolone cheese Let's start with the main ingredients. Cheese tortellini is the star of this dish. You can use fresh or frozen tortellini; both work well. Ribeye steak adds a rich and savory flavor. Thinly slice it for the best texture. Next, we have onion and bell pepper. They add sweetness and crunch. Lastly, garlic and provolone cheese bring the dish together. Garlic adds depth, and provolone gives that creamy finish. - Olive oil - Worcestershire sauce - Salt and pepper Now, let’s talk about pantry essentials. Olive oil is key for cooking the steak and veggies. It adds a nice flavor. Worcestershire sauce gives a savory kick. It enhances the steak's taste. Don't forget salt and pepper. They are simple but essential for seasoning. - Fresh parsley - Crushed red pepper flakes Garnishes can elevate your dish. Fresh parsley adds color and freshness. A sprinkle of crushed red pepper flakes brings heat. You can adjust the amount based on your spice level. If you want to explore more, check out the Full Recipe for additional ideas. - First, boil a large pot of salted water. - Add 12 ounces of cheese tortellini to the boiling water. - Cook according to the package instructions, usually about 3-5 minutes. - Drain the tortellini and set it aside for later. - Heat 2 tablespoons of olive oil in a large skillet over medium heat. - Add 1 medium onion and 1 medium bell pepper, both sliced. - Sauté for 5-7 minutes until the onion is soft and clear. - Add 2 cloves of minced garlic and cook for 1 more minute. - In the same skillet, add 1 pound of thinly sliced ribeye steak. - Season the steak with salt, pepper, and 1 tablespoon of Worcestershire sauce. - Cook for about 3-4 minutes, stirring until the steak is nicely browned. - Return the sautéed vegetables to the skillet with the steak. - Add the cooked tortellini and mix everything well. - Heat for another 2-3 minutes until it’s all warm. - Remove the skillet from heat once everything is heated through. - Sprinkle 1 cup of shredded provolone cheese on top. - Cover the skillet for about 2 minutes to let the cheese melt. These steps will guide you to make a delicious Cheesesteak Tortellini. For more details, check the Full Recipe. - Ensuring steak is thinly sliced: Use a sharp knife. Freeze the ribeye for 30 minutes. This makes slicing easier. Aim for pieces about 1/4 inch thick. Thin slices cook faster and stay tender. - Preventing tortellini from overcooking: Follow the package instructions. Set a timer while they cook. Drain them as soon as they float. Overcooked tortellini can turn mushy. Keep them al dente for the best texture. - Choosing the right skillet: A large, heavy skillet works best. It heats evenly and holds heat well. Avoid overcrowding the pan. This allows the steak to brown properly. - Serving suggestions: Use wide bowls for a nice look. This lets you show off the colorful dish. Serve hot for the best taste. - Garnishing ideas: Sprinkle freshly chopped parsley on top. Add crushed red pepper flakes for a hint of heat. A drizzle of olive oil adds shine and flavor. - Enhancing flavor with additional toppings: Try adding sautéed mushrooms or jalapeños. These add a kick and depth. A sprinkle of extra cheese can make it richer. - Suggested side dishes: A simple side salad works well. Roasted vegetables are a great choice too. Garlic bread adds a nice touch. - Recommended wines to complement the dish: Pair with a light red wine like Pinot Noir. A chilled white like Sauvignon Blanc also works. Both enhance the dish's flavors. - Additional herbs and spices: Fresh basil or oregano can brighten the dish. A dash of smoked paprika adds warmth. Experiment with spices to find your favorite mix. {{image_2}} If you want to switch up the meat, try using chicken or turkey. They both cook quickly and absorb flavors well. For a vegetarian twist, mushrooms are a great option. They add a nice umami taste and a hearty texture. For a vegan version, look for cheese substitutes made from nuts or soy. These options keep the dish creamy while fitting dietary needs. For those avoiding gluten, gluten-free tortellini is widely available. You can also use different pasta shapes like penne or rigatoni. These shapes hold sauces well and offer a fun twist to the dish. Want to change the sauce? You can add a creamy sauce for a richer flavor. Marinara or Alfredo sauces also work great for a different taste. If you're craving some heat, throw in jalapeños or a dash of hot sauce. These additions elevate the dish and make it even more exciting. To keep your Cheesesteak Tortellini fresh, let it cool first. Store it in an airtight container. Place it in the fridge within two hours of cooking. This helps prevent bacteria. It stays good for up to three days. When reheating, use the microwave or a skillet. Heat it until it’s hot throughout. You can add a splash of water or broth to keep it moist. If you want to save some for later, freezing works well. First, let the dish cool completely. Then, scoop portions into freezer-safe bags. Squeeze out the air and seal them tightly. You can freeze it for up to three months. When ready to eat, move it to the fridge to thaw overnight. Reheat in the microwave or on the stovetop until warm. Stir occasionally to heat evenly. Keep your ingredients fresh for longer. Store cheese in its original packaging or wrap it tightly. For steak, use a sealed bag and keep it in the coldest part of your fridge. Use it within three days for best taste. Bell peppers and onions last about a week when stored in a cool, dark place. Always check for freshness before using. Making Cheesesteak Tortellini is quick and easy. You will need about 15 minutes to prep. Cooking takes around 15 minutes. So, the total time is about 30 minutes. This recipe is perfect for a busy weeknight dinner. Yes, you can use pre-cooked steak. If you have leftovers, this is a great way to use them. Just cut the steak into small pieces and add it to the skillet after cooking the veggies. It will save you time, and the dish will still taste amazing. Serve this dish with a fresh side salad or garlic bread. You can also add roasted vegetables for extra flavor. For a complete meal, consider a light soup like minestrone or a creamy tomato soup. Each option will pair well with the rich flavors of the tortellini. To add heat, try using hot Italian sausage instead of ribeye. You can also add crushed red pepper flakes while cooking. Another option is to mix in some diced jalapeños or serve with a spicy sauce on the side. Adjust the spice level to fit your taste! Yes, this dish is great for meal prep. You can make a large batch and store it in the fridge. It holds well for about 3-4 days. Just reheat it in the microwave or on the stove when you're ready to eat. This makes it a convenient choice for busy days. For the best flavor, add fresh cheese right before serving. For the full recipe, check out the recipe section above. This blog post guides you through making delicious Cheesesteak Tortellini. We covered key ingredients like cheese tortellini, ribeye steak, and fresh veggies. You learned step-by-step instructions to cook and combine everything into a tasty dish. With cooking tips and variations offered, you can make it your own. In conclusion, this recipe is simple and full of flavor. With a few tweaks, it can fit any diet. Enjoy cooking and impressing your family and friends with this meal!

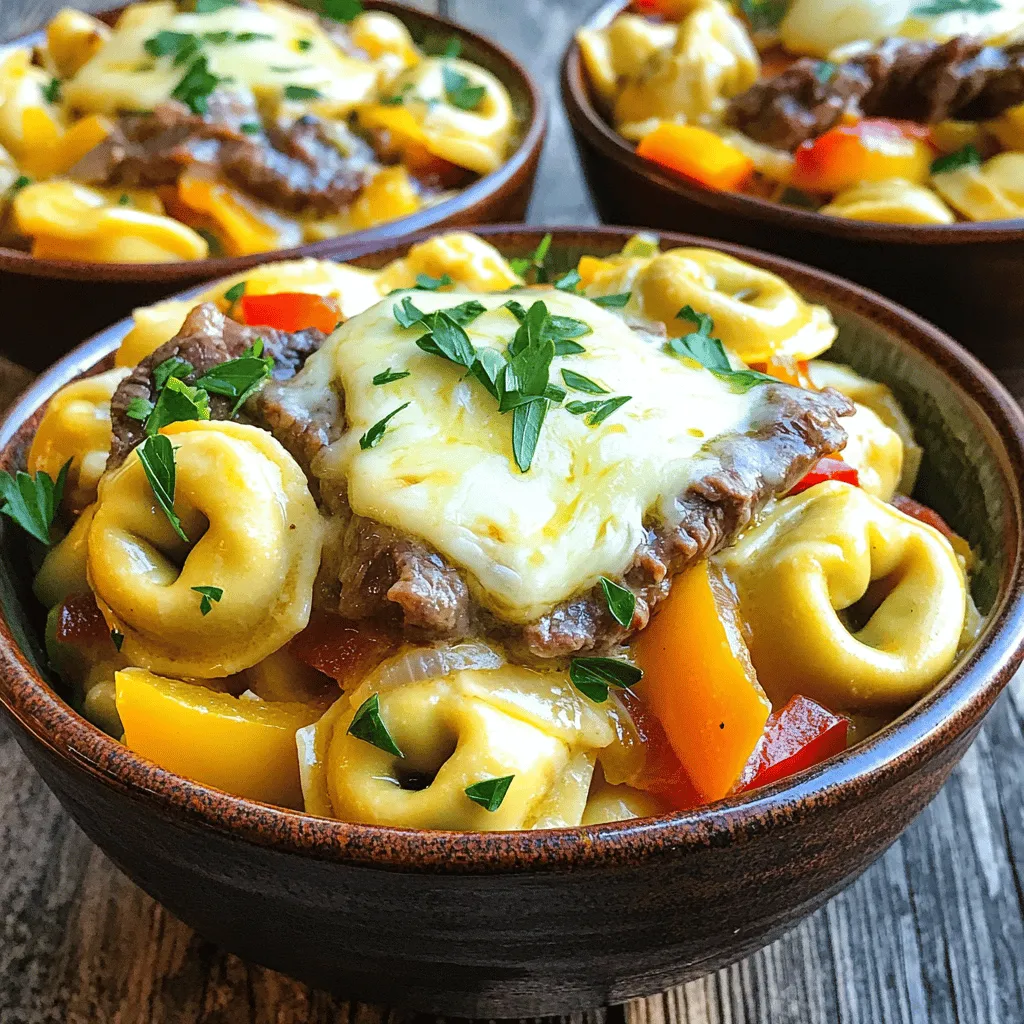
Are you ready to enjoy a dish that combines classic flavors in a fun way? Cheesesteak Tortellini takes all the savory goodness of a traditional cheesesteak and wraps it in …

Read more

Categories Dinner
Older posts
Newer posts
← Previous Page1 … Page117 Page118 Page119 … Page134 Next →

TOSSED RECIPES

Simple meals, bold taste. Quick recipes made for real life — always fresh, always delicious. 🌿🍴

PAGES

Home About Contact Privacy Policy Terms & Conditions Cookie Policy GDPR Policy Copyright Policy Disclaimer

CATEGORIES

Appetizers Desserts Salads Breakfast Dinner

Contact

  • Pinterest
  • Mail
Copyright © 2026 Tossed Recipes. All rights reserved.