Air Fryer Garlic Parmesan Wings Crispy Flavor Boost
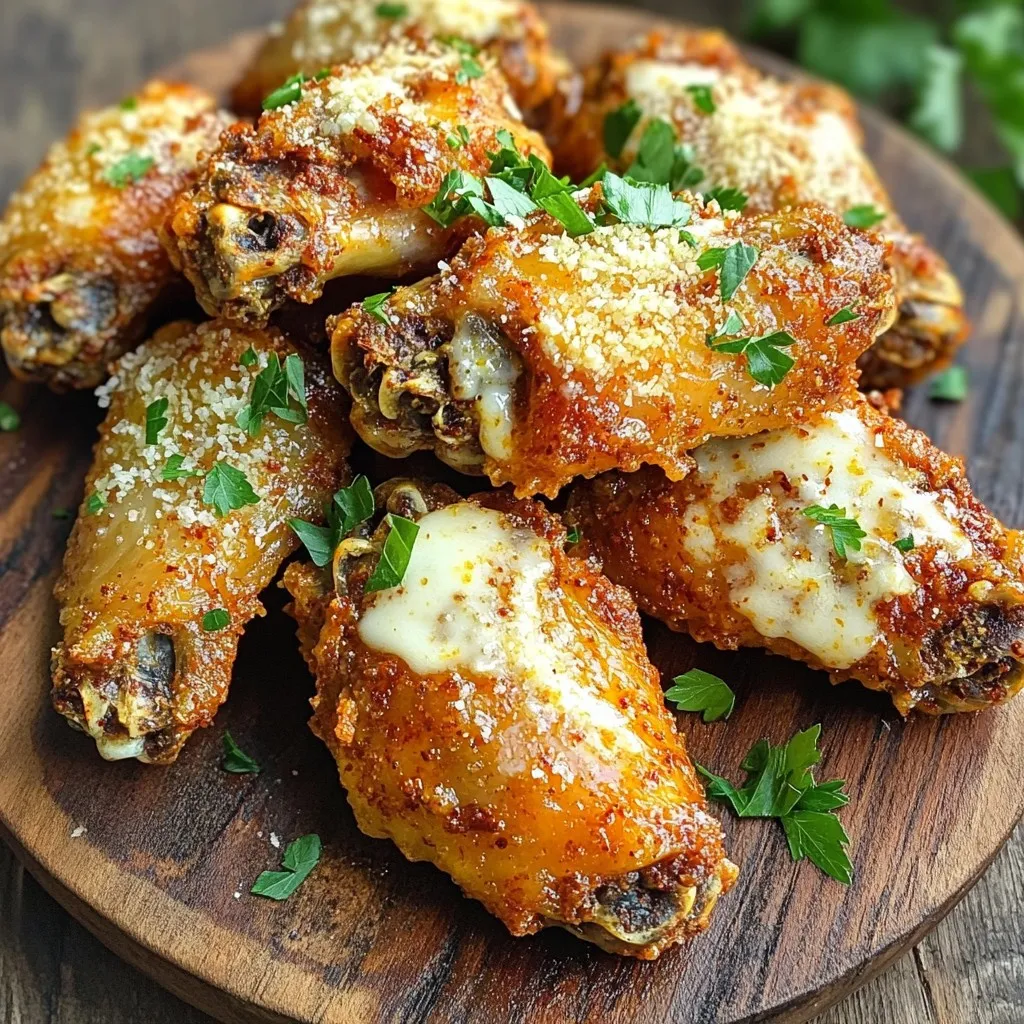
Looking for a quick and tasty snack? My Air Fryer Garlic Parmesan Wings will wow your taste buds! These wings are crispy, flavorful, and packed with garlic and Parmesan goodness. …
Looking for a quick and tasty snack? My Air Fryer Garlic Parmesan Wings will wow your taste buds! These wings are crispy, flavorful, and packed with garlic and Parmesan goodness. …
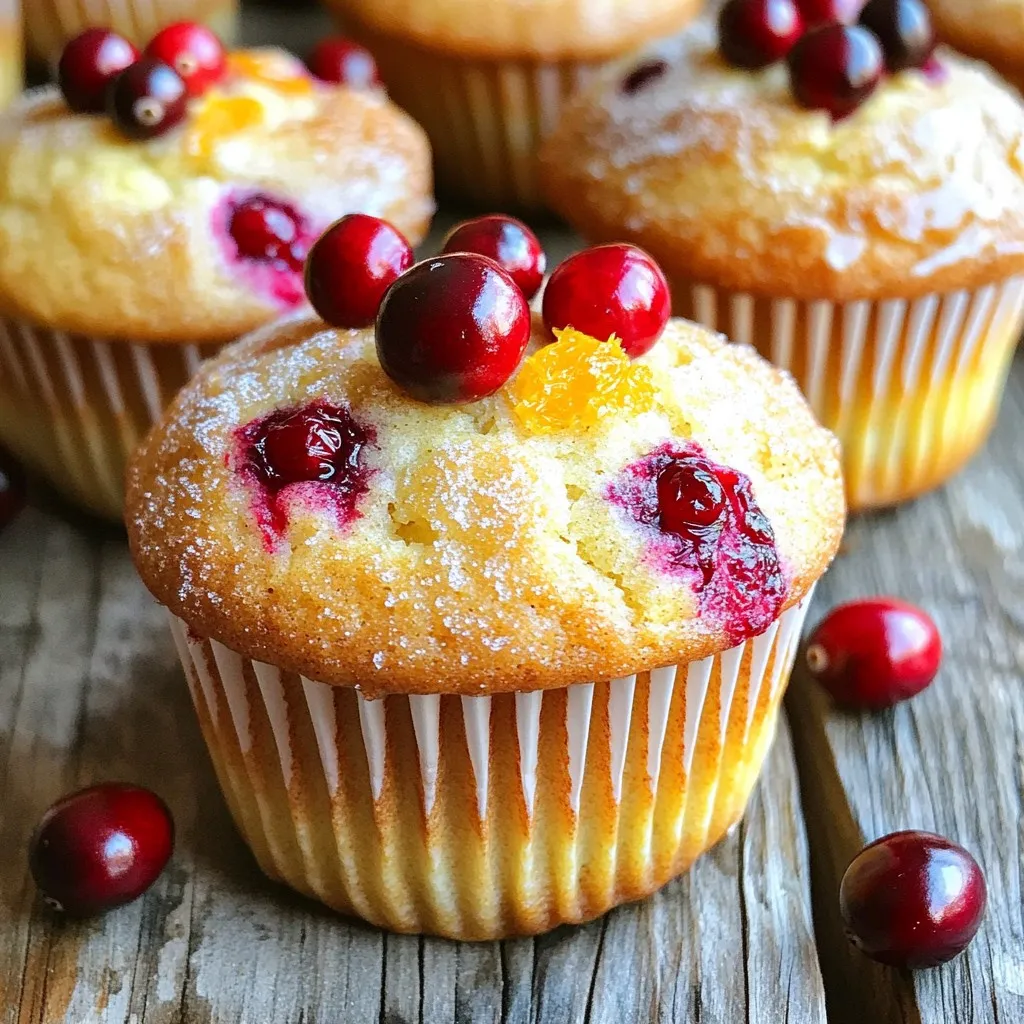
Are you ready for a tasty treat that’s simple to make? These spiced cranberry orange muffins blend tangy cranberries and bright orange zest for a burst of flavor. They’re perfect …
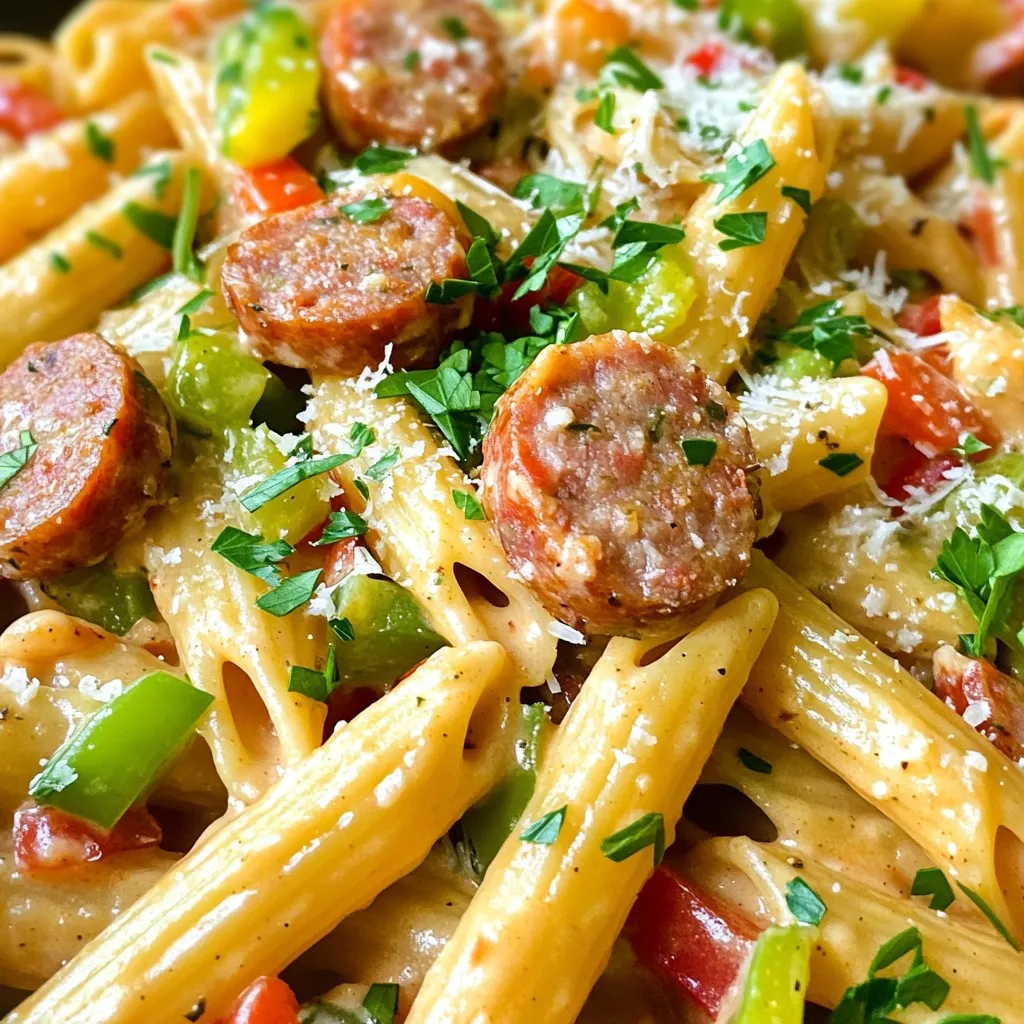
Looking for a quick, tasty meal? You’ve found it! My One-Pot Creamy Cajun Sausage Pasta is perfect for busy nights. This dish packs bold flavors and comes together in just …
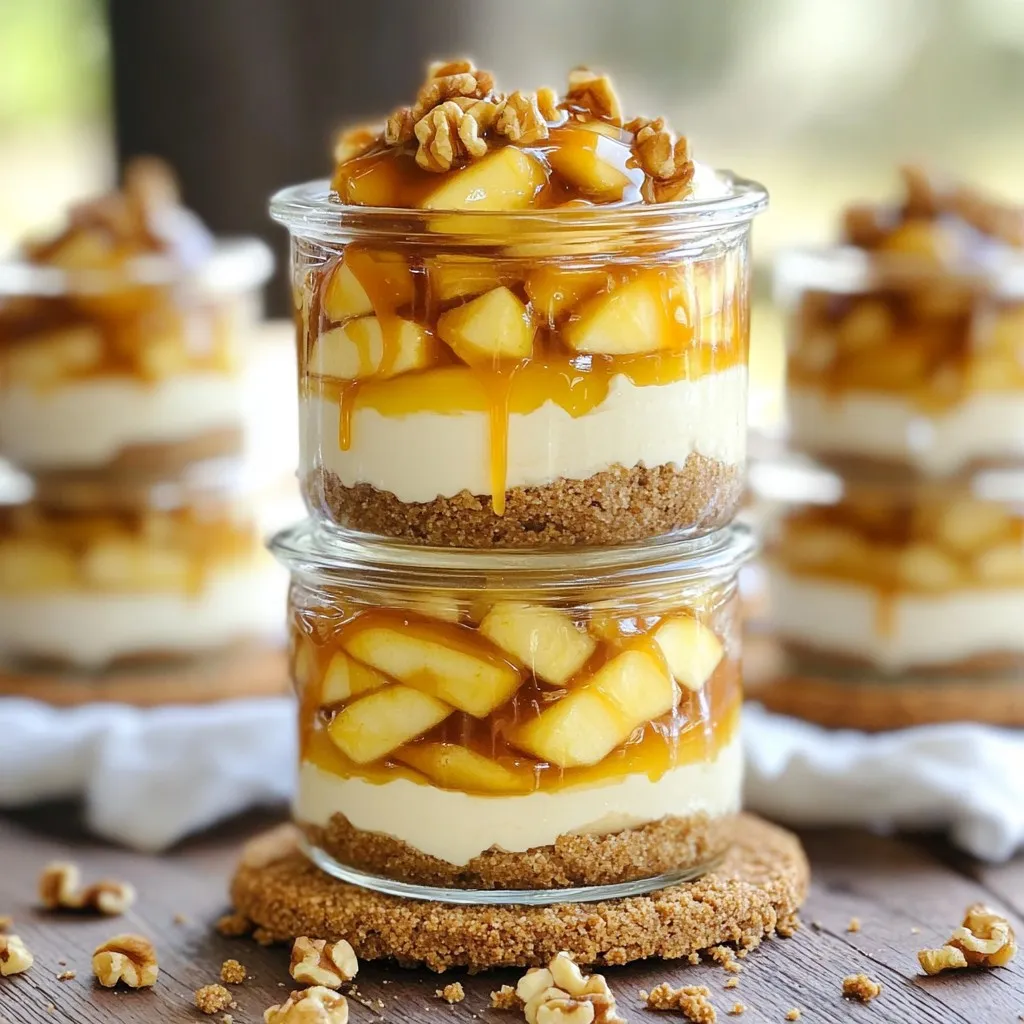
Craving a dessert that’s both easy and delicious? You’re in for a treat! My Caramel Apple Cheesecake Parfaits combine creamy cheesecake, sweet apples, and rich caramel in a simple layered …
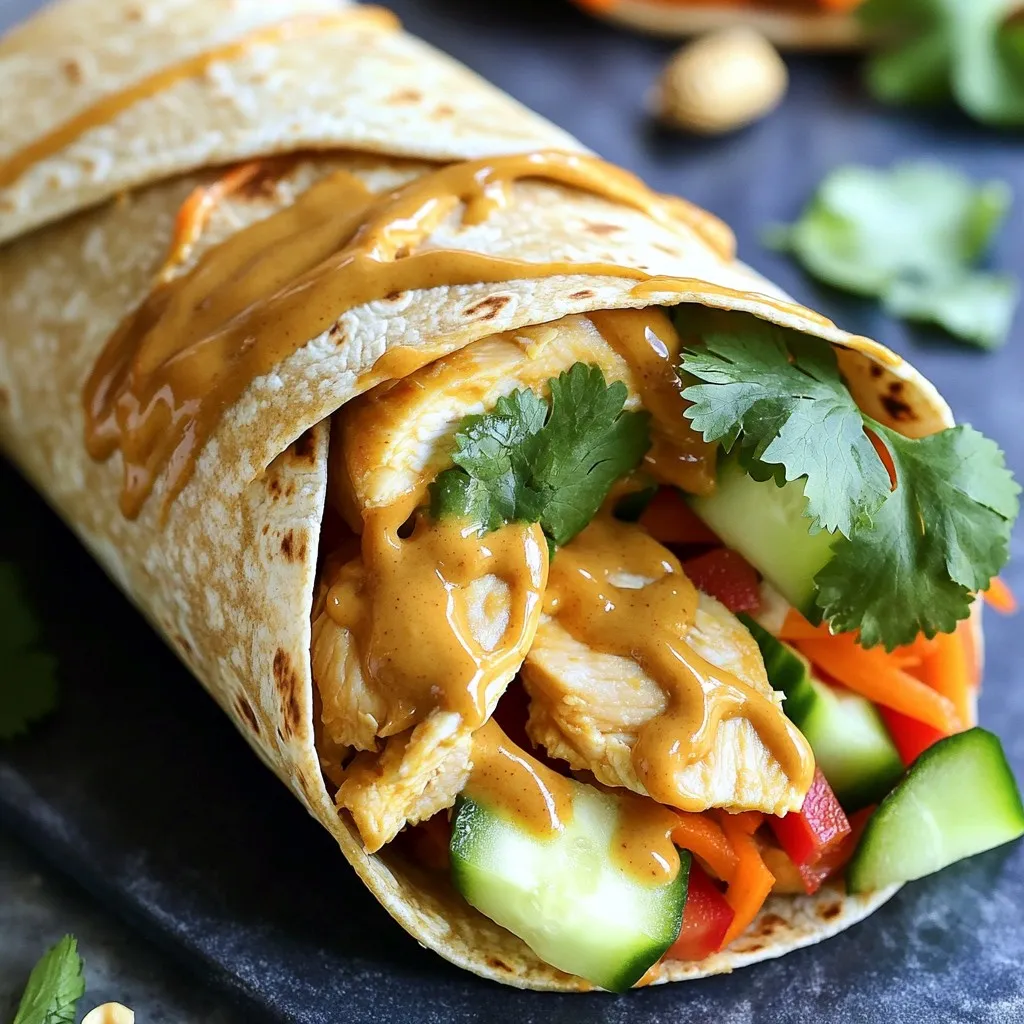
Get ready to spice up your meals with my Minute Thai Peanut Chicken Wraps! This dish bursts with flavor and comes together in no time. You’ll love how easy it …
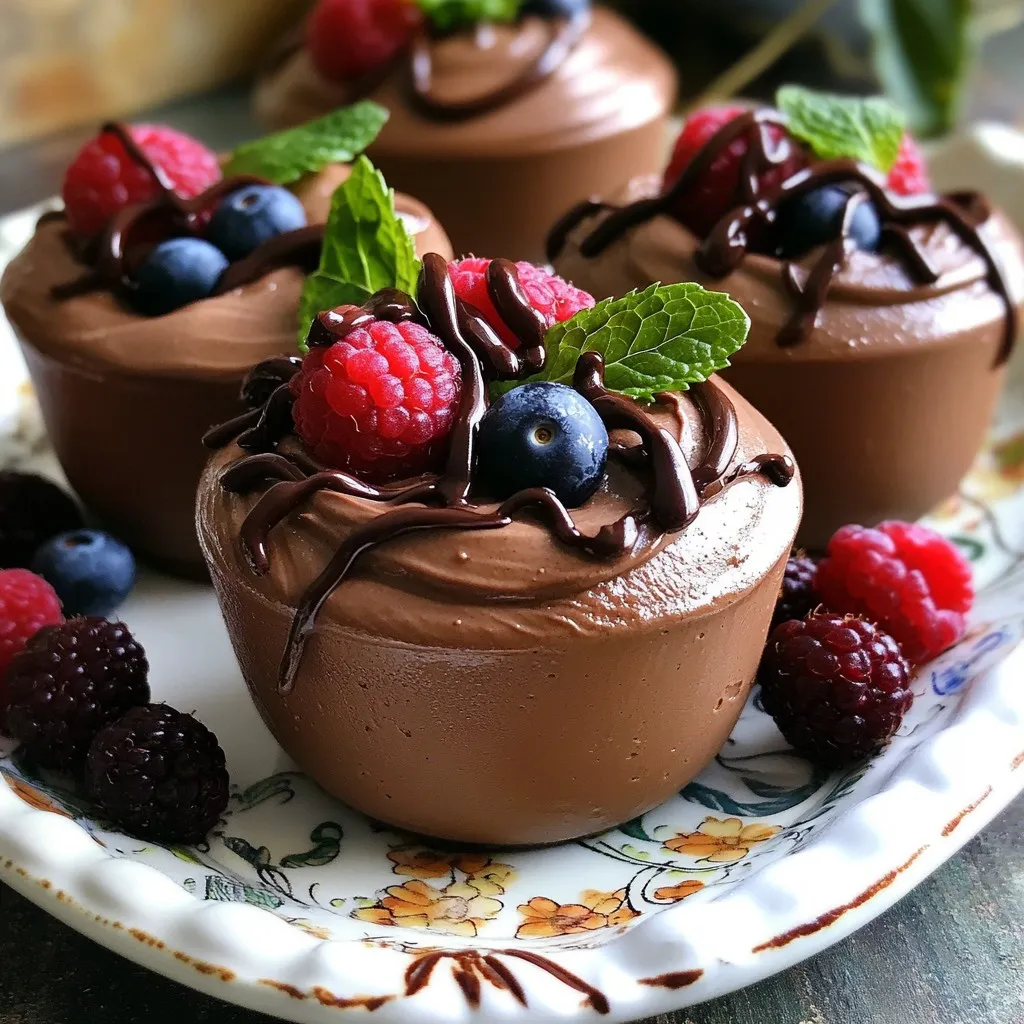
Want to impress your friends with a simple yet delicious dessert? These Cottage Cheese Chocolate Mousse Cups are just the treat you need! With a few easy steps, you’ll create …
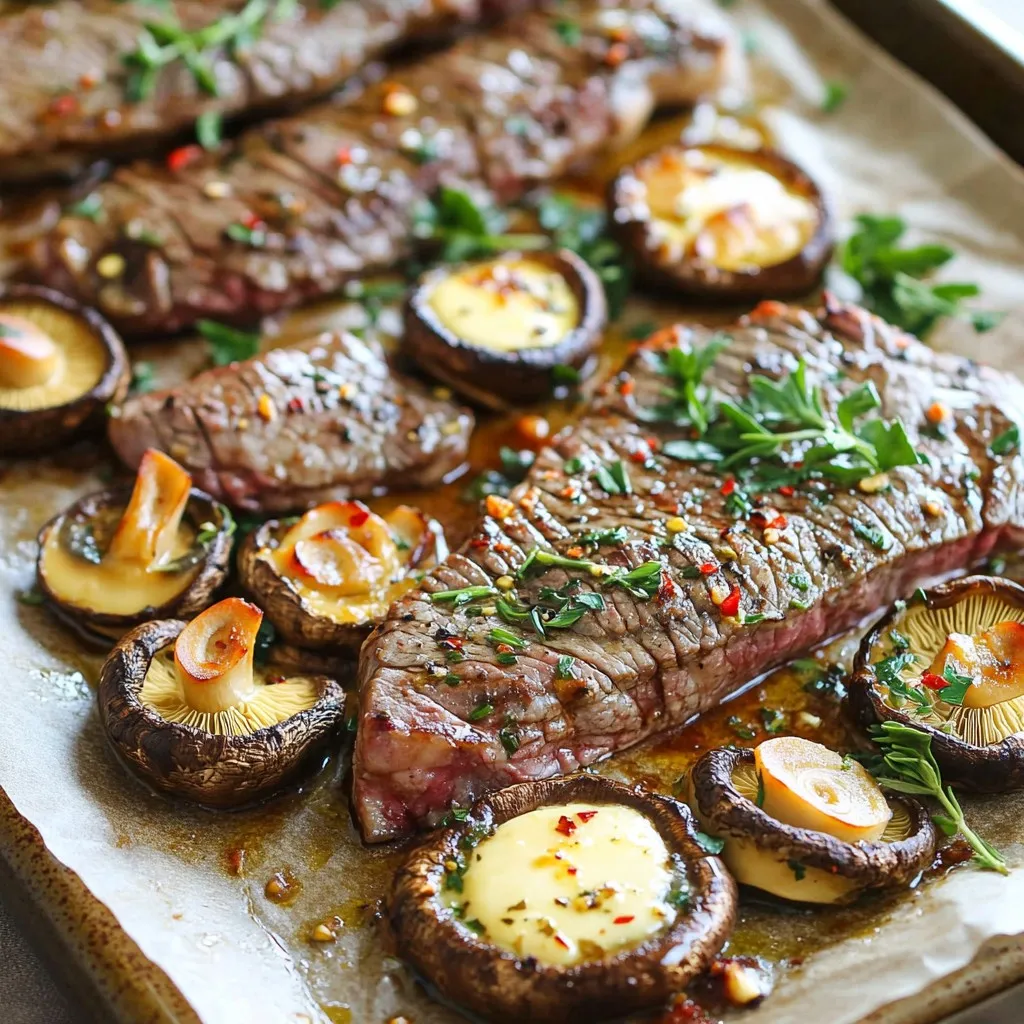
Ready to treat your taste buds? My Sheet Pan Garlic Butter Steak and Mushrooms recipe brings rich flavors and easy prep right to your home. With just one pan, you …
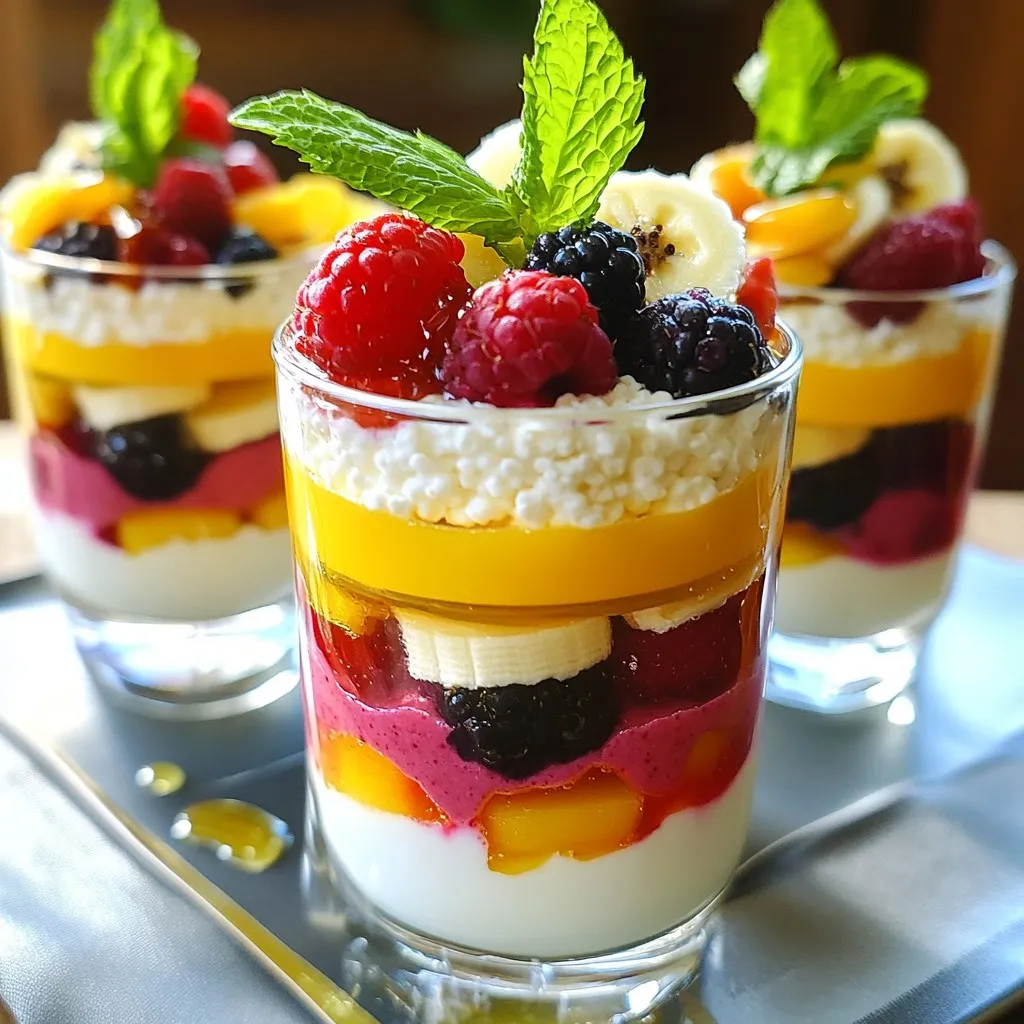
Get ready to enjoy a tasty, healthy treat with my Minute Protein Cottage Cheese Smoothie Cups Delight! These easy-to-make smoothie cups blend cottage cheese, bananas, and mixed berries into a …
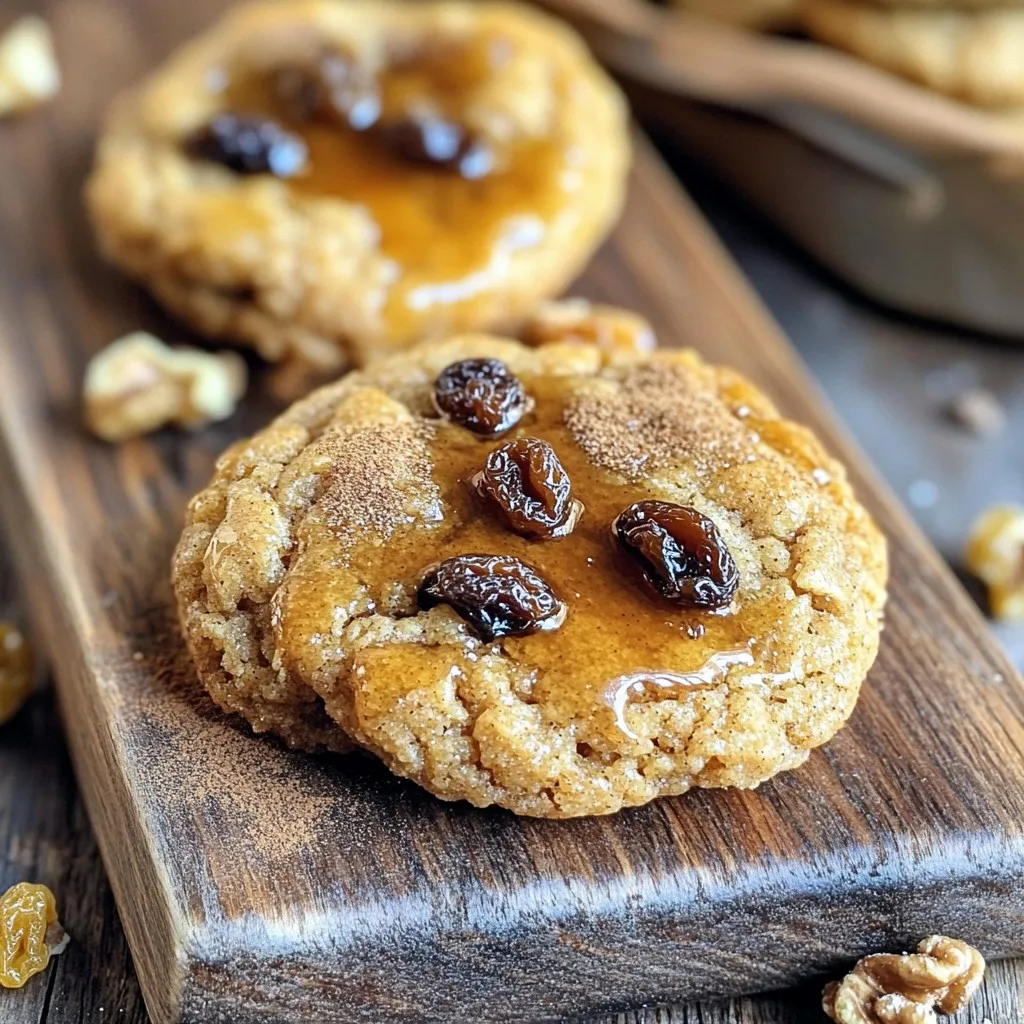
Are you ready to elevate your breakfast routine? These Spiced Maple Brown Sugar Breakfast Cookies are a delicious way to start your day. With warm flavors and a rich, sweet …
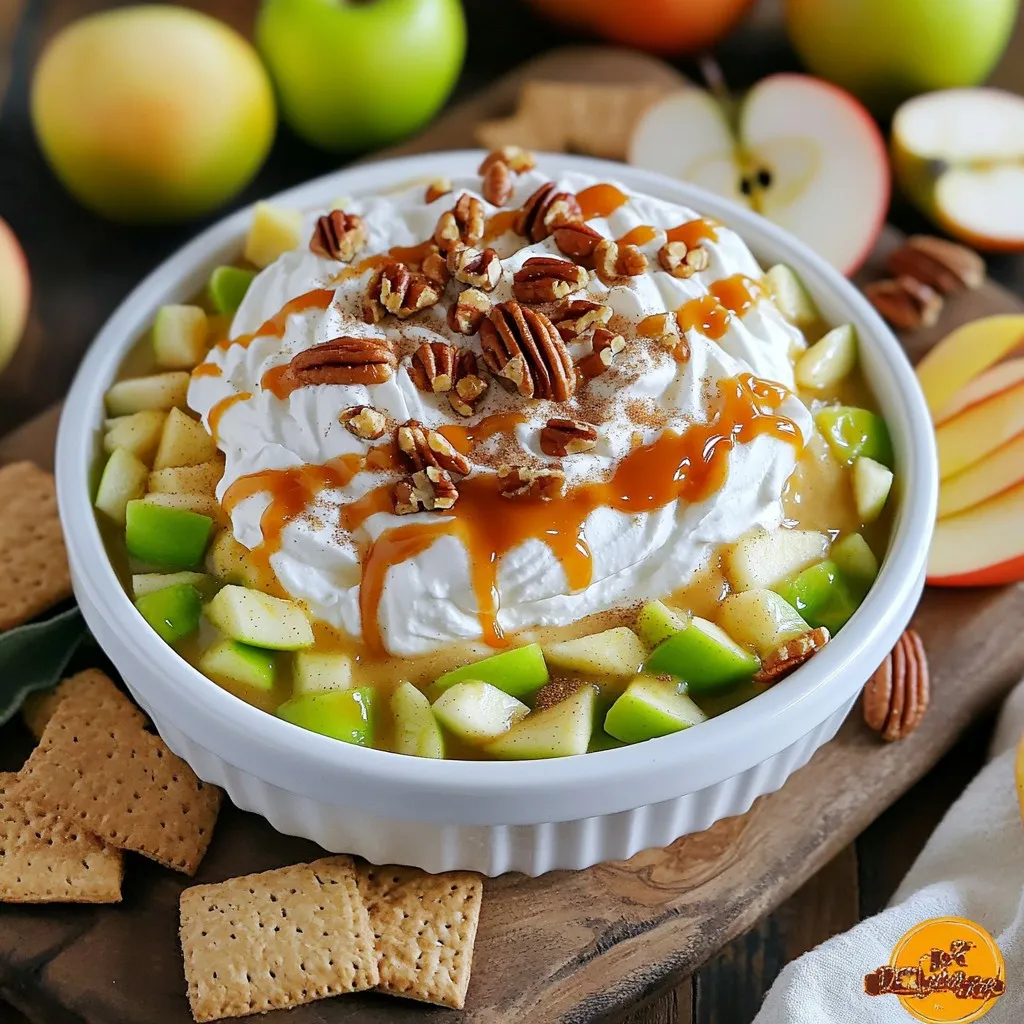
Get ready for a sweet treat with my No Bake Caramel Apple Cheesecake Dip Delight! If you love creamy, rich desserts that are super easy to make, this dip is …