Skip to content
Tossed Recipes
  • Home
  • Appetizers
  • Desserts
  • Salads
  • Breakfast
  • Dinner
  • Privacy Policy
  • Contact
  • About

Chef Jamie

Italian Tortellini Pasta Salad Flavorful and Fresh Dish

January 5, 2026March 5, 2025 by Chef Jamie
To make a delicious Italian tortellini pasta salad, you need fresh and tasty ingredients. Here’s what you will need: - 12 oz cheese tortellini - 1 cup cherry tomatoes, halved - 1 cup cucumber, diced - 1/2 cup bell pepper (red or yellow), diced - 1/4 cup red onion, finely chopped - 1/2 cup black olives, sliced - 1/3 cup Italian dressing - 1/4 cup fresh basil, chopped - Salt and pepper to taste - Grated Parmesan cheese for garnish Each of these items adds flavor and color to your salad. The cheese tortellini gives it a nice, filling base. I love using cherry tomatoes and cucumbers for their crunch. Bell peppers bring sweetness, while red onion adds a bit of sharpness. Don’t forget the black olives! They add a briny taste that works well. The Italian dressing coats everything in zesty goodness. Fresh basil brightens it all up. Finally, sprinkle some grated Parmesan on top for that creamy finish. Gather these ingredients, and you are ready to create a fresh, flavorful dish. {{ingredient_image_1}} Start by filling a pot with water. Add a pinch of salt for flavor. Bring the water to a boil. Once boiling, add 12 ounces of cheese tortellini. Cook it according to the package instructions until it is al dente. This usually takes around 3 to 5 minutes. Drain the tortellini in a colander. Rinse it under cold water to stop the cooking. This keeps the pasta firm and fresh. While the tortellini cools, grab a large mixing bowl. Cut 1 cup of cherry tomatoes in half and add them to the bowl. Dice 1 cup of cucumber and add that too. Next, chop 1/2 cup of bell pepper, either red or yellow. Finely chop 1/4 cup of red onion for a nice kick. Finally, slice 1/2 cup of black olives. Toss all these fresh veggies together in the bowl. Now it’s time to bring the salad together. Add the cooled tortellini to the vegetable mix. Drizzle 1/3 cup of Italian dressing over everything. Sprinkle in salt and pepper to taste. Toss gently but thoroughly. You want all the ingredients coated with the dressing. Then, add 1/4 cup of chopped fresh basil. This adds a lovely aroma and flavor. To let the flavors blend, cover the bowl with plastic wrap. Place it in the refrigerator for at least 30 minutes. This cooling time helps the salad taste better. When you’re ready to serve, give it a final toss. If you want, sprinkle some grated Parmesan cheese on top before serving. This adds a creamy touch to your dish. When selecting tortellini, I recommend cheese-filled options for the best flavor. Fresh tortellini tastes great but frozen ones work too. Check the package for cooking times. Aim for al dente, which means it should be firm yet tender. This texture holds up well in the salad. Fresh herbs can elevate your tortellini salad. I love using basil for its sweet, peppery kick. Chop it finely and mix it in before serving. You can also try parsley or oregano for different flavors. Just be careful not to overpower the dish. A little goes a long way! This salad is versatile and can be served in many ways. Try it as a side dish at your next barbecue or picnic. You can also serve it as a light lunch. Pair it with crusty bread and a nice drink. For a heartier meal, add grilled chicken or shrimp on top. Pro Tips Use Fresh Ingredients: Always opt for fresh vegetables and herbs to enhance the flavor and nutrition of your salad. Chill Before Serving: Letting the salad sit in the refrigerator for at least 30 minutes allows the flavors to meld beautifully. Customize Your Dressing: Feel free to experiment with different types of Italian dressings or even make your own for a personal touch. Garnish for Presentation: A sprinkle of grated Parmesan cheese on top not only adds flavor but also makes the salad visually appealing. {{image_2}} You can boost your tortellini salad with protein. Try adding grilled chicken, shrimp, or even salami. These options add flavor and make the dish more filling. For a vegetarian choice, chickpeas work great. They add texture and protein without meat. If you want a plant-based option, consider adding tofu. While Italian dressing is a classic, feel free to switch it up. A balsamic vinaigrette offers a sweet tang. If you like spicy, try a chipotle dressing. For a creamy touch, ranch or Caesar dressing can work well too. Experimenting with different dressings keeps the salad fresh and exciting. Incorporate seasonal ingredients for a fresh twist. In summer, add fresh corn or ripe avocados for creaminess. In fall, consider roasted butternut squash or apples for sweetness. You can also swap vegetables based on what's fresh at the market. This approach not only enhances flavor but also keeps your salad vibrant and colorful. Store your Italian tortellini pasta salad in a clean, airtight container. This keeps it fresh. Place it in the fridge right after it cools down. Avoid leaving it out at room temperature for more than two hours. This helps prevent bad bacteria from growing. Your tortellini salad will stay good in the fridge for about three to five days. If you notice any off smells or colors, it’s best to toss it out. Trust your senses to judge freshness. You can freeze this salad, but some ingredients may change texture. For best results, freeze only the plain tortellini. Store it in a freezer-safe bag or container. It will last for about three months in the freezer. When you are ready to eat it, thaw it in the fridge overnight before mixing it with the fresh veggies and dressing again. Yes, you can use store-bought Italian dressing. It saves time and adds good flavor. Just choose a dressing that you enjoy. Homemade dressing is great too if you have the time. No, this recipe is not gluten-free. The cheese tortellini contains wheat. However, you can find gluten-free tortellini at many stores. Just check the labels to make sure. Yes, you can make this pasta salad in advance. It tastes even better after sitting in the fridge. I suggest making it a few hours ahead or even a day before serving. Just keep it covered. Some great side dishes include garlic bread or a fresh green salad. You could also serve it with grilled chicken or shrimp. These sides complement the tortellini well and make a nice meal. This blog post covered a tasty tortellini pasta salad. We discussed key ingredients, cooking steps, and useful tips. Adding protein or fresh herbs enhances the taste. You learned about storage and answered common questions. Now you can create a delightful dish that fits any meal. Enjoy experimenting with flavors and share your tasty results!

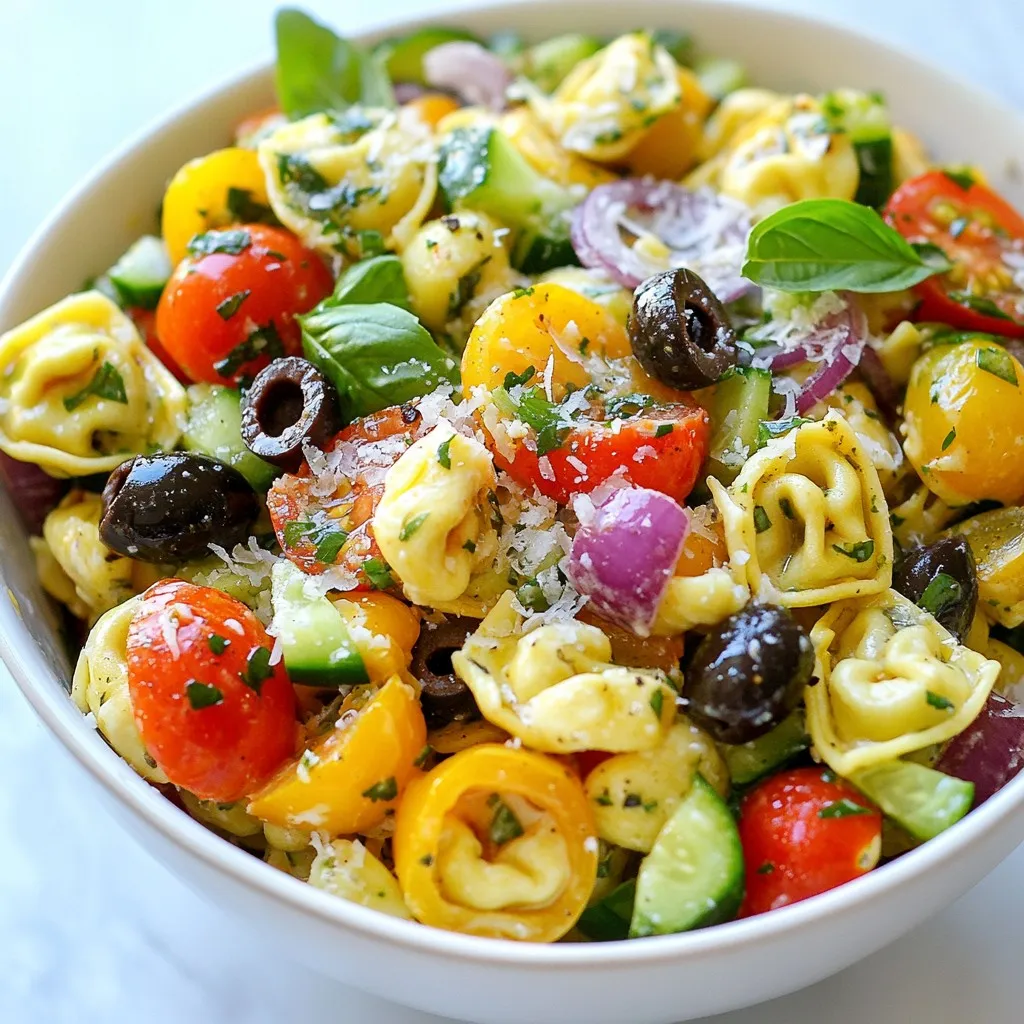
Looking for a dish that bursts with flavor and feels fresh? You’re in the right place! My Italian Tortellini Pasta Salad combines cheesy tortellini, crisp veggies, and zesty dressing. It’s …

Read more

Categories Salads

No-Bake Peanut Butter Bars Simple and Tasty Treat

January 4, 2026March 5, 2025 by Chef Jamie
Here are the simple ingredients you need for my no-bake peanut butter bars: - 1 cup creamy peanut butter - 1/2 cup honey or maple syrup - 2 cups rolled oats - 1/2 cup coconut flour - 1/4 cup chocolate chips (optional) - 1/4 cup crushed nuts (like almonds or walnuts) - 1/4 teaspoon salt - 1 teaspoon vanilla extract You can make these bars your own! Here are some fun options: - Add a scoop of protein powder for a protein boost. - Swap honey for agave syrup for a vegan option. - Mix in dried fruit like raisins or cranberries for extra flavor. - Use different nut butters, like almond or cashew, for a twist. Each bar is packed with nutrients. Here’s what you get per serving (1 bar): - Calories: 200 - Protein: 6g - Carbohydrates: 25g - Fat: 10g - Fiber: 3g - Sugars: 8g These bars are not just tasty; they also give you energy. Enjoy them as a snack or dessert! {{ingredient_image_1}} Making no-bake peanut butter bars is easy and fun. You will need about 10 minutes to prep. Then, let the bars chill for at least two hours. This time helps them set. You will enjoy making this tasty treat! 1. Melt the Base: In a medium saucepan, heat 1 cup of creamy peanut butter and 1/2 cup of honey over low heat. Stir until both are melted and mixed well. Remove the pan from heat and let it cool a bit. 2. Mix Dry Ingredients: In a large bowl, combine 2 cups of rolled oats, 1/2 cup of coconut flour, 1/4 teaspoon of salt, and 1/4 cup of crushed nuts. If you want, save 1/4 cup of chocolate chips for later. 3. Combine Wet and Dry: Pour the warm peanut butter mix into the bowl with dry ingredients. Add 1 teaspoon of vanilla extract. Mix until it all comes together. You should see a thick dough-like texture. 4. Fold in Chocolate: If you like chocolate, now is the time to fold in the saved chocolate chips. This adds a nice touch! 5. Press into Pan: Line an 8x8 inch square pan with parchment paper. Press the mixture evenly into the pan. Use a spatula to smooth the top. 6. Chill to Set: Place the pan in the fridge for at least 2 hours. This helps the bars firm up. 7. Cut and Store: Once set, lift the bars from the pan and cut them. Store bars in an airtight container in the fridge for up to two weeks or freeze them for longer storage. - Mix Well: Make sure to mix the peanut butter and honey thoroughly. This ensures even flavor. - Press Firmly: When pressing the mixture into the pan, press firmly. This helps the bars hold together. - Chill Longer: If you want firmer bars, chill them longer than two hours. A good chill makes a big difference! - Add Texture: For extra crunch, try adding different nuts or seeds. They can boost flavor and texture. I recommend storing your peanut butter bars in an airtight container. Keep them in the refrigerator. They will stay fresh for up to two weeks this way. If you want to keep them longer, freeze them. Just wrap each bar in parchment paper before freezing. This helps keep them from sticking together. For the best texture, use creamy peanut butter. This keeps the bars moist and smooth. You can also mix in a bit of crunchy peanut butter for added texture. The oats and coconut flour give the bars a nice, chewy bite. Adjust the amount of honey or maple syrup to suit your taste. More sweetener makes the bars sweeter and softer. One common mistake is not letting the peanut butter mixture cool. If it’s too hot, it can melt the oats. Mix the dry ingredients well before combining them with the wet ones. This ensures even flavor and texture. Don't skip the refrigeration step! Chilling is key for getting firm bars. Pro Tips Use Natural Peanut Butter: Opt for natural peanut butter with no added sugars or oils for a healthier treat that enhances the flavor. Customize Your Mix-ins: Feel free to add dried fruits, seeds, or different types of nuts to personalize your bars and increase their nutritional value. Ensure Proper Cooling: Let the peanut butter mixture cool before mixing with dry ingredients to prevent the oats from becoming mushy. Cut with a Warm Knife: For clean cuts, use a warm knife to slice the bars, making it easier to get neat edges. {{image_2}} You can change the flavor of your peanut butter bars by adding fun ingredients. Try mixing in some dried fruit, like raisins or cranberries. You can also add seeds, like chia or flaxseeds, for extra texture. If you love spice, a pinch of cinnamon or nutmeg can give a warm kick. You can even swap out peanut butter for almond or cashew butter for a different taste. Each addition will make the bars unique. These no-bake bars can fit many diets. To make them gluten-free, just use gluten-free oats. If you want a vegan treat, replace honey with maple syrup or agave nectar. Both options work well and keep the bars sweet. Check that your chocolate chips are dairy-free if you want to stay vegan. With these small changes, everyone can enjoy these tasty treats. Toppings can make your bars even better. You might sprinkle some crushed nuts or seeds on top for crunch. Drizzling melted chocolate or peanut butter over the bars adds a nice touch. You can also use coconut flakes for a tropical vibe. Don’t forget to get creative! Mix in your favorite ingredients to make these bars truly yours. Store your no-bake peanut butter bars in an airtight container. This keeps them fresh. Place the container in the fridge. They will stay good for up to two weeks. If you want to keep them longer, freezing is a great option. To freeze the bars, first cut them into pieces. Wrap each bar in parchment paper. Place the wrapped bars in a freezer-safe container. They can last for about three months in the freezer. When you're ready to eat them, just thaw in the fridge overnight. For the best taste, eat the bars within two weeks if stored in the fridge. Check for any signs of spoilage, like an off smell or color change. If you freeze them, label the container with the date. This way, you’ll know how long they’ve been stored. Yes, you can use natural peanut butter. It will add a rich flavor. Just be aware that natural peanut butter can be runnier than regular peanut butter. This may change the texture slightly. If you find it too loose, you can add a bit more coconut flour. To make these bars vegan, simply substitute honey with maple syrup. This keeps the sweetness while ensuring it is plant-based. Ensure your chocolate chips are dairy-free if you choose to add them. If you don’t have coconut flour, you can use regular all-purpose flour. You can also use almond flour for a nutty flavor. Keep in mind that coconut flour is very absorbent. So, if you use a different flour, you might need to adjust the amount. Yes, you can add protein powder. It’s a great way to boost the nutritional value. Start with 1/4 cup of protein powder and reduce the coconut flour slightly. This helps maintain the right texture. These bars last up to two weeks in the fridge. Store them in an airtight container. For longer storage, you can freeze them. They will stay fresh for about three months in the freezer. You learned about making tasty peanut butter bars today. We covered key ingredients and the steps for easy preparation. I shared tips for perfecting texture and flavor, plus storage hints. Don’t forget the fun variations to keep things interesting. Lastly, I answered common questions to help you succeed. Enjoy making your bars your way, and remember that small changes can bring big flavors. Happy snacking!

Looking for a quick and easy treat? These No-Bake Peanut Butter Bars are both simple and delicious! With just a few ingredients, you can whip up a snack that satisfies …

Read more

Categories Desserts

Creamy Chicken and Gnocchi Pot Pie Delightful Meal

November 11, 2025February 20, 2025 by Chef Jamie
To make a delicious creamy chicken and gnocchi pot pie, gather these key ingredients: - Chicken - 1 lb boneless, skinless chicken breasts, cut into bite-sized pieces - Vegetables - 1 medium onion, diced - 2 garlic cloves, minced - 2 carrots, diced - 2 celery stalks, diced - 2 cups frozen peas - Seasonings - 1 teaspoon dried thyme - 1 teaspoon dried rosemary - Salt and pepper to taste - Liquid Ingredients - 4 cups chicken broth - 1 cup heavy cream - Gnocchi - 1 ½ cups store-bought gnocchi (fresh or frozen) - Puff Pastry - 1 cup frozen puff pastry (1 sheet), thawed - Egg - 1 egg, beaten (for egg wash) Each ingredient adds flavor and texture. The chicken gives protein, while the gnocchi adds heartiness. Fresh and frozen vegetables bring color and nutrients. The heavy cream and broth create a rich, creamy filling. Puff pastry tops it all off with a flaky crust. {{ingredient_image_1}} - Preheat Oven Start by preheating your oven to 400°F (200°C). This step is key for getting a nice, golden crust. - Sauté Vegetables In a large pot, heat 1 tablespoon of olive oil over medium heat. Add 1 medium diced onion, 2 diced carrots, and 2 diced celery stalks. Sauté these for 5-7 minutes. You want them soft and the onion to turn translucent. - Cook Chicken Add 1 pound of bite-sized chicken pieces to the pot. Season with salt and pepper. Cook the chicken for about 5-7 minutes. The chicken should no longer be pink. - Add Broth and Cream Pour in 4 cups of chicken broth. Bring this to a gentle boil. Then, reduce the heat and stir in 1 cup of heavy cream and 1½ cups of gnocchi. Let this simmer for about 5 minutes. The gnocchi should be cooked, and the mixture should look creamy. - Transfer Filling to Baking Dish Carefully transfer your creamy chicken and gnocchi mixture into a baking dish. Spread it out evenly for the best results. - Prepare Puff Pastry Top Roll out the thawed puff pastry on a floured surface. Cut it to fit your baking dish, leaving some overhang. - Seal and Cut for Steam Place the puff pastry over the filling. Press the edges down with a fork to seal them well. Cut a few slits in the top for steam to escape while baking. - Brush with Egg Wash Brush the top of the pastry with a beaten egg. This gives it a beautiful, golden color when baked. - Bake Until Golden Put the pot pie in the oven and bake for 25-30 minutes. You want the pastry to puff up and turn golden brown. - Cooling Time Once baked, remove the pot pie from the oven. Let it sit for 5 minutes before serving. This cooling time helps the filling set a bit. Selecting Gnocchi When choosing gnocchi, look for quality. Fresh gnocchi often has a light, fluffy texture. If you use frozen gnocchi, check the packaging for the best results. Both types cook quickly, so keep an eye on them. They should float to the top when done. Perfecting the Creamy Filling To create a rich and creamy filling, use heavy cream. It adds a wonderful texture. Stir in the cream slowly after the broth simmers. This helps blend the flavors well. Don't rush this step; let the flavors develop. Taste and adjust salt and pepper as needed. Avoiding Soggy Pastry To prevent soggy pastry, ensure your filling is not too wet. Let the mixture cool a bit before adding the puff pastry. This helps the pastry stay crisp. Also, brush the top with egg wash for a golden finish. Cut slits in the pastry to let steam escape. Garnishing Options Once baked, garnishing makes your pot pie look appealing. Use fresh thyme sprigs or parsley for color. A sprinkle of black pepper adds a nice touch, too. These simple additions enhance both the look and flavor of the dish. Pairing with Sides Serve your pot pie with simple sides. A fresh green salad pairs well. You can also add steamed green beans for a nice crunch. These sides balance the creamy filling and add a fresh taste to your meal. Enjoy your delicious creation! Pro Tips Use Leftover Chicken: If you have leftover rotisserie chicken, it’s a great time-saver and adds extra flavor to the pot pie. Experiment with Vegetables: Feel free to add other vegetables like mushrooms or bell peppers for added flavor and nutrition. Perfect Puff Pastry: Ensure your puff pastry is cold when you place it on the filling for the best puff and flakiness. Serving Suggestion: Serve with a side salad or crusty bread to soak up the delicious creamy filling! {{image_2}} Chicken Alternatives You can use turkey instead of chicken. Shredded rotisserie chicken also works well. For a vegetarian option, try chickpeas or tofu. Vegetable Substitutions Feel free to swap veggies based on what you have. Zucchini, mushrooms, or bell peppers can add great flavor. You can also use fresh spinach for a pop of color. Dairy-Free Options To make this dish dairy-free, swap heavy cream with coconut milk. Use a dairy-free puff pastry for the top. This keeps the creaminess without the dairy. Herbs and Spices Adding fresh herbs brings a bright flavor. Try fresh parsley or chives for a fresh taste. A pinch of red pepper flakes adds a nice kick. Adding Cheeses Mixing in cheese can elevate the dish. Try shredded cheddar or mozzarella for a creamy texture. You can also sprinkle some parmesan on top before baking for a rich flavor. - Storing Leftovers: After your meal, let the pot pie cool. Cover it tightly with plastic wrap or foil. You can also use an airtight container. It stays fresh in the fridge for up to three days. - Reheating Methods: To reheat, preheat your oven to 350°F (175°C). Place the pot pie in an oven-safe dish. Cover it with foil to keep it from getting too brown. Heat for about 20-25 minutes. You can also microwave individual portions for about 2-3 minutes, but this might make the pastry less crispy. - Preparing for Freezing: If you want to freeze the pot pie, do this before baking. Wrap the dish tightly with plastic wrap, then with foil. This keeps out air and prevents freezer burn. It can last in the freezer for up to three months. - Thawing and Reheating: To use a frozen pot pie, take it out the night before and let it thaw in the fridge. When ready to bake, preheat your oven to 400°F (200°C). Unwrap the pot pie and bake for 30-35 minutes, until golden and bubbly. If baking from frozen, increase the time to about 50-60 minutes. Check for doneness by making sure the filling is hot and the pastry is golden. Can I make this dish ahead of time? Yes, you can. Prepare the filling and store it in the fridge. Then, add the puff pastry before baking. This keeps the crust fresh. What can I substitute for puff pastry? If you don’t have puff pastry, use pie crust or biscuit dough. Both options give a nice, flaky top. Is this pot pie gluten-free? The original recipe is not gluten-free due to puff pastry. To make it gluten-free, use a gluten-free crust instead. How to know when the pot pie is done? Look for a golden-brown crust. The filling should bubble slightly. If both are true, it’s ready to serve. Can I use cooked chicken? Absolutely! Using cooked chicken saves time. Just add it to the pot with the broth and cream. How can I make it spicier? To spice it up, add red pepper flakes or a dash of hot sauce. Adjust the amount to your taste. In this post, we explored how to make a delicious pot pie. We covered the ingredients, step-by-step instructions, tips, variations, storage info, and FAQs. You now have the tools to create this dish your way. Remember, cooking is about fun and creativity. Don't hesitate to experiment with flavors and ingredients. Enjoy making and sharing your tasty pot pie!

If you’re craving a cozy meal that warms the heart and fills the belly, look no further than this Creamy Chicken and Gnocchi Pot Pie. It’s rich, savory, and topped …

Read more

Categories Dinner

Crunchy Baked Mac and Cheese Irresistible Delight

November 13, 2025February 18, 2025 by Chef Jamie
- 8 ounces elbow macaroni - 2 cups sharp cheddar cheese, grated - 1 cup mozzarella cheese, grated - 1/2 cup grated Parmesan cheese - 2 cups milk - 1/4 cup unsalted butter - 1/4 cup all-purpose flour - 1 teaspoon garlic powder - 1 teaspoon onion powder - 1/2 teaspoon mustard powder - Salt and pepper to taste - 1 cup panko breadcrumbs - 1 tablespoon olive oil - Fresh parsley, chopped (for garnish) To make this crunchy baked mac and cheese, you will need a few key tools. Here’s what you’ll need: - A large pot for boiling pasta - A medium pot for making cheese sauce - A whisk for mixing - A baking dish (9x13 inch) - A wooden spoon for stirring - A small bowl for mixing breadcrumbs - An oven for baking Using fresh ingredients makes a big difference. Here are my tips: - Choose high-quality cheese. Sharp cheddar gives great flavor. - Use fresh mozzarella for a creamy texture. - Select whole milk for a rich sauce. - Look for panko breadcrumbs. They provide the best crunch. - Use unsalted butter to control salt levels in your dish. These choices enhance the taste and texture of your mac and cheese. Enjoy the process of gathering these ingredients! {{ingredient_image_1}} Start by gathering all your ingredients. You will need elbow macaroni, cheddar cheese, mozzarella cheese, and Parmesan cheese. Also, grab milk, butter, flour, garlic powder, onion powder, mustard powder, and panko breadcrumbs. Prepare a large pot for boiling water and another pot for making the cheese sauce. Fill a large pot with water. Add a pinch of salt and bring it to a boil. Once boiling, add 8 ounces of elbow macaroni. Cook it for about 7 to 8 minutes until it is al dente. Drain the pasta in a colander and set it aside. In a clean pot, melt 1/4 cup of unsalted butter over medium heat. Once melted, whisk in 1/4 cup of all-purpose flour. Cook this for about 2 minutes until it is bubbly and slightly golden. Gradually pour in 2 cups of milk while whisking. Stir in 1 teaspoon of garlic powder, 1 teaspoon of onion powder, and 1/2 teaspoon of mustard powder. Add salt and pepper to taste. Cook this mixture for 5 to 7 minutes until the sauce thickens. Remove the pot from heat and stir in 2 cups of grated cheddar and 1 cup of grated mozzarella cheese until it melts and becomes creamy. Fold the cooked macaroni into the cheese sauce until well mixed. Pour this mixture into a greased 9x13 inch baking dish. In a small bowl, combine 1 cup of panko breadcrumbs with 1 tablespoon of olive oil and a pinch of salt. Mix well until the breadcrumbs are coated. Sprinkle this breadcrumb mixture evenly over the mac and cheese. Add 1/2 cup of grated Parmesan cheese on top for a crunchy finish. Bake in the oven at 350°F for 25 to 30 minutes until the top is golden brown and crispy. Once done, let it cool for 5 minutes and garnish with fresh chopped parsley before serving. Enjoy your crunchy baked mac and cheese! To get that perfect crunch on top, use panko breadcrumbs. They are lighter than regular breadcrumbs. Mix them with a little olive oil for flavor. This step makes a huge difference! Sprinkle them evenly over your mac and cheese. For extra crunch, add grated Parmesan on top before baking. The cheese will melt and create a golden crust. Bake until you see a nice brown color on top. For a rich flavor, pair sharp cheddar with mozzarella. Cheddar gives a tangy bite while mozzarella adds creaminess. You can also try Gruyère or Gouda for something different. These cheeses melt well and add depth. If you like a little spice, add pepper jack cheese. This gives a nice kick to your dish. One common mistake is overcooking the pasta. Cook it until it's al dente, as it will bake longer in the oven. Another mistake is using low-quality cheese. Always choose good cheese for the best flavor. Also, don’t skip the salt in the pasta water. This step helps season the pasta. Lastly, let it cool briefly after baking. This helps it set and makes serving easier. Pro Tips Use Quality Cheese: Always opt for high-quality cheese for the best flavor. Sharp cheddar enhances the taste significantly. Don’t Overcook the Pasta: Cook the macaroni until just al dente, as it will continue to cook in the oven and avoid a mushy texture. Experiment with Toppings: Feel free to mix in herbs or spices into the breadcrumb topping for added flavor and texture. Let It Rest: Allow the baked mac and cheese to cool for a few minutes before serving; this helps it set and makes for easier serving. {{image_2}} You can make your Crunchy Baked Mac and Cheese even better by adding protein. Cooked chicken or crispy bacon works well. To add chicken, use grilled or rotisserie chicken. Shred it and mix it with the cheese sauce. To use bacon, cook it until crispy, then crumble it over the top. Both options add great flavor and make this dish more filling. For a vegetarian twist, consider adding veggies. Broccoli, spinach, or mushrooms blend well. Steam or sauté the veggies before mixing them in. You can also replace the cheese with a plant-based version. This keeps the dish creamy without meat while still being tasty. You can boost the flavor with spices and herbs. Try adding a pinch of paprika or cayenne for heat. Fresh herbs like thyme or rosemary can add a nice aroma. Mix in these spices when you make the cheese sauce to let them blend well. This small change makes a big difference in taste. Cool the Crunchy Baked Mac and Cheese to room temperature. Place leftovers in an airtight container. Store in the fridge for up to three days. Make sure to cover it well to keep it fresh. To reheat, use the oven for the best results. Preheat your oven to 350°F (175°C). Place the mac and cheese in a baking dish. Add a splash of milk to keep it moist. Cover the dish with foil. Bake for about 20 minutes. Remove the foil for the last 5 minutes for extra crunch. You can also microwave it. Heat on medium for 2-3 minutes, stirring halfway through. You can freeze Crunchy Baked Mac and Cheese for up to three months. Cool it completely before freezing. Use a freezer-safe container or bag. For best flavor, wrap it tightly. When ready to eat, thaw it overnight in the fridge. Reheat it in the oven or microwave as described above. Crunchy Baked Mac and Cheese lasts about 3 to 5 days in the fridge. Store it in an airtight container to keep it fresh. The longer it sits, the softer the texture becomes. Yes, you can use other types of pasta. Shells, penne, or rotini work well. Just make sure to adjust cooking times based on the pasta shape. Absolutely! You can prepare the dish a day in advance. Just assemble it, cover it, and refrigerate. Bake it just before serving for the best crunch. This dish pairs well with salads, steamed veggies, or grilled chicken. You can also serve it as a side with your favorite meats. To make it gluten-free, use gluten-free pasta and substitute the all-purpose flour with a gluten-free blend. This way, you can enjoy the same great taste! In this article, we explored the tasty world of Crunchy Baked Mac and Cheese. We discussed key ingredients, essential cooking tools, and tips for choosing the best items. We shared step-by-step instructions for preparation, cooking, and baking. You learned valuable tips for the perfect crunch and common mistakes to avoid. Feel free to experiment with protein and vegetarian options to suit your taste. Remember to store your leftovers properly for later enjoyment. Enjoy your cooking journey, and have fun making this dish!

Are you ready for a cheesy joy that crunches with every bite? Today, I’m sharing my ultimate recipe for Crunchy Baked Mac and Cheese! This dish combines creamy cheese with …

Read more

Categories Dinner

Beef & Cheddar Sliders Tasty and Easy Party Treat

January 12, 2026February 17, 2025 by Chef Jamie
To make tasty beef and cheddar sliders, you need: - 1 lb ground beef (80/20) - 1 teaspoon garlic powder - 1 teaspoon onion powder - 1 teaspoon smoked paprika - Salt and pepper to taste - 8 mini slider buns - 8 slices sharp cheddar cheese - 1 tablespoon Worcestershire sauce - 1 tablespoon olive oil - 1 small red onion, thinly sliced - 1 cup arugula or baby spinach - 2 tablespoons mayonnaise - Optional: pickles or jalapeños for topping These ingredients create a rich flavor in each bite. The beef gives a savory base, while the cheddar adds creaminess. The spices enhance the taste, making them hard to resist. You’ll need a few tools to make these sliders: - Large mixing bowl - Skillet - Spatula - Measuring spoons - Knife and cutting board - Serving platter These tools help you mix, cook, and serve your sliders with ease. A skillet is key for getting that perfect sear on the patties. You can personalize your sliders with fun toppings: - Pickles for a crunchy bite - Jalapeños for a spicy kick - Avocado for creaminess - Extra cheese for a cheesy delight These add-ons let you mix flavors and textures. Experiment with different toppings to find your favorite combo. {{ingredient_image_1}} First, grab a large mixing bowl. Add 1 pound of ground beef, garlic powder, onion powder, and smoked paprika. Sprinkle in some salt and pepper to taste. Then, mix everything together gently. You want all the spices to blend into the beef. This adds a lot of flavor. Once mixed, divide the beef into 8 equal portions. Shape them into mini patties. Make these patties a bit larger than the buns. They will shrink a little while cooking. Next, heat 1 tablespoon of olive oil in a large skillet over medium-high heat. Wait until the oil is hot. Carefully add the patties to the skillet. Cook them for about 3-4 minutes on each side. You want them to be juicy and cooked to your liking. During the last minute of cooking, add a slice of sharp cheddar cheese on each patty. Cover the skillet with a lid. This helps the cheese melt nicely over the beef. Now, it’s time to put everything together. First, lightly toast the mini slider buns in another pan or under the broiler until they are golden brown. Spread a thin layer of mayonnaise on the bottom half of each bun. Place a cheesy beef patty on top of the mayo. Then, add a few slices of thin red onion and a handful of arugula or baby spinach. If you like, you can add pickles or jalapeños for extra flavor. Finally, cover each slider with the top bun. Your tasty beef and cheddar sliders are ready to serve! To keep your sliders juicy, choose 80/20 ground beef. This means it has 80% lean meat and 20% fat. The fat adds flavor and moisture. Mix the beef gently with spices and Worcestershire sauce. Over-mixing can make them tough. Shape the patties slightly larger than the buns. They will shrink while cooking, so this step is key. Cook them on medium-high heat for about 3-4 minutes on each side. This gives a nice crust while keeping the inside moist. For the best cheese melt, add it in the last minute of cooking. Place a slice of cheddar on each patty. Cover the skillet with a lid. This traps heat and helps the cheese melt smoothly. Use sharp cheddar for a strong flavor. If you want extra creaminess, consider adding a little cream cheese in the mix before cooking. It pairs well with the beef and adds richness. Toasting slider buns adds flavor and crunch. Lightly coat a pan with olive oil over medium heat. Place the buns cut-side down and toast until golden brown. You can also use a broiler for a quicker option. Just watch them closely to avoid burning. Toasting the buns helps them hold up to the juicy beef and melted cheese. It’s a simple step that makes a big difference in taste and texture. Pro Tips Choose the Right Beef: Using ground beef with a fat content of 80/20 ensures juicy and flavorful sliders. Leaner beef can lead to dry patties. Don't Overmix: When combining the beef and seasonings, mix gently to avoid tough sliders. Overworking the meat can make it dense. Toast the Buns: Lightly toasting the slider buns adds texture and prevents them from becoming soggy when loaded with toppings. Experiment with Toppings: Feel free to customize your sliders with different cheeses, sauces, or veggies. Adding a bit of spice with jalapeños can elevate the flavor! {{image_2}} To make spicy beef and cheddar sliders, add heat to the beef mix. You can mix in 1-2 teaspoons of chili powder or cayenne pepper. If you like it really spicy, add diced jalapeños directly into the beef. You can also top the sliders with spicy pickles for an extra kick. These small changes will make your sliders a hit with spice lovers. If you want a meat-free option, use black beans or lentils. Mash them and mix in the garlic powder, onion powder, and spices. Form them into patties just like the beef version. Another option is to use portobello mushrooms. Grilled or roasted, they make a great base for your sliders. Top with cheese or avocado for a tasty treat. While sharp cheddar is tasty, you can try other cheeses. Pepper jack adds a spicy twist, while gouda gives a creamy texture. For a classic touch, use Swiss cheese. Each cheese brings its own flavor, so feel free to mix and match. This way, you can create sliders that suit every taste at your party. You can store leftover sliders in an airtight container. Place them in the fridge. They will stay fresh for about three days. If you can, wrap them tightly in foil first. This keeps them from drying out. To reheat your sliders, use the oven or a skillet. For the oven, preheat to 350°F. Wrap the sliders in foil to keep them moist. Heat for about 10-15 minutes. In a skillet, heat a little oil over medium heat. Cook for about 3-5 minutes, flipping them gently. This method keeps the buns soft and the beef juicy. You can freeze sliders for quick meals later. First, let them cool completely. Then wrap each slider in plastic wrap. Place them in a freezer bag or container. They can last up to three months in the freezer. To cook them, thaw overnight in the fridge. Reheat them as explained earlier. Enjoy sliders anytime you want! I recommend using ground beef that has 80% meat and 20% fat. This blend gives you juicy and tasty sliders. The fat adds flavor and keeps the meat tender. Leaner beef can dry out, making your sliders less enjoyable. Always check the package for the blend type. Yes, you can prep these sliders in advance. Make the beef patties and store them in the fridge for a day. You can also cook the patties and keep them warm in the oven. Just reheat them before serving. This saves you time and effort when guests arrive. Pair your beef sliders with light and fun sides. Potato wedges or sweet potato fries work well. You can also serve a fresh salad or coleslaw for crunch. If you want something extra, try nachos or a cheese platter. These sides complement the sliders and make your meal more festive. Making beef and cheddar sliders is simple and fun. We covered the key ingredients, tools, and tasty toppings. You learned step-by-step how to prepare, cook, and assemble these delicious sliders. I shared tips for juicy patties and cheesy goodness. You can also explore variations like spicy options or vegetarian alternatives. Don’t forget how to store and reheat leftovers! These sliders are easy to make and perfect for meals. Try them out, and enjoy every tasty bite!

If you’re looking for a crowd-pleaser at your next gathering, you’re in the right place! Beef and cheddar sliders are the perfect mix of tasty and easy. These small sandwiches …

Read more

Categories Appetizers

Savory Sticky Garlic Chicken Noodles Delight

November 11, 2025February 16, 2025 by Chef Jamie
- 300g egg noodles - 2 boneless, skinless chicken breasts, thinly sliced - 4 cloves garlic, minced - 2 tablespoons soy sauce - 2 tablespoons honey - 1 tablespoon sesame oil - 1 tablespoon vegetable oil - 1 red bell pepper, sliced - 1 cup snap peas, trimmed - 2 green onions, chopped (for garnish) - Sesame seeds (for garnish) - Salt and pepper to taste For a perfect meal, I recommend serving four people. Each person gets about 75g of noodles. You can adjust the chicken to 100g per person if you want more protein. For those who are gluten-free, swap the egg noodles for rice noodles. If you're vegetarian, consider using tofu instead of chicken. This recipe is flexible for different tastes and diets. {{ingredient_image_1}} To cook egg noodles perfectly, bring a pot of salted water to a boil. Add the noodles and cook them according to the package instructions, usually about 4-6 minutes. Stir them gently to prevent sticking. Once done, drain the noodles in a colander. Rinse them under cold water to stop the cooking process. This step keeps them from getting mushy. For the chicken, slice two boneless, skinless breasts into thin strips. Season the chicken with salt and pepper. In a large skillet or wok, heat vegetable oil over medium-high heat. Add the chicken to the skillet and cook for about 5-7 minutes. Brown the chicken well. It should look golden and cooked through. Once done, remove it from the skillet and set it aside. Mix soy sauce, honey, and sesame oil in a small bowl. This combination creates a sweet and savory sauce. After you sauté the garlic, pour the sauce over the chicken and vegetables. This timing ensures the sauce mixes well and coats everything perfectly. In the same skillet, add minced garlic and sauté for about 30 seconds. Then, toss in sliced red bell pepper and snap peas. Stir-fry these for about 2-3 minutes until they are tender yet crisp. Return the browned chicken to the skillet, then add the sauce. Finally, add the cooked egg noodles. Toss everything together to combine well. Heat through for another 2-3 minutes. Taste the dish and adjust seasonings if needed. For a beautiful presentation, serve the chicken noodles in deep bowls. Garnish with chopped green onions and a sprinkle of sesame seeds. For extra flair, drizzle a little honey on top for added glossiness. For tender chicken, slice it thinly. This helps it cook fast and stay juicy. Cook it in a hot pan with oil for great browning. Keep an eye on the chicken while it cooks. Remove it from the heat when it’s no longer pink. To avoid overcooked vegetables, add them at the right time. Stir-fry bell peppers and snap peas for just a few minutes. You want them crisp, not mushy. This keeps their bright colors and fresh taste. Want to add heat? Try red pepper flakes or a dash of hot sauce. These spices boost flavor without overwhelming the dish. You can also add ginger for a zesty kick. Feel free to mix in other vegetables. Broccoli, carrots, or bok choy work great. They add color and nutrients, making the dish even better. Serve Sticky Garlic Chicken Noodles with a side salad. A light cucumber salad pairs well. It adds crunch and freshness. For drinks, try iced green tea. Its subtle taste complements the bold flavors of the noodles. Enjoy this meal with friends or family for a fun dinner night! Pro Tips Marinate the Chicken: For enhanced flavor, marinate the sliced chicken in soy sauce and honey for at least 30 minutes before cooking. Use Fresh Ingredients: Fresh garlic and vegetables make a big difference in taste. Opt for fresh snap peas and bell peppers for the best results. Adjust Sauce Consistency: If you prefer a thicker sauce, you can add a cornstarch slurry (cornstarch mixed with water) during the last few minutes of cooking. Garnish for Appeal: Don't skip the garnishes! Chopped green onions and sesame seeds not only add flavor but also enhance the dish's presentation. {{image_2}} For those needing gluten-free options, you can swap egg noodles for rice noodles or zucchini noodles. Both options work great and keep the dish tasty. If you want a vegetarian twist, try using tofu or tempeh instead of chicken. Just stir-fry them until golden brown, then follow the same steps in the recipe. To jazz up your dish, think about adding fresh ginger or a bit of chili paste. These will give your Sticky Garlic Chicken Noodles an exciting kick. If you like crunch, consider tossing in some chopped peanuts or cashews. They add texture and a nice nutty flavor that pairs well with the sauce. If you want to make meals ahead of time, cook everything up to the noodle step. Let it cool, then store in the fridge. You can reheat it later and add fresh noodles. For quick meals, store leftovers in airtight containers. They will last for a few days, so you can enjoy them anytime! To store leftovers of Sticky Garlic Chicken Noodles, let them cool first. Place them in an airtight container. Be sure to seal it tightly to keep moisture out. For best results, divide leftovers into single servings. This makes it easy to grab one when you need it. Glass containers work great, as they don’t stain or smell. You can also use BPA-free plastic containers for a lighter option. To freeze Sticky Garlic Chicken Noodles, use freezer-safe containers. Make sure to leave space for expansion as the food freezes. You can also use freezer bags; just squeeze out the air. To reheat, let them thaw in the fridge overnight. You can heat them in a microwave or a skillet. Add a splash of water or broth to keep them moist while reheating. In the fridge, these noodles last up to three days. If you freeze them, they can stay good for about two months. Check for signs of spoilage before eating. If you see any off-smells or colors, it’s best to toss it out. Always trust your senses; they are your best guide! Yes, you can make this dish ahead of time. Cook the chicken and noodles. Store them in separate containers in the fridge. When ready to eat, heat both and mix them with the sauce. This dish tastes great even after a day in the fridge. You can use rice noodles or whole wheat noodles instead of egg noodles. These options still hold the sauce well. Zucchini noodles or spaghetti squash are also great if you want a low-carb choice. Each brings a unique texture and flavor to the dish. This dish is not spicy at all. The flavors come from garlic and soy sauce. If you like heat, you can add chili flakes or sriracha. Just a little can make a big difference without overpowering the taste. Absolutely! You can use shrimp, tofu, or beef in place of chicken. Each protein will change the flavor slightly. Cook them until they're browned, just like the chicken, to keep them juicy and tender. Yes, this dish is perfect for kids! It has a mild flavor and fun textures. The sweet honey balances the savory sauce, making it appealing. You can adjust the veggies to their liking, too! Kids often enjoy the colorful bell peppers and snap peas. This blog post covered how to make Sticky Garlic Chicken Noodles. We started with key ingredients like egg noodles and chicken breasts, then moved into step-by-step cooking directions. You learned tips for tender chicken and how to enhance flavors. We also explored variations for different diets and shared storage tips. In the end, you'll create a tasty meal that everyone will enjoy. Explore these ideas and add your touch for the perfect dish!

Are you ready to enjoy a delightful meal that’s both simple and bursting with flavor? Join me as we dive into the world of Sticky Garlic Chicken Noodles. This dish …

Read more

Categories Dinner

Classic Buffalo Chicken Dip Flavorful Party Delight

November 11, 2025February 8, 2025 by Chef Jamie
- 2 cups shredded cooked chicken - 1 (8 oz) cream cheese, softened - 1/2 cup sour cream - 1/2 cup ranch dressing - 1/2 cup buffalo sauce (adjust to taste) - 1 cup shredded cheddar cheese - 1/2 cup blue cheese crumbles (optional) - Fresh celery sticks and tortilla chips for serving Buffalo chicken dip starts with simple ingredients that pack a lot of flavor. You need shredded cooked chicken as a base. It adds protein and texture. Softened cream cheese gives the dip a rich and creamy feel. Sour cream adds extra creaminess and a nice tang. Ranch dressing adds flavor and pairs well with buffalo sauce. Buffalo sauce is key to this dish. You can adjust it based on how spicy you like your dip. Shredded cheddar cheese melts beautifully and brings a lovely taste. If you enjoy blue cheese, add it for a more complex flavor. For serving, fresh celery sticks and tortilla chips are perfect. They add crunch and freshness. You can also use veggie sticks or crackers. This dip is a crowd-pleaser, making it great for parties. {{ingredient_image_1}} - Preheat your oven to 350°F (175°C). - Grab a baking dish and set it aside. - In a large bowl, mix the softened cream cheese, sour cream, ranch dressing, and buffalo sauce. - Stir until the mixture is smooth and creamy. - Gently fold in the shredded chicken and 3/4 cup of the shredded cheddar cheese. - If you enjoy blue cheese, add the crumbles now and mix lightly. - Pour the creamy mixture into your prepared baking dish. - Evenly spread it out and top with the remaining cheddar cheese. - Place it in the oven and bake for 20-25 minutes. Watch for it to bubble and turn golden. You can prepare buffalo chicken dip before your party. Just mix all the ingredients. Store the dip in the fridge for up to two days before baking. This way, the flavors meld together nicely. When it's time to bake, preheat the oven to 350°F (175°C). For reheating, take the dip out of the fridge. Let it sit for 10-15 minutes at room temperature. This helps it heat evenly. Bake for 20-25 minutes until it’s bubbly and golden. If you want, you can microwave it in short bursts. Stir in between to heat evenly. Buffalo sauce can be spicy. To customize the heat, start with a half cup of buffalo sauce. Taste it first. If you want more heat, add more sauce a tablespoon at a time. Remember, you can use milder sauces if you prefer less spice. Mixing in some honey can help balance out the heat too. Buffalo chicken dip pairs well with many things. Serve it with fresh celery sticks or tortilla chips. These crunchy sides add texture and flavor. You can also try crackers or pita chips for variety. For garnish, add fresh celery sticks on top. A drizzle of buffalo sauce adds a nice touch. You can also sprinkle chopped green onions or parsley for color. This makes your dish look even more inviting. Pro Tips Adjust the Heat: Feel free to modify the amount of buffalo sauce depending on your spice tolerance. Start with less and add more until it reaches your desired heat level. Mixing Tip: Ensure your cream cheese is at room temperature for easier mixing. This will help achieve a smooth and creamy dip without lumps. Make Ahead: You can prepare the dip a day in advance. Just cover and refrigerate it before baking. It will save you time on the day of your gathering! Serving Suggestion: For a fun twist, serve the dip in individual cups with celery sticks and tortilla chips for dipping, making it easy for guests to enjoy! {{image_2}} You can spice up your buffalo chicken dip in many ways. Try using different hot sauces to change the heat. For a milder dip, use a sweet chili sauce. For extra heat, go with a ghost pepper sauce. Each sauce brings a unique flavor to the dish. Adding vegetables can also create a fun twist. Chopped green onions or diced bell peppers mix well. You can even stir in some spinach for added nutrition. These veggies not only add flavor but also make the dip colorful and appealing. If you need to make this dip gluten-free, use gluten-free ranch dressing. Check the labels to ensure the buffalo sauce is also gluten-free. This way, everyone can enjoy the dip without worry. For a low-carb option, skip the blue cheese and serve with fresh veggies. Think celery sticks, carrots, or bell peppers. They offer a nice crunch and keep the dish light. If you want a vegan version, use shredded jackfruit in place of chicken. Replace cream cheese with cashew cream or a store-bought vegan cream cheese. Use a vegan ranch dressing and buffalo sauce to complete the dish. This way, everyone can join in on the fun! To store leftover dip, place it in an airtight container. This keeps it fresh. The dip lasts about three to four days in the fridge. Always check for any off smells before using. If it smells fine, it should be safe to eat. If you want to keep the dip longer, you can freeze it. First, let it cool down completely. Then, transfer it to a freezer-safe container. Make sure to leave some space at the top, as it will expand when frozen. The dip can last up to three months in the freezer. Just remember to label it with the date! When you're ready to enjoy the dip again, you can reheat it easily. The best way is to thaw it in the fridge overnight. Then, place it in a baking dish and heat it at 350°F (175°C) for about 20 minutes. Stir it halfway through to warm it evenly. You can also microwave it for a quick fix. Heat it in short bursts, stirring in between, until it's hot. This way, you keep the creamy texture and rich flavor. If you want to swap ranch dressing, you have options. You can use blue cheese dressing for a richer flavor. Alternatively, try a homemade mix of yogurt, garlic powder, and herbs. This gives a fresh taste and keeps it healthy. You can even use a simple mix of sour cream and mayo. It’s all about your taste! Yes, you can make this dip in a slow cooker! Start by mixing all the ingredients in the slow cooker. Set it on low for about 2 to 3 hours. Stir it every so often to mix everything well. The dip will be hot and bubbly when ready. The slow cooker is great for keeping it warm during your party! Buffalo chicken dip lasts about 3 to 4 days in the fridge. Make sure to store it in an airtight container. This keeps it fresh and tasty. When you want to eat it again, check for any off smells or changes in texture. If it looks good, just reheat it until hot. Enjoy your tasty dip! This blog post showed you how to make buffalo chicken dip from start to finish. We covered the ingredients, step-by-step instructions, and tips for serving. You learned about variations and how to store leftovers. Buffalo chicken dip is fun to make and share. It’s a great dish for parties or game days. Now you can impress your friends with this tasty recipe! Enjoy your cooking adventure!

Are you ready to impress your friends at the next party? This Classic Buffalo Chicken Dip is a must-have! It’s creamy, spicy, and loaded with flavor. You only need a …

Read more

Categories Appetizers

Ultra Creamy Baked Mac and Cheese Blissful Dish

November 12, 2025February 6, 2025 by Chef Jamie
To make ultra creamy baked mac and cheese, gather these key ingredients: - 8 ounces elbow macaroni - 4 tablespoons unsalted butter - 1/4 cup all-purpose flour - 3 cups whole milk - 2 cups sharp cheddar cheese, grated - 1 cup mozzarella cheese, grated - 1/2 cup cream cheese, softened - 1 teaspoon garlic powder - 1 teaspoon onion powder - 1/2 teaspoon paprika - Salt and pepper to taste - 1 cup Panko breadcrumbs - 2 tablespoons olive oil - Fresh parsley, chopped (for garnish) Measuring your ingredients ensures the perfect balance of flavors. Use a kitchen scale for accuracy, especially for the cheese and flour. Use standard measuring cups for liquids like milk and melted butter. For the grated cheese, pack it lightly into the measuring cup. This method helps the cheese melt better in the sauce. Garnishes add flair and fresh taste. Consider these options: - Fresh parsley adds color and freshness. - A sprinkle of extra paprika gives a nice kick. - Crushed red pepper flakes for heat. - Crispy bacon pieces for a savory twist. These garnishes enhance the dish and make it even more appealing! {{ingredient_image_1}} First, gather all your ingredients. You need: - 8 ounces elbow macaroni - 4 tablespoons unsalted butter - 1/4 cup all-purpose flour - 3 cups whole milk - 2 cups sharp cheddar cheese, grated - 1 cup mozzarella cheese, grated - 1/2 cup cream cheese, softened - 1 teaspoon garlic powder - 1 teaspoon onion powder - 1/2 teaspoon paprika - Salt and pepper to taste - 1 cup Panko breadcrumbs - 2 tablespoons olive oil - Fresh parsley, chopped (for garnish) Next, preheat your oven to 350°F (175°C). This step is vital for a perfect bake. Start by boiling a pot of water. Cook the elbow macaroni until it is al dente. Drain the macaroni and set it aside. In a large saucepan over medium heat, melt the butter. Once melted, add the flour. Whisk it to create a roux. Cook this mixture for about 2 minutes. It should look bubbly and golden. Now, slowly add the whole milk while whisking. This helps to avoid lumps. Keep cooking until the mixture thickens, which takes about 5 to 7 minutes. Lower the heat and add the sharp cheddar, mozzarella, and cream cheese. Stir until all the cheese melts, making a smooth sauce. Add garlic powder, onion powder, paprika, and season with salt and pepper. This adds great flavor to your cheese sauce. Add the cooked macaroni to the cheese sauce. Stir well to coat all the pasta. Transfer this creamy mixture to a greased 9x13 inch baking dish. In a small bowl, mix Panko breadcrumbs with olive oil. Coat them well, then sprinkle evenly over the mac and cheese. Bake it in your preheated oven for 25 to 30 minutes. Look for a golden, crispy top. Once out of the oven, let it sit for about 5 minutes. This makes it easier to serve. Garnish with chopped parsley for a fresh touch. Enjoy your ultra creamy baked mac and cheese! To get that ultra creamy texture, you need to combine the right ingredients. Start with a roux made from butter and flour. Cook it until it’s bubbly and golden. Then, slowly add whole milk while whisking. This step helps avoid lumps. Keep stirring until the mixture thickens, about 5 to 7 minutes. Now, add your cheeses slowly. I love using sharp cheddar, mozzarella, and cream cheese. They melt well together, creating a smooth, rich sauce. Choosing the right cheese makes all the difference. Sharp cheddar gives a nice bite. Mozzarella adds stretch and creaminess. Cream cheese brings a rich, smooth finish. You can also try Gruyère or fontina for a gourmet twist. Mixing different cheeses lets you play with flavors and textures. Experiment to find your perfect blend! No one wants clumpy cheese sauce! To prevent this, ensure your cheese is grated finely. Adding cheese too quickly causes clumps. Gradually stir in the cheese when the sauce is smooth. Always keep the heat low when adding cheese. This gentle heat helps it melt evenly. If you see any clumps, whisk vigorously until they disappear. Pro Tips Use Fresh Cheese: Freshly grated cheese melts better and creates a creamier texture compared to pre-shredded cheese. Don’t Overcook the Pasta: Cook the macaroni until just al dente. It will continue to cook in the oven and absorb some of the sauce. Experiment with Cheese: Feel free to mix different types of cheese such as Gruyère or Fontina for a unique flavor profile. Let It Rest: Allow the baked mac and cheese to sit for a few minutes before serving. This helps it set and makes serving easier. {{image_2}} You can make your Ultra Creamy Baked Mac and Cheese heartier by adding protein. Cooked chicken, bacon, or ham work well. For a vegetarian option, try adding cooked lentils or chickpeas. These proteins not only add flavor but also boost nutrition. Mix them in right before baking for a complete meal. Adding veggies can enhance your dish. Spinach, broccoli, or roasted peppers bring color and taste. You can sauté them first to soften the texture. Stir in cooked vegetables along with the macaroni. This way, you get a balanced dish that is both creamy and healthy. Want a kick? Add jalapeños or crushed red pepper to spice things up. For a gourmet touch, try mixing in truffle oil or a fancy cheese like Gruyère. These simple twists can elevate the dish to something special. Experiment with flavors to find your perfect combo. To store leftover mac and cheese, let it cool first. Once cool, transfer it to an airtight container. Keep it in the fridge for up to three days. If you want to enjoy it later, refrigerating helps maintain its creamy texture. Just remember to cover it well to prevent it from drying out. If you want to freeze it, use a freezer-safe container. Portion the mac and cheese into smaller servings for easy thawing. It can stay frozen for up to three months. Before freezing, ensure the dish has cooled completely. This step keeps the texture nice when you reheat it later. To reheat, you can use the oven or microwave. For the oven, preheat it to 350°F (175°C). Place the mac and cheese in an oven-safe dish. Cover it with foil to keep it moist. Heat for about 20 minutes or until warmed through. If you use the microwave, heat in short bursts of 1-2 minutes. Stir between heating to ensure even warming. Add a splash of milk to restore creaminess. Enjoy your ultra creamy baked mac and cheese bliss! The best cheese for mac and cheese is sharp cheddar. It melts well and adds flavor. I also like to mix in mozzarella. Mozzarella gives a nice stretch to the dish. You can try Gruyère or fontina for a gourmet touch. Each cheese brings its own taste, so feel free to experiment. Yes, you can make mac and cheese without cream cheese. The dish may not be as creamy, but it will still taste great. You can use more cheddar or add a bit of ricotta for creaminess. Another option is to use a bit of sour cream. This keeps the dish rich and smooth. To make mac and cheese spicy, add some hot sauce to the cheese sauce. You can also mix in diced jalapeños or crushed red pepper flakes. For a smoky flavor, try adding chipotle peppers. These will give your mac and cheese a nice kick and make it unique. You can now make delicious mac and cheese with the tips from this guide. We covered all the key ingredients, from measuring them right to achieving that creamy texture. I shared easy steps to cook and bake your dish, and gave you variations to try. You also learned how to store leftovers properly. With these insights, you can enjoy the best mac and cheese, tailored to your taste! Keep experimenting and have fun in the kitchen!

Welcome to Ultra Creamy Baked Mac and Cheese Blissful Dish! If you crave rich, cheesy goodness that warms your soul, you’re in the right place. I’ll guide you through a …

Read more

Categories Dinner

Cheddar Garlic Herb Potato Soup Comforting and Creamy

January 5, 2026February 4, 2025 by Chef Jamie
Here’s what you need for the perfect Cheddar Garlic Herb Potato Soup: - 4 medium russet potatoes, peeled and diced - 1 medium onion, chopped - 3 cloves garlic, minced - 4 cups vegetable broth - 1 cup heavy cream - 2 cups shredded sharp cheddar cheese - 1 teaspoon dried thyme - 1 teaspoon dried rosemary - 2 tablespoons olive oil - Salt and pepper to taste - Fresh chives, chopped (for garnish) Each ingredient plays a key role in building flavor. The russet potatoes give the soup its creamy base. Onion and garlic add depth and warmth. Heavy cream and cheddar cheese create a rich, smooth texture. Fresh herbs, thyme and rosemary, bring a hint of earthiness. The olive oil helps sauté the veggies and enhances the taste. Salt and pepper finish off the dish perfectly. Don't forget fresh chives for a pop of color! Using quality ingredients makes a big difference. Choose fresh potatoes and good cheese. This way, your soup will taste rich and satisfying. Enjoy the cooking process; it’s all part of the fun! {{ingredient_image_1}} 1. Sauté onion and garlic: Start by heating 2 tablespoons of olive oil in a large pot over medium heat. Once hot, add 1 chopped onion. Cook for about 5 minutes until the onion is soft and clear. Next, add 3 minced garlic cloves. Cook for an extra 1-2 minutes until it smells great. 2. Add potatoes and broth: Now, stir in 4 medium russet potatoes, diced into small pieces. Cook them for another 2-3 minutes. This helps the potatoes soak up the onion and garlic flavors. After that, pour in 4 cups of vegetable broth. Bring this mixture to a boil, then lower the heat. Let it simmer for about 15-20 minutes until the potatoes are soft. 3. Blend and finish the soup: Once the potatoes are tender, grab an immersion blender. Puree the soup until it is smooth. If you don’t have one, you can carefully transfer the soup to a blender in batches. After blending, return it to low heat. Now, stir in 1 cup of heavy cream and 2 cups of shredded sharp cheddar cheese. Mix it well until the cheese melts and the soup is creamy. Add 1 teaspoon of dried thyme and 1 teaspoon of dried rosemary. Season with salt and pepper to taste. Let it cook for another 5 minutes to blend the flavors. Serve hot, and top with fresh chopped chives. Enjoy your comforting bowl of cheddar garlic herb potato soup! - Use fresh herbs for enhanced flavor: Fresh herbs, like chives and thyme, bring a bright taste. They add a pop of flavor you can't get from dried herbs. Chop them right before adding to keep them fresh. - Adjust creaminess to preference: If you want a lighter soup, use less cream. You can also swap some cream with more broth. This keeps the flavor strong while changing the texture to your liking. - Tips for perfect texture: To get a smooth soup, blend it well. An immersion blender works great. If you prefer a chunkier texture, blend just half of the soup. This gives you a mix of creamy and chunky bites. These tips will help you make the best Cheddar Garlic Herb Potato Soup. Enjoy the rich flavors! Pro Tips Choose the Right Potatoes: Russet potatoes are ideal for this soup due to their high starch content, which helps create a creamy texture when blended. Enhance the Flavor: For a deeper flavor, consider roasting the garlic before adding it to the soup. This will give a sweeter, more mellow garlic taste. Make it Lighter: To reduce calories, substitute half of the heavy cream with low-fat milk or a dairy-free alternative. Garnish for Freshness: Fresh herbs like parsley or cilantro can brighten up the flavor profile of the soup. Feel free to experiment with different herbs! {{image_2}} If you want to change things up, here are some great ideas. Dairy-free or vegan options: You can swap heavy cream with coconut milk. Use a vegan cheese for a creamy texture. Also, choose vegetable broth to keep it plant-based. Adding protein options: For some extra protein, try adding cooked chicken or bacon. You can also use beans or lentils for a vegetarian boost. Spice level adjustments: If you love heat, add red pepper flakes or cayenne pepper. For a milder soup, keep the spices light. You can also add fresh jalapeños for a fresh kick. These variations let you customize your soup. Enjoy making it your own! To keep your Cheddar Garlic Herb Potato Soup fresh, start with proper refrigeration. Store the soup in an airtight container. This helps keep the flavors intact. Place it in the fridge within two hours of cooking. It will stay good for about 3 to 5 days. If you want to keep it longer, freezing is a great option. Let the soup cool completely before freezing. Pour it into freezer-safe bags or containers. Leave some space at the top, as liquids expand when frozen. It can last up to 3 months in the freezer. When you are ready to enjoy the soup again, use these reheating methods. For the best taste, thaw it in the fridge overnight. Then, heat it on the stove over low heat. Stir often to keep it smooth. You can also use a microwave. Heat it in short bursts, stirring in between, until hot. This soup is comforting and creamy, perfect for any day. Enjoy every spoonful! Yes, you can use other cheeses. Try gouda or Monterey Jack for a different taste. Each cheese adds its own flavor. Blend them with cheddar for a creamy mix. Experiment to find your favorite combo. This soup lasts about 3 to 4 days in the fridge. Store it in an airtight container. Make sure it cools down before you put it in the fridge. This keeps it fresh and tasty for later. You can make this soup ahead of time. It tastes even better the next day. Just store it in the fridge after it cools. Reheat it on the stove or in the microwave when you are ready to enjoy it. This blog post shared how to make a delicious potato soup. We covered ingredients, cooking steps, and tips for the best flavor. You can also explore variations and storage techniques. Remember to use fresh herbs and adjust the creaminess to your liking. This soup is easy to customize and perfect for any meal. Enjoy making it your own and sharing it with family and friends. The warmth of this soup will surely delight everyone.

When the chill sets in, nothing warms you up like a bowl of Cheddar Garlic Herb Potato Soup. This creamy delight combines the rich flavors of cheddar cheese and herbs …

Read more

Categories Dinner

Cheddar Jalapeño Cornbread Muffins Flavorful Delight

November 12, 2025January 31, 2025 by Chef Jamie
To make Cheddar Jalapeño Cornbread Muffins, gather these ingredients: - 1 cup cornmeal - 1 cup all-purpose flour - 1 tablespoon baking powder - 1/2 teaspoon salt - 1/4 teaspoon black pepper - 1 cup buttermilk - 1/3 cup vegetable oil - 1 large egg - 1 cup shredded sharp cheddar cheese - 1/2 cup fresh jalapeños, finely chopped (seeds removed for less heat) - 2 tablespoons honey (optional, for a hint of sweetness) You can add a few optional ingredients to boost flavor: - Fresh herbs like cilantro or chives for a fresh note - A pinch of garlic powder for savory depth - Crumbled bacon for a smoky crunch Don’t worry if you lack some ingredients. Here are some swaps: - Use almond milk or oat milk instead of buttermilk. - Substitute coconut oil for vegetable oil to add a hint of sweetness. - Replace sharp cheddar with pepper jack for extra heat. These substitutions keep the muffins tasty while catering to your needs. Enjoy the process of making these flavorful muffins! {{ingredient_image_1}} First, I start by preheating my oven to 400°F (200°C). This temperature helps the muffins rise well. I then grease a muffin tin or line it with paper liners. This step keeps the muffins from sticking. Next, I grab a large mixing bowl. In it, I combine 1 cup of cornmeal, 1 cup of all-purpose flour, 1 tablespoon of baking powder, 1/2 teaspoon of salt, and 1/4 teaspoon of black pepper. I whisk these together until they blend nicely. This mix gives the muffins their base. In another bowl, I mix the wet ingredients. I add 1 cup of buttermilk, 1/3 cup of vegetable oil, and 1 large egg. I stir these until they look smooth. This mixture adds moisture and richness to the muffins. Now, I pour the wet mix into the dry mix. I gently stir until just combined. It’s key not to overmix here. Then, I fold in 1 cup of shredded sharp cheddar cheese and 1/2 cup of finely chopped jalapeños. If I want a touch of sweetness, I add 2 tablespoons of honey. This step layers in flavor and texture. I divide the batter evenly among the muffin cups, filling each about two-thirds full. Then, I place the muffin tin in the oven. I bake them for 15-20 minutes. I check for doneness by inserting a toothpick into the center. If it comes out clean, they're ready! After baking, I let them cool in the tin for about 5 minutes. Then, I transfer them to a wire rack to cool completely. To get a great muffin texture, I focus on mixing. I mix the dry and wet ingredients separately. When I combine them, I stir gently. This helps keep air in the batter. Overmixing can make them dense. I like to see small lumps in the mix; this is normal. Jalapeños can be spicy or mild. To control the heat, I remove the seeds. If you want less spice, use fewer jalapeños. For more heat, add more chopped jalapeños. You can also mix in some crushed red pepper for extra kick. Each baker can adjust to their taste. I love serving these muffins warm. A dollop of butter on top makes them special. You can also pair them with a spicy dipping sauce. For a fun look, add a slice of jalapeño on top. These muffins work great as a side dish for chili or soup. They can also be a tasty snack on their own. Pro Tips Fresh Jalapeños: Using fresh jalapeños adds vibrant flavor and heat. If you prefer less spice, remove the seeds and membranes before chopping. Buttermilk Substitute: If you don’t have buttermilk, you can make a quick substitute by mixing 1 cup of milk with 1 tablespoon of vinegar or lemon juice. Let it sit for 5 minutes before using. Don’t Overmix: Mix the batter just until combined to ensure your muffins are light and fluffy. Overmixing can lead to dense muffins. Storage Tips: Store leftover muffins in an airtight container at room temperature for up to 2 days or freeze them for longer storage. Reheat in the oven for the best texture. {{image_2}} You can swap out cheddar cheese for other tasty options. Try pepper jack for a spicy kick. Or, use Monterey Jack for a milder flavor. If you like blue cheese, it adds a bold taste too. Each cheese brings its own unique flavor. Feel free to get creative with your muffins. You can add whole corn kernels for extra texture. Chopped green onions lend a fresh taste. Consider mixing in cooked bacon bits for a savory touch. You can even fold in sun-dried tomatoes for a hint of sweetness. You can make sweet or savory cornbread muffins. To make them sweet, add honey or sugar to the batter. You can also mix in blueberries or cranberries. For a savory twist, skip the honey and add herbs like thyme or rosemary. Both versions taste great and fit different meals. Store your leftover muffins in an airtight container. This keeps them fresh. You can place a paper towel inside to absorb any moisture. Let them cool completely before storing. They will stay good for up to three days at room temperature. For longer storage, move them to the fridge. They stay fresh for about a week this way. Reheat your muffins in the oven for the best taste. Preheat the oven to 350°F (175°C). Place the muffins on a baking sheet. Heat them for about 5 to 10 minutes. This keeps them soft and warm. You can also microwave them for 15 to 20 seconds. But this may make them a bit chewy. Freezing is a great option for long-term storage. Wrap each muffin tightly in plastic wrap. Then, place them in a freezer bag. They will last for up to three months in the freezer. When you want to eat them, thaw them in the fridge overnight. Reheat them in the oven for a tasty treat. Yes, you can make these muffins gluten-free. Simply swap out the all-purpose flour for a gluten-free flour blend. Look for blends that include xanthan gum for the best results. This change keeps the muffins light and fluffy without gluten. To adjust the heat level, you can change the amount of jalapeños. Use fewer jalapeños if you want less spice. If you love heat, add more or leave some seeds in. For a milder flavor, try using roasted red peppers instead. These muffins pair well with many dishes. Serve them warm with butter for a simple treat. They are great alongside chili, soups, or stews. You can also enjoy them with a spicy dipping sauce for added flavor. These muffins stay fresh for about 2-3 days at room temperature. Store them in an airtight container to keep them moist. You can also freeze them for up to 3 months. Just thaw before serving for the best taste. In this blog post, we explored the key ingredients for Cheddar Jalapeño Cornbread Muffins. You learned about optional ingredients to boost flavor and smart substitutions. We also covered step-by-step instructions for mixing, baking, and cooling. Tips for the perfect texture and serving ideas were shared, along with variations to make them your own. Finally, we discussed the best ways to store and reheat leftovers. Now, you’re ready to bake delicious muffins that everyone will love. Enjoy experimenting with flavors and sharing your creations!

Are you ready to elevate your snack game with Cheddar Jalapeño Cornbread Muffins? These flavorful delights combine the rich taste of cheese and the perfect kick of spice. I’ll guide …

Read more

Categories Appetizers
Older posts
Newer posts
← Previous Page1 … Page131 Page132 Page133 Page134 Next →

TOSSED RECIPES

Simple meals, bold taste. Quick recipes made for real life — always fresh, always delicious. 🌿🍴

PAGES

Home About Contact Privacy Policy Terms & Conditions Cookie Policy GDPR Policy Copyright Policy Disclaimer

CATEGORIES

Appetizers Desserts Salads Breakfast Dinner

Contact

  • Pinterest
  • Mail
Copyright © 2026 Tossed Recipes. All rights reserved.