Skip to content
Tossed Recipes
  • Home
  • Appetizers
  • Desserts
  • Salads
  • Breakfast
  • Dinner
  • Privacy Policy
  • Contact
  • About

Chef Jamie

Ingredient Peanut Butter Cookies Easy and Flavorful Treat

November 13, 2025December 30, 2024 by Chef Jamie
To make these tasty peanut butter cookies, you need: - 1 cup creamy peanut butter - 1 cup brown sugar, packed - 1/2 cup granulated sugar - 1 large egg - 1 teaspoon vanilla extract - 1/2 teaspoon baking soda - 1/4 teaspoon salt These ingredients create a rich and sweet flavor that makes each bite special. Measuring your ingredients is key for great cookies. Here’s how to do it: - Creamy peanut butter: Use a dry measuring cup. Scoop it in and level it off. - Brown sugar: Pack the sugar tightly in the cup. This adds moisture and sweetness. - Granulated sugar: Scoop it in without packing. Just level it off gently. - Egg: Use a large egg for the right moisture and binding. - Vanilla extract: One teaspoon adds a warm flavor. - Baking soda: This helps the cookies rise. Measure carefully. - Salt: A little salt enhances the sweetness. Each ingredient plays a role in the cookie’s texture and taste. You can add fun flavors to your cookies. Here are some great options: - Chocolate chips: Half a cup adds a sweet, melty touch. - Crushed peanuts: A quarter cup gives a nice crunch on top. Feel free to mix and match these add-ins to suit your taste. They make your cookies even more exciting! {{ingredient_image_1}} First, set your oven to 350°F (175°C). This heat is perfect for baking. While the oven warms up, grab a baking sheet and line it with parchment paper. This helps prevent sticking. In a large bowl, add 1 cup of creamy peanut butter, 1 cup of packed brown sugar, and 1/2 cup of granulated sugar. Use an electric mixer to mix on medium speed. Beat until the mix is fluffy and smooth. Next, add 1 large egg, 1 teaspoon of vanilla extract, 1/2 teaspoon of baking soda, and 1/4 teaspoon of salt. Mix until everything blends well. If you want a sweet twist, fold in 1/2 cup of chocolate chips gently. Scoop rounded balls of dough using a tablespoon or cookie scoop. Place them on the baking sheet, leaving 2 inches between each cookie. This space is key because they will spread. To create classic cookie shapes, press down each ball with a fork to make a criss-cross pattern. If you like, sprinkle crushed peanuts on top for more crunch. Bake the cookies for 10-12 minutes. Look for golden edges and soft centers. After baking, let them cool on the sheet for 5 minutes. Then, transfer to a wire rack to cool fully. Enjoy your warm, tasty treats! To stop your dough from sticking, chill it for 30 minutes. This will help it firm up. If it’s still too sticky, add a bit more flour. A little extra flour can make a big difference! For soft and chewy cookies, do not overmix the dough. Mix until just combined. When baking, keep an eye on the time. Take them out when the edges are golden but the middle looks soft. They will firm up as they cool. To boost the flavor, try adding chocolate chips or crushed peanuts. Both add a nice crunch and taste. You can also use a pinch of cinnamon for warmth. A hint of sea salt on top can balance the sweetness, too. Pro Tips Use Room Temperature Ingredients: Allow your peanut butter and egg to reach room temperature before mixing. This helps create a smoother batter and ensures even baking. Experiment with Nut Butters: Try using different nut butters like almond or cashew for a unique flavor twist. Just keep the consistency similar to peanut butter. Don’t Overbake: For soft and chewy cookies, keep a close eye on them while baking. They should look slightly underbaked in the center when you take them out. Store Properly: Keep your cookies in an airtight container at room temperature for up to a week. You can also freeze them for longer storage; just thaw before enjoying! {{image_2}} You can make your peanut butter cookies even better by adding chocolate chips. Just fold in 1/2 cup of chocolate chips into the dough before baking. This little twist makes the cookies rich and sweet. The warm chocolate melts in your mouth and pairs perfectly with the peanut butter flavor. It’s an easy way to impress your family or friends. If you love crunch, try adding nuts. Chopped peanuts work well, but you can use other nuts too. Just add 1/4 cup of chopped nuts into the dough. This addition gives your cookies a nice texture. The nuts add a different flavor that blends well with peanut butter. You get a delightful surprise in each bite! You can easily make these cookies vegan or gluten-free. To make them vegan, swap the egg for a flax egg. Mix 1 tablespoon of ground flaxseed with 2.5 tablespoons of water. Let it sit for a few minutes to thicken. For gluten-free cookies, use gluten-free flour instead of regular flour. These changes ensure everyone can enjoy your tasty treats. Store your peanut butter cookies in an airtight container. This keeps them fresh. You can layer the cookies with parchment paper. This prevents them from sticking together. Keep the cookies at room temperature for up to one week. To freeze your cookies, first let them cool completely. Then, place them in a single layer on a baking sheet. Freeze for about two hours. Once frozen, transfer them to a freezer bag. Label the bag with the date. You can freeze them for up to three months. Peanut butter cookies can last a week at room temperature. If stored in the fridge, they can last up to two weeks. Frozen cookies can taste great for three months. Enjoy them later for a sweet treat! Yes, you can use natural peanut butter. It will make the cookies taste great! Just know that natural peanut butter has oil on top. Stir it well before measuring. This type may make the cookies a bit drier. If you want softer cookies, add a bit more sugar or an extra egg. To make cookies softer, try a few simple tricks. First, don’t overbake them. Take them out when the edges are golden but the centers look soft. Second, chill your dough for 30 minutes before baking. This helps them keep their shape and stay soft. Lastly, add a bit more peanut butter or sugar for extra moisture. If you don’t have brown sugar, you can use white sugar instead. Just replace it with the same amount. Another option is to mix white sugar with a bit of molasses. For each cup of white sugar, add one tablespoon of molasses. This will give your cookies a nice flavor and color. You now know how to make delicious peanut butter cookies. We covered the key ingredients, step-by-step instructions, and helpful tips to ensure perfect cookies every time. Remember, variations like chocolate chips and nuts can enhance your recipe. Proper storage will keep them fresh longer. Enjoy experimenting with different flavors and textures. With this guide, you can create tasty treats your friends and family will love. Happy baking!

Do you love warm, soft cookies that burst with peanut flavor? I’m here to share my easy recipe for ingredient peanut butter cookies that you can whip up in no …

Read more

Categories Desserts

Creamy Tuscan Shrimp Flavorful Dinner Delight

November 13, 2025December 25, 2024 by Chef Jamie
- 1 pound large shrimp, peeled and deveined - 2 tablespoons olive oil - 3 cloves garlic, minced - 1 cup cherry tomatoes, halved - 1 cup fresh spinach, roughly chopped - 1 cup heavy cream - 1 cup grated Parmesan cheese - 1 teaspoon dried Italian herbs (oregano, basil, thyme) - Salt and pepper to taste - Fresh basil leaves for garnish - Optionally serve with cooked pasta or crusty bread The stars of this dish are the shrimp and the creamy sauce. Large shrimp offer a nice bite and flavor. The heavy cream makes the sauce rich and smooth. Parmesan cheese adds a salty note and helps thicken the sauce. The garlic brings a warm aroma that enhances the dish. Fresh spinach and cherry tomatoes add color and freshness to your plate. If you don’t have shrimp, chicken or tofu works well. Use any cream you have, like half-and-half, for a lighter sauce. Instead of cherry tomatoes, diced regular tomatoes can be used. If you can't find fresh spinach, frozen spinach will do. Just make sure to thaw and drain it well. For a dairy-free option, try coconut cream and a vegan cheese substitute. {{ingredient_image_1}} To get ready for creamy Tuscan shrimp, gather all your ingredients first. This dish takes about 25 minutes to make. You will need shrimp, garlic, tomatoes, spinach, cream, and Parmesan cheese. A large skillet works best for cooking. 1. Heat 2 tablespoons of olive oil in your skillet over medium-high heat. 2. Add 1 pound of peeled and deveined shrimp. Season them with salt and pepper. 3. Cook the shrimp for 2-3 minutes on each side. They should turn pink and opaque. Once done, set them aside. 4. In the same skillet, add 3 cloves of minced garlic. Sauté for about 30 seconds until it smells great. 5. Next, toss in 1 cup of halved cherry tomatoes. Cook for 3-4 minutes until they soften. 6. Now, stir in 1 cup of roughly chopped spinach. Cook it until it wilts, which takes about 2 minutes. 7. Reduce the heat to medium. Pour in 1 cup of heavy cream, stirring it well. Let it simmer for 2-3 minutes until it thickens slightly. 8. Add 1 cup of grated Parmesan cheese and 1 teaspoon of dried Italian herbs. Mix until the cheese melts and the sauce is creamy. 9. Return the cooked shrimp to the skillet. Toss them in the sauce and heat for an extra 1-2 minutes. 10. Remove from heat. Serve the creamy Tuscan shrimp over pasta or with crusty bread. - Make sure your shrimp are fresh and not frozen. This helps with cooking time. - Keep an eye on the garlic. It can burn quickly, leading to a bitter taste. - Stir often to prevent the sauce from sticking to the skillet. - Use a timer to keep track of cooking times. This helps ensure everything cooks evenly. When you cook shrimp, timing is key. Overcooked shrimp can turn rubbery. Here are my best tips: - Use fresh shrimp: Fresh shrimp taste better. Check for a sweet smell. - Don’t crowd the pan: If the shrimp are too close, they steam instead of sear. - Cook quickly: Heat the pan first. Cook shrimp for about 2-3 minutes each side. Look for a pink color. A creamy sauce makes this dish shine. Here’s how to get it just right: - Start with garlic: Sauté minced garlic for 30 seconds. This adds deep flavor. - Choose the right cream: Heavy cream creates a rich sauce. Don’t substitute with low-fat options. - Add cheese slowly: Stir in Parmesan gradually. This helps it melt smoothly and thickens the sauce. - Season well: Taste and adjust with salt and pepper. The right balance makes a huge difference. Serving this dish can be fun and creative. Here are some ideas: - Pasta pairing: Serve the shrimp over cooked pasta. It absorbs the sauce well. - With bread: Crusty bread is perfect for dipping. It soaks up that creamy goodness. - Garnish smartly: Fresh basil leaves and extra Parmesan make your plate look special. A sprinkle of herbs adds color and flavor. These tips will help you create a delicious meal that impresses everyone. Enjoy cooking! Pro Tips Fresh Shrimp is Best: For the best flavor and texture, use fresh shrimp instead of frozen. If using frozen, make sure to thaw them completely before cooking. Adjust Creaminess: If you prefer a lighter sauce, you can substitute half of the heavy cream with chicken broth or a splash of white wine to reduce calories without sacrificing flavor. Perfectly Cooked Shrimp: Be careful not to overcook the shrimp as they can become rubbery. They are done when they turn pink and opaque, which usually takes just a couple of minutes. Flavor Boost: Enhance the flavor by adding a pinch of red pepper flakes for a little heat or a squeeze of lemon juice for brightness before serving. {{image_2}} You can add more veggies to your creamy Tuscan shrimp. Bell peppers, zucchini, or asparagus work well. Just chop them up and add them with the cherry tomatoes. They will cook down nicely in the sauce. If you want to use other proteins, try chicken or scallops. Cook them in the same way as shrimp. Just adjust the cooking time. Chicken needs longer, while scallops cook faster. To add spice, toss in red pepper flakes. Start with a pinch and taste as you go. You can also use spicy sausage for a kick. Brown it in the skillet before adding shrimp. For extra creaminess, add more heavy cream or cheese. You can even stir in cream cheese. This will make the sauce thicker and richer. To make this dish low-carb, skip the pasta. Serve it with zucchini noodles instead. They soak up the sauce well and keep it light. If you need a gluten-free option, use gluten-free pasta. Just check the package to ensure it fits your needs. This way, you can enjoy the dish without worry. Store leftover creamy Tuscan shrimp in an airtight container. Make sure it cools first before sealing. Keep it in the fridge for up to three days. If you have pasta or bread, store them separately to keep them fresh. When you want to reheat, use the stove for best results. Heat a skillet over medium heat. Add the shrimp and a splash of cream to keep it moist. Stir gently until warmed through. You can also use the microwave, but stir every 30 seconds to avoid overcooking. Creamy Tuscan shrimp lasts about three days in the fridge. If you want to keep it longer, freeze it. Use a freezer-safe container, and it can last up to three months. Just remember to thaw in the fridge overnight when you're ready to enjoy it again. I recommend using large shrimp for this dish. They hold up well in the sauce. Look for shrimp that are fresh or frozen, peeled, and deveined. Wild-caught shrimp often have a richer flavor compared to farmed shrimp. If you prefer a milder taste, go for farmed shrimp. Just make sure they are not overcooked. Cook them until they are pink and opaque. Yes, you can prepare some parts ahead. Cook the shrimp and sauce, then store them separately. Keep the sauce in the fridge and reheat before adding the shrimp. The dish tastes best when fresh, but it stays good for a day in the fridge. Just don’t cook the shrimp too long when reheating. Overcooking can make them tough. To lighten this dish, swap heavy cream for half-and-half or a plant-based milk. You can also use low-fat cheese instead of Parmesan. Adding more vegetables like zucchini or bell peppers can boost nutrition. Serve it over zucchini noodles or spaghetti squash for a low-carb option. This way, you keep the flavor but reduce calories. In this post, we explored the ingredients, cooking steps, and tips for making Creamy Tuscan Shrimp. I highlighted key ingredients and their substitutes, ensuring you have options. Following my detailed steps will help you create a great dish. Remember the variations to customize your meal. Store leftovers properly for the best taste later. You now have the tools to enjoy this delicious recipe. Dive in and make it your own with unique touches. Enjoy your cooking adventure!

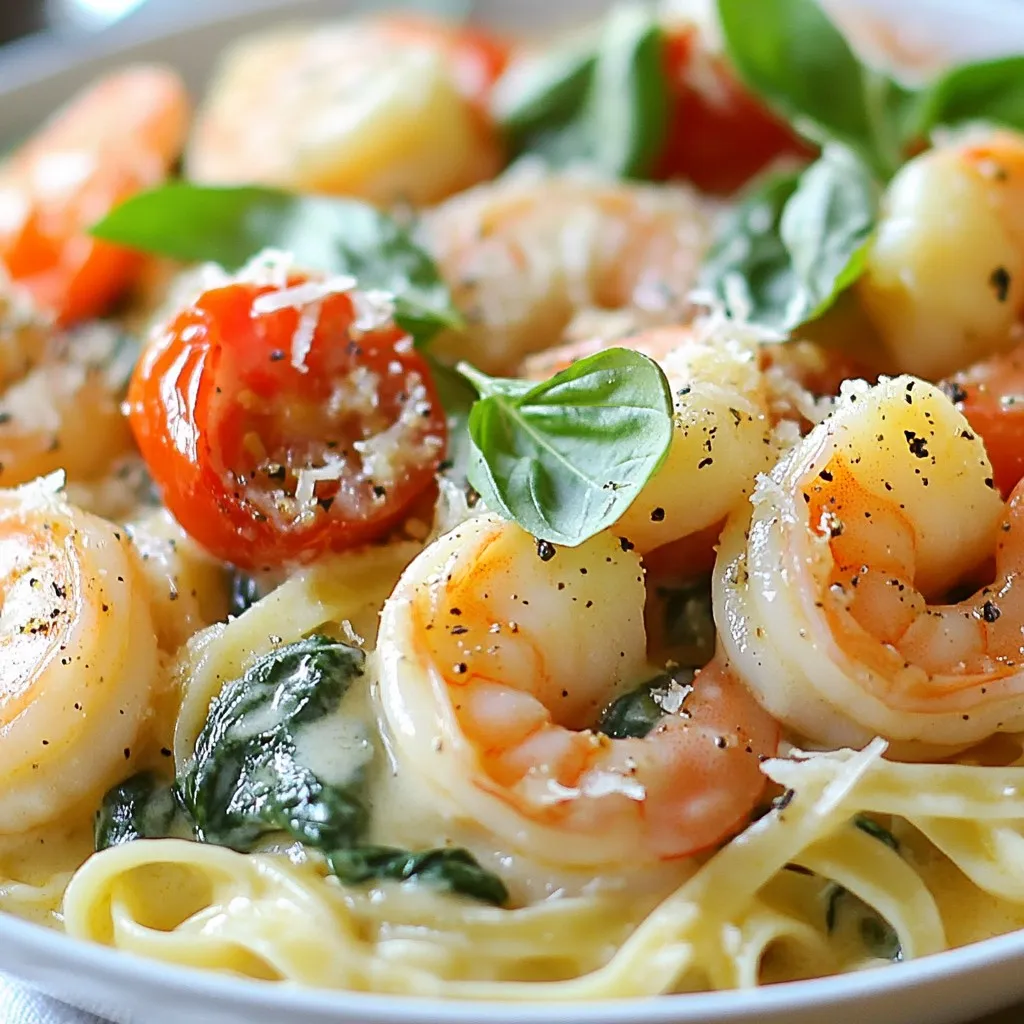
If you crave a quick, tasty meal, Creamy Tuscan Shrimp is your answer! This dish brings rich flavors and easy cooking into one delightful dinner. I’ll walk you through simple …

Read more

Categories Dinner

S’mores Chocolate Chip Skillet Cookie Delight

November 13, 2025December 13, 2024 by Chef Jamie
To make this delicious treat, gather the following items: - 1 cup all-purpose flour - 1/2 teaspoon baking soda - 1/4 teaspoon salt - 1/2 cup unsalted butter, softened - 1/2 cup brown sugar, packed - 1/4 cup granulated sugar - 1 large egg - 1 teaspoon vanilla extract - 1 cup semi-sweet chocolate chips - 1 cup mini marshmallows - 1/2 cup crushed graham crackers - Extra chocolate chips for topping You can adjust the recipe using these alternatives: - Use honey or maple syrup instead of granulated sugar. - For a gluten-free option, try almond or coconut flour. - Replace unsalted butter with coconut oil or vegan butter. Each substitution will change the taste and texture a bit. Experiment to find what you like best! {{ingredient_image_1}} 1. Preheat your oven to 350°F (175°C). This step is key for even baking. 2. In a small bowl, mix the flour, baking soda, and salt. This makes the dry mix. 3. In a large bowl, cream the softened butter, brown sugar, and granulated sugar. Mix until creamy. 1. Add in the egg and vanilla. Mix well to combine everything smoothly. 2. Gradually add the dry mix to the wet mix. Stir until just combined. Don't overmix! 3. Fold in the chocolate chips and crushed graham crackers. This adds flavor and texture. 1. Grease your skillet using cooking spray or butter. This keeps the cookie from sticking. 2. Spread the cookie dough evenly in the skillet. Smooth the top for even baking. 3. Bake for 20-25 minutes. The edges should be golden brown. The center should be slightly soft. 4. Remove the skillet and sprinkle mini marshmallows and extra chocolate chips on top. 5. Broil for 1-2 minutes. Watch closely! You want a toasted top, not burned. 6. Allow to cool for a few minutes before serving. Enjoy warm, maybe with ice cream! - Achieving the right consistency of dough: Mix the butter and sugars well. It should be creamy with no lumps. Then, add the egg and vanilla. This helps create a soft, chewy cookie. - Ideal baking time for gooey center: Bake the cookie for 20-25 minutes. Look for golden edges and a soft center. This means it’s perfect for that gooey texture. - Preventing burning when broiling marshmallows: Keep a close eye when broiling. Set a timer for one minute, then check. If they start to brown too fast, pull it out right away. - Best pairings with ice cream: Serve your skillet cookie warm with a scoop of vanilla ice cream. The cold ice cream melts over the warm cookie. It’s a delightful treat! - Ideas for garnishing with crushed graham crackers: Sprinkle crushed graham crackers on top. This adds crunch and extra flavor. It makes the dish look fancy, too. - Serving warm vs cooling options: Warm is best! But if you want to cool it, let it sit for about 10 minutes. Just remember, the gooey center is what makes it special. Pro Tips Use Room Temperature Ingredients: Ensure your butter and egg are at room temperature for a smoother batter and better incorporation of ingredients. Don't Overmix the Dough: Mix until just combined to keep the cookie soft and chewy. Overmixing can lead to a tougher texture. Customize Your Toppings: Feel free to add other mix-ins like peanut butter chips, nuts, or even a drizzle of caramel for a unique twist! Watch the Broiling Time: Keep a close eye while broiling the marshmallows, as they can burn quickly. Aim for a golden brown color! {{image_2}} You can change the flavor of your S’mores chocolate chip skillet cookie with ease. Here are some fun ideas: - Peanut Butter: Add 1/2 cup of creamy or chunky peanut butter for a nutty twist. - Mint Chocolate Chips: Swap in mint chips for a fresh flavor boost. - Chocolate Types: Use dark or white chocolate instead of semi-sweet for unique tastes. - Flour Types: Try almond or oat flour for a different texture and flavor. These variations help you create a cookie that suits your taste. Experimenting can lead to some delicious surprises! You can enjoy this skillet cookie even if you have dietary needs. Here are some options: - Gluten-Free: Use a gluten-free flour blend instead of all-purpose flour. - Low-Sugar: Replace sugars with stevia or erythritol for a low-sugar version. - Vegan-Friendly: Substitute the egg with a flax egg and use vegan butter. These swaps allow everyone to enjoy this tasty treat. Don't hesitate to customize it to meet your needs! To store leftovers at room temperature, let the skillet cookie cool. Once cool, cover it with plastic wrap. This keeps it fresh for up to two days. If you want to refrigerate, place it in an airtight container. This helps the cookie stay soft and tasty for about a week. For long-term storage, you can freeze the baked cookie. Cut it into slices and wrap each piece in plastic wrap. Then, place them in a freezer bag. This way, they can last for up to three months. When you're ready to eat, take out a slice and let it thaw in the fridge overnight. For a warm treat, heat it in the oven at 350°F for about 10 minutes. This brings back that fresh, gooey goodness. Can I make the cookie dough ahead of time? Yes, you can make the cookie dough ahead of time. Just store it in the fridge for up to 24 hours. This helps the flavors blend well. When ready, spread it in the skillet and bake it. How do I know when my cookie is done baking? Check the edges of the cookie. They should be golden brown. The center should look slightly soft. If it meets these points, it is ready to come out of the oven. Can I use a different type of skillet? Yes, you can use any oven-safe baking dish. Cast iron skillets work best for even baking. Just make sure it’s large enough to hold the cookie dough. What to do if the cookie is too dry/wet? If the cookie is dry, add a little melted butter or a splash of milk. This will help moisten it. If it is too wet, add a bit more flour until you reach the right texture. How to fix burnt marshmallows? If the marshmallows burn, simply scrape off the burnt layer. You can then add fresh mini marshmallows on top. Broil them for a shorter time next time to avoid burning. Steps to take if the dough doesn’t spread properly If the dough doesn’t spread, try letting it sit at room temperature for a few minutes. This helps soften the butter. You can also press it down gently in the skillet to help it spread. In this post, we explored a delicious S’mores Chocolate Chip Skillet Cookie. We covered main ingredients, substitutions, and step-by-step cooking instructions. You learned tips for the perfect bake and various flavor variations to try. Don't forget storage details for leftovers and answers to common questions. This treat is fun and easy to make. Enjoy it warm with ice cream for the best experience. Get creative with flavors or adjustments to suit your needs. Happy baking!

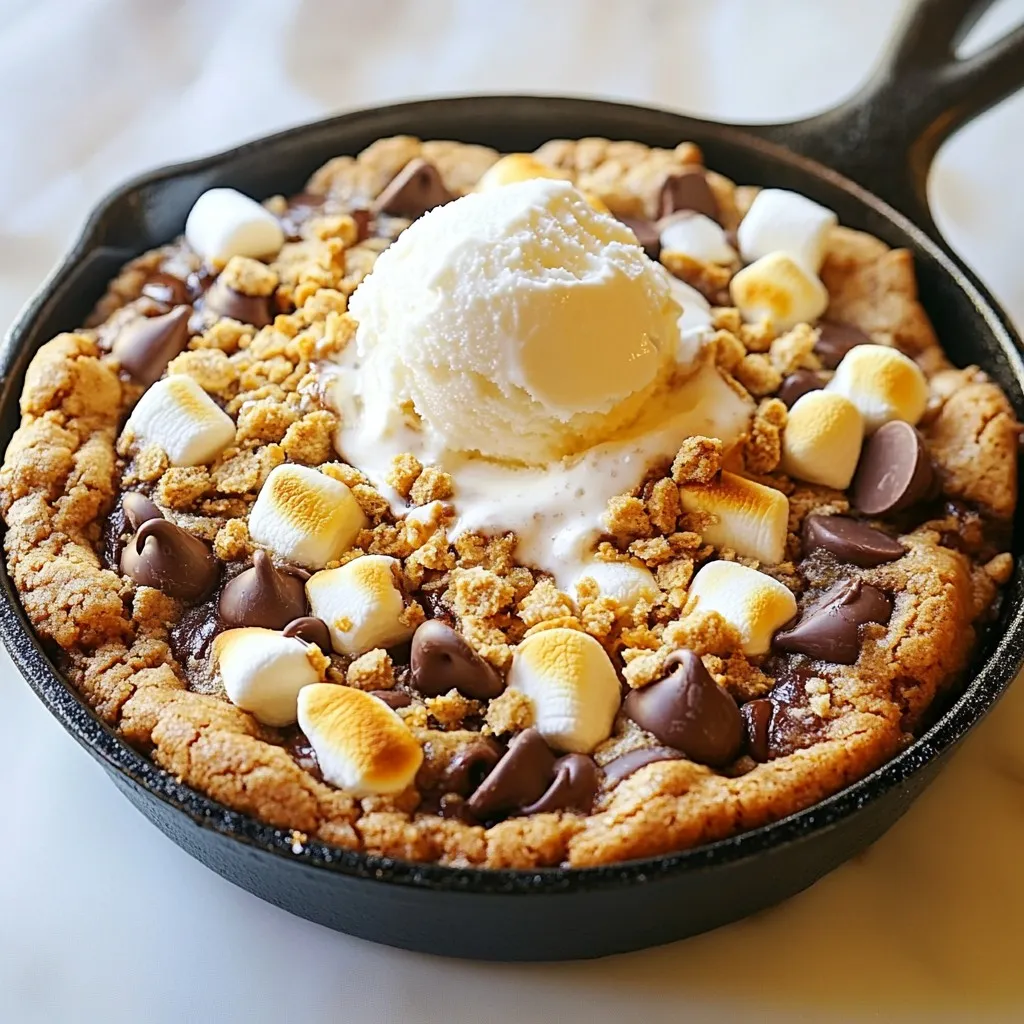
Craving dessert that brings joy to every bite? Meet your new favorite treat: the S’mores Chocolate Chip Skillet Cookie. This warm, gooey delight combines the classic campfire flavors of s’mores …

Read more

Categories Desserts

Garlic Parmesan Chicken Pasta Easy and Tasty Recipe

November 14, 2025November 25, 2024 by Chef Jamie
- 8 oz fettuccine pasta - 2 boneless, skinless chicken breasts, diced - 4 cloves garlic, minced - 1 cup heavy cream - 1 cup grated Parmesan cheese - 2 tablespoons olive oil - 1 teaspoon Italian seasoning - Salt and pepper to taste - Fresh parsley, chopped, for garnish When I cook Garlic Parmesan Chicken Pasta, I gather my ingredients first. This helps me stay organized. I love using fettuccine for its wide shape. It holds the creamy sauce well. For protein, I pick two boneless, skinless chicken breasts. Dicing them makes cooking easy and fast. Garlic is a must in this dish. Four cloves minced add great flavor. I also like to use a cup of heavy cream for that rich taste. Grated Parmesan cheese is key for its savory touch. I find two tablespoons of olive oil gives a nice base for sautéing. I flavor the chicken with Italian seasoning, salt, and pepper. Fresh parsley is my favorite garnish. It adds a pop of color and brightens the dish. Having all these ingredients ready makes the cooking process smooth and fun! {{ingredient_image_1}} To cook the fettuccine al dente, bring a large pot of salted water to a boil. Add the pasta and stir it well. Follow the package instructions for cooking time, usually about 8-10 minutes. Al dente means the pasta should be firm to the bite. After draining, save about 1/2 cup of pasta water. This water helps make the sauce creamy and smooth. Heat a large skillet over medium heat and add 2 tablespoons of olive oil. Once hot, add the diced chicken breasts. Season with salt, pepper, and 1 teaspoon of Italian seasoning. Cook for about 5-7 minutes. Stir often until the chicken turns golden brown and is fully cooked. This step gives the chicken a great flavor and texture. When the chicken is done, add 4 minced garlic cloves to the skillet. Cook for 1-2 minutes, stirring well. Be careful not to burn the garlic, as it can turn bitter. Next, turn the heat to low and pour in 1 cup of heavy cream. Stir gently to combine with the chicken and garlic. Gradually add 1 cup of grated Parmesan cheese, mixing until it melts. If the sauce is too thick, use the reserved pasta water to adjust the consistency. This makes a rich and creamy sauce that coats the pasta perfectly. To boost the taste of your Garlic Parmesan Chicken Pasta, try adjusting your seasonings. You can add more garlic for a bolder flavor. Fresh herbs, like basil or thyme, can also enhance the dish. These herbs bring freshness and depth to the creamy sauce. For a beautiful plate, arrange the pasta in a large bowl. Twirl the fettuccine with a fork for an elegant look. Top it with extra Parmesan cheese for richness. A sprinkle of fresh parsley adds a pop of color and flavor, making the dish appealing. One common mistake is overcooking the chicken. Always cook it until it's golden brown but still juicy. Another mistake is forgetting to save pasta water. This water can help adjust the sauce's thickness. Always remember to reserve it before draining the pasta. Pro Tips Perfect Pasta: Always cook the pasta until al dente to maintain its texture when mixed with the sauce. Chicken Browning: For extra flavor, ensure the chicken is browned well before adding garlic to enhance the overall taste. Cheese Incorporation: Gradually adding the Parmesan cheese helps in achieving a smooth and creamy sauce without clumps. Garnish Smartly: Adding fresh parsley not only adds color but also a refreshing flavor that elevates the dish. {{image_2}} If you want to switch up the protein, try shrimp or vegetables. Shrimp cooks fast, just like chicken. For a veggie option, use bell peppers, zucchini, or mushrooms. They add great flavor and texture. You can also use gluten-free pasta if you need a gluten-free option. Look for rice or corn-based pasta. They work well and taste good too. To lighten the dish, use half-and-half or milk instead of heavy cream. This keeps it creamy but cuts down on calories. You can also mix in some Greek yogurt for added creaminess. When it comes to cheese, swap the Parmesan for Pecorino Romano or Asiago. Each cheese brings its own unique taste. Want to spice things up? Add sun-dried tomatoes or fresh spinach. Sun-dried tomatoes give a sweet and tangy taste. Fresh spinach adds color and nutrition. You can also sprinkle in red pepper flakes for a kick. A little heat makes the dish exciting and flavorful. To store leftovers safely, let the pasta cool first. Place it in an airtight container. Make sure to seal it tightly. This keeps out air and moisture. Store it in the fridge. It can stay fresh for about 3-4 days. If you want to freeze the pasta, use a freezer-safe container. Divide the pasta into smaller portions. This makes it easy to thaw later. When you are ready to eat, thaw it in the fridge overnight. Reheat it in a skillet over low heat. Add a splash of cream or pasta water to keep it creamy. In the fridge, Garlic Parmesan Chicken Pasta lasts 3-4 days. If you freeze it, it can last up to 3 months. After that, the flavor and texture may change. To enjoy the dish at its best, eat it within these time frames. It takes about 30 minutes to make this dish. You spend 10 minutes prepping and 20 minutes cooking. It’s quick and easy. Yes, you can use any pasta you like. Shells, penne, or spaghetti work well. Just adjust the cooking time as needed. Absolutely! This dish stores well. You can make it ahead and keep it in the fridge. It stays fresh for about three days. You can serve it with a side salad or garlic bread. Both add great flavor and texture. A glass of white wine pairs nicely too. To spice it up, add red pepper flakes. You can mix them in the sauce as you cook. Fresh jalapeños or sriracha work well too. In summary, we explored a delicious Garlic Parmesan Chicken Pasta recipe. You learned about the key ingredients, helpful kitchen tools, and step-by-step instructions for cooking. Tips on enhancing flavor and avoiding common mistakes were included. We also discussed variations and storage methods to keep your dish fresh. Take these insights and create a special meal. Enjoy the process and share it with loved ones!

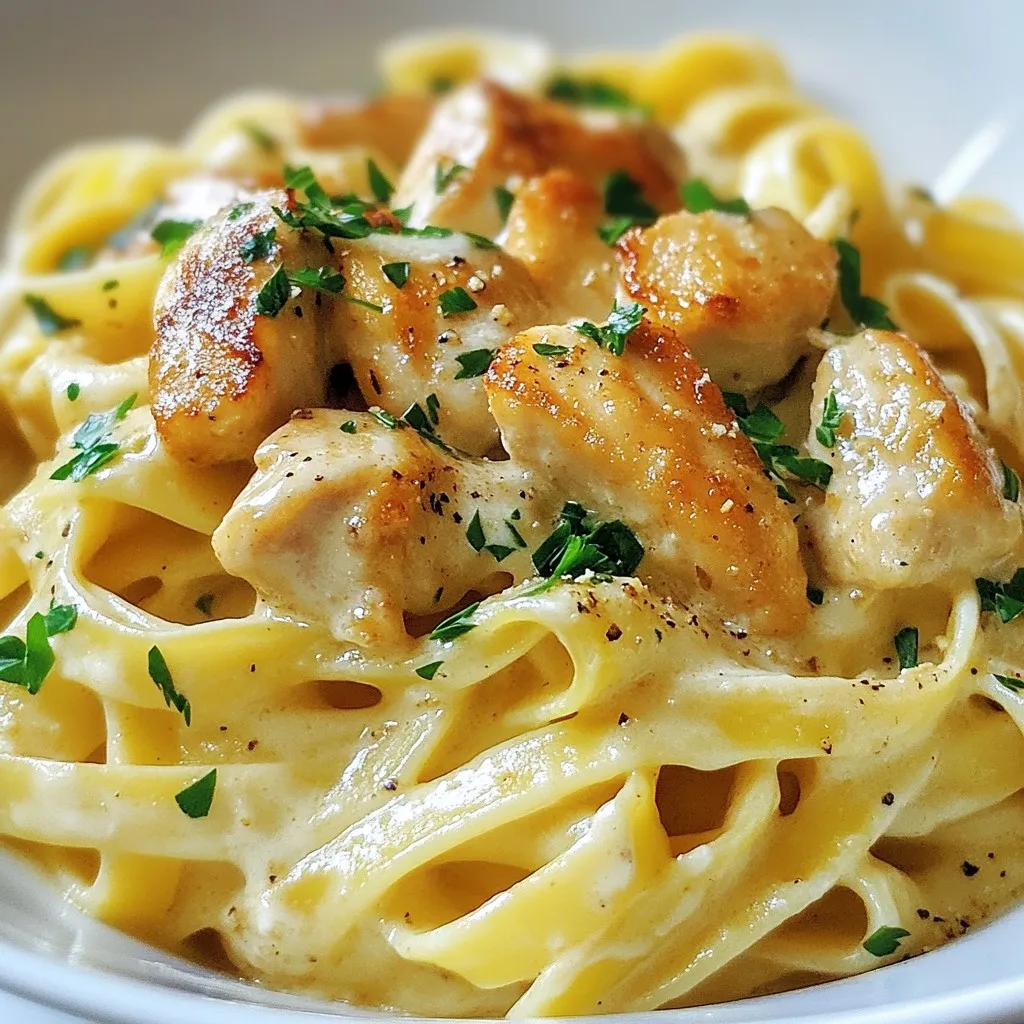
Are you ready to impress your family with a delicious meal? This Garlic Parmesan Chicken Pasta recipe is easy to prepare and packed with flavor. In just a few simple …

Read more

Categories Dinner

TikTok Feta Tomato Pasta Delight in 30 Minutes

November 11, 2025November 18, 2024 by Chef Jamie
To make this tasty dish, you need some key ingredients. Here’s what you will need: - 8 oz (225g) penne pasta - 1 pint cherry tomatoes, halved - 7 oz (200g) block of feta cheese - 1/4 cup olive oil - 4 cloves garlic, minced - 1 teaspoon red pepper flakes - Salt and pepper to taste - Fresh basil leaves, torn for garnish - Zest and juice of 1 lemon These ingredients work together to create a creamy and flavorful sauce. The feta cheese melts beautifully and blends with the tomatoes. You can add your own twist to this recipe. Here are some optional ingredients you might enjoy: - Fresh spinach or kale for added greens - Cooked chicken or shrimp for protein - Other herbs like oregano or thyme for extra flavor - A splash of balsamic vinegar for tanginess Feel free to mix and match these to fit your taste. Making it your own makes cooking fun! If you have any dietary needs, here are some easy swaps: - Use gluten-free pasta if you're avoiding gluten. - Swap feta cheese for a dairy-free cheese to make it vegan. - Try using a different type of pasta, like fusilli or spaghetti, for variety. These substitutions keep the dish tasty while fitting your needs. Enjoy experimenting with the flavors! {{ingredient_image_1}} First, gather all your ingredients. You will need: - 8 oz (225g) penne pasta - 1 pint cherry tomatoes, halved - 7 oz (200g) block of feta cheese - 1/4 cup olive oil - 4 cloves garlic, minced - 1 teaspoon red pepper flakes - Salt and pepper to taste - Fresh basil leaves, torn for garnish - Zest and juice of 1 lemon Next, preheat your oven to 400°F (200°C). This step is key to getting the tomatoes blistered and the feta creamy. While the oven heats up, prepare the cherry tomatoes. Halve each one and place them in a large baking dish. Mince the garlic and sprinkle it over the tomatoes. Add the red pepper flakes. You can adjust the amount based on your spice preference. Drizzle the olive oil over the mixture and season with salt and pepper. Give it all a good mix to combine. Now, make a space in the center of the tomatoes. Place the block of feta cheese right there. Drizzle a bit of olive oil over the feta and season it with a pinch of salt and pepper. This helps the feta melt and soak up the flavors. Bake the dish in the preheated oven for 25-30 minutes. You want the tomatoes to blister and the feta to turn golden. The smell will be amazing, and you’ll know it’s ready when the feta is soft. While the baking is happening, cook the penne pasta according to the package instructions. Aim for al dente, which means it should still have a little bite. Before draining, reserve 1/2 cup of the pasta water. This water helps to create a creamy sauce later. Once the baking is done, remove the dish from the oven. Use a fork to mash the feta and tomatoes together. It should turn creamy and well mixed. Add the drained pasta to the baking dish. Toss everything together. Gradually pour in the reserved pasta water until you reach your desired sauce consistency. Finish things off with a squeeze of lemon juice and some lemon zest. Toss in torn basil leaves for freshness and flavor. Serve in bowls, garnished with more basil and a drizzle of olive oil for that gourmet touch. To cook perfect pasta, follow these steps: - Use a large pot of water. - Add plenty of salt before boiling. - Cook pasta until it is al dente, or firm to the bite. - Reserve some pasta water before draining. This starchy water helps to thicken your sauce later. Seasoning is key to making your pasta shine. Here are my top tips: - Use fresh garlic for a stronger flavor. - Adjust red pepper flakes to your spice level. - Don't skip the lemon juice and zest; they brighten the dish. - Fresh basil adds freshness; tear the leaves instead of chopping. These small touches create layers of flavor. To keep your feta tomato pasta fresh: - Let the pasta cool to room temperature. - Store leftovers in an airtight container. - Refrigerate for up to three days. - Reheat gently on the stovetop with a splash of water. This keeps the pasta from drying out. Pro Tips Choose Quality Ingredients: Using fresh, high-quality tomatoes and feta cheese will elevate the flavor of your pasta dish significantly. Adjust the Spice Level: Feel free to modify the amount of red pepper flakes to suit your heat preference. Start with less and add more if desired. Don’t Skip the Pasta Water: The reserved pasta water is essential for achieving a creamy sauce consistency. Add it gradually until you reach your desired texture. Experiment with Herbs: While basil is a classic choice, try adding other fresh herbs like parsley or oregano for a different flavor profile. {{image_2}} To make your pasta creamy, add heavy cream after mixing the tomatoes and feta. Start with half a cup of cream. Stir it in slowly while mixing the pasta. This will give you a rich, smooth sauce. The cream balances the tangy feta. It also adds a lovely texture. This version is great for those who love a luxurious feel in their dishes. You can make this dish even healthier by adding spinach or kale. Just toss in a handful of fresh spinach or chopped kale. Add these greens to the baking dish before you mix in the pasta. They will wilt nicely while the tomatoes and feta bake. This adds color and nutrition. You can even use frozen spinach if you’re in a pinch. Just make sure to thaw and drain it well. Want to make this dish heartier? Add chicken or shrimp. For chicken, use cooked, shredded chicken. Stir it in when you mix the pasta. If you prefer shrimp, sauté them in a pan until they turn pink. Add them just before you toss everything together. Both options boost protein and flavor. They make this meal filling while keeping it simple. To keep your leftover TikTok feta tomato pasta fresh, store it in an airtight container. Let the pasta cool down to room temperature first. This helps prevent moisture build-up. Place a layer of plastic wrap over the pasta before sealing the container. This extra step keeps flavors locked in. Leftovers can stay in the fridge for up to three days. When reheating, avoid the microwave if you can. It can make the pasta dry. Instead, use a pan on low heat. Add a splash of water or olive oil to help bring back moisture. Stir gently until everything is warm. If you must use the microwave, heat in short bursts. Stir after each burst to keep it even. If you want to freeze your pasta, let it cool completely. Then, portion it into freezer-safe bags or containers. Remove as much air as possible before sealing. This helps prevent freezer burn. The pasta can last up to two months in the freezer. When ready to eat, thaw overnight in the fridge. Reheat as mentioned for the best taste. TikTok Feta Tomato Pasta became a viral hit due to its simplicity and flavor. The creamy feta and sweet tomatoes create a rich sauce that is easy to make. The dish is quick, taking only about 30 minutes from start to finish. Plus, it uses common ingredients found in most kitchens. Many people enjoy sharing their creations online, making it a fun cooking challenge. Yes, you can make this dish dairy-free! Instead of feta cheese, use a dairy-free feta alternative. Many brands offer plant-based options that melt well. You can also try cashew cheese or nutritional yeast for a cheesy flavor without dairy. Just ensure that the other ingredients, like olive oil and tomatoes, are also dairy-free. To adjust the spice level, change the amount of red pepper flakes. If you like it mild, use less or skip it altogether. If you love heat, add more flakes or even a pinch of cayenne pepper. You can also add fresh chili peppers for a kick. Just taste as you go to find your perfect spice level. TikTok Feta Tomato Pasta is simple and fun to make. We covered the main ingredients, steps, and useful tips. You can mix in seasonings or swap ingredients to suit your taste. Remember, storing leftovers is easy if done right. Don’t be afraid to explore variations to keep things fresh. I hope you feel inspired to try this dish and make it your own. Cooking is about creativity and enjoying good food.

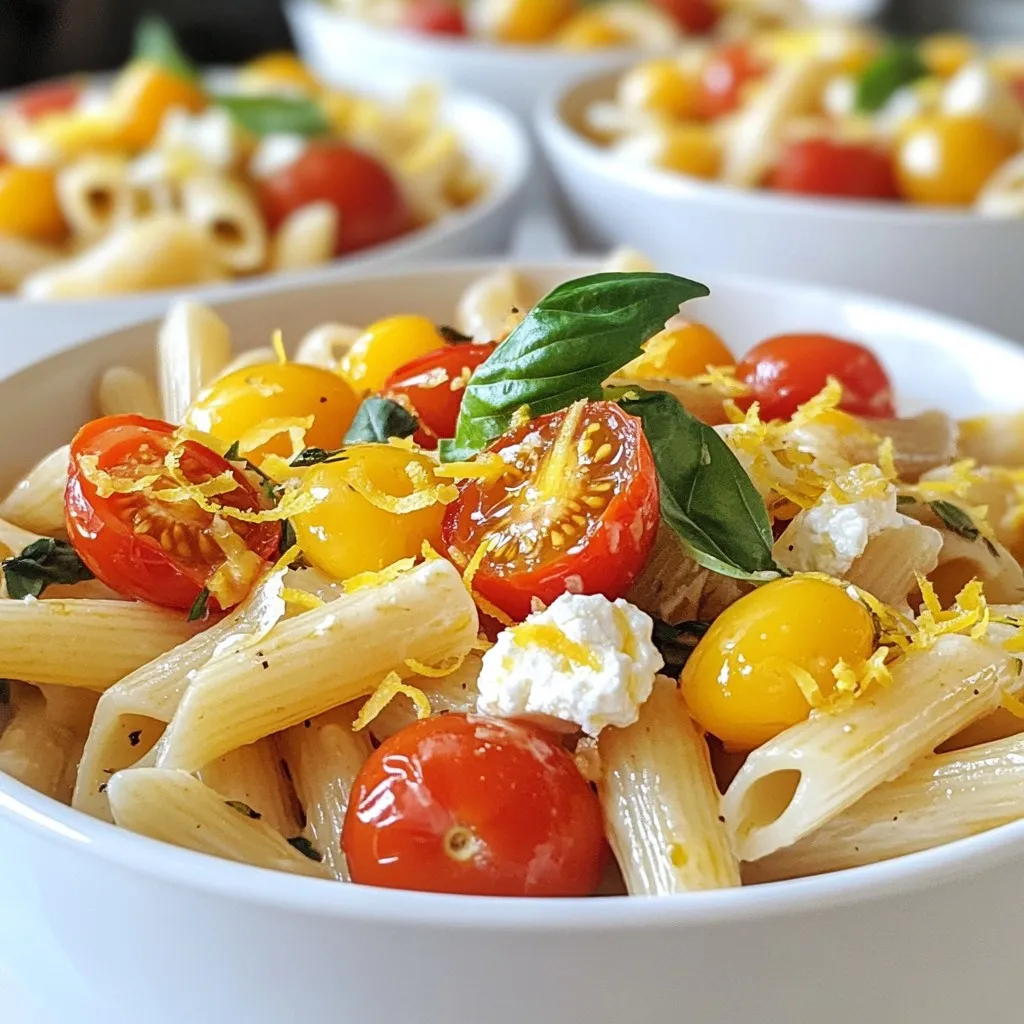
Craving a quick and tasty meal? Let me show you how to make TikTok Feta Tomato Pasta in just 30 minutes! This dish exploded in popularity for good reason—it’s creamy, …

Read more

Categories Dinner

One Pot Creamy Tuscan Shrimp Orzo Delight Recipe

November 11, 2025November 12, 2024 by Chef Jamie
To make this tasty dish, gather these main ingredients: - 1 pound large shrimp, peeled and deveined - 1 cup orzo pasta - 3 cups chicken broth - 1 cup heavy cream - 1 cup cherry tomatoes, halved - 2 cups fresh spinach - 1/2 cup sun-dried tomatoes, chopped - 3 cloves garlic, minced - 1 teaspoon Italian seasoning - 1 tablespoon olive oil - Salt and pepper to taste These ingredients combine to create a rich and creamy meal. The shrimp adds protein, while the orzo acts as a hearty base. The spinach and tomatoes bring freshness and color. You can personalize your shrimp orzo with these optional ingredients: - Fresh herbs like parsley or thyme - Lemon zest for a bright flavor - Red pepper flakes for heat - Artichoke hearts for extra texture - Cream cheese for more creaminess Feel free to add or swap ingredients to match your taste. Cooking should be fun and flexible. To finish off your dish, consider these toppings: - Grated Parmesan cheese - Fresh basil leaves - A drizzle of olive oil - Cracked black pepper These toppings elevate the flavors and make your dish look beautiful. Enjoy experimenting with different combinations to find your favorite! {{ingredient_image_1}} You need to gather all your ingredients first. This makes cooking easier and faster. Here’s what you need: - 1 pound large shrimp, peeled and deveined - 1 cup orzo pasta - 3 cups chicken broth - 1 cup heavy cream - 1 cup cherry tomatoes, halved - 2 cups fresh spinach - 1/2 cup sun-dried tomatoes, chopped - 3 cloves garlic, minced - 1 teaspoon Italian seasoning - 1 tablespoon olive oil - Salt and pepper to taste - Grated Parmesan cheese for serving - Fresh basil leaves for garnish 1. Start by heating your olive oil in a large pot over medium heat. 2. Add the minced garlic and cook for 1-2 minutes. You want it fragrant but not burned. 3. Next, toss in the shrimp, adding salt, pepper, and Italian seasoning. Cook them for 2-3 minutes until they turn pink. 4. Remove the shrimp and set them aside. 5. In the same pot, add the orzo. Stir it for about 1 minute to lightly toast it. 6. Pour in the chicken broth and bring to a gentle boil. Lower the heat, cover, and cook for 8-10 minutes. Stir now and then to stop sticking. 7. After the orzo is al dente, mix in the heavy cream, cherry tomatoes, sun-dried tomatoes, and spinach. Stir until the spinach wilts. 8. Return the shrimp to the pot and mix gently. Heat everything for another 1-2 minutes. 9. Adjust the seasoning with salt and pepper if needed. 10. Remove from heat and let the dish sit for a few minutes to thicken. 11. Serve warm, topped with grated Parmesan cheese and fresh basil. For that perfect finish, sprinkle extra Parmesan cheese on top. The cheese adds a lovely flavor. Fresh basil gives a nice aroma and bright color. If you like a bit of heat, add red pepper flakes when cooking. This dish is rich and creamy, so serve it warm for the best taste! When cooking shrimp, timing is key. Cook them for only 2-3 minutes. They should turn pink and opaque. Overcooking makes shrimp tough. Always remove the shrimp from the pot early. This way, they will stay tender while you finish the dish. To get that perfect creamy sauce, use heavy cream. It thickens well and adds richness. After cooking the orzo, add the cream slowly. Stir it gently to mix. This helps prevent lumps. If the sauce is too thick, add a bit more broth. Always check the consistency before serving. Seasoning is vital for flavor. Use salt, pepper, and Italian seasoning. Fresh garlic makes the dish pop. Sun-dried tomatoes add a sweet and tangy taste. Don’t forget to taste as you cook. Adjust the seasoning to your liking. Just a pinch more salt or pepper can make a big difference. Pro Tips Perfectly Cooked Shrimp: Be careful not to overcook the shrimp; they should turn pink and opaque, which usually takes about 2-3 minutes. Remove them from the pot as soon as they are cooked to prevent them from becoming rubbery. Al Dente Orzo: Keep an eye on the orzo while it cooks to ensure it reaches the perfect al dente texture. Stir occasionally to prevent sticking and to ensure even cooking. Make it Creamy: For a richer flavor, let the heavy cream simmer for a minute or two before adding the other ingredients. This helps to enhance the creaminess of the sauce. Fresh Herbs Finish: Always add fresh herbs like basil after cooking to maintain their vibrant flavor and color. This will elevate the dish's overall presentation and taste. {{image_2}} If you want a vegetarian dish, you can swap shrimp for mushrooms. Use 8 ounces of sliced mushrooms for a meaty texture. You can also add chickpeas for protein. They add great flavor and texture. Try using diced zucchini or eggplant for a fresh twist. Both choices work well in this creamy dish. Orzo is a great pasta choice, but you can use others too. Try using farro or quinoa for a hearty option. If you want gluten-free, use rice or gluten-free pasta. Each choice brings a unique taste and texture. Just watch the cooking times, as they may differ from orzo. You can customize the recipe to fit your needs. If you are lactose-free, swap heavy cream for coconut milk. It gives a creamy feel without dairy. For a lower-carb option, use cauliflower rice instead of orzo. You can also use vegetable broth for a plant-based dish. These swaps keep your meal tasty and enjoyable. After you enjoy your One Pot Creamy Tuscan Shrimp Orzo, always store leftovers properly. Cool the dish to room temperature. Then, transfer it to an airtight container. This keeps the flavors fresh. Store it in the fridge for up to three days. Label the container with the date, so you remember when you made it. When you're ready to eat your leftovers, reheating is simple. Place the orzo in a pot over low heat. Add a splash of chicken broth or cream to keep it moist. Stir well and heat until warm. You can also use the microwave. Place in a microwave-safe bowl, cover it, and heat for 1-2 minutes, stirring halfway. If you want to save some for later, freezing is a good option. First, let the dish cool completely. Then, portion it into freezer-safe containers. Make sure to leave some space for expansion. Label each container with the date. You can freeze it for up to three months. To reheat, thaw it overnight in the fridge. Then, follow the reheating instructions above for the best results. To make One Pot Creamy Tuscan Shrimp Orzo, start by heating olive oil in a large pot. Add minced garlic and cook it for a minute. Then, add the shrimp, season with salt, pepper, and Italian seasoning, and cook until pink. Remove the shrimp and set them aside. Next, add orzo pasta to the same pot and stir for about one minute. Pour in chicken broth and bring it to a boil. Lower the heat and cover the pot, cooking for 8-10 minutes until the orzo is tender. Now, stir in heavy cream, cherry tomatoes, sun-dried tomatoes, and spinach. Cook until the spinach wilts. Finally, return the shrimp to the pot, mix gently, and heat through. Serve it warm with Parmesan cheese and basil on top. Yes, you can use frozen shrimp for this recipe. Just thaw them first. To thaw, place shrimp in cold water for about 15 minutes. Once thawed, peel and devein them if needed. This step will save you time and still give you tasty results. Creamy Tuscan Shrimp Orzo pairs well with a fresh salad. A simple green salad with a light vinaigrette works great. You can also serve it with garlic bread for a hearty meal. For a special touch, try a glass of white wine to complement the dish. This dish lasts about 3-4 days in the refrigerator. Store it in an airtight container to keep it fresh. When ready to eat, just reheat it gently on the stove or in the microwave. Add a splash of cream or broth if it seems a bit dry when reheating. You learned about the key ingredients and steps to make One Pot Creamy Tuscan Shrimp Orzo. I shared tips on cooking shrimp, creating a creamy sauce, and enhancing flavors. You can even try different pasta or a vegetarian option. Remember to store leftovers properly and enjoy them later. This dish is simple and tasty, perfect for any meal. Dive into your kitchen and make this delightful recipe today!

If you’re craving a meal that bursts with flavor and comes together in just one pot, you’re in for a treat! My One Pot Creamy Tuscan Shrimp Orzo Delight Recipe …

Read more

Categories Dinner
Newer posts
← Previous Page1 … Page133 Page134

TOSSED RECIPES

Simple meals, bold taste. Quick recipes made for real life — always fresh, always delicious. 🌿🍴

PAGES

Home About Contact Privacy Policy Terms & Conditions Cookie Policy GDPR Policy Copyright Policy Disclaimer

CATEGORIES

Appetizers Desserts Salads Breakfast Dinner

Contact

  • Pinterest
  • Mail
Copyright © 2026 Tossed Recipes. All rights reserved.