Chocolate Pecan Scones Fresh and Flavorful Delight

Are you ready to indulge in a sweet treat that’s both rich and nutty? Chocolate Pecan Scones are the perfect blend of flavors that will brighten any morning or afternoon! …
Are you ready to indulge in a sweet treat that’s both rich and nutty? Chocolate Pecan Scones are the perfect blend of flavors that will brighten any morning or afternoon! …
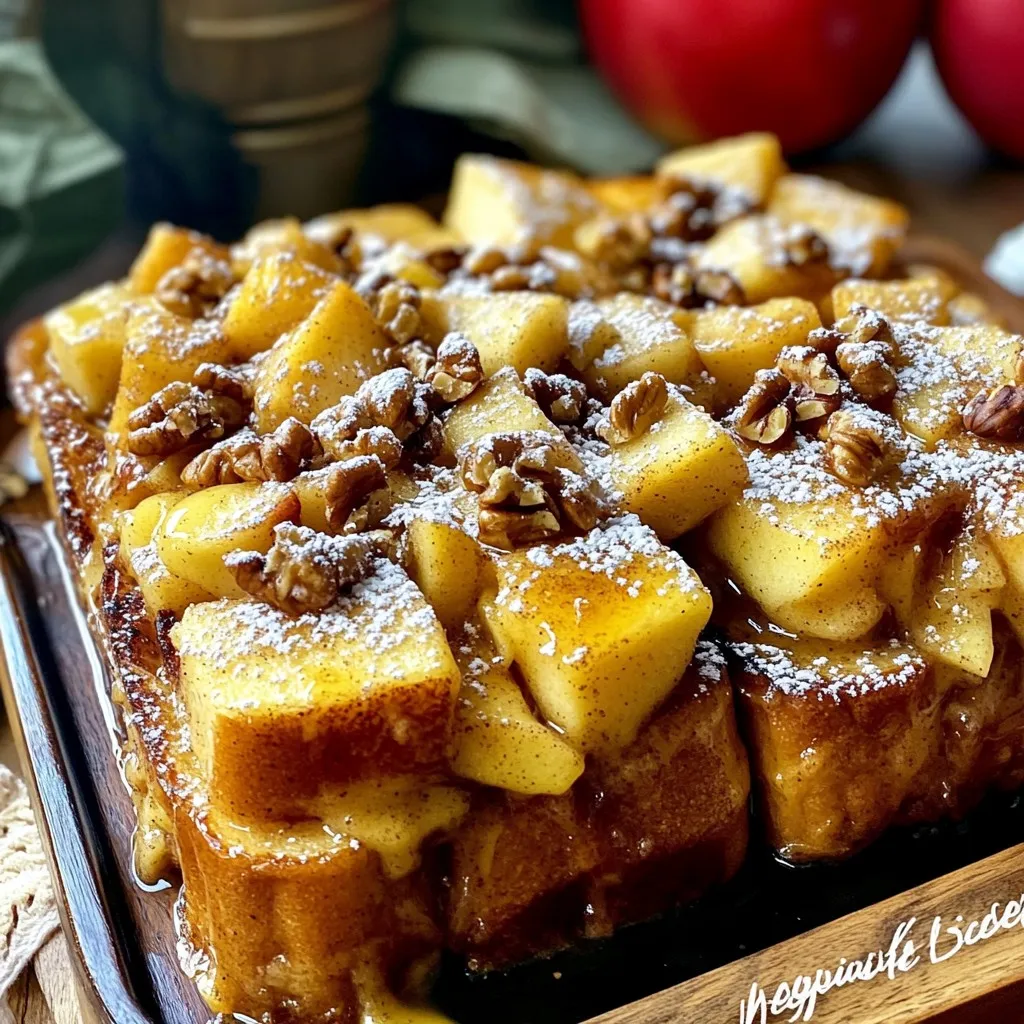
Imagine waking up to the sweet scent of cinnamon and apples wafting through your home. With my Slow Cooker Cinnamon Apple French Toast Bake, you can make that dream come …

Are you ready to elevate your dinner table? This Air Fryer Garlic Parmesan Cauliflower is a delicious side dish that’s simple to make and will impress everyone. With just a …

Are you craving a comforting meal that bursts with flavor? Look no further! In this blog, I’ll guide you through making Creamy Sun-Dried Tomato Chicken Pasta Delight. With tender chicken, …
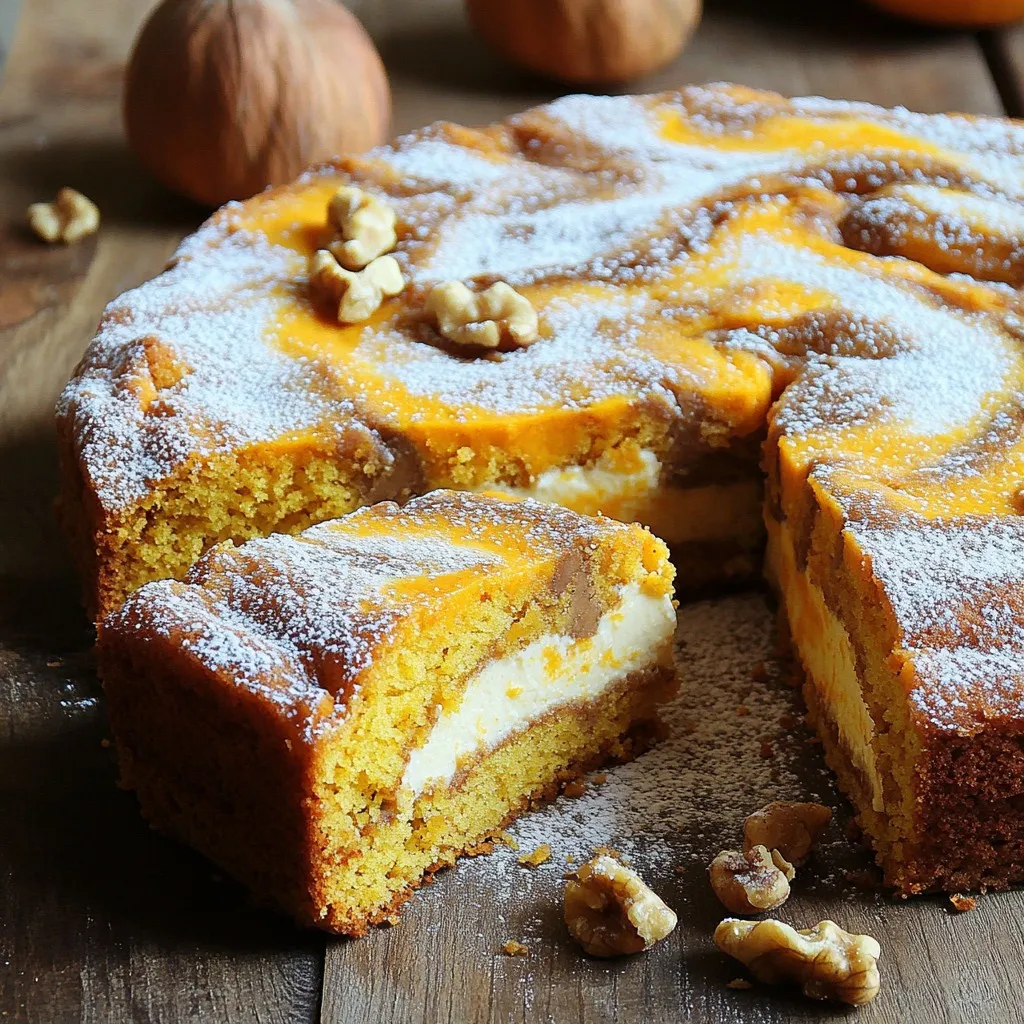
Get ready to indulge in a delightful treat with my Pumpkin Cream Cheese Coffee Cake recipe! This easy and delicious cake combines the warm flavors of pumpkin and spices with …
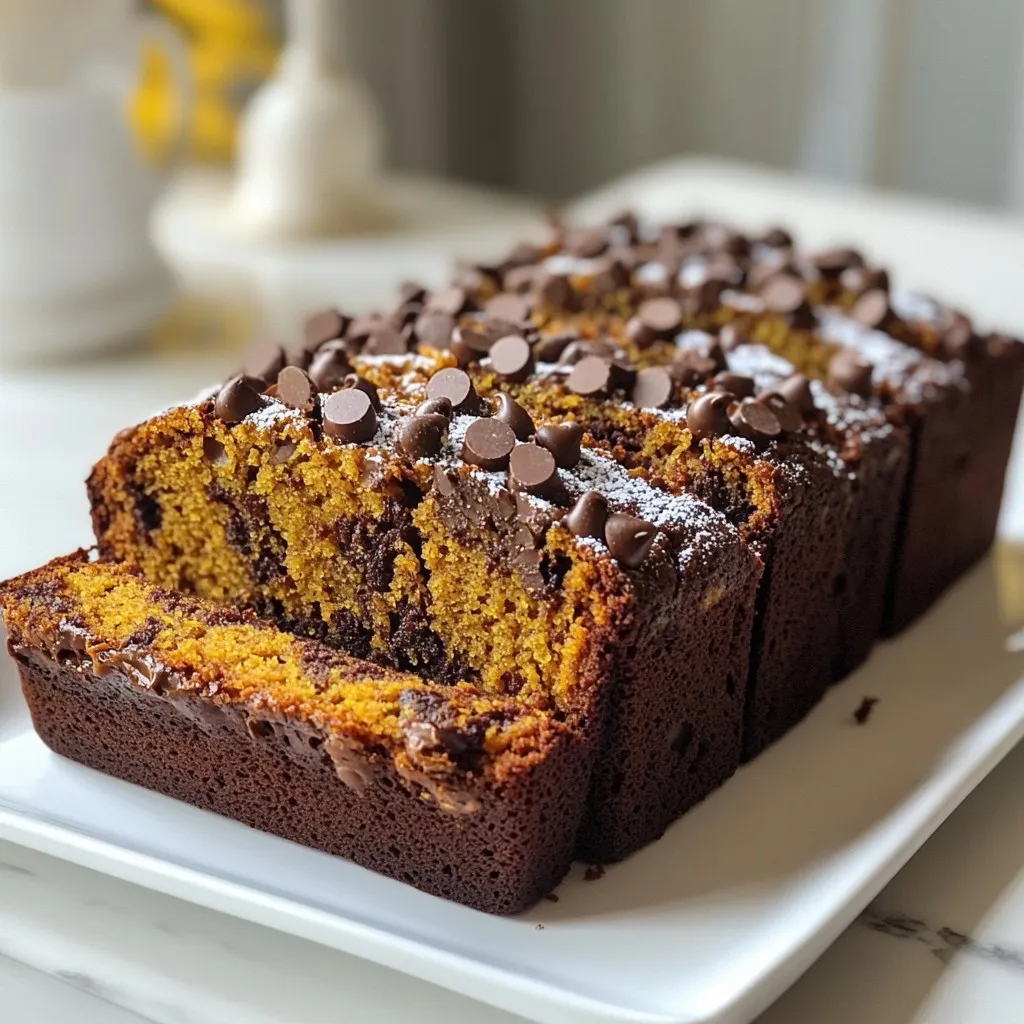
Are you ready to enjoy a slice of comfort that’s both tasty and healthy? Our Healthy Chocolate Pumpkin Bread is a rich treat that combines flavors you love with ingredients …
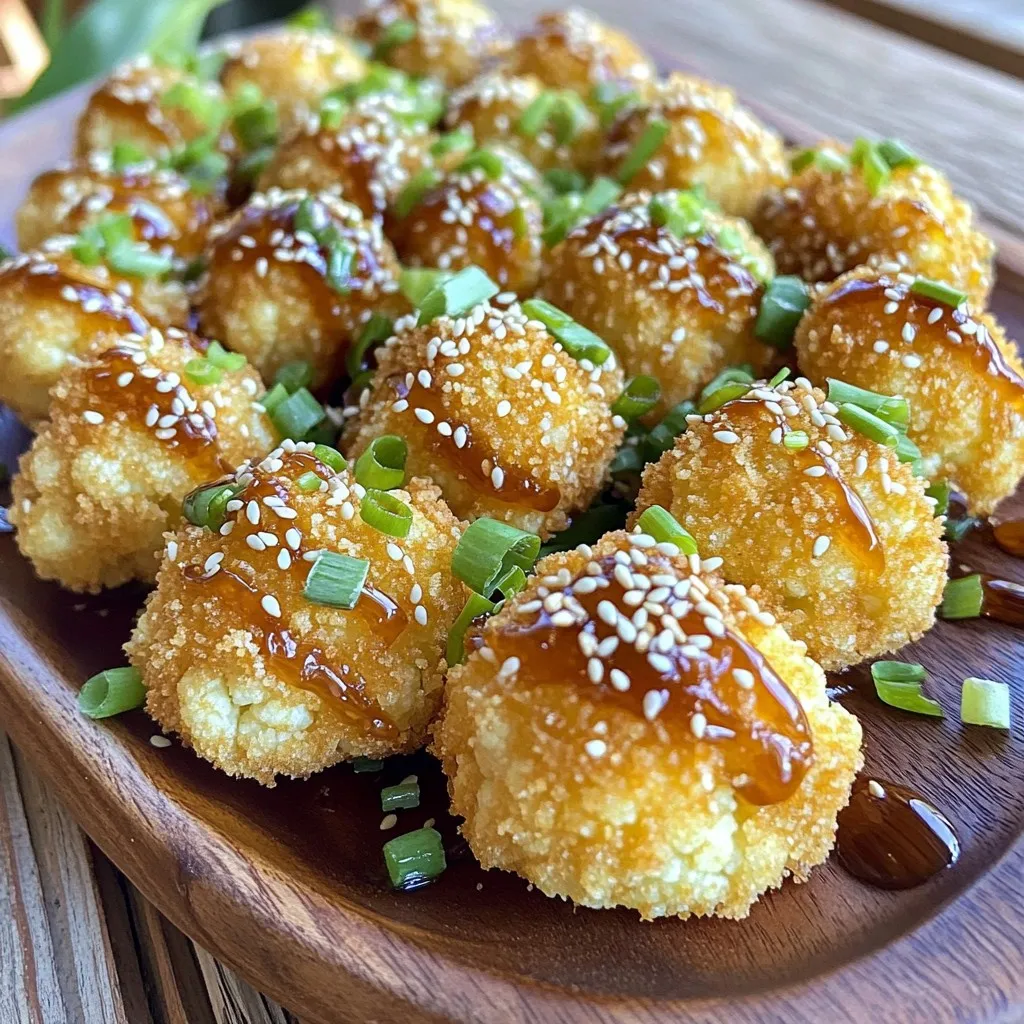
Looking for a tasty snack that packs a crunch? My Crispy Asian Sesame Cauliflower Bites are the answer! This easy recipe transforms cauliflower into a delightful dish, perfect for dinner …

Are you ready to impress your family with a tasty dinner? Spinach Artichoke Stuffed Chicken Breasts are easy to make and packed with flavor. In this post, I’ll guide you …
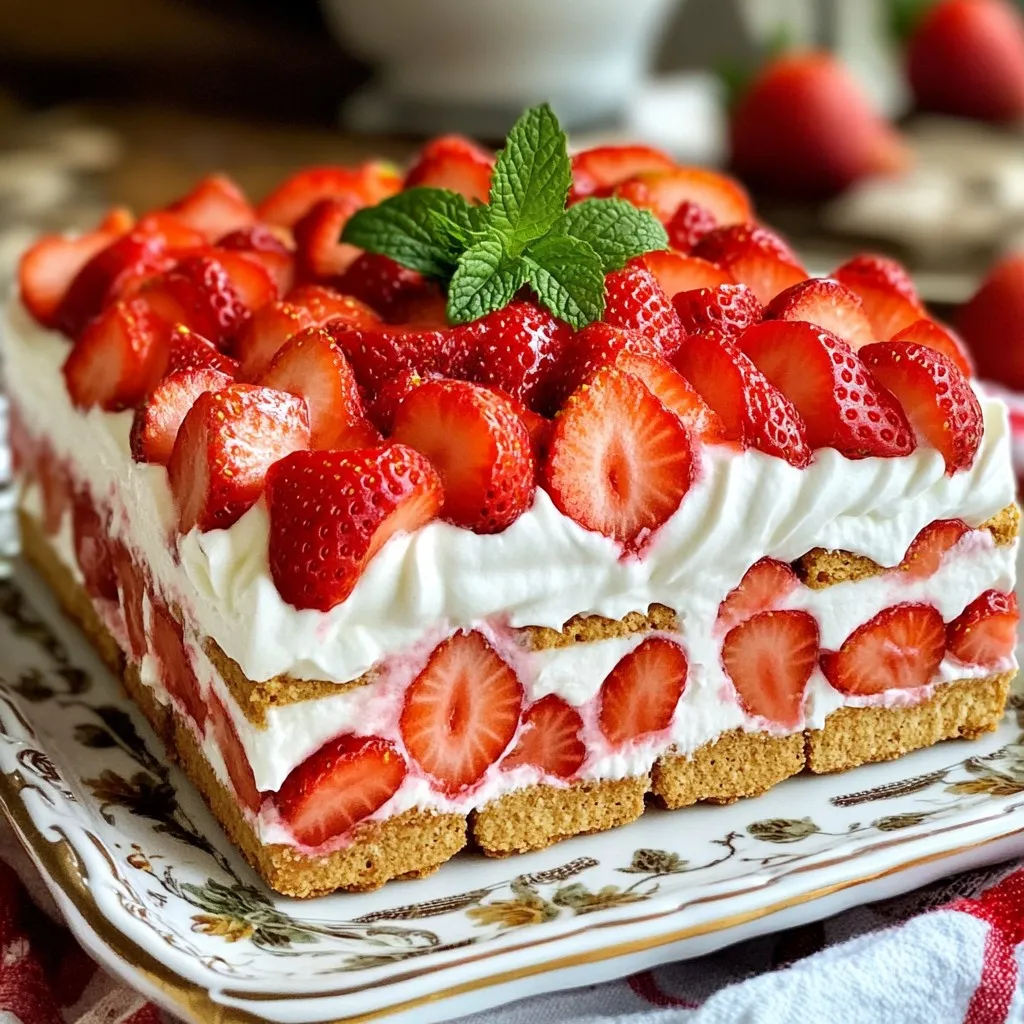
If you’re craving a sweet treat that is easy to make, look no further! This no-bake Strawberry Shortcake Icebox Cake is the perfect dessert for any occasion. Bursting with fresh …
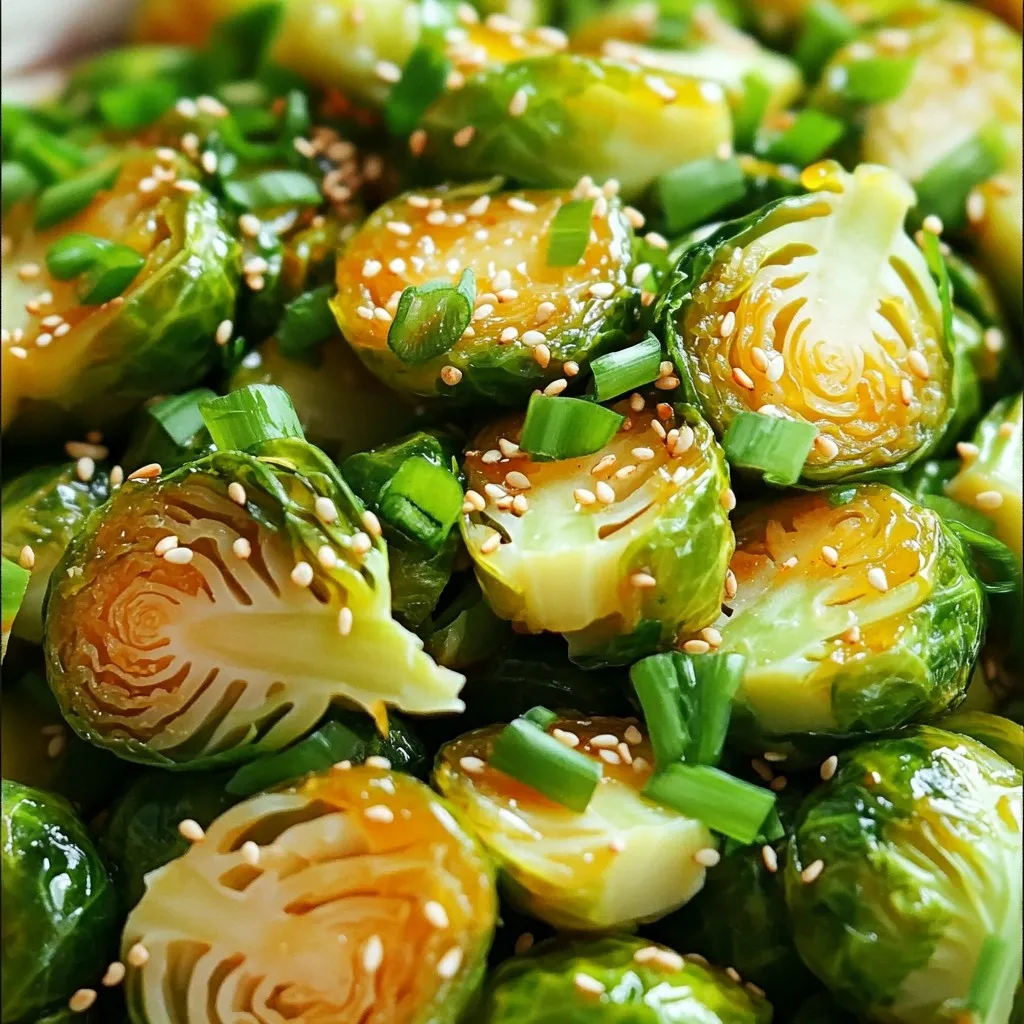
If you’re looking for a tasty and easy side dish, you need to try these Honey Sriracha Brussels Sprouts! With an air fryer, you can achieve crispy, flavorful sprouts in …