Brown Butter Pecan Scones Flavorful and Easy Treat
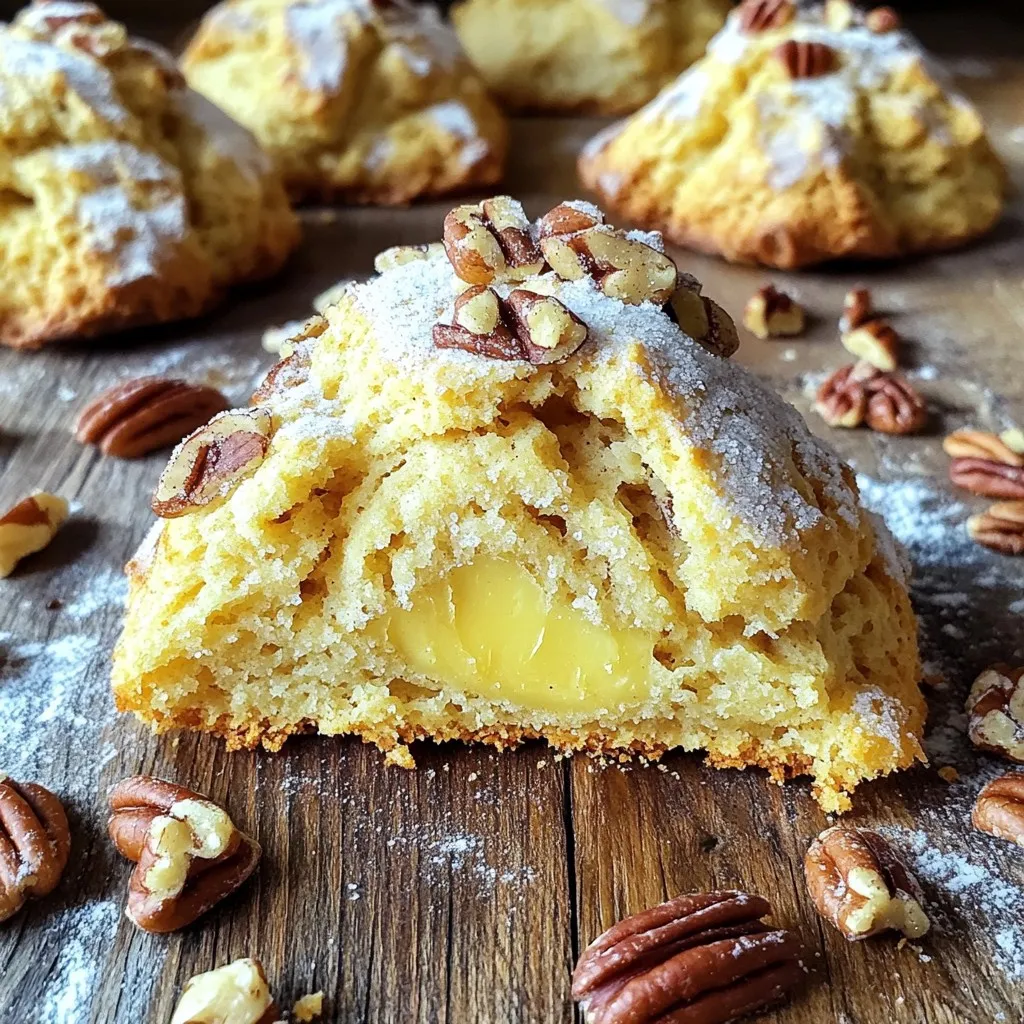
Are you ready to treat yourself to something delicious? These Brown Butter Pecan Scones are a perfect blend of nutty flavor and warm, buttery goodness. This easy recipe takes just …
Are you ready to treat yourself to something delicious? These Brown Butter Pecan Scones are a perfect blend of nutty flavor and warm, buttery goodness. This easy recipe takes just …

Welcome to my kitchen! Today, I’m excited to share my recipe for Slow Cooker Maple Dijon Chicken and Carrots Delight. This dish combines tender chicken thighs, sweet maple syrup, and …
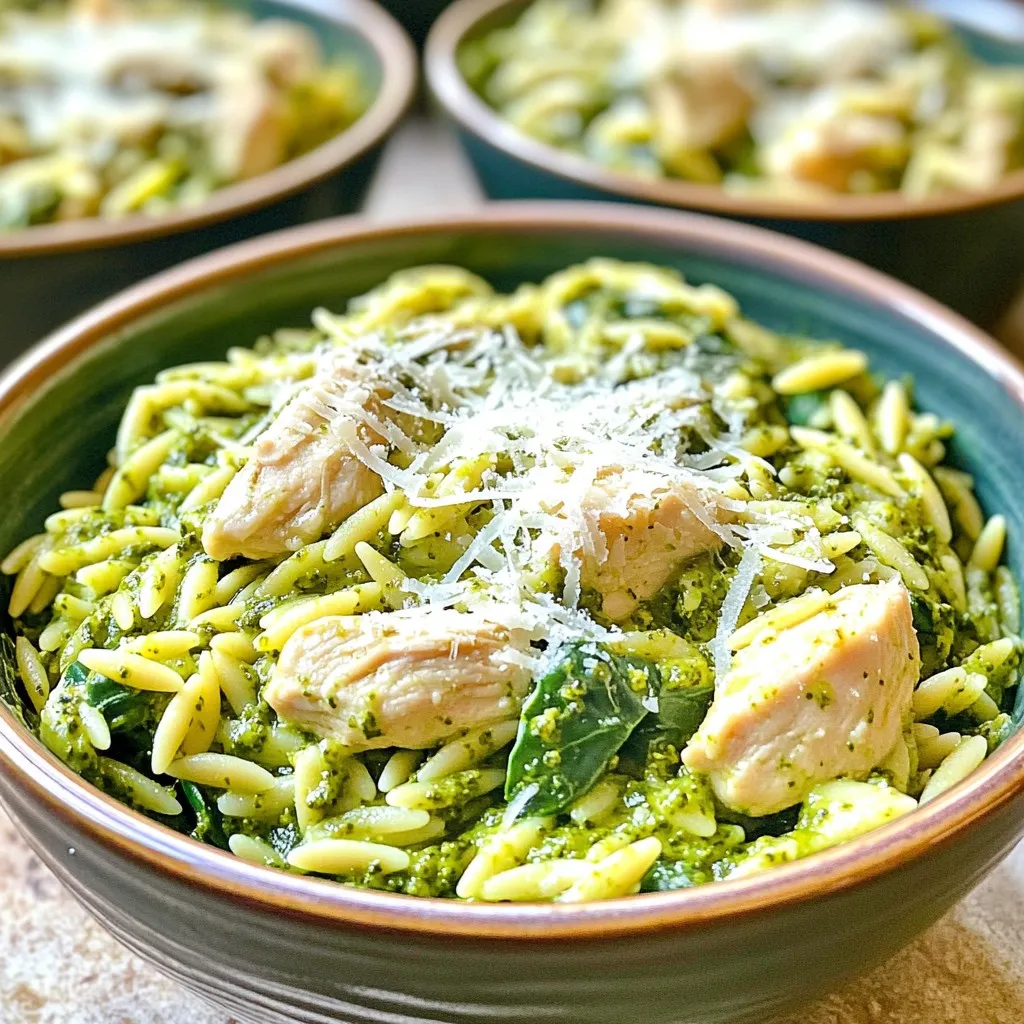
Looking for a quick, tasty meal that makes cleanup easy? You’ve found it! My One-Pan Creamy Pesto Chicken Orzo combines tender chicken, rich pesto, and fluffy orzo in just one …
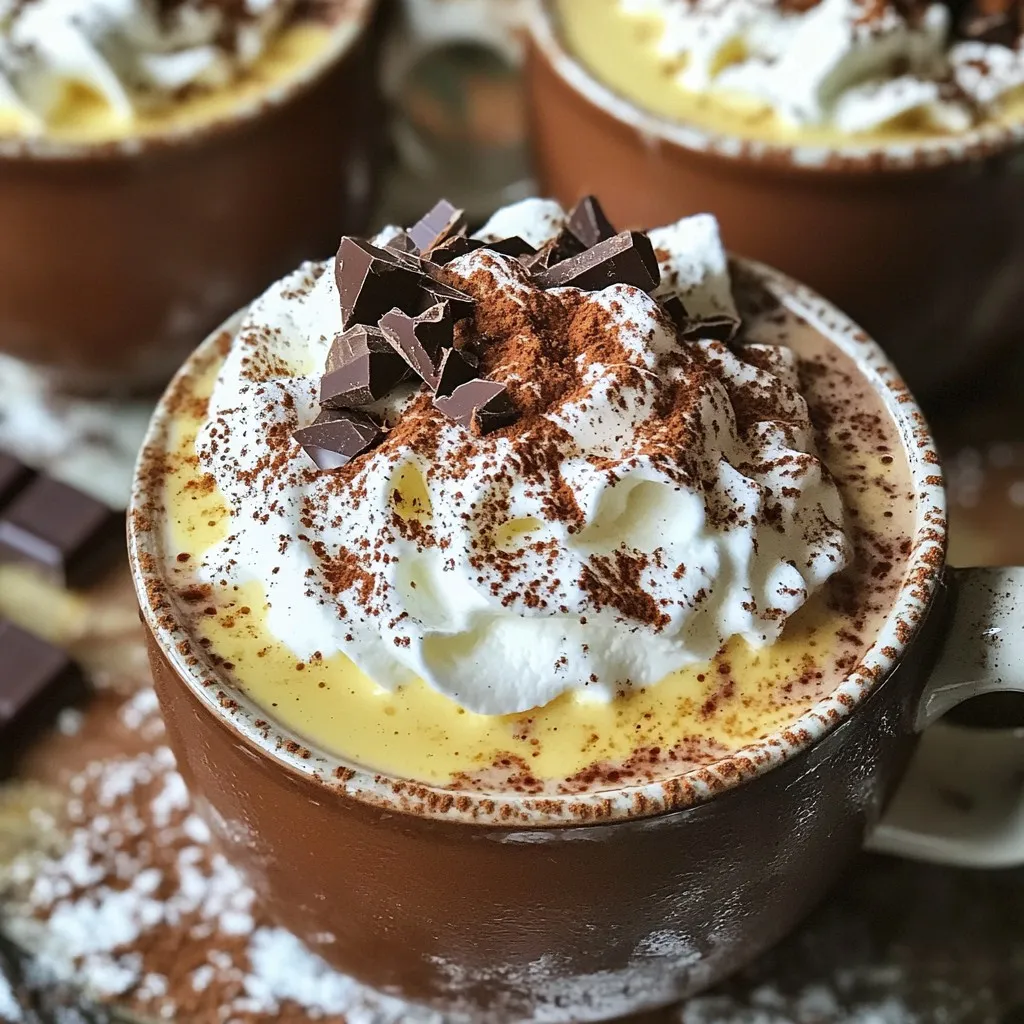
Warm up your winter nights with my Spiced Hot Chocolate with Whipped Cream Delight! This rich, creamy drink brings together comforting spices and smooth chocolate, creating the perfect cozy treat. …
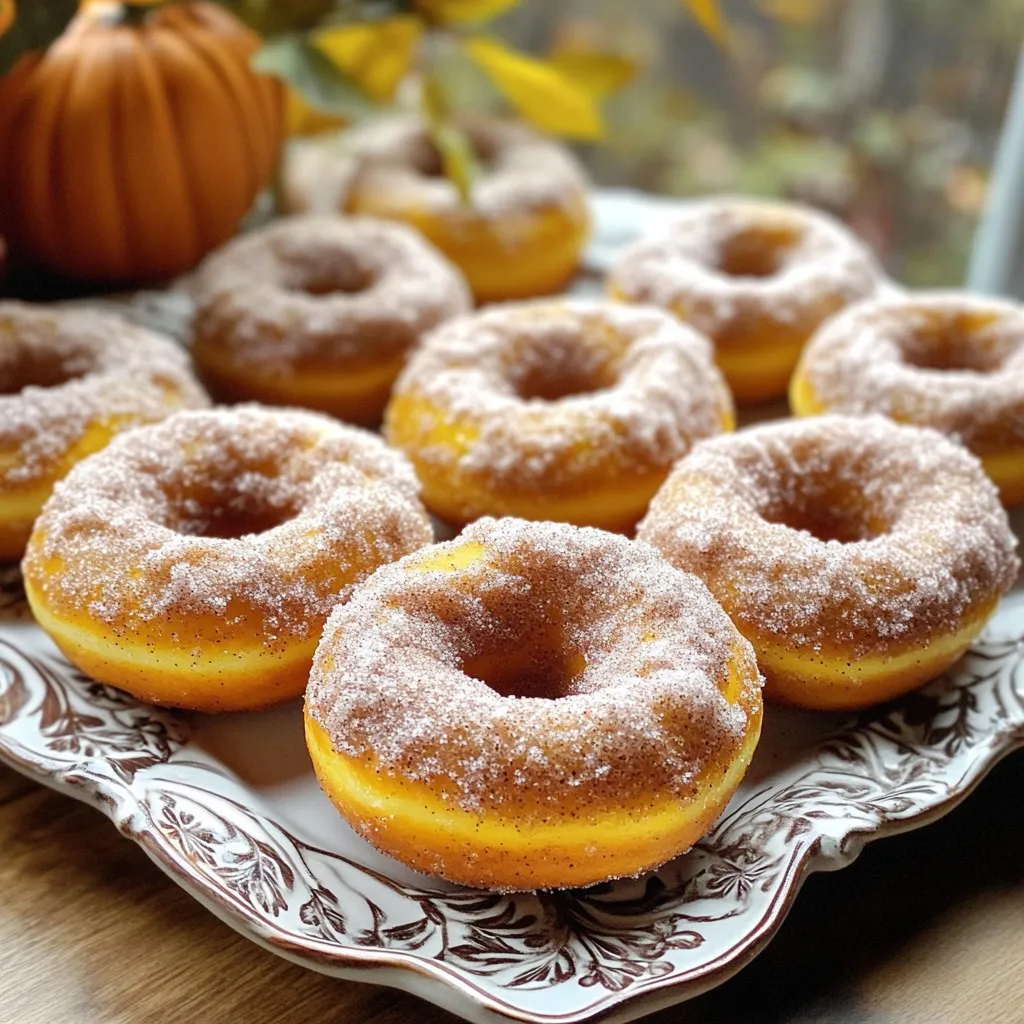
Craving a sweet treat that captures the essence of fall? You’re in for a treat with these Bakery-Style Cinnamon Sugar Pumpkin Donuts! Perfectly spiced and coated in a warm cinnamon …
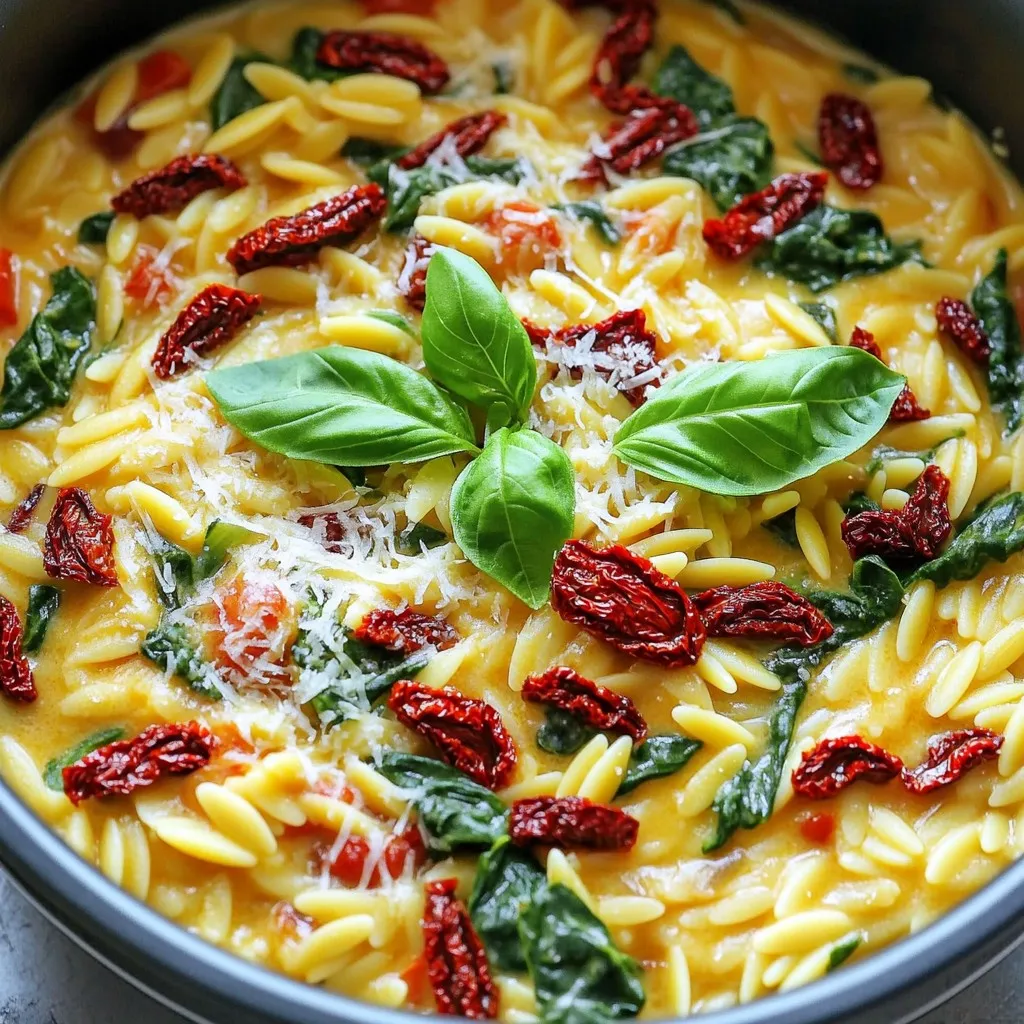
Welcome to your next favorite dish: Creamy One-Pot Sun-Dried Tomato Orzo Delight! If you’re looking for a quick, yummy meal that hugs you from the inside, you’re in the right …
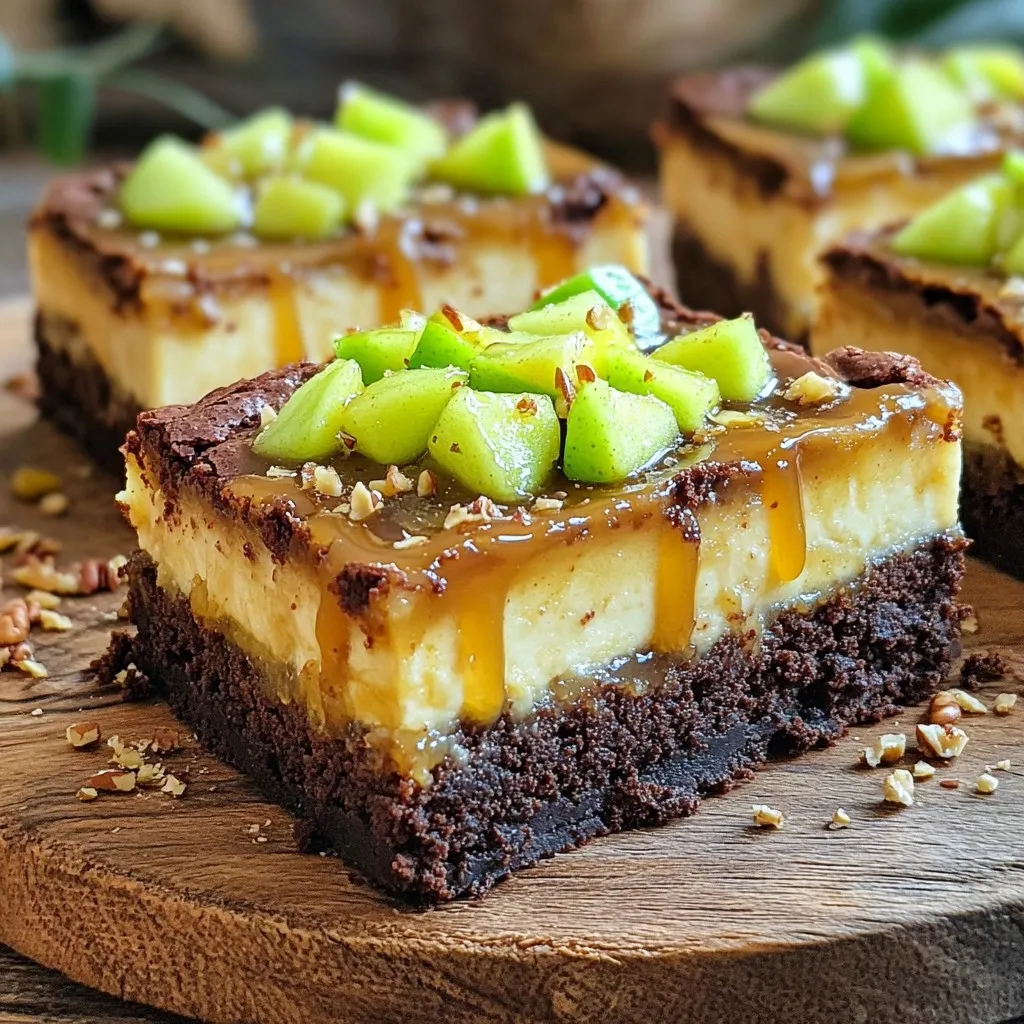
Craving a sweet, gooey dessert? My Caramel Apple Cheesecake Brownie Bars are your answer! This tasty treat layers rich brownie, creamy cheesecake, and spiced apple topping, all drizzled with caramel. …
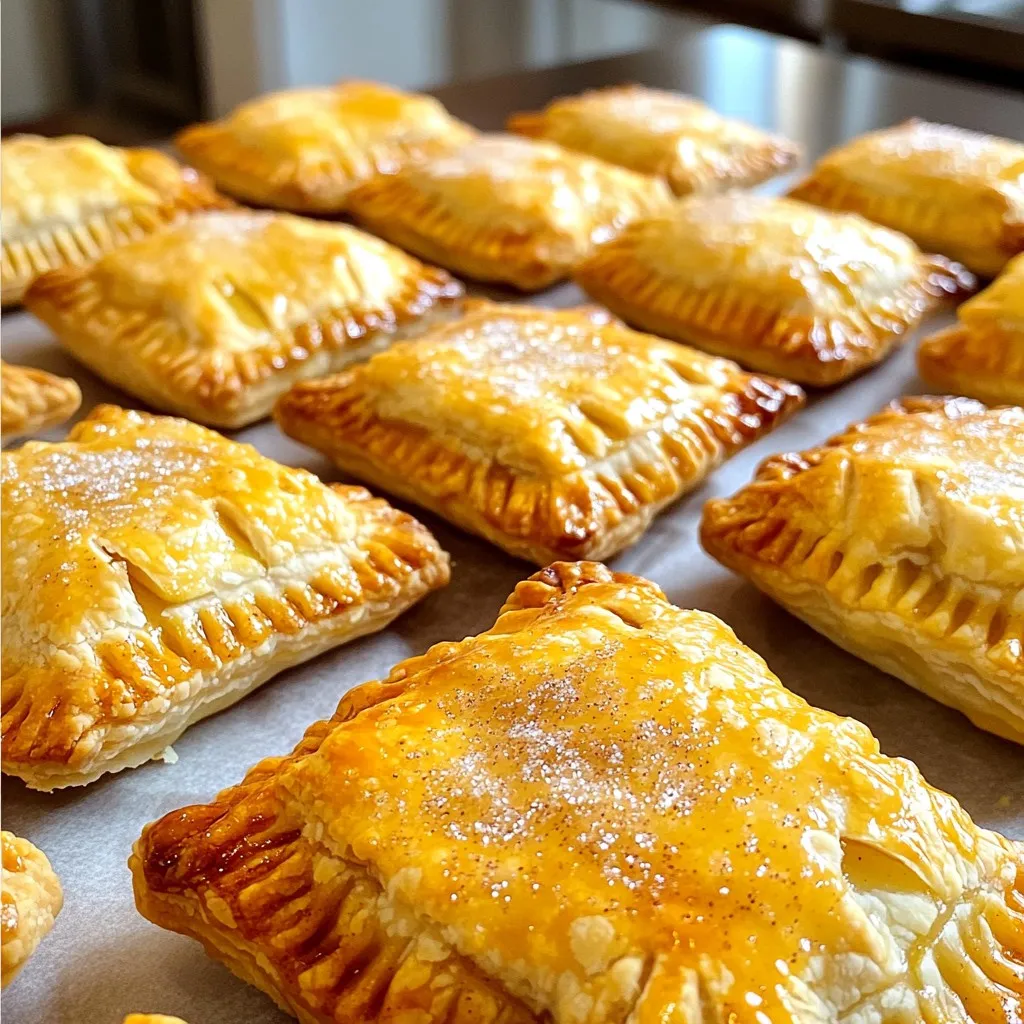
Craving a tasty treat that’s easy to make? These Air Fryer Apple Cinnamon Hand Pies are just what you need! With simple ingredients like fresh apples, sugar, and cinnamon, you …
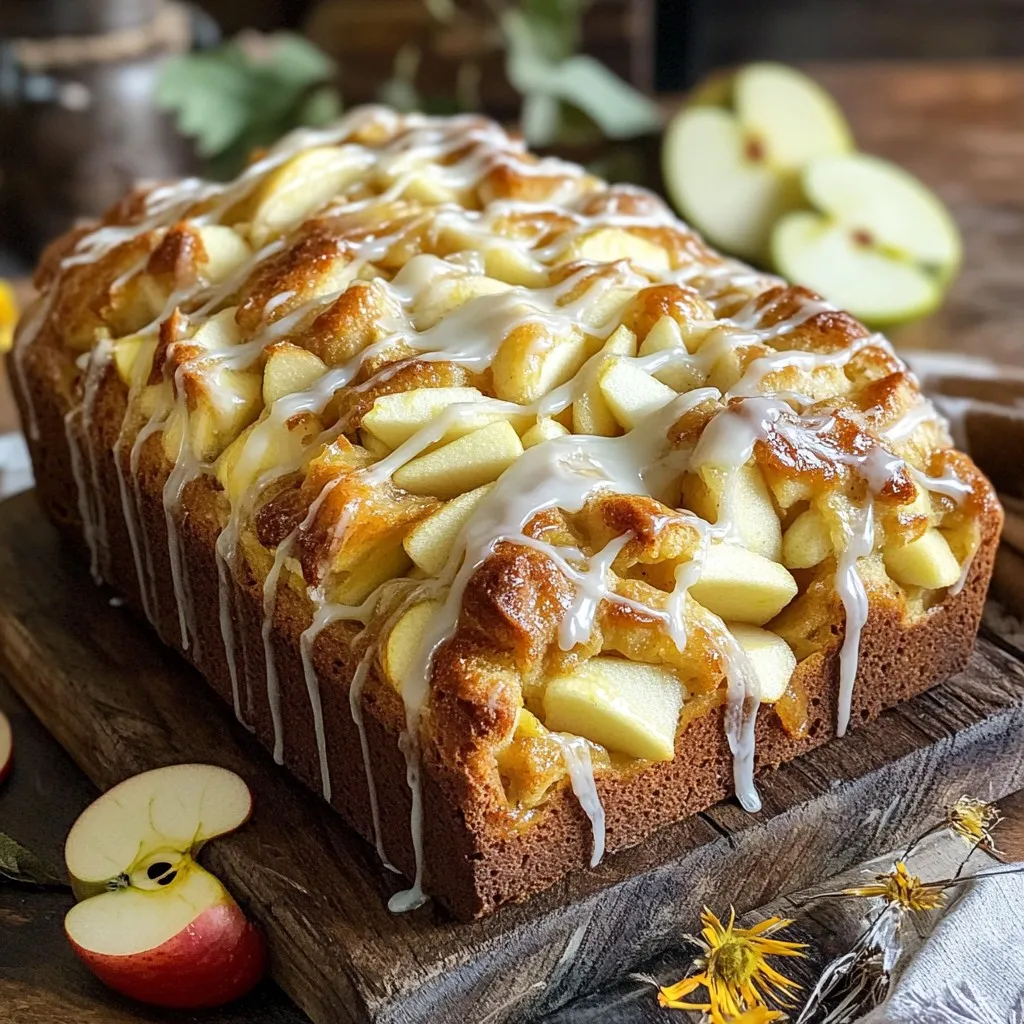
Welcome to the sweet world of Bakery Style Apple Fritter Bread! If you love the warm, comforting taste of apple fritters, you’re in for a treat. This easy recipe combines …
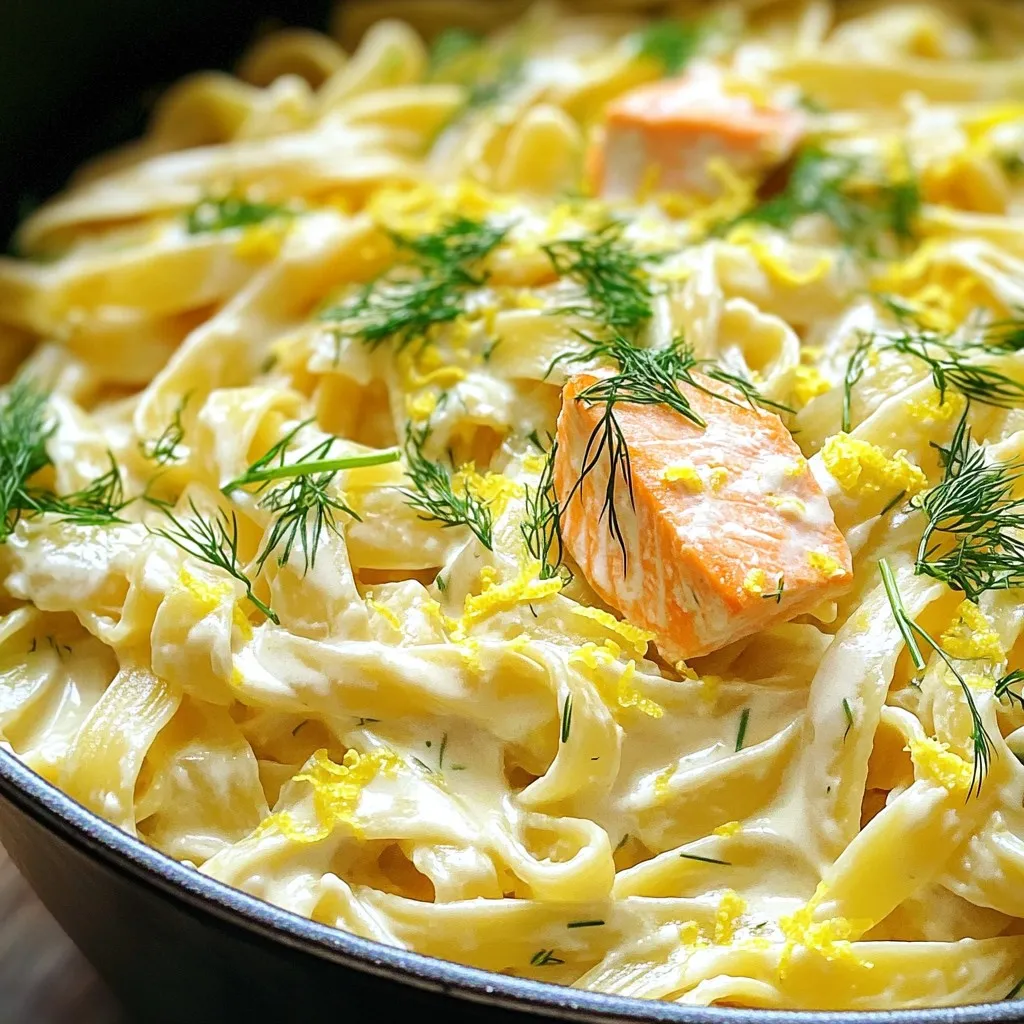
If you crave a meal that’s quick, easy, and bursting with flavor, you’ll love this One Pot Creamy Lemon Dill Salmon Pasta Delight. Picture creamy pasta glistening with a zesty …