Flourless Double Chocolate Banana Bread Delight

Are you ready to indulge in a rich dessert that’s also guilt-free? This Flourless Double Chocolate Banana Bread combines ripe bananas and nut butter for a moist, fudgy treat. Perfect …
Are you ready to indulge in a rich dessert that’s also guilt-free? This Flourless Double Chocolate Banana Bread combines ripe bananas and nut butter for a moist, fudgy treat. Perfect …

Warm your kitchen and your heart with my Savory Slow Cooker Tuscan White Bean Soup. This delicious soup is easy to make and packed with flavor. Using dried cannellini beans, …

Are you ready to elevate your dinner game? Minute Honey Sriracha Salmon Bowls are easy, delicious, and packed with flavor! This simple recipe combines tender salmon with a sweet and …

Looking for a quick and tasty meal? One-Skillet Creamy Pesto Gnocchi hits the mark! This dish is simple, flavorful, and requires easy cleanup. You can whip it up in no …
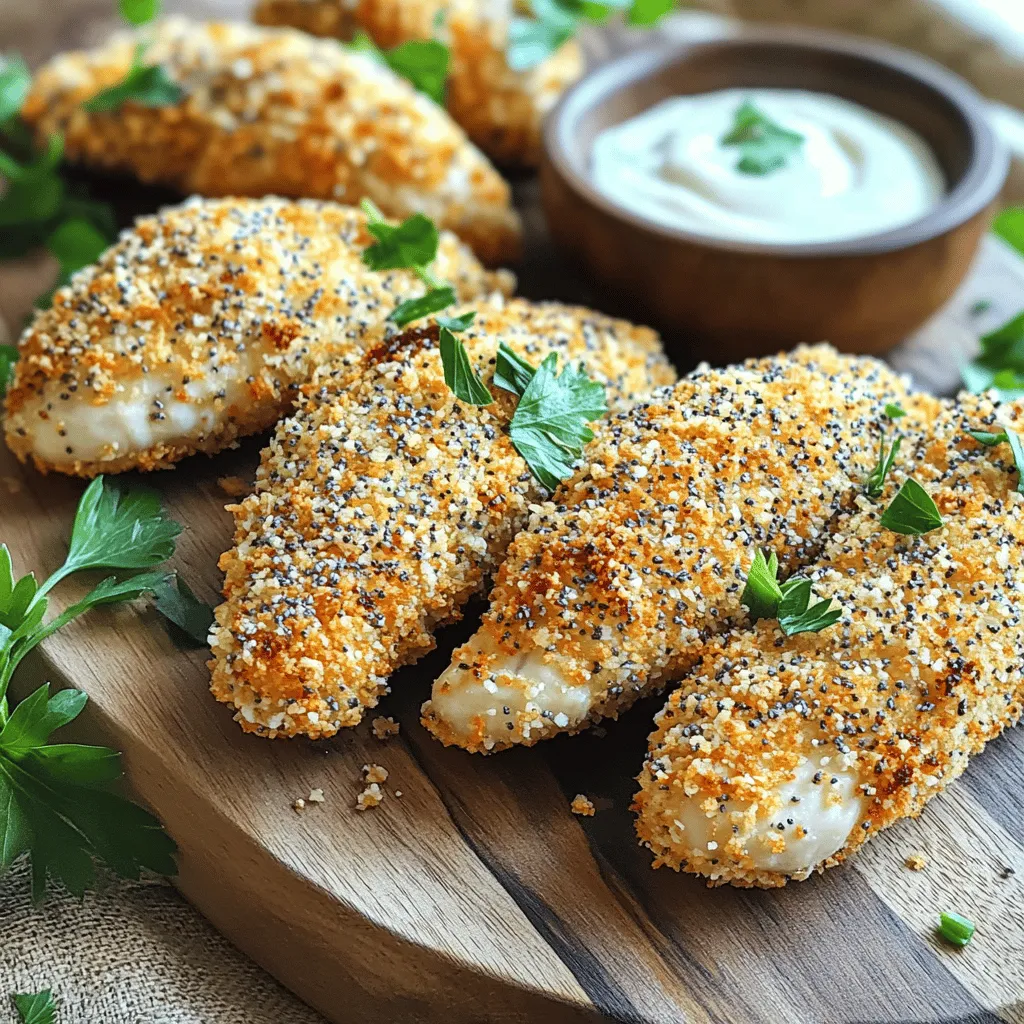
Craving a crispy treat that packs flavor? Look no further! My Air Fryer Everything Bagel Chicken Tenders combine the crunch of panko breadcrumbs with savory everything bagel seasoning. This easy …

If you love sweet treats but want to skip the oven, you’re in for a treat! My No-Bake Lemon Blueberry Cheesecake Jars are simple, creamy, and bursting with fresh flavors. …
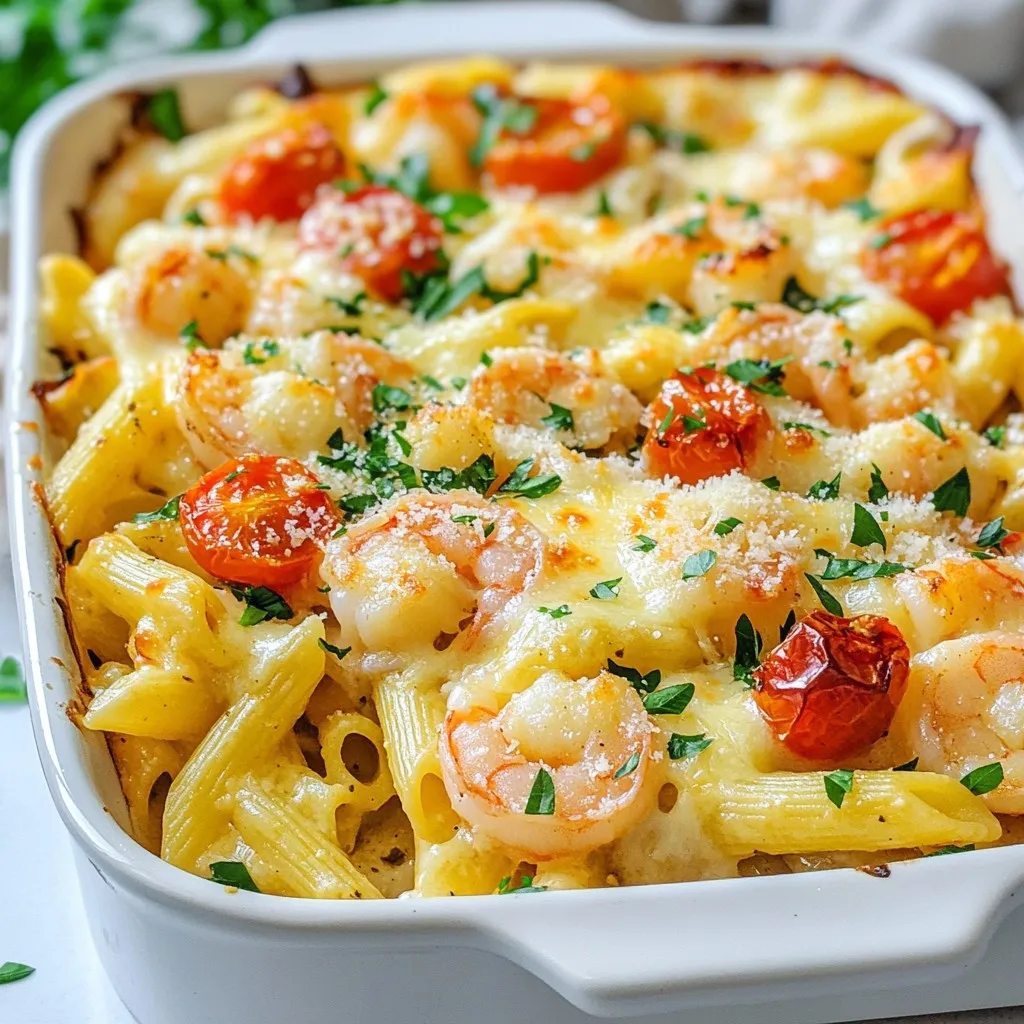
If you’re craving a dish that’s rich and full of flavor, look no further! My Shrimp Scampi Pasta Bake combines tender shrimp and cheesy goodness all in one cozy casserole. …
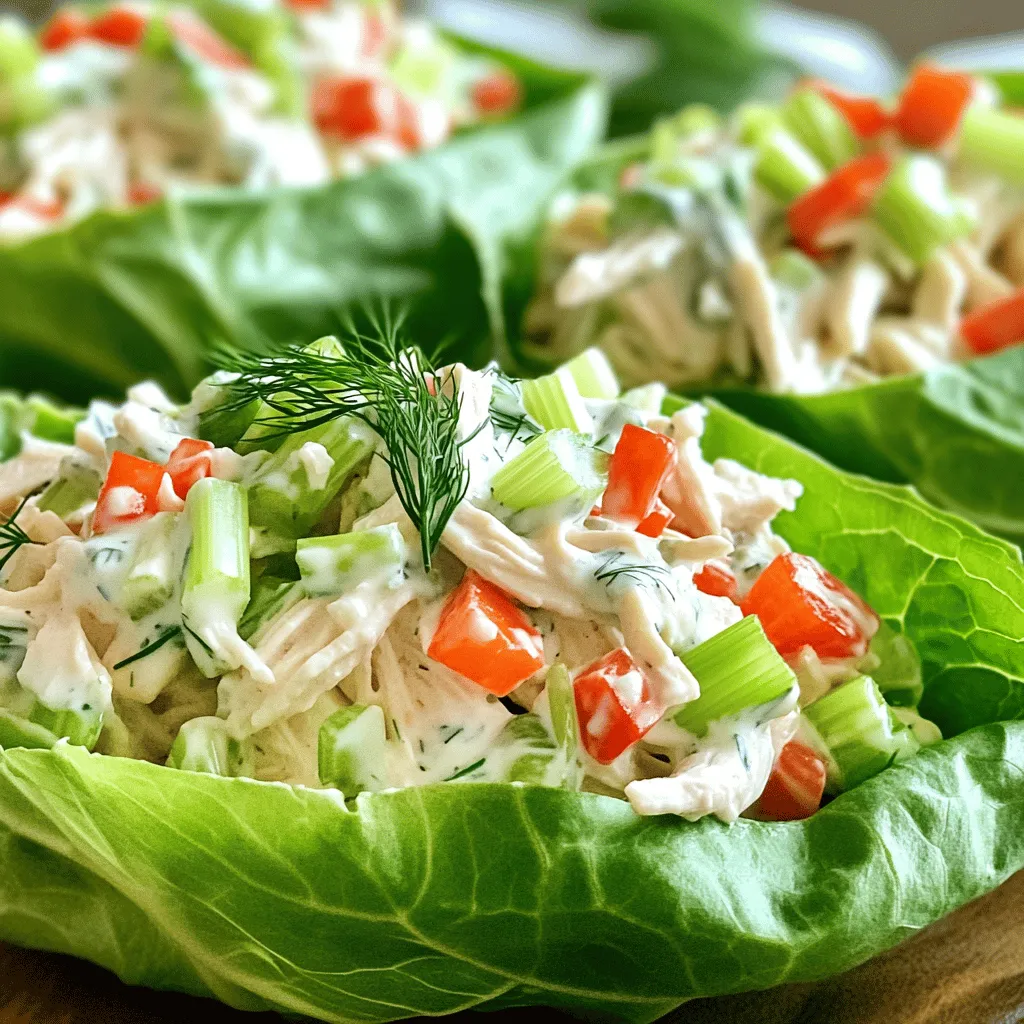
Looking for a fresh and tasty meal that’s easy to make? You’re in the right place! My Greek Yogurt Ranch Chicken Salad Lettuce Boats are not only healthy but packed …

Are you ready to indulge in a tasty, creamy treat? My Whipped Cottage Cheese Alfredo Pasta is here to elevate your dinner game. With just a few simple ingredients, you’ll …

Craving a sweet treat that’s quick and easy? This Flourless Chocolate Peanut Butter Mug Cake is your answer! In just minutes, you can whip up a rich, gooey dessert that …