One-Pan Lemon Herb Chicken & Potatoes Quick Meal
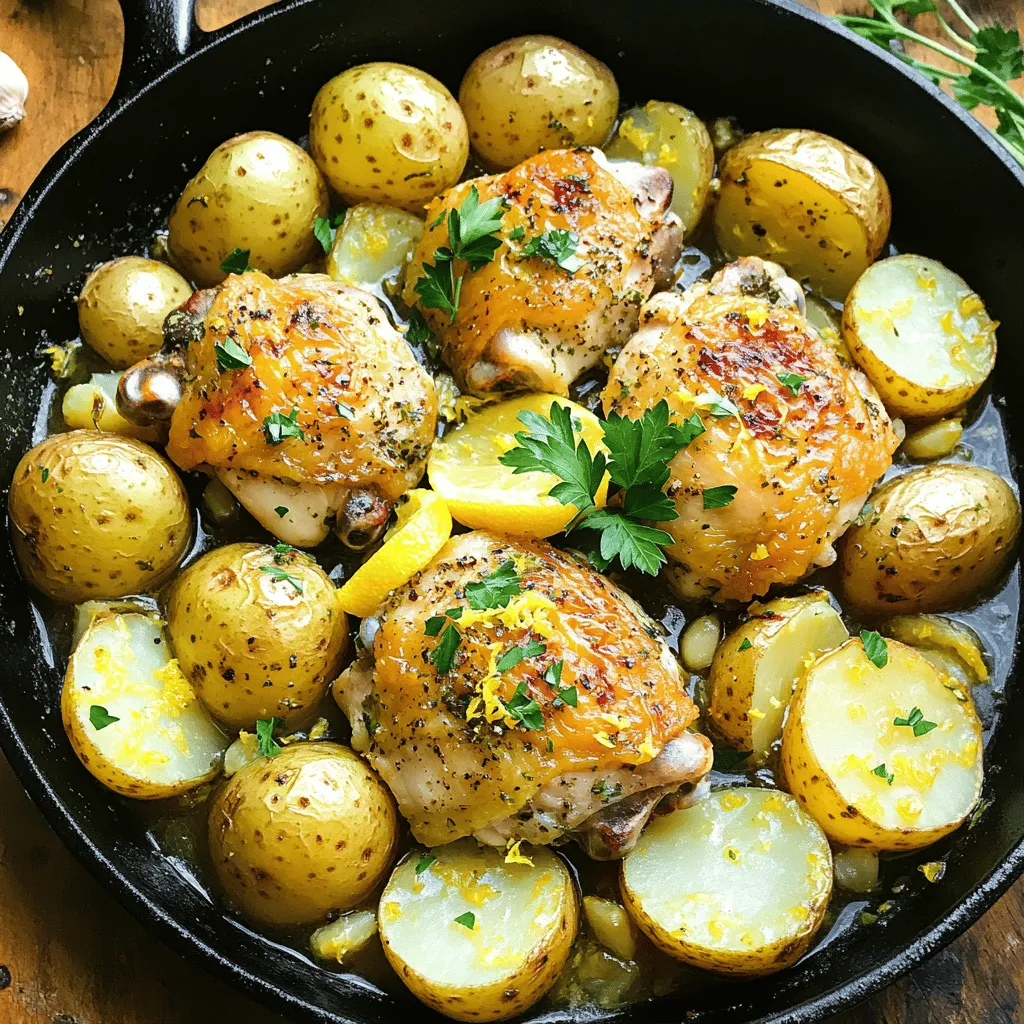
Are you looking for a quick and easy meal that tastes great? One-Pan Lemon Herb Chicken & Potatoes is your answer! This dish combines juicy chicken with golden potatoes and …
Are you looking for a quick and easy meal that tastes great? One-Pan Lemon Herb Chicken & Potatoes is your answer! This dish combines juicy chicken with golden potatoes and …

Are you ready to treat yourself? These Chocolate Dipped Pumpkin Spice Donuts are the perfect blend of cozy fall flavors and rich chocolate. With a soft, spiced dough and a …
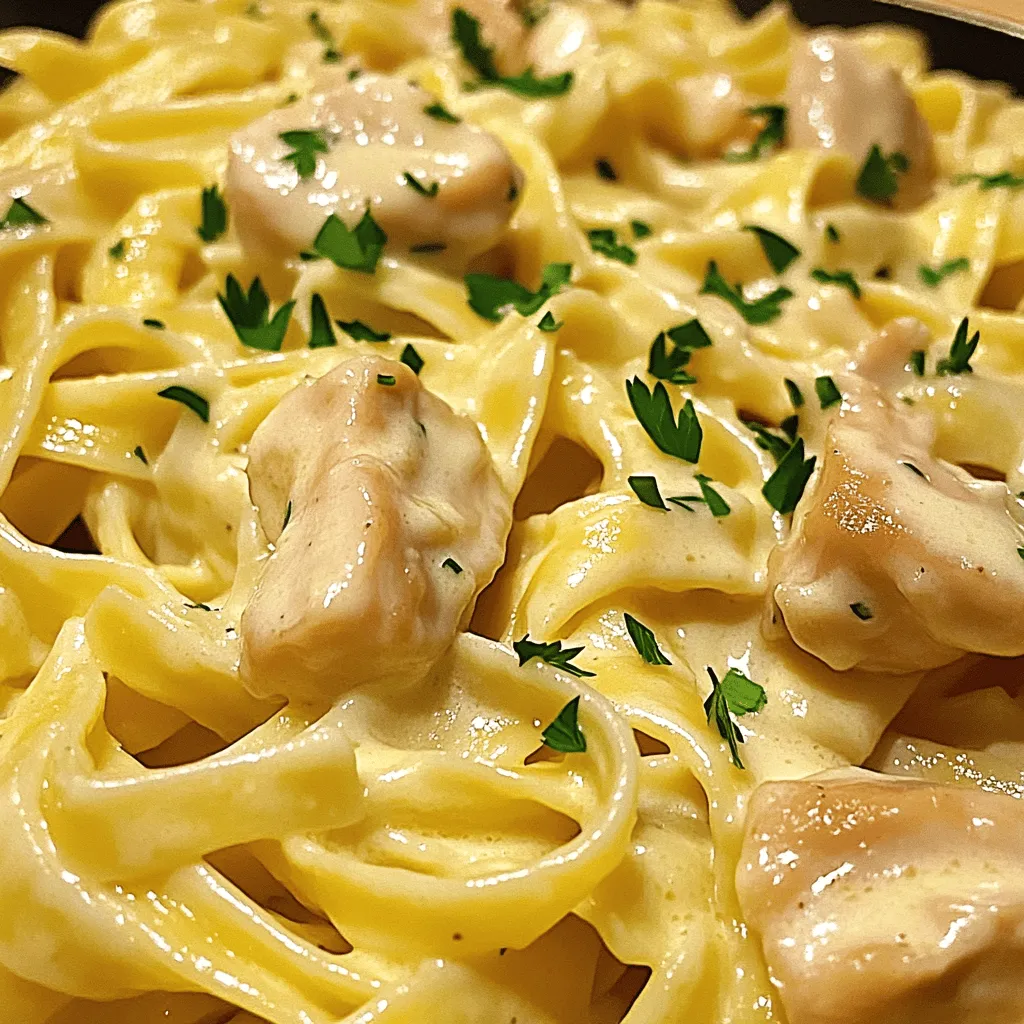
Looking for a quick, creamy dinner that delights your taste buds? This Instant Pot Chicken Alfredo is your answer! With just a few simple ingredients and easy steps, you can …

Start your day with a fun twist on breakfast: Greek Yogurt Blueberry Pancakes! This recipe is not just tasty but also healthy. Packed with protein and bursting with flavor, these …
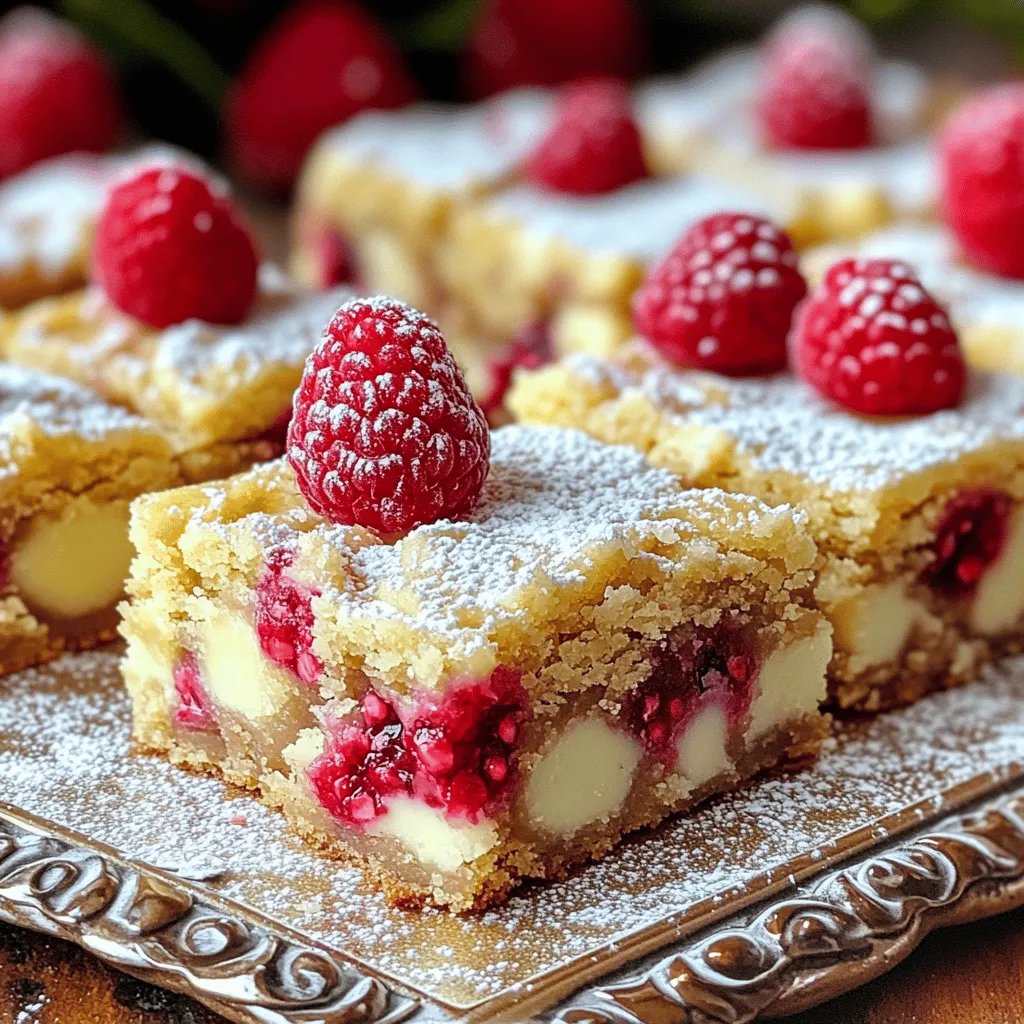
Get ready for a sweet treat that combines tart and creamy flavors! Raspberry White Chocolate Blondies are soft, chewy, and perfect for any occasion. With just a handful of ingredients, …

If you’re craving a dish that bursts with flavor, you’ve found it! My Sriracha Honey Chicken Tenders are simple yet delicious. With the perfect sweet and spicy blend, they make …
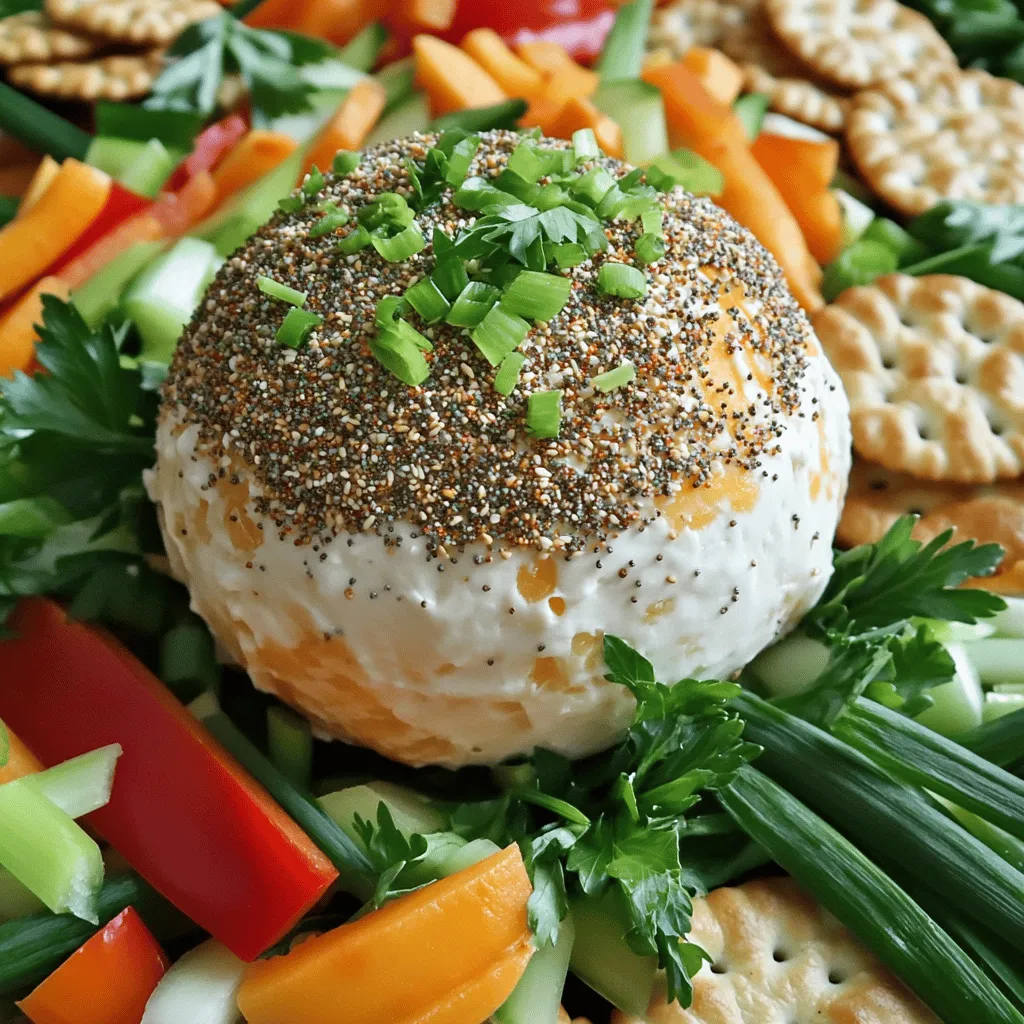
Looking for a fun and tasty snack? You’ve found it! This Everything Bagel Cheese Ball is easy to make and perfect for any gathering. With simple ingredients and quick steps, …

If you’re searching for a quick and delicious treat, look no further! These Cranberry Orange Crumble Bars are easy to make and packed with flavor. This recipe combines tart cranberries …
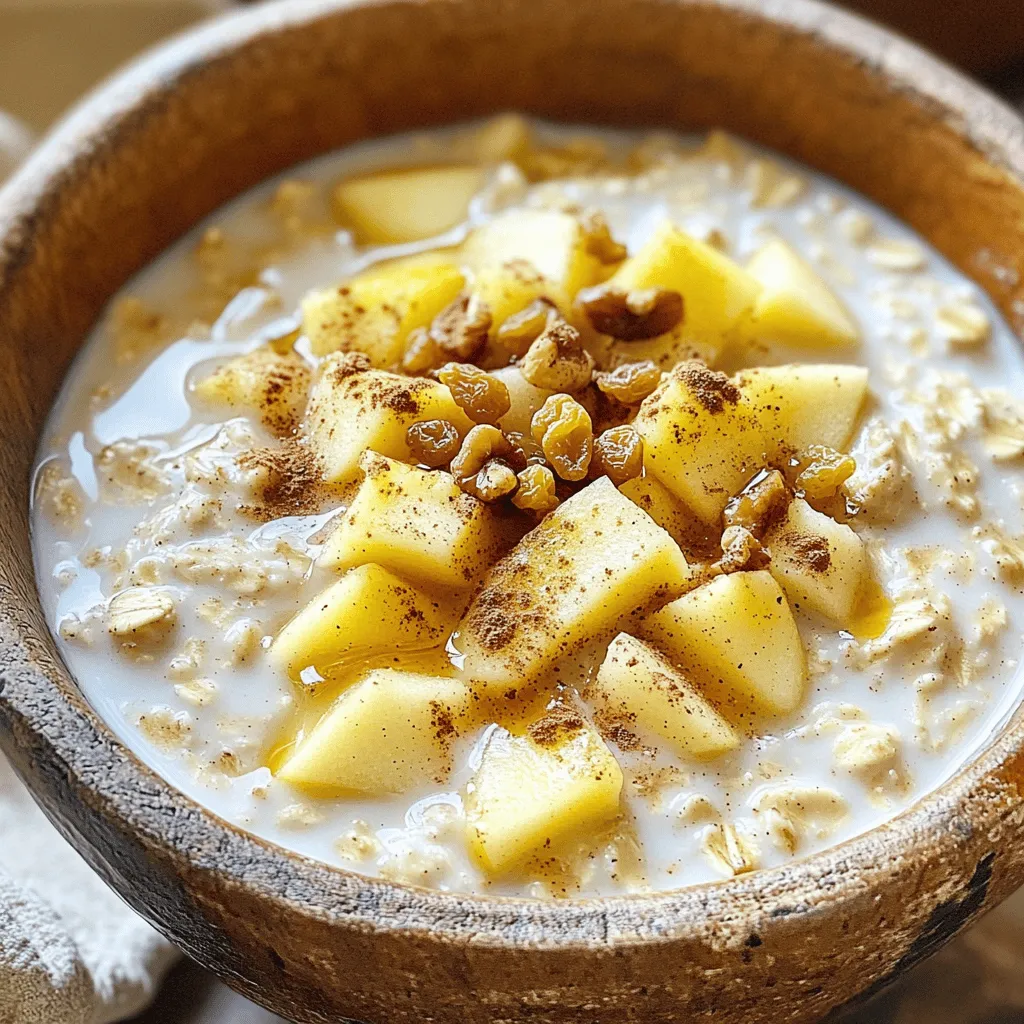
If you’re looking for a quick and delicious breakfast, you’ve come to the right place! My Apple Cinnamon Overnight Oats recipe is both tasty and easy to make. Using simple …

Looking for a simple, tasty dinner? You’ve found it! In this blog, I’ll show you how to make Honey Garlic Chicken and Sweet Potatoes on one pan. This meal is …