Savory Banana Bread Cookies Easy and Tasty Treat

Looking for a treat that mixes the warmth of banana bread with the fun of cookies? You’re in the right place! I’m excited to share my easy recipe for savory …
Looking for a treat that mixes the warmth of banana bread with the fun of cookies? You’re in the right place! I’m excited to share my easy recipe for savory …
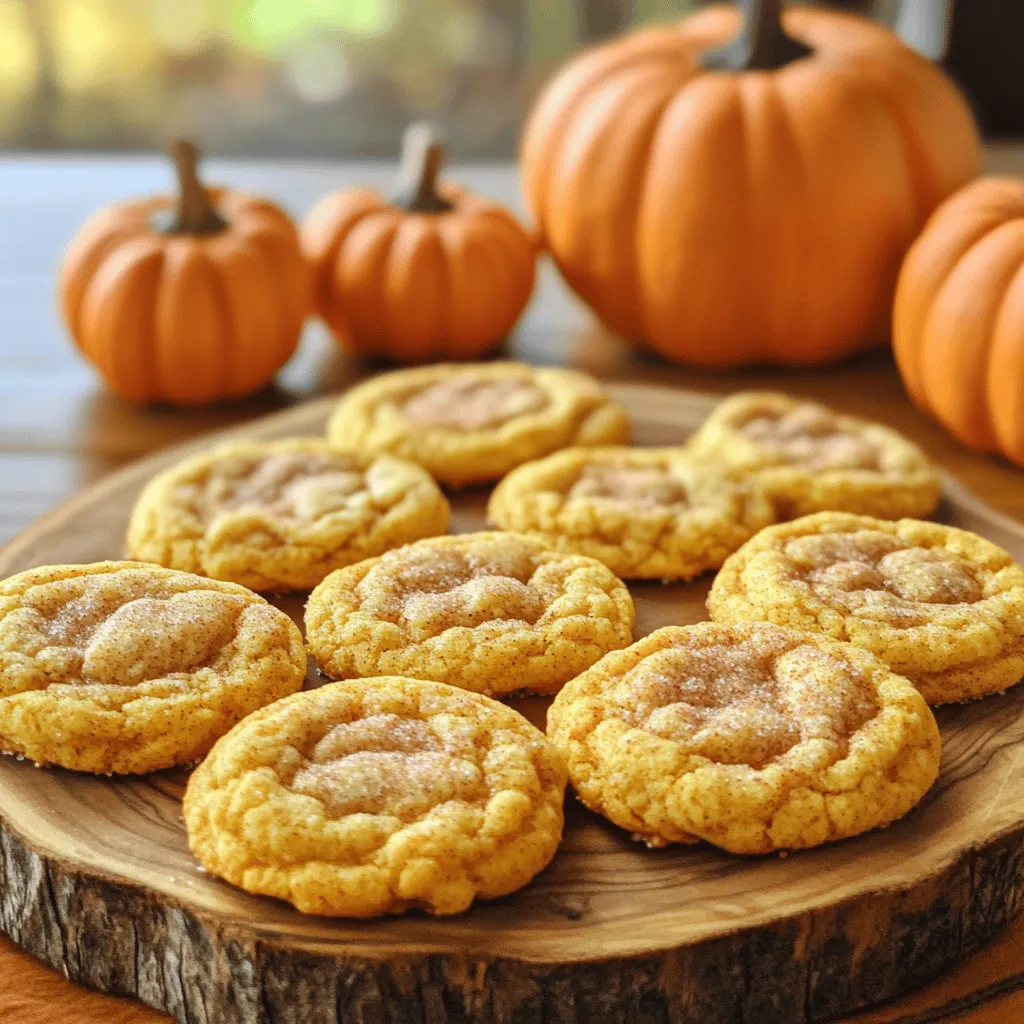
Ready to make your fall baking dreams come true? This Pumpkin Spice Snickerdoodles recipe combines warm spices and sweet cookie goodness, making them perfect for any autumn occasion. Whether you’re …
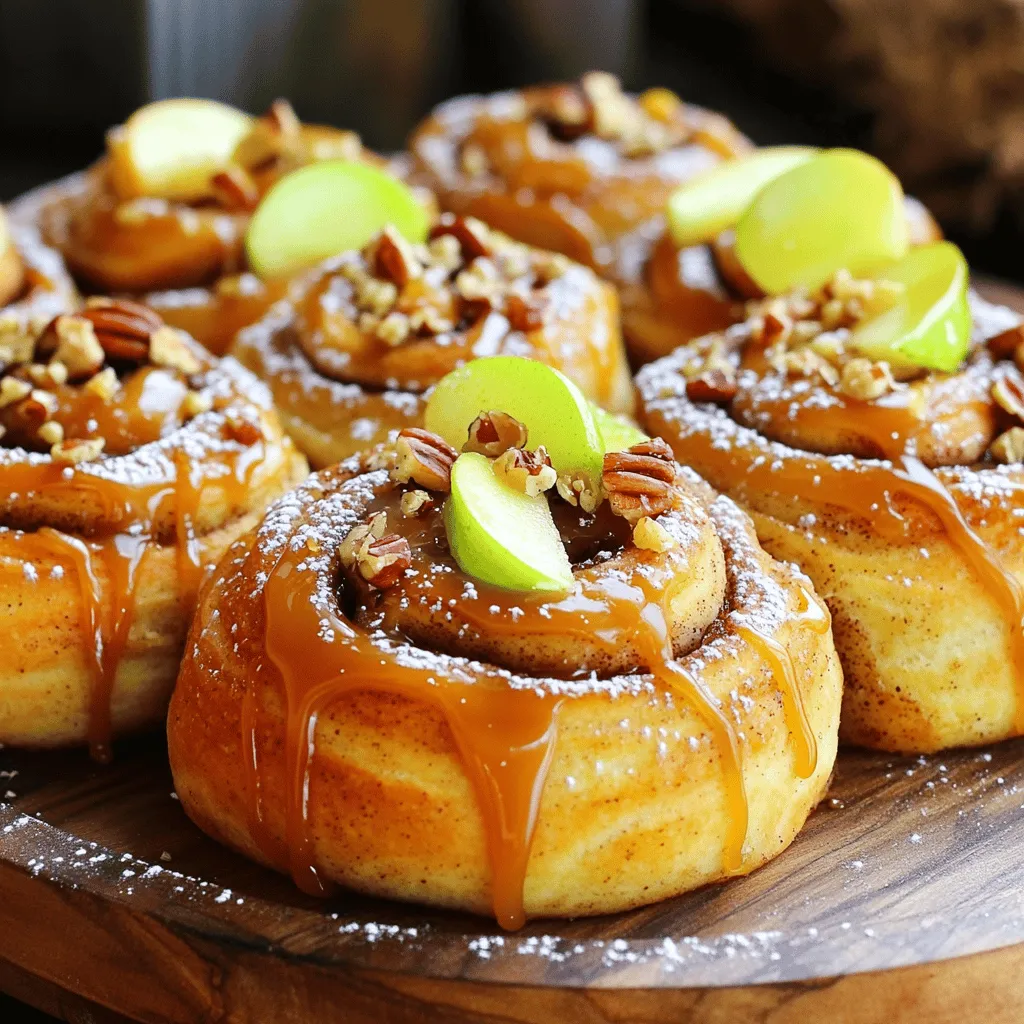
If you’re craving a treat that combines gooey caramel, tender apples, and warm cinnamon, look no further! My Caramel Apple Cinnamon Rolls are a decadent delight you’ll love. These rolls …
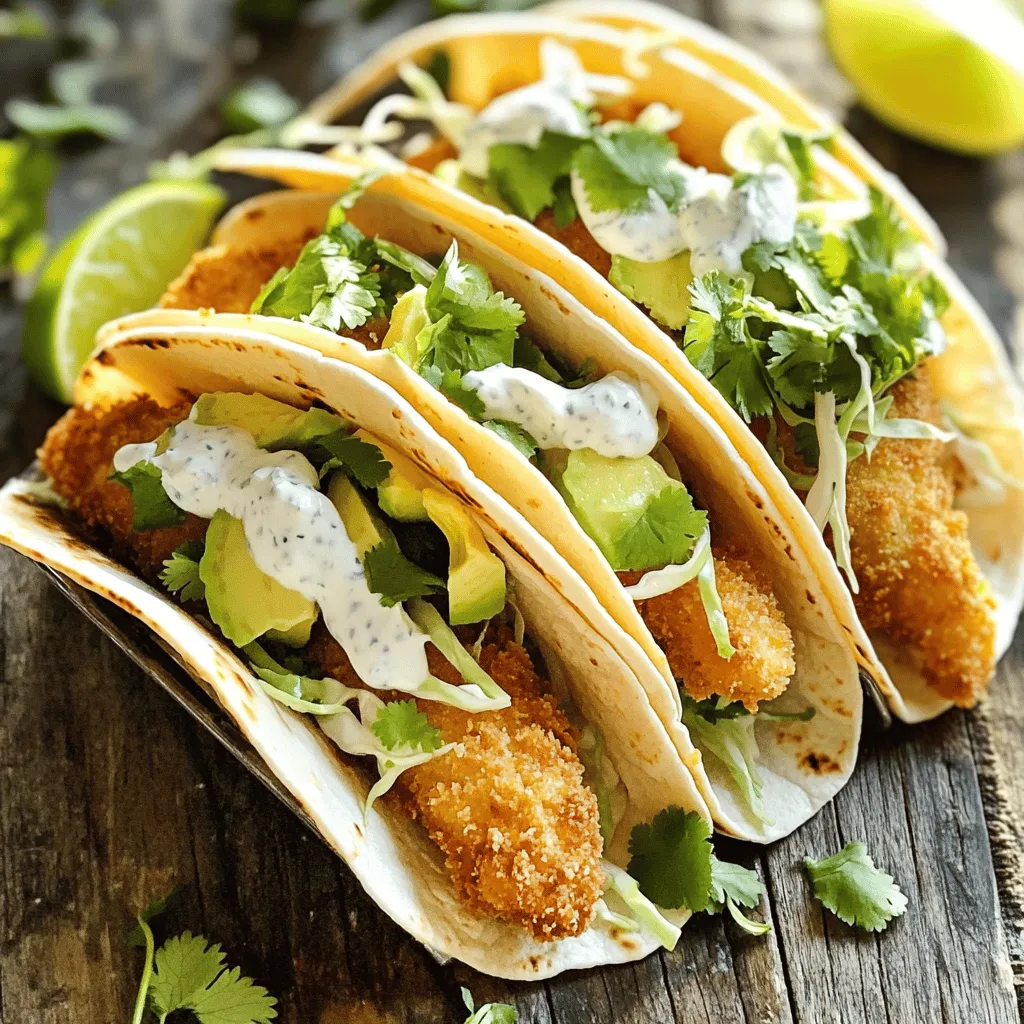
Are you ready to dive into the bright, fresh world of Baja Fish Tacos? This guide will show you how to make flavorful, crispy tacos that anyone can enjoy. I …
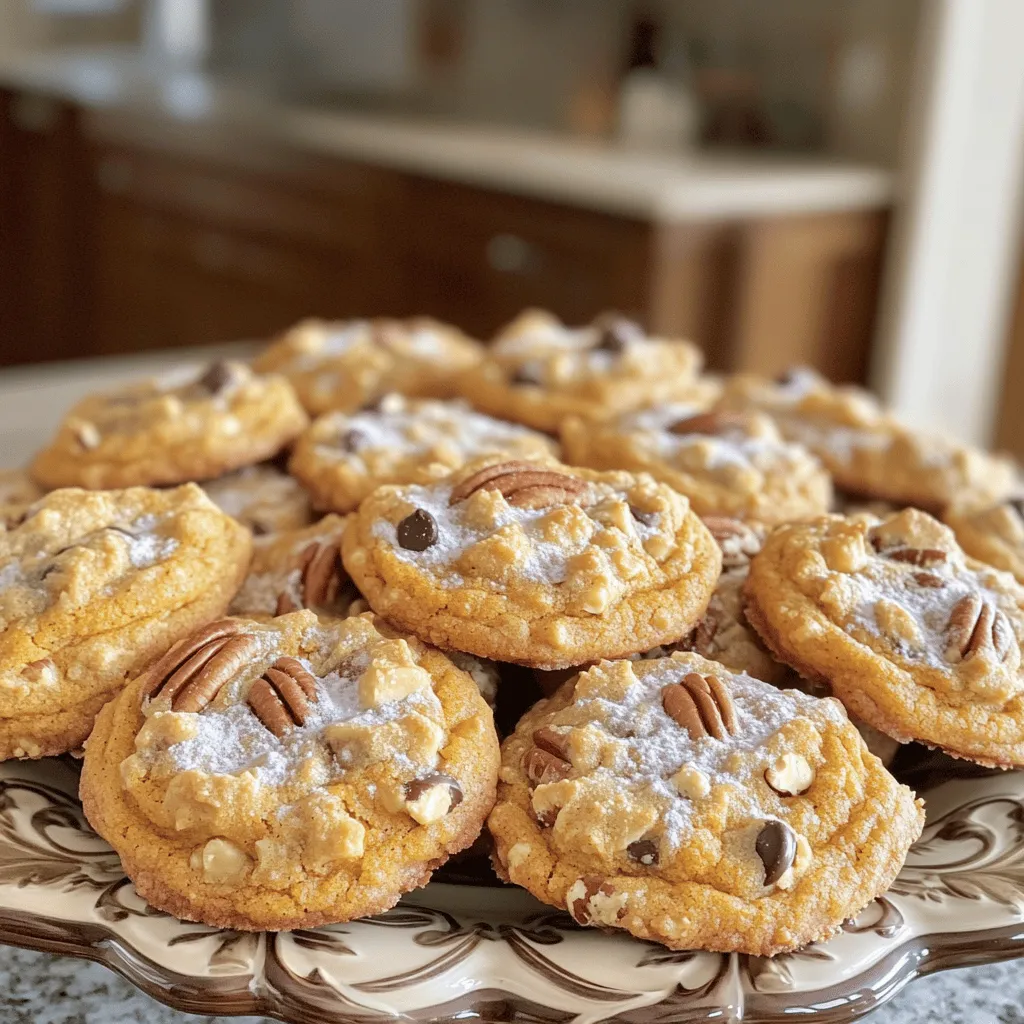
Fall is here, and nothing says autumn like Crumbl Pumpkin Pie Cookies! These treats pack the warm flavors of pumpkin pie into a soft, chewy cookie that you won’t be …
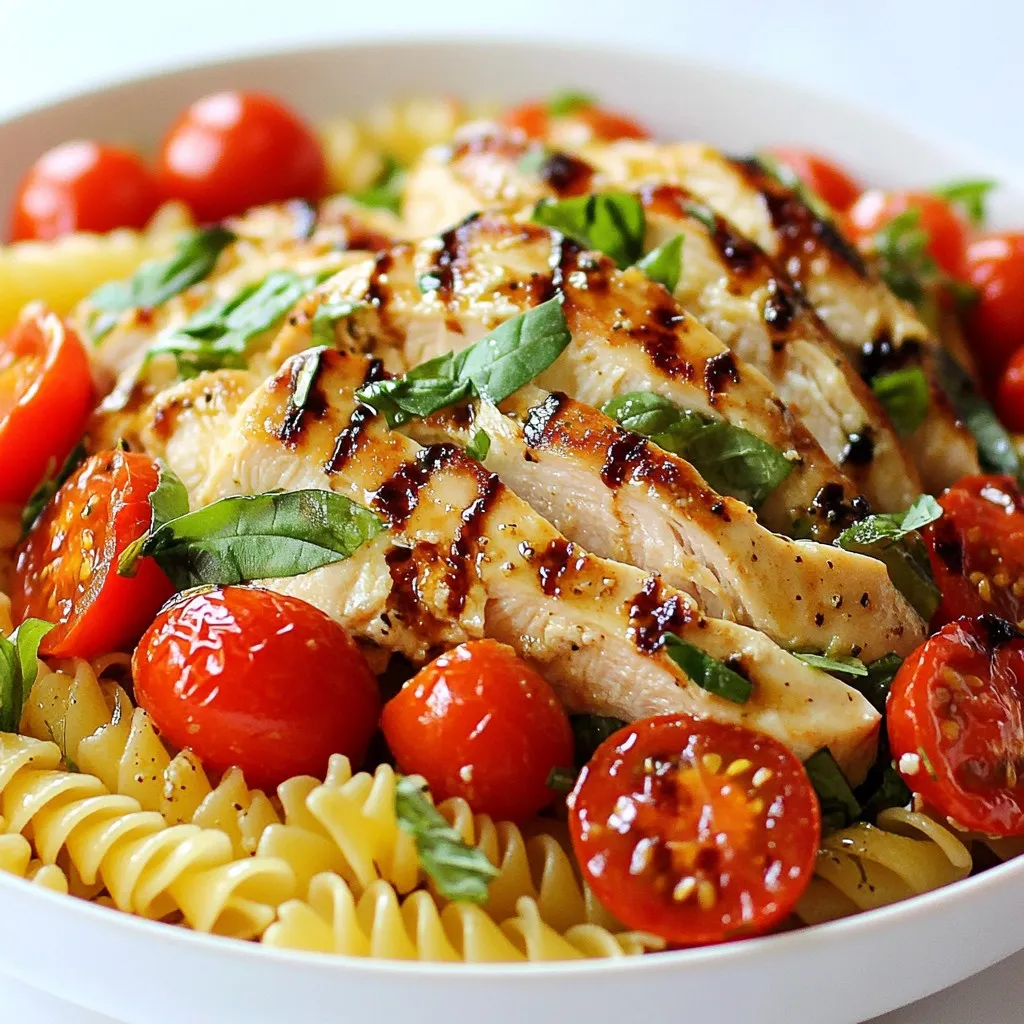
If you crave a delicious pasta dish that’s simple to make, you’ve come to the right place! Bruschetta Chicken Pasta bursts with fresh flavors and is perfect for any night …
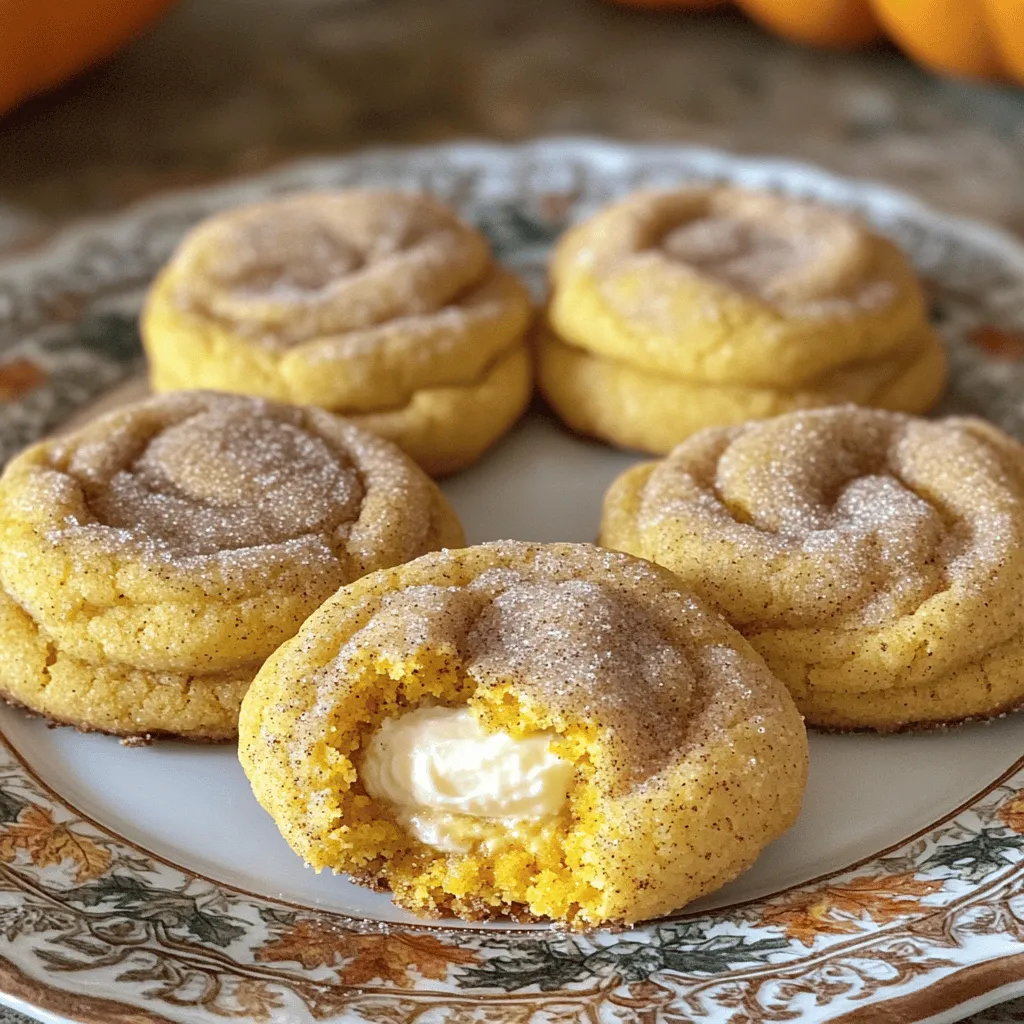
Are you ready to enjoy a sweet twist on fall flavors? In this article, I’ll guide you through the process of making Pumpkin Cheesecake Snickerdoodle Cookies. These cookies mix creamy …
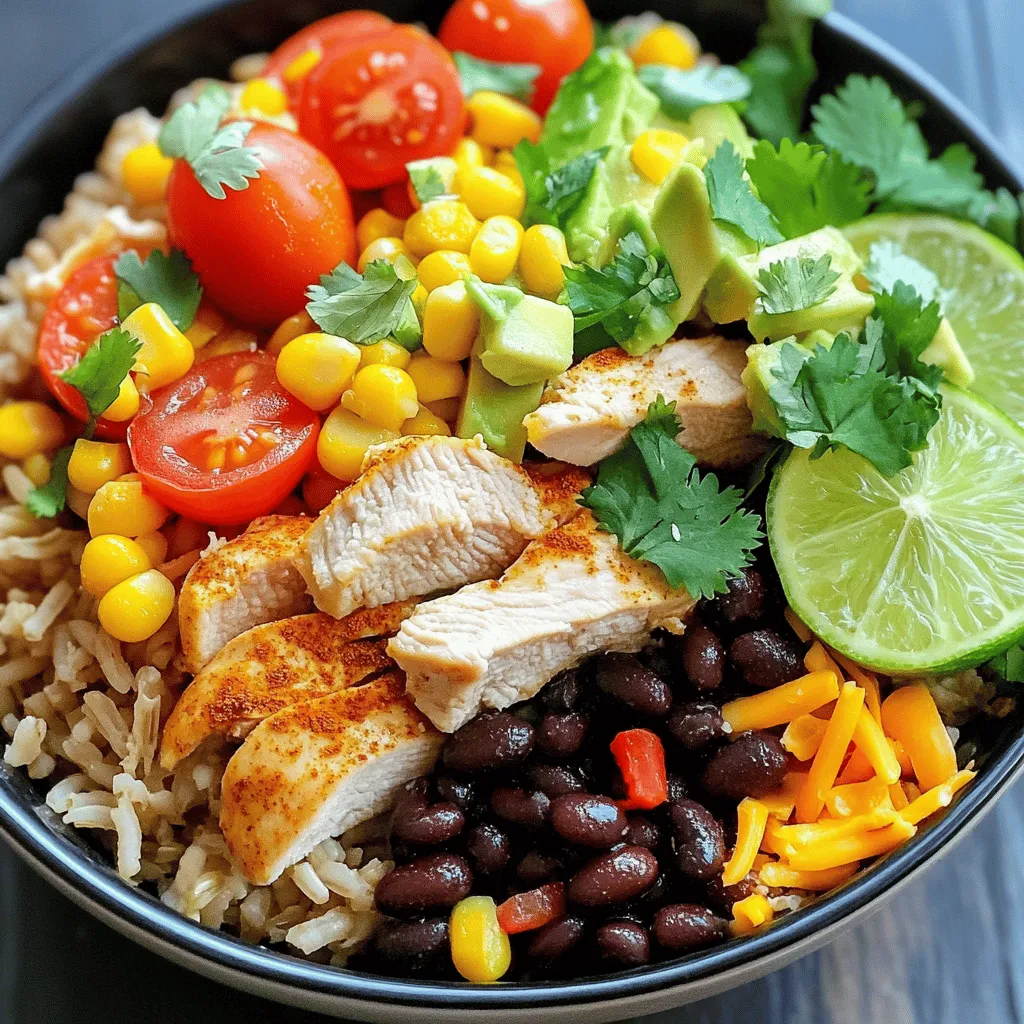
Are you ready to enjoy a fresh and flavorful meal? My Mexican Chicken Burrito Bowls are here to spice up your dinner routine! This simple recipe is packed with tender …
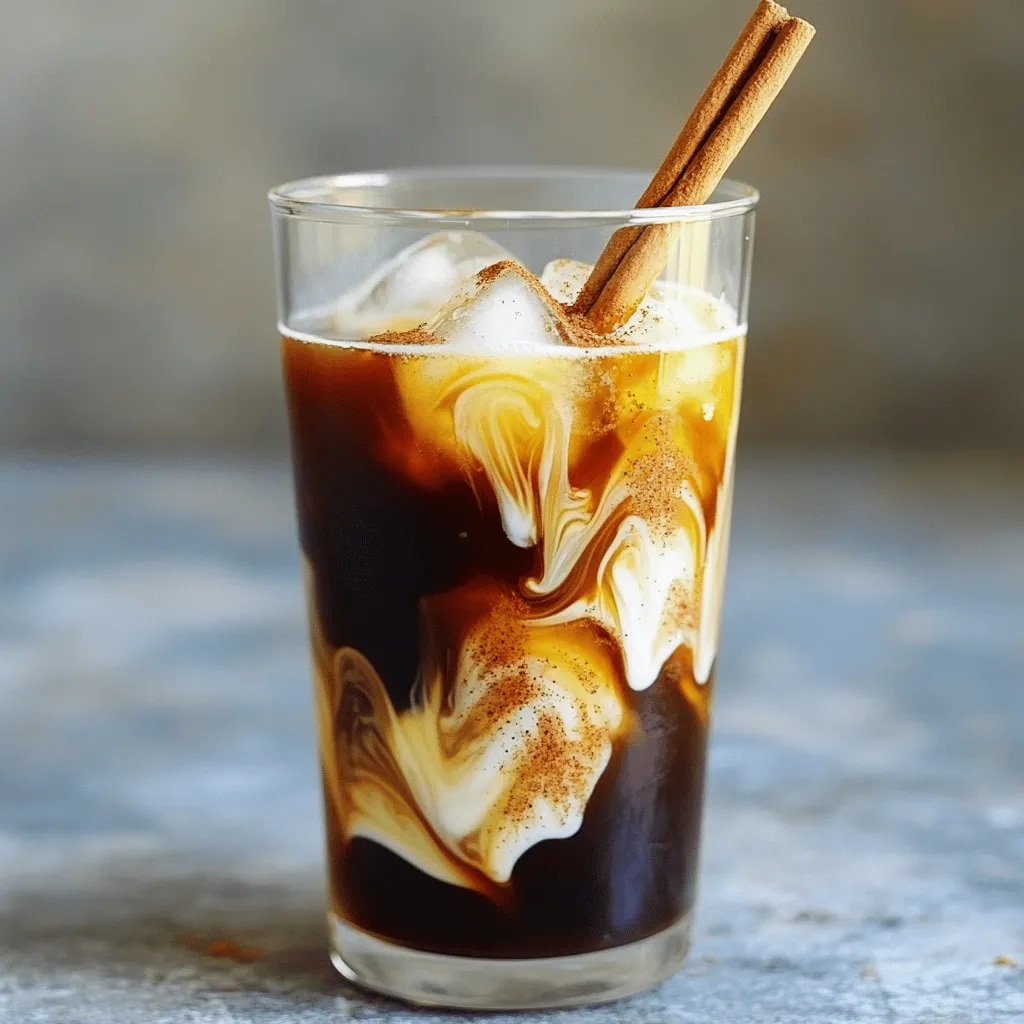
Looking for a refreshing summer drink that combines rich coffee flavor with sweet honey and spicy cinnamon? You’ve found it! In this blog post, I’ll share my favorite recipe for …
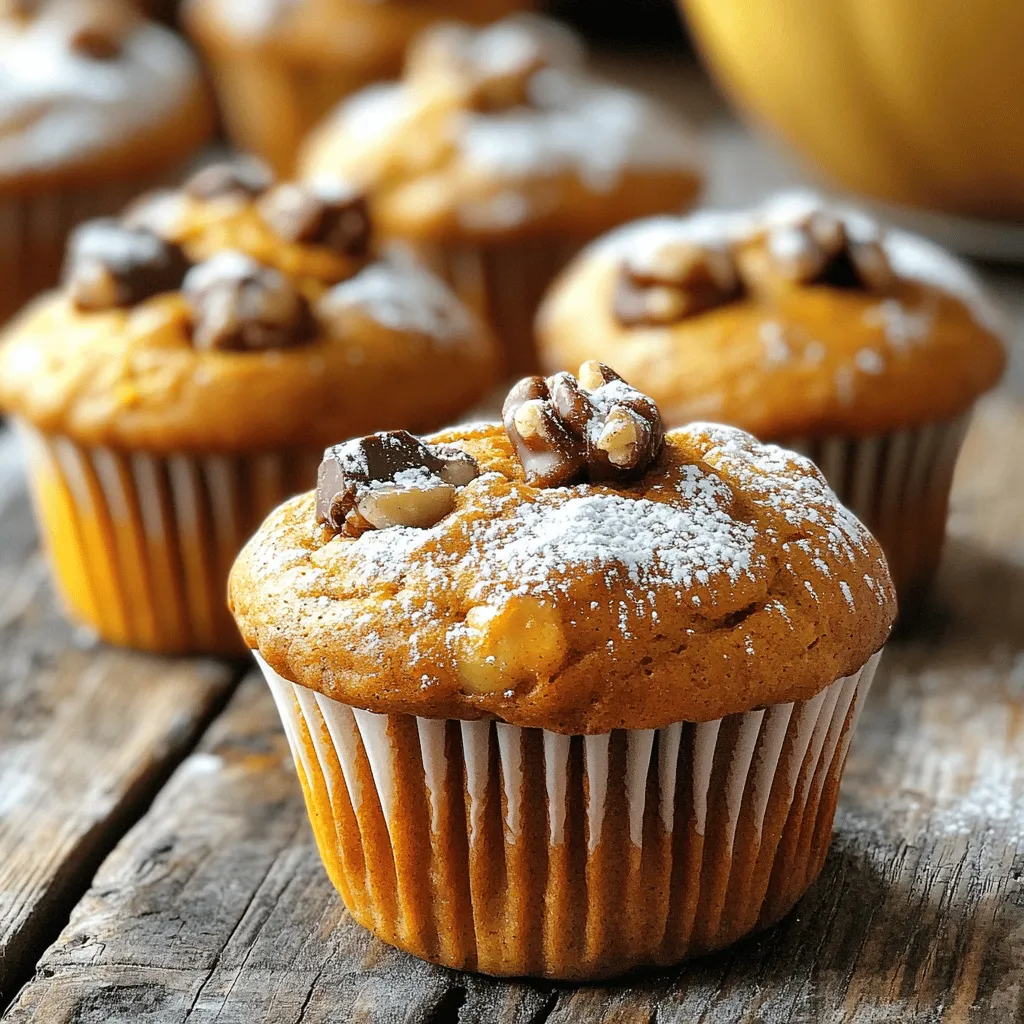
Discover the joy of baking with my recipe for moist pumpkin banana muffins! These treats blend the sweetness of ripe bananas with rich pumpkin, creating a delightful snack for any …