Skip to content
Tossed Recipes
  • Home
  • Appetizers
  • Desserts
  • Salads
  • Breakfast
  • Dinner
  • Privacy Policy
  • Contact
  • About

Chef Jamie

Pumpkin Snickerdoodle Snack Cake Irresistible Treat

August 7, 2025 by Chef Jamie
To make your Pumpkin Snickerdoodle Snack Cake, gather these key items: - 1 cup pumpkin puree - 3/4 cup granulated sugar - 1/2 cup brown sugar, packed - 1/2 cup vegetable oil - 2 large eggs - 1 teaspoon vanilla extract - 2 cups all-purpose flour - 1 teaspoon baking powder - 1 teaspoon baking soda - 1 teaspoon ground cinnamon - 1/2 teaspoon ground nutmeg - 1/4 teaspoon ground ginger - 1/4 teaspoon salt - 1 tablespoon cinnamon sugar (for topping: mix 1 tablespoon sugar with 1 teaspoon cinnamon) These ingredients blend perfectly to create a moist and flavorful cake. Pumpkin puree brings a rich taste and a lovely orange hue. The sugars add sweetness and help the cake rise. The spices provide warmth and depth, making every bite cozy. You can add even more flavor and texture to your cake. Try these optional ingredients: - Chopped nuts (like pecans or walnuts) - Chocolate chips - Dried fruit (like cranberries or raisins) These additions make the cake personal and unique. Nuts add crunch, while chocolate brings a sweet surprise. Dried fruit adds a nice chew and extra flavor. If you want to change things up, here are some useful swaps: - Use coconut oil instead of vegetable oil for a hint of coconut flavor. - Swap granulated sugar for coconut sugar for a deeper, caramel taste. - Use whole wheat flour instead of all-purpose flour for added fiber. These substitutions can enhance your cake's flavor or make it a bit healthier. Each change helps you create a snack cake that fits your taste and diet. For the full recipe, check out the details above! Start by preheating your oven to 350°F (175°C). Grease and flour a 9x13 inch baking pan. You can also line it with parchment paper for easy removal later. In a large bowl, mix together 1 cup of pumpkin puree, 3/4 cup of granulated sugar, and 1/2 cup of brown sugar. Add 1/2 cup of vegetable oil and stir until everything is smooth. Next, beat in 2 large eggs and 1 teaspoon of vanilla extract. Keep mixing until it all blends well. In another bowl, whisk together 2 cups of all-purpose flour, 1 teaspoon of baking powder, 1 teaspoon of baking soda, 1 teaspoon of ground cinnamon, 1/2 teaspoon of ground nutmeg, 1/4 teaspoon of ground ginger, and 1/4 teaspoon of salt. Gradually add this dry mix to the wet ingredients. Stir gently until just mixed. Do not overmix, as this can make the cake tough. Pour the batter into your prepared pan, spreading it evenly. Sprinkle the top with 1 tablespoon of cinnamon sugar. Bake for 25-30 minutes. To check if it's done, insert a toothpick into the center. If it comes out clean, your cake is ready. Let it cool for about 10 minutes in the pan, then transfer it to a wire rack to cool completely. You can find the full recipe [Full Recipe]. To keep your Pumpkin Snickerdoodle Snack Cake moist, use fresh pumpkin puree. Canned pumpkin works too, but check for quality. Mix the wet ingredients well. This helps blend flavors and keeps the cake soft. Adding a bit of extra oil can also boost moisture. If you want a richer taste, use brown sugar instead of white sugar. It adds depth and pairs well with spices. One big mistake is overmixing the batter. This can make your cake dense and dry. Mix just until the dry ingredients are combined. Another common issue is not measuring ingredients correctly. Use measuring cups for accuracy. If you skip the cinnamon sugar topping, you miss out on that signature snickerdoodle taste. So, don’t forget to sprinkle it on before baking! Ovens can vary, which affects baking times. If you have a convection oven, reduce the temperature by 25°F. This helps avoid overbaking. For older ovens, check your cake a few minutes early. Use a toothpick to test for doneness. Insert it in the center; if it comes out clean, your cake is ready. Always rotate your pan halfway through baking for even cooking. For the full recipe, check out the instructions above! {{image_2}} To make this cake gluten-free, swap the all-purpose flour for a gluten-free blend. Many blends work well, but look for one that includes xanthan gum. This helps the cake rise and hold its shape. Follow the same instructions in the Full Recipe. The texture may change slightly but it will still taste great. You can easily adapt this cake to be vegan. Replace the eggs with flax eggs. To make one flax egg, mix one tablespoon of ground flaxseed with three tablespoons of water. Let it sit for a few minutes until it thickens. Use this in place of each egg in the recipe. You can also substitute vegetable oil with unsweetened applesauce for a lighter option. Want to mix things up? Here are some fun add-ins to consider: - Caramel: Drizzle caramel sauce on top before baking for a sweet surprise. - Chocolate: Fold in chocolate chips for a rich twist that pairs well with pumpkin. - Different Spices: Try adding allspice or cloves for more depth of flavor. These small changes can create a whole new dessert experience while keeping the cake delicious! To keep your Pumpkin Snickerdoodle Snack Cake fresh, store it in an airtight container. Place the container in the fridge if you plan to eat it within a week. If you want it to last longer, keep it at room temperature for a day or two. Always let the cake cool completely before sealing it up. This helps prevent sogginess. You can freeze this cake to enjoy later! First, cut it into squares. Wrap each piece in plastic wrap tightly. Then, place the wrapped pieces in a freezer bag. Make sure to remove as much air as possible. The cake can stay frozen for up to three months. When you’re ready to eat it, just thaw it in the fridge overnight. Reheating the cake is easy. You can use the microwave or the oven. For the microwave, place a slice on a plate for about 15-20 seconds. Check it often to avoid overheating. If using the oven, preheat it to 350°F (175°C). Place the cake on a baking sheet and warm it for about 10-15 minutes. This way, the cake stays soft and tasty. For the best flavor, enjoy it warm with a sprinkle of cinnamon sugar. For the full recipe, check the details above. To make this cake gluten-free, swap all-purpose flour for a gluten-free blend. Look for a mix that works well in baking. You can find these blends at most stores. Use the same amount as the recipe states. The cake will still be soft and tasty! Yes, you can use fresh pumpkin! Start by roasting a pumpkin until soft. Then, scoop out the flesh and puree it until smooth. Fresh pumpkin adds great flavor. Just be sure to measure it correctly, as you need one cup for the recipe. To check if the cake is done, insert a toothpick into the center. If it comes out clean or with a few moist crumbs, it’s ready. The cake will look golden and slightly puffed. Trust your eyes and the toothpick test for best results! Serve this cake warm or at room temperature. Slice it into squares for easy sharing. Dust each piece with extra cinnamon sugar for a sweet touch. You can also add some chopped nuts on top for a nice crunch. Enjoy it with coffee or tea! For the full recipe, check the instructions above. This article covered all you need to make a delicious Pumpkin Snickerdoodle Snack Cake. You learned about key ingredients, useful tips, and creative variations. Remember, baking is fun and lets you be creative. Don’t hesitate to try substitutions or add flavors you love. Store your leftovers wisely, and enjoy every bite. Making this cake will bring joy to your kitchen and those you share it with. Happy baking!

Ready to indulge in a sweet twist on fall flavors? My Pumpkin Snickerdoodle Snack Cake is the perfect treat for cozy days. With its soft texture and warm spices, this …

Read more

Categories Desserts

Crockpot Lasagna Soup Hearty and Simple Meal Recipe

August 7, 2025 by Chef Jamie
- Crockpot - Large skillet - Wooden spoon - Measuring cups and spoons - Knife and cutting board - Ladle for serving For this hearty soup, you need several key ingredients. Each adds flavor and texture. - Ground beef or Italian sausage (1 pound): This is your main protein. Choose what you like best. - Onion (1 medium, diced): Onion brings sweetness and depth to the soup. - Garlic (3 cloves, minced): Garlic adds a nice kick and aroma. - Bell pepper (1, chopped): This adds crunch and a bit of sweetness. - Crushed tomatoes (1 can, 28 oz): This is the base of your soup. It gives it a rich flavor. - Beef broth (4 cups): Broth adds depth and makes the soup hearty. - Italian seasoning (1 teaspoon): This mix of herbs ties all the flavors together. - Red pepper flakes (1/2 teaspoon, optional): For a little heat, add these if you like spice. - Pasta (8 oz, like rigatoni or shells): Pasta makes the soup filling and comforting. - Fresh spinach (2 cups): Spinach adds color and nutrients. - Ricotta cheese (1 cup): This gives a creamy texture and a delicious taste. - Shredded mozzarella cheese (1 cup): Mozzarella adds gooey goodness on top. - Grated Parmesan cheese (1/2 cup): This adds a salty, nutty flavor. - Salt and pepper: Use these to taste for perfect seasoning. - Fresh basil (optional): Basil is a nice touch for garnish and fresh taste. You can add a few extras for more flavor. Consider these options: - Mushrooms: Sautéed mushrooms add an earthy taste. - Zucchini: Chopped zucchini can add a great texture. - Carrots: Diced carrots bring sweetness and color to the mix. - Red wine: A splash can deepen the flavor of your soup. Feel free to mix and match these ingredients to suit your taste. You can follow the Full Recipe to see how to combine them for a wonderful meal. Start by browning your ground beef or Italian sausage in a skillet. Cook it over medium heat until it is fully browned. This should take about 5 to 7 minutes. Make sure to drain any excess fat. After that, transfer the meat to your crockpot. Next, add diced onion, minced garlic, and chopped bell pepper to the meat in the crockpot. Stir everything together well. This mix adds great flavor to your soup. Now, pour in one can of crushed tomatoes and four cups of beef broth. Add one teaspoon of Italian seasoning and half a teaspoon of red pepper flakes if you like some heat. Season with salt and pepper to taste, then stir again. Cover your crockpot and set it to cook. You can choose to cook on low for 6 to 8 hours or on high for 3 to 4 hours. This slow cooking lets all the flavors blend together beautifully. About 30 minutes before serving, add your pasta to the pot. I like using rigatoni or shells. If the soup feels too thick, feel free to add more broth or water. Stir gently to combine. When your pasta is tender, it’s time to add fresh spinach, ricotta cheese, and half of the mozzarella cheese. Stir gently. Let it cook for another 10 minutes. The spinach should wilt, and everything needs to heat through. Once your soup is ready, serve it hot. Top each bowl with the remaining mozzarella and grated Parmesan cheese. You can also add fresh basil as a garnish if you want a pop of color and flavor. This soup is hearty and comforting. It’s perfect for a cozy dinner. For the full recipe, check out the details above. Enjoy! To get the best flavor in your Crockpot Lasagna Soup, use fresh ingredients. Fresh herbs like basil add a bright taste. I also recommend using high-quality crushed tomatoes. They make a big difference! For more depth, cook the meat with the onion and garlic first. This step builds a strong base for flavor. Add the spices early so they infuse into the soup. Don't shy away from using a bit of salt; it brings out the flavors. One common mistake is overcooking the pasta. If you add it too soon, it may turn mushy. Add the pasta about 30 minutes before serving to keep it firm. Another mistake is not tasting the soup. Always taste before you serve. Adjust the salt and pepper as needed. Lastly, don’t skip the cheese. The ricotta and mozzarella add creaminess that makes this soup special. Store your leftovers in an airtight container. Let the soup cool before sealing it. You can keep it in the fridge for up to 3 days. If you want to freeze it, use freezer-safe bags. To reheat, add a splash of broth to prevent it from thickening too much. Heat it on the stove or in the microwave. Stir well to ensure even heating. Enjoy your Crockpot Lasagna Soup again with ease! {{image_2}} You can easily make a vegetarian version of Crockpot Lasagna Soup. Start by swapping the meat for 1 pound of mushrooms or lentils. Both add great taste and texture. Use vegetable broth instead of beef broth for a rich base. Add more veggies like zucchini or carrots for extra flavor and nutrition. This version stays hearty and satisfying without meat. To make this soup gluten-free, choose gluten-free pasta. Brands like brown rice or chickpea pasta work well. You can also use quinoa for a nutritious twist. Make sure to check the broth and canned tomatoes for hidden gluten. With these swaps, you can enjoy a warm bowl of lasagna soup without worry. To boost flavor, consider adding fresh herbs. Basil and oregano enhance the Italian vibe. Try thyme or rosemary for a unique twist. A splash of balsamic vinegar can add depth, too. For heat, increase the red pepper flakes. You can also mix in a dash of smoked paprika for a smoky kick. These small tweaks can elevate your soup to a whole new level. Check out the Full Recipe to see how to combine these flavors perfectly. After you enjoy your Crockpot Lasagna Soup, store any leftovers in an airtight container. Make sure the soup is cool before sealing the container. This helps keep it fresh. Place it in the fridge. It should stay good for about three to four days. If you want to keep it longer, freezing is a great option. Use a freezer-safe container or a heavy-duty freezer bag. Leave some space at the top, as liquids expand when frozen. Label the container with the date. You can freeze the soup for up to three months. To use, just move it to the fridge to thaw overnight. Reheating is easy! You can use the stove or the microwave. If using the stove, pour the soup into a pot. Heat it over medium-low heat, stirring often. This helps it heat evenly. If you prefer the microwave, use a microwave-safe bowl. Heat it for one to two minutes, stirring halfway through. Always check that it is hot throughout before serving. For extra creaminess, add a bit more ricotta cheese when you reheat. Enjoy your meal again! Yes, you can use many kinds of meat. Ground turkey or chicken works great in this soup. You can also try a mix of meats for extra flavor. Each type adds a unique taste. Just ensure you cook it before adding it to the crockpot. This keeps the soup rich and tasty. To make this soup creamy, add more cheese. You can stir in extra ricotta or even cream cheese. Another option is to mix in sour cream at the end. This will give your soup a rich texture and flavor. You can adjust the creaminess based on what you like best. Yes, you can make this soup ahead of time. Prepare it a day before and store it in the fridge. Just cook it as you usually would. When you’re ready to eat, heat it up on the stove or in the crockpot. The flavors will meld even more, making it taste great. For the full recipe, check the section above! In this blog post, we covered key ingredients, tools, and steps for a great recipe. I shared tips to boost flavor and avoid common mistakes. We explored variations for different diets and how to store leftovers properly. Remember, using the right tools and ingredients makes cooking easier. With practice, you’ll master this dish and offer tasty meals. Don't hesitate to try new flavors and make it your own. Cooking is fun and creative. Enjoy your culinary journey!

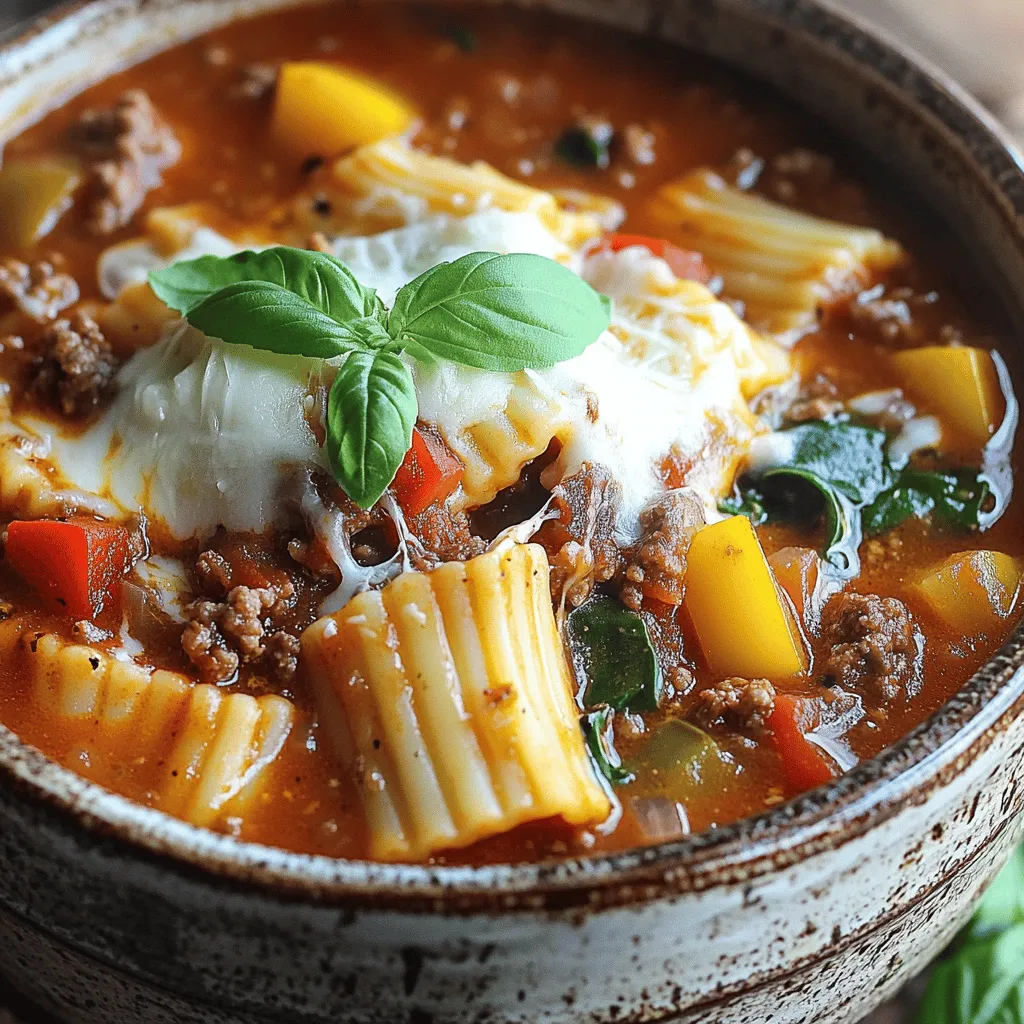
If you love lasagna but want a simpler way to enjoy it, I’ve got just the recipe for you! This Crockpot Lasagna Soup is both hearty and easy to make. …

Read more

Categories Dinner

Pumpkin Coffee Cake Cookies Irresistible Fall Treat

August 7, 2025 by Chef Jamie
To make these pumpkin coffee cake cookies, gather these must-have items: - 1 cup canned pumpkin puree - 1/2 cup unsalted butter, softened - 1 cup brown sugar - 1/2 cup granulated sugar - 1 large egg - 1 teaspoon vanilla extract - 2 cups all-purpose flour - 1 teaspoon baking powder - 1/2 teaspoon baking soda - 1/2 teaspoon salt - 2 teaspoons ground cinnamon - 1/2 teaspoon ground nutmeg - 1/2 teaspoon ground ginger These ingredients work together to create soft, moist cookies with a lovely fall flavor. You can enhance your cookies by adding these optional ingredients: - 1/2 cup chopped walnuts - 1/2 cup chocolate chips or butterscotch chips These add-ins bring extra texture and flavor to your cookies. You can mix and match based on what you enjoy! - Canned pumpkin puree: This ingredient gives your cookies a rich pumpkin taste. Make sure to use plain pumpkin, not pumpkin pie filling. - Unsalted butter: Using unsalted butter allows you to control the salt in your recipe. - Spices: The mix of cinnamon, nutmeg, and ginger gives the cookies their signature warmth. Adjust the amounts to suit your taste. Follow the Full Recipe for step-by-step guidance to create these delightful treats! Start by preheating your oven to 350°F (175°C). Line a baking sheet with parchment paper. In a large bowl, cream together 1/2 cup softened butter, 1 cup brown sugar, and 1/2 cup granulated sugar. Mix until it looks light and fluffy. Next, add 1 cup canned pumpkin puree, 1 large egg, and 1 teaspoon vanilla extract. Stir until everything is well combined. In another bowl, whisk together 2 cups all-purpose flour, 1 teaspoon baking powder, 1/2 teaspoon baking soda, 1/2 teaspoon salt, 2 teaspoons ground cinnamon, 1/2 teaspoon ground nutmeg, and 1/2 teaspoon ground ginger. Gradually add this dry mix to the wet ingredients. Stir until fully combined. If you want extra crunch, fold in 1/2 cup chopped walnuts or chocolate chips. Using a spoon or cookie scoop, drop rounded tablespoons of dough onto your prepared baking sheet. Make sure to leave space between each cookie. Bake in the preheated oven for 12 to 15 minutes. Look for lightly golden edges and set centers. Once baked, let the cookies cool on the sheet for about 5 minutes. After that, transfer them to a wire rack to cool completely. While the cookies cool, prepare the glaze. In a small bowl, mix 1/3 cup powdered sugar with 1 tablespoon milk until smooth. Once the cookies are cool, drizzle the glaze over them. This final touch adds a sweet finish and makes these cookies even more delightful. For the full recipe, refer to the earlier section. To get soft and chewy cookies, use room-temperature butter. Cream it well with sugars until fluffy. This step adds air, making your cookies rise nicely. When mixing in the pumpkin, don’t overmix the dough. Just combine until you no longer see dry flour. For a tender bite, avoid adding too much flour. Measure carefully and scoop gently. One big mistake is not preheating your oven. Always make sure it's hot before baking. Another error is not using parchment paper. This helps cookies bake evenly and prevents sticking. Don’t crowd your baking sheet with cookies. Give them space to spread out. Lastly, keep an eye on your baking time. Overbaking will lead to dry cookies. Serve these cookies warm with a drizzle of glaze on top. Add a sprinkle of cinnamon for extra flavor. A nice touch is to pair them with a hot cup of coffee or tea. They also shine at fall gatherings. Place them on a colorful platter to catch the eye. For a fun twist, try adding a scoop of vanilla ice cream on the side. These cookies are perfect for sharing, so don't hesitate to invite friends over! {{image_2}} You can easily make gluten-free pumpkin coffee cake cookies. Replace all-purpose flour with a gluten-free blend. Make sure it has xanthan gum for better texture. This swap keeps your cookies soft and tasty. You won’t miss the gluten! For vegan pumpkin coffee cake cookies, switch the egg for a flax egg. To make a flax egg, mix one tablespoon of flaxseed meal with three tablespoons of water. Let it sit for five minutes to thicken. Use vegan butter instead of regular butter. These changes keep the cookies light and fluffy without eggs or dairy. Want to change up the flavor? Add more spices! Try a dash of cardamom or allspice. You can also use almond extract instead of vanilla for a nutty twist. For an extra kick, add a pinch of cayenne pepper. This gives your cookies a warm, spicy note. The options are endless, so feel free to get creative! For the complete recipe, check out the Full Recipe section. To keep your pumpkin coffee cake cookies fresh, store them in an airtight container. Line the container with parchment paper to absorb moisture. This helps maintain the soft texture. Place a piece of bread in the container to keep the cookies moist. Store at room temperature for the best results. You can freeze these cookies for later enjoyment. First, let them cool completely. Then, arrange them in a single layer on a baking sheet. Freeze them for about one hour. Once frozen, transfer the cookies to a freezer-safe bag. Be sure to label the bag with the date. They can last up to three months in the freezer. These cookies stay fresh for about one week at room temperature. If you store them in the fridge, they can last up to two weeks. The flavors blend and get better with time. However, for the best taste, enjoy them within a week. For the full recipe, check back in case you need to make more! Yes, you can use fresh pumpkin in this recipe. You just need to cook and puree it first. Make sure to remove extra moisture. Canned pumpkin is easier and saves time, but fresh gives great flavor. To keep your cookies soft, do not overbake them. Take them out when the edges turn golden. Let them cool on the baking sheet for a few minutes before moving them. The cookies will continue to set as they cool. If you don’t like walnuts, you can use pecans or almonds. You can also skip them if you prefer plain cookies. For a crunch, consider using pumpkin seeds or even oats. Your cookies are done when the edges look lightly golden. The centers might look slightly underbaked, but they will firm up as they cool. You can also check with a toothpick; it should come out clean or with a few crumbs. For the full recipe, refer to the Pumpkin Coffee Cake Cookies section. This post covered everything you need for pumpkin coffee cake cookies. We went through the basic and optional ingredients, so you can customize your treats. The step-by-step instructions guide you from mixing to glazing. I shared tips to get the right texture and avoid common mistakes. Variations let you enjoy gluten-free or vegan options. Proper storage ensures your cookies stay fresh. Remember, baking can be fun and creative. Enjoy every bite of your cookies!

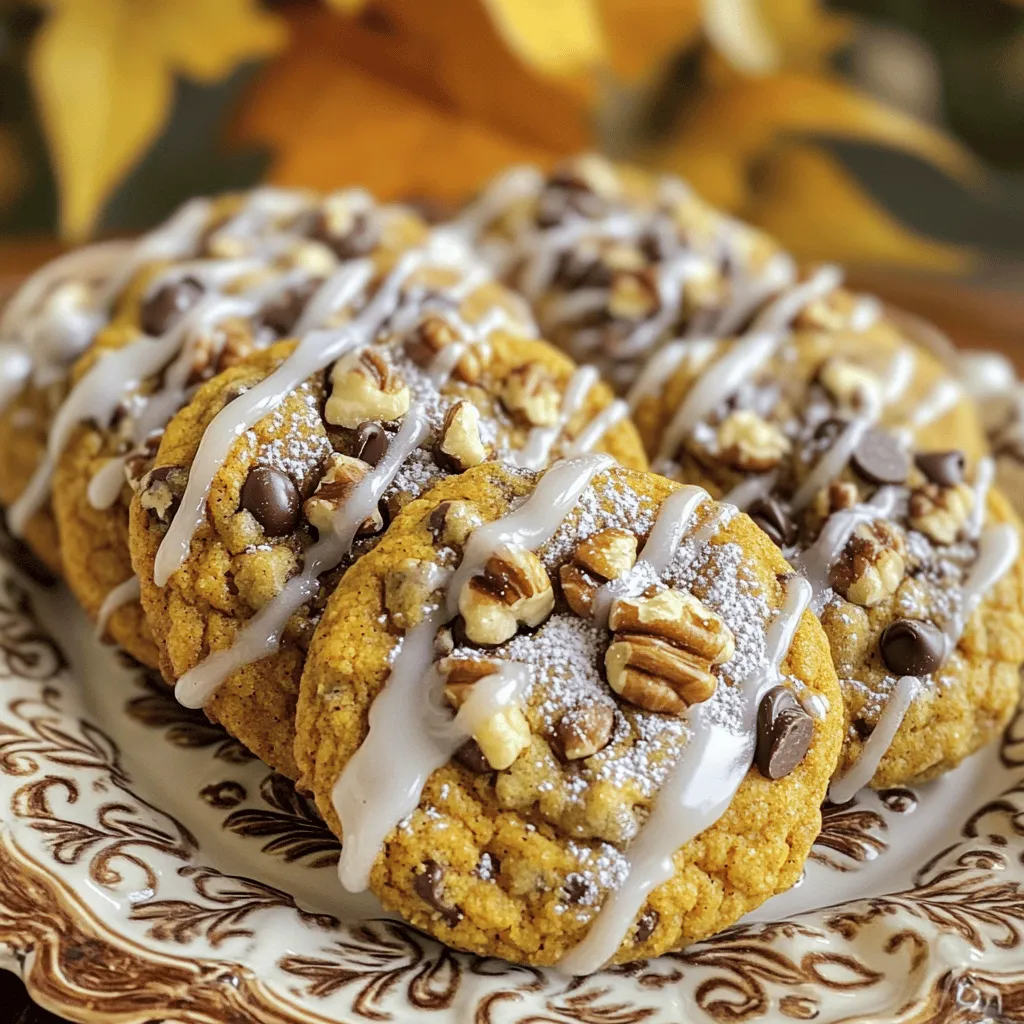
Fall is here, and that means it’s time for cozy treats! If you love the warm flavors of pumpkin spice, you’ll adore these Pumpkin Coffee Cake Cookies. They blend the …

Read more

Categories Desserts

Easy Pumpkin Pie Truffles Simple and Flavorful Treat

August 7, 2025 by Chef Jamie
Let’s dive into the tasty ingredients for Easy Pumpkin Pie Truffles. These simple items will help you create a treat everyone will love. - Canned pumpkin puree: 1 cup - Cream cheese, softened: 1 cup - Maple syrup: 1 tablespoon - Vanilla extract: 1 teaspoon - Pumpkin pie spice: 1 teaspoon - Crushed graham crackers: 2 cups - White chocolate chips: 1 cup - Optional: extra pumpkin pie spice for dusting Each ingredient plays a key role in making these truffles delicious. The canned pumpkin puree adds that rich, autumn flavor. Cream cheese gives a creamy texture, while maple syrup adds a touch of sweetness. The vanilla extract enhances the overall taste. Pumpkin pie spice brings warmth and a hint of spice. Crushed graham crackers provide a crunchy base, and white chocolate chips offer a sweet coating. If you want, sprinkle extra pumpkin pie spice on top for added flavor. For the complete steps to make these truffles, check the Full Recipe. 1. In a mixing bowl, combine the pumpkin puree, cream cheese, maple syrup, vanilla extract, and pumpkin pie spice. Mix until smooth and well-blended. 2. Fold in the crushed graham crackers to create a thick mixture. This gives your truffles a nice texture. 1. Roll the mixture into 1-inch balls and place on a baking sheet. 2. Freeze the truffles for 30 minutes to 1 hour until firm. This step helps them hold their shape. 1. Melt white chocolate chips in a microwave-safe bowl in 30-second intervals. Stir in between until fully melted and smooth. 2. Dip each truffle in the melted chocolate. Let excess chocolate drip off before placing them back on the baking sheet. 3. If you want, sprinkle optional pumpkin pie spice before the chocolate sets. This adds a nice touch! Mix the cream cheese well to avoid lumps. Start softening it before use. A smooth mixture makes the truffles easier to roll and taste better. If you find lumps, use a hand mixer for quick results. Freeze the truffles longer for easier dipping into chocolate. I recommend at least one hour. The colder they are, the better the chocolate coating sticks. It also helps keep the truffles' shape during dipping. Use decorative plates or boxes for serving. A pretty presentation makes the truffles more inviting. Consider adding a sprinkle of cinnamon or extra pumpkin pie spice on top for an autumn touch. {{image_2}} Flavor variations allow you to customize your Easy Pumpkin Pie Truffles. Here are some fun options: - Use milk chocolate instead of white chocolate. This swap adds a rich flavor and a different look. - Add crushed nuts for added texture. Walnuts or pecans give a nice crunch that pairs well with the soft truffles. Dietary adjustments can help you meet different needs: - Substitute cream cheese with vegan cream cheese for a dairy-free option. This keeps the truffles creamy without dairy. - Use gluten-free graham crackers for a gluten-free version. This way, everyone can enjoy these tasty treats. You can also enhance the truffles with additional garnishes: - Dip in melted caramel for a different flavor. This adds sweetness and a chewy texture. - Drizzle with dark chocolate for contrast. The dark chocolate balances the sweetness of the truffles. These variations make the recipe even more fun and personal. Try them out! For the full recipe, check the earlier section. You can refrigerate the truffles for up to 1 week. Keep them in an airtight container. This helps keep them fresh and tasty. To store for longer, freeze the truffles for up to 3 months. Wrap each truffle well in plastic wrap. This will prevent freezer burn and keep them safe. When ready to enjoy, thaw the truffles in the refrigerator overnight. This keeps them cool and tasty for serving. Yes, you can make these truffles ahead of time and store them properly. This makes them a great treat for parties or gatherings. Just keep them chilled until you are ready to serve. You can use vegan cream cheese or mascarpone as replacements. Both options will give you a similar creamy texture. If you want a lighter option, Greek yogurt works well too. Keep leftover truffles in an airtight container. You can store them in the fridge for up to a week. If you want to save them longer, freeze them for up to three months. Just remember to let them thaw before serving. To make these truffles more festive, add colorful sprinkles or edible gold dust. You can also use crushed nuts on top for some extra crunch. These little touches can make your truffles stand out. Check the section titled "Easy Pumpkin Pie Truffles" for the complete recipe details. This will help you with all the steps and tips to make these tasty treats. This article covered how to make delicious pumpkin pie truffles. You need simple ingredients like canned pumpkin and cream cheese. Follow easy steps for preparation, rolling, and coating. Remember to freeze your truffles to keep them firm. Try different flavors or dietary options to suit your taste. Store them well to enjoy later. With these tips, you can impress friends and family with a fun treat. Enjoy creating your own pumpkin pie truffles and share them joyfully.

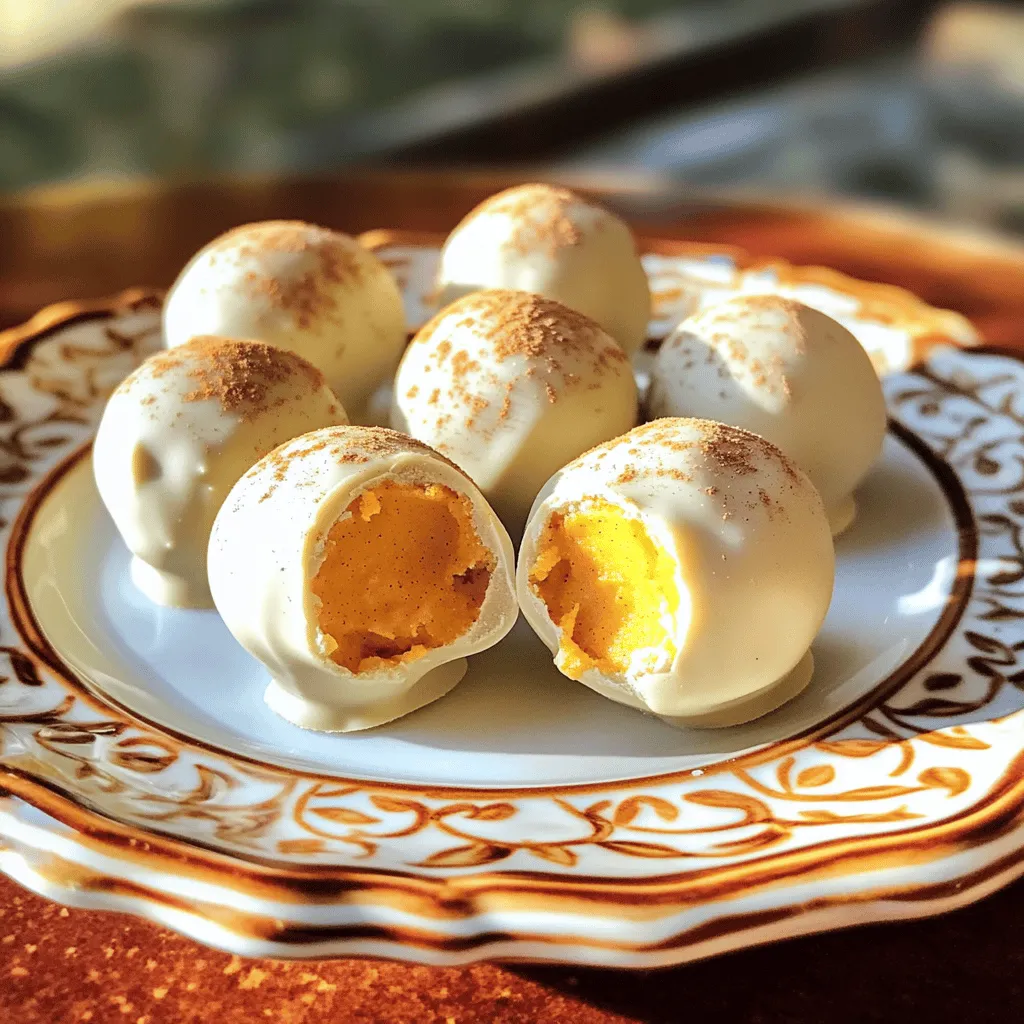
Fall flavors in bite-sized treats? Yes, please! These Easy Pumpkin Pie Truffles are rich, creamy, and bursting with that classic pumpkin taste. You’ll whip up these simple delights in no …

Read more

Categories Desserts

Mini Peach and Cream Cheese Tarts Delightful Recipe

August 7, 2025 by Chef Jamie
To make these tasty mini tarts, gather these key ingredients: - 1 package of refrigerated pie crusts (or homemade if preferred) - 8 oz cream cheese, softened - 1/4 cup powdered sugar - 1 teaspoon vanilla extract - 2 ripe peaches, thinly sliced - 2 tablespoons honey - 1 tablespoon lemon juice These ingredients work together to create a lovely dessert. The cream cheese brings a rich texture, while the peaches add natural sweetness and freshness. You can add unique flavors to your tarts. Here are some optional ingredients to consider: - Cinnamon for warmth - Almond extract for a nutty touch - Berries like blueberries or raspberries for extra color - A sprinkle of nutmeg for a spicy note Feel free to mix and match these options. They can change the taste and make your tarts even more special. Before you start, make sure you have the right tools on hand: - A mini muffin tin for baking - A rolling pin if using homemade crust - A cookie cutter or glass for cutting circles - Mixing bowls for blending ingredients - An electric mixer or whisk for the cream cheese filling Having these items ready will make the process smooth and enjoyable. You can find the full recipe in the recipe section for more details. Preheating the Oven Start by setting your oven to 375°F (190°C). This temperature helps the crust bake evenly. Preparing the Pie Crusts Take your pie crusts, either store-bought or homemade. Roll them out on a floured surface until thin. Use a cookie cutter or glass to cut out 3-inch circles. Press each circle gently into a mini muffin tin. Make sure they cover the bottom and sides well. Bake the crusts for 10-12 minutes until they turn golden brown. Once baked, let them cool before removing from the tin. In a mixing bowl, combine 8 oz of softened cream cheese with 1/4 cup of powdered sugar and 1 teaspoon of vanilla extract. Mix until smooth and creamy. This filling adds rich flavor and a nice texture to your tarts. Adding the Peaches Slice 2 ripe peaches thinly. In a separate bowl, mix the peach slices with 2 tablespoons of honey and 1 tablespoon of lemon juice. This mix enhances the peach flavor and keeps them fresh. Once your tarts have cooled, spoon a generous amount of the cream cheese filling into each crust. Top each one with a few peach slices, arranging them nicely. Garnishing the Tarts For a touch of elegance, add fresh mint leaves on top of each tart. This not only looks great but also adds a fresh flavor. Enjoy creating these delightful mini peach and cream cheese tarts! For the full recipe, check out the details above. To get a flaky crust, start with cold ingredients. Use chilled butter or shortening if you make your own crust. Roll the dough gently to avoid overworking it. If you use store-bought crusts, keep them cold too. Cut out your circles quickly and press them into the muffin tin without stretching. This helps them hold their shape while baking. For a creamy filling, ensure your cream cheese is at room temperature. This step is key to smooth blending. Beat it well with powdered sugar and vanilla extract. Use an electric mixer for the best results. Mix until the filling looks fluffy and well combined. Avoid lumps to keep the texture creamy. You can enhance the flavor of your tarts with simple add-ins. Try adding a pinch of cinnamon or nutmeg to the cream cheese filling for warmth. You can also mix in a bit of lemon zest for brightness. For a twist, consider adding a splash of almond extract. It pairs beautifully with peaches. {{image_2}} You can switch out the peaches for other fruits. Try using fresh strawberries, blueberries, or raspberries. Each fruit brings its own unique flavor. For a tropical twist, mango slices work great too. You can also mix fruits. A blend of berries adds color and taste. Cream cheese is very versatile. You can mix in flavors to change the taste. Try adding lemon zest or a touch of almond extract for a nice twist. For a fruity kick, fold in some pureed strawberries or blueberries. This gives the filling extra depth and flavor. For a gluten-free option, use a gluten-free pie crust. Many stores sell these now. If you want a vegan version, swap out the cream cheese for a plant-based cream cheese. You can also use maple syrup instead of honey. This makes the tarts suitable for everyone. Store your mini peach and cream cheese tarts in an airtight container. Keep them in the fridge for up to three days. This helps maintain their freshness and taste. Avoid stacking them to prevent any crushing. If you plan to have leftovers, allow them to cool completely before storing. This keeps the crust crispy for longer. To reheat your tarts, place them in an oven preheated to 350°F (175°C). Heat for about 5 to 7 minutes. This warms them gently without making the crust soggy. You can also use a microwave for quick reheating. Just heat for 10 to 15 seconds. Be careful not to overheat, as this can change the texture. You can freeze these tarts for later enjoyment. First, bake and cool them completely. Then, place them in a single layer on a baking sheet. Freeze until firm, about 1 hour. After that, transfer them to a freezer-safe container. They can last for up to three months in the freezer. To enjoy, thaw them in the fridge overnight before reheating. Mini Peach and Cream Cheese Tarts stay fresh for about three days. Store them in an airtight container in the fridge. After three days, they may lose their crispness. Always check for any signs of spoilage before eating. Yes, you can use canned peaches! Drain them well before slicing. Keep in mind that canned peaches are softer than fresh ones. This may change the texture of your tarts but will still taste great. Serve these tarts chilled or at room temperature. They look great on a platter. You can garnish with fresh mint leaves. This adds a nice touch and enhances the flavor. Pair them with coffee or tea for a delightful treat. You can find the full recipe for Mini Peach and Cream Cheese Tarts right here! Just follow the instructions closely for the best results. Enjoy making this delicious dessert! In this article, we covered how to make delicious mini peach and cream cheese tarts. You learned the key ingredients and essential equipment needed. I shared step-by-step instructions, helpful tips, and tasty variations to try. Finally, we looked at storage tips for any leftovers. You now have all you need to create these tasty treats. Enjoy baking and sharing them with friends!

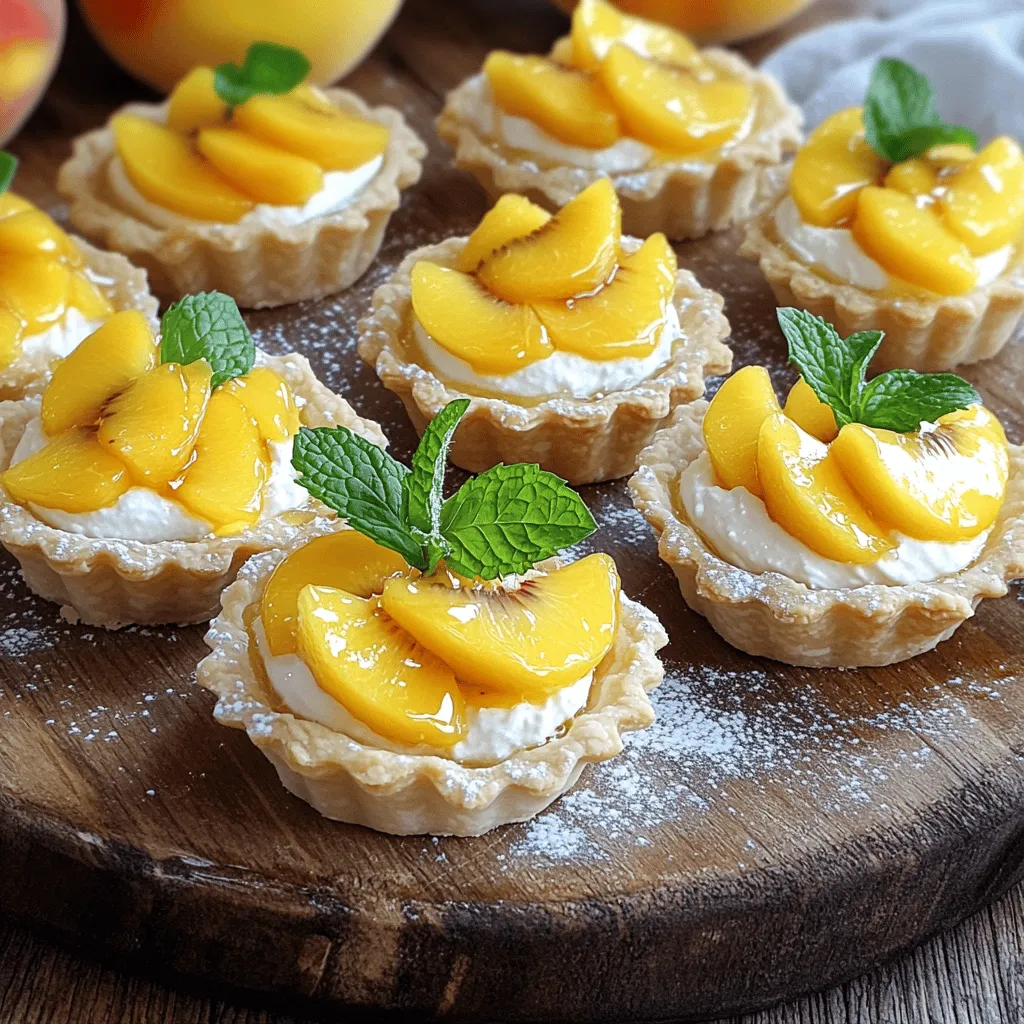
Are you ready to treat your taste buds? This Mini Peach and Cream Cheese Tarts recipe is a simple delight that combines sweet peaches with rich cream cheese. I’ll guide …

Read more

Categories Desserts

Apple Crisp Mini Cheesecakes Tasty and Easy Treat

August 7, 2025 by Chef Jamie
The right ingredients make Apple Crisp Mini Cheesecakes a delight. Here’s what you need: - 1 ½ cups graham cracker crumbs - ½ cup unsalted butter, melted - 2 tablespoons brown sugar - 16 oz cream cheese, softened - ¾ cup granulated sugar - 1 teaspoon vanilla extract - 2 large eggs - 2 cups apples, peeled and diced - 1 teaspoon cinnamon - ½ cup rolled oats - ¼ cup chopped walnuts (optional) - ¼ cup powdered sugar (for garnish) Each ingredient plays a key role in the flavor and texture. The graham cracker crumbs form a buttery crust. The cream cheese gives it a creamy base. Fresh apples add sweetness and a nice crunch. Cinnamon brings warmth, making these mini cheesecakes perfect for fall or any time of year. Using quality ingredients matters. Fresh apples enhance the taste. I love using Granny Smith apples for a tangy kick. They balance the sweetness of the sugar well. When you mix the ingredients, remember to measure them accurately. This ensures your mini cheesecakes turn out just right. You can find the full recipe for more details. Enjoy the process of creating this tasty treat! 1. First, preheat your oven to 325°F (160°C). Line a muffin tin with cupcake liners. 2. Next, in a medium bowl, combine 1 ½ cups graham cracker crumbs, ½ cup melted butter, and 2 tablespoons brown sugar. Mix until the crumbs are well coated. 3. Press about 1 tablespoon of this mixture into each cupcake liner to make a crust. Bake for 10 minutes, then remove and let cool slightly. 1. In a large bowl, beat 16 oz of softened cream cheese with ¾ cup granulated sugar and 1 teaspoon vanilla extract. Mix until smooth and creamy. 2. Add 2 large eggs, one at a time. Mix well after each addition until fully blended. 3. In a separate bowl, mix 2 cups of peeled and diced apples, 1 teaspoon cinnamon, ½ cup rolled oats, and ¼ cup chopped walnuts if you like. Gently fold this apple mixture into the cream cheese batter. 1. Spoon the cream cheese and apple mixture into the muffin liners over the cooled crusts. Fill each about ⅔ full. 2. Bake for 20-25 minutes, or until the cheesecakes are set but still slightly jiggly in the center. 3. Allow them to cool completely in the tin. After that, transfer them to the fridge and chill for at least 2 hours. For the full recipe, check the preceding section where all ingredients are listed. To make the best apple crisp mini cheesecakes, focus on the texture. First, avoid over-mixing your cream cheese mixture. When you mix too much, the cheesecake can become too airy. This can make it puff up and sink later. Mix just until smooth and creamy. Next, chilling is key. After baking, let the cheesecakes cool in the tin. Then, transfer them to the fridge. Chill for at least two hours. This helps them set properly. Chilled cheesecakes taste better and have a firm texture. Presentation matters! Serve your mini cheesecakes on a nice platter. You can add thin apple slices on top for flair. A sprinkle of cinnamon adds a warm touch. For toppings, consider drizzling caramel sauce. This pairs well with the apple flavor. You can also use whipped cream for extra creaminess. These small details can make your treats shine! Want the full recipe? Find it [here]. {{image_2}} You can easily change the taste of your Apple Crisp Mini Cheesecakes. Try adding caramel or chocolate swirls. This will give a rich, sweet touch. Just drizzle the caramel or melted chocolate on top before baking. It adds a fun layer of flavor. You can also switch out the apples. Use pears, peaches, or berries instead. Each fruit brings a new taste. This way, you can enjoy different flavors every time you make them. If you need gluten-free options, use almond flour or gluten-free cookies for the crust. This keeps the yummy taste while making it safe for gluten-free diets. For those who want dairy-free choices, swap cream cheese with a nut-based cream cheese. Use coconut milk instead of regular milk. These changes still give a creamy texture without the dairy. You can enjoy these treats with ease. These ideas help you make Apple Crisp Mini Cheesecakes your own. Check out the full recipe for more details! After you enjoy your Apple Crisp Mini Cheesecakes, store any leftovers in the fridge. Use an airtight container to keep them fresh. Place parchment paper between layers to avoid sticking. This method keeps the taste and texture superb. If you want to save some for later, you can freeze mini cheesecakes. Wrap each one in plastic wrap. Then, place them in a freezer-safe bag or container. Make sure to label them with the date. This way, you’ll know how long they’ve been there. In the fridge, your mini cheesecakes will last about 5 days. They stay fresh and tasty during this time. If you freeze them, they can last for up to 3 months. You can enjoy them later without losing flavor or texture. Just remember to thaw them overnight in the fridge before serving. For the full recipe, check out the detailed instructions above. Can I make these mini cheesecakes ahead of time? Yes, you can make these mini cheesecakes ahead of time. They taste great after chilling in the fridge. I often make them a day before serving. Just cover them well to keep them fresh. What type of apples are best for this recipe? I recommend using Granny Smith or Honeycrisp apples. They add a nice tartness and hold their shape well when baked. You can also mix different apple types for more flavor. How do you know when cheesecakes are done baking? You can tell if they are done when they are set but still slightly jiggly in the center. I like to look for a light golden color on top. If they puff up too much, they may crack, so avoid overbaking. You now know how to make delicious apple crisp mini cheesecakes. We covered all the ingredients, from graham cracker crumbs to apples. The step-by-step guide ensures your success in preparation and baking. Remember to chill your cheesecakes for the best texture. Experiment with flavors and toppings to make it your own. Store leftovers properly to keep them fresh. With these tips, you can create tasty treats anytime. Enjoy every bite of your mini cheesecakes!

Get ready for a treat that blends creamy cheesecake and the delightful crunch of apple crisp! In this post, I’ll guide you through making Apple Crisp Mini Cheesecakes. They’re simple, …

Read more

Categories Desserts

Cheddar and Herb Soda Bread Flavorful Baking Delight

August 6, 2025 by Chef Jamie
- 4 cups all-purpose flour - 1 teaspoon baking soda - 1 teaspoon salt - 1 1/2 cups grated sharp cheddar cheese - 1/4 cup fresh herbs (e.g., rosemary, thyme, parsley), finely chopped - 1 3/4 cups buttermilk - 2 tablespoons unsalted butter, melted For this Cheddar and Herb Soda Bread, each ingredient plays a key role. The flour gives the bread its structure. Baking soda acts as the leavening agent, making the bread rise. Salt enhances the flavors, while sharp cheddar adds a rich taste. Fresh herbs bring a burst of freshness, making each bite exciting. Buttermilk adds moisture and a slight tang, while melted butter gives the loaf a soft crumb. - Alternate flours: You can use whole wheat flour or a gluten-free blend. This adds different textures and flavors. - Dairy-free options: Use plant-based milk and a dairy-free butter to make this bread vegan. - Different cheese choices: Try gouda or feta for a twist on flavor. Each cheese brings its unique taste profile. - Best herb pairings: Rosemary is strong, while thyme and parsley are milder. Mix them for balance. - How to select and chop herbs: Choose bright green herbs without browning. Chop finely for even flavor distribution. Use a sharp knife to avoid bruising the leaves. Preheating your oven is key. It helps the bread rise properly and cook evenly. Set your oven to 425°F (220°C) now. While the oven heats, prepare your baking sheet. Line it with parchment paper. This makes for easy cleanup and keeps the bread from sticking. Start with a large mixing bowl. Add the 4 cups of all-purpose flour, 1 teaspoon of baking soda, and 1 teaspoon of salt. Mix them well using a whisk or fork. This helps the baking soda spread evenly. After mixing, add 1 1/2 cups of grated sharp cheddar cheese and 1/4 cup of finely chopped herbs. Gently fold them in. Be careful not to overmix; you want a light mix for best results. Now, create a well in the center of your dry mix. Pour in 1 3/4 cups of buttermilk and 2 tablespoons of melted butter. Use a wooden spoon or your hands to mix until you form a soft, sticky dough. When kneading, do it gently for about 1 minute. This helps hold the texture. Shape the dough into a round loaf, about 1.5 inches thick. Place the loaf on your prepared baking sheet. Cut a deep cross on the top, about 1/4 inch deep. This helps it bake evenly. Bake the bread for 30-35 minutes. It’s done when the top is golden brown and sounds hollow when tapped. Let it cool on a wire rack for at least 10 minutes. This cooling step helps keep the texture just right. Enjoy your Cheddar and Herb Soda Bread! Kneading is key for good soda bread. Here are some tips to avoid overworking the dough: - Use your fingertips instead of your palms. - Knead gently for just one minute. - Stop when the dough comes together. To make a light, airy loaf, follow these steps: - Use fresh baking soda. It helps the bread rise. - Make sure the buttermilk is at room temperature. - Create a deep cross on top before baking. This helps it rise evenly. Want more flavor? Try these spices: - Black pepper adds warmth. - Garlic powder gives a nice twist. - Paprika adds depth and color. When it comes to cheddar, aged cheddar has a sharper taste. Young cheddar is milder and creamier. Choose based on your flavor preference. Aged cheddar pairs well with herbs. Young cheddar works great for a softer bite. If the dough is too sticky, try this: - Add a bit more flour, one tablespoon at a time. - Dust your hands with flour while shaping. To fix over-baking, check your oven's temperature. An oven thermometer helps ensure it’s accurate. If the bread is too dark, cover it with foil during baking. This protects the crust while the inside cooks through. {{image_2}} You can play with many herbs to boost flavor. My favorites include rosemary, thyme, and parsley. These herbs work well together, adding depth to the bread. For seasonal flavors, consider using fresh basil in summer or sage in fall. Each herb brings a unique taste. Experiment with your favorites to find new blends. While sharp cheddar shines, you can use other cheeses too. Try gouda for a smoky flavor or feta for a tangy kick. Mozzarella offers a milder taste, making it a great base for added herbs. Each cheese changes the bread's texture and flavor, so feel free to mix and match. If you need a gluten-free option, use a blend of gluten-free flours. Look for mixes that include almond flour and brown rice flour. Adjust the liquid to keep the dough soft. Gluten-free dough may require more liquid. This helps create a tender loaf that everyone can enjoy. I recommend storing your cheddar and herb soda bread at room temperature. Wrap it in a clean kitchen towel. This keeps it fresh without making it soggy. If you want to save it longer, you can refrigerate it. Just make sure to place it in a sealed plastic bag. This helps prevent it from drying out. To freeze your soda bread, slice it first. Place the slices in an airtight bag. Remove as much air as possible to avoid freezer burn. It will stay good for up to three months. When you’re ready to eat, take out what you need. You can reheat it in the oven at 350°F (175°C). Bake for about 10-15 minutes, or until warmed through. This keeps the bread soft and tasty. At room temperature, your soda bread lasts about two days. After that, it may start to dry out. If you notice any mold or an off smell, it's best to throw it away. Always check your bread before enjoying it! Soda bread is a quick bread. It uses baking soda instead of yeast. This makes it faster to mix and bake. The dough rises from the reaction between baking soda and buttermilk. This gives soda bread its unique texture and flavor. The bread has a crispy crust and a soft, tender inside. You can add ingredients like cheese and herbs for extra taste. My Cheddar and Herb Soda Bread is a perfect example of this! You can tell the bread is done by looking and listening. First, check the color. It should be golden brown on top. Second, tap the bottom of the loaf. It should sound hollow if it is ready. If you see any wet dough in the center, it needs more time. Bake it a few more minutes until it meets these signs. Yes, you can make soda bread without buttermilk. You can use milk mixed with vinegar or lemon juice. This creates a similar acidity. Use one cup of milk with one tablespoon of vinegar. Let it sit for about five minutes. This will give you a good substitute for buttermilk. You can also use yogurt or sour cream if you have them. Cheddar and Herb Soda Bread is great with many dishes. You can serve it with soups or stews for a hearty meal. It also pairs well with salads for a light lunch. Try spreading butter or cream cheese on warm slices. You can even add jams or chutneys for a sweet touch. This bread is perfect for any occasion! To make a smaller batch, simply halve the ingredients. Use 2 cups of flour, 1/2 teaspoon of baking soda, and 1/2 teaspoon of salt. Adjust the cheese and herbs to your taste too. This will yield about four servings instead of eight. You can still follow the same steps in the Full Recipe for best results. In this post, I shared how to make cheddar and herb soda bread. We covered ingredients, mixing, baking, and storage tips. Remember to tweak the recipe with personal ingredient choices. Don't be afraid to experiment with different herbs and cheeses. With practice, you will create a perfect loaf every time. Enjoy the process and share your results with others! Happy baking!

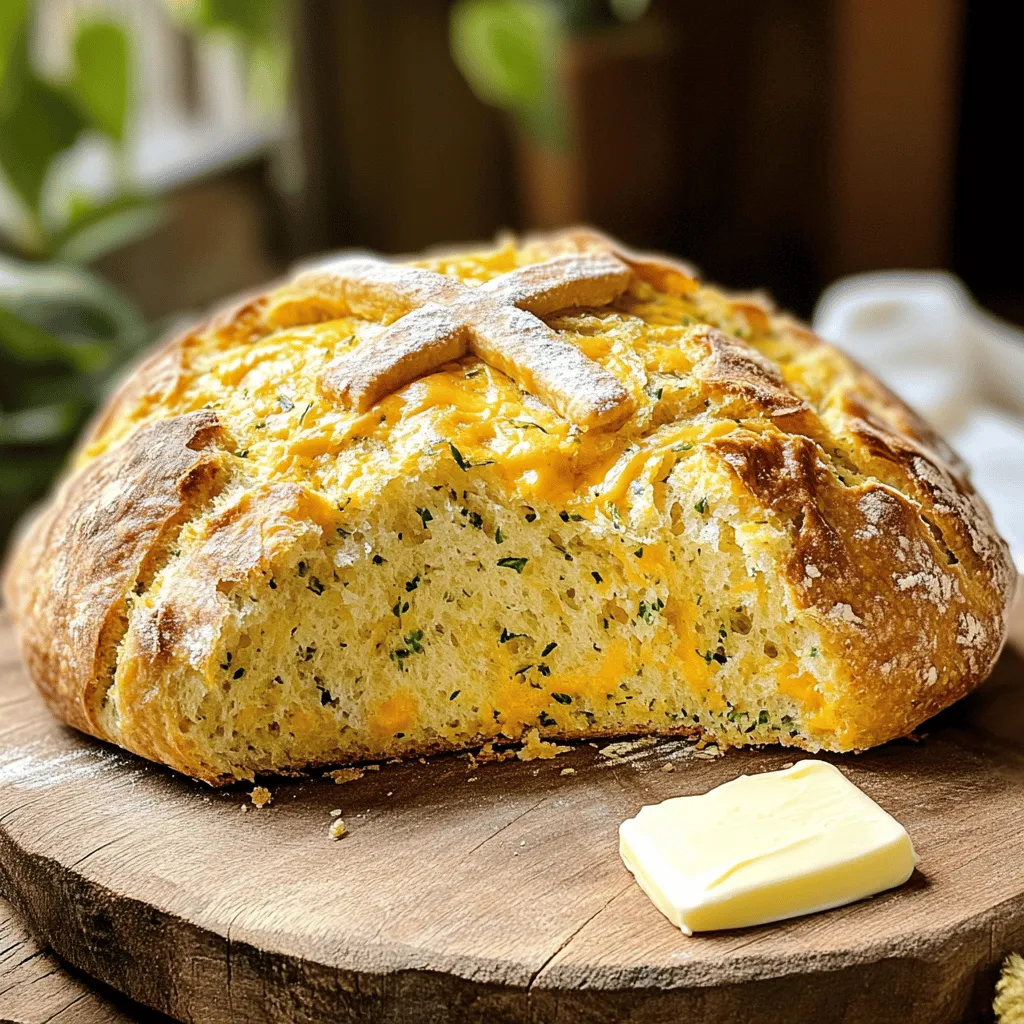
Are you ready to bake a loaf that’s packed with flavor and easy to make? My Cheddar and Herb Soda Bread is the perfect addition to any meal. With sharp …

Read more

Categories Dinner

Pumpkin Cupcakes with Caramel Cream Cheese Frosting Delight

August 6, 2025 by Chef Jamie
- 1 cup all-purpose flour - 1 tsp baking powder - 1/2 tsp baking soda - 1/2 tsp ground cinnamon - 1/2 tsp ground nutmeg - 1/4 tsp ground ginger - 1/4 tsp salt - 1/2 cup granulated sugar - 1/2 cup brown sugar, packed - 1/2 cup vegetable oil - 2 large eggs - 1 cup pumpkin puree (canned or fresh) - 1 tsp vanilla extract - 8 oz cream cheese, softened - 1/4 cup unsalted butter, softened - 1 cup powdered sugar - 1/4 cup caramel sauce (plus additional for drizzling) - 1/2 tsp vanilla extract When baking pumpkin cupcakes, the right ingredients make all the difference. I love using fresh pumpkin puree for its rich flavor, but canned works well too. The dry ingredients include all-purpose flour, baking powder, and spices. These spices add warmth and depth, making each bite delightful. For the wet ingredients, I mix sugars and oil first. The mix of granulated and brown sugar adds sweetness and moisture. The eggs and pumpkin puree create a smooth batter that rises perfectly. Now, let’s talk about frosting. Cream cheese and butter blend for a creamy base. Adding powdered sugar sweetens the mix, while caramel sauce gives it a rich twist. This frosting is not just for taste; it adds a beautiful shine to the cupcakes. You can find the full recipe in the section above to guide you through each step. Remember, quality ingredients lead to tasty results! - Preheat your oven to 350°F (175°C) and line a 12-cup muffin tin with cupcake liners. - In a medium bowl, whisk together the flour, baking powder, baking soda, cinnamon, nutmeg, ginger, and salt. Set aside. - In a large bowl, combine the granulated sugar, brown sugar, and vegetable oil. Mix until well combined. - Add the eggs, pumpkin puree, and vanilla extract to the sugar mixture and whisk until smooth. - Gradually fold the dry ingredients into the wet ingredients until just combined; do not overmix. - Spoon the batter into the prepared muffin tin, filling each liner about two-thirds full. - Bake for 18-20 minutes or until a toothpick inserted into the center comes out clean. Allow the cupcakes to cool in the pan for 5 minutes before transferring to a wire rack to cool completely. - Beat together softened cream cheese and butter until smooth. - Gradually add the powdered sugar, caramel sauce, and vanilla extract to the frosting mix. - Frost cooled cupcakes and drizzle with extra caramel sauce. For the full recipe, check out the details above. - Ensure your pumpkin puree is well-drained if using fresh. - Avoid overmixing the batter to keep cupcakes fluffy. To make pumpkin cupcakes that melt in your mouth, focus on moisture. Fresh pumpkin puree can hold a lot of water. If it’s too wet, your cupcakes may turn soggy. Drain the puree in a fine mesh strainer for a few minutes. This removes excess liquid and helps keep your cupcakes light. Mixing is another key step. After you combine wet and dry ingredients, stir gently. Overmixing can cause your cupcakes to become dense and tough. Aim for just combined; a few lumps are okay! - Use room temperature ingredients for a smoother frosting texture. - For a decorative touch, use a piping bag for frosting application. Frosting can make or break your cupcakes. Start with room temperature cream cheese and butter. This helps create a smooth and creamy frosting. Cold ingredients can lead to lumps. Using a piping bag for frosting gives a pretty finish. It also lets you control the amount on each cupcake. If you don’t have a piping bag, a zip-top bag with a corner cut off works too. - Arrange on a decorative platter and sprinkle with chopped pecans. Presentation adds to the fun! Once frosted, place your cupcakes on a nice platter. A simple sprinkle of chopped pecans adds texture and a pop of color. It makes your dessert look fancy without much effort. For an extra touch, drizzle some caramel sauce over the top. This not only looks good but also enhances the flavor! For the full recipe, check out Pumpkin Spice Wonders! {{image_2}} You can change the flavor of these cupcakes in fun ways. - Add chocolate chips for a rich taste. They will melt and create pockets of sweetness. - Incorporate chopped nuts or dried fruits for texture. Pecans or cranberries work great here. Try different frostings for a new twist. - Use whipped cream instead of cream cheese for a lighter option. It adds airiness and freshness. - Experiment with flavored frostings like maple or vanilla. Each one gives a unique taste. Want a gluten-free version? It’s simple. - Substitute all-purpose flour with a gluten-free blend. This swap keeps the cupcakes moist and delicious. For the full recipe, check the earlier section. Enjoy baking! Store your frosted cupcakes in an airtight container. They will stay fresh at room temperature for up to 2 days. If you want to keep them longer, consider refrigerating them. For unfrosted cupcakes, use an airtight container in the fridge. They will last up to 1 week. You can also freeze them for up to 3 months. Make sure to thaw them before frosting. When layering cupcakes, place parchment paper between each layer. This protects the frosting from sticking and keeps them looking great. Yes, canned pumpkin puree works perfectly for this recipe. It saves time and effort. Canned pumpkin has a smooth texture that blends well into the batter. I often use it when I’m short on time. Ensure you use quality liners and grease them lightly if needed. A light spray of cooking oil can help. This small step makes a big difference. It helps the cupcakes slide out easily without tearing. Substitute eggs with a flaxseed mixture and use plant-based cream cheese. Mix one tablespoon of flaxseed meal with three tablespoons of water. Let it sit for five minutes to thicken. This simple swap keeps the cupcakes moist and tasty. You can use chocolate ganache or a simple sugar glaze as an alternative. Both options add a different flavor twist. Chocolate ganache gives a rich taste, while sugar glaze offers a sweet touch. Yes, you can bake and freeze the cupcakes, frosting them just before serving. Allow the cupcakes to cool completely before freezing. This way, they stay fresh and tasty when you need them. These pumpkin cupcakes are fun to make and delicious to eat. You learned about the key ingredients, easy steps, and helpful tips. Remember to check your pumpkin puree and avoid overmixing to keep them fluffy. Try fun variations and store them right for later enjoyment. With these simple guidelines, you can whip up tasty treats for any occasion. Enjoy the baking, the sharing, and the smiles these cupcakes bring!

Get ready to delight your taste buds with these delicious Pumpkin Cupcakes! With a soft, spiced base and a rich caramel cream cheese frosting, this treat is perfect for any …

Read more

Categories Desserts

Delicious Vanilla Chai Pumpkin Latte Cupcakes Recipe

August 6, 2025 by Chef Jamie
To make these tasty cupcakes, you will need: - 1 cup all-purpose flour - 1/2 cup almond flour - 1 tsp baking powder - 1/2 tsp baking soda - 1/2 tsp salt - 1 tbsp chai spice mix (cinnamon, ginger, cardamom, cloves, and black pepper) - 1/2 cup canned pumpkin puree - 1/2 cup granulated sugar - 1/4 cup brown sugar - 2 large eggs - 1/4 cup vegetable oil - 1/2 cup brewed strong chai tea (cooled) - 1 tsp vanilla extract These ingredients create a base that gives the cupcakes their rich flavor and moist texture. For an extra kick, consider adding: - A splash of brewed chai tea (for frosting) - Ground nutmeg or a sprinkle of chai spice (for garnish) These optional ingredients can elevate each bite, enhancing the chai and pumpkin notes. This frosting adds a creamy touch to your cupcakes. You will need: - 1/2 cup cream cheese - 1/4 cup unsalted butter - 1 cup powdered sugar Mix these together for a smooth and sweet topping that pairs perfectly with the cupcakes. You can add a splash of brewed chai tea if you want to adjust the frosting's consistency. For the full recipe, check the details above. These cupcakes are a delightful treat for any time! To start, preheat your oven to 350°F (175°C) and line a cupcake tin with paper liners. Next, grab a medium bowl. Whisk together these dry ingredients: - 1 cup all-purpose flour - 1/2 cup almond flour - 1 tsp baking powder - 1/2 tsp baking soda - 1/2 tsp salt - 1 tbsp chai spice mix Mix these well to ensure an even flavor. Now, take a large bowl. Here, you will combine the wet ingredients. Add: - 1/2 cup canned pumpkin puree - 1/2 cup granulated sugar - 1/4 cup brown sugar - 2 large eggs - 1/4 cup vegetable oil - 1/2 cup brewed strong chai tea (cooled) - 1 tsp vanilla extract Stir this mix until smooth and creamy. Gradually pour the dry mix into the wet mix. Stir gently until combined, but do not overmix. This keeps your cupcakes light. Scoop the batter into the lined cupcake tin. Fill each liner about two-thirds full. Place the tin in your preheated oven. Bake for 18-20 minutes. To check if they are done, insert a toothpick into the center of a cupcake. If it comes out clean, they are ready! Let the cupcakes cool in the pan for 5 minutes. After that, move them to a wire rack to cool completely. This step is key for the frosting to stick later. While the cupcakes cool, it’s time for the frosting. In a mixing bowl, beat together: - 1/2 cup cream cheese - 1/4 cup unsalted butter Mix these until creamy. Gradually add: - 1 cup powdered sugar Continue mixing until smooth. If you want a little more chai flavor, add a splash of brewed chai tea. This will make the frosting even more delicious! Once your cupcakes are cool, frost them generously with your cream cheese frosting. For a lovely touch, sprinkle each one with ground nutmeg or chai spice. Enjoy your tasty treat! For the complete recipe details, check the Full Recipe! To get soft and fluffy cupcakes, use room-temperature ingredients. This helps them mix well. Mix the dry and wet ingredients in separate bowls first. Then, combine them gently. Overmixing can make the cupcakes tough. Fill each cupcake liner only two-thirds full. This gives them room to rise without spilling. One big mistake is not measuring ingredients correctly. Always use measuring cups and spoons. Too much flour can make your cupcakes dry. Another mistake is opening the oven door too soon. This can cause your cupcakes to sink. Wait until they are almost done baking before checking. These cupcakes shine with a cup of hot chai tea. You can also pair them with a scoop of vanilla ice cream. For a fun twist, try adding a drizzle of caramel sauce on top. If you want to make them festive, serve them on a pretty platter with autumn leaves. For the full recipe, click here. {{image_2}} You can make these cupcakes dairy-free by using plant-based butter and cream cheese. Coconut cream is a good base for frosting. For gluten-free cupcakes, swap all-purpose flour with a gluten-free blend. Make sure your baking powder is gluten-free. This way, everyone can enjoy the delicious taste. If you want to switch up the frosting, try a maple frosting. Mix maple syrup with butter and powdered sugar for a sweet twist. You can also use whipped coconut cream for a light and airy texture. It adds a nice touch and keeps it dairy-free. Want to change the flavor? Add chocolate chips for a sweet burst. You can also use sweet potato instead of pumpkin for a different taste. For a spicy kick, add more chai spice or even a dash of cayenne. These small changes can create a whole new cupcake experience. For the full recipe, refer to the earlier section. To keep your Vanilla Chai Pumpkin Latte Cupcakes fresh, store them in an airtight container. This method keeps moisture in and prevents them from drying out. Place a piece of parchment paper between layers if stacking. Avoid direct sunlight to maintain their taste and texture. When stored properly, these cupcakes last about 3 to 5 days at room temperature. If you want to keep them longer, consider freezing. Just remember, they taste best when fresh! To freeze your cupcakes, first let them cool completely. Then, wrap each cupcake in plastic wrap. After that, place them in a freezer-safe bag or container. They can last up to 3 months in the freezer. Thaw them overnight in the fridge when you’re ready to enjoy! For the best taste, frost them after thawing. Check the [Full Recipe] for more tips on making these delicious treats. Vanilla chai pumpkin latte cupcakes are a fun twist on classic cupcakes. They blend pumpkin flavor with the warm spices of chai tea. You get a moist cupcake topped with creamy frosting. These treats are perfect for fall or any time you crave something sweet and cozy. Yes, you can make these cupcakes in advance. Bake them a day or two before your event. Just store them in an airtight container at room temperature. Frost them right before serving for the best taste and texture. To check if your cupcakes are ready, use a toothpick. Insert it into the center of a cupcake. If it comes out clean or with a few crumbs, they are done. If you see wet batter, bake them for a few more minutes. If you don’t have chai spice mix, you can make your own. Mix equal parts cinnamon, ginger, cardamom, and cloves. You can also add a pinch of black pepper for extra warmth. This will give you a similar flavor profile to enhance your cupcakes. These Vanilla Chai Pumpkin Latte Cupcakes combine warm spices and rich pumpkin flavor. You’ve learned how to bake them from scratch, create creamy frosting, and store them well. I shared tips to avoid baking mishaps and ideas for fun variations. Remember, experimenting can lead to great discoveries. With these cupcakes, enjoy the cozy vibes they bring. You can take this recipe and make it your own. Happy baking!

Get ready to indulge in a cozy treat with my Delicious Vanilla Chai Pumpkin Latte Cupcakes! These moist cupcakes blend the rich flavors of chai, pumpkin, and creamy frosting for …

Read more

Categories Desserts

Cinnamon Sugar Pumpkin Donut Holes Simple Delight

August 6, 2025 by Chef Jamie
To make the best cinnamon sugar pumpkin donut holes, you need a few key ingredients. They will create a moist and flavorful treat that everyone will love. Here’s what you’ll need: - 1 cup all-purpose flour - 1/2 teaspoon baking powder - 1/2 teaspoon baking soda - 1/2 teaspoon ground cinnamon - 1/4 teaspoon ground nutmeg - 1/4 teaspoon salt - 1/2 cup pumpkin puree - 1/4 cup granulated sugar - 1/4 cup brown sugar, packed - 1/4 cup buttermilk (or milk + 1/4 teaspoon vinegar) - 1 large egg - 2 tablespoons melted butter - 1/2 cup granulated sugar (for coating) - 2 teaspoons ground cinnamon (for coating) Each ingredient plays a special role in the donut holes. The flour gives the structure, while the baking powder and baking soda help them rise. The spices add warmth and flavor, making each bite cozy and delightful. Pumpkin puree keeps the donut holes moist. Sweeteners like granulated and brown sugar bring out a rich sweetness. Buttermilk adds a nice tang, and the egg binds everything together. Finally, the coating of cinnamon sugar gives a delicious finish that makes these treats irresistible. For the full recipe, check out the detailed steps to create these sweet delights. 1. Preheat your oven to 350°F (175°C) and prepare your baking pan. Use a mini muffin tin or a donut hole pan. Lightly grease it to stop the donut holes from sticking. 2. In a medium bowl, mix together the dry ingredients. This includes 1 cup of all-purpose flour, 1/2 teaspoon of baking powder, 1/2 teaspoon of baking soda, 1/2 teaspoon of ground cinnamon, 1/4 teaspoon of ground nutmeg, and 1/4 teaspoon of salt. Set the bowl aside for later. 3. In another bowl, combine the wet ingredients. Whisk together 1/2 cup of pumpkin puree, 1/4 cup of granulated sugar, 1/4 cup of packed brown sugar, 1/4 cup of buttermilk, 1 large egg, and 2 tablespoons of melted butter until smooth. 4. Gradually add the dry mixture to the wet mixture. Stir gently until just combined. It's okay if there are a few lumps; avoid overmixing. 5. Use a spoon or small cookie scoop to fill each muffin cavity about 2/3 full with batter. This helps them rise properly while baking. 6. Bake in the preheated oven for 12-15 minutes. Check for doneness by inserting a toothpick. It should come out clean. 1. While the donut holes bake, prepare the cinnamon sugar mixture. In a bowl, mix 1/2 cup of granulated sugar with 2 teaspoons of ground cinnamon. 2. Once baked, let the donut holes cool in the pan for about 5 minutes. Then, remove them carefully. 3. Roll the warm donut holes in the cinnamon sugar mixture. Coat them evenly until they are fully covered. 4. Set the coated donut holes on a wire rack to cool completely. Enjoy these Cinnamon Sugar Pumpkin Donut Holes as a sweet treat! For the full recipe, check out the details above. - How to prevent overmixing: Mix the wet and dry ingredients until just combined. A few lumps are okay. This keeps your donut holes soft and fluffy. If you mix too much, they can become tough. - Perfect baking time and toothpick test: Bake for 12-15 minutes. Use a toothpick to check if they are done. Insert it into the center. If it comes out clean, they're ready. If not, give them a few more minutes. - Ensuring even baking: Make sure to fill each cavity of the pan equally. This helps all the donut holes bake at the same time. Rotate the pan halfway through baking for even heat. - Serving suggestions: Serve the donut holes in a decorative bowl. You can also stack them on a platter for a fun look. Pair them with coffee or tea to enhance the experience. - Decorative options for serving platter: Dust the top with extra cinnamon sugar before serving. You can add some fall leaves or small pumpkins around the platter for a festive touch. This makes your dessert stand out and look appealing. For the full recipe, check out the details and enjoy making these treats! {{image_2}} You can easily change the taste of your cinnamon sugar pumpkin donut holes. Adding chocolate chips gives a sweet surprise in each bite. Try mixing in nuts for a satisfying crunch. Walnuts or pecans work well. If you want a spicy kick, switch out the cinnamon for allspice or ginger. Each spice brings its own warmth. You can even blend spices for a unique flavor profile. If you need gluten-free options, use a gluten-free flour blend. Just make sure it has a good binding agent. For dairy-free substitutions, try almond milk or oat milk instead of buttermilk. You can also swap the melted butter with coconut oil or dairy-free margarine. These simple swaps make the recipe fit for everyone. For the full recipe, check out the details above. Store your cinnamon sugar pumpkin donut holes at room temperature for the best taste. Use a container with a tight lid. If you live in a humid place, you might want to refrigerate them. Just make sure to wrap them well. Use plastic wrap or place them in an airtight bag. This helps keep them soft and fresh. These donut holes are best eaten within three days. After that, they may lose their soft texture. If you keep them in the fridge, they can last up to a week. Look for signs of spoilage, like a dry texture or off smell. If they look hard or have mold, it’s time to toss them. Enjoy these treats while they're fresh for the best flavor! Can I use fresh pumpkin instead of puree? Yes, you can use fresh pumpkin. First, cook the pumpkin until soft. Then, mash it until smooth. Make sure to drain any excess water. This will help your donut holes stay fluffy. Can I freeze cinnamon sugar pumpkin donut holes? Absolutely! Let them cool completely first. Place them in an airtight container or a freezer bag. They can last up to three months in the freezer. Just thaw and reheat when you're ready to enjoy them. How do I make the donut holes more flavorful? To boost flavor, add a pinch of ground ginger or cloves. You can also mix in chocolate chips or chopped nuts. Experimenting with different spices can create unique flavors you’ll love. What can I serve with donut holes? These donut holes are great with coffee or tea. You can also serve them with whipped cream or a sweet dip. Fruits like apples or berries make a nice side. Can I bake these in a regular muffin tin? You can, but keep in mind the size will change. Baking them in a regular muffin tin will make bigger muffins. Adjust the baking time to about 18-20 minutes for larger sizes. Enjoy the fun variations! For the full recipe, check out the detailed steps to make these delicious treats. In this blog post, we explored how to make cinnamon sugar pumpkin donut holes. We discussed ingredients, step-by-step instructions, and helpful baking tips. I shared ideas for flavor tweaks and storing your treats. Remember, baking is fun and creative. Feel free to experiment with flavors and toppings. Enjoy your yummy donut holes with family and friends.

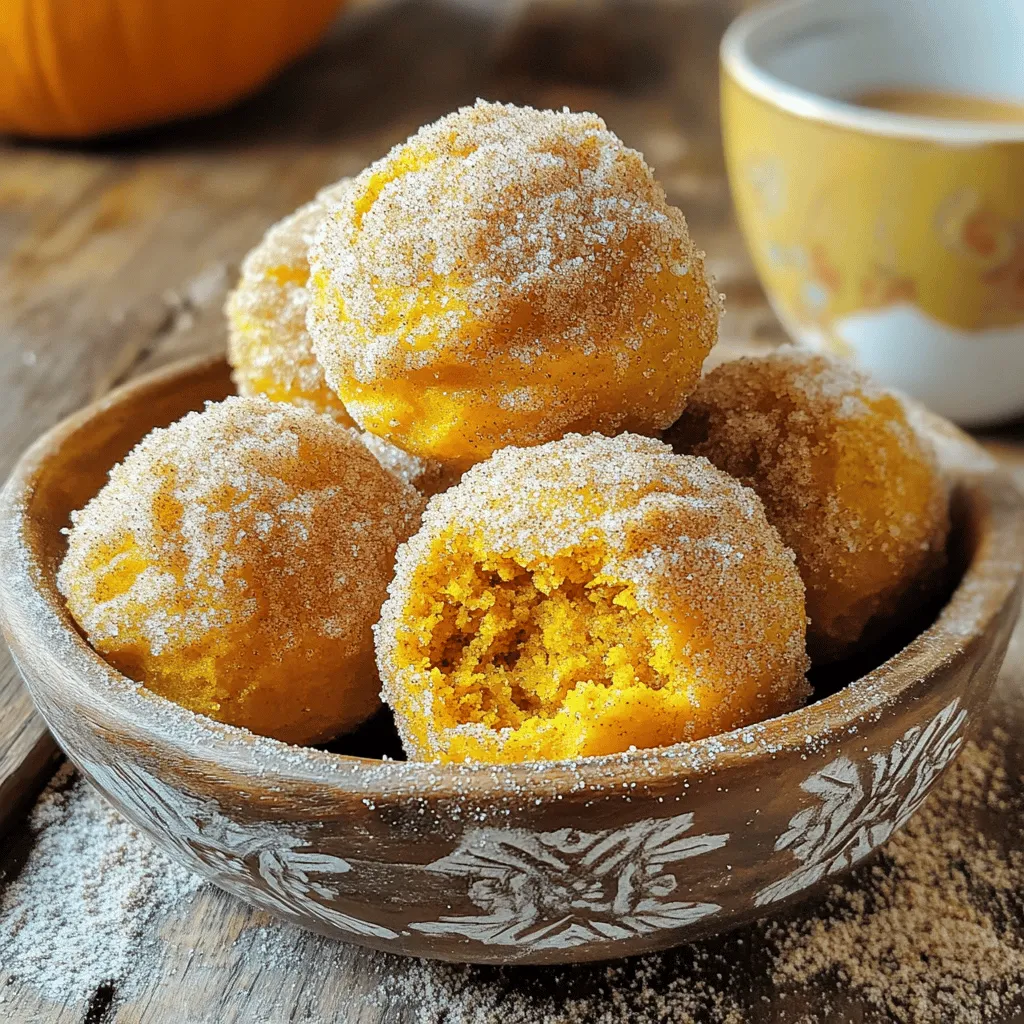
Fall’s favorite treat just got easier! These Cinnamon Sugar Pumpkin Donut Holes are the perfect blend of sweet and spice. You’ll love how simple they are to whip up, making …

Read more

Categories Desserts
Older posts
Newer posts
← Previous Page1 … Page55 Page56 Page57 … Page134 Next →

TOSSED RECIPES

Simple meals, bold taste. Quick recipes made for real life — always fresh, always delicious. 🌿🍴

PAGES

Home About Contact Privacy Policy Terms & Conditions Cookie Policy GDPR Policy Copyright Policy Disclaimer

CATEGORIES

Appetizers Desserts Salads Breakfast Dinner

Contact

  • Pinterest
  • Mail
Copyright © 2026 Tossed Recipes. All rights reserved.