Skip to content
Tossed Recipes
  • Home
  • Appetizers
  • Desserts
  • Salads
  • Breakfast
  • Dinner
  • Privacy Policy
  • Contact
  • About

Chef Jamie

Meal Prep Chicken Sweet Potato Bowls Easy Recipe

January 5, 2026August 5, 2025 by Chef Jamie
To make these chicken sweet potato bowls, gather these main ingredients: - 2 large sweet potatoes, diced - 1 lb (450g) boneless, skinless chicken breasts - 1 red bell pepper, chopped - 1 cup broccoli florets - 1 can (15 oz) black beans, rinsed and drained These ingredients form the base of your meal prep bowls. The sweet potatoes give a sweet flavor, while the chicken adds protein. The veggies bring color and crunch. Next, we need to add flavor. Use these seasonings for the best taste: - 2 tablespoons olive oil - 1 teaspoon garlic powder - 1 teaspoon paprika - 1 teaspoon cumin - Salt and pepper to taste These seasonings make the dish pop. Olive oil helps with cooking and adds richness. Garlic powder and paprika give depth, while cumin adds warmth. Adjust salt and pepper to your liking. For a fresh finish, consider these optional garnishes: - Fresh cilantro - Lime wedges Cilantro adds a nice herbal note. Lime wedges give a zesty kick. These extras make each bite more exciting. You can skip them, but they enhance the dish beautifully. {{ingredient_image_1}} First, I preheat my oven to 425°F (220°C). This step is key for crispy sweet potatoes. Next, I take 2 large sweet potatoes and dice them into small pieces. In a big bowl, I toss the sweet potatoes with 1 tablespoon of olive oil. I add salt, pepper, garlic powder, and paprika for flavor. Then, I spread the sweet potatoes out on one side of a baking sheet. This helps them cook evenly. While the sweet potatoes roast, I prepare the chicken. I use 1 pound of boneless, skinless chicken breasts. I season them with salt, pepper, and cumin. In a large skillet, I heat the remaining tablespoon of olive oil over medium-high heat. I sear the chicken for about 5-7 minutes on each side. I wait until the chicken is fully cooked and golden brown. Once done, I remove it from the heat and let it rest before slicing. With the chicken cooking, I focus on the veggies. I chop 1 red bell pepper and grab 1 cup of broccoli florets. When the sweet potatoes are halfway done, I add the bell pepper and broccoli to the other side of the baking sheet. I roast everything for an additional 15-20 minutes. I stir the veggies halfway through to ensure they cook well. When they are tender and slightly caramelized, they are ready to join the meal prep! Meal prepping is simple and fun. Start by picking a day to prep. Sunday works well for many. Gather all your ingredients first. This saves time and makes cooking easy. Chop your sweet potatoes and veggies ahead of time. Store them in sealed bags. Cook in batches to speed up the process. Use clear containers to see your meals easily. This helps you grab and go during busy days. To cook chicken breasts just right, start by using good quality meat. Pat the chicken dry before seasoning. This helps it sear better. Use a hot skillet with olive oil. Sear each side for about 5-7 minutes. The chicken should be golden brown and firm. Use a meat thermometer to check for doneness. Chicken should reach 165°F (74°C). Let the chicken rest for a few minutes before slicing. This keeps it juicy. Store your Chicken Sweet Potato Bowls in airtight containers. Keep them in the fridge for up to four days. For longer storage, freeze the bowls. They last for about three months. When reheating, add a splash of water to keep things moist. Heat in the microwave for 1-2 minutes. Stir halfway through to warm evenly. Enjoy your easy, tasty meals throughout the week! Pro Tips Use a Meat Thermometer: Ensure your chicken is cooked perfectly by using a meat thermometer. The internal temperature should reach 165°F (74°C) for safe consumption. Customize Your Veggies: Feel free to swap out the vegetables based on your preference or what's in season. Zucchini, asparagus, or kale are great alternatives! Batch Cooking: Double the recipe for meal prep and enjoy throughout the week. These bowls store well in the fridge for up to 5 days. Spice It Up: If you like heat, add some chili powder or cayenne pepper to the chicken seasoning for an extra kick! {{image_2}} If you want a veggie option, swap the chicken for chickpeas or tofu. Both add protein and taste great. Use the same seasonings for flavor. You can roast the chickpeas for a crunchy bite. For tofu, press it first to remove water. Then, marinate it in the olive oil and spices before cooking. This gives you a tasty, filling meal. Feel free to mix up the seasonings. Try adding curry powder or Italian herbs for a new twist. You can also use lemon zest instead of lime for a fresh taste. If you like heat, add cayenne pepper or chili powder. These changes keep the meal exciting and fun every time you make it. Toppings can really change your bowl. Add sliced avocado for creaminess. You can sprinkle feta cheese for a salty kick. Other great options are corn, salsa, or hot sauce. Fresh greens like spinach or arugula can also add color and crunch. Feel free to get creative and make it your own! When you store your meal prep chicken sweet potato bowls, use the right containers. I suggest airtight glass or BPA-free plastic containers. These keep food fresh and make reheating easy. Choose containers that are the right size for your portions. This way, you avoid waste and save space in your fridge. These bowls can last in the fridge for about four days. Be sure to cool them down before sealing them. Keeping them in an airtight container will help maintain flavor and texture. For best taste, eat them within that time frame. You can freeze chicken sweet potato bowls for longer storage. They can last up to three months in the freezer. To freeze, let them cool first, then place them in freezer-safe containers. Label each container with the date. When you're ready to eat, thaw in the fridge overnight. Reheat them in the microwave or oven. If you refrigerate them, use them within four days for the best taste. Yes, you can use other vegetables. Try carrots, zucchini, or asparagus. Just cut them into similar sizes. This way, they cook evenly. Roasting adds great flavor to many veggies. Mix and match to find your favorite combo. To lower calories, reduce the olive oil. Use only one tablespoon instead of two. You can also skip the black beans for fewer carbs. Adding more veggies increases volume without many calories. Choose low-calorie options like spinach or mushrooms for more bulk. Yes, it is safe to meal prep chicken and sweet potatoes. Cook them fully before storing. Keep them in airtight containers. Store in the fridge for up to four days. Reheat well before eating to ensure food safety. Enjoy your meals without worry! You learned how to make Chicken Sweet Potato Bowls, from ingredients to storage tips. I shared cooking steps and meal prep secrets to make it easy. Remember, you can swap veggies or try different spices for fun twists. Meal prepping helps you enjoy healthy meals all week. Whether you freeze or refrigerate, these bowls stay tasty. Enjoy making this dish and feel free to explore new flavors! Your cooking will get better with practice.

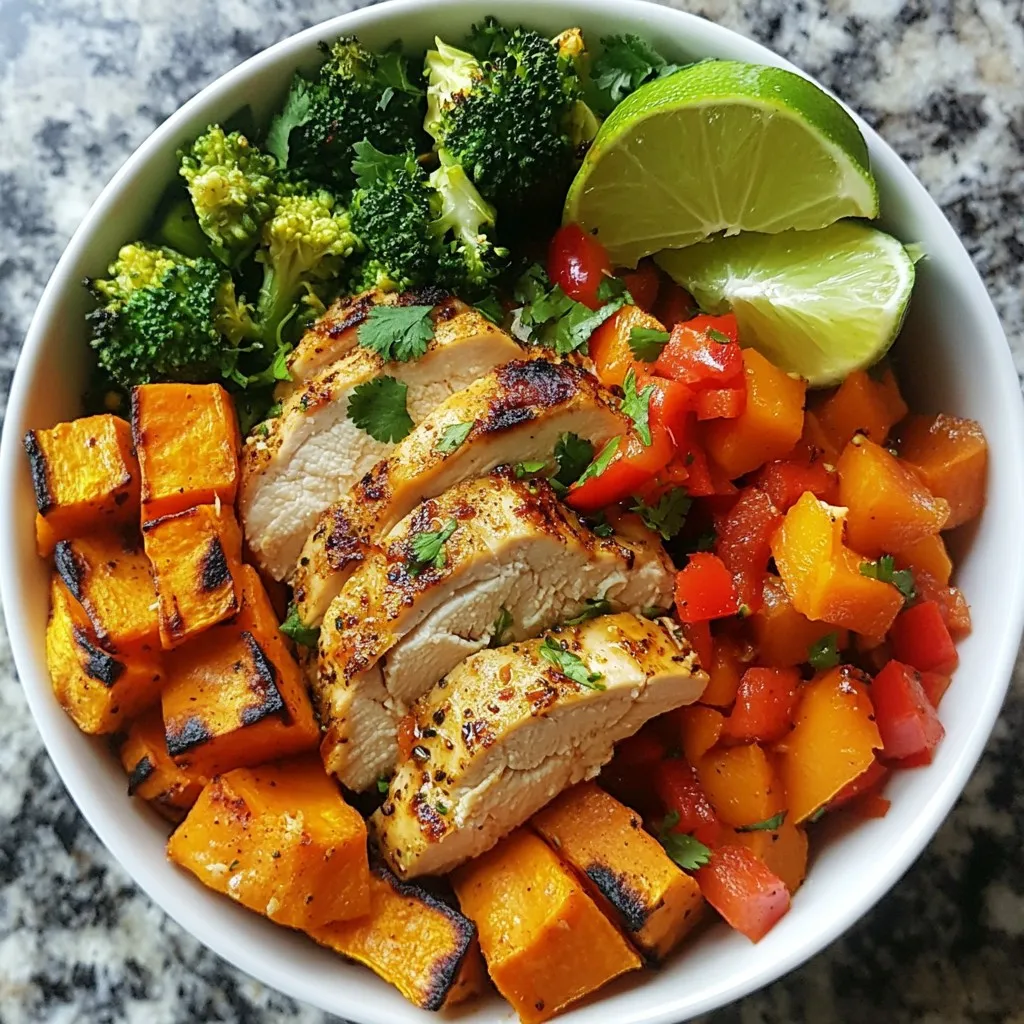
Are you ready to simplify your weeknight dinners? Meal Prep Chicken Sweet Potato Bowls are delicious and easy to make. This recipe is perfect for busy folks like you who …

Read more

Categories Dinner

Easy Huckleberry Muffin Recipe Quick and Tasty Treat

August 4, 2025 by Chef Jamie
- Fresh or Frozen Huckleberries - All-Purpose Flour - Granulated Sugar - Baking Powder - Baking Soda - Salt - Large Egg - Milk - Vegetable Oil - Vanilla Extract - Lemon Zest Huckleberries are the star of this muffin recipe. You can use fresh huckleberries if you can find them. If not, frozen huckleberries work great too. Just remember to thaw them first. All-purpose flour gives the muffins their nice texture. Use gluten-free flour if needed. It’s easy to find and works well in this recipe. Granulated sugar adds sweetness. You could swap it for coconut sugar for a different flavor. Baking powder and baking soda help the muffins rise. Both are important for fluffy muffins. Salt balances the sweetness and enhances all the flavors. The large egg binds the mixture and adds moisture. If you want to make this recipe vegan, use a flax egg. To make a flax egg, mix 1 tablespoon of flaxseed meal with 2.5 tablespoons of water. Let it sit for a few minutes to thicken. Milk keeps the batter smooth. You can use almond milk or oat milk if you prefer dairy-free options. Vegetable oil keeps the muffins moist. You can use melted coconut oil or applesauce as a substitute. Vanilla extract adds a warm flavor. Lemon zest brightens the muffins and adds a fresh touch. You can skip it, but I recommend trying it! - Alternatives for Huckleberries: You can use blueberries, raspberries, or blackberries if huckleberries are hard to find. - Gluten-Free Flour Options: Use a gluten-free all-purpose blend for a similar texture. - Dairy-Free Milk Choices: Almond milk, coconut milk, or soy milk work as good substitutes for regular milk. For the full recipe, check out the section on baking instructions! - Preheat the Oven Start by preheating your oven to 375°F (190°C). This helps your muffins bake evenly. - Mix Dry Ingredients In a large bowl, whisk together these dry ingredients: - 1 ½ cups all-purpose flour - ½ cup granulated sugar - 2 teaspoons baking powder - ½ teaspoon baking soda - ½ teaspoon salt Make sure they are well mixed. - Combine Wet Ingredients In another bowl, beat 1 large egg. Then, add: - ½ cup milk - ⅓ cup vegetable oil - 1 teaspoon vanilla extract - Zest of 1 lemon Mix until everything is smooth. - Combine Dry and Wet Ingredients Pour the wet mix into the dry mix. Stir gently until just combined. A few lumps are okay. - Folding in Huckleberries Now, fold in 1 cup of huckleberries. Gently mix to spread them evenly in the batter. - Scooping into Muffin Tin Use a scoop to fill the prepared muffin tin. Fill each cup about ¾ full for the best rise. - Baking Temperature Place your muffin tin in the preheated oven. Bake for 18-20 minutes. - Testing for Doneness To check if they're done, insert a toothpick into the center of a muffin. If it comes out clean, they are ready. - Cooling Instructions Let the muffins cool in the pan for 5 minutes. Then, move them to a wire rack to cool completely. For the full recipe, refer back to the beginning. Happy baking! Avoiding Overmixing Mixing too much can ruin your muffins. It makes them tough and chewy. When you combine wet and dry ingredients, stir just until they come together. A few lumps are okay. This keeps your muffins light and fluffy. Achieving the Right Texture The best huckleberry muffins have a soft and moist inside. Use fresh huckleberries for a burst of flavor. If you have frozen berries, thaw and drain them first. This helps keep the batter from getting too wet. Enhancing Flavor with Additional Spices You can boost the flavor of your muffins with spices. A pinch of cinnamon or nutmeg adds warmth. For a fresh twist, try a bit of cardamom. Just remember, a little goes a long way. Pairing with Spreads These muffins taste great warm or cold. Serve them with butter, honey, or cream cheese. You can also try them with fruit preserves for a sweet touch. Breakfast Ideas Huckleberry muffins make a perfect breakfast. Pair them with yogurt or fresh fruit for a balanced meal. They are also great for brunch with friends. Storing and Freezing Muffins To keep muffins fresh, store them in an airtight container. They last up to three days at room temperature. For longer storage, freeze them. Wrap each muffin in plastic wrap and place them in a freezer bag. To enjoy, just thaw at room temperature or warm them in the oven. For the full recipe, check out Huckleberry Heaven Muffins. {{image_2}} Adding Nuts or Chocolate Chips You can make these muffins even better. Add chopped nuts like walnuts or pecans. They add a nice crunch. You can also mix in chocolate chips for a sweet twist. They pair well with huckleberries! Lemon Blueberry Muffins If you want a change, try lemon blueberry muffins. Just swap huckleberries for blueberries. Add a bit more lemon zest for a bright flavor. This twist is refreshing and perfect for summer. Vegan Huckleberry Muffins To make vegan huckleberry muffins, replace the egg with a flax egg. Mix 1 tablespoon of flaxseed meal with 2.5 tablespoons of water. Let it sit for a few minutes to thicken. Use plant-based milk instead of regular milk for a tasty vegan treat. Spring and Summer Additions In spring and summer, you can add fresh herbs. Try mixing in chopped mint or basil. These herbs give a fresh, vibrant taste. They also add an exciting twist to each bite. Using Different Berries Feel free to switch up the berries. You can use blueberries, raspberries, or strawberries. Each berry brings its own flavor. This lets you enjoy new tastes throughout the year. - Room Temperature Tips Store your muffins in an airtight container. This keeps them fresh and soft. Place them on the counter. They stay good for up to three days. - Refrigerating for Freshness If you want to keep them longer, put them in the fridge. This helps them last up to a week. Just remember to wrap them well to prevent drying out. - Best Practices for Freezing For longer storage, freeze your muffins. First, let them cool completely. Then, wrap each muffin in plastic wrap. Place them in a freezer bag. They can last up to three months. - Thawing and Reheating Tips To enjoy frozen muffins, just take one out. Let it thaw on the counter. If you want a warm muffin, pop it in the microwave for about 15 seconds. This brings back that fresh-baked taste. Try this storage method to keep your huckleberry muffins tasty! For the full recipe, check out the details above. Can I Use Frozen Huckleberries? Yes, you can use frozen huckleberries. Just thaw them first. Drain any extra juice. This keeps your muffins from getting too wet. Fresh or frozen huckleberries both work well in this recipe. What Can I Substitute for Eggs? If you need an egg substitute, try using applesauce. Use ¼ cup of unsweetened applesauce per egg. You can also use a flax egg. Mix 1 tablespoon of ground flaxseed with 2.5 tablespoons of water. Let it sit for a few minutes until it thickens. How Long Do Muffins Last? Muffins can last for about 3 to 4 days at room temperature. Store them in an airtight container. They also freeze well. Wrap them tightly in plastic wrap and place them in a freezer bag. They can last up to 3 months in the freezer. My Muffins Are Dense; What Did I Do Wrong? Dense muffins often happen from overmixing the batter. Mix just until the dry and wet ingredients combine. Another reason could be using too much flour. Make sure you measure it correctly. Spoon it into the measuring cup and level it off. Why Are My Muffins Sticking to the Liners? If your muffins stick, you may not have greased the liners. Try lightly greasing the liners before filling them. Also, make sure they cool for about five minutes before removing them from the tin. How Do I Know When Muffins Are Done Baking? To check if your muffins are done, insert a toothpick into the center. If it comes out clean or with a few crumbs, they are ready. The tops should be golden brown, and they should spring back when lightly pressed. Making huckleberry muffins is simple and fun. We covered the key ingredients, like huckleberries, flour, and egg, along with some handy substitutions. I shared step-by-step baking instructions and tips to perfect your muffins. In the end, creativity is key. Experiment with flavors and adjust as you like. Whether you enjoy them fresh or frozen, these muffins bring joy. Enjoy your baking journey!

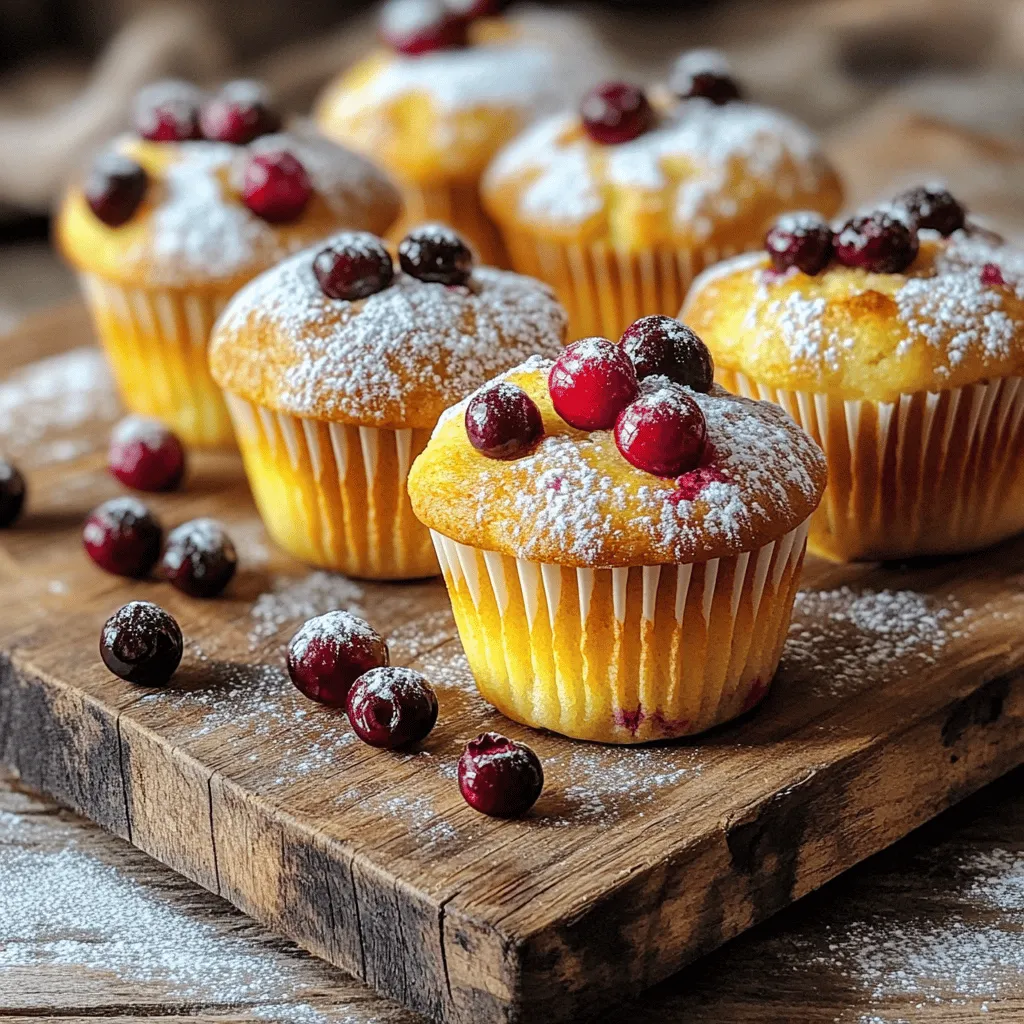
Looking for a quick and tasty treat? This Easy Huckleberry Muffin Recipe is just for you! With fresh or frozen huckleberries, you can whip up soft, delicious muffins that everyone …

Read more

Categories Desserts

Creamy Cookie Butter Iced Chai Tea Latte Delight

August 4, 2025 by Chef Jamie
To make the Creamy Cookie Butter Iced Chai Tea Latte, you need these required ingredients: - 2 cups brewed chai tea, cooled - 1/4 cup cookie butter - 1 cup milk (dairy or non-dairy) - 1 tablespoon honey or maple syrup (adjust to taste) - 1/2 teaspoon vanilla extract - Ice cubes - Whipped cream (optional) - Pinch of ground cinnamon for garnish These ingredients create a rich and creamy drink that tastes like dessert. Each one plays a key role in building flavor and texture. For customization, consider these optional ingredients: - Different sweeteners like agave syrup or stevia - Non-dairy creamers for a creamier texture - Extra spices like nutmeg or cardamom for added warmth Feel free to mix and match to find your perfect combination. You can find the full recipe in the article for detailed steps. To start, pick a good chai tea. Look for blends with strong spices. You want rich flavors to shine through. I love using loose tea for its bold taste. If you prefer ease, tea bags work well too. For brewing, use about two teaspoons of loose tea or one tea bag per cup of water. Boil the water, then steep for five to seven minutes. After brewing, let the tea cool completely before blending. Next, gather all your ingredients. Start with the cooled chai tea in your blender. Then add the cookie butter, milk, honey or maple syrup, and vanilla extract. It's best to add the cookie butter first. This helps it blend smoothly. Blend everything until it is creamy and smooth. If you want it sweeter, taste it and add more honey or syrup. The goal is to have a rich blend that feels indulgent. For serving, use tall glasses. They show off the layers and look great. Fill each glass with ice cubes before pouring in the blend. Leave some space at the top if you want whipped cream. Top with whipped cream for a treat. A sprinkle of ground cinnamon adds a nice touch. This makes your drink look fancy and inviting. Enjoy your Creamy Cookie Butter Iced Chai Tea Latte right away! You can easily change the milk in your creamy cookie butter iced chai tea latte. Use dairy milk like whole or almond milk. If you prefer non-dairy options, try oat milk or soy milk. Each choice adds a unique flavor. Adjusting sweetness is also key. I like to start with one tablespoon of honey or maple syrup. After blending, taste it. If it needs more sweetness, just add a bit more. You can always add, but you can’t take away! Cooling the chai tea is very important. If you pour hot tea over ice, it will melt fast and water down your drink. Let your chai cool to room temperature before blending. When blending, watch out for common mistakes. Always add the liquids first, then the solids. This helps everything mix well. If you blend too long, the tea can get too frothy. Keep it smooth and creamy for the best results. {{image_2}} You can make your Creamy Cookie Butter Iced Chai Tea Latte even better by adding spices. Try cardamom or nutmeg for a unique twist. Both spices bring warmth and depth to your drink. Just a pinch goes a long way! You can also experiment with flavored milks. Almond milk adds a nutty taste, while oat milk brings a creamy feel. Each choice changes the flavor profile. Don’t be afraid to mix things up! When the holidays come around, you can create fun, festive versions. For example, add pumpkin spice for an autumn vibe. Just mix a teaspoon of pumpkin spice into your drink. It will warm your heart and bring joy to your taste buds. Another option is peppermint. Simply add a splash of peppermint extract to your latte. This will give it a refreshing, wintery flavor. You can even top it with crushed candy canes for a sweet crunch. Enjoy the magic of the season in every sip! To keep your creamy cookie butter iced chai tea latte fresh, store it in the fridge. Use an airtight container to prevent it from absorbing other flavors. It’s best to consume it within three days for the best taste. The iced chai may separate over time, so shake it well before pouring. If you prefer your chai warm, you can reheat it. Pour the chilled latte into a saucepan. Warm it over low heat, stirring gently. Avoid boiling, as it can change the flavor. If you want to enjoy it cold, just add more ice and stir. Enjoy it however you like! Yes, you can use store-bought chai tea for this drink. It saves time and effort. Many brands provide tasty options. However, homemade chai lets you control flavors. You can adjust spices and sweetness better. If you prefer convenience, grab a box of your favorite chai tea bags. Just brew and let it cool. This recipe can easily fit vegan diets. Use non-dairy milk like almond or oat milk. For sweetening, swap honey with maple syrup or agave. Cookie butter may contain dairy; check labels to ensure it's vegan. Many brands offer vegan cookie butter. This way, you can enjoy the creamy treat without worry. This recipe makes two servings. Each serving is perfect for sharing or enjoying alone. If you want more, simply double the ingredients. You'll still have that creamy, cookie butter delight in each sip. Just follow the Full Recipe for all the details. You’ve learned how to create a Creamy Cookie Butter Iced Chai Tea Latte. We covered key ingredients, brewing methods, and smart blending tips. I shared ideas to customize your drink and make it unique. Remember, experimenting with flavors can really enhance your drink. Store any leftovers properly for later enjoyment. Enjoy your delicious latte creation. It’s time to sip and relax!

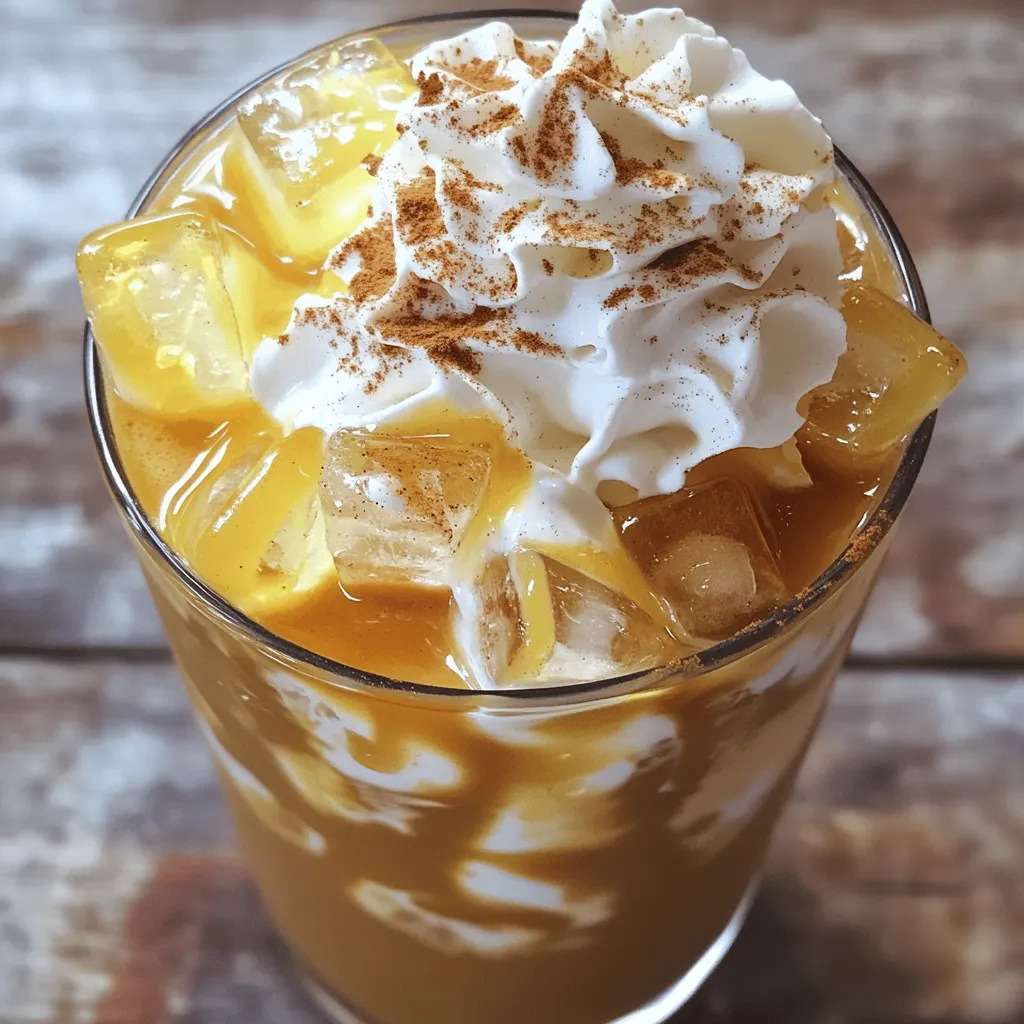
Are you ready to treat yourself? Today, I’m excited to share my beloved Creamy Cookie Butter Iced Chai Tea Latte recipe. This drink combines rich chai flavors with a sweet …

Read more

Categories Breakfast

Pumpkin Delight Dessert Irresistible Sweet Treat

August 4, 2025 by Chef Jamie
To make your Pumpkin Delight Dessert, you will need the following ingredients: - 1 cup pumpkin puree - 1 cup heavy cream - 1/2 cup powdered sugar - 1 teaspoon vanilla extract - 1 teaspoon ground cinnamon - 1/2 teaspoon ground nutmeg - 1/4 teaspoon ground ginger - 1 cup crushed gingersnap cookies - 1/2 cup chopped pecans (optional) - Fresh mint leaves for garnish Choosing the right ingredients can make your dessert shine. Look for fresh pumpkin puree. Canned pumpkin works well, too. Check for heavy cream that is rich and thick. Fresh spices add more flavor than old ones. Use high-quality gingersnap cookies for a tasty crunch. If you add pecans, choose ones that are fresh and not stale. Fresh mint leaves will give a nice touch. You can change this dessert to suit your taste. Try adding chocolate chips for a sweet twist. Use graham cracker crumbs instead of gingersnap cookies. You can even add whipped cream on top for extra creaminess. If you like, drizzle caramel sauce for a rich flavor. Each of these options makes the dessert unique and fun. For the full recipe, check out the details provided above. Start by gathering your ingredients. You will need pumpkin puree, heavy cream, powdered sugar, vanilla extract, and spices. In a large bowl, add 1 cup of pumpkin puree. Next, pour in 1 cup of heavy cream and 1/2 cup of powdered sugar. Whisk them together until the mix is smooth. Then, stir in 1 teaspoon of vanilla extract, 1 teaspoon of ground cinnamon, 1/2 teaspoon of ground nutmeg, and 1/4 teaspoon of ground ginger. Make sure everything blends well. This pumpkin mixture should be rich and creamy. Now, it’s time to layer your dessert. Take a separate bowl and mix 1 cup of crushed gingersnap cookies with 1/2 cup of chopped pecans if you choose to use them. Save a few tablespoons of this mixture for later. Grab your serving glasses or bowls. Start with a layer of the pumpkin mixture at the bottom. Follow this with a layer of the gingersnap cookie mix. Repeat these layers until the glasses are full. Make sure to end with the pumpkin mixture on top for a beautiful finish. Once you finish layering, place the glasses in the refrigerator. Chill your dessert for at least 2 hours. This helps the flavors blend and the texture set nicely. Before serving, sprinkle the reserved gingersnap cookies and pecans on top. Add some fresh mint leaves for a lovely garnish. This step makes the dessert look extra special. Enjoy your Pumpkin Delight Dessert and savor every bite! For the full recipe, check the section above. To get the best texture in your Pumpkin Delight Dessert, focus on mixing. Use a large bowl. Combine your pumpkin puree, heavy cream, and powdered sugar well. Whisk until smooth. This step is key for a creamy base. Make sure there are no lumps. When adding spices, blend them in fully. This gives a nice, even flavor. One mistake is not chilling the dessert long enough. You need to chill it for at least 2 hours. This sets the layers and melds the flavors. Another mistake is using too much sugar. Stick to the 1/2 cup of powdered sugar. Too much sweetness can overpower the pumpkin. Lastly, don’t skip the garnish. It adds flair and flavor. For a beautiful presentation, use clear glasses. This lets the colorful layers shine. Start with a pumpkin layer, then add the cookie mix. Repeat until filled, finishing with pumpkin on top. Sprinkle the reserved gingersnap cookies and pecans on each. Add fresh mint leaves for color. This makes your dessert pop and look fancy. For the complete recipe, check the Full Recipe section. {{image_2}} If you have dietary needs, you can still enjoy this treat. For a dairy-free version, swap the heavy cream with coconut cream. It gives a lovely flavor and creamy texture. Use maple syrup instead of powdered sugar for a natural sweetener. This choice works well for those on a vegan diet. You can also use gluten-free gingersnap cookies, so everyone can indulge without worry. Want to mix it up? Add a layer of chocolate pudding between the pumpkin layers. It adds a rich taste that pairs well with pumpkin. You could also sprinkle some cocoa powder on top for a chocolatey twist. If you enjoy spices, try adding cardamom or allspice with the pumpkin mixture. It gives a new depth to the flavor. Gingersnap cookies are great, but you can experiment with other types as well. Try using crushed graham crackers for a sweeter base. Oreos can add a fun chocolate flavor too. For a nutty taste, consider using crushed pecan cookies. Each choice gives the dessert a unique spin. You can even mix different cookie types for a fun layered effect. To see the full recipe, check out the details above and get started on your own Pumpkin Delight Dessert! To keep Pumpkin Delight Dessert fresh, cover it tightly with plastic wrap. You can also use an airtight container. This helps keep moisture in and air out. Store it in the fridge for best results. Avoid placing it near items with strong scents, as pumpkin can absorb flavors. When stored correctly, this dessert lasts about 3 to 5 days in the fridge. After that, it may lose its texture and flavor. Always check for any signs of spoilage, like off-smells or changes in texture. You can freeze Pumpkin Delight Dessert, but it's best to do so before adding the gingersnap topping. Freeze the dessert in an airtight container. It will keep well for about 1 to 2 months. When ready to enjoy, thaw it overnight in the fridge. Once thawed, add your gingersnap cookies and nuts just before serving for the best crunch! Pumpkin Delight Dessert is a layered treat made with pumpkin puree and cream. It has a creamy texture and a warm spice flavor. You mix pumpkin with heavy cream, sugar, and spices like cinnamon and nutmeg. Then, layer it with crushed gingersnap cookies. This dessert is light, sweet, and perfect for fall. It brings the taste of pumpkin pie into a new form. Yes, you can make this dessert ahead of time. In fact, it tastes better when chilled for a few hours. Prepare it the day before and let it sit in the fridge. This allows the flavors to mix well. Just remember to keep it covered so it stays fresh and tasty. You can serve Pumpkin Delight Dessert with whipped cream or ice cream. A dollop of whipped cream adds extra creaminess. Vanilla ice cream pairs well and adds a sweet touch. You could also serve it with spiced nuts or fresh fruit for a crunchy contrast. Store leftovers in an airtight container in the fridge. This helps keep the flavors fresh and the texture nice. Enjoy leftovers within three days for the best taste. You can also freeze it, but the texture may change slightly. Absolutely! You can change the spices to suit your taste. Try adding cardamom or allspice for a different flavor. You can also swap gingersnap cookies for chocolate cookies or graham crackers. This adds a unique twist to the dessert. Serve Pumpkin Delight Dessert in clear glasses. This shows off the beautiful layers. Top it with crushed cookies and fresh mint for a pop of color. It makes the dessert look fancy and fun! For the complete recipe, check out the Full Recipe section above! This blog post covers how to make a delicious pumpkin dessert. We looked at key ingredients, tips for choosing quality options, and ways to customize your dish. I shared step-by-step instructions for preparing the mixture and layering your dessert. We covered storage tips and mistakes to avoid. Finally, you can explore variations for dietary needs and flavors. Remember, cooking should be fun and creative. Enjoy making your Pumpkin Delight Dessert!

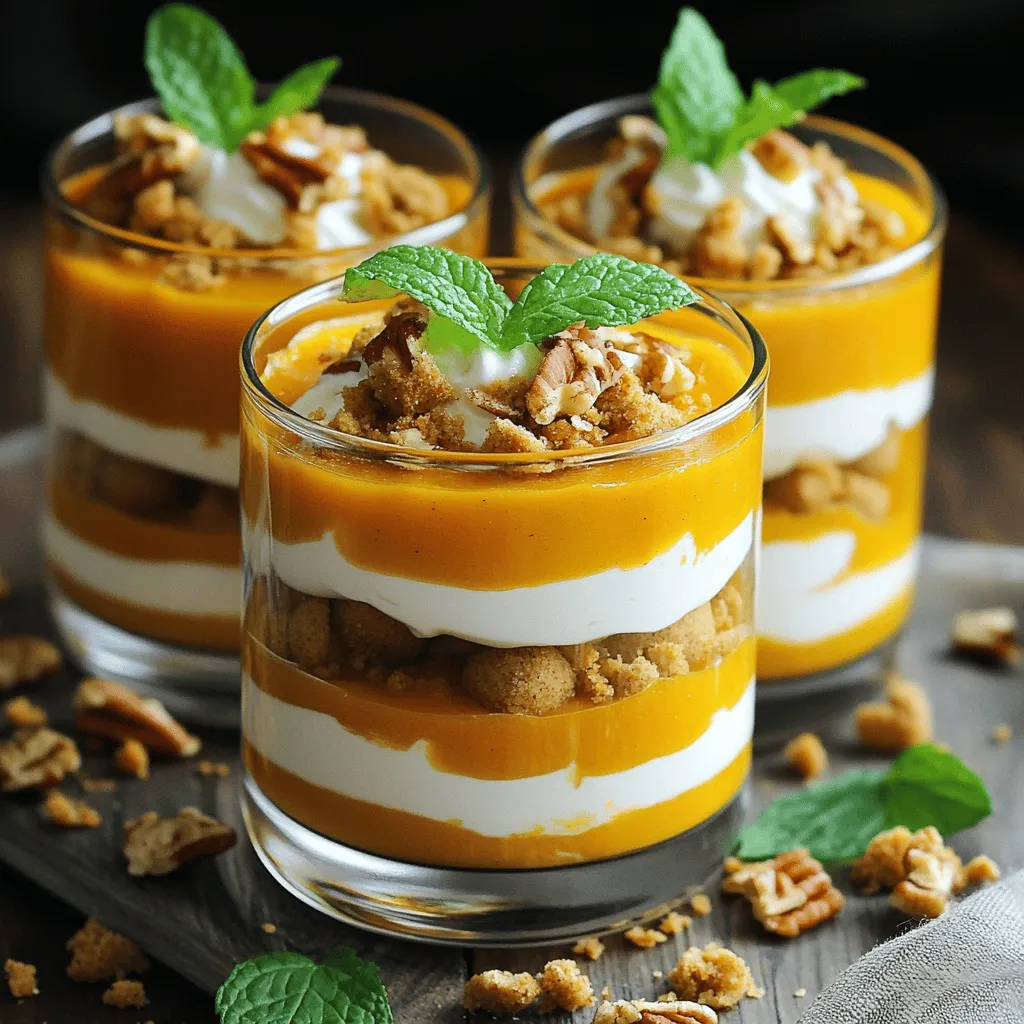
Looking for a dessert that brings joy to your fall gatherings? You’ll love Pumpkin Delight Dessert! This delicious treat combines creamy pumpkin with delightful layers, perfect for sweet teeth of …

Read more

Categories Desserts

Gingerbread Donuts with Cinnamon Sugar Delight

August 4, 2025 by Chef Jamie
To make gingerbread donuts, you need key ingredients that create rich flavor. Here’s what you will use: - 1 cup all-purpose flour - 1/2 cup brown sugar, packed - 1 tsp baking powder - 1/2 tsp baking soda - 1/2 tsp salt - 1 tsp ground ginger - 1 tsp ground cinnamon - 1/4 tsp ground nutmeg - 1/4 tsp ground cloves - 1/2 cup molasses - 1/4 cup buttermilk (or milk mixed with 1 tsp vinegar) - 1 large egg - 1/4 cup unsalted butter, melted These ingredients blend together to make the donuts soft and tasty. Cinnamon sugar adds a sweet touch to your donuts. For this, you will need: - 1/4 cup granulated sugar - 1 tsp ground cinnamon Mixing these two creates a delightful coating that enhances the flavor. If you lack some ingredients, don’t worry. You can make easy swaps. For instance, if you don't have molasses, you can use honey or maple syrup. If you want a dairy-free option, replace buttermilk with almond milk or coconut milk mixed with a bit of vinegar. Lastly, for those who prefer a nut-free choice, leave out ground cloves or replace them with more cinnamon. For the complete recipe, check out the Full Recipe. To make the batter, start by preheating your oven to 350°F (175°C). This step is key for a perfect bake. Grease your donut pan with non-stick spray to prevent sticking. In a large bowl, mix together the dry ingredients. Combine 1 cup of all-purpose flour, 1/2 cup of packed brown sugar, 1 tsp of baking powder, 1/2 tsp of baking soda, 1/2 tsp of salt, 1 tsp of ground ginger, 1 tsp of ground cinnamon, 1/4 tsp of ground nutmeg, and 1/4 tsp of ground cloves. Whisk these ingredients until they blend well. In another bowl, combine 1/2 cup of molasses, 1/4 cup of buttermilk, 1 large egg, and 1/4 cup of melted unsalted butter. Whisk until the mixture is smooth. Pour the wet mixture into the dry mixture. Stir gently until just combined. Don’t worry about a few lumps; they are fine. This helps keep your donuts soft. Once your batter is ready, it’s time to fill the donut pan. You can use a piping bag or a zip-top bag with a corner snipped to make this easier. Fill each donut cavity about 2/3 full. This allows room for the donuts to rise without overflowing. Bake them in the preheated oven for 10-12 minutes. To check if they are done, insert a toothpick into the center. If it comes out clean, they are ready. While the donuts bake, mix together your cinnamon sugar. In a shallow bowl, combine 1/4 cup of granulated sugar with 1 tsp of ground cinnamon. Set this aside. Once the donuts are baked, let them cool for a few minutes in the pan. Then, transfer them to a wire rack to cool completely. While they are still warm, brush each donut lightly with melted butter. This step makes the cinnamon sugar stick better. Then, dip each donut into the cinnamon sugar mixture. Make sure they are fully coated for that sweet crunch. Now you have delightful gingerbread donuts with a sweet cinnamon sugar coating! Enjoy making these treats with the full recipe for more details. To get soft and fluffy gingerbread donuts, mix the batter gently. Over-mixing can make them dense. You want a few lumps in the batter. This method keeps the donuts light. The right oven temperature also matters. Make sure it’s preheated to 350°F (175°C). This helps the donuts rise nicely. Want to boost the flavor? Try adding a splash of vanilla extract to the wet mix. It pairs well with the spices. You can also use fresh ginger for a zingy twist. If you love a spicy kick, add more ground ginger or cinnamon. This will make the donuts even more aromatic and tasty. One common mistake is not greasing the donut pan. If you skip this step, the donuts stick. Another mistake is using old spices. Fresh spices make a big difference in flavor. Also, don’t open the oven door too soon. This can cause the donuts to sink. Follow the baking time closely for the best results. For the perfect gingerbread donuts, check the Full Recipe for detailed steps. Enjoy your baking! {{image_2}} You can change the flavor of your gingerbread donuts by adding different spices. Try adding cardamom for a floral hint. Nutmeg brings warmth, while allspice can deepen the taste. Each spice adds a unique twist to your donuts. Start by using half a teaspoon of your chosen spice. Adjust according to your taste. Cinnamon sugar is delicious, but you can top your donuts in many ways. Consider a simple glaze made from powdered sugar and milk. You can also use melted chocolate for a rich treat. For a fruity touch, add a drizzle of lemon icing. Each topping transforms the donuts into something new and exciting. If you need gluten-free donuts, swap all-purpose flour with a gluten-free mix. Make sure to check the blend for proper binding. For a dairy-free version, use almond milk or coconut milk instead of buttermilk. You can replace butter with coconut oil or a dairy-free spread. This way, everyone can enjoy these tasty treats! For the full recipe, check out the Gingerbread Donuts with Cinnamon Sugar section above. To keep your gingerbread donuts fresh, store them in an airtight container. Place a piece of parchment paper between layers to prevent sticking. They can last up to three days at room temperature. If you want them to last longer, consider refrigerating them. In the fridge, they stay good for about a week. To enjoy your gingerbread donuts warm, simply pop them in the microwave for about 10-15 seconds. This warms them up without drying them out. If you prefer a crispier texture, you can reheat them in an oven set to 350°F (175°C) for about 5 minutes. You can freeze gingerbread donuts for later enjoyment. Once cooled, wrap each donut tightly in plastic wrap. Then place them in a freezer bag or container. They can stay fresh for up to three months. When you are ready to eat them, thaw them in the fridge overnight. For a fresh taste, reheat them as mentioned above. Enjoy your gingerbread donuts with cinnamon sugar anytime! For the complete process, check out the Full Recipe. Yes, you can prepare these donuts ahead of time. Bake the donuts and let them cool completely. Then, store them in an airtight container at room temperature for up to three days. You can also freeze them for up to a month. Just remember to coat them with cinnamon sugar after reheating. This keeps them fresh and tasty. Serve gingerbread donuts warm for the best taste. They pair well with hot coffee or tea. For a festive touch, arrange them on a nice plate. Sprinkle extra cinnamon sugar around the donuts for a beautiful presentation. You can also add a dollop of whipped cream or a scoop of ice cream for a fun twist. To check if the donuts are fully baked, insert a toothpick into the center of one. If it comes out clean or with a few crumbs, they are done. If it has wet batter on it, bake for a few more minutes. Keep an eye on them to avoid overbaking. Trust me, knowing when they’re done is key to keeping them soft and moist. For the full recipe, visit [Full Recipe]. You’ve learned the key ingredients and steps for making gingerbread donuts. You now know how to coat them and add fun flavors. Remember to avoid common mistakes for the best texture. Feel free to try different spices and toppings. By following these tips, you can make delicious donuts to enjoy fresh or later. I hope you have fun baking and sharing these treats!

Craving a warm treat for the holidays? Look no further! These Gingerbread Donuts with Cinnamon Sugar will warm your heart and delight your taste buds. Perfectly spiced and easy to …

Read more

Categories Desserts

Pumpkin Muffins with Maple Cream Cheese Filling Recipe

August 4, 2025 by Chef Jamie
To make these tasty pumpkin muffins, gather the following ingredients: - 1 ¾ cups all-purpose flour - 1 teaspoon baking soda - ½ teaspoon baking powder - ½ teaspoon salt - 1 teaspoon ground cinnamon - 1 teaspoon ground nutmeg - ½ teaspoon ground ginger - 1 cup pumpkin puree (canned or fresh) - ½ cup granulated sugar - ½ cup brown sugar, packed - ½ cup vegetable oil - 2 large eggs - 1 teaspoon vanilla extract - 8 oz cream cheese, softened - ¼ cup maple syrup - 1 teaspoon vanilla extract (for filling) You can swap some ingredients if you want to change the flavors or make it healthier. - Use whole wheat flour instead of all-purpose flour for more fiber. - You can replace granulated sugar with coconut sugar for a lower glycemic index. - For a dairy-free option, try using vegan cream cheese in the filling. - Instead of vegetable oil, you might use melted coconut oil for a different taste. When selecting your ingredients, freshness matters a lot. Here are some tips: - Check the date on your canned pumpkin. It should be fresh and not expired. - Choose spices that are fragrant; old spices lose their flavor. - For cream cheese, it should be soft but not expired, so check the date. - Fresh eggs should feel heavy and have no cracks. You can also do the water test: fresh eggs sink! Using fresh and quality ingredients makes your muffins taste even better. Enjoy making these pumpkin muffins with maple cream cheese filling! Don't forget to check the Full Recipe for detailed steps. First, preheat your oven to 350°F (175°C). This step is key to baking perfect muffins. While the oven warms up, you can prepare your muffin tin. Line it with paper liners or grease it with cooking spray. This helps the muffins come out easily after baking. In a medium bowl, whisk together the dry ingredients. Combine 1 ¾ cups of flour, 1 teaspoon of baking soda, ½ teaspoon of baking powder, ½ teaspoon of salt, 1 teaspoon of ground cinnamon, 1 teaspoon of ground nutmeg, and ½ teaspoon of ground ginger. Mixing these well ensures even flavor and texture in your muffins. Set this bowl aside for now. In a large bowl, mix the wet ingredients. Start with 1 cup of pumpkin puree, add ½ cup of granulated sugar, ½ cup of packed brown sugar, ½ cup of vegetable oil, and 2 large eggs. Don't forget to add 1 teaspoon of vanilla extract. Whisk the mixture until it is smooth and well combined. This is where the pumpkin flavor shines. In a separate bowl, prepare the cream cheese filling. Take 8 oz of softened cream cheese and mix it with ¼ cup of maple syrup and 1 teaspoon of vanilla extract. Use a hand mixer or a whisk to get a smooth, creamy texture. This filling adds a sweet surprise to your muffins. Now, it’s time to fill the muffin tins. Spoon a layer of pumpkin batter into each cup. Fill them about one-third full. Then, add about 1 teaspoon of the cream cheese filling on top. Cover this with more pumpkin batter until each cup is about two-thirds full. This method ensures you get a nice layer of cream cheese in each muffin. Place the muffin tin in the oven and bake for 18-20 minutes. To check if they’re done, insert a toothpick into the pumpkin part of the muffin. It should come out clean but may have some cream cheese residue. Once baked, let the muffins cool in the pan for about 5 minutes. After that, transfer them to a wire rack to cool completely. Enjoy the warm muffins or let them sit at room temperature. To get soft, fluffy muffins, use the right balance of wet and dry ingredients. Avoid overmixing the batter. Stir it just until combined; lumps are fine. This keeps your muffins light and airy. Also, let your ingredients reach room temperature before mixing. This helps them blend better. One common mistake is not measuring ingredients correctly. Use dry measuring cups for flour and sugars, and liquid cups for oils and liquids. Another mistake is skipping the preheating step. Always preheat your oven to 350°F (175°C). Lastly, don’t open the oven door too soon. This can cause your muffins to sink. For a fun touch, sprinkle some cinnamon sugar on top before baking. You can also drizzle extra maple syrup over the cooled muffins. Serve them warm for a cozy treat or at room temperature for a snack. Pair these muffins with coffee or tea for the perfect afternoon pick-me-up. For more ideas, check the Full Recipe for extra serving tips. {{image_2}} You can make these muffins gluten-free. Use a gluten-free flour blend instead of all-purpose flour. Look for blends that contain xanthan gum. This helps mimic the texture of regular flour. Just follow the same recipe steps. The muffins will still be moist and tasty. To make vegan pumpkin muffins, swap the eggs for flax eggs. Mix 1 tablespoon of ground flaxseed with 2.5 tablespoons of water for each egg. Also, use a plant-based oil, like coconut oil. Replace cream cheese with a vegan alternative. Use coconut cream mixed with maple syrup for a similar filling. Want to spice up your muffins? Add-ins can make them even better. Consider mixing in chocolate chips, nuts, or dried fruits like cranberries. You can also add a sprinkle of pumpkin seeds on top for crunch. These small changes can create a fun twist on the classic recipe. Check out the Full Recipe for more details on making these delicious muffins! Store your pumpkin muffins in an airtight container. This keeps them fresh and moist. Place a paper towel in the container to absorb extra moisture. You can keep them at room temperature for about two days. If you want to keep them longer, refrigerate them. Muffins can last up to a week in the fridge. To freeze your muffins, first let them cool completely. Then, wrap each muffin in plastic wrap. Place the wrapped muffins in a freezer bag or container. Label the bag with the date. They can stay in the freezer for up to three months. When you're ready to eat them, simply thaw them in the fridge overnight. Reheat your muffins in the microwave for about 10-15 seconds. This brings back their warm, soft texture. You can also use the oven. Preheat it to 350°F (175°C). Place the muffins on a baking sheet and heat for about 5-10 minutes. Enjoy them warm with a touch of butter or cream cheese. For the complete recipe, check out the Full Recipe section. You can check if the muffins are done by inserting a toothpick into the pumpkin part. If it comes out clean, the muffins are done. You may see some cream cheese on the toothpick, but that’s okay. The tops should feel firm and spring back when lightly touched. Keep an eye on them after about 18 minutes of baking. Yes, you can make these muffins ahead of time. They store well in an airtight container for about three days. You can also freeze them for up to three months. Just make sure they cool completely before you freeze them. When you're ready to eat, let them thaw at room temperature. If you don’t have cream cheese, you can use Greek yogurt or ricotta cheese. Both options will give you a creamy texture. You might want to adjust the sweetness since Greek yogurt can be tangy. For a dairy-free option, try using a plant-based cream cheese. To make the muffins less sweet, reduce the amount of sugar. You can cut the granulated sugar and brown sugar by half. You can also use unsweetened applesauce to add moisture without extra sugar. Taste the batter before baking to see if it suits your taste. In this guide, we covered everything you need for perfect pumpkin muffins. From ingredients to tips, you learned how to make them tasty and fresh. Remember to choose good ingredients and follow the steps carefully. Common baking mistakes can ruin your muffins, so keep those tips in mind. With options for gluten-free and vegan muffins, everyone can enjoy this treat. Now, you have the info to bake delicious muffins. Enjoy your baking and share your creations!

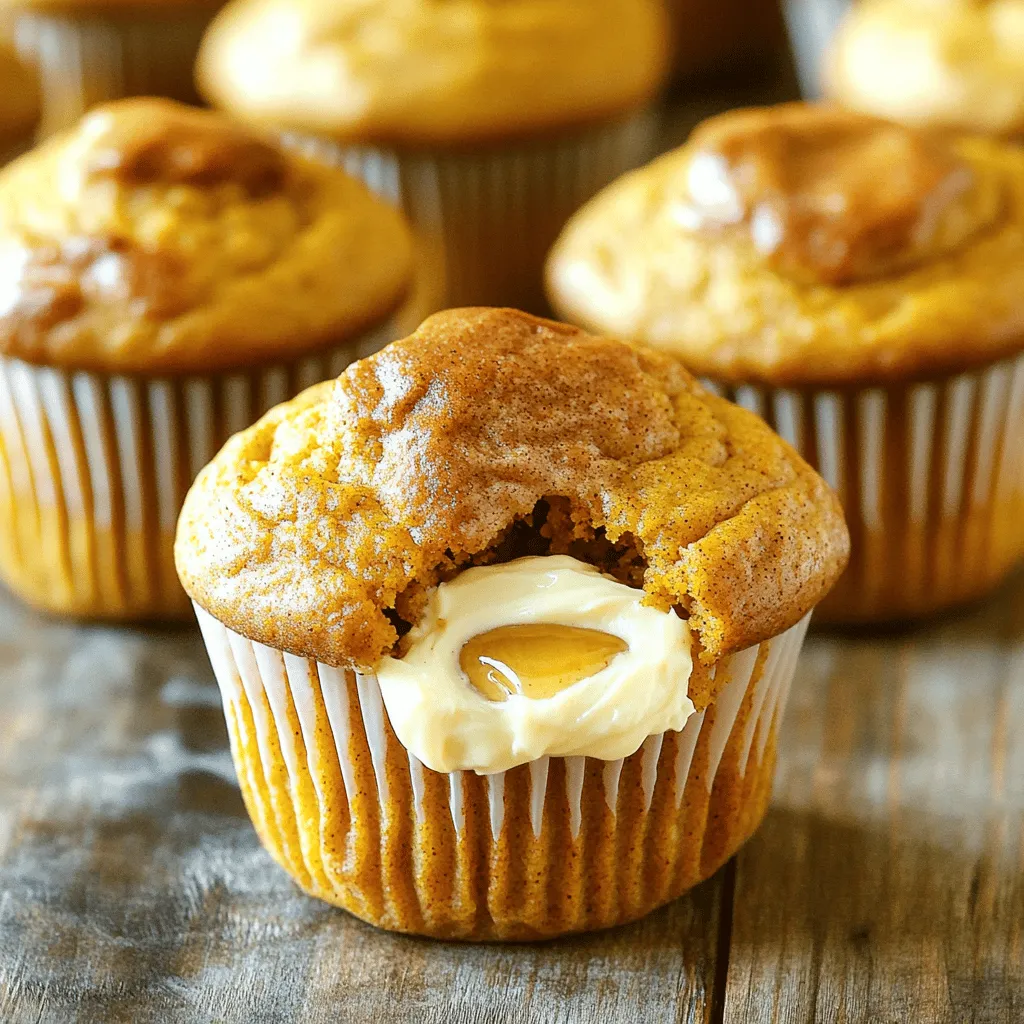
Warm, spiced pumpkin muffins with a sweet maple cream cheese filling make fall feel magical. You’ll love how simple they are to bake! In this recipe, I’ll guide you through …

Read more

Categories Desserts

Homestyle Classic Chili Flavorful and Hearty Recipe

November 11, 2025August 4, 2025 by Chef Jamie
- 1 pound ground beef or turkey - 1 large onion, diced - 3 cloves garlic, minced - 2 cans (15 oz each) kidney beans, drained and rinsed - 1 can (15 oz) black beans, drained and rinsed - 1 can (28 oz) diced tomatoes with juices For a hearty chili, I always start with ground beef or turkey. This gives the dish a rich flavor and a nice texture. Next, I add a large onion and three cloves of garlic. These aromatics add depth and warmth. Beans are a must for heartiness. I use kidney beans and black beans for variety. Diced tomatoes bring moisture and acidity, which balances the richness of the meat. - 2 tablespoons chili powder - 1 tablespoon ground cumin - 1 teaspoon smoked paprika - 1 teaspoon dried oregano - 1 teaspoon salt - ½ teaspoon black pepper Spices make or break chili. I use two tablespoons of chili powder for a robust flavor. Ground cumin adds earthiness, while smoked paprika brings a subtle smokiness. Dried oregano adds an herbal note. Finally, I season with salt and black pepper to enhance all the flavors. - 1-2 jalapeños, diced (optional, for heat) - 2 cups beef or vegetable broth - 1 cup corn (frozen or canned) - Fresh cilantro and shredded cheese, for garnish For those who like heat, I add jalapeños. They give a nice kick. If you prefer a milder chili, leave them out. I also add broth for a rich base and corn for sweetness. To finish, I like to garnish with fresh cilantro and shredded cheese. This adds color and freshness to each bowl. {{ingredient_image_1}} Browning the ground meat Start by heating a large pot or Dutch oven over medium heat. Add 1 pound of ground beef or turkey. Cook it until it turns brown. Make sure to break it up with a spatula as it cooks. This helps it brown evenly. If there is extra fat, drain it away. Sautéing onions and garlic Next, add 1 large diced onion. Then, add 3 cloves of minced garlic. Stir the mix for about 3 to 4 minutes. You want the onion to turn soft and clear. This adds a nice flavor base to your chili. Adding spices and toasting Now, it's time to add flavor! Stir in 2 tablespoons of chili powder, 1 tablespoon of ground cumin, 1 teaspoon of smoked paprika, 1 teaspoon of dried oregano, 1 teaspoon of salt, and ½ teaspoon of black pepper. If you like heat, add 1 to 2 diced jalapeños. Cook this mix for 1 to 2 minutes. This toasts the spices and boosts their taste. Incorporating tomatoes and beans Next, pour in 1 can of diced tomatoes with their juices. Add 2 cans of drained kidney beans and 1 can of drained black beans. Don't forget to add 1 cup of corn, either frozen or canned. Mix everything well to combine all the flavors. Bringing to a boil and simmering Now, add 2 cups of beef or vegetable broth to the pot. Bring the mixture to a boil. Once it starts bubbling, reduce the heat to low. Let it simmer for at least 30 minutes. For even richer flavors, let it simmer for up to 1 hour. Stir it occasionally to avoid sticking. Adjusting seasoning to taste After simmering, taste your chili. You may need to adjust the salt or spices. Feel free to add more if you like. Serve your chili hot. Enjoy the hearty and rich flavors you created! To make your chili taste great, toasting spices is key. Toasting brings out the rich flavors. When you add the chili powder, cumin, and smoked paprika, cook them for a bit. This step wakes up the spices and makes the dish pop. Simmering also plays a big role in flavor. The longer you let your chili simmer, the better it gets. Aim for at least 30 minutes. For even richer taste, try simmering for an hour or more. This time allows the flavors to blend and deepen. If you want to save time, use an Instant Pot. Brown your meat first, then add all the ingredients. Secure the lid and cook on high for about 15 minutes. This method locks in flavors quickly. You can also use a slow cooker. Brown the meat and sauté the onions and garlic as usual. Then, add everything to the slow cooker. Set it on low for 6-8 hours. This method creates a deep, rich flavor. For a hearty meal, serve your chili with crusty bread or rice. The bread is great for dipping, and the rice soaks up the chili's sauce. Garnishing adds a nice touch. Top your chili with fresh cilantro and shredded cheese. You could also add a dollop of sour cream for creaminess. Enjoy your delicious bowl of homestyle chili! Pro Tips Use Fresh Ingredients: Fresh herbs and spices enhance the flavor of your chili. Always opt for fresh garlic and onion when possible. Adjust the Heat: For spicier chili, add more jalapeños or a dash of cayenne pepper. Taste as you go to find your perfect heat level. Simmer Longer for Depth: Allowing the chili to simmer for at least an hour will deepen the flavors. Don’t rush this step! Experiment with Toppings: Beyond cilantro and cheese, try adding avocado, sour cream, or crushed tortilla chips for extra texture and flavor. {{image_2}} You can switch up the proteins in your chili. Use ground turkey for a leaner option. For a vegetarian version, try lentils or crumbled tofu. Both will soak up flavors well. You can also play with the beans. Black beans add a rich taste, while pinto beans lend creaminess. If you want a different twist, use chickpeas or navy beans. As for tomatoes, diced tomatoes with green chilies can add a nice kick. Chili varies by region. Texas chili often skips beans and focuses on beef. It’s all about the meat and spices. Traditional chili, however, usually includes beans and tomatoes. You can add unique ingredients like beer or cocoa powder to give it a special touch. In New Mexico, green chili peppers bring a fresh flavor. In Cincinnati, chili often contains cinnamon and chocolate. Explore these styles for a fun twist on your homestyle chili. To control the spice, start with one jalapeño. Taste as you go. If you want more heat, add another. You can also use chili powder for a milder spice. To balance heat, add a touch of sweetness. A teaspoon of brown sugar or honey can help. You can also add a dollop of sour cream. This cools down the heat and makes each bite smooth. To keep your chili fresh, store it in a clean container. Let it cool to room temperature first. - Refrigeration guidelines: Place the container in the fridge. Use it within three to four days. Make sure it is sealed well to stop any odors from mixing. - Freezing for future meals: If you have more, freeze it! Use freezer-safe bags or containers. It can last for up to three months. Remember to label the container with the date. When you want to enjoy your leftover chili, here are the best ways to reheat it. - Best methods for reheating chili: The stove works great. Pour the chili into a pot and heat it gently. Stir often to prevent sticking. You can also use the microwave. Heat in short bursts and stir in between. - Keeping texture and flavor intact: Add a splash of broth or water if it looks too thick. This helps keep the chili moist. Taste and adjust seasonings if needed. It's important to know how long your chili stays fresh. - Understanding freshness and safety: When stored in the fridge, chili lasts about three to four days. If frozen, it can stay good for up to three months. Always check for any off smell or mold before eating. If in doubt, throw it out. To thicken chili, you have a few good options. First, let it simmer longer. This lets water cook off. Another way is to mash some beans. This adds texture and body. You can also use flour or cornstarch. Mix one tablespoon of either with a bit of water. Stir this mixture into your chili and let it cook for a few more minutes. This will help it thicken nicely. Yes, you can make chili ahead of time. It often tastes better the next day. The flavors meld together as it sits. To store pre-made chili, let it cool first. Then, place it in an airtight container. You can keep it in the fridge for up to four days. For longer storage, you can freeze it. Just make sure to leave some space in the container, as it expands. If your chili is too spicy, there are ways to fix it. You can add more beans or tomatoes. This will help dilute the heat. Another method is to add some creaminess. Stir in a bit of sour cream or cream cheese. You can also add sweetness, like sugar or honey. This balances the heat and makes the dish more enjoyable. In this blog post, we explored the best ingredients for homestyle classic chili and how to cook it step-by-step. You learned about essential spices, optional ingredients, and tips for great flavor. I shared several variations and ways to store your chili. Remember, making chili can be fun and flexible. Feel free to adjust the heat and ingredients to fit your taste. Enjoy your cooking, and savor every bite of your delicious, homemade chili!

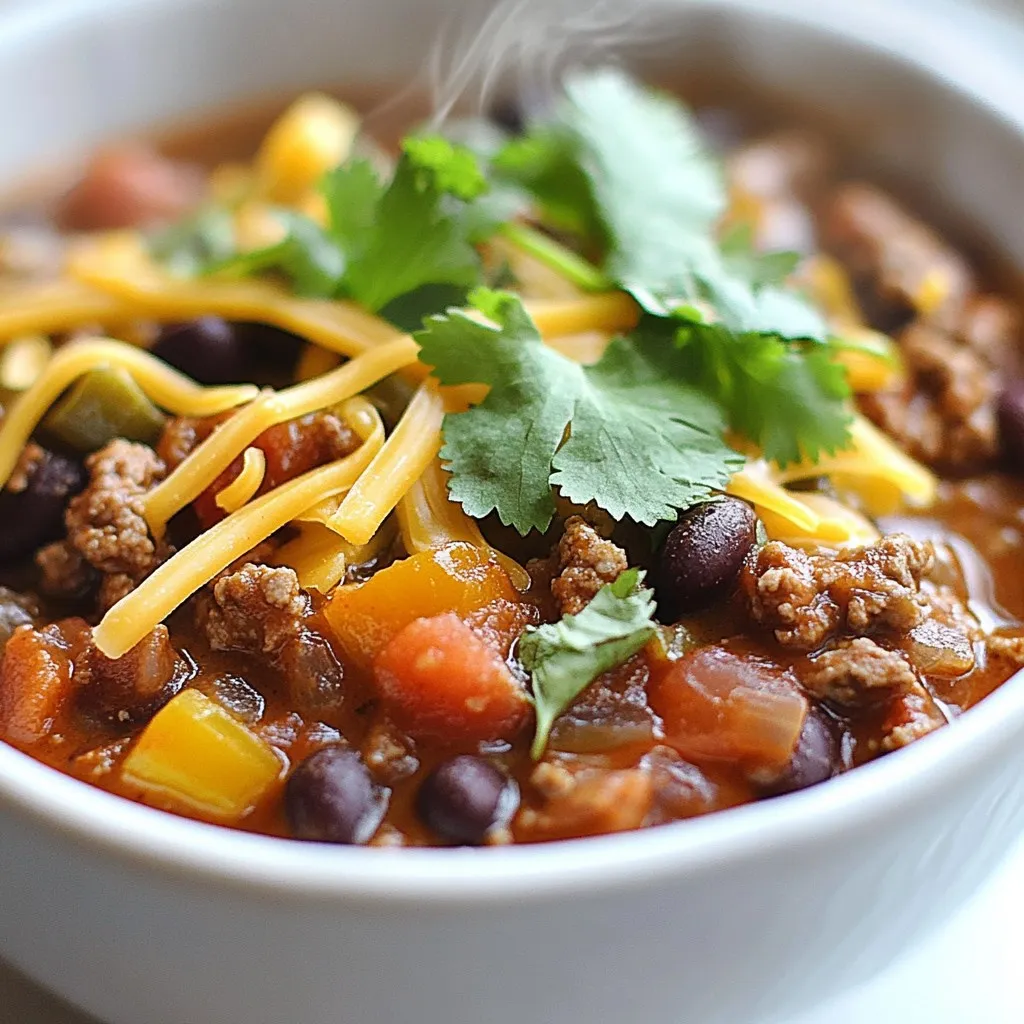
If you crave a warm, hearty dish that feels like a big hug, you’re in the right place! My Homestyle Classic Chili recipe combines ground meat, beans, and savory spices …

Read more

Categories Dinner

Apple Crisp Macchiato Flavorful Fall Drink Recipe

August 3, 2025 by Chef Jamie
To make the Apple Crisp Macchiato, you'll need a few key ingredients. Each one adds to the rich flavors of this cozy drink. Here’s what you will need: - 1 cup strong brewed coffee or espresso - 1/2 cup milk (dairy or non-dairy) - 1/4 cup apple cider - 1 tablespoon maple syrup - 1/2 teaspoon cinnamon - 1/4 teaspoon nutmeg - 1/4 cup granola (preferably apple or cinnamon flavored) - Sliced apples, for garnish - Whipped cream (optional) Each ingredient plays a role in creating that warm, fall taste. The strong coffee or espresso gives you a bold base. Milk adds creaminess, while apple cider brings a sweet and fruity kick. The maple syrup enhances the sweetness, and spices like cinnamon and nutmeg give it a cozy warmth. Granola adds a crunchy texture, making every sip delightful. You can check the Full Recipe for detailed steps. For the best flavor, choose a strong coffee or espresso. I love using a dark roast for depth. A French press or espresso machine works well for brewing. If you use a French press, coarsely grind the beans. Let the coffee steep for about four minutes. For espresso, pack the grounds tightly and brew for about 25 seconds. In a small saucepan, mix apple cider, maple syrup, cinnamon, and nutmeg. Heat it over medium heat. Stir occasionally until it starts to simmer. This process brings out the warm flavors. Remove from heat after simmering for about five minutes. You can froth milk at home with a few simple tools. A milk frother is the easiest option. If you don’t have one, use a whisk. Heat the milk gently in a saucepan first. Then, whisk vigorously to create foam. Aim for a light and airy texture. Start by pouring the brewed coffee or espresso into your favorite glass or mug. Slowly add the frothed milk mixture on top. Next, spoon some of the warm apple cider mixture over the froth. Finish by sprinkling granola on top for crunch. Garnish with thin apple slices and whipped cream if you like. Enjoy your Apple Crisp Macchiato! For a full recipe, check the detailed steps. To get the best foam, you need a good frother. A handheld frother works great. You can also use a whisk, but it takes longer. Heat the milk to about 150°F before frothing. This makes the foam light and airy. Pour the milk slowly to keep the air in it. If you like it sweeter, add more maple syrup. Start with one tablespoon, then taste. You can always add more. For a stronger flavor, use less milk or add more apple cider. Experiment to find your perfect balance. You can also try different syrups, like caramel or vanilla. A beautiful drink makes it taste better. Use clear glasses to show off the layers. After pouring the milk, add a spoonful of warm apple cider on top. Sprinkle granola over the froth for crunch. Add thin apple slices for color. A dollop of whipped cream on top makes it even nicer. For the complete preparation steps, check the Full Recipe. {{image_2}} To make a vegan Apple Crisp Macchiato, swap dairy milk for non-dairy options. Almond milk, oat milk, or coconut milk work well. These options give a creamy texture while keeping it plant-based. Use a vegan whipped cream if you want that extra touch on top. For the maple syrup, ensure it’s pure and free from additives. Fall is all about warm spices. You can add pumpkin spice for a cozy twist. Just mix a teaspoon into your apple cider mixture. Caramel syrup is another great choice. Drizzle some in your drink or mix it into the milk. For extra fun, try adding a pinch of nutmeg or cloves for that seasonal vibe. Want to turn your macchiato into dessert? Simply add a scoop of vanilla or cinnamon ice cream. Prepare the drink as usual, then float the ice cream on top. The warm coffee melts the ice cream, creating a creamy delight. It’s a fun way to enjoy this drink as a sweet treat! For the complete details on making this tasty drink, check out the Full Recipe. To keep your ingredients fresh, store them properly. For the apple cider, seal it in an airtight container. This will help it last longer in the fridge. If you have leftover granola, place it in a cool, dry place. This keeps it crunchy and tasty. Milk can spoil quickly, so check the date. Use it within a week for the best flavor. You can make parts of this drink ahead of time. Brew your coffee and chill it. This saves time when you want to enjoy your drink. You can also heat and mix the apple cider with spices in advance. Just store it in the fridge. When you are ready, warm it up and add the milk. This way, you can whip up your Apple Crisp Macchiato in no time! Want to see how to make this drink? Check the Full Recipe for all the steps. An Apple Crisp Macchiato blends coffee with sweet, spiced flavors. You taste rich coffee, smooth milk, and apple cider. The drink has warm notes of cinnamon and nutmeg. Topping it with granola adds a crunchy texture. When you sip, you enjoy a cozy fall vibe. Yes, you can use decaf coffee or espresso for a caffeine-free option. The flavors still shine through. It tastes just as delightful without the caffeine kick. Feel free to enjoy this drink any time of day. Many coffee shops serve an Apple Crisp Macchiato in the fall. Look for local cafes or major chains like Starbucks. Some shops may offer seasonal specials, so check their menus. You might discover your new favorite drink nearby. You can easily make this drink your own. Try different milk options like oat or almond. Adjust the sweetness by adding more or less maple syrup. You can also experiment with extra spices. For a fun twist, add a splash of caramel. For the complete preparation steps, visit the [Full Recipe] for Apple Crisp Macchiato. In this guide, I shared how to create a delicious Apple Crisp Macchiato. We discussed the essential ingredients, like coffee, milk, and apple cider. Then, I outlined clear steps to brew, prepare, and assemble your drink. I also gave tips for perfect foam and decorating your beverage. Remember, you can customize this drink to fit your taste or seasonal choices. Enjoy making and sharing your new favorite coffee creation!

Fall is here, and it’s time for cozy drinks! The Apple Crisp Macchiato combines rich coffee, creamy milk, and sweet apple cider. This delightful drink captures the flavors of autumn …

Read more

Categories Breakfast

Pumpkin Cheesecake Cookies Soft and Irresistible Treat

August 3, 2025 by Chef Jamie
To make these soft and delicious Pumpkin Cheesecake Cookies, you will need: - 1 cup all-purpose flour - 1/2 teaspoon baking powder - 1/4 teaspoon baking soda - 1/4 teaspoon ground cinnamon - 1/4 teaspoon ground nutmeg - 1/4 teaspoon salt - 1/2 cup unsalted butter, softened - 3/4 cup brown sugar, packed - 1/4 cup granulated sugar - 1 large egg - 1 teaspoon vanilla extract - 1/2 cup canned pumpkin puree - 1/2 cup cream cheese, softened - 1/4 cup powdered sugar - 1 teaspoon pumpkin spice For the best results, I recommend using fresh ingredients. Here are some of my favorites: - Butter: Use a good quality unsalted butter for the best flavor. Brands like Kerrygold or Land O'Lakes work great. - Flour: All-purpose flour from King Arthur Baking Company gives great texture. - Pumpkin puree: Libby’s is a trusted brand for canned pumpkin. - Cream cheese: Philadelphia cream cheese is always creamy and easy to work with. If you cannot find some ingredients, here are some easy swaps: - Butter: You can use coconut oil for a dairy-free version. - Sugar: Substitute brown sugar with coconut sugar for a different flavor. - Egg: Use a flax egg (1 tablespoon ground flaxseed mixed with 2.5 tablespoons water) as a vegan option. - Pumpkin spice: If you don’t have pumpkin spice, mix equal parts of cinnamon, nutmeg, and ground ginger. These small changes can help you customize the cookies to fit your diet and taste. Enjoy the fun of baking! Start by gathering your tools. You need a mixing bowl, a whisk, and a baking sheet. A cookie scoop helps too. Make sure your oven is clean and ready. Preheat your oven to 350°F (175°C). Line your baking sheet with parchment paper to keep cookies from sticking. This is a simple step that saves time and mess. 1. In a medium bowl, whisk together the flour, baking powder, baking soda, cinnamon, nutmeg, and salt. Set this mix aside for later. 2. In a large bowl, cream the softened butter with brown and granulated sugar. Mix until it looks light and fluffy. 3. Beat in one egg and the vanilla extract. Make sure it’s well combined. 4. Add the pumpkin puree to your butter mix and stir until smooth. This gives the cookies that rich pumpkin flavor. 5. Gradually add the dry ingredients from your earlier bowl. Stir until just combined, but don’t overmix. 6. In another bowl, mix the softened cream cheese with powdered sugar and pumpkin spice until smooth. This will be your creamy filling. 7. Using a cookie scoop or a tablespoon, drop cookie dough onto the prepared baking sheet. 8. Create a small dip in the center of each cookie. This is where you will add the cream cheese mix. 9. Fill each dip with a little of the cream cheese mixture. It should look like a tiny dollop. 10. Bake for 12-15 minutes. Look for lightly golden edges to know they are done. 11. Let the cookies cool on the baking sheet for a few minutes. Then, move them to a wire rack to cool completely. To get a soft and chewy cookie, don’t overmix the dough. Mix just until the dry ingredients are combined. Also, make sure your butter is soft but not melted. This helps keep the cookies light. When baking, keep an eye on the time. Each oven is different, so check for that golden edge. Enjoy your delicious Pumpkin Cheesecake Cookies! For the complete recipe, refer to the Full Recipe. When making pumpkin cheesecake cookies, some common mistakes can ruin your batch: - Overmixing: Mixing too much can make cookies tough. Mix until just combined. - Wrong oven temp: Always preheat your oven. A cold oven can lead to uneven baking. - Skipping the chill: If your dough is too warm, cookies may spread too much. Chill for 30 minutes if needed. - Not measuring: Use proper measuring cups and spoons for accuracy. This helps keep your cookies soft. To make your cookies the best they can be, consider these expert tips: - Soft butter: Ensure your butter is soft but not melted. This adds air while mixing. - Use fresh spices: Fresh spices can boost flavor. Check your spice rack for freshness. - Cream cheese filling: Make sure your cream cheese is at room temp. This helps it blend smoothly. - Dough scoop: Use a cookie scoop for even sizes. This ensures even baking. Enhancing your cookies is easy with these simple ideas: - Add nuts: Chopped pecans or walnuts can add crunch and flavor. - Drizzle icing: A light cream cheese or vanilla glaze can add sweetness and flair. - Garnish: Top with a sprinkle of cinnamon or pumpkin spice for a pretty finish. - Serve warm: Warm cookies taste best. Serve them fresh out of the oven for a delightful treat. For the complete recipe, check out the [Full Recipe]. {{image_2}} You can add new flavors to your pumpkin cheesecake cookies. Try mixing in chocolate chips for a sweet surprise. You can also add white chocolate chunks for a creamy twist. If you like nuts, chopped pecans or walnuts can add a nice crunch. For a fun flavor kick, consider adding a hint of orange zest. It gives the cookies a bright taste. If you need gluten-free cookies, swap the all-purpose flour for a gluten-free blend. Look for one that works well in baking. For a dairy-free version, use coconut oil instead of butter. You can also use a dairy-free cream cheese for the filling. This way, everyone can enjoy these tasty treats. These cookies fit perfectly with the seasons. In winter, use peppermint extract for a festive touch. For spring, add lemon zest to brighten the flavor. In summer, you might try adding fresh berries to the mix. Each season brings a new way to enjoy these pumpkin cheesecake cookies. You can make them all year round! For the full recipe, check out the detailed steps above to create these delightful cookies. To keep your pumpkin cheesecake cookies soft and fresh, store them in an airtight container. This method prevents air from drying them out. You can stack the cookies with parchment paper between layers. This helps avoid sticking. I recommend keeping them at room temperature for up to a week. If you want to keep them longer, refrigeration is best. Just remember to bring them back to room temperature before serving. Freezing pumpkin cheesecake cookies is a great way to save some for later. First, let the cookies cool completely. Then, place them in a single layer on a baking sheet. Freeze them for about two hours. Once frozen, transfer them to a freezer bag or container. Make sure to squeeze out as much air as possible. You can keep them in the freezer for up to three months. When you're ready to eat, just thaw them on the counter. These cookies can last up to a week at room temperature. If stored correctly, they can stay fresh for even longer in the fridge. The cream cheese filling may change texture over time, but it will still taste great. For the best flavor, eat them within a few days. If you notice any change in smell or texture, it's best to discard them. Enjoy your cookies at their peak freshness! For the full recipe, check out the detailed instructions. Pumpkin Cheesecake Cookies stay fresh for about one week. Store them in an airtight container. This keeps them soft and tasty. You can also freeze them. They last up to three months in the freezer. Just make sure to wrap them well. Thaw them in the fridge before enjoying. Yes, you can use fresh pumpkin! Just cook and puree the pumpkin first. Choose a sugar pumpkin for the best flavor. Make sure it is smooth and not watery. Fresh pumpkin adds a nice touch to your cookies. However, canned pumpkin is easier and saves time. Both options will yield delicious cookies. Serve Pumpkin Cheesecake Cookies warm or at room temperature. They pair well with coffee or tea. For a fun twist, add a drizzle of caramel sauce on top. You can also sprinkle some chopped nuts for a crunchy bite. Another idea is to make a dessert platter with other treats. These cookies are great for sharing! For the full recipe, check out the recipe section. You learned everything about making Pumpkin Cheesecake Cookies. We covered the best ingredients, tips, and tricks. You can swap ingredients, avoid common mistakes, and try fun variations. I shared how to store and freeze cookies for later enjoyment. Remember, the goal is to have fun and be creative in the kitchen. With these steps, you'll bake cookies that wow everyone. Enjoy making your delicious treats!

If you crave a warm, soft treat, you will love these Pumpkin Cheesecake Cookies. They blend the rich taste of cheesecake with the cozy flavors of fall. Picture biting into …

Read more

Categories Desserts

Mini Caramel Apple Bites Sweet and Tasty Treats

August 3, 2025 by Chef Jamie
For mini caramel apple bites, I recommend using Granny Smith or Honeycrisp apples. These apples give a nice balance of sweet and tart flavors. You will need 2 medium-sized apples for this recipe. You can choose either store-bought or homemade caramel sauce. If you want a quick option, store-bought works great. For those who enjoy cooking, make your own caramel sauce for fresher flavors. You will need 1 cup of caramel sauce for coating. Toppings add fun and crunch. You can use crushed nuts like walnuts, pecans, or peanuts. These nuts add great texture and flavor. If you like chocolate, you can sprinkle on 1/4 cup of mini chocolate chips as an optional topping. Finally, sprinkle a little 1/4 teaspoon of sea salt on top to enhance the taste. For the full recipe, check the sections below for step-by-step instructions. Start by washing your apples well under cold water. This removes any dirt or wax. Dry them with a clean towel. For cutting, place an apple on a cutting board. Slice it into quarters and remove the core. Cut each quarter into small cubes, about 1 inch wide. This size is perfect for dipping and eating. You can melt caramel in two ways. For the stovetop method, use a small saucepan. Add the caramel sauce and coconut oil if you want it smoother. Heat it on low, stirring so it does not burn. For the microwave method, place the caramel in a bowl. Heat it in 30-second bursts, stirring in between until it is smooth and pourable. Now, dip each apple cube into the warm caramel. Let the excess drip off. This helps prevent a sticky mess. Next, roll each caramel-coated bite in crushed nuts or mini chocolate chips if you like. Place them on a lined baking sheet. Finally, chill the bites in the fridge for 15-20 minutes. This makes the caramel harden nicely. After chilling, sprinkle a little sea salt on top for extra flavor. These steps create delightful Mini Caramel Apple Bites. For the full recipe, refer to the instructions above. To make great caramel, keep the heat low. High heat can burn the sugar quickly. Stir the caramel often to help it heat evenly. Add a bit of coconut oil for a smooth mix. If it gets too thick, add a splash of water to loosen it up. This keeps your caramel silky and easy to work with. Make your platter pop! Arrange the mini caramel apple bites in a circle. Add colorful fruits or nuts around them for extra flair. For a fun twist, serve them in small cups. This way, each bite is ready to grab and enjoy. You can even add a stick to each bite for easy handling. You can prep these treats in advance. Cut the apples and store them in water with lemon juice. This keeps them fresh and bright. Make the caramel the day before, too. Just warm it up when you're ready to coat the apple bites. Store the finished treats in a sealed container in the fridge. They stay tasty for about two days before they lose their crunch. {{image_2}} You can make mini caramel apple bites even more fun with flavor twists. Adding spices can change the whole taste. Try mixing in cinnamon or nutmeg for warmth. These spices pair well with sweet apples. You could also go for different toppings. Coconut flakes add a tropical vibe, while colorful sprinkles bring a festive touch. Each bite can surprise your taste buds with new flavors. If you follow a vegan diet, don't worry! You can find vegan caramel options at many stores. Look for caramel made with coconut cream or other plant-based ingredients. For nut-free variations, skip the nuts and use seeds like pumpkin or sunflower seeds. You can still have a tasty treat without worrying about allergies. These adjustments let everyone enjoy mini caramel apple bites! To keep your mini caramel apple bites fresh, store them in a cool place. Use an airtight container to prevent them from drying out. Place a piece of parchment paper between layers to avoid sticking. This keeps each bite intact and ready to enjoy. These apple bites last about three to five days in the fridge. If you want to freeze them, they can last up to three months. Just make sure to wrap them well to avoid freezer burn. To thaw, leave them in the fridge overnight before serving. For the full recipe, check out the details above. Yes, you can! I recommend using Granny Smith or Honeycrisp apples. Granny Smith apples are tart and crisp, which balances the sweet caramel. Honeycrisp apples have a sweet flavor and great crunch. Both types work well and add a nice texture to your bites. To thicken the caramel, cook it a bit longer over low heat. You can also add more sugar or corn syrup for extra thickness. To thin the caramel, add a bit of milk or cream while heating. Stir well to mix it in, and keep adjusting until you reach your desired consistency. If you want nut-free options, try using crushed cookies or sprinkles. Coconut flakes are a great addition for a tropical twist. You can also just drizzle more caramel or chocolate on top. These choices keep your bites sweet and fun without nuts. These bites can last up to three days in the fridge. Store them in an airtight container to keep them fresh. If you freeze them, they can last about a month. Just remember to let them thaw in the fridge before enjoying again. In this article, we explored how to make delicious Mini Caramel Apple Bites. We discussed the best apples, like Granny Smith or Honeycrisp, and compared store-bought and homemade caramel sauces. You learned about fun toppings like nuts and mini chocolate chips, along with easy step-by-step instructions for preparing, melting, and coating. Finally, we shared tips for perfecting your caramel, serving, and storing your bites. This treat is easy and fun. Enjoy making these bites for your next gathering!

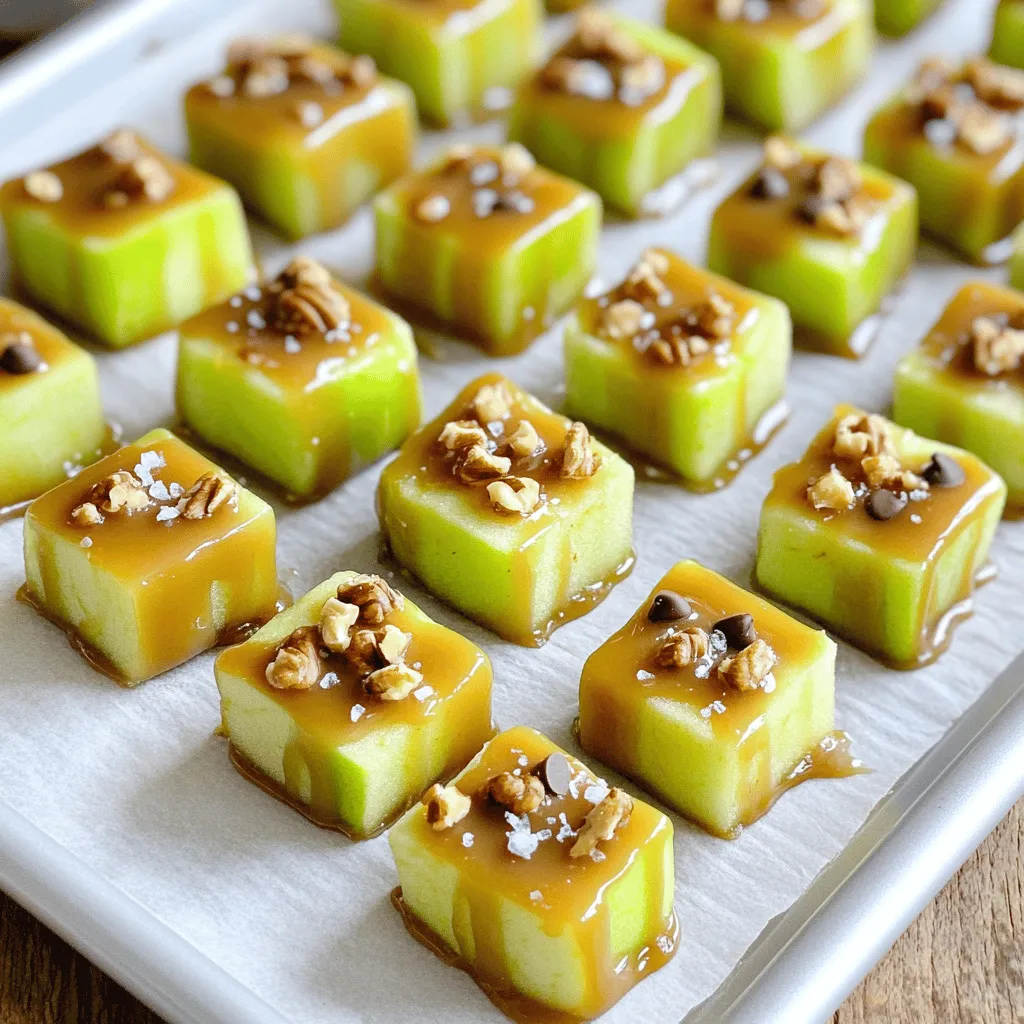
Get ready to satisfy your sweet tooth with these Mini Caramel Apple Bites! They’re simple to make, perfect for any occasion, and packed with flavor. You’ll learn about the best …

Read more

Categories Desserts
Older posts
Newer posts
← Previous Page1 … Page57 Page58 Page59 … Page134 Next →

TOSSED RECIPES

Simple meals, bold taste. Quick recipes made for real life — always fresh, always delicious. 🌿🍴

PAGES

Home About Contact Privacy Policy Terms & Conditions Cookie Policy GDPR Policy Copyright Policy Disclaimer

CATEGORIES

Appetizers Desserts Salads Breakfast Dinner

Contact

  • Pinterest
  • Mail
Copyright © 2026 Tossed Recipes. All rights reserved.