Skip to content
Tossed Recipes
  • Home
  • Appetizers
  • Desserts
  • Salads
  • Breakfast
  • Dinner
  • Privacy Policy
  • Contact
  • About

Chef Jamie

Crack Green Bean Casserole Rich and Flavorful Dish

January 4, 2026August 1, 2025 by Chef Jamie
To make Crack Green Bean Casserole, you need some key ingredients. Here’s what you’ll use: - 2 cans (14.5 oz each) green beans, drained and rinsed - 1 can (10.5 oz) cream of mushroom soup - 1 cup sour cream - 1 tablespoon soy sauce - 1 teaspoon garlic powder - 1 cup sharp cheddar cheese, shredded - 1 cup crispy fried onions - 1/2 teaspoon black pepper - 1/4 teaspoon salt - Optional: 1/2 cup cooked and crumbled bacon These ingredients create a rich and creamy dish that everyone loves. The special ingredients in this casserole add depth to the taste. Cream of mushroom soup gives it a great base. Sour cream adds creaminess that is hard to beat. The soy sauce brings a salty note that works well with the green beans. Garlic powder adds a warm and savory flavor. Finally, sharp cheddar cheese makes the dish cheesy and rich. You can swap some ingredients if you need to. For a lighter option, use Greek yogurt instead of sour cream. If you don’t have cream of mushroom soup, try cream of chicken soup. You can also use fresh green beans if you prefer. Just make sure to cook them first. If you want a vegetarian dish, leave out the bacon or use a plant-based option. {{ingredient_image_1}} 1. Start by preheating your oven to 350°F (175°C). This step ensures the casserole cooks evenly. 2. Grab a large mixing bowl. Combine the cream of mushroom soup, sour cream, soy sauce, garlic powder, black pepper, and salt. Stir until the mixture is smooth. 3. Next, fold in the drained green beans. Add half of the crispy fried onions too. Mix until everything is well coated. 4. Now, add the shredded cheddar cheese to your mixture. Reserve a little cheese for topping later. 5. Transfer the mixture into a greased 9x13 inch baking dish. Spread it out evenly. 6. Sprinkle the reserved cheddar cheese over the top. This will create a tasty, cheesy crust. 7. Place the dish in the preheated oven. Bake for 25-30 minutes. You want it hot and bubbly. 8. After baking, remove the casserole from the oven. Top it with the remaining crispy fried onions. Return it to the oven for another 5-10 minutes. This step makes the onions golden brown. 9. Let the casserole sit for about 5 minutes before serving. This allows it to set slightly and makes it easier to serve. - Always wash your hands before cooking. Clean hands help prevent germs. - Rinse the green beans under cold water after draining. This removes any canning residue. - Keep your workspace clean. Wipe down counters and utensils as you go. - Store leftovers in an airtight container and refrigerate them promptly. This keeps your food safe to eat later. To make the best crack green bean casserole, start with quality ingredients. Use fresh green beans if you can, but canned ones work great too. Drain and rinse the beans well to remove any excess sodium. When mixing your sauce, blend the cream of mushroom soup, sour cream, soy sauce, garlic powder, black pepper, and salt until smooth. This base adds great flavor. Mix in half of the crispy fried onions for a nice crunch. Add sharp cheddar cheese for richness. Reserve some cheese for the top. This step ensures a cheesy, golden finish. Spread the mixture evenly in your baking dish. Bake until it’s hot and bubbly, then top with the remaining onions for an extra crunch. Crack green bean casserole is great for any meal. Serve it as a side dish for holidays or family dinners. Pair it with roast chicken or turkey for a hearty meal. You can also enjoy it with grilled meats. It adds a creamy texture that balances out rich meats. For a lighter option, serve it with a fresh salad. This helps cut through the creaminess. You can also offer it as a main dish for a vegetarian meal. Just add some crusty bread on the side. Pair your casserole with a light white wine or sparkling water. A crisp Sauvignon Blanc works well with the dish's rich flavors. If you prefer non-alcoholic options, try a refreshing lemonade or iced tea. For a cozy meal, serve it with mashed potatoes or rice. Both options absorb the sauce's flavor well. You could also include roasted vegetables for a colorful plate. Pro Tips Choose Fresh Beans: For the best flavor, use fresh green beans instead of canned. Blanch them briefly before adding to the casserole for a crispier texture. Customize Your Cheese: Experiment with different types of cheese like Monterey Jack or Pepper Jack for a unique flavor twist. Crunchy Topping: Add a mix of breadcrumbs and fried onions for an extra crunchy topping that contrasts beautifully with the creamy filling. Make Ahead: Prepare the casserole a day in advance and refrigerate it. Just bake it when you're ready to serve for a hassle-free meal. {{image_2}} You can easily make this dish vegetarian. Just skip the bacon. The base is rich and creamy, thanks to the cream of mushroom soup and sour cream. If you want a non-vegetarian twist, add crumbled bacon. It gives a smoky flavor that many love. Each option provides a unique taste while keeping the dish delicious. For a dairy-free version, swap sour cream with a plant-based yogurt. You can also use dairy-free cheese. Look for options that melt well. These changes keep the texture creamy without using dairy. Make sure to check the labels for any hidden dairy ingredients in soup and cheese. Feel free to get creative with extra ingredients! Adding cooked mushrooms or diced bell peppers can boost flavor. You might also try mixing in some cooked chicken for added protein. Some people enjoy a handful of nuts for crunch. Just remember, keep the balance of flavors in mind. Each addition should enhance the dish, not overpower it. After you enjoy your Crack Green Bean Casserole, let it cool down. Transfer any leftovers to an airtight container. Store it in the fridge for up to three days. If you have a large batch, you can divide it into smaller portions. This makes it easy to reheat later. When you're ready to eat the leftovers, preheat your oven to 350°F. Place the casserole in a safe dish. Cover it with foil to keep it moist. Heat for about 20 minutes or until it's hot. You can also use a microwave if you're in a hurry. Just heat it in short bursts to avoid overcooking. To freeze the casserole, make sure it's completely cool. Use a freezer-safe container or a heavy-duty freezer bag. It can last up to three months in the freezer. When you're ready to use it, thaw it overnight in the fridge. Then, reheat it in the oven for the best taste. Yes, you can make this casserole ahead of time. Mix all the ingredients together, but don’t bake it yet. Cover the dish and store it in the fridge for up to 24 hours. When ready, bake it as directed. You can store leftover casserole in the fridge for about 3 to 5 days. Make sure to cover it tightly. When you’re ready to eat it again, just reheat in the oven or microwave. If you want a substitute for cream of mushroom soup, you can use cream of chicken soup or a homemade white sauce. You can also use a can of cream of celery soup for a different twist. Yes, you can add other vegetables to the casserole! Some tasty options include chopped broccoli, carrots, or corn. These veggies will add flavor and color. Just be sure to adjust the cooking time if you add more ingredients. In this blog post, we explored the key ingredients and steps for making Crack Green Bean Casserole. We covered how to prepare it, bake it, and keep it safe to eat. I shared tips to make the dish shine and gave options for variations to suit diet needs. Remember, you can store leftovers and even freeze extra portions. This dish is flexible, tasty, and perfect for any meal. Enjoy making it your own!

Looking for a dish that combines delicious flavors and a creamy texture? You’ve found it! My Crack Green Bean Casserole is not only easy to make, but it also turns …

Read more

Categories Dinner

15 Easy Non-Sandwich Lunch Ideas for Busy Days

July 31, 2025 by Chef Jamie
For the 15 easy non-sandwich lunch ideas, you will need some key ingredients. Here’s a quick list: - Bell peppers - Quinoa - Black beans - Corn - Cheddar cheese - Chickpeas - Cherry tomatoes - Cucumbers - Feta cheese - Eggs - Spinach - Sushi rice - Avocados - Olive oil - Various herbs and spices Most of these items are common pantry staples. You might already have many in your kitchen. Always check your pantry before shopping! You can easily swap ingredients if you have specific needs. Here are some alternatives: - Quinoa: Use brown rice or couscous. - Black beans: Try kidney beans or lentils. - Cheddar cheese: Use mozzarella or a dairy-free cheese. - Chickpeas: Substitute with white beans or edamame. - Feta cheese: Goat cheese or tofu works well too. Feel free to adjust based on your dietary needs. If you're vegan or gluten-free, there are many options to make these recipes work for you! Here’s a brief breakdown of calories and nutrients for some of the lunch ideas: - Cheesy Quinoa Stuffed Peppers: About 350 calories, 15g protein, 15g fat, 45g carbs per serving. - Mediterranean Chickpea Salad: Roughly 250 calories, 10g protein, 12g fat, 30g carbs per serving. - Savory Egg Muffins: Around 200 calories, 12g protein, 14g fat, 6g carbs per serving. - Tasty Veggie Sushi Rolls: Approximately 300 calories, 8g protein, 5g fat, 55g carbs per serving. These numbers can vary based on your choices. Always check specific brands or ingredients to be sure! For detailed preparation of Cheesy Quinoa Stuffed Peppers, refer to the Full Recipe. Enjoy your healthy lunches! To make your non-sandwich lunches easy, start with some simple steps. First, gather all your ingredients. For each idea, you will prepare a base, like grains or veggies. Common bases are quinoa, rice, and pasta. Cook these bases first. You can boil quinoa or rice in water until soft. Pasta should cook until al dente. For veggies, steaming or roasting enhances their flavor. Let’s dive into the Cheesy Quinoa Stuffed Peppers. 1. Preheat your oven to 375°F (190°C). 2. Cut the tops off the bell peppers and remove the seeds. 3. In a large bowl, mix the cooked quinoa, black beans, corn, half of the cheese, cumin, paprika, olive oil, salt, and pepper. 4. Stuff each pepper with this mixture. 5. Place them upright in a baking dish and cover with foil. 6. Bake for 25 minutes. Remove the foil and add the rest of the cheese on top. 7. Bake for another 10 minutes until the cheese is melted and bubbly. 8. Garnish with fresh cilantro before serving. Other great recipes include Mediterranean Chickpea Salad, Savory Egg Muffins, and Tasty Veggie Sushi Rolls. Each one provides a unique flavor and easy prep. When cooking grains, rinse them before boiling to remove excess starch. This keeps them fluffy. For veggies, chop them into even pieces for uniform cooking. Roasting brings out natural sweetness, while steaming keeps them crisp. Tools can make cooking easier. A good knife helps with chopping. A rice cooker simplifies grain cooking. Use a baking dish for oven meals. Always keep your workspace clean to avoid mix-ups. Meal prep saves time and energy during busy days. Start by choosing a day to prepare meals. I often choose Sunday. Cook large batches of grains, proteins, and veggies. This way, you have a base ready for each lunch. For example, cook quinoa or rice in bulk. Store it in the fridge for easy access. Batch cooking helps you avoid stress. Make several servings of dishes like Mediterranean chickpea salad or cheesy quinoa stuffed peppers. These meals hold well in the fridge. You can mix and match them throughout the week. Grab-and-go lunches become a breeze when you have everything ready. Seasoning makes meals fun and tasty. Try using fresh herbs like basil or cilantro. They add freshness to any dish. Spices like cumin or paprika give warmth and depth. Don't forget to add salt and pepper to enhance flavors. Quick dressings or dips can transform a meal. For instance, mix olive oil with lemon juice for a simple salad dressing. You can also blend yogurt with herbs for a creamy dip. These little touches can change a basic dish into something special. Presentation makes meals more appealing. Use colorful plates to showcase your food. Arrange ingredients neatly to create a visual feast. Garnish with fresh herbs or a sprinkle of cheese for a pop of color. Pair your meals with refreshing drinks. A sparkling water with a slice of lemon complements many dishes. You can also serve sliced fruits as a side. They add sweetness and color to your lunch plate. {{image_2}} You can easily change these lunch ideas to fit your diet. For instance, if you want vegan meals, swap out cheese for nutritional yeast or avocado. For gluten-free options, use quinoa or brown rice instead of pasta. You can also explore flavors from different cultures. Try adding spices like curry for Indian flair or sesame oil for an Asian twist. The world of flavors awaits you! Using seasonal ingredients can make your meals fresh and tasty. Look for vegetables that are in season, like squash in fall or tomatoes in summer. You can also use leftovers creatively. For example, if you have grilled chicken, toss it into a salad or make a wrap. This not only reduces waste but also adds variety to your meals. Combining dishes can make lunch more exciting. Think about pairing a Mediterranean chickpea salad with savory egg muffins for a hearty meal. You could also create themed lunches. An Asian theme could feature veggie sushi rolls alongside a miso soup. It’s a fun way to try different flavors and keeps your lunch box interesting! Storing leftovers is key to keeping your meals fresh and tasty. For non-sandwich lunches, use airtight containers to lock in flavor. Glass or BPA-free plastic containers work best. Label each container with a date to track how long food lasts. For meals like Mediterranean chickpea salad, store it in a bowl with a lid. For cheesy quinoa stuffed peppers, wrap them tightly in foil before placing them in the fridge. Reheating meals can be tricky, but it is easy with the right tools. Use a microwave for quick meals like savory egg muffins. Heat them in short bursts for even warming. For dishes like creamy avocado pasta, use an oven to keep the texture. Preheat your oven to 350°F (175°C) and place the meal in a baking dish. Cover with foil to avoid drying out. Knowing how long your food lasts is important. In the fridge, most non-sandwich lunches last about 3-5 days. You can freeze meals like veggie sushi rolls for up to 3 months. Check for signs that food has gone bad. If it smells off or has changed color, it’s best to toss it. Always trust your senses when it comes to food safety. You can try a few of my favorite meals. The Mediterranean Chickpea Salad is bright and fresh. It has protein from chickpeas and fiber from veggies. Another great option is Savory Egg Muffins. They are easy to make and packed with spinach and cheese. Lastly, Tasty Veggie Sushi Rolls are fun and nutritious. You can fill them with fresh veggies like cucumber and avocado. These meals are quick and full of flavor. Yes, you can prepare many of these meals ahead of time. Meal prepping saves time on busy days. For example, you can make the Cheesy Quinoa Stuffed Peppers and store them in the fridge. Just reheat them when you’re ready to eat. The Mediterranean Chickpea Salad also keeps well for a few days. Make it on Sunday, and enjoy it all week. To make your lunches more filling, add protein or healthy fats. For instance, mix in some grilled chicken or chickpeas for extra protein. You can also top your dishes with avocado or nuts for healthy fats. These additions will help you feel satisfied longer. Yes, these recipes are quite budget-friendly. Most ingredients are easy to find and not too costly. For example, canned chickpeas and frozen corn are both affordable and healthy. You can also buy seasonal veggies to save more money. Planning meals around what’s on sale will help keep costs down. In this article, we explored simple non-sandwich lunch ideas, focusing on essential ingredients and their substitutes. You learned about nutritious options, cooking techniques, and meal prep tips to save time. Also, we discussed how to enhance flavors and store leftovers effectively. These strategies help you create tasty and satisfying lunches. So, dive in, get creative, and enjoy your meals! Remember, your kitchen is a space to experiment and have fun.

Are you tired of the same old sandwich routine for lunch? I feel you! In this post, I share 15 easy non-sandwich lunch ideas that will spice up your busy …

Read more

Categories Dinner

Strawberry Poppyseed Salad Dressing Simple and Fresh

July 31, 2025 by Chef Jamie
- Strawberries: Look for bright red, firm strawberries. Wash them gently and remove the green tops. Slice them for the dressing. Fresh strawberries give the best flavor. You can also use ripe berries for extra sweetness. - Greek yogurt: Use plain Greek yogurt for a creamy texture. It adds protein and tang. If you want a lighter option, you can replace it with low-fat yogurt or dairy-free yogurt. Both work well and keep the dressing creamy. - Honey: Honey adds natural sweetness. If you prefer other options, try maple syrup or agave nectar. These will change the flavor but still taste good. Adjust to your liking. - Apple cider vinegar: This vinegar brings a tangy flavor. It helps balance the sweetness of the strawberries. If you need a substitute, white vinegar or lemon juice can work too. Both provide a nice acidic kick. - Poppy seeds: These tiny seeds add crunch and a nutty flavor. Poppy seeds are also rich in nutrients like fiber and calcium. They enhance the dressing's texture and look. - Olive oil: Use high-quality extra virgin olive oil for the best taste. It adds richness to the dressing. If you want a different flavor, you can try avocado oil or sunflower oil. Each oil brings a unique taste to your dressing. For the complete recipe, check out the [Full Recipe]. To start making strawberry poppyseed salad dressing, you need to blend the base ingredients first. - Blending the base ingredients: Add 1 cup of fresh strawberries, 1/4 cup of Greek yogurt, 2 tablespoons of honey, and 2 tablespoons of apple cider vinegar to your blender. Toss in 1 tablespoon of poppy seeds, 1/4 teaspoon of salt, and 1/4 teaspoon of black pepper. Blend on high until everything is smooth and creamy. Scrape down the sides if needed. - Achieving the right texture: The goal is a silky and creamy texture. If it’s too thick, blend in a little water or more yogurt. If it’s too thin, add more strawberries or yogurt to thicken it up. Next, we emulsify the dressing to make it creamy and smooth. - Techniques for smooth dressing: While the blender runs, slowly drizzle in 1/2 cup of extra virgin olive oil. This helps to combine the ingredients well. Blend until fully mixed and creamy. - Adjusting acidity and sweetness: After blending, taste your dressing. If it’s not sweet enough, add a little more honey. If it’s too sweet, a splash more apple cider vinegar can balance it out. Chilling is key for great flavor. - Importance of chilling: Refrigerate your dressing for at least 30 minutes. This allows all the flavors to meld together. - How long to refrigerate before serving: You can chill it longer if you want. Just keep it in an airtight container. This dressing tastes best when served cold. Once you follow these steps, your strawberry poppyseed salad dressing will be ready to elevate your salads! For a detailed overview, check out the Full Recipe. To balance flavors, you want sweet and tangy to work together. The honey adds sweetness, while the apple cider vinegar brings tang. Taste as you mix to get it just right. If it's too sweet, add more vinegar. If it’s too tangy, add honey. If your dressing is too thick, add a splash of water or more olive oil. For a thinner consistency, blend longer. If it's too thin, blend in more Greek yogurt to thicken it up. This dressing shines on salads, especially with mixed greens and fruits. Pair it with nuts, cheese, or grilled chicken to enhance flavors. You can also use it as a dip for fresh veggies. It works great on grain bowls or drizzled over roasted veggies. Serve your dressing in a pretty bottle or jar. Add a ribbon for flair. When you pour it over a salad, it looks stunning with vibrant colors. Store it in decorative containers to make it a standout item in your fridge. For a fun twist, label your jars with the date or special notes about the dressing. Check out the Full Recipe for the perfect dressing to try today! {{image_2}} You can add herbs for extra flavor in strawberry poppyseed dressing. Fresh basil or mint adds a nice twist. Start with a small amount and blend it in. Taste as you go to find the right balance. You can also experiment with citrus flavors. Try adding lime or orange juice. This will brighten the dressing and make it more refreshing. To make the dressing vegan, substitute Greek yogurt with a plant-based yogurt. You can also use maple syrup instead of honey. This keeps the sweetness while staying true to vegan diets. For low-calorie options, reduce the olive oil. You can use less or replace it with vegetable broth. This change cuts calories without losing too much flavor. Using seasonal fruits can change the flavors of your dressing. In summer, try adding peaches or raspberries. In fall, you might use apples or pears. Each fruit brings its unique taste and makes the dressing special. You can also tailor the dressing for holiday parties. During winter, add cranberries for a festive touch. This adds color and a tart flavor perfect for holiday meals. For the full recipe, check out the Strawberry Poppyseed Bliss Dressing. To keep your Strawberry Poppyseed Salad Dressing fresh, use glass jars or BPA-free containers. Glass keeps flavors intact and doesn't absorb odors. Always label your jar with the date you made it. This step helps you track freshness. This dressing can last about one week in the fridge. Store it in the coldest part, usually at the back. Look for signs like separation, off smell, or mold. If you notice any, it’s best to toss it. You can freeze this dressing, but it may change texture. Pour the dressing into ice cube trays for easy use later. To thaw, place cubes in the fridge overnight. Stir well before using to regain the creamy texture. How can I make it less sweet? You can reduce sweetness by cutting back on honey. Try adding more vinegar to balance the taste. You can also mix in a bit of plain Greek yogurt for a creamy, less sweet flavor. Can I use frozen strawberries instead of fresh? Yes, you can use frozen strawberries. Just thaw them first and drain any excess liquid. This will help keep your dressing from being too watery. Is it safe to eat if left out for a while? I recommend not leaving it out for more than two hours. The yogurt can spoil if not kept cool. Always store any leftovers in the fridge. Best brands for pre-made strawberry poppyseed dressing Some popular brands include Annie's, Ken's, and Kraft. They offer tasty options and are easy to find. Check the salad dressing aisle at your local grocery store. Where to find it in stores Look for strawberry poppyseed dressing in the salad dressing section. Some stores may place it near fresh produce. If you can't find it, ask a store employee for help. Calorie count per serving This dressing has about 80 calories per two-tablespoon serving. This can vary based on the brand or ingredients used. Any potential allergens to be aware of This dressing contains dairy from Greek yogurt and may have honey. Check labels for allergens. If you're allergic to nuts, watch for any added nuts in store-bought options. This blog post covered making a tasty strawberry poppyseed dressing. We looked at fresh and pantry ingredients, plus step-by-step instructions. I shared tips to improve your dressing, ways to serve it, and how to store it safely. Remember to balance your flavors and try seasonal twists. Enjoy your dressing on salads, or even as a dip. With these ideas, you’ll create something delicious that everyone will love. Get started today and elevate your meals!

Looking to add a burst of flavor to your salads? My Strawberry Poppyseed Salad Dressing is simple, fresh, and utterly delicious! With just a few easy-to-find ingredients, you’ll create a …

Read more

Categories Salads

Cozy Gingerbread Latte Warm and Delightful Beverage

July 31, 2025 by Chef Jamie
To make a cozy gingerbread latte, you'll need these key ingredients: - 1 cup milk (dairy or non-dairy) - 1 cup brewed strong coffee or espresso - 2 tablespoons gingerbread syrup (store-bought or homemade) - 1/4 teaspoon ground cinnamon - 1/4 teaspoon ground ginger - 1/8 teaspoon nutmeg These ingredients blend together to create a warm and delightful drink. Choose your milk based on your taste or dietary needs. Both dairy and non-dairy options work well. The coffee or espresso you use will impact the drink's strength. A strong brew pairs nicely with the sweet flavors of the gingerbread syrup. Feel free to use your favorite brand. The gingerbread syrup adds that classic holiday taste. You can easily make it at home or buy it from a store. Spices like cinnamon, ginger, and nutmeg enhance the drink's warmth. They add depth to the flavor and make it feel special. You can take your gingerbread latte to the next level with these options: - 1 tablespoon whipped cream (optional) - A sprinkle of cinnamon or crushed graham crackers for garnish Whipped cream adds a rich and creamy touch. It makes your latte look inviting too. For garnish, you can use cinnamon or crushed graham crackers. Both add a nice crunch and extra flavor. You can also try other flavors like vanilla or caramel. These can give your latte a unique twist. The cozy gingerbread latte is all about comfort, so feel free to customize it! For the full recipe, check out the Cozy Gingerbread Latte section. To start, heat 1 cup of milk in a small saucepan over medium heat. Keep a close eye on it to avoid boiling. Stir occasionally until it gets hot. Once hot, grab a frother or whisk. Froth the milk until it becomes creamy and foamy. While you heat the milk, brew 1 cup of strong coffee or espresso. Use your favorite coffee maker. You want a rich flavor to stand up to the spices. If you prefer espresso, aim for a double shot for a stronger taste. In a large mug, combine your brewed coffee with 2 tablespoons of gingerbread syrup. Add 1/4 teaspoon ground cinnamon, 1/4 teaspoon ground ginger, and 1/8 teaspoon nutmeg. Stir well to blend these flavors into the coffee. The spices create a warm, cozy feeling that pairs perfectly with the gingerbread syrup. Next, take your frothed milk and slowly pour it into the coffee mixture. Hold back the foam with a spoon as you pour. This will help you achieve a nice layered look. Once you’ve added the milk, gently mix again to combine. Now for the fun part! If you like, top your latte with a dollop of whipped cream. This adds a lovely creaminess and looks great, too. For an extra touch, sprinkle a little cinnamon or crushed graham crackers on top. Serve your cozy gingerbread latte immediately. Enjoy it warm to get the full flavor. This drink is perfect for chilly days or a festive gathering. For the full recipe, check out the Cozy Gingerbread Latte section. To make the perfect latte, you need the right balance of coffee and milk. I suggest using a 1:1 ratio. That means one cup of coffee to one cup of milk. This mix gives you a strong flavor without being too heavy. Frothing the milk is key for a good latte. Heat the milk until it's hot but not boiling. Use a frother or whisk to create froth. Aim for a creamy and foamy texture. This step adds a nice touch to your drink. You can make your latte healthier with low-calorie options. For the syrup, look for a sugar-free gingerbread syrup. You can also use almond or oat milk for fewer calories. These options keep your drink light and tasty. If you want a vegan latte, replace dairy milk with coconut or almond milk. Choose a vegan gingerbread syrup to match. This way, everyone can enjoy this cozy drink. Feel free to mix up flavors for the seasons. Add a dash of nutmeg or peppermint for a holiday twist. You can also experiment with maple syrup for a different taste. Pair your gingerbread latte with treats like gingerbread cookies or biscotti. This combo makes a lovely snack. It’s perfect for cozy gatherings or quiet moments at home. {{image_2}} Adding different flavors can make your cozy gingerbread latte even better. Try adding a touch of pumpkin spice for warmth. The spice mix has nutmeg, cinnamon, and ginger, which fit right in. Caramel can also add a sweet twist. Just a drizzle on top or mixed in can brighten the taste. You can also use different sweeteners, like honey or maple syrup. These can change the flavor a lot and make it your own. You may want a gingerbread latte without caffeine. For a tasty option, use steamed milk with gingerbread syrup. If you want a kid-friendly drink, use warm milk and syrup without coffee. This way, kids can enjoy that festive flavor too. Another option is to use herbal tea. A spiced chai tea can work well and still give you that gingerbread taste. On warm days, try an iced gingerbread latte. Start by brewing your coffee or espresso and let it cool. Next, mix it with gingerbread syrup and spices. Fill a glass with ice, and pour in the coffee mix. Finally, top with cold milk and stir. For fun, you can add whipped cream on top. This drink is refreshing and brings the cozy flavors of gingerbread into a cool treat. Enjoy it on a sunny afternoon! To keep brewed coffee or espresso fresh, store it in an airtight container. This helps keep the flavor intact. You can keep it in the fridge for up to three days. If you have gingerbread syrup left over, pour it into a clean bottle. Seal it tightly and store it in the fridge. It should last for about a month. When it's time to enjoy your gingerbread latte again, you can reheat the coffee on the stove. Use low heat to avoid burning it. For the milk, I suggest using a microwave or stovetop. Heat it gently, stirring often. This keeps the flavor and texture just right. Milk can stay fresh in the fridge for about a week after opening. Always check the expiration date. Your gingerbread syrup should stay good for about a month in the fridge. Look for changes in color or smell to spot spoilage. If it smells off or looks strange, it’s best to toss it out. To make homemade gingerbread syrup, you need simple ingredients. Here’s a basic recipe: - 1 cup water - 1 cup brown sugar - 1 teaspoon ground ginger - 1 teaspoon ground cinnamon - 1/2 teaspoon ground nutmeg - 1/2 teaspoon vanilla extract 1. In a saucepan, combine water and brown sugar over medium heat. 2. Stir until the sugar dissolves. 3. Add the spices and vanilla extract. 4. Simmer for 5-10 minutes. 5. Let it cool and store in a jar. This syrup adds warmth and spice to your Cozy Gingerbread Latte. Yes, you can make a gingerbread latte without coffee. Here are a few ideas: - Use brewed herbal tea like chai for a spiced flavor. - Try steamed milk with gingerbread syrup for a sweet treat. - Mix hot chocolate with gingerbread syrup for a cozy drink. These options still give you that warm gingerbread taste! Different types of milk froth differently. Here’s a quick comparison: - Whole milk: Creates rich, creamy foam. Best choice for many. - 2% milk: Froths well but is less creamy than whole. - Almond milk: Can froth, but may be less stable. - Oat milk: Froths nicely and adds a sweet flavor. For your Cozy Gingerbread Latte, whole milk is often the best for that perfect texture. Many cafes serve gingerbread lattes, especially in fall and winter. Here are some popular spots: - Starbucks: Known for their seasonal gingerbread latte. - Dunkin': Often features a gingerbread flavor during the holidays. - Local coffee shops: Check seasonal menus for unique takes on this drink. These places often have their own twist, so keep an eye out! Creating a gingerbread latte at home is fun and simple. Start with essential ingredients like milk, coffee, and gingerbread flavoring. Follow the steps to prepare, mix, and serve your latte perfectly. Use the tips for healthful options and seasonal twists to keep it exciting. Experiment with variations, including iced and non-caffeinated options. Remember to store leftovers properly, and check the freshness of your ingredients. Now, you can enjoy a cozy cup any time you want!

Imagine wrapping your hands around a warm, cozy mug filled with a fragrant gingerbread latte. This delightful beverage brings holiday cheer any time of year. With easy steps and simple …

Read more

Categories Breakfast

Pumpkin Streusel Muffins Delightful and Easy Recipe

July 31, 2025 by Chef Jamie
To make these tasty muffins, you need some key ingredients. Here’s a list: - 1 cup canned pumpkin puree - 1/3 cup vegetable oil - 1/2 cup brown sugar - 1/4 cup granulated sugar - 2 large eggs - 1 teaspoon vanilla extract - 1 1/2 cups all-purpose flour - 1 teaspoon baking powder - 1 teaspoon baking soda - 1 teaspoon ground cinnamon - 1/2 teaspoon ground ginger - 1/4 teaspoon ground nutmeg - 1/4 teaspoon salt - 1/2 cup chopped walnuts (optional) These ingredients come together to give your muffins a moist and rich flavor. The pumpkin puree adds a lovely texture and sweetness that makes every bite delightful. You can add extra flavors to your muffins. Here are some ideas: - Chocolate chips for a sweet touch - Dried cranberries or raisins for a fruity burst - Chopped apples for added texture - Different nuts like pecans or almonds These add-ins can change the taste and make your muffins unique. Feel free to mix and match what you like. Gathering the right tools makes baking easier. Here’s what you need: - Muffin pan - Paper liners or non-stick spray - Mixing bowls - Whisk and spatula - Measuring cups and spoons - Toothpick for testing doneness Having these tools on hand helps you create perfect muffins each time. Now, you're ready to bake using the [Full Recipe]. Enjoy creating these delicious pumpkin streusel muffins! Start by preheating your oven to 350°F (175°C). Line your muffin pan with paper liners or grease it well. In a large mixing bowl, combine the pumpkin puree, vegetable oil, brown sugar, granulated sugar, eggs, and vanilla extract. Mix everything together until it is smooth. In another bowl, whisk together the flour, baking powder, baking soda, cinnamon, ginger, nutmeg, and salt. Gradually add this dry mix to your wet mix. Stir until just combined. Be careful not to overmix; it can make muffins tough. If you want to add walnuts, fold them in gently now. For the streusel topping, grab a small bowl. Mix the flour, brown sugar, and cinnamon together. Then, add the cold butter. Use your fingers or a fork to crumble it all together. It should look like coarse crumbs by the time you finish. Spoon the muffin batter into the prepared muffin pan, filling each cup about 3/4 full. This allows room for the muffins to rise. Generously sprinkle the streusel topping over each muffin. Bake them in the oven for 18 to 20 minutes. To check if they are done, insert a toothpick in the center. It should come out clean. Once baked, remove them from the oven. Let the muffins cool in the pan for about 5 minutes. After that, transfer them to a wire rack to cool completely. Enjoy these delightful treats right away or save them for later! If you want the full recipe, you can find it in the earlier section. To make your muffins moist, use canned pumpkin puree. It adds natural moisture and flavor. Make sure not to overmix the batter. Mixing too much makes the muffins dry and tough. Instead, stir until just combined. This keeps the muffins light and fluffy. Avoid using too much flour. This can happen if you pack it in the measuring cup. Instead, use a spoon to add the flour to the cup. Then level it off with a knife. Also, don’t skip the streusel topping! It adds a nice crunch and extra flavor. Lastly, check the oven temperature. If it’s too hot, your muffins may burn on the outside but stay raw inside. To boost the flavor, add a pinch of nutmeg or more cinnamon. Chopped walnuts give a nice crunch, too. If you want to try something new, consider adding chocolate chips. They melt in the oven and add a delicious sweetness. For a fun twist, mix in some dried cranberries or raisins. These add a chewy texture that pairs well with pumpkin. For the full recipe, refer to the previous section. {{image_2}} You can easily make these muffins gluten-free. Swap regular flour for a gluten-free blend. Look for a blend that has xanthan gum. This helps the muffins rise and stay soft. You can follow the same recipe for mixing and baking. Just remember to double-check your labels for gluten-free ingredients. Nuts and seeds can add flavor and crunch. Try pecans, almonds, or even pumpkin seeds. You can add about half a cup of your chosen nuts or seeds to the batter. Mix them in gently to keep your muffins light and fluffy. If you prefer a nut-free option, sunflower seeds work great too! You can switch up the spices for a new taste. Instead of cinnamon, try pumpkin pie spice or cardamom. You can also add fruits like raisins or cranberries for extra sweetness. If you want a richer flavor, replace half of the oil with applesauce. This keeps the muffins moist and adds a nice touch. For the full recipe, check out the main article. Enjoy experimenting with these variations! Store your pumpkin streusel muffins in an airtight container. This keeps them fresh and moist. You can stack them, but place parchment paper between layers to avoid sticking. If you want them to last longer, keep them in the fridge. Just remember to let them cool fully before storing. You can freeze these muffins for up to three months. Wrap each muffin in plastic wrap, then place them in a freezer bag. When you want to eat one, take it out and let it sit at room temperature. For a quick heat-up, pop it in the microwave for about 15 to 20 seconds. This revives the taste and texture. These muffins stay fresh at room temperature for about three days. If stored in the fridge, they last about a week. Always check for any signs of mold or unusual smell before eating. Enjoy your pumpkin streusel muffins fresh or reheated, and don't forget to check the Full Recipe for more details! Yes, you can use fresh pumpkin. Start by roasting a small pumpkin. Cut it in half, remove the seeds, and place it cut side down on a baking sheet. Roast it at 350°F (175°C) for about 45 minutes or until soft. Scoop out the flesh and mash it until smooth. Use this in place of the canned pumpkin puree in the recipe. Fresh pumpkin adds a nice flavor but may be slightly wetter than canned. Adjust the liquid in your batter if needed. To check if your muffins are done, insert a toothpick in the center. If it comes out clean or with just a few crumbs, they're ready. If it has wet batter on it, give them a few more minutes. Usually, they take about 18-20 minutes to bake. The muffins should also look puffed up and golden brown on top. If you need to replace eggs, try using applesauce or mashed banana. Use 1/4 cup of unsweetened applesauce or mashed banana for each egg. These options keep the muffins moist and add a hint of sweetness. You can also use flaxseed meal. Mix 1 tablespoon of flaxseed meal with 2.5 tablespoons of water and let it sit for a few minutes. This makes one egg substitute. These swaps work well and keep your muffins tasty. For the full recipe, check out the details above. Pumpkin streusel muffins are easy to make and delicious. We covered key ingredients, tips, and tricks. I shared step-by-step instructions for a perfect bake. You learned how to make them moist and flavorful, while avoiding common mistakes. There are fun variations, like gluten-free options or tasty add-ins. Finally, I gave storage tips to keep your muffins fresh. Enjoy baking these treats, and don’t be afraid to experiment with flavors!

If you love the cozy flavors of fall, you’ll adore my Pumpkin Streusel Muffins recipe! These muffins are not just easy to make; they deliver rich pumpkin taste and a …

Read more

Categories Desserts

Chewy Maple Brown Sugar Cookies Irresistible Treat

July 31, 2025 by Chef Jamie
- 2 ¼ cups all-purpose flour - ¾ cup unsalted butter, softened - 1 cup packed brown sugar - ½ cup granulated sugar The main ingredients in chewy maple brown sugar cookies create a rich and sweet flavor. The brown sugar adds a deep taste, while the butter makes them soft. Flour gives the cookies structure, letting them hold together well. - 1 cup chopped pecans or walnuts - ½ tsp ground cinnamon Using chopped nuts adds crunch. Pecans or walnuts give a nice texture. Ground cinnamon enhances the warm flavor of maple. These add-ins are not necessary, but they elevate the cookie. - 1 large egg - 2 tbsp pure maple syrup - 1 tsp vanilla extract - 1 tsp baking soda - ½ tsp salt The egg binds the dough and helps it rise. Maple syrup brings a lovely sweetness and aroma. Vanilla extract adds depth. Baking soda helps the cookies puff up, while salt balances the sweetness. This mix creates a perfect cookie dough. For the full recipe, check out the provided details. Enjoy making these delightful cookies! - Preheat the oven to 350°F (175°C). - Line a baking sheet with parchment paper. - Whisk together flour, baking soda, salt, and cinnamon. - Cream together softened butter, brown sugar, and granulated sugar until fluffy. - Beat in egg, maple syrup, and vanilla extract. - Combine dry ingredients with wet mixture. - Fold in optional nuts if desired. - Drop dough onto the baking sheet. - Bake for 10-12 minutes. The moment you take these cookies out of the oven, the sweet aroma fills your kitchen. These chewy maple brown sugar cookies are not only delicious but also easy to make. Follow the steps above, and you will create a treat that your family and friends will love. For the complete recipe, check out the Full Recipe section. To make your cookies chewy, avoid overmixing the dough. Mix just until the flour disappears. This keeps the cookies soft. Bake them until the edges are golden but the centers remain soft. This way, you get that perfect bite. After baking, let your cookies cool on the baking sheet for 5 minutes. This helps them firm up a bit. Then, transfer them to a wire rack. This cooling step keeps them from getting soggy. For a fun look, stack the cookies on a colorful plate. This makes them pop! You can drizzle some maple syrup over the top. Add a sprinkle of nuts for extra charm. These small touches make your cookies look as good as they taste. Find the Full Recipe to create your own batch! {{image_2}} You can change the flavor of your cookies in fun ways. Try adding chocolate chips for a sweeter treat. The rich chocolate pairs well with maple. You can also experiment with different nuts, like almonds or pecans. Dried fruits, such as cranberries or raisins, add a nice chewiness. Mix and match to find your favorite blend. If you need a gluten-free choice, it's easy! Just swap out the all-purpose flour for a gluten-free flour blend. This simple switch keeps the cookies chewy and delicious. Make sure to check the blend for the best results. Want to make these cookies vegan? It's simple! Use vegan butter instead of regular butter. Replace the egg with a flax egg. To make a flax egg, mix one tablespoon of ground flaxseed with three tablespoons of water. Let it sit for a few minutes to thicken. This will keep your cookies tasty and cruelty-free. Try these variations to enjoy chewy maple brown sugar cookies in new ways! For the complete recipe, check out the Full Recipe. You can keep your chewy maple brown sugar cookies in an airtight container. They will stay fresh at room temperature for up to 1 week. This makes them great for snacks or treats throughout the week. Want to save some cookies for later? You can freeze both unbaked dough and baked cookies. Simply wrap the dough in plastic wrap and place it in a freezer bag. For baked cookies, store them in an airtight container or freezer bag. They will keep their flavor and texture for several months. If your cookies lose their chewiness, don’t worry! Just reheat them in the oven for a few minutes. This will help bring back that soft, chewy texture. Enjoy them warm for the best taste! For the full recipe, check out the earlier section. Typically, they last up to one week at room temperature. Store them in an airtight container. This helps keep them soft and chewy. Yes, you can refrigerate or freeze the dough. If you freeze it, just thaw it before baking. This way, you can enjoy fresh cookies anytime. Avoid overmixing and underbake slightly for a soft center. This keeps the cookies moist and chewy. You want the edges golden but the center still soft. Yes, light brown sugar works well but may yield a milder flavor. Dark brown sugar adds more depth and a hint of caramel. Choose based on your taste preference. Yes, simply multiply the ingredients by two for a larger batch. This is great for sharing with friends or for parties. Just keep an eye on the baking time. For the full recipe, check out the detailed instructions above. Happy baking! You learned how to make chewy maple brown sugar cookies step by step. We covered all the key ingredients, including optional add-ins for extra flavor. You now know the tips for perfect texture and presentation ideas. You can also explore variations and storage methods for long-lasting treats. Baking these cookies can be fun and rewarding. Try your own mix-ins and share your cookie journey! Enjoy every bite of your homemade goodness.

Looking for a cookie that hits all the right notes? These Chewy Maple Brown Sugar Cookies are your answer! With warm, rich flavors and a delightful chewiness, these treats will …

Read more

Categories Desserts

Warm & Spicy Orange Cinnamon Milk Tea Delight Recipe

July 31, 2025 by Chef Jamie
Here is what you need to make warm and spicy orange cinnamon milk tea. Gather these simple ingredients: - 2 cups milk (dairy or plant-based) - 1 cup water - 1 orange (zest and juice) - 2 teaspoons loose black tea or 2 tea bags - 1 cinnamon stick - 1-2 teaspoons honey or maple syrup (adjust to taste) - 1/4 teaspoon ground ginger - 1/4 teaspoon ground cloves or allspice - A pinch of nutmeg - Orange slices and cinnamon sticks for garnish These ingredients blend together to create a cozy drink. The milk adds creaminess, while the spices bring warmth. The orange zest and juice give it a bright, fruity note that lifts the entire drink. You can adjust the sweetness to your liking. If you want to learn how to prepare this delightful tea, check out the full recipe. Each sip will warm your soul and bring comfort to your day! 1. In a saucepan, combine 1 cup of water, the zest of 1 orange, and 1 cinnamon stick. This mix will give your tea a warm and inviting scent. 2. Bring the mixture to a gentle boil over medium heat. Watch it closely, as you want it to bubble softly and not boil hard. 3. Once boiling, add 2 teaspoons of loose black tea or 2 tea bags. Let it steep for about 4-5 minutes. This time allows the tea to release its rich flavor. 1. After steeping, remove the tea bags or strain out the loose tea leaves. This step leaves you with a smooth tea base. 2. Now, add 2 cups of milk (dairy or plant-based) and the juice of your zested orange to the saucepan. This makes the tea creamy and adds citrusy notes. 3. Stir in 1-2 teaspoons of honey or maple syrup, 1/4 teaspoon of ground ginger, 1/4 teaspoon of ground cloves or allspice, and a pinch of nutmeg. Mix well to ensure all the flavors blend together. 1. Heat the mixture gently until it is warm but not boiling. Stir occasionally to keep it from sticking to the bottom of your pan. 2. Once heated, pour the tea into mugs. The aroma will fill the air, making your mouth water! 3. For a nice touch, garnish each mug with an orange slice and an extra cinnamon stick. This adds a lovely visual appeal and extra flavor. For more details, check the Full Recipe. You can choose between honey or maple syrup for sweetness. Honey gives a floral taste. Maple syrup adds a rich, earthy flavor. Start with one teaspoon and adjust to your liking. Taste it after stirring in the sweetener. If it needs more sweetness, add a little more. Steep the black tea for 4-5 minutes. This gives you a strong flavor without bitterness. If you steep too long, the tea can taste harsh. Try using a timer for better control. Taste it at 4 minutes to see if it’s strong enough for you. Serve the tea warm, not boiling. The ideal temperature is around 160°F (70°C). If you want frothy milk, heat the milk separately and whisk it. This makes a nice foam on top. Pour the milk into the tea slowly to keep the froth intact. Enjoy your warm drink! {{image_2}} You can use dairy milk or plant-based milk for this recipe. Dairy milk gives a rich and creamy taste. For plant-based options, almond milk, oat milk, and coconut milk are great choices. They add unique flavors and keep the tea enjoyable. Want to spice things up? Try adding cardamom or black pepper for a kick. You can also increase the amount of ginger or cloves. If you like heat, add a pinch of cayenne pepper. This will make your drink warm and exciting. Using natural sweeteners like agave or stevia can cut down sugar. They add sweetness without extra calories. For a dairy-free version, coconut milk is a great choice. It's rich and creamy, plus it has healthy fats. This makes your tea tasty and good for you! Explore the [Full Recipe](#) to create your own delicious Warm & Spicy Orange Cinnamon Milk Tea! To store your Warm & Spicy Orange Cinnamon Milk Tea, first let it cool. Pour it into an airtight container. Keep it in the refrigerator for freshness. This tea stays tasty for a few days. When you want to enjoy it again, pour it into a pot. Heat it on the stove or in the microwave. Stir often to keep it smooth. This tea lasts up to three days in the fridge. After that, it may lose flavor. Look for changes in smell or color. If it smells off or looks strange, throw it away. Never risk your health for old tea. You can freeze the tea if you want to keep it longer. Pour it into ice cube trays for easy use later. Once frozen, transfer the cubes to a freezer bag. To use, thaw the cubes in the fridge overnight or heat them directly. This way, you always have a warm treat ready! To make this tea, follow these simple steps: 1. In a saucepan, mix 1 cup of water, zest from 1 orange, and 1 cinnamon stick. 2. Heat the mixture over medium heat until it gently boils. 3. Once boiling, add 2 teaspoons of loose black tea or 2 tea bags. Let it steep for 4-5 minutes. 4. Remove the tea bags or strain the tea leaves. 5. Add 2 cups of milk and the juice of the orange to the saucepan. 6. Stir in 1-2 teaspoons of honey or maple syrup, 1/4 teaspoon of ground ginger, 1/4 teaspoon of ground cloves, and a pinch of nutmeg. 7. Heat until warm, but do not boil. Stir gently to avoid sticking. 8. Pour into mugs and garnish with an orange slice and an extra cinnamon stick. Each ingredient offers unique health benefits: - Milk: Provides calcium and vitamin D for strong bones. - Orange: Packed with vitamin C, it boosts your immune system. - Black tea: Contains antioxidants that can improve heart health. - Cinnamon: Known for its anti-inflammatory properties and can help regulate blood sugar. - Honey or maple syrup: Natural sweeteners that offer nutrients and antioxidants. - Ginger: Aids digestion and can reduce nausea. - Cloves or allspice: Rich in antioxidants and have anti-inflammatory effects. - Nutmeg: May improve sleep and reduce stress. Yes, you can make this tea vegan. Here are some tips: - Use plant-based milk like almond, soy, or oat milk. - Replace honey with maple syrup or agave nectar for sweetness. - All other ingredients are naturally vegan-friendly. You can find these ingredients at most grocery stores. - Milk: Look for dairy or plant-based options in the dairy aisle. - Tea: Check the tea section for loose black tea or tea bags. - Spices: Find cinnamon, ginger, cloves, and nutmeg in the spice aisle. - Oranges: Fresh oranges are available in the produce section. - Sweeteners: Honey or maple syrup can be found in the baking aisle. For the Full Recipe, you can refer back to the main article. This article covered how to make Warm & Spicy Orange Cinnamon Milk Tea. We explored the key ingredients, step-by-step instructions, and helpful tips for the best taste. You learned about variations to suit your diet and preferences, along with storage guidance. Enjoy experimenting with flavors and customizing this tea. It’s simple yet delicious, warm and comforting. This drink can brighten your day and taste great anytime. Now, gather your ingredients and start brewing!

Craving a cozy beverage that bursts with flavor? Look no further! My Warm & Spicy Orange Cinnamon Milk Tea will wrap you in warmth and delight. Picture the rich fusion …

Read more

Categories Breakfast

Bento Lunches for Kids Packed with Fun and Flavor

July 31, 2025 by Chef Jamie
When you make bento lunches, having the right ingredients is key. Each bite needs to be fun and tasty. - Rice and Protein Choices - Start with 1 cup cooked jasmine rice. This rice is soft and sticky, perfect for packing. - Add a protein like 1/2 cup cooked chicken, diced. You can use grilled, baked, or even rotisserie chicken. - For a veggie option, try tofu or beans. They add protein and flavor. - Colorful Vegetables and Fruits - Use 1/2 cup cucumber, thinly sliced. Cucumbers add a nice crunch. - Include 1/2 cup cherry tomatoes, halved. These bring a burst of sweetness. - Add 1/4 cup baby carrots, cut into sticks. They are great for munching. - For a pop of color, toss in 1/4 cup sweet corn. This could be canned or fresh. - Optional Garnishes and Seasonings - Drizzle in 2 tablespoons soy sauce (low sodium) for flavor. - Add 1 tablespoon sesame oil for a rich taste. - Sprinkle 1 tablespoon sesame seeds for a nice touch. - Don’t forget 2 hard-boiled eggs, peeled and halved. They are filling and fun. - For a finishing touch, use seaweed sheets for decoration. You can cut these into fun shapes to make your bento lively. These ingredients combine to make a well-rounded bento lunch. You can mix and match to keep things exciting. Try the full recipe to see how everything comes together! 1. Cooking Instructions for Jasmine Rice: Start with one cup of jasmine rice. Rinse it well under cold water. Then, cook according to the package instructions. Usually, this involves a 1:1.5 rice-to-water ratio. Bring water to a boil and add the rice. Reduce heat, cover, and simmer until tender. 2. Mixing in Flavor Enhancers: Once the rice is cooked, fluff it with a fork. Add one tablespoon of sesame oil and one tablespoon of sesame seeds. This gives the rice a nice nutty flavor. 3. Cooling Tips for Rice: Spread the rice on a plate to cool it quickly. This prevents it from becoming sticky. Let it cool completely before packing it into the bento box. 1. Recommended Marinade Ingredients: For the chicken, use half a cup of diced cooked chicken. Mix it with two tablespoons of low-sodium soy sauce. This will add a savory taste that kids love. 2. Time Recommendations for Marination: Let the chicken marinate for about ten minutes. This short time allows the flavors to soak in without making it too salty. 1. Hard-Boiling Eggs Properly: To make two hard-boiled eggs, place them in a pot of cold water. Bring the water to a boil. Once boiling, cook for ten minutes. Then, move them to cold water for easy peeling. 2. Cutting and Preparing Vegetables: Prepare the veggies while the chicken marinates. Slice half a cucumber thinly. Halve the cherry tomatoes and cut baby carrots into sticks. If using fresh corn, cook it until tender and cool it down. 3. Assembling the Bento Box Efficiently: Start by adding the cooled rice to one compartment of the bento box. Next, place the marinated chicken beside it. In another section, arrange the cucumber, tomatoes, corn, and carrot sticks. Add the halved hard-boiled eggs and a portion of shelled edamame. Now you have a colorful and fun bento lunch ready to go! For the full recipe, check out Bento Bliss: Colorful Kids’ Lunchbox. Serving Sizes for Kids When packing bento lunches, keep portions small. Kids do best with smaller servings. Aim for about: - 1/2 cup of rice - 1/4 cup of protein - 1/2 cup of veggies These sizes help avoid waste and keep kids energized. Incorporating Food Groups A balanced bento includes all food groups. Include: - Grains (like rice or quinoa) - Proteins (like chicken or tofu) - Vegetables (like cucumbers or carrots) - Fruits (like berries or apple slices) Mixing these makes lunches healthy and tasty. Using Fun Shapes and Colors Kids love fun! Use cookie cutters to create shapes. Try making: - Star-shaped sandwiches - Heart-shaped fruit Colorful foods attract kids’ eyes too. Use bright veggies and fruits to make meals pop. Using Seaweed for Decoration Seaweed can add flair. Use it to: - Create funny faces on rice or eggs - Wrap around sushi rolls Kids enjoy the playful designs. Plus, seaweed adds flavor and nutrients. Prepping in Advance for Busy Days Make bento lunches easier by prepping ahead. Cook rice and proteins on the weekend. Store them in the fridge. Cut veggies and fruits the night before. This saves time on busy mornings. Storing Bento Components Separately Keep ingredients fresh by storing them apart. Use small containers for each food group. This way, flavors don’t mix, and everything stays crisp. It also makes assembly quick and easy. For more ideas, check out the Full Recipe for Bento Bliss: Colorful Kids’ Lunchbox. {{image_2}} When you make bento lunches, the protein choice can change the whole meal. - Vegetarian Choices: You can use tofu, chickpeas, or tempeh. These options add great taste and texture. Try marinating tofu in soy sauce for flavor. It’s also fun to shape it into cute forms. - Seafood Options: Fish like salmon or shrimp can add a twist to your bento. Cooked shrimp is easy to eat and packed with protein. You can also use canned tuna mixed with a little mayo for a tasty spread. Switching up your base can make each bento unique. - Quinoa or Brown Rice Variants: Quinoa is a great swap for rice. It cooks quickly and is full of nutrients. Brown rice is also a hearty option, giving a nutty flavor. Both grains work well with many toppings. - Noodle-based Bento Options: Try using soba or rice noodles as your base. They are fun and different. Add some veggies and protein on top for a colorful meal. Using seasonal ingredients keeps your bento fresh and exciting. - Summer Fruits and Vegetables: In summer, add fruits like strawberries or watermelon. They are sweet and refreshing. Vegetables like bell peppers and cucumbers are crunchy and fun to eat. - Winter Comfort Additions: In colder months, root vegetables like carrots or sweet potatoes are great. They add warmth and comfort. You can roast them for extra flavor. For a complete bento experience, check out the Full Recipe. It has a wonderful mix of flavors and colors! Temperature Control and Safety Keeping your bento lunch safe is key. Aim to keep your food below 40°F (4°C). Use ice packs if you pack your bento for school. This helps keep proteins and other perishables fresh. If your child eats lunch after a long break, this is especially important. Containers to Use for Max Freshness Choose airtight containers for your bento. These containers help keep moisture in and air out. Look for bento boxes with separate compartments. This keeps each food item separate and fresh. Silicone liners can also help keep foods from mixing. Tips on Keeping Vegetables Crisp To keep veggies fresh, wash and dry them before packing. Store cucumbers and carrots in a damp paper towel. This helps keep them crisp during the day. You can also pack them in a small container with a lid. This way, they stay crunchy and tasty. Preventing Rice from Drying Out To stop rice from drying out, keep it covered. Once it's cool, place it in your bento box right away. Add a small piece of damp paper towel on top. This will help lock in moisture. If you use jasmine rice, it stays moist longer. This makes it a great choice for your bento. Remember to check the full recipe for more tips! Bento lunches are Japanese-style meals packed in a box. They often feature rice, protein, and colorful veggies. The main goal is to create a balanced meal. Each section of the bento box holds different foods, making lunch fun and varied. You can customize bento boxes to fit your child’s tastes and preferences. They are great for school or picnics. To attract picky eaters, focus on color and shape. Use bright vegetables like carrots, bell peppers, and cherry tomatoes. Cut food into fun shapes using cookie cutters. This makes meals look exciting. You can also include dips, like ranch or hummus, to encourage kids to try new foods. Add familiar favorites alongside new items. Experiment with different combinations to find what works best. Yes, you can prepare bentos the night before. This saves time on busy mornings. Store each food in separate airtight containers to keep them fresh. Assemble the bento box in the morning for a quick grab-and-go option. Make sure to include cold packs if needed to keep food safe. Most bento boxes are not dishwasher safe. Check the care instructions for your specific box. Hand washing with mild soap is usually best. This helps maintain the box's shape and design. Avoid using harsh scrubbers that can scratch the surface. Proper care will keep your bento box looking new and lasting longer. In summary, making bento lunches involves key ingredients like rice and protein, plus colorful veggies. We discussed step-by-step tips for cooking rice, marinating chicken, and assembling your bento. Creative ideas will help make the lunches fun. Always remember to store your bentos properly to maintain freshness. Bento lunches can be healthy and exciting for everyone. With a little planning, you can enjoy a delicious and fun meal every day!

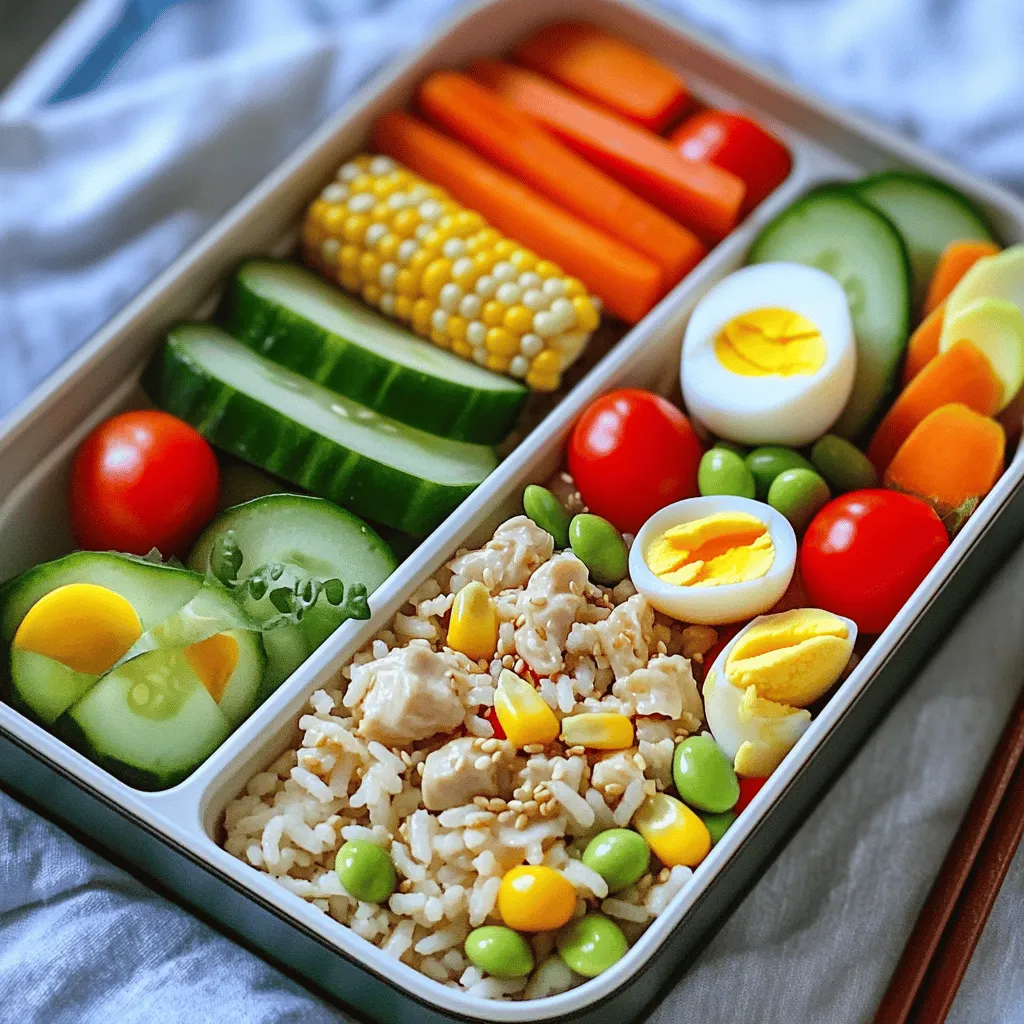
Are you tired of the same old lunch options for your kids? Let’s change that with fun and tasty bento lunches! In this guide, you’ll discover easy ingredients, fun presentation …

Read more

Categories Dinner

Easy Dinners for Toddlers Quick and Healthy Ideas

July 31, 2025 by Chef Jamie
For these yummy cheesy veggie pancakes, you need: - 1 cup whole wheat flour - 1 cup grated zucchini - 1/2 cup grated carrot - 1/2 cup shredded cheddar cheese - 2 large eggs - 1/2 cup milk (or non-dairy alternative) - 1 teaspoon baking powder - 1/2 teaspoon garlic powder - 1/2 teaspoon salt - 1 tablespoon olive oil (for cooking) These ingredients create a tasty meal that toddlers will love. Each ingredient plays a key role in making these pancakes healthy: - Whole wheat flour adds fiber, which helps digestion. - Zucchini is low in calories and packed with vitamins. - Carrots provide beta-carotene, good for vision. - Cheddar cheese offers calcium for strong bones. - Eggs are full of protein, helping with growth. - Milk delivers more calcium and vitamins. - Baking powder helps the pancakes rise. - Garlic powder adds flavor and has health benefits. - Salt enhances taste but should be used sparingly. - Olive oil is a heart-healthy fat. Together, these ingredients make a balanced dish for little ones. If you have allergies or preferences, here are some swaps: - Replace whole wheat flour with oat flour for gluten-free needs. - Use finely shredded sweet potato instead of zucchini for a different taste. - Swap cheddar cheese with dairy-free cheese for lactose intolerance. - Choose flaxseed meal and water as a vegan substitute for eggs. - Use almond milk or oat milk if you want a non-dairy option. These substitutions let you adjust the recipe to fit various needs while keeping it tasty. For the full recipe, be sure to check out the complete details! To start making cheesy veggie pancakes, gather your ingredients. You will need whole wheat flour, zucchini, carrot, cheddar cheese, eggs, milk, baking powder, garlic powder, salt, and olive oil. First, mix the dry ingredients in one bowl. In another bowl, whisk the eggs and milk until smooth. Then, add the grated veggies and cheese to the wet mix. Combine the two mixtures gently. Remember, do not overmix. When cooking pancakes, use a non-stick skillet for easy flipping. Heat the skillet on medium heat and add a little olive oil. Pour about 1/4 cup of batter for each pancake. Watch for small bubbles on the surface. This shows it's time to flip. Use a spatula to carefully turn the pancake. Cook until both sides are golden brown. Each pancake needs about 2-3 minutes on each side. This gives them a nice color and texture. If you make smaller pancakes, check them sooner. You want them cooked but not burnt. Keep cooking until all the batter is gone. Serve the pancakes warm with fruit slices or yogurt for dipping. For the full recipe, check the earlier section. To make pancakes that toddlers love, focus on flavors and textures. Start with the base recipe for Cheesy Veggie Pancakes. The key is to keep it simple and fun. Use whole wheat flour for a healthier choice. Grate veggies small so they blend well. This way, kids won't notice them as much. You can also add a pinch of cinnamon for sweetness. Sneaking veggies into meals is easy and smart. Besides zucchini and carrots, try adding finely chopped spinach or bell peppers. You can also blend cooked sweet potatoes into the batter. This adds sweetness and nutrition without changing the taste. Try serving pancakes with a side of apple sauce or yogurt. Both pair well and add more flavor. If your child is a picky eater, try different cooking methods. For example, bake the pancakes in muffin tins for fun shapes. This can make them more appealing. You can also try making mini pancakes. Smaller sizes are easier for little hands to hold. Lastly, let your child help in the kitchen. They may be more excited to eat what they made. For more details, check out the Full Recipe. {{image_2}} You can switch up the veggie mix. Try adding spinach or sweet potato to your pancakes. Both options add nutrients and flavor. If you want a touch of sweetness, use mashed banana instead of zucchini. You can also swap cheddar cheese for mozzarella or feta. This keeps it fun and fresh! You can make sweet pancakes too! Add a tablespoon of honey or maple syrup to the batter. Use blueberries or apple chunks for a fruity twist. For savory pancakes, try adding herbs like parsley or dill. This makes them tasty and exciting for your toddler's palate. Freezing pancakes is simple and smart. Let the pancakes cool completely, then stack them with parchment paper in between. Put them in a freezer bag. When ready to eat, take out as many as you need. Reheat them in the toaster or microwave. This keeps them warm and soft without losing flavor. For more tips, check the Full Recipe for Cheesy Veggie Pancakes. Once you cook your cheesy veggie pancakes, store leftovers right. Let them cool first. Place the pancakes in an airtight container or wrap them tightly in plastic wrap. This keeps them fresh and prevents them from drying out. Leftover pancakes last about three days in the fridge. If you want to keep them longer, freeze them. Place parchment paper between each pancake to avoid sticking. Store them in a freezer-safe bag. They can stay good for up to two months in the freezer. When it's time to eat your pancakes again, heat them well. You can use a toaster, microwave, or skillet. For the toaster, set it to medium and toast until warm. In the microwave, heat them for about 20-30 seconds. If using a skillet, warm them over low heat for a few minutes. This keeps them soft and tasty. Enjoy your pancakes with fruit or yogurt for a fun meal! For more ideas, check out the Full Recipe for cheesy veggie pancakes. The best vegetables for toddler pancakes are those that have mild flavors and soft textures. I love using zucchini, carrots, and spinach. Zucchini adds moisture without a strong taste. Carrots bring a nice sweetness. Spinach blends well and packs in nutrients. You can also try mashed sweet potatoes for a fun twist. These veggies will make your pancakes colorful and healthy. Yes, you can make these pancakes ahead of time. Just prepare the batter earlier in the day or even the night before. Store it in the fridge until you are ready to cook. You can also cook and freeze the pancakes. Simply stack them with parchment paper in between. Then, put them in a freezer bag. When it's time to eat, just reheat them in the microwave or toaster. To serve these pancakes to picky eaters, keep it fun and simple. Cut the pancakes into fun shapes using cookie cutters. Pair them with a tasty dip like yogurt or applesauce. You can also add some fruit slices on the side for a colorful plate. Let your little ones help with the toppings. This involvement may make them more excited to eat. For more ideas, check out the full recipe for Cheesy Veggie Pancakes. You learned how to make cheesy veggie pancakes, exploring essential ingredients and their benefits. We covered easy steps to prepare them quickly for toddlers. I shared helpful tips to please picky eaters and make pancakes that your kids will love. Don’t forget the variations for sweet or savory options. Storing and reheating leftovers can keep your meals fresh and tasty. These pancakes are a fun way to sneak in healthy veggies. Try them out and enjoy cooking with your little ones!

Finding quick, healthy dinners for toddlers can be a tough task. As a parent, I know that preparing meals your little one will enjoy is crucial. In this post, I …

Read more

Categories Breakfast

15 Pumpkin Recipes for Fall Flavorful Delights

July 31, 2025 by Chef Jamie
Pumpkin recipes need some basic ingredients. These ingredients make your dishes tasty and fun. Here are the must-haves: - Pumpkin puree - All-purpose flour - Sugar - Baking powder - Spices (like cinnamon and nutmeg) - Eggs - Butter or oil - Vegetable broth These ingredients work well together, bringing out the pumpkin's sweet and savory notes. To make your pumpkin dishes stand out, consider adding unique ingredients. These can give your meals a twist. Here are some to try: - Coconut milk: Adds creaminess to soups and curries. - Chickpeas: Great for a hearty addition to savory dishes. - Cheese: Parmesan or cream cheese can enhance flavor. - Fresh herbs: Basil or sage can lift your dishes. - Nuts and seeds: Use for crunch and extra nutrition. These ingredients can change your pumpkin dish from good to great. Sometimes you may need to swap out ingredients. Here are some easy substitutions: - Use almond flour instead of all-purpose flour for gluten-free options. - Swap sugar for honey or maple syrup for natural sweetness. - Replace eggs with applesauce in muffins for a vegan option. - Use vegetable stock instead of chicken stock for a vegetarian dish. These alternatives can keep your pumpkin recipes delicious and fun, no matter your diet. Pumpkin Spice Pancakes 1. In a large bowl, mix: - 1 cup all-purpose flour - 2 tablespoons sugar - 1 tablespoon baking powder - 1 teaspoon pumpkin pie spice - 1/2 teaspoon salt 2. In another bowl, whisk together: - 1 cup milk - 1 large egg - 1/4 cup pumpkin puree - 2 tablespoons melted butter 3. Pour the wet mix into the dry mix. Stir gently until combined. 4. Heat a non-stick skillet over medium heat. Pour 1/4 cup batter per pancake. 5. Cook until bubbles form, then flip and brown the other side. 6. Serve warm with maple syrup and a dash of cinnamon. Creamy Pumpkin Risotto 1. In a large skillet, heat 2 tablespoons olive oil over medium heat. 2. Add 1 small finely chopped onion. Sauté until it turns translucent. 3. Stir in 2 minced garlic cloves and 1 cup Arborio rice. Cook for 1-2 minutes. 4. Gradually add 4 cups warm vegetable stock, one ladle at a time. Stir often. 5. After 15 minutes, mix in 1 can of pumpkin puree. Cook until creamy. 6. Stir in 1/2 cup grated Parmesan cheese. Season with salt and pepper. Savory Pumpkin Soup 1. In a large pot, heat 1 tablespoon olive oil over medium heat. 2. Add 1 chopped onion. Cook until it softens, then add 2 minced garlic cloves. 3. Stir in 1 teaspoon cumin and 1 teaspoon coriander. Cook for another minute. 4. Add 1 medium cubed pumpkin and 4 cups vegetable broth. Bring to a boil. 5. Reduce heat and simmer until the pumpkin is tender. 6. Blend the soup until smooth. Season with salt and pepper, then garnish with seeds. To get the best flavors from pumpkin, you need the right techniques. Start with fresh pumpkin. Cut it into small pieces for even cooking. Roasting enhances its sweetness. Use a sharp knife for clean cuts. Always season well. Salt brings out the flavor. Taste as you go for the best results. Pair pumpkin dishes with warm bread or salads. They work well with nuts like pecans or walnuts. For a sweet touch, try drizzling honey or maple syrup. A dollop of sour cream or yogurt can add creaminess. Fresh herbs like basil or parsley add color and taste. Enjoy experimenting with different flavors! When cooking with pumpkin, avoid these common mistakes: - Using the wrong pumpkin: Not all pumpkins are the same. Some are great for carving, while others are better for cooking. Look for sugar pumpkins or pie pumpkins for the best flavor. - Not seasoning enough: Pumpkin can taste bland without proper seasoning. Use spices like cinnamon, nutmeg, or ginger to enhance its flavor. - Overcooking: Cook pumpkin until tender, but don’t let it go mushy. It should still hold its shape in dishes. Here are some hacks to make cooking with pumpkins easier: - Roasting: Cut pumpkins into wedges, scoop out the seeds, and roast them for a sweet flavor. This makes them easy to mash or puree. - Use a blender: If you want a smooth texture, blend cooked pumpkin with a little water or broth. This works great for soups or sauces. - Freeze puree: Make extra pumpkin puree and freeze it in ice cube trays. This way, you can use it later in other recipes. Choosing the right pumpkin can make all the difference. Here are tips: - Look for a firm skin: A good pumpkin should feel heavy for its size and have a hard skin. This shows it is fresh. - Check for blemishes: Avoid pumpkins with soft spots or cuts. These can spoil quickly. - Size matters: Smaller pumpkins have sweeter flesh. Choose smaller pumpkins for desserts and larger ones for savory dishes. For more pumpkin recipes, check out the full recipe collection. {{image_2}} Pumpkin shines in both sweet and savory dishes. For sweet recipes, think of pumpkin spice pancakes or muffins. These dishes often use sugar and spices, creating a warm and comforting taste. Then, we have savory options like pumpkin risotto or soup. These meals highlight pumpkin’s natural flavor with herbs and spices. Each type brings out different sides of pumpkin, letting you enjoy its full range. You can make pumpkin recipes accessible for everyone. For gluten-free options, use almond flour or gluten-free blends instead of regular flour. Many pumpkin recipes can easily become vegan too. Swap eggs with flaxseed meal or applesauce. Use plant-based milk and oils to keep that rich flavor. This way, everyone can enjoy the tasty joys of pumpkin. As the seasons change, you can add new flavors to your pumpkin dishes. In fall, try adding apples, cinnamon, or nutmeg for warmth. As winter approaches, add spices like ginger or cardamom for a cozy touch. You can also mix in seasonal veggies like kale or sweet potatoes for a hearty meal. These additions help keep your pumpkin recipes fresh and exciting throughout the season. After you make your pumpkin dishes, cool them down first. Then, place them in airtight containers. You can keep them in the fridge for about three to five days. If you want to enjoy them later, freezing is a great option. Just remember to label your containers with the date. To store pumpkin purée, scoop it into a clean, dry container. Use an airtight lid to keep air out. You can keep it in the fridge for about one week. If you have extra purée, freeze it in ice cube trays. Once frozen, transfer the cubes to a freezer bag. This way, you can use small amounts later. When freezing pumpkin recipes, ensure they are completely cool. Portion the servings in freezer-safe bags. Squeeze out as much air as possible before sealing. For best taste, use them within three months. When ready to eat, thaw in the fridge overnight or use the microwave. Enjoy your fall flavors anytime! [Full Recipe] Pumpkin is a star ingredient in many meals. It adds a rich flavor and creamy texture. You can use it in both sweet and savory dishes. Pumpkin easily blends with spices like cinnamon and nutmeg for desserts. It also pairs well with herbs like sage and thyme for main courses. This flexibility makes pumpkin a favorite in many kitchens. It can be roasted, pureed, or even stuffed. The options are endless! Yes, you can use canned pumpkin in place of fresh. Canned pumpkin is often more convenient and saves time. It is also cooked and pureed, ready to use in recipes. Just make sure to choose 100% pumpkin, not pumpkin pie filling. Canned pumpkin works well in soups, pies, and muffins. It offers the same great taste and texture as fresh pumpkin. This makes it a smart choice for busy cooks. To check if pumpkin is cooked, pierce it with a fork. If it goes in easily, your pumpkin is done. For soups or purees, cook until it is soft all the way through. You can also check the color; it should be bright and vibrant. If using whole pumpkin, roasting it until soft yields the best flavor. Don't rush this step; fully cooked pumpkin enhances your dishes' taste. In this blog post, we explored essential ingredients for pumpkin recipes and their unique options. I shared step-by-step instructions for dishes like pancakes, risotto, and soup. We also covered helpful tips to avoid common mistakes and ways to choose the right pumpkin. Remember, pumpkin is versatile. Whether you make sweet or savory dishes, it’s easy to adapt. With the right storage, your pumpkin creations stay fresh longer. Now, go create tasty dishes and enjoy the flavors of pumpkin all season long!

Fall is here, and it’s time to roll up your sleeves and dive into the cozy flavors of pumpkin! In my latest post, 15 Pumpkin Recipes for Fall Flavorful Delights, …

Read more

Categories Dinner
Older posts
Newer posts
← Previous Page1 … Page60 Page61 Page62 … Page134 Next →

TOSSED RECIPES

Simple meals, bold taste. Quick recipes made for real life — always fresh, always delicious. 🌿🍴

PAGES

Home About Contact Privacy Policy Terms & Conditions Cookie Policy GDPR Policy Copyright Policy Disclaimer

CATEGORIES

Appetizers Desserts Salads Breakfast Dinner

Contact

  • Pinterest
  • Mail
Copyright © 2026 Tossed Recipes. All rights reserved.