Skip to content
Tossed Recipes
  • Home
  • Appetizers
  • Desserts
  • Salads
  • Breakfast
  • Dinner
  • Privacy Policy
  • Contact
  • About

Chef Jamie

Healthy School Lunch Ideas That Kids Will Love

July 31, 2025 by Chef Jamie
To make a tasty and healthy school lunch, you need fresh and colorful ingredients. Here is what you will need: - Whole wheat tortilla - Hummus (your favorite flavor) - Fresh vegetables (spinach, carrots, bell peppers, cucumber) - Avocado and seasonings These ingredients come together to create a fun Rainbow Veggie Wrap. The whole wheat tortilla gives it a nice base. Hummus adds creaminess and flavor. Fresh veggies bring crunch and color. Avocado adds healthy fats and a smooth texture. Using these ingredients makes it easy to pack a lunch kids will enjoy. You can mix and match veggies to keep it exciting. This wrap is not just healthy; it is also fun to eat! Plus, kids can help choose their favorite flavors and colors. For the full recipe, check the Rainbow Veggie Wrap section. It shows how to put all these great ingredients together. 1. Preparing the tortilla and hummus Start by laying the whole wheat tortilla flat on a clean surface. Spread your favorite hummus evenly over the whole tortilla. Leave about an inch around the edges. This space helps keep the filling inside when you roll it. 2. Arranging the vegetables and avocado In the center of the tortilla, layer fresh spinach leaves, shredded carrots, sliced bell peppers, and diced cucumber. These veggies give color and crunch. Next, add the avocado slices on top. Sprinkle with salt, pepper, and lemon juice to brighten the flavors. 3. Rolling the wrap and cutting it for serving Carefully fold in the sides of the tortilla. Start rolling from the bottom up. Keep the filling tight as you roll. Once you finish rolling, slice the wrap in half diagonally. This makes it easy for kids to hold. Optionally, wrap it in parchment paper or place it in a lunch container to keep it together. For a full recipe, check out the Rainbow Veggie Wrap . It’s healthy and quick to make! Making wraps ahead of time is a great idea. You can save time in the morning rush. Prepare the wraps the night before and store them in the fridge. This way, your kids can grab their lunch easily. To keep the ingredients fresh until lunchtime, wrap each prepared wrap in parchment paper. This helps them stay intact and tasty. Storing them in a lunch container with a small ice pack can also help keep them cool. You can customize flavors with different hummus varieties. Try roasted red pepper or garlic hummus for a twist. Kids may love the added taste, which makes lunch fun. You can even mix and match based on their favorite flavors. For a full recipe, check out the Rainbow Veggie Wrap. This recipe is not only healthy but also colorful and fun! {{image_2}} You can switch up the wraps to keep things fun. Try different kinds of tortillas. Use gluten-free wraps if needed. You can also pick flavored wraps. Spinach or tomato tortillas add a nice twist. Next, think about spreads. Hummus is great, but cream cheese or guacamole works too. Each spread adds its own taste and texture. Now, let’s talk about veggies and protein. You can add more veggies like cucumbers or shredded cabbage. For protein, try grilled chicken or cheese. These options make the wrap filling and tasty. You can find these ideas in the Full Recipe. Enjoy mixing and matching to find what your kids love the most! To keep your wraps fresh, you need to store them well. Here are some tips: - Short-term storage in the fridge: Keep wraps in the fridge for up to three days. Wrap them in plastic wrap or parchment paper. This keeps them moist and tasty. - Tips for freezing wraps: If you want to save wraps for later, freeze them. Wrap each one in plastic wrap. Then, place them in a freezer bag. They can last for up to three months. When ready to eat, let them thaw in the fridge overnight. - Recommended containers for school lunches: Use airtight containers for school lunches. This helps prevent the wraps from getting soggy. You can also use bento boxes with separate compartments. This keeps your wrap and sides fresh. Following these storage tips ensures your kids enjoy healthy and tasty wraps every day! How long do healthy wraps last in the fridge? Healthy wraps can last about three days in the fridge. This keeps them fresh and tasty. Make sure to store them in an airtight container. This helps prevent them from getting soggy. Can these wraps be made vegan? Yes, you can easily make these wraps vegan. Just use a plant-based hummus. You can also skip the avocado if you prefer. The veggies and hummus will still give great flavor. What are some easy sides to pair with these lunches? You can serve many sides with these wraps. Here are some simple ideas: - Baby carrots - Apple slices - Yogurt cups - A small bag of popcorn - Cucumber sticks Each of these sides adds fun and nutrition. They pair well with the Rainbow Veggie Wrap. For the full recipe, check the earlier section. This blog post covered healthy wraps, from ingredients to storage tips. You learned how to make tasty wraps with whole wheat tortillas, hummus, fresh veggies, and avocado. I shared preparation steps and meal prep advice to save time. Customizing flavors and storing wraps properly makes them fun and easy. Try different ingredients to keep lunches exciting. These wraps are perfect for anyone wanting quick, healthy meals. Make them your own, enjoy, and share with friends!

Are you tired of the same boring lunches? I’ve got you covered with healthy school lunch ideas that your kids will actually want to eat! These tasty wraps are full …

Read more

Categories Salads

Cream Cheese Apple Dip Irresistible and Easy Treat

July 30, 2025 by Chef Jamie
- 8 oz cream cheese, softened - 1/2 cup powdered sugar - 1/4 cup brown sugar - 1 tsp vanilla extract - 1/4 cup caramel sauce - 1/2 tsp ground cinnamon - 4 apples (Fuji or Honeycrisp, cored and sliced) - Optional toppings: Chopped nuts (pecans or walnuts) To make a delicious cream cheese apple dip, you need some simple ingredients. Start with 8 ounces of softened cream cheese. This makes the dip smooth and creamy. Next, add 1/2 cup of powdered sugar and 1/4 cup of brown sugar. These sugars give the dip a sweet taste. A teaspoon of vanilla extract adds a nice flavor. Then, pour in 1/4 cup of caramel sauce for a rich touch. Sprinkle in 1/2 teaspoon of ground cinnamon for warmth. You will also need 4 apples. I love using Fuji or Honeycrisp apples because they are sweet and crisp. Slice and core them for easy dipping. If you want a bit of crunch, add chopped nuts like pecans or walnuts on top. This combination creates a fantastic dip that everyone will love. You can find the full recipe at the end of this article. - Combine cream cheese and sugars Start by taking the softened cream cheese and placing it in a mixing bowl. Add in the powdered sugar, brown sugar, vanilla extract, and ground cinnamon. These ingredients create a sweet and flavorful base. - Mix ingredients using an electric mixer Next, grab your electric mixer. Beat the mixture on medium speed for about 2-3 minutes. You want it to be smooth and creamy, with no lumps. This step is key to a great texture. - Fold in caramel sauce Now, take half of the caramel sauce and gently fold it into the cream cheese blend. Use a spatula to mix until it is evenly combined. This adds a delicious caramel flavor that pairs well with apples. - Transfer mixture and smooth the top Once your dip is ready, transfer it to a shallow serving dish. Use a spatula to smooth the top. This makes it look pretty and ready for serving. - Drizzle caramel and arrange apple slices Drizzle the remaining caramel sauce over the top of the cream cheese mixture. Then, arrange your sliced apples around the dip for easy access. This makes it fun and inviting. - Add optional toppings If you want to add some extra crunch, sprinkle chopped nuts like pecans or walnuts on top. This gives the dip a nice texture and extra flavor. For more detailed instructions, check the Full Recipe. To make a great cream cheese apple dip, start with softened cream cheese. Softened cream cheese mixes well and creates a smooth texture. You can leave it out at room temperature for about 30 minutes before use. This small step ensures that your dip will be creamy and easy to spread. Next, adjust the sweetness to your taste. The recipe calls for powdered sugar and brown sugar. You can add more sugar if you like it sweeter. Tasting as you go is key. Each person has a different preference, so don’t be afraid to find your perfect balance. Presentation adds to the fun! Garnish your dip with a sprinkle of cinnamon and some chopped nuts. This simple touch makes it look fancy and tastes great too. The cinnamon adds warmth, and the nuts give a nice crunch. Serve the dip in an attractive dish. A colorful bowl will catch the eye and make your table look inviting. Arrange the apple slices around the dip for easy access. This way, guests can enjoy the dip without any mess. For the full recipe, check the details provided earlier. {{image_2}} You can easily change the flavor of your cream cheese dip. Try using different flavored cream cheeses, like chive or strawberry. Each type adds a unique twist. You can also experiment with spices. Nutmeg and allspice can give your dip a warm, cozy taste. Just a pinch can make a big difference! Want a fluffier dip? Add whipped cream! It lightens the texture and makes it fun to eat. You can also add chocolate chips for extra sweetness. This will appeal to chocolate lovers and make the dip even more exciting. Mix and match these ideas to create your perfect blend. For the full recipe, check out the details above. After enjoying your dip, store leftovers in an airtight container. This keeps the dip fresh and safe. You can eat the dip within 3-5 days. If it starts to smell off or changes color, it’s best to toss it. Can the dip be frozen? Yes, you can freeze it. However, keep in mind that freezing may change the texture. To freeze, put the dip in a freezer-safe container. Leave some space at the top, as it may expand. For thawing, move the dip to the fridge for several hours or overnight. Once thawed, stir it well before serving. This restores some of its original creaminess. For the best taste, consume within a month. For the full recipe, check out the instructions above. To make your cream cheese dip sweeter, simply add more sugar. Start with one tablespoon of powdered sugar. Mix it in and taste. You can keep adding sugar until it reaches your desired sweetness. You can also try using honey or maple syrup for a different flavor. These natural sweeteners can add a nice twist. Yes, you can use low-fat cream cheese. It will change the dip's texture and flavor a bit. Low-fat cream cheese can be creamier but may not be as rich. If you want to keep the dip tasty, add a little more caramel or sugar. This will help boost the flavor. For dipping, I recommend Fuji or Honeycrisp apples. These apples are sweet and crisp, making them great for this dip. They hold their shape well, too. You can also try Granny Smith apples if you like a tart flavor. Mixing different apple types can create a fun taste experience. For the full recipe, check out the Creamy Caramel Apple Delight section above. In this blog post, we explored how to make a tasty cream cheese dip. We covered necessary ingredients, step-by-step instructions, and creative tips for serving. Variations give you fun options, like flavored cream cheese or extra mix-ins. Proper storage keeps your dip fresh for days. This dip is simple, fun, and delicious. Try it out for your next gathering!

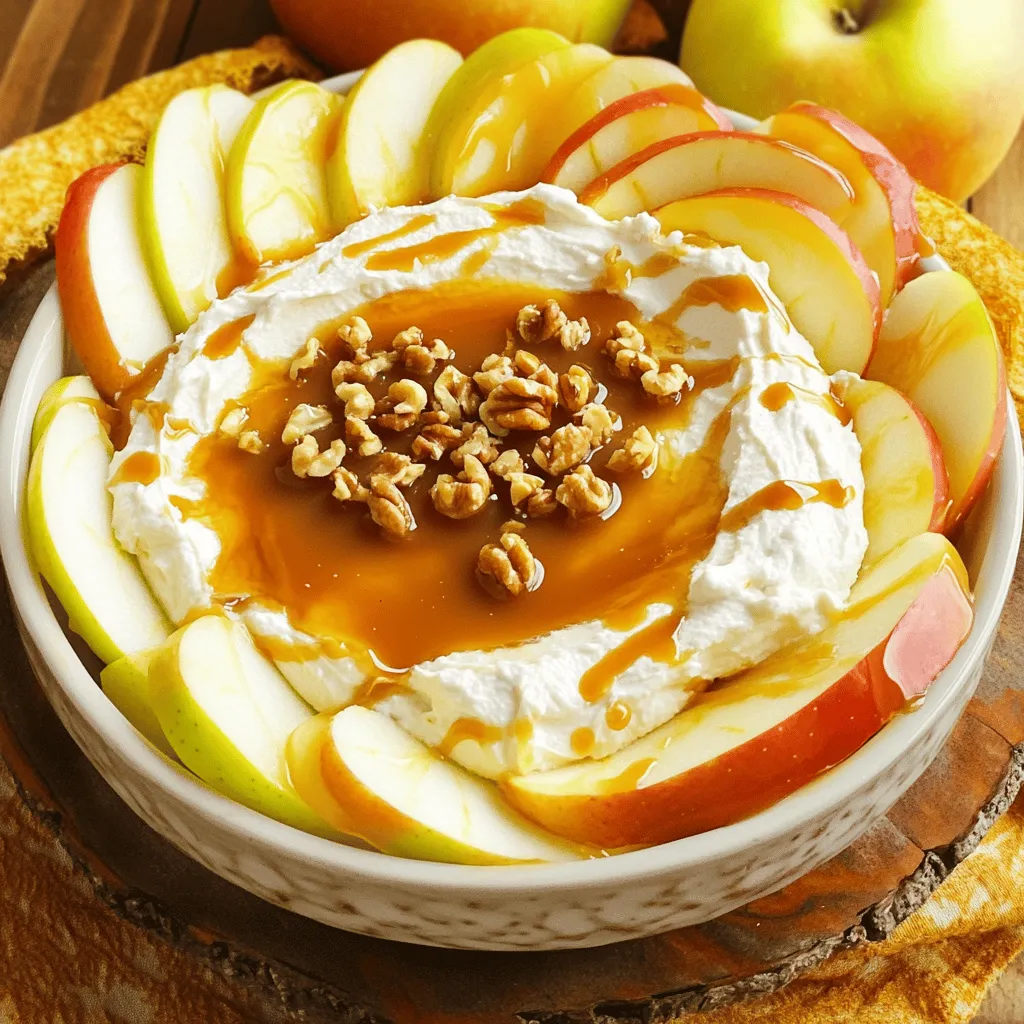
Looking for a delicious treat that’s easy to whip up? This Cream Cheese Apple Dip is your answer! With just a handful of simple ingredients, you can create a sweet …

Read more

Categories Desserts

Mini Pumpkin Pie Crescent Rolls Tasty Fall Delight

July 30, 2025 by Chef Jamie
To make Mini Pumpkin Pie Crescent Rolls, gather these simple items: - 1 can (8 oz) refrigerated crescent roll dough - 1 cup canned pumpkin puree - 1/3 cup brown sugar - 1 teaspoon pumpkin pie spice - 1/2 teaspoon vanilla extract - 1 egg, beaten (for egg wash) - 1/4 cup granulated sugar (for topping) - Whipped cream (for serving, optional) This list gives you everything you need to create a tasty fall treat. The star of the show is the pumpkin puree. It gives these rolls their rich, sweet flavor. Using refrigerated crescent roll dough makes this recipe quick and easy. You won’t need a lot of time or effort to impress your family or friends. Brown sugar adds a nice, deep sweetness, while pumpkin pie spice brings warmth to the filling. The vanilla extract enhances all the flavors nicely. The egg wash gives the rolls a shiny golden color after baking. Lastly, a sprinkle of sugar on top adds a sweet crunch. For a special touch, serve the rolls with whipped cream. It’s a fun way to enjoy this tasty dessert! You can find the Full Recipe in the next section for all the steps needed to make these delightful rolls. To start, grab a mixing bowl. Add 1 cup of canned pumpkin puree, 1/3 cup of brown sugar, 1 teaspoon of pumpkin pie spice, and 1/2 teaspoon of vanilla extract. Mix these ingredients well until they are smooth. You want a creamy consistency. This will be your tasty filling for the rolls. Now, let’s move on to the dough. Unroll 1 can of refrigerated crescent roll dough on a clean surface. You will see lines that separate the dough into triangle shapes. Carefully pull apart each piece along these lines. Next, take a spoonful of your pumpkin filling. Place about 1 tablespoon at the wide end of each triangle. Roll the dough from the wide end to the tip. Make sure the filling is enclosed inside. Place each rolled crescent on a baking sheet lined with parchment paper. Before baking, preheat your oven to 375°F (190°C). This step is key for a nice golden finish. Brush the tops of the rolls with 1 beaten egg to give them a shiny look. In a small bowl, mix 1/4 cup of granulated sugar with a sprinkle of pumpkin pie spice. Sprinkle this mixture on top of each roll. Bake the rolls for about 12-15 minutes. They should look golden brown and puffed. To check if they are done, look for that lovely color. The rolls should be firm to the touch. Let them cool for a bit before serving. For the full recipe, visit the detailed instructions above. Enjoy your delicious mini pumpkin pie crescent rolls! To get a beautiful golden color on your crescent rolls, brush them with a beaten egg. This egg wash gives them a shiny finish that looks great on your table. You can also sprinkle a bit of sugar mixed with pumpkin pie spice on top before baking. This adds flavor and makes them even more appealing. To keep the filling from leaking out while baking, use just the right amount of pumpkin mixture. A tablespoon per crescent triangle works well. Make sure to seal the edges tightly when you roll them up. Pinching the seams helps keep the filling inside and prevents a mess in your oven. Garnishing these rolls with whipped cream can make them extra special. You can add a dollop right on top or serve it on the side. Either way, it enhances the flavor and adds a nice touch. Pair these sweet rolls with warm apple cider or a scoop of vanilla ice cream. They also go well with coffee or a sweet chai latte. For a fun dessert platter, try adding other fall treats like caramel apples or pecan pie. This makes your gathering feel festive and delicious! {{image_2}} You can get creative with the filling. Here are some ideas for different sweet pie fillings: - Apple Pie Filling: Use canned apple filling instead of pumpkin. This gives a nice change and taste. - Cherry Filling: Canned cherry pie filling works well too. It's sweet and tart for a fun twist. - Chocolate Hazelnut Spread: Spread a thin layer of chocolate hazelnut spread inside. This is a great treat for chocolate lovers. - Nut Butter and Banana: Spread nut butter and add banana slices for a yummy, fruity filling. You can also add chocolate or nuts to enhance the flavors: - Chocolate Chips: Add a few chocolate chips to any filling. They melt and create a gooey surprise. - Chopped Nuts: Mix in chopped pecans or walnuts for crunch. This adds texture to your rolls. You can make these rolls a bit healthier with a few simple tweaks. - Reduced-Sugar Dough: Look for reduced-sugar crescent roll dough at the store. This lowers the sugar without losing taste. - Whole Wheat Dough: Whole wheat dough offers more fiber. It also adds a nutty flavor to the rolls. For a vegan option, you can skip the egg wash. Try these alternatives: - Plant-Based Milk: Brush the tops with almond or soy milk. This gives a nice color when baked. - Aquafaba: Use aquafaba, the liquid from a can of chickpeas, as an egg wash. It works great for a golden finish. These variations and healthier options let you enjoy mini pumpkin pie crescent rolls in new ways. You can find the full recipe above to explore all the delicious possibilities. To keep your mini pumpkin pie crescent rolls fresh, use airtight containers. Glass or plastic containers work well. If you have a lot, wrap them in plastic wrap first. Refrigeration: Store in the fridge for up to three days. The cold will help keep them tasty. Freezing: For longer storage, freeze them. Place the rolls in a single layer on a baking sheet. Once frozen, transfer them to a freezer bag. They can last for up to two months in the freezer. To reheat without drying out, use the oven or microwave. If using the oven, set it to 350°F (175°C). Place the rolls on a baking sheet. Cover them with foil to keep moisture in. Heat for about 10-15 minutes. If using a microwave, place one roll on a plate. Heat for about 20-30 seconds. Check if it’s warm enough. You can always add more time if needed. Enjoy these delightful bites warm, and they will taste just as good as when you first baked them! These mini pumpkin pie crescent rolls stay fresh for about 3 days in the fridge. Store them in an airtight container. If you want them to last longer, freeze them. They can last up to 2 months in the freezer. Just make sure to wrap them well in plastic wrap before placing them in a freezer bag. Yes, you can prepare the filling ahead of time. Mix the pumpkin puree, brown sugar, pumpkin pie spice, and vanilla extract. Then, store it in an airtight container in the fridge. This works great for saving time. Just be sure to use it within 3 days for the best taste. If you don't have pumpkin pie spice, don’t worry! You can use a mix of cinnamon, nutmeg, and ginger. For a quick blend, use 1 teaspoon of cinnamon, 1/2 teaspoon of nutmeg, and 1/4 teaspoon of ginger. This will give your filling a warm and cozy flavor. You can adjust the amounts to suit your taste. This blog post shares easy steps to make tasty pumpkin pie crescent rolls. You learned about key ingredients, preparation, and how to bake them perfectly. I also covered tips for serving and storing leftovers. In conclusion, this treat is quick to make and fun to enjoy. You can customize it or make it healthier, fitting any diet. These rolls bring joy to any table, especially in fall. Enjoy your baking adventure!

Fall is here, and so is the craving for sweet treats! If you love pumpkin pie, you’ll adore these Mini Pumpkin Pie Crescent Rolls. They are easy to make and …

Read more

Categories Desserts

Apple Chutney Recipe Tasty and Simple to Make

July 30, 2025 by Chef Jamie
To make my tasty apple chutney, you'll need a few key ingredients. Here is the list: - 4 medium apples, peeled, cored, and diced - 1 cup onion, finely chopped - 1 cup brown sugar - 1/2 cup apple cider vinegar - 1 teaspoon grated fresh ginger - 1 teaspoon ground cinnamon - 1/2 teaspoon ground allspice - 1/2 teaspoon ground cloves - 1/2 teaspoon mustard seeds - Salt to taste - 1 cup dried cranberries - 1 tablespoon olive oil Choosing the right ingredients is crucial for great flavor. For apples, I suggest using tart varieties like Granny Smith. They bring a nice balance to the sweetness of brown sugar. When picking onions, go for yellow onions. They have a nice sweetness when cooked. Make sure to use fresh ginger. It adds a bright flavor that really shines in the chutney. The spices should be fresh too, as old spices lose their flavor. Always check dates on jars and bags. For the apple cider vinegar, choose a quality brand. A good vinegar enhances the tangy notes in your chutney. Lastly, using dried cranberries adds a chewy texture and a touch of sweetness. Once you have all your ingredients, you're ready to create something delicious. For the full recipe, please refer to the previous section. 1. Preparing the ingredients: peels, cores, and dicing Start with your apples. Peel them, remove the cores, and dice them into small pieces. This step helps the apples cook evenly. Use a sharp knife for best results. You need about four medium apples. 2. Heating the oil and sautéing onions In a large saucepan, heat one tablespoon of olive oil over medium heat. Add one cup of finely chopped onion. Sauté the onions until they look translucent. This should take about five minutes. The onions add a sweet and savory flavor to the chutney. 3. Combining and simmering the ingredients Once the onions are ready, add the diced apples, one cup of brown sugar, half a cup of apple cider vinegar, and spices (ginger, cinnamon, allspice, cloves, and mustard seeds). Stir everything together. Bring the mixture to a boil, then lower the heat. Simmer uncovered for 30 to 40 minutes. Stir it occasionally. The apples will break down and the mixture will thicken. 4. Adding dried cranberries and adjusting flavors In the last ten minutes of cooking, add one cup of dried cranberries. This adds a burst of sweetness and chewiness. Taste your chutney. If it needs more flavor, add salt or adjust the sweetness with more sugar or vinegar. Remove it from the heat and let it cool completely before putting it in jars. This process creates a delicious spiced apple chutney that you can enjoy with many dishes. For the full recipe, check the earlier section. How to choose the best apples for chutney? I recommend using a mix of sweet and tart apples. Good choices are Granny Smith and Honeycrisp. These apples add depth and balance to your chutney. Look for apples that are firm and free from bruises. Freshness matters for the best taste. Techniques for adjusting sweetness and acidity: Taste your chutney as it cooks. If it’s too sweet, add a splash more apple cider vinegar. For extra sweetness, stir in more brown sugar. This method helps you create a flavor you love. Remember, small changes make a big difference. Best practices for stirring and simmering: Stir the chutney often, especially as it thickens. This helps prevent it from sticking to the bottom of your pan. Keep the heat low during the simmer. This slow cooking lets the flavors blend well. A gentle simmer gives you a rich and tasty chutney. Ideal pairings with cheeses and meats: Apple chutney pairs well with sharp cheeses like cheddar or creamy brie. It also enhances roasted meats, especially pork and chicken. Spread it on sandwiches for a tasty twist. You can even serve it alongside charcuterie boards for a fun snack. Creative ways to use apple chutney in meals: Try mixing apple chutney into yogurt for a quick snack. Use it as a glaze for grilled meats. You can also add it to stir-fries for a sweet touch. This chutney is versatile and can brighten up many dishes. {{image_2}} You can add nuts for a crunchy texture. Walnuts or pecans work great. Simply chop them and stir them in during the last few minutes of cooking. This will give your chutney a delightful bite. Experimenting with other dried fruits can also add unique flavors. Try adding apricots or raisins. They will bring a different sweetness and texture. Just chop them up and mix them in with the apples. If you like some heat, you can create spicy variations. Use jalapeños or serrano peppers. Chop them finely and add them with the onions. This will give your chutney a nice kick. Incorporating seasonal spices or fruits can make your chutney special. For fall, add nutmeg or cardamom. In spring, fresh herbs like mint can brighten the flavors. You can adapt the recipe for different festive occasions. For Thanksgiving, add a splash of orange juice for a citrus twist. For summer, mix in fresh berries for a fun twist. Each season brings new tastes to explore! To keep your apple chutney fresh, use glass jars. They do not absorb odors like plastic. Make sure the jars have tight-fitting lids. This helps keep air out and prevents spoilage. Refrigerate your chutney after it cools. It can stay fresh in the fridge for weeks. Always use a clean spoon to scoop out chutney. This keeps bacteria from getting in the jar. If you want to store it for a long time, consider canning. Fill sterilized jars with hot chutney, leaving some space at the top. Seal them with lids and process in a water bath for about 10 minutes. This method can help you enjoy your chutney for months. When stored correctly, apple chutney lasts about 2 to 3 weeks in the fridge. If canned, it can last for a year. Look for signs of spoilage. If you see mold, or if the chutney smells off, it’s best to throw it away. An odd color change can also mean it has gone bad. Keep an eye on these signs to ensure your chutney remains safe and tasty. Can I use different types of apples? Yes, you can use any apple you like. I enjoy using tart apples like Granny Smith. Sweet apples like Fuji or Gala also work well. Mixing different apples gives the chutney a unique flavor. Is it possible to reduce the sugar content? Yes, you can cut back on the sugar. Use less sugar than the recipe calls for. You can also try using honey or maple syrup. Just remember that sugar helps with preservation and flavor. How do I can apple chutney for shelf storage? To can apple chutney, prepare it as usual. Pour hot chutney into sterilized jars. Leave a little space at the top. Seal the jars with lids. Process in a boiling water bath for 10-15 minutes. This helps it last longer on your shelf. What are the best dishes to serve with apple chutney? Apple chutney pairs well with many dishes. It’s great with cheese platters, grilled meats, and sandwiches. You can also serve it with curry for a nice twist. How do I reheat leftovers? Reheat leftovers on the stove over low heat. Stir it often to avoid burning. You can also use the microwave in short bursts. Just make sure to stir between each time. Can apple chutney be frozen? Yes, apple chutney can be frozen. Just let it cool completely before freezing. Use airtight containers to keep out air. It can last up to six months in the freezer. This guide covered all you need to make delicious apple chutney. We discussed ingredients, cooking steps, and expert tips for perfect results. You can adapt the recipe to fit your taste, add seasonal flavors, or store it properly. Apple chutney pairs well with many dishes, making it a versatile addition to your meals. Remember, keeping your chutney fresh is key for the best flavor. Dive in and enjoy creating your own tasty variations!

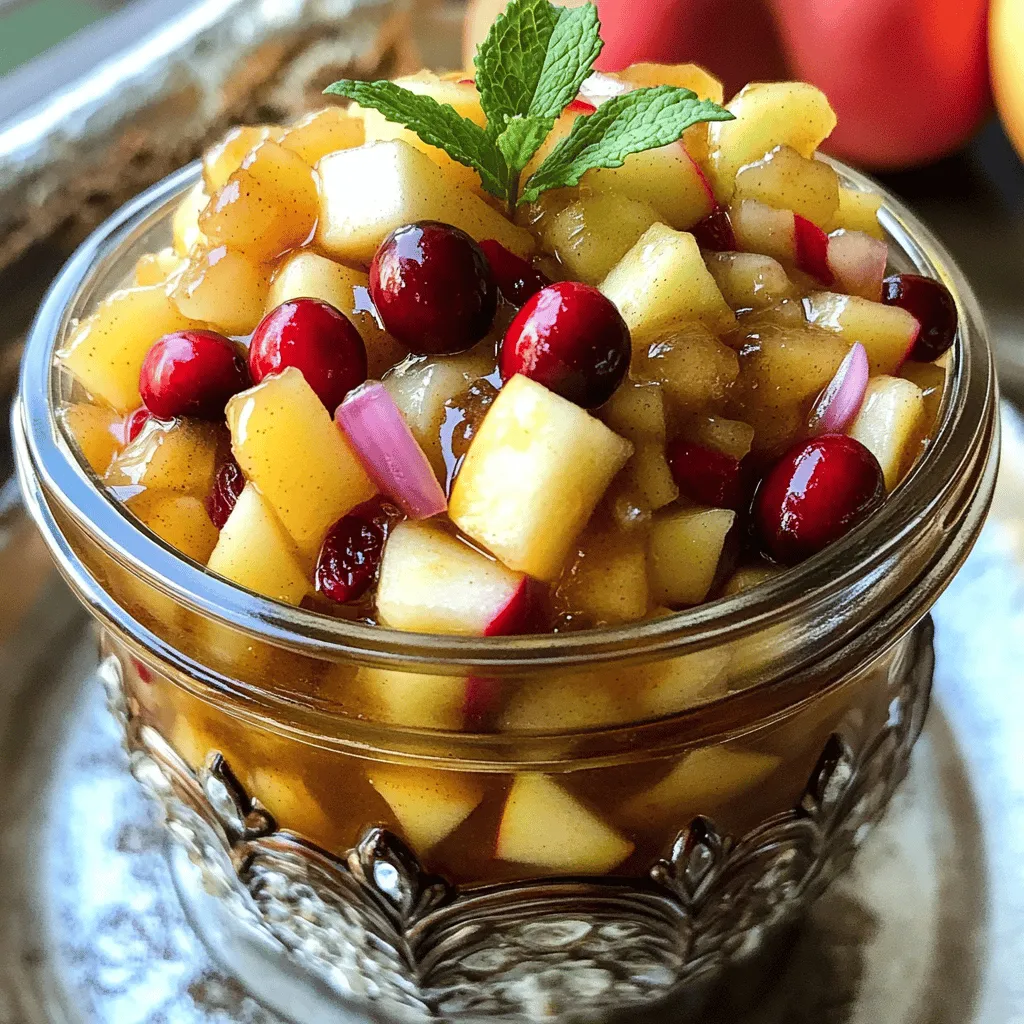
If you’re looking for a tasty and simple treat, try this apple chutney recipe! You’ll love how easy it is to make with just a few fresh ingredients. Imagine sweet …

Read more

Categories Appetizers

Moist Chocolate Pumpkin Bread Irresistible Recipe

July 30, 2025 by Chef Jamie
- 1 ½ cups canned pumpkin puree - 1 cup granulated sugar - ½ cup brown sugar, packed - ½ cup vegetable oil - 2 large eggs - 1 teaspoon vanilla extract - 2 cups all-purpose flour - ½ cup unsweetened cocoa powder - 1 teaspoon baking soda - ½ teaspoon baking powder - 1 teaspoon salt - 1 teaspoon ground cinnamon - ½ teaspoon ground nutmeg - ½ cup chocolate chips (semi-sweet or dark) To make this moist chocolate pumpkin bread, each ingredient plays a key role. The pumpkin puree adds moisture, while sugars provide sweetness. The oil keeps the bread tender. Eggs help bind everything, giving it a nice rise. - Options for using fresh pumpkin: You can roast fresh pumpkin and puree it. Use the same amount as canned. - Alternatives to granulated sugar: Consider coconut sugar for a lower glycemic index. You can also try honey or maple syrup, adjusting the liquid in the recipe. - Using different types of chocolate chips: Feel free to swap semi-sweet chips for dark or milk chocolate. You can even use white chocolate for a fun twist. These tips help you customize the recipe to fit your taste and preferences. For the full recipe, check the detailed instructions provided earlier. 1. Preheat the oven: Set your oven to 350°F (175°C). This step is key. 2. Greasing and preparing the loaf pan: Grab a 9x5-inch loaf pan. Grease it well with some oil or butter. You can also use parchment paper for easy removal later. 1. Combining wet ingredients methodology: In a large bowl, mix the canned pumpkin puree, granulated sugar, brown sugar, vegetable oil, eggs, and vanilla extract. Stir until everything is smooth and mixed well. 2. Sifting dry ingredients effectively: In another bowl, sift the all-purpose flour, cocoa powder, baking soda, baking powder, salt, cinnamon, and nutmeg. This makes the bread fluffy and light. 1. Adjusting baking time for different ovens: Pour the batter into the prepared pan. Bake it for 60-70 minutes. Ovens can vary, so keep an eye on it. 2. How to test for doneness with a toothpick: Insert a toothpick into the center of the bread. If it comes out clean, the bread is ready. A few moist crumbs are fine, but no wet batter. To make your chocolate pumpkin bread moist, pay close attention to ingredient ratios. The pumpkin puree is key. It helps retain moisture and adds a rich flavor. Use the right amount of oil too; it keeps the bread soft. Do not overmix the batter. Mixing too much adds air and can make the bread dry. Stir just until the dry ingredients combine with the wet ones. A few lumps are okay; they will bake out. Spices can take your bread to the next level. Ground cinnamon and nutmeg add warmth and depth. You might also try ginger or allspice for a twist. Pair your chocolate pumpkin bread with toppings like cream cheese frosting or a scoop of vanilla ice cream. You can also serve it with a hot cup of coffee or tea. This makes for a cozy treat any time. For a beautiful presentation, slice the bread neatly and dust it with powdered sugar. This adds a touch of elegance. Garnish with a dollop of whipped cream on top. It looks great and adds extra creaminess. You can also sprinkle extra chocolate chips or nuts on top for a nice finish. Enjoy your creation! {{image_2}} You can make moist chocolate pumpkin bread even better with some fun additions. - Adding nuts or dried fruits: Chopped walnuts or pecans add a nice crunch. You can also add dried cranberries or raisins for sweetness. - Swapping cocoa powder for flavored variations: Try using dark chocolate cocoa for a richer taste. You can also experiment with flavored cocoa, like mint or orange. This recipe is flexible for different diets. - Gluten-free options using alternative flours: You can use almond flour or oat flour. These flours keep the bread moist and tasty. - Vegan adaptations for the recipe: Replace eggs with flaxseed meal or applesauce. Use plant-based oil and dairy-free chocolate chips to keep it vegan. You can enjoy this bread in many ways. - Turning the bread into a dessert: Serve slices with a scoop of vanilla ice cream. This makes for a tasty treat! - Ideas for breakfast pairings: Toast slices and spread some peanut butter on top. This adds protein and flavor, making it a great breakfast option. For the complete recipe, check out the Full Recipe section! To keep your moist chocolate pumpkin bread fresh, store it in an airtight container. This method locks in moisture and flavor. You can also wrap the bread tightly in plastic wrap before placing it in the container. If you want to save some for later, freezing is a great option. Slice the bread first, then wrap each slice in plastic wrap. Place the wrapped slices in a freezer-safe bag. This way, you can enjoy a piece whenever you crave it! When it's time to eat, thaw your slices in the fridge overnight. You can also warm them in the microwave for a few seconds. At room temperature, your chocolate pumpkin bread stays fresh for about 3 to 4 days. Make sure to keep it covered to protect it from air and moisture. Watch for signs of spoilage. If you see mold or a change in smell, it’s best to toss it. A dry texture or hard crust can also mean it’s time to say goodbye. Always trust your senses to keep your treats safe and tasty! Can I make this chocolate pumpkin bread ahead of time? Yes, you can make this bread a day or two before you need it. Wrap it well in plastic wrap or foil. This will help keep it moist. Just remember to store it at room temperature. How do I know if my bread is fully baked? Check your bread with a toothpick. Insert it into the center. If it comes out clean or with a few moist crumbs, it's done. If it has wet batter on it, bake a little longer. What can I do if my pumpkin bread is too dense? If your bread is too dense, it may be due to overmixing. Try not to stir too much when combining wet and dry ingredients. You can also add a bit more baking powder to help it rise. Can I substitute canned pumpkin for homemade? Yes, you can use homemade pumpkin puree instead of canned. Just make sure it is smooth and not too watery. This will ensure the right texture for your bread. What is the best way to measure flour? To measure flour correctly, use the spoon-and-level method. Spoon flour into your measuring cup, then level it off with a knife. This will give you the right amount without packing it down. Which type of cocoa powder is recommended? I recommend using unsweetened cocoa powder for this recipe. It has the best flavor and works well with the pumpkin. You can use either Dutch-process or natural cocoa powder. Are there dairy-free options for the chocolate chips? Yes, you can choose dairy-free chocolate chips. Many brands offer great-tasting options that are also vegan. Look for them in health food stores or the baking aisle. You can follow this [Full Recipe] to make your own delicious chocolate pumpkin bread! This blog focused on making delicious chocolate pumpkin bread. You learned the essential ingredients and how to mix them. We discussed easy substitutes and tips for perfect texture and flavor. Variations, storage tips, and answers to common questions were explored too. Remember, baking is fun and allows for creativity. Use this recipe as a base to make it your own. Enjoy your baking journey!

Are you ready to indulge in a slice of pure heaven? This Moist Chocolate Pumpkin Bread is the perfect treat for any occasion! With rich chocolate, warm spices, and a …

Read more

Categories Desserts

Easy Apple Casserole Simple and Delicious Recipe

July 30, 2025 by Chef Jamie
To make an Easy Apple Casserole, you need a few simple ingredients. Here’s a list to help you gather what you need: - 4 medium apples, peeled and sliced - 1 cup oats - 1 cup brown sugar - 1 teaspoon ground cinnamon - ½ teaspoon nutmeg - ½ cup walnuts or pecans, chopped (optional) - ½ cup unsalted butter, melted - 1 cup milk - 1 teaspoon vanilla extract These ingredients create a warm, cozy dish that bursts with flavor. The apples bring sweetness and tang, while the oats add a nice texture. Brown sugar gives it that rich taste, and the spices make it truly special. If you want a little crunch, add some nuts. They give a great contrast to the soft apples. You can find the full recipe detailed later in the article. It’s an easy way to whip up a delicious dessert or side dish that everyone will love. Plus, it’s perfect for sharing! Start by peeling and slicing the apples. You want them thin so they cook evenly. Granny Smith or Honeycrisp apples work best. In a large bowl, combine the sliced apples with oats, brown sugar, ground cinnamon, nutmeg, and chopped nuts if you choose to use them. Mix well to coat the apples evenly with the dry ingredients. Next, in another bowl, whisk together the melted butter, milk, and vanilla extract. This mixture adds moisture and flavor to the casserole. Pour this wet mixture over the apple and oat mix. Stir gently to combine everything without breaking the apples. Choose a 9x13-inch baking dish for this recipe. Grease the dish well to prevent sticking. Preheat your oven to 350°F (175°C). Once your oven is ready, pour the apple mixture into the greased dish. Spread everything evenly for even baking. Bake in the preheated oven for 40 to 45 minutes. You want the apples to be tender and the top to turn golden brown. Keep an eye on it towards the end. Let the casserole cool for about 10 minutes after baking. This helps the flavors settle and makes it easier to serve. You can enjoy it warm on its own or add a scoop of vanilla ice cream on top for extra yum! To make the best apple casserole, choose the right apples. I recommend using Granny Smith or Honeycrisp apples. They hold their shape well and add a nice tart flavor. Granny Smith apples are crisp and tart, while Honeycrisp apples are sweet and juicy. Mixing these varieties can give you a great balance of taste and texture. One key to a great casserole is avoiding a soggy bottom. To do this, make sure to drain excess juice from the apples. You can also place the casserole on a baking sheet to catch any spills. When it comes to spices, balance is important. Stick with cinnamon and nutmeg for warm flavors. Too much spice can overpower the apples. Serving your casserole warm with ice cream is a must. Vanilla ice cream complements the flavors nicely. You can also add toppings like whipped cream or chopped nuts. For a fun twist, drizzle caramel sauce over the top. This adds sweetness and makes your dish look stunning. Enjoy your delicious creation! {{image_2}} You can easily make this apple casserole gluten-free. Simply substitute the oats with gluten-free oats. Many brands offer these, so check the label. This swap keeps the texture while making it safe for those avoiding gluten. For sweeteners, try alternatives like maple syrup or coconut sugar. These options add a unique flavor and keep the dish healthy. Adjust the amount to your taste. Want to jazz up your casserole? Add dried fruits like raisins or cranberries. These fruits bring a chewy texture and a sweet burst. You can also sprinkle in chocolate chips for a fun twist. The chocolate melts into gooey pockets, adding rich flavor with each bite. Seasonal fruits are a great way to change this casserole. Try adding ripe pears or juicy peaches. They blend well with apples and bring a fresh taste. For holidays, think about cranberries. Their tartness will balance the sweetness and add a festive touch. These variations keep the recipe lively and fun. Explore these options to find your favorite! For the full recipe, check the recipe section above. To keep your easy apple casserole fresh, use airtight containers. Glass or plastic containers work well. Make sure the casserole is cool before covering it. This step helps prevent moisture build-up. If you leave it uncovered, it can dry out quickly. You can reheat your casserole in the oven or microwave. The oven is best for even heating. Preheat it to 350°F (175°C) and place the casserole inside for about 15 minutes. If you use a microwave, heat it in short bursts. Start with 30 seconds, then check. Stir in between to warm it evenly. In the fridge, your apple casserole lasts about 3 to 4 days. Make sure it's in an airtight container. If you want to keep it longer, you can freeze it. Wrap it tightly in plastic wrap and then foil. It can last up to 3 months in the freezer. When you are ready to eat, thaw it overnight in the fridge. Then, reheat it as mentioned above. For the full recipe, check the earlier sections! Yes, you can swap apples for other fruits. Try using pears or peaches for a change. You can also mix fruits for a fun twist. A blend of apples and berries adds great taste and color. Experimenting with different fruits keeps this dish fresh. To prepare this dish in advance, slice your apples and mix them with other dry ingredients. You can store this mixture in the fridge. Cover it well to keep it fresh. On baking day, just add the wet ingredients and bake. This makes it easy to enjoy later. You can serve this casserole warm or at room temperature. Pair it with vanilla ice cream for a creamy touch. For special occasions, add whipped cream or caramel sauce. This dish shines at potlucks, family dinners, or holiday gatherings. It's a crowd-pleaser every time. Making an Easy Apple Casserole is fun and rewarding. You gathered the right ingredients like apples, oats, and spices. You learned how to prepare and bake it, ensuring a perfect finish. We discussed tips for selecting apples and keeping the right texture. Variations and storage options add more ways to enjoy your dish. In the end, this casserole is not just a recipe; it’s a chance to create lasting memories with loved ones. Enjoy experimenting with flavors and sharing your delicious creation. Happy baking!

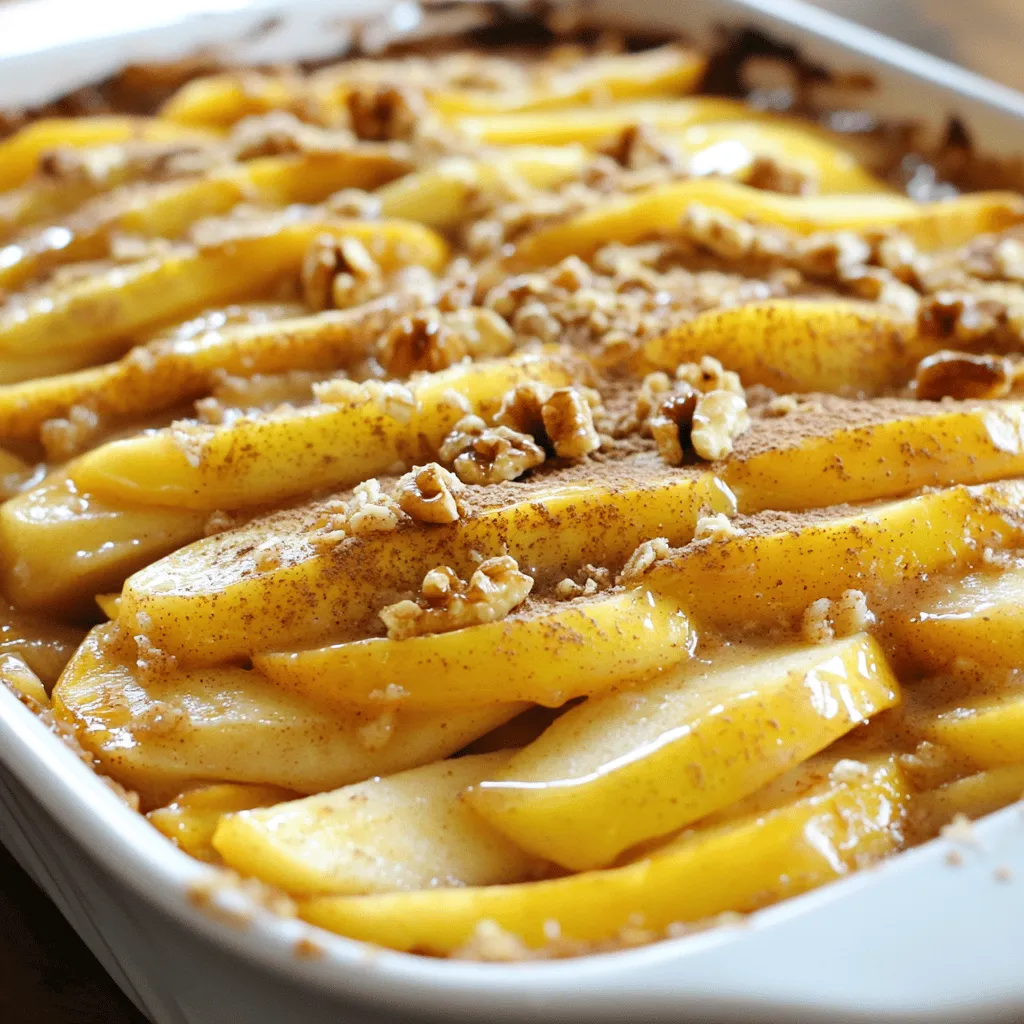
Are you ready to impress your family and friends with a delightful dessert? This Easy Apple Casserole is simple and oh-so-delicious! With just a few ingredients like apples, oats, and …

Read more

Categories Desserts

Savory Slow Cooker Burrito Meat Simple Recipe Guide

July 30, 2025 by Chef Jamie
To make the best slow cooker burrito meat, gather these key items: - 2 lbs beef chuck roast, cut into chunks - 1 onion, diced - 4 cloves garlic, minced - 2 tablespoons chili powder - 1 teaspoon cumin - 1 teaspoon smoked paprika - 1 teaspoon oregano - 1 can (15 oz.) black beans, drained and rinsed - 1 can (15 oz.) diced tomatoes with green chilies - 1 cup beef broth - Salt and pepper to taste - 1 tablespoon olive oil These ingredients create a rich and savory flavor. Adding toppings can elevate your burrito meat. Consider these options: - Shredded cheese - Sour cream - Avocado - Fresh cilantro Each topping adds a unique taste and texture. For the best burrito experience, choose your tortillas wisely. You can use: - Flour tortillas for a soft, chewy texture - Corn tortillas for a gluten-free option Both types work well with the flavorful meat. Enjoy building your own burritos! For the full recipe, check out the Savory Slow Cooker Burrito Bliss section. To start, use 2 pounds of beef chuck roast. Cut it into chunks. This beef is perfect for slow cooking. Next, heat 1 tablespoon of olive oil in a skillet over medium-high heat. Once the oil is hot, add the beef chunks. Sear them for about 4-5 minutes. You want them browned on all sides. This step adds great flavor. After browning, transfer the beef to your slow cooker. Now, it's time for the vegetables. Dice 1 onion. Add it to the same skillet. Sauté for about 3 minutes until softened. After that, mince 4 cloves of garlic. Add the garlic to the onions and cook for another minute. This unlocks their flavors and makes your dish smell amazing. Next, take the onion and garlic mix and pour it over the beef in the slow cooker. Then, add the spices. You need 2 tablespoons of chili powder, 1 teaspoon each of cumin, smoked paprika, and oregano. Stir it all together. Now for the beans and tomatoes. Open a can of black beans (15 oz), drain and rinse them. Add them to the slow cooker. Then, open a can of diced tomatoes with green chilies (15 oz) and pour that in too. Don’t forget to add 1 cup of beef broth. This keeps everything moist. Finally, season with salt and pepper to taste. Stir well to combine. Cover the slow cooker and set it on low for 8 hours. If you're in a hurry, you can choose high for 4 hours. When it's done, shred the beef using two forks right in the slow cooker. Mix it back into the juices for added flavor. To serve, warm your tortillas. Place the shredded burrito meat in a bowl. Surround it with tortillas and your favorite toppings, like cheese or avocado. This recipe, known as Savory Slow Cooker Burrito Bliss, will wow your family. Enjoy! To keep your burrito meat tender, start by searing the beef. This step locks in moisture. Use a chuck roast for the best results. The slow cooker will do the rest. Cooking on low for 8 hours works wonders. If you're short on time, you can cook on high for 4 hours, but low is better. Always check the meat's doneness. It should shred easily with two forks when done. Flavor comes from the right spices. I love using chili powder, cumin, and smoked paprika. They add depth to the dish. Always sauté your onions and garlic before adding to the slow cooker. This brings out their sweetness. You can adjust the seasoning to your taste. If you like heat, add more chili powder or some diced jalapeños. Don't forget to season with salt and pepper before cooking! Having the right tools makes cooking easier. A good slow cooker is key for this recipe. I recommend a model with a timer. A large skillet is great for browning meat and softening veggies. Use sturdy tongs for shredding the beef. You’ll also want measuring spoons for accuracy. Lastly, a set of sharp knives makes chopping quick and safe. These tools help you create the best burrito meat with ease. If you follow the [Full Recipe], you'll find everything you need to know. {{image_2}} You can switch out beef for other proteins. Chicken thighs work great in burritos. They stay juicy and soak up flavors well. Pork shoulder is another option. It becomes tender and shreddable after cooking. Ground turkey or chicken is a leaner choice. Just remember to adjust cooking times. For a tasty vegetarian option, use jackfruit. This fruit shreds like meat and absorbs flavors well. Lentils are a protein-packed choice. Cook them until soft, then mix with spices. You can also use firm tofu. Press it to remove water, then cube and cook. Try adding different spices to enhance flavor. Chipotle peppers in adobo sauce add heat and smokiness. Fresh herbs like cilantro or parsley brighten up the dish. You can also toss in corn for sweetness and texture. If you want a twist, use a different broth. Vegetable broth works well for vegetarian dishes. Experimenting with flavors can lead to your own unique burrito meat! For the full recipe, check out Savory Slow Cooker Burrito Bliss. Enjoy the journey of flavor! To keep your burrito meat fresh, let it cool first. Use an airtight container. This will help it last longer in the fridge. You can store it for up to 3 days. If you want to keep it longer, consider freezing it. When you're ready to eat leftovers, reheat with care. Use the stove or microwave. If using the stove, add a splash of beef broth to keep it moist. Stir often to avoid burning. In the microwave, heat in short bursts. Stir every minute until heated through. Freezing is a great way to save extra burrito meat. Package it in a freezer-safe bag. Squeeze out the air before sealing. It can last up to 2 months in the freezer. When ready to use, thaw it in the fridge overnight. Reheat as mentioned above for the best taste. Using these storage tips ensures your savory slow cooker burrito meat stays tasty and ready for your next meal! For the full recipe, check out the details above. You can keep leftover burrito meat in the fridge for about 3 to 4 days. Make sure to store it in an airtight container. This keeps it fresh and safe to eat. If you notice any off smells or colors, it's best to throw it away. Yes, you can make Slow Cooker Burrito Meat ahead of time. In fact, it tastes even better the next day! Just cook it as usual and store it in the fridge. When you’re ready to eat, simply reheat it on the stove or in the microwave. Yes, you can cook burrito meat on high heat. It will take about 4 hours instead of 8. However, cooking on low heat gives the meat more time to get tender and soak in flavors. If you are short on time, high heat works fine! In this blog post, I covered how to make tasty slow cooker burrito meat. We explored main ingredients, optional toppings, and the best tortillas to use. I provided clear steps for preparation and offered tips to keep the meat juicy and flavorful. You learned about variations, storage tips, and answered common questions. With these insights, you can create a perfect burrito meal every time. Enjoy cooking and trying new flavors!

Welcome to my guide on making delicious Slow Cooker Burrito Meat! This simple recipe will bring bright flavors to your table. You’ll learn the main ingredients, easy steps, and helpful …

Read more

Categories Dinner

Spaghetti Lunchbox Idea for a Tasty Meal Prep

July 30, 2025 by Chef Jamie
To make the perfect Spaghetti Lunchbox Delight, you need these key ingredients: - 8 oz (225g) spaghetti - 1 cup cherry tomatoes, halved - 1 small zucchini, spiralized or finely chopped - 1 cup spinach leaves - ½ cup mozzarella balls, halved - ¼ cup black olives, sliced - 2 tablespoons olive oil - 1 tablespoon balsamic vinegar - 1 teaspoon Italian seasoning - Salt and pepper to taste - Fresh basil leaves for garnish Each ingredient plays an important role in flavor and texture. The spaghetti serves as the base. Cherry tomatoes add sweetness, while zucchini brings crunch. Spinach gives a fresh taste, and mozzarella adds creaminess. Olives offer a salty bite, and the dressing ties everything together. You can easily adjust this recipe to fit different needs. - Gluten-Free: Use gluten-free pasta instead of regular spaghetti. - Dairy-Free: Swap mozzarella for vegan cheese or leave it out altogether. - Low-Carb: Try spiralized zucchini or spaghetti squash as a pasta replacement. - Nut-Free: Ensure that your chosen dressings do not contain nuts. These substitutions keep the meal tasty while meeting dietary needs. Want to boost the taste? Here are some fun add-ins: - Protein: Add grilled chicken or chickpeas for a hearty option. - Herbs: Mix in fresh herbs like parsley or thyme for a fresh kick. - Spices: Sprinkle some chili flakes for heat or lemon zest for brightness. Feel free to get creative! These extras make your Spaghetti Lunchbox even more delicious. For the full recipe, check the main section. To start, grab a large pot and fill it with water. Add a pinch of salt and bring it to a boil. Once the water bubbles, add 8 oz of spaghetti. Cook it for about 8 to 10 minutes, or until it feels firm yet tender. This is called al dente. When done, drain the spaghetti and rinse it under cold water. This stops the cooking and helps it cool down quickly. Next, let’s make the dressing. In a small bowl, mix 2 tablespoons of olive oil, 1 tablespoon of balsamic vinegar, and 1 teaspoon of Italian seasoning. Add a pinch of salt and pepper. Whisk it all together until it blends well. Now, in a big mixing bowl, combine the spaghetti, 1 cup of halved cherry tomatoes, 1 small spiralized zucchini, 1 cup of spinach, ½ cup of mozzarella balls, and ¼ cup of sliced black olives. Pour the dressing over this mix. Toss gently until everything is coated in that tasty dressing. Now comes the fun part—packing! Take your spaghetti mix and divide it into lunchboxes. Top each box with fresh basil leaves for a nice touch. This makes your meal look pretty and adds flavor. You can eat it right away, or store it in the fridge for up to 2 days. It tastes great cold or at room temperature. Enjoy your Spaghetti Lunchbox Delight! For more details, check the Full Recipe. To keep your lunchbox clean, use containers with tight lids. Choose ones made for liquids. Stack your spaghetti with veggies on top to avoid sogginess. Place a paper towel inside to absorb extra moisture. This helps keep your meal fresh and neat. To keep spaghetti fresh, store it in an airtight container. Let it cool before packing to prevent steam buildup. Add dressing just before eating. This keeps everything crunchy and tasty. Adding a layer of spinach on top can also help. It provides a barrier to moisture from the other ingredients. Cook double the amount of spaghetti one day. Store half for another meal. Use pre-chopped veggies to save time. You can also buy spiralized zucchini. This cuts prep time by half. Meal prep on the weekend makes busy days easier. Pack your lunchboxes the night before. This way, you grab and go in the morning! For the full recipe, check out the Spaghetti Lunchbox Delight. {{image_2}} Kids love fun shapes and bright colors. You can make spaghetti exciting! Use fun pasta shapes like stars or hearts. Add veggies like carrots and bell peppers for color. Kids also enjoy adding meatballs or mini sausages. These make the meal more filling. You can even let them pick their toppings. That way, they feel involved and excited to eat their lunch. For a vegetarian twist, just skip the meat. You can keep the cheese or use a vegan cheese. For a vegan option, replace mozzarella with avocado or nuts. You can add chickpeas or lentils for protein. These beans add texture and flavor. Try adding roasted veggies too, like bell peppers or eggplant. They give a lovely taste and make your meal colorful. Sauce can change everything! While the basic dressing is great, you can explore more flavors. Try a pesto sauce made from basil and nuts. It gives a fresh taste. Alfredo sauce is creamy and rich, perfect for a change. For a kick, use a spicy marinara or arrabbiata sauce. You can even mix sauces for a unique flavor. Don't be afraid to get creative! Check out the Full Recipe for more ideas. To keep your spaghetti fresh, store it in an airtight container. This helps prevent it from drying out. You can refrigerate the lunchbox for up to two days. Make sure to allow it to cool before sealing. When ready to eat, you can enjoy it cold or let it sit at room temperature for a bit. If you want to make meals ahead of time, freezing is a great option. First, let the spaghetti cool completely. Then, pack it in freezer-safe containers. You can also use freezer bags for easy storage. Be sure to remove as much air as possible. This helps prevent freezer burn. When ready to eat, thaw it in the fridge overnight and reheat. Leftover spaghetti can last in the fridge for about two days. If you freeze it, it can last for up to three months. Always check for signs of spoilage, like off smells or unusual colors. Trust your senses! If it seems off, throw it out. Enjoy delicious meals with your Spaghetti Lunchbox Delight! For the full recipe, visit the recipe section. Yes, you can make this spaghetti lunchbox recipe ahead of time. I recommend preparing it the night before. This way, the flavors blend nicely. Just store it in the fridge until you are ready to eat. You can enjoy it cold or let it sit for a bit at room temperature. A sturdy lunchbox with compartments works best for spaghetti. Look for one that has a tight seal to avoid spills. I prefer a box that keeps the sauce separate from the pasta until you are ready to eat. This keeps everything fresh and tasty. To keep spaghetti from sticking, rinse it in cold water after cooking. This stops the cooking process and cools it down. You can also toss the pasta with a little olive oil. This adds flavor and helps keep it separate. If you follow these tips, your lunchbox will have perfect spaghetti every time! This blog post covered everything you need for a perfect spaghetti lunchbox. We discussed the essential ingredients, tasty variations, and smart packing tips. I shared ways to customize your meal for different diets and preferences. You learned how to avoid messes and keep your spaghetti fresh. In closing, with these tips, your spaghetti lunchboxes can be fun, easy, and delicious. Enjoy making them for yourself or your family!

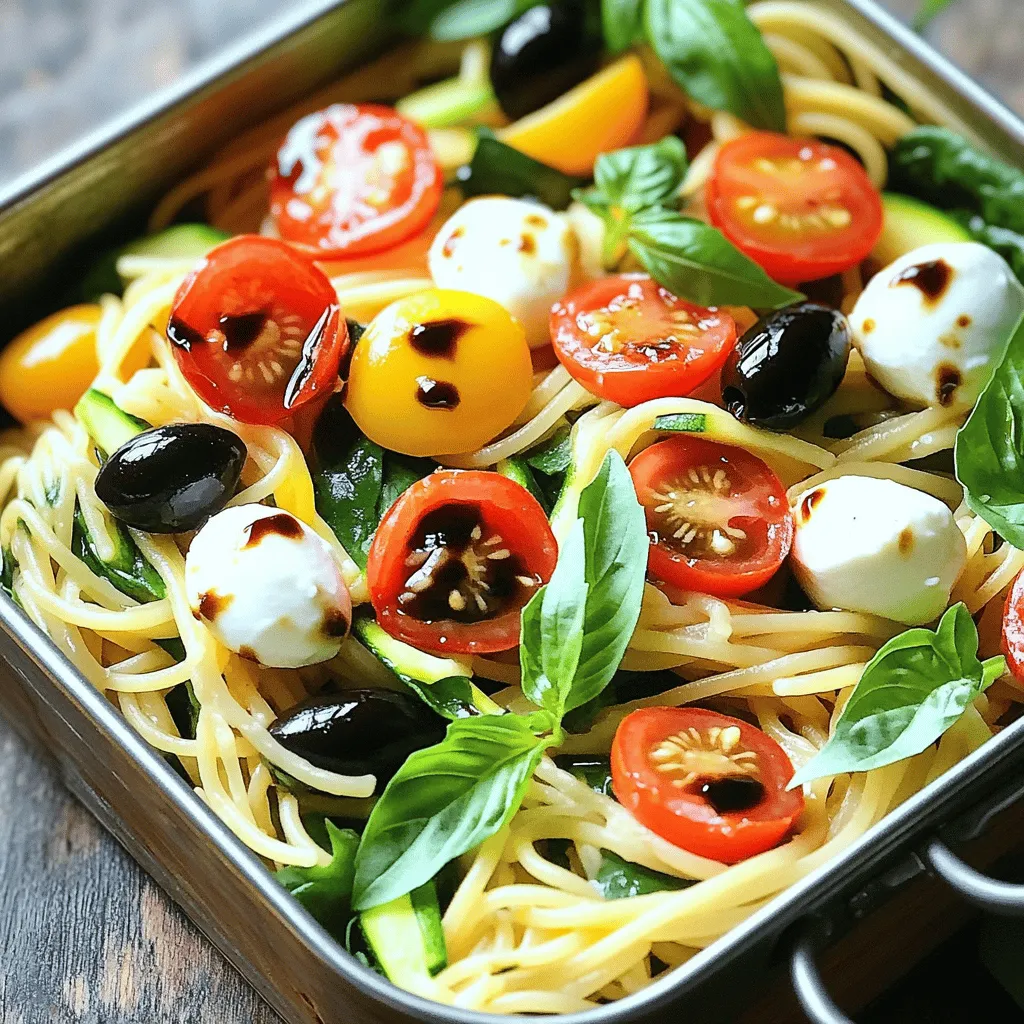
Looking for a fun and tasty meal prep idea? You’ll love this spaghetti lunchbox recipe! It’s simple and perfect for both kids and adults. I’ll walk you through easy ingredients …

Read more

Categories Salads

Harry Potter Butterbeer Cookies Delightful Treat Recipe

July 30, 2025 by Chef Jamie
- 2 ½ cups all-purpose flour - 1 teaspoon baking soda - ½ teaspoon salt - 1 cup unsalted butter, softened - 1 cup brown sugar, packed - ½ cup granulated sugar - 1 tablespoon vanilla extract - 2 large eggs - 1 tablespoon butterscotch syrup (or caramel syrup as a substitute) - 1 cup butterscotch chips - 1 cup white chocolate chips - Pinch of nutmeg (optional) These ingredients create a rich and tasty cookie. Each one adds to the overall flavor. The butterscotch and white chocolate chips give a delightful sweetness. You can also add a pinch of nutmeg for warmth. - If you need a different flavor, use caramel syrup instead of butterscotch. - For a gluten-free option, try using gluten-free flour blends. - If you want a dairy-free cookie, use coconut oil or a dairy-free butter. Feel free to swap ingredients based on your needs. These simple changes let everyone enjoy these cookies. Whether you have dietary needs or just want to try something new, these swaps can work well. 1. Preheat your oven to 350°F (175°C). Line two baking sheets with parchment paper. This keeps the cookies from sticking. 2. In a medium bowl, whisk together 2 ½ cups of flour, 1 teaspoon of baking soda, and ½ teaspoon of salt. If you like, add a pinch of nutmeg for extra flavor. 3. In a large mixing bowl, cream 1 cup of softened butter, 1 cup of brown sugar, and ½ cup of granulated sugar. Mix until it’s light and fluffy, about 3 to 4 minutes. 1. Add 1 tablespoon of vanilla extract and 1 tablespoon of butterscotch syrup to the butter mixture. Mix well to combine. 2. Beat in 2 large eggs, one at a time. Make sure each egg is fully mixed before adding the next. 3. Gradually add the dry mixture to the wet ingredients. Mix just until combined. This helps keep the dough soft. 4. Fold in 1 cup of butterscotch chips and 1 cup of white chocolate chips. Ensure they are evenly spread throughout the dough. 1. Scoop tablespoon-sized balls of dough and place them on the prepared baking sheets. Leave some space between each cookie. 2. Bake for 10 to 12 minutes. The edges should be lightly golden and the centers set. Keep an eye on them! 3. After baking, let the cookies cool on the sheets for 5 minutes. Then, transfer them to wire racks to cool completely. Enjoy your delicious treats! For the full recipe, check the instructions above! To make the best Harry Potter Butterbeer cookies, start with your oven. Each oven is different. You may need to adjust your baking time. If your cookies look brown but feel soft, they are likely ready. Check them at the 10-minute mark. Next, let's talk about texture. You want your cookies soft and chewy, not hard. To help with this, chill the dough for at least 30 minutes. Chilling firms the dough, making it easier to scoop and shape. It also helps the flavors blend well. When serving your Butterbeer cookies, think about fun ways to present them. Use a whimsical jar to make them look magical. You can also stack them on a fun platter. For a Harry Potter theme, consider using themed containers. Think about using a decorative box that looks like a Hogwarts letter. You can also sprinkle powdered sugar on top for a snowy effect. Many people make mistakes while baking cookies. One common mistake is overmixing the dough. This can make your cookies tough. Mix just until you combine the ingredients. Another mistake is not measuring ingredients correctly. Always use dry measuring cups for flour and sugar. Too much flour can make cookies dry and crumbly. Lastly, don’t forget to cool your cookies properly. If you move them too soon, they may break. Let them cool on the baking sheet for five minutes. Then, transfer them to wire racks to cool completely. Follow these tips, and you'll have perfect Butterbeer cookies every time! For the complete recipe, check out the Full Recipe. {{image_2}} You can make these Butterbeer cookies even better with some fun add-ins! - Spices: Try adding cinnamon or ginger for warmth. They add a cozy feel. - Mix-ins: You can include things like chopped nuts or different types of chocolate for extra flavor. - Vegan Options: If you want a vegan version, swap the butter for coconut oil and use flax eggs. Make these cookies special for any holiday! - Holidays: For Christmas, add a hint of peppermint extract for a festive twist. - Seasonal Ingredients: Use pumpkin spice in fall for a rich flavor. It fits the season perfectly. - Themed Events: For Harry Potter parties, use cookie cutters to shape them like stars or wands. You can change how you bake these cookies for variety! - Bars: Instead of individual cookies, bake the dough as bars. Just adjust the baking time. - Thickness: If you want chewy cookies, make the dough balls thicker. For crispy, flatten them more. - Shapes: Get creative! You can cut them into different shapes or even make sandwiches with frosting. These variations make the Butterbeer cookies fun and exciting. Check out the Full Recipe for more details! To keep your Harry Potter Butterbeer Cookies fresh, store them in an airtight container. This helps prevent them from drying out. I recommend using a plastic or glass container with a tight lid. You can also use a resealable plastic bag. - In the fridge: Cookies last about one week. - In the pantry: They stay fresh for up to ten days. You can freeze both the dough and baked cookies. For unbaked dough, scoop the dough onto a baking sheet. Freeze until solid, then store in a bag. When you want to bake, just thaw the dough in the fridge overnight. To freeze baked cookies, place them in an airtight container with parchment paper between layers. They can last up to three months in the freezer. To reheat cookies, use the oven for the best results. Preheat it to 300°F (150°C). Place the cookies on a baking sheet for about five minutes. This warms them without drying them out. You can also use a microwave. Heat the cookies for about ten seconds. This warms them up but be careful not to overheat them. Enjoy your soft, warm Butterbeer Cookies! These cookies connect to the magical world of Harry Potter. They bring the flavor of Butterbeer right to your kitchen. The sweet taste comes from butterscotch and white chocolate chips. A pinch of nutmeg adds a warm touch. This unique flavor profile makes them a delight for fans of all ages. Yes, you can make these cookies in advance! Prepare the dough and chill it for a few hours. This helps the flavors blend better. You can also bake the cookies ahead and store them. Just make sure to follow proper storage tips for best results. Store leftover cookies in an airtight container. This keeps them fresh for about a week. You can also freeze them for longer storage. To maintain texture, place parchment paper between layers. This way, they stay soft and tasty even after freezing. In this post, we covered the essential ingredients for Butterbeer cookies and their substitutes. We explained step-by-step instructions to create them perfectly, plus tips for baking and serving. I shared fun variations and storage methods to keep your cookies fresh. Remember, these cookies bring a bit of magic to any occasion. Trust me, you'll impress everyone with your baking skills. So, gather your ingredients, follow the steps, and enjoy the process!

Are you ready to bring a taste of Hogwarts to your kitchen? These Harry Potter Butterbeer Cookies are a magical treat that combines the creamy flavors of butterscotch and white …

Read more

Categories Desserts

Spooky Halloween Marble Cake Festive and Fun Treat

July 29, 2025 by Chef Jamie
Here are the ingredients you need for the spooky Halloween marble cake: - 2 cups all-purpose flour - 1 ½ cups granulated sugar - ½ cup unsalted butter, softened - 1 cup whole milk - 3 large eggs - 2 teaspoons baking powder - 1 teaspoon vanilla extract - ¼ teaspoon salt - ½ cup unsweetened cocoa powder - 1 cup black and orange sprinkles (for decoration) - 1 cup Halloween-themed candy (optional for layering) These ingredients help create a deliciously moist and flavorful cake. The blend of vanilla and chocolate batters gives it a fun, spooky vibe. The sprinkles add a festive touch, making the cake perfect for Halloween gatherings. You can also layer candy inside for a sweet surprise! This cake is easy to make and will impress your friends and family. For detailed steps, check the full recipe. - Preheat your oven to 350°F (175°C). - Grease and flour a 9x5-inch loaf pan. - In a large bowl, cream together the softened butter and sugar until fluffy. - Beat in the eggs one at a time, mixing well after each addition. Add the vanilla extract. - In a separate bowl, whisk together the dry ingredients: flour, baking powder, and salt. - Gradually combine the wet and dry mixtures, alternating with the milk. Stir until just mixed. - Divide the batter into two bowls: one for vanilla and one for chocolate. Stir cocoa powder into the chocolate batter. - Spoon the vanilla and chocolate batters alternately into the prepared pan. - Use a knife to swirl the batters together for a marbled design. - If you want, layer some Halloween-themed candy in the center for a fun surprise. Bake the cake for 45-55 minutes. Check with a toothpick to see if it is done. For more details, check the Full Recipe. To create an even swirl, start by alternating spoonfuls of vanilla and chocolate batter. Use a knife to gently swirl the batters together. Aim for a figure-eight motion to blend without losing the distinct layers. This method gives a great look and taste. If you want more intricate designs, use a skewer. Dip it into the batter and make small circles or zig-zags. This adds a fun twist to your marble cake. Experiment with different patterns to find what you like best! Sprinkles add a festive touch. Use black and orange sprinkles to match the Halloween theme. Scatter them on top right before baking for a fun look. You can also add them after the cake cools for a brighter pop. For creative ghost and pumpkin icing, use white and orange frosting. Pipe little ghost shapes or pumpkin faces on top. This not only makes the cake fun but also adds a sweet layer of flavor. Get creative, and let your Halloween spirit shine through! To ensure the cake is cooked through, keep an eye on the time. Start checking at 45 minutes. The edges should pull away from the pan slightly, and the top should be firm. Use a toothpick to check if the cake is done. Insert it into the center; it should come out clean or with a few crumbs. If it’s wet with batter, bake a bit longer. This simple tip guarantees a perfectly baked cake every time. {{image_2}} You can change the flavor of your spooky Halloween marble cake. Adding extracts like almond or orange gives it a new twist. These flavors bring a unique taste to your cake. You can also mix in spices like cinnamon or nutmeg. These spices add warmth and depth, perfect for the fall season. Get creative with your cake toppings! Chocolate ganache can add a rich layer. Simply melt chocolate and mix it with cream for a smooth finish. You can also use fruit-based decorations. Fresh berries or spooky fruit shapes can brighten the cake. These options can make your cake stand out at any Halloween party. If you need a gluten-free cake, there are great flour substitutes. Almond flour or coconut flour works well. Just remember to adjust your wet ingredients. You may need to add a bit more liquid to keep the batter moist. This way, everyone can enjoy a slice of your spooky Halloween marble cake. For the full recipe, check out the [Full Recipe]. To keep your spooky Halloween marble cake fresh, wrap it tightly in plastic wrap. This helps keep the moisture in. You can also store it in an airtight container. Place it in the fridge if you plan to eat it within a week. For longer storage, freeze the cake. Slice it first for easy thawing. Wrap each slice in plastic wrap, then put them in a freezer bag. When you want to enjoy a slice, take it out and let it sit at room temperature for about an hour. Your spooky Halloween marble cake stays fresh for about five days in the fridge. In the freezer, it can last up to three months. Check for signs that the cake has spoiled. If you see mold or a strange smell, it's best to toss it. A dry or hard texture also means it’s time to say goodbye. Enjoy this festive treat while it’s fresh! For the full recipe, check out the recipe section. To make your spooky Halloween marble cake extra festive, think of fun mix-ins and toppings. Here are some ideas: - Mini chocolate chips for a sweet surprise - Crushed Halloween-themed cookies for crunch - Chopped nuts for added texture - Edible glitter for a magical touch - Whipped cream ghosts or pumpkin icing for decoration - Extra black and orange sprinkles on top for more flair These additions can make your cake not only tastier but also more visually fun. Kids and adults alike will love the spooky surprise! Yes, you can make this cake ahead of time! Here are some tips for prepping: - Bake the cake a day or two before your event. - Let it cool completely before wrapping it in plastic wrap. - Store the wrapped cake in the fridge to keep it fresh. - You can also freeze the cake for up to three months. - Thaw it in the fridge overnight before serving. Making it in advance can save you time, so you can focus on other fun Halloween tasks! To ensure your cake rises well, follow these tips: - Make sure your baking powder is fresh. - Room temperature ingredients help the cake mix better. - Don’t overmix the batter; mix until just combined. - Check your oven temperature with an oven thermometer. - Place the cake in the center of the oven for even baking. Avoiding these common pitfalls will give you a fluffy and delicious cake! For the full recipe, refer to the Spooky Halloween Marble Cake. This blog post covered a delicious marble cake recipe just in time for Halloween. We explored the key ingredients, easy preparation steps, and tips for a perfect marble effect. You learned how to add festive touches and alternative options. As you bake and decorate, remember to have fun and get creative. This cake can be a delightful treat for any gathering, year-round. With practice, you’ll master each layer and impress everyone with your skills. Enjoy your baking journey!

Get ready for a Halloween treat that will delight both kids and adults! My Spooky Halloween Marble Cake is easy to make and perfect for parties. With a blend of …

Read more

Categories Desserts
Older posts
Newer posts
← Previous Page1 … Page61 Page62 Page63 … Page134 Next →

TOSSED RECIPES

Simple meals, bold taste. Quick recipes made for real life — always fresh, always delicious. 🌿🍴

PAGES

Home About Contact Privacy Policy Terms & Conditions Cookie Policy GDPR Policy Copyright Policy Disclaimer

CATEGORIES

Appetizers Desserts Salads Breakfast Dinner

Contact

  • Pinterest
  • Mail
Copyright © 2026 Tossed Recipes. All rights reserved.