Pumpkin Spice Donuts Simple and Tasty Recipe
![To make your pumpkin spice donuts, gather the following ingredients: - 1 cup all-purpose flour - 1/2 cup pumpkin puree - 1/4 cup granulated sugar - 1/4 cup brown sugar, packed - 1/2 teaspoon baking powder - 1/2 teaspoon baking soda - 1 teaspoon pumpkin pie spice - 1/2 teaspoon cinnamon - 1/4 teaspoon salt - 1/2 cup Greek yogurt - 1 large egg - 1 teaspoon vanilla extract - 2 tablespoons melted coconut oil - For the glaze: 1 cup powdered sugar, 2 tablespoons milk, and a pinch of cinnamon Each ingredient plays a role in making these donuts soft and tasty. The pumpkin puree adds moisture and flavor. The sugars give sweetness, and the spices bring warmth. You also need yogurt for richness. The baking powder and baking soda help the donuts rise. For the glaze, the powdered sugar makes it sweet and smooth. The milk helps it spread nicely. A pinch of cinnamon adds a lovely touch. If you want to see the full recipe, check out the [Full Recipe]. Gather these ingredients, and you will be ready to make some delicious pumpkin spice donuts! First, you need to preheat your oven to 350°F (175°C). This step ensures the donuts bake evenly. Next, lightly grease your donut pan with a bit of coconut oil or cooking spray. This will help the donuts pop out easily after baking. In a mixing bowl, whisk together the following dry ingredients: - 1 cup all-purpose flour - 1/2 teaspoon baking powder - 1/2 teaspoon baking soda - 1 teaspoon pumpkin pie spice - 1/2 teaspoon cinnamon - 1/4 teaspoon salt Mix these well. This blend of flour and spices adds flavor and structure to the donuts. In another bowl, mix the wet ingredients. Combine: - 1/2 cup pumpkin puree - 1/4 cup granulated sugar - 1/4 cup brown sugar, packed - 1/2 cup Greek yogurt - 1 large egg - 1 teaspoon vanilla extract - 2 tablespoons melted coconut oil Stir these until smooth. This mixture adds moisture and richness to your donuts. Now, gradually add the dry ingredients to the wet bowl. Stir gently until just combined. Be careful not to overmix! Overmixing can lead to tough donuts, and nobody wants that. Spoon the batter into your prepared donut pan, filling each cavity about 3/4 full. Bake the donuts in your preheated oven for 10-12 minutes. To check if they are done, insert a toothpick into the center. It should come out clean. After baking, let the donuts cool in the pan for 5 minutes. Then, transfer them to a wire rack to cool completely. While they cool, prepare the glaze by whisking together: - 1 cup powdered sugar - 2 tablespoons milk - A pinch of cinnamon Once the donuts are cool, dip the tops in the glaze. Allow the excess glaze to drip off. Set the glazed donuts aside to let the glaze set. Enjoy your homemade pumpkin spice donuts! For the complete recipe, check out the Full Recipe. - Avoiding overmixing: Overmixing your batter makes donuts tough. Mix just until combined. This keeps them soft and light. - Ensuring even baking: Place your donut pan in the center of the oven. This helps heat circulate evenly. Rotate the pan halfway through baking for uniform results. - Decorative plating ideas: Use a pretty plate to display your donuts. Arrange them in a circle or stack them high for a fun look. - Garnishing tips: Sprinkle a little cinnamon on top. You can also add tiny pumpkin decorations for a festive touch. - Underbaking risks: Make sure to bake the donuts long enough. Insert a toothpick to check. If it comes out clean, they are ready. - Incorrect measuring techniques: Measure your ingredients carefully. Use dry measuring cups for flour and a liquid cup for pumpkin puree. This ensures the right texture and flavor. {{image_2}} To make vegan pumpkin spice donuts, you need to swap out eggs and dairy. For the egg, use a flax egg. Mix one tablespoon of ground flaxseed with three tablespoons of water. Let it sit for a few minutes until it thickens. For dairy, replace Greek yogurt with unsweetened applesauce or a plant-based yogurt. These choices will keep your donuts moist and delicious. If you want gluten-free donuts, choose the right flour. Almond flour or oat flour works well. You can also use a gluten-free all-purpose blend. When using these, you may need to add a bit more baking powder. This helps the donuts rise and stay fluffy. Just remember to check that your flour is certified gluten-free. To make your donuts even tastier, think about adding chocolate chips or nuts. Dark chocolate chips bring a rich flavor that pairs great with pumpkin spice. Walnuts or pecans add a nice crunch. Mix these in gently before spooning the batter into the pan. Your donuts will be extra special this way! For the complete recipe, check out the Full Recipe. To keep your pumpkin spice donuts fresh, follow these tips: - Cool Completely: Before storing, let the donuts cool fully on a wire rack. - Airtight Containers: Use an airtight container to prevent them from drying out. - Layer with Paper Towels: Place paper towels between layers if stacking, to absorb moisture. You can freeze your donuts for longer storage. Here’s how: - Cool First: Ensure donuts are completely cool before freezing. - Wrap Individually: Wrap each donut tightly in plastic wrap. - Use Freezer Bags: Place the wrapped donuts in a freezer bag. To thaw, simply leave them at room temperature for about 1 hour. For best texture, you can warm them in the oven for a few minutes before serving. Enjoy your pumpkin spice donuts anytime! To make pumpkin spice donuts from scratch, first gather your ingredients. You will need flour, pumpkin puree, sugars, and spices. Mix your dry and wet ingredients in separate bowls. Then, combine them carefully without overmixing. Spoon the batter into a greased donut pan. Bake at 350°F for 10 to 12 minutes. Let them cool before glazing. For a detailed guide, check the Full Recipe. If you don’t have pumpkin puree, you can use applesauce or squash puree. Both options provide moisture and sweetness. You can also try using mashed bananas. Keep in mind that each option will change the flavor slightly. Applesauce gives a sweet taste, while squash is more neutral. Yes, you can bake these donuts without a donut pan. Use a regular muffin tin instead. Just fill the muffin cups about halfway. The donuts will be more like muffins, but still tasty. You can also make a freeform shape with parchment paper. Pumpkin spice donuts will last about three days at room temperature. Store them in an airtight container to keep them fresh. If you want them to last longer, you can freeze them. They stay fresh in the freezer for about two months. You can find pumpkin spice donuts at local bakeries, coffee shops, or grocery stores. Many places offer seasonal treats around fall. Check your favorite bakery for their special offerings. You might even find some unique flavors or styles. You now have a clear path to making delicious pumpkin spice donuts. We covered the key ingredients, step-by-step instructions, and helpful tips. You learned how to avoid common mistakes and explore variations like vegan and gluten-free options. Remember, proper storage keeps your donuts fresh longer. Enjoy your baking adventure, and share these treats! They are sure to delight everyone who tries them. Keep experimenting and make these donuts your own!](https://tossedrecipes.com/wp-content/uploads/2025/07/c25a7821-c08c-4cb2-98e9-b19c9ad24756.webp)
Fall is the perfect time to indulge in warm, fluffy Pumpkin Spice Donuts. If you love the taste of pumpkin and spices, you’re in for a treat! In this simple …
Fall is the perfect time to indulge in warm, fluffy Pumpkin Spice Donuts. If you love the taste of pumpkin and spices, you’re in for a treat! In this simple …
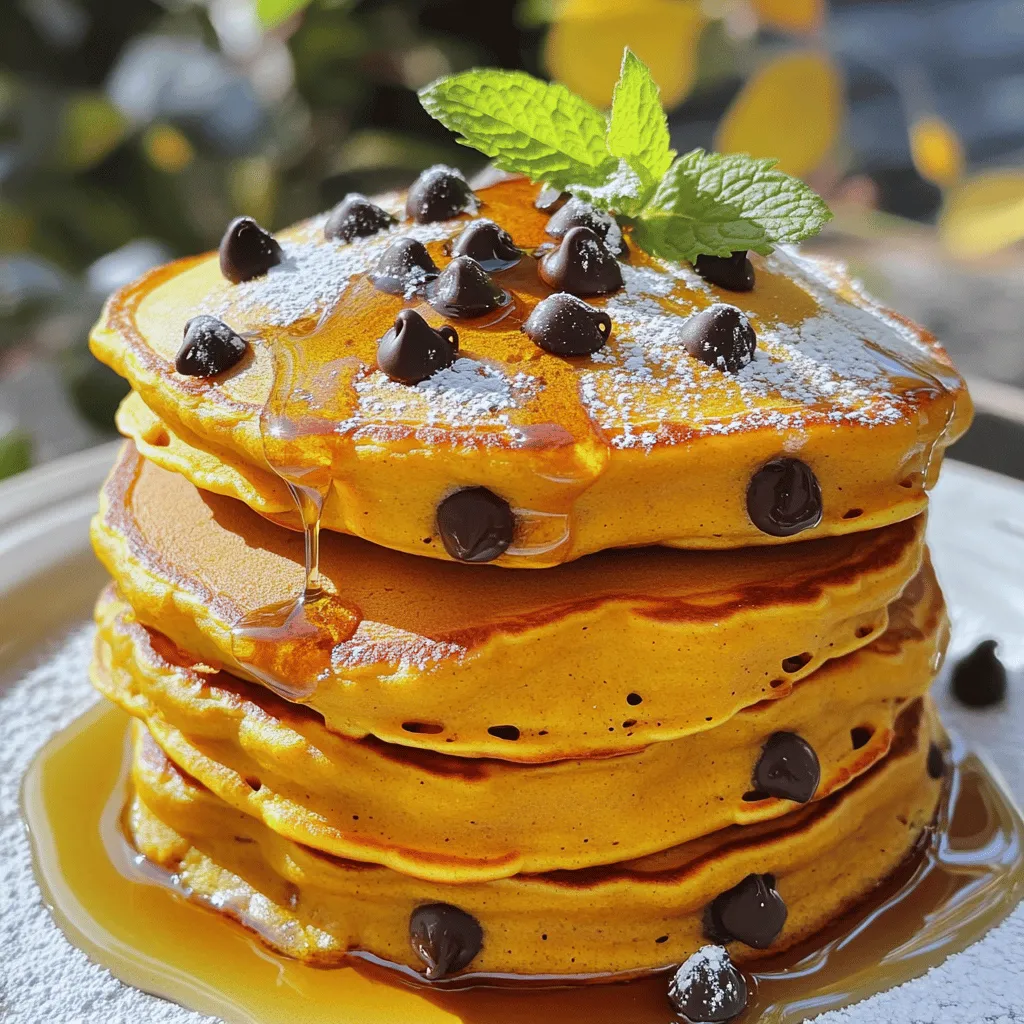
Get ready to delight your taste buds with pumpkin chocolate chip pancakes that are fluffy and delicious! These pancakes blend warm, cozy pumpkin flavors with sweet chocolate chips. They make …

Are you ready to take your snack game to the next level? Air Fryer Chicken Taquitos are the answer! These crispy, flavorful treats are packed with shredded chicken, creamy cheese, …
![To make a fantastic pumpkin cobbler, you need some key ingredients. These components create a warm and comforting dish that screams fall. - 1 can (15 oz) pure pumpkin puree - 1 cup granulated sugar - 1/2 cup packed brown sugar - 1 teaspoon vanilla extract - 2 large eggs - 1 teaspoon ground cinnamon - 1/2 teaspoon ground nutmeg - 1/2 teaspoon ground ginger - 1/4 teaspoon salt - 1 cup all-purpose flour - 1 teaspoon baking powder - 1 cup milk - 1/2 cup unsalted butter, melted Using fresh ingredients matters. Fresh spices bring out vibrant flavors. Pure pumpkin puree gives a rich taste and smooth texture. Always choose the best quality for great results. You can take your pumpkin cobbler to the next level with some optional ingredients. These add-ins can change the flavor and texture. - 1 cup pecans or walnuts, chopped (optional) - Alternative sweeteners like maple syrup or honey Adding nuts gives a nice crunch. You can also mix in some extra spices like cloves or allspice for a unique twist. If you prefer less sugar, try using natural sweeteners. Each option brings a new flair to your cobbler, making it your own. For the full recipe, check out [Full Recipe]. To make the batter, start with a large mixing bowl. Add the pumpkin puree, granulated sugar, brown sugar, and vanilla extract. Mix these ingredients well until they blend into a smooth mixture. Next, add the eggs one at a time. Mix after each egg to ensure it is well combined. Then, stir in the ground cinnamon, nutmeg, ginger, and salt. This adds warmth and spice to your cobbler. Now, take another bowl and whisk together the flour and baking powder. This helps evenly distribute the baking powder. Gradually add this dry mix into the pumpkin mixture. Alternate adding the milk with the flour, starting and ending with the flour. This helps achieve the right consistency. Mix until everything is just combined. You want to avoid over-mixing, which can make the cobbler tough. Prepare your baking dish by greasing it with non-stick spray or butter. This step ensures your cobbler comes out easily. Pour the melted butter into the bottom of the dish first. Then, gently pour the pumpkin batter over the butter. Do not stir! This creates a deliciously crisp bottom layer. If you like, sprinkle chopped pecans or walnuts on top for added flavor. Bake the cobbler in your preheated oven at 350°F (175°C). The baking time is important. You want to bake it for 45 to 55 minutes. Check for doneness by inserting a toothpick in the center. If it comes out clean, your cobbler is ready. Let it cool for at least 15 minutes before serving. This step helps the flavors settle. Enjoy your tasty, warm pumpkin cobbler! For the full recipe, check out the complete guide. One common mistake is mismeasuring ingredients. Always use the right tools, like measuring cups and spoons. Too much or too little sugar can change how sweet your cobbler is. Another key point is not stirring the butter and batter. When you pour the batter over melted butter, do not mix them. This creates a crispy bottom layer that everyone loves. To enhance flavor, add more spices. A touch more cinnamon or nutmeg can boost the taste. Consider adding a splash of maple syrup for a sweet twist. For the perfect texture, make sure not to overmix. Mix until combined, but leave some lumps. This keeps your cobbler light and fluffy. Enjoy your Pumpkin Cobbler warm, topped with vanilla ice cream. It makes the dish even better! For the detailed recipe, check the Full Recipe link. {{image_2}} To make a vegan pumpkin cobbler, you can swap some ingredients. Instead of eggs, use flaxseed meal. Mix 1 tablespoon of flaxseed meal with 2.5 tablespoons of water. Let it sit for a few minutes. This will act as a binder, just like eggs do. For the milk, use almond milk or coconut milk. They add a lovely flavor and keep it creamy. Instead of butter, use coconut oil or vegan butter. These swaps help keep the dish delicious while making it plant-based. If you want a gluten-free version, choose gluten-free flour. A blend of almond flour and coconut flour works well. You can also use a store-bought gluten-free all-purpose flour. Just make sure it has xanthan gum in it. To keep the flavor and texture, mix in a bit of cornstarch. This will help give your cobbler a nice lift. Remember to follow the cooking times carefully. Gluten-free dishes can sometimes need a bit more time to set. Store your pumpkin cobbler in the fridge. Use an airtight container to keep it fresh. You can also cover the dish with plastic wrap or foil. This helps prevent it from drying out. Make sure to cool the cobbler completely before storing. This keeps moisture in and ensures better flavor. If you plan to eat it later, try to finish it within three to four days. To reheat your pumpkin cobbler, use the oven for best results. Preheat the oven to 350°F (175°C). Place the cobbler in an oven-safe dish. Cover it with foil to keep it moist. Heat for about 15 to 20 minutes. You can also use the microwave. Place a piece on a plate and cover it with a damp paper towel. Heat it for 30 seconds at a time until warm. Consider turning leftovers into a new dessert. Add a drizzle of caramel sauce or a scoop of vanilla ice cream. This can make your pumpkin cobbler feel fresh and exciting! You can tell when your Pumpkin Cobbler is done by looking for a few signs. First, check the color. It should be golden brown on top. Next, gently shake the baking dish; the cobbler should be set and not jiggle. The best test is the toothpick test. Insert a toothpick into the center. If it comes out clean, your cobbler is ready! Yes, you can freeze Pumpkin Cobbler! First, let it cool completely. Cut it into slices. Then, wrap each slice tightly in plastic wrap. Place the wrapped slices in a freezer bag. Label the bag with the date. To thaw, take a slice out and leave it in the fridge overnight. You can also reheat it in the oven at 350°F until warmed through. Pumpkin Cobbler tastes great with many toppings. Try serving it with a scoop of vanilla ice cream. Whipped cream also adds a nice touch. For a crunch, sprinkle some chopped nuts on top. For side dishes, consider a simple salad or roasted veggies. They balance the sweet flavors. When it comes to drinks, warm spiced cider goes well with the cobbler. A light coffee or tea also pairs nicely. Enjoy the cozy flavors of fall with these options! In this post, we covered how to make delicious pumpkin cobbler. Fresh ingredients are key for great flavor. Mixing the batter correctly ensures a smooth texture. Avoid common mistakes, like wrong measurements. You can also try vegan or gluten-free variations for more options. Store your leftovers properly to keep them tasty. Enjoy your pumpkin cobbler warm, with your favorite toppings. Remember, cooking is about having fun, so get creative! Happy baking!](https://tossedrecipes.com/wp-content/uploads/2025/07/4467910c-8467-4f3f-b276-13e32b892577.webp)
Fall is here, and that means it’s time for the ultimate treat: Pumpkin Cobbler! This recipe is your ticket to a warm, spiced dessert that will impress your family and …
![- 2 cups rotini pasta - 1 cup cherry tomatoes, halved - 1 cup cucumber, diced - 1/2 cup carrots, grated - 1/2 cup bell peppers (red, yellow, green), diced - 1/4 cup black olives, sliced - 1/4 cup feta cheese, crumbled - 1/4 cup Italian dressing - 1 tablespoon olive oil - Salt and pepper to taste - Fresh parsley, chopped (for garnish) Kids' pasta salad is a fun dish you can make together. The first step is to gather your ingredients. I love using rotini pasta because it holds the flavors well. You can choose any colorful vegetables you have. Cherry tomatoes add brightness, while cucumbers give a nice crunch. Grated carrots bring sweetness, and diced bell peppers add more color. Adding feta cheese makes the salad creamy and tasty. If your kids like olives, add some sliced black olives for extra flavor. For the dressing, I recommend using Italian dressing. It’s tangy and pairs well with the veggies. A drizzle of olive oil adds a smooth touch. Make sure to have salt and pepper for seasoning. Fresh parsley gives a nice pop of green as a garnish. This mix of ingredients helps create a salad that is not only tasty but also visually appealing. For the full recipe, check out the details. Start by boiling 2 cups of rotini pasta. Follow the package instructions for cooking time. Make sure the pasta is al dente, which means it should be firm but cooked through. Once the pasta is done, drain it in a colander. Rinse the pasta under cold water to cool it off. This helps stop the cooking process and keeps the pasta fresh. Chop your colorful veggies while the pasta cooks. Use cherry tomatoes, cucumber, carrots, and bell peppers. Aim for small, bite-sized pieces. This makes them easy for kids to eat. Kids love bright colors, so mix red, yellow, and green bell peppers. Each veggie adds fun and flavor to the salad. In a large mixing bowl, combine the cooled pasta and chopped vegetables. Add sliced black olives and crumbled feta cheese for extra taste. In a separate small bowl, whisk together 1/4 cup of Italian dressing and 1 tablespoon of olive oil. Pour the dressing over the pasta and veggies. Gently toss everything together until coated. Taste the salad and add salt and pepper as needed. Chill the pasta salad for at least 30 minutes. This helps the flavors blend. Serve it in colorful bowls for a fun meal. Check the [Full Recipe] for more details! Involving kids in the kitchen makes cooking fun. Let them help wash the veggies. They can stir the pasta, too! Kids love to be part of the process. You can also ask them to pick out their favorite colors of vegetables. This adds a fun twist to the meal. To make the pasta salad look great, use lots of colors. Use bright cherry tomatoes, green cucumbers, and orange carrots. When kids see a rainbow on their plate, they get excited. You can even shape the vegetables into fun designs. This makes eating more enjoyable! Kids often prefer milder flavors. Start with less dressing, then let them taste it. If they want more flavor, you can add a bit more dressing. Keep the seasoning simple. You can use a pinch of salt or pepper, but avoid anything too spicy. Consider adding ingredients like sweet corn or peas. These are usually a hit with kids. You can also include small pieces of cooked chicken or turkey. These proteins make the salad more filling and tasty. Serving pasta salad in colorful bowls makes it more fun. Look for bowls in bright colors or fun shapes. This makes the meal look appealing. You can also serve the salad in cups for a snack. Garnishing adds a special touch. Try sprinkling fresh parsley on top. You can also use a few extra pieces of chopped veggies. This adds color and makes it look fancy. Kids love to eat what looks good! {{image_2}} You can switch up the pasta shape for fun. Try shapes like bows, shells, or spirals. Each one adds a new twist. You can also use whole wheat pasta for more fiber. Changing the cheese can add flavor too. Instead of feta, use mozzarella or cheddar. You can even try a dairy-free cheese. For dressing, experiment with ranch or a yogurt-based option. Each change can create a new taste adventure. Adding protein makes the salad hearty. You can mix in cooked chicken or turkey for a filling meal. Beans like chickpeas or black beans work great too. They add texture and protein. For kids who prefer meatless options, try tofu or veggie sausage. These proteins are fun and tasty, making the salad more balanced. Themed pasta salads are great for parties or holidays. For Halloween, add black olives and orange bell peppers. For Christmas, use red tomatoes and green spinach. In spring, try fresh peas and asparagus for a bright look. Each season brings special veggies. These salads can reflect the time of year and make meals more festive. To keep your kids' pasta salad fresh, store it in a sealed container. Make sure the container is airtight to prevent moisture loss. Place it in the refrigerator right after serving. Pasta salad typically lasts up to three days in the fridge. If you notice any change in smell or color, it’s best to toss it out. You can freeze pasta salad, but it may change the texture. To freeze, use a freezer-safe container and leave some space at the top. This allows for expansion. When you want to eat it, move it to the fridge to thaw overnight. Avoid refreezing after thawing, as it can spoil the taste and texture. For best results, serve leftovers cold. If you prefer it warm, heat it gently in a pan over low heat. Add a splash of olive oil to maintain moisture. Avoid using a microwave as it can make the pasta mushy. Always check the taste and texture before serving. For kids, I recommend rotini or farfalle pasta. These shapes are fun and easy to eat. Their twists and bows catch the dressing and flavors well. Kids enjoy these shapes because they look playful on the plate. Plus, they hold onto the veggies and dressing, making every bite tasty. Yes, you can! Making pasta salad ahead of time is a great idea. I suggest preparing it a few hours before serving. This allows the flavors to blend nicely. Just keep it in the fridge. If you make it the night before, it will still taste fresh. Just give it a good stir before serving! Sneaking in veggies can be simple. Try grating or finely chopping them. Carrots, zucchini, or spinach can blend in well. You can also use small amounts of pureed veggies in the dressing. Mixing in colorful veggies like bell peppers can make it look fun. Kids love bright colors, which can distract them from what’s in there! While Italian dressing is tasty, there are other options. Try ranch, honey mustard, or a light vinaigrette. Kids often enjoy sweeter dressings. You can also mix plain yogurt with herbs for a creamy twist. Just like the main dish, dressings can be fun to explore! This pasta salad combines rotini, colorful veggies, and tasty dressings. You can easily make it a fun meal with your kids. Engage them in prepping and mixing ingredients. Try new pasta shapes or swap in different cheeses. Don't forget about storage! Keep leftovers for later or freeze them for a quick meal. With these tips, your pasta salad will keep kids excited at mealtime. This simple dish can adapt for any occasion while still being healthy and fun. Enjoy creating a dish that your family will love!](https://tossedrecipes.com/wp-content/uploads/2025/07/839e9238-fc1e-43c4-9c49-c012885c1719.webp)
Looking for a fun and tasty meal that kids will actually eat? I’ve got the perfect recipe for you! This Kids’ Pasta Salad mixes colorful veggies, yummy cheeses, and flavorful …

Craving a dish that is both tasty and easy to make? Look no further! My Thai Peanut Chicken recipe combines juicy chicken with fresh veggies and a creamy peanut sauce. …
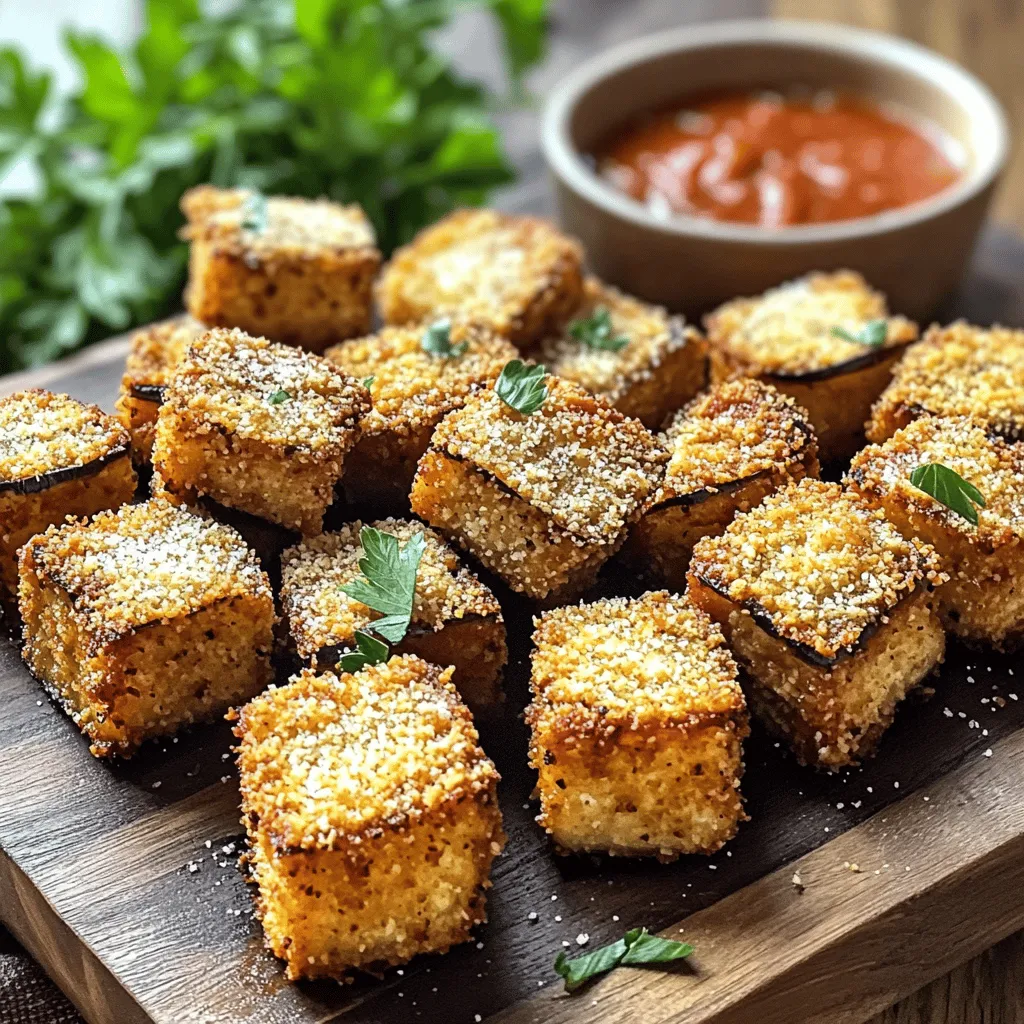
If you’re looking for a quick and tasty dish, this savory air fryer eggplant recipe is for you. I’ll show you how to turn simple ingredients into a crispy delight …
![To make a great Chicken Caesar Pasta Salad, you need simple and fresh ingredients. Here’s what you’ll need: - 2 cups rotini pasta - 1 cup cooked chicken breast, diced - 1 cup romaine lettuce, chopped - ½ cup cherry tomatoes, halved - ¼ cup grated Parmesan cheese - ½ cup Caesar dressing (store-bought or homemade) - 1 tablespoon olive oil - 1 teaspoon garlic powder - Salt and pepper, to taste - Croutons, for garnish These ingredients come together to create a dish full of flavor and texture. When selecting your ingredients, freshness is key. Here are some tips: - Pasta: Choose rotini for a fun shape that holds dressing well. - Chicken: Use cooked chicken. Grilling adds a nice flavor. - Lettuce: Look for crisp, bright green romaine. Avoid wilted leaves. - Tomatoes: Pick firm cherry tomatoes that are vibrant in color. - Cheese: Freshly grated Parmesan melts better and tastes richer. Fresh ingredients make your salad taste amazing. Always check for quality. If you can't find certain ingredients, feel free to swap them out. Here are some ideas: - Pasta: Any short pasta works well, like fusilli or penne. - Chicken: Substitute with turkey or even canned chicken for ease. - Lettuce: Spinach or mixed greens can replace romaine. - Tomatoes: Use diced bell peppers for a crunchy bite. - Dressing: Try ranch or Greek yogurt dressing for a twist. These substitutions can change the flavor and feel of your dish while keeping it delicious. For the full recipe, check out the details above. First, boil a large pot of salted water. Once the water is boiling, add the rotini pasta. Cook it according to the package instructions until it is al dente. This usually takes about 8 to 10 minutes. After cooking, drain the pasta in a colander. Rinse it under cold water to stop the cooking process and cool it down. This step is key to keeping your pasta firm and fresh. If you don’t have pre-cooked chicken, you can easily cook it. Grill or sauté the chicken breast until it is fully cooked. Season it with olive oil, garlic powder, salt, and pepper for great flavor. Once cooked, let it cool before cutting it into bite-sized pieces. This will make mixing the salad easier and keep everything light. In a large mixing bowl, combine the cooled rotini pasta, diced chicken, chopped romaine lettuce, halved cherry tomatoes, and grated Parmesan cheese. Give it a good stir to mix all the ingredients well. Then, pour the Caesar dressing over the top. Toss everything gently to make sure each piece is coated with the dressing. This will bring all the flavors together in a delicious way. Before serving, taste the salad to check the seasoning. You can add more salt, pepper, or dressing if needed. Just before serving, sprinkle croutons on top. This keeps them crunchy and adds a nice texture. Now, your Chicken Caesar Pasta Salad is ready to enjoy! For the full recipe, click [Full Recipe]. To get the best flavor in your Chicken Caesar Pasta Salad, use fresh ingredients. Fresh romaine lettuce and ripe cherry tomatoes make a big difference. I recommend using high-quality Caesar dressing for a richer taste. If you have time, you can make homemade dressing for an extra kick. A touch of garlic powder adds depth. You can also sprinkle some lemon juice for brightness. Taste as you go to balance the flavors. To keep your salad fresh, store ingredients separately until serving. Keep the pasta and chicken in one container. Store the greens and tomatoes in another. This way, the dressing won’t wilt the lettuce. If using croutons, add them just before serving. This keeps them crunchy and fun to eat. If you have leftovers, cover the salad tightly and eat within two days for best quality. If you want to make more or less salad, adjust the ingredients easily. For each extra serving, add one more cup of rotini and ¼ cup of chicken. Keep the other ingredients in proportion. If you are serving a crowd, you can double the recipe. Just make sure you have a big bowl to mix everything. For small gatherings, halve the recipe but keep the same flavors for the best taste. For the full recipe, check out the Chicken Caesar Pasta Salad! {{image_2}} You can easily make a vegetarian version of Chicken Caesar Pasta Salad. Replace the chicken with chickpeas or grilled tofu. Both add protein and texture. Use a creamy dressing made from cashews or a store-bought vegan Caesar dressing. This keeps the flavors bold and fresh. Add more veggies, like bell peppers or cucumbers, for crunch and color. To make this salad gluten-free, choose gluten-free pasta like quinoa or brown rice pasta. Ensure your Caesar dressing is gluten-free to avoid any hidden gluten. This way, everyone can enjoy this dish without worry. The flavors remain delicious, and the texture stays inviting. You can customize your salad with extra ingredients. Try adding slices of avocado for creaminess. You can also toss in olives for a briny kick. Nuts or seeds, like pine nuts or sunflower seeds, can add crunch. Experiment with different cheeses, like feta or blue cheese, for a new twist. Enjoy creating your perfect Chicken Caesar Pasta Salad! For the full recipe, check out the detailed steps above. To keep your Chicken Caesar Pasta Salad fresh, store it in an airtight container. This helps prevent air from drying it out. Make sure the salad is cool before sealing it. If you have leftover dressing, store it separately to avoid sogginess. When stored properly in the fridge, Chicken Caesar Pasta Salad can last up to three days. After that, the quality may decline. Always check for freshness before eating. If it looks or smells off, it's best to discard it. If you want to reheat your Chicken Caesar Pasta Salad, do it gently. Place it in the microwave for about 30 seconds. Stir it well, then heat for another 30 seconds if needed. Be careful not to overheat, as it can make the pasta mushy. If you prefer it cold, enjoy it straight from the fridge. For a fresh taste, add more dressing before serving. Yes, you can make Chicken Caesar Pasta Salad ahead of time. This dish tastes great after chilling in the fridge. I recommend making it a few hours before serving. This helps the flavors mix well. Just keep the croutons separate until you are ready to eat. They stay crunchy that way! The best dressing for Chicken Caesar Pasta Salad is Caesar dressing. You can use store-bought or homemade. I often make my own dressing for extra flavor. Just blend garlic, lemon juice, anchovies, and Parmesan cheese. A good dressing makes the salad creamy and rich. To make a lighter version, use whole wheat pasta. You can also swap regular dressing for a light or yogurt-based version. Use less cheese or toss in more veggies like cucumbers or bell peppers. These changes keep the salad tasty while cutting calories. To add extra protein, try adding chickpeas or black beans. You can also mix in some diced hard-boiled eggs. These options boost nutrition and make the salad more filling. If you like seafood, shrimp or crab meat works well too! For the complete details on how to prepare this dish, check out the Full Recipe. This blog post covered how to make Chicken Caesar Pasta Salad. We looked at key ingredients, cooking steps, and tips for flavor. You learned about keeping ingredients fresh and how to store leftovers. We also explored variations to fit different diets and preferences. In the end, this salad is easy to customize and prepare. With these instructions, you can enjoy a tasty dish any time. Get creative and make it your own!](https://tossedrecipes.com/wp-content/uploads/2025/07/9a18e803-6a5d-4eb8-836f-c66e71e8ff9e.webp)
Looking for a quick and tasty meal? My Savory Chicken Caesar Pasta Salad is easy and fresh! This dish combines juicy chicken, crisp romaine, and tender pasta with bold Caesar …
![To make these tasty baked pumpkin spice donuts, you'll need the following ingredients: - 1 cup pumpkin puree (canned or homemade) - 1/2 cup granulated sugar - 1/2 cup brown sugar - 2 large eggs - 1/4 cup unsweetened applesauce - 1/4 cup vegetable oil - 1 teaspoon vanilla extract - 1 1/2 cups all-purpose flour - 1 teaspoon baking powder - 1/2 teaspoon baking soda - 1 teaspoon ground cinnamon - 1/2 teaspoon ground nutmeg - 1/2 teaspoon ground ginger - 1/4 teaspoon salt - 1/4 teaspoon ground cloves - Optional: powdered sugar or cinnamon sugar for dusting If you prefer using grams, here are some quick conversions: - 1 cup pumpkin puree = 240 grams - 1/2 cup granulated sugar = 100 grams - 1/2 cup brown sugar = 110 grams - 1/4 cup unsweetened applesauce = 60 grams - 1/4 cup vegetable oil = 60 grams - 1 1/2 cups all-purpose flour = 190 grams These conversions can help you measure accurately. When choosing your ingredients, look for these tips: - For pumpkin puree, select the brand with the fewest added ingredients. Pure pumpkin is best. - Choose eggs that are labeled "fresh" for the best taste and texture. - Check the expiration dates on sugar and flour. Freshness matters. - For spices, look for vibrant colors and strong aromas. Old spices lose their flavor. By picking the right ingredients, you’ll ensure your baked pumpkin spice donuts are full of flavor and joy. For the full recipe, refer to the recipe section above. First, I preheat my oven to 350°F (175°C). I use a donut pan and spray it with non-stick cooking spray. If I want easy removal, I choose silicone. Next, I mix the wet ingredients. In a large bowl, I whisk together 1 cup of pumpkin puree, 1/2 cup of granulated sugar, and 1/2 cup of brown sugar. Then, I add 2 large eggs, 1/4 cup of unsweetened applesauce, 1/4 cup of vegetable oil, and 1 teaspoon of vanilla extract. I blend until smooth. In another bowl, I combine the dry ingredients. I whisk together 1 1/2 cups of all-purpose flour, 1 teaspoon of baking powder, 1/2 teaspoon of baking soda, and spices: 1 teaspoon of ground cinnamon, 1/2 teaspoon of ground nutmeg, 1/2 teaspoon of ground ginger, 1/4 teaspoon of salt, and 1/4 teaspoon of ground cloves. I make sure everything is well mixed. Now, I gently add the dry mix to the wet mix. I stir just until combined. I leave a few lumps; overmixing can make the donuts tough. I transfer the batter into a piping bag or a resealable plastic bag. If I use a plastic bag, I cut off one corner. This makes filling the donut pan easier. I fill each cavity about 2/3 full with the batter. Then, I place the pan in the oven and bake for 10-12 minutes. I check the donuts by inserting a toothpick in the center. If it comes out clean, they are ready. Once baked, I pull the pan from the oven. I let the donuts cool in the pan for about 5 minutes. Then, I transfer them to a wire rack to cool completely. If I want to add a sweet touch, I dust them with powdered sugar. Sometimes, I roll them in cinnamon sugar for extra flavor. These baked pumpkin spice donuts are now ready to enjoy! For the full recipe, check here. To keep your donuts moist, use pumpkin puree. It adds moisture and flavor. Applesauce also helps. It replaces some oil while keeping them soft. Make sure not to overmix the batter. Mixing too much can make them dry. Bake them just until a toothpick comes out clean. For perfect donut shapes, use a piping bag. It helps fill the mold evenly. If you don’t have one, a resealable bag works too. Cut a small corner and fill the donut pan. Fill each cavity about 2/3 full. This allows room for rising without spilling. One common mistake is overbaking the donuts. Keep an eye on them near the end of baking. Another mistake is not letting them cool. Cooling them in the pan for a few minutes helps them set. If you try to remove them too soon, they may break. Follow the Full Recipe for best results! {{image_2}} You can take your baked pumpkin spice donuts to the next level by adding toppings. Drizzle melted chocolate on top for a sweet touch. You can use dark, milk, or white chocolate. Chop up nuts, like pecans or walnuts, and sprinkle them on the chocolate. This adds crunch and extra flavor. If you need a gluten-free option, don’t worry! You can use gluten-free flour instead of regular flour. Look for a blend that works well for baking. Almond flour and coconut flour are also great choices. Just remember to adjust the liquid in your batter to keep it moist. Mixing flavors can make your donuts even more exciting. Try a maple glaze for a sweet kick. To make this, combine powdered sugar, maple syrup, and a splash of milk. You can also drizzle caramel sauce over the top. This adds a rich, sweet taste that pairs well with pumpkin spice. For the full recipe, check out the details above. To keep your baked pumpkin spice donuts fresh, store them in an airtight container. This helps to trap moisture and keeps them soft. Place a layer of paper towels at the bottom of the container. This absorbs extra moisture. You can store them at room temperature for up to three days. If you plan to keep them longer, the fridge is a good option. Freezing is a great way to save extra donuts. Allow the donuts to cool completely first. Then, wrap each donut tightly in plastic wrap. Place the wrapped donuts in a freezer-safe bag or container. Label the bag with the date. You can freeze them for up to three months. When you want to enjoy them, just take them out and let them thaw at room temperature. To enjoy your donuts warm, reheating is key. Preheat your oven to 350°F (175°C). Place the donuts on a baking sheet. Heat for about 5 to 7 minutes. This brings back their soft texture. For a quick fix, you can use the microwave. Heat each donut for about 10 to 15 seconds. This warms them up without drying them out. If you want to add a touch of sweetness, sprinkle some cinnamon sugar before serving. Yes, you can use fresh pumpkin. Fresh pumpkin gives a great flavor. To use it, first, roast or steam the pumpkin. Then, scoop out the flesh and mash it. Make sure it is smooth, like canned pumpkin. This will help your donuts stay moist and tasty. You can check if the donuts are done by using a toothpick. Insert the toothpick into the center of a donut. If it comes out clean, your donuts are ready. If it has wet batter on it, bake them for a few more minutes. They usually need 10-12 minutes in the oven. If you need an egg substitute, there are a few good options. You can use 1/4 cup of unsweetened applesauce for each egg. You can also use mashed banana, yogurt, or a flaxseed mixture. To make the flaxseed mixture, mix 1 tablespoon of ground flaxseed with 2.5 tablespoons of water. Let it sit for a few minutes until it gets thick. This will work well in your baked pumpkin spice donuts. For the full recipe, check out the [Full Recipe]. This blog post covered every step to make perfect donuts. We talked about ingredients, prep, baking, and storage. You learned how to pick fresh ingredients and avoid mistakes. Plus, we explored fun variations and answered common questions. Baking donuts can be easy and fun. With these tips, you can impress anyone with your treats. Enjoy your baking journey!](https://tossedrecipes.com/wp-content/uploads/2025/07/266f7fb3-ead8-48a1-84a7-f17712799ea4.webp)
Fall is here, and so is the craving for cozy treats! You’ll love these Baked Pumpkin Spice Donuts. They’re easy to make and packed with warm spices. I’ll guide you …
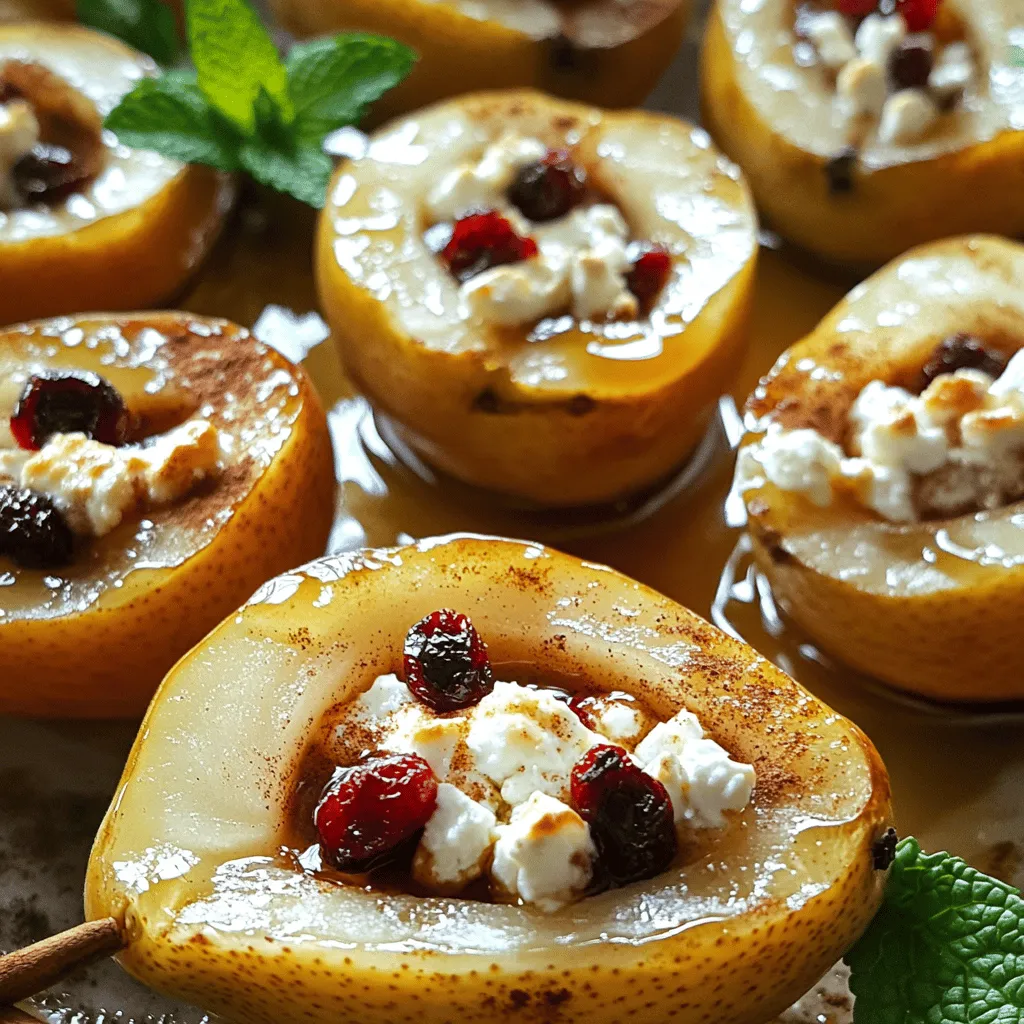
If you’re looking for a simple yet delicious dessert, baked pears with feta, honey, and cranberries are the answer. This dish brings together sweet, savory, and tangy flavors in a …