Skip to content
Tossed Recipes
  • Home
  • Appetizers
  • Desserts
  • Salads
  • Breakfast
  • Dinner
  • Privacy Policy
  • Contact
  • About

Chef Jamie

Gluten-Free Apple Cider Donuts Simple and Tasty Recipe

July 27, 2025 by Chef Jamie
To make these delightful donuts, you will need the following ingredients: - 1 cup apple cider - 1 ½ cups gluten-free all-purpose flour - ½ cup almond flour - ½ cup granulated sugar - 1 teaspoon baking powder - 1 teaspoon baking soda - 1 teaspoon ground cinnamon - ½ teaspoon ground nutmeg - ¼ teaspoon salt - 2 large eggs - ¼ cup unsweetened applesauce - ¼ cup melted coconut oil - 1 teaspoon vanilla extract - ½ cup powdered sugar (for dusting) - Extra cinnamon (for dusting) This mix of flours and spices gives the donuts a rich, warm flavor. The apple cider adds a sweet and tangy twist. If you need to change any of these ingredients, here are some easy swaps: - Gluten-Free Flour: You can use a different gluten-free blend if needed. Look for one that includes xanthan gum for better texture. - Almond Flour: You can replace it with oat flour or another nut flour if you prefer. - Eggs: For a vegan option, use flax eggs or chia eggs. Mix 1 tablespoon of flaxseed meal or chia seeds with 2.5 tablespoons of water. Let it sit for 5 minutes to thicken. - Coconut Oil: You can use vegetable oil or melted butter if you want. Always check labels for allergens. To bake these donuts, you will need some basic tools: - Donut pan - Mixing bowls - Whisk - Measuring cups and spoons - Saucepan - Toothpick (for testing doneness) - Wire rack (for cooling) Having these items ready will make your baking process smooth and fun. Each tool plays a key role in creating perfectly shaped and delicious gluten-free apple cider donuts. Happy baking! To make these gluten-free apple cider donuts, start by boiling the apple cider. Pour one cup of apple cider into a saucepan. Heat it over medium heat until it boils. Lower the heat and let it simmer for 10 to 15 minutes. This thickens the cider and enhances the flavor. After that, remove it from the heat and let it cool. Next, preheat your oven to 350°F (175°C). Grease your donut pan with non-stick spray or coconut oil to prevent sticking. In a large bowl, mix the dry ingredients. Combine 1 ½ cups of gluten-free all-purpose flour, ½ cup of almond flour, ½ cup of granulated sugar, one teaspoon of baking powder, one teaspoon of baking soda, one teaspoon of ground cinnamon, ½ teaspoon of ground nutmeg, and ¼ teaspoon of salt. Stir until well mixed. Now, prepare the wet ingredients. In another bowl, beat two large eggs. Add the cooled apple cider, ¼ cup of unsweetened applesauce, ¼ cup of melted coconut oil, and one teaspoon of vanilla extract. Mix these until smooth. Gradually pour the wet mixture into the dry ingredients. Stir gently until just combined. Avoid overmixing to keep the donuts light and fluffy. Carefully spoon the batter into the donut pan. Fill each mold about ¾ full. Bake in the preheated oven for 12 to 15 minutes. To check for doneness, insert a toothpick into the center of a donut. If it comes out clean, they are ready. For the best results, measure your ingredients accurately. Use a kitchen scale if possible. When mixing, fold gently. This keeps air in the batter, giving you fluffy donuts. Bake these donuts at the right temperature. Too low means they won’t rise; too high means they can burn. Keep an eye on them during the last few minutes of baking. To check if your donuts are done, use a toothpick. Insert it in the center of a donut. If it comes out clean, they are baked perfectly. Once baked, let the donuts cool in the pan for five minutes. Then, transfer them to a wire rack. This helps them cool evenly. Wait until they are completely cool before dusting with powdered sugar. This ensures the sugar sticks well. For a fun touch, sprinkle some extra cinnamon on top before serving. Enjoy your delicious gluten-free apple cider donuts! For detailed ingredients and full instructions, refer to the Full Recipe. To get fluffy donuts, use fresh ingredients. Old baking powder can ruin the rise. Measure your flour correctly. Too much flour makes donuts dense. Use a spoon to scoop flour into the measuring cup, then level it with a knife. Mix dry and wet ingredients just until combined. Overmixing can lead to tough donuts. Fill your donut pan ¾ full. This allows space for the donuts to rise. Use a piping bag or a zip-top bag with the corner cut off. This makes it easier to fill the pan neatly. Don’t skip greasing the pan! This helps the donuts release easily after baking. Avoid baking when the oven isn't fully preheated. This can lead to uneven cooking. Don't open the oven door too early. This causes temperature drops. Always check your donuts for doneness with a toothpick. A clean toothpick means they are ready. Follow the Full Recipe closely for best results. {{image_2}} You can mix in fun flavors to make your donuts unique. Try adding: - ½ cup chopped nuts, like walnuts or pecans - ½ cup dried cranberries or raisins - 1 teaspoon orange zest for a citrus kick - A pinch of cloves for warmth These additions will enhance the taste and provide fun textures. Just fold them into the batter before pouring it into the donut pan. If you want bite-sized treats, make donut holes! Use the same batter from the recipe. Instead of a donut pan, use a mini muffin pan. Fill each cup about halfway and bake for 10-12 minutes. They will puff up nicely! Toppings can take your donuts to the next level. Here are some ideas: - Drizzle a simple glaze made from powdered sugar and apple cider. - Dip them in melted dark chocolate for a rich taste. - Roll them in cinnamon sugar for a classic touch. Feel free to experiment with toppings that excite your taste buds! Enjoy trying the full recipe with these variations for a delightful experience. To store your gluten-free apple cider donuts, place them in an airtight container. Make sure they cool completely before sealing. This keeps them moist and fresh. You can store them at room temperature for up to three days. If you want to keep them longer, consider freezing them. To freeze your donuts, wrap each one in plastic wrap. Then, place them in a freezer-safe bag or container. They can last up to three months in the freezer. When you are ready to eat, take them out and let them thaw at room temperature. You can warm them in the oven for a few minutes to regain their softness. To keep your donuts fresh and tasty, avoid stacking them. This prevents them from becoming squished. Instead, store them in a single layer. If you have to stack them, place parchment paper between layers. For extra flavor, dust them with powdered sugar right before serving. This keeps the sweetness intact while adding a pretty touch. I recommend using a gluten-free all-purpose flour blend. Look for one with xanthan gum, as it helps bind the donuts. Brands like Bob's Red Mill or King Arthur Flour work great. The blend usually contains rice flour, potato starch, and tapioca flour. This mix mimics the texture of regular flour. Yes, you can make these donuts vegan! Substitute the eggs with flax eggs. To make a flax egg, mix one tablespoon of ground flaxseed with three tablespoons of water. Let it sit for five minutes to thicken. You can also replace the melted coconut oil with unsweetened applesauce or a plant-based butter. Gluten-free donuts stay fresh for about three days at room temperature. Store them in an airtight container to keep moisture in. If you want to keep them longer, freeze them. Place them in a freezer bag for up to three months. Just thaw them at room temperature before enjoying. For the complete recipe, check out the Full Recipe section. You’ve learned how to make tasty gluten-free apple cider donuts. We covered essential ingredients, helpful tips, and various ways to enjoy them. Remember to mix well and watch your baking times. Try different flavors for a fun twist. Store your donuts properly to keep them fresh longer. With these steps and advice, you can bake with confidence. Enjoy your delicious treats and share them with friends!

Are you craving a delicious fall treat that fits your gluten-free needs? Look no further! I’m excited to share my simple and tasty recipe for gluten-free apple cider donuts. With …

Read more

Categories Desserts

Pumpkin Chai Latte Comforting Fall Flavor Guide

July 27, 2025 by Chef Jamie
- 1 cup brewed chai tea - 1/2 cup unsweetened pumpkin puree - 1 cup milk (dairy or non-dairy) - 2 tablespoons maple syrup The essential ingredients form the base of your pumpkin chai latte. First, you need chai tea. This tea brings warmth and spice, setting the stage for comfort. Next, the pumpkin puree adds creaminess and that signature fall flavor. The milk rounds it off, making it smooth and rich. Lastly, maple syrup adds a hint of sweetness that balances all the flavors. - 1/2 teaspoon pumpkin pie spice - 1/2 teaspoon vanilla extract - Whipped cream for topping Optional ingredients can elevate your drink. Pumpkin pie spice adds warmth and depth. Vanilla extract enhances the overall flavor profile. Whipped cream makes it feel like a treat. You can skip these if you like, but they add extra joy. - Variations of sweeteners (honey, agave nectar) - Alternative spices (cinnamon, nutmeg) You can change up the sweeteners. Honey or agave nectar can replace maple syrup. These options add unique flavors. For spices, consider using cinnamon or nutmeg. They can create a different twist on your classic drink. Experimenting with these can lead to your perfect pumpkin chai latte! Check out the Full Recipe for detailed steps and measurements. First, you need to brew your chai tea. You can use tea bags or loose leaf. If you choose tea bags, use one bag per cup. For loose leaf, use about one teaspoon. Let the tea steep for five minutes. This is key for a strong flavor. The longer you steep, the more robust the taste. Now, combine the brewed chai tea with pumpkin puree and maple syrup. Mix these in a small saucepan over medium heat. Whisk them together until smooth. This takes about two to three minutes. Whisking is important. It helps create a nice, even texture. If you skip this step, you might end up with clumps. For the milk, heat it in a separate pan until it steams. Make sure it does not boil. Once it’s hot, use a milk frother or a hand whisk to froth the milk. You want it light and airy. Frothing adds a lovely texture. It also makes your latte look fancy. You can pour it over the chai mixture gently for a nice effect. For the full recipe, check the details above. Enjoy your cozy drink! To make your latte just right, start with sweetness. The base recipe uses two tablespoons of maple syrup. You can adjust this to your taste. If you like it sweeter, add more syrup. If not, just cut back. Next, let's talk about froth. For the best froth, warm your milk gently. Use a milk frother or a whisk. Keep whisking until it’s light and airy. This step makes a big difference in texture. Choose the right mug for your drink. A wide mug helps keep your latte warm. It also gives a nice view of the layers. Try a clear glass to see the beautiful colors. For garnishing, sprinkle a little pumpkin pie spice on top. You can also add a swirl of whipped cream. These small touches make your drink look special and inviting. You can prep some ingredients before you make your latte. Brew your chai tea and store it in the fridge. You can even mix the pumpkin puree and spices ahead of time. This way, your latte will come together faster. When you store the brewed chai mixture, use an airtight container. It will stay fresh in the fridge for up to three days. Just heat it when you're ready to enjoy your drink. For the full recipe, check the earlier section in this guide. {{image_2}} To make a dairy-free or vegan pumpkin chai latte, choose plant-based milk. Almond, oat, and coconut milk all work great. These options add unique flavors and keep your drink rich and creamy. For sweeteners, consider using maple syrup or agave nectar. These are good substitutes for honey and add a natural sweetness. You can spice up your pumpkin chai latte by playing with different spice blends. Try adding more ginger or cardamom for extra warmth. For a sweet twist, consider adding chocolate syrup or caramel. Both bring a delightful contrast to the pumpkin flavor. If you prefer your drinks cold, making an iced pumpkin chai latte is simple. Brew your chai tea as usual, then let it cool. Pour the chai over ice, add pumpkin puree and sweeteners, and stir. Finish with chilled frothed milk on top. This drink is perfect for warm fall days or festive gatherings. For the complete recipe, check out the Full Recipe section. You can keep the pumpkin chai latte mixture in the fridge for about 3 to 5 days. Store it in an airtight container to keep it fresh. Glass jars or plastic containers work well. Just shake or stir before using it again. You can freeze the pumpkin chai latte! Pour it into freezer-safe containers, leaving space for expansion. It stays good for up to 2 months. Thaw it in the fridge overnight. When ready to enjoy, reheat it gently on the stove or in the microwave. Stir well to mix the flavors back together. Pumpkin puree lasts about a week in the fridge once opened. Milk can spoil quickly, so check the date on the carton. Use leftover pumpkin puree in pancakes or soups. This way, you reduce waste and enjoy more tasty meals! To make a pumpkin chai latte, follow these easy steps based on the full recipe: 1. Brew the chai tea: Start by brewing 1 cup of chai tea. Use tea bags or loose leaf. Let it steep for 5 minutes, then remove the tea bags or strain out the leaves. 2. Mix the pumpkin: In a small saucepan, combine the brewed chai tea, 1/2 cup of unsweetened pumpkin puree, and 2 tablespoons of maple syrup. Whisk until smooth and warm, about 2-3 minutes. 3. Heat the milk: In another pan, heat 1 cup of your choice of milk until it steams. Do not let it boil. Use a frother or a whisk to froth the milk until light and airy. 4. Add spices and vanilla: Stir in 1/2 teaspoon of pumpkin pie spice and 1/2 teaspoon of vanilla extract into the chai-pumpkin mix. 5. Assemble your latte: Pour the chai mixture into your favorite mug. Gently layer the frothed milk on top. 6. Garnish: If you like, add whipped cream on top and sprinkle some extra pumpkin pie spice for a nice touch. Yes, you can make a pumpkin chai latte without chai tea. Here are some alternatives: - Black tea: Use a strong black tea for a robust flavor. This choice offers a bold base for your latte. - Green tea: Choose green tea for a lighter, fresher taste. The pumpkin will still shine through. - Herbal tea: Try an herbal tea like rooibos for a caffeine-free option. This gives a sweet, nutty flavor. Each option brings its own unique taste to the pumpkin chai latte, so feel free to experiment! Pumpkin chai lattes offer several health benefits: - Pumpkin: It is rich in vitamins A and C. These vitamins boost your immune system. - Chai spices: Spices like ginger and cinnamon can help with digestion and reduce inflammation. - Maple syrup: It is a natural sweetener that has antioxidants. It can be a healthier choice than refined sugar. Enjoying this drink can be a cozy way to embrace the fall season while also treating your body well. You now know how to make a delicious pumpkin chai latte. We covered essential and optional ingredients, plus ways to enhance flavor. You learned steps to brew, mix, and froth your drink. Remember to adapt sweetness and try different spices to make it your own. You can store your latte well, whether in the fridge or freezer. Enjoy your fall drink as a treat or a comfort any time!

Welcome to your cozy fall favorite—Pumpkin Chai Latte! This creamy drink blends spicy chai and rich pumpkin puree to warm your soul. I’ll guide you through simple steps, must-have ingredients, …

Read more

Categories Breakfast

Caramel Apple Trifles Delightful and Easy Dessert

July 27, 2025 by Chef Jamie
- 3 medium apples, peeled and diced - 1 cup brown sugar - 1/4 cup unsalted butter - 1 teaspoon cinnamon - 1 cup caramel sauce (store-bought or homemade) - 1 1/2 cups heavy whipping cream - 1/4 cup powdered sugar - 1 teaspoon vanilla extract - 1 box of vanilla sponge cake or ladyfinger cookies - Chopped pecans or walnuts for garnish Each ingredient plays a key role in the taste and texture of your trifle. The apples offer a sweet and tart base. I prefer using Granny Smith or Honeycrisp apples. They hold up well in cooking and add great flavor. The brown sugar helps caramelize the apples, bringing out their natural sweetness. Butter adds richness and helps to soften the apples. Cinnamon brings warmth and spice to the mix, making everything feel cozy. Caramel sauce is the star of the show. You can use store-bought sauce for ease. If you want to make your own, go for it! The heavy whipping cream creates a light and fluffy layer. The powdered sugar sweetens the whipped cream, while vanilla extract adds depth. The sponge cake or ladyfinger cookies provide a soft base that soaks up flavors. Finally, the chopped pecans or walnuts add a nice crunch and nutty flavor on top. When choosing apples, look for fresh, firm ones. I suggest local farms for the best flavor. For caramel sauce, check out artisanal brands or make your own for an extra touch. For heavy cream, choose organic if you can. It tastes richer and creamier. I recommend using fresh vanilla extract instead of imitation for the best flavor. Finally, pick a soft sponge cake that won't fall apart easily. These choices will elevate your trifle and impress everyone! To see how to put all these ingredients together, check out the Full Recipe. To start, grab a medium saucepan. Melt 1/4 cup of unsalted butter over medium heat. Once melted, add 3 medium apples, peeled and diced. Sprinkle in 1 cup of brown sugar and 1 teaspoon of cinnamon. Cook this mix for about 5 to 7 minutes. You want the apples to soften and caramelize nicely. When they are ready, remove the pan from heat. Stir in half of your caramel sauce. Let the mixture cool down before using it. Now, let's make the whipped cream! Take a large mixing bowl and pour in 1 1/2 cups of heavy whipping cream. Add 1/4 cup of powdered sugar and 1 teaspoon of vanilla extract. Using a hand mixer, whip the cream until you see soft peaks form. This means it’s ready to use. The whipped cream adds a light and fluffy texture to the trifle. It's time to assemble our trifles! Use clear glasses or dessert cups for a beautiful display. Start with a layer of vanilla sponge cake or ladyfinger cookies. You can break these into smaller pieces if needed to fit. Next, add a layer of the caramelized apple mixture. On top of that, dollop a generous layer of whipped cream. Repeat these layers until the glasses are filled, usually two to three layers work best. Top each trifle with the remaining caramel sauce. Sprinkle some chopped pecans or walnuts for a nice crunch. This builds flavor and texture. Finally, refrigerate the trifles for at least 1 hour before serving. This chilling helps the flavors blend together beautifully. Enjoy your delicious Caramel Apple Trifles! For a full recipe, check out the recipe section above. Layering is key to a great trifle. Start with the cake pieces at the bottom. Use sponge cake or ladyfinger cookies. They soak up flavor well. After the cake, add the caramelized apples. Make sure to distribute them evenly. Next, add a thick layer of whipped cream. This helps keep the layers separate. Repeat the process until you fill the glass. Aim for two or three layers for the best look and taste. Chill your trifles before serving. This enhances the flavors. Refrigerate for at least one hour. The cool temperature makes the dessert refreshing. If you want to serve them later, keep them in the fridge. Serve them cold for a delightful experience. Garnishes can make your trifles pop. Sprinkle chopped pecans or walnuts on top for crunch. You can also drizzle extra caramel sauce over the whipped cream. For a fresh touch, add a thin apple slice on top. This adds color and makes the trifles eye-catching. Simple garnishes can elevate your dessert, making it look gourmet. {{image_2}} You can switch apples for other fruits in this trifle. Pears work great. Their soft texture blends well with caramel. You might also try peaches for a juicy twist. Berries add a tartness that contrasts nicely with the sweet caramel. Choose fruits based on what you love. Each fruit brings its own flavor and character. While sponge cake is classic, you can explore other bases. Ladyfinger cookies add a fun texture. You could even use brownies for a rich flavor. If you like crunch, try crushed graham crackers. Each choice changes the dessert's taste. Be bold and mix it up to find your favorite. You can make this dessert lighter with some tweaks. Use Greek yogurt instead of heavy cream for a protein boost. Swap brown sugar for coconut sugar to lower the glycemic index. For a vegan option, try coconut cream and maple syrup. These swaps keep the spirit of the trifle while making it healthier. Explore these options to fit your diet. To store your caramel apple trifles, cover them tightly with plastic wrap or place them in an airtight container. This keeps the trifles fresh and prevents them from absorbing any other smells in your fridge. Make sure to keep them chilled. When stored correctly, caramel apple trifles will last for about 2 to 3 days in the fridge. After this time, the layers may start to blend together. So, it’s best to enjoy them within this timeframe for the best flavor and texture. Freezing trifles is not recommended. The whipped cream may separate, and the cake can become soggy. If you want to prepare in advance, consider freezing the caramelized apples and cake separately. Just thaw them in the fridge before assembling your trifles. Enjoy the full recipe for detailed instructions! Yes, you can make caramel apple trifles a day ahead. This dessert tastes better when it sits. The flavors mix well overnight. Just store them in the fridge. Cover each trifle to keep them fresh. If you need a substitute for heavy cream, use coconut cream or whole milk. You can also blend milk with butter. Mix 3/4 cup of milk with 1/4 cup of melted butter. This works well in recipes. Absolutely, you can use store-bought ingredients for your trifles. Store-bought caramel sauce saves time. You can also use pre-made whipped cream. This makes your dessert quick and easy. Just remember to check the quality. To avoid soggy layers, let the apple mixture cool before adding it. Use dry cake or cookies. If your cake is too moist, it will soak up the layers. Layer quickly and serve cold. This guide covered how to make caramel apple trifles. We started with the key ingredients, reviewed their qualities, and shared top products. Next, I walked you through step-by-step instructions for preparation, whipping cream, and layering. I offered tips for the best presentation and served suggestions too. We explored fun variations and discussed how to store your leftovers. In conclusion, making caramel apple trifles is easy and fun. Enjoy trying different options and impress your friends!

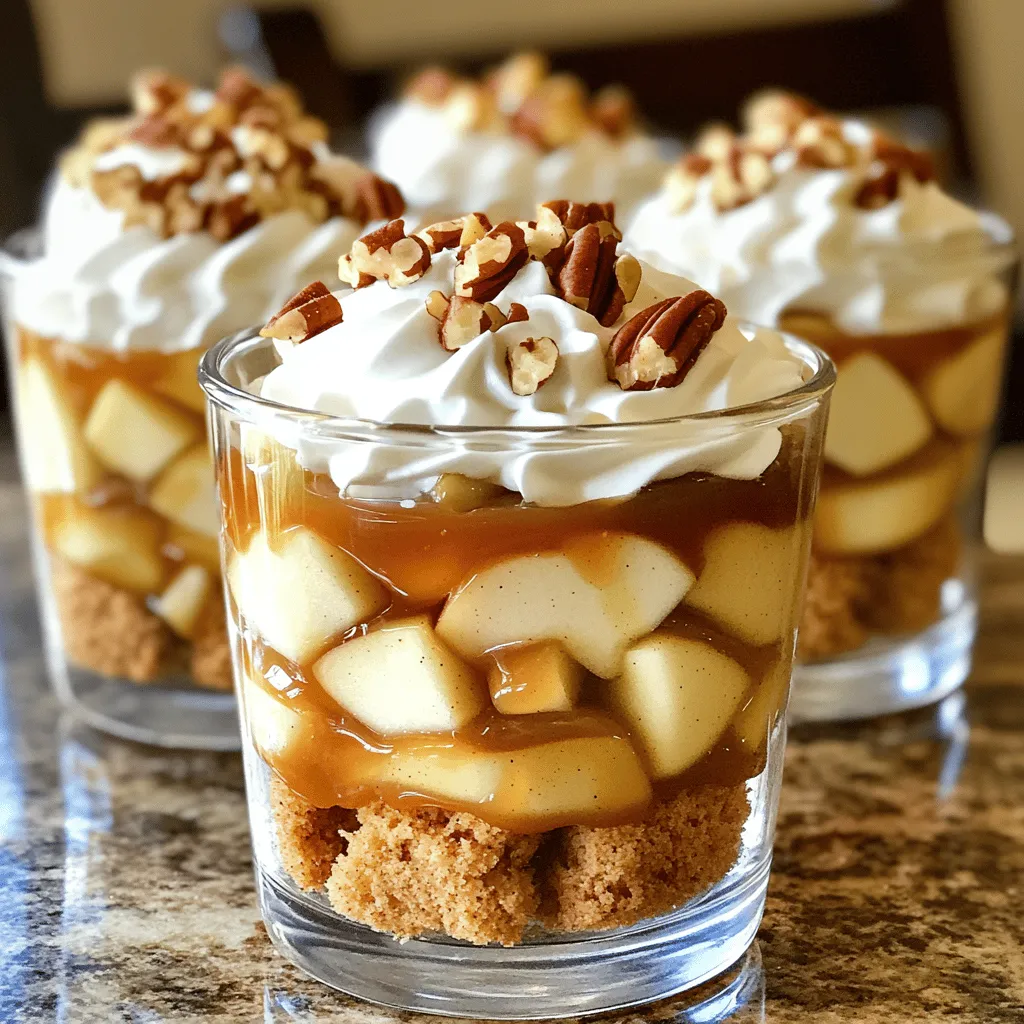
Are you ready to treat yourself to a stunning dessert that’s both simple and delicious? Caramel apple trifles bring sweet layers of flavor that perfectly blend rich caramel, crisp apples, …

Read more

Categories Desserts

Apple Cider Cheesecake Cookies Delicious Dessert Treat

July 27, 2025 by Chef Jamie
To make Apple Cider Cheesecake Cookies, you will need: - 1 cup unsalted butter, softened - 1 cup cream cheese, softened - 1 cup granulated sugar - 1/2 cup brown sugar, packed - 2 large eggs - 1 teaspoon vanilla extract - 3 cups all-purpose flour - 1 teaspoon baking powder - 1/2 teaspoon baking soda - 1/2 teaspoon ground cinnamon - 1/4 teaspoon ground nutmeg - 1/2 teaspoon salt - 1 cup apple cider - 1 cup chopped apples (preferably Granny Smith) - 1/2 cup caramel sauce (for drizzling) Using high-quality ingredients makes a big difference. Choose fresh, unsalted butter for a rich flavor. Cream cheese should be soft for easy blending. Use pure vanilla extract, not imitation, for the best taste. Fresh apples add crunch and sweetness. Opt for good-quality caramel sauce to enhance the flavor of your cookies. You can swap the unsalted butter for coconut oil if needed. For a dairy-free option, use vegan cream cheese. If you want to cut sugar, try using a sugar substitute like Stevia. Instead of Granny Smith apples, you can use Honeycrisp for a sweeter taste. The caramel sauce can be replaced with a homemade version or omitted altogether if you prefer a lighter cookie. For the full recipe, check out the detailed instructions and enjoy baking these delightful treats! To make these apple cider cheesecake cookies, start with simple steps. Gather your ingredients first. You will need butter, cream cheese, sugars, eggs, flour, and spices. Don’t forget the apple cider and chopped apples. 1. Preheat your oven to 350°F (175°C). Line two baking sheets with parchment paper. This helps cookies bake evenly. 2. In a large bowl, mix the softened butter, cream cheese, granulated sugar, and brown sugar. Beat until smooth and fluffy. This is key for a rich flavor. 3. Add the eggs one at a time. Mix well after each egg. Then, add the vanilla extract. This adds a nice depth to the cookies. 4. In another bowl, sift together the flour, baking powder, baking soda, cinnamon, nutmeg, and salt. This helps ensure even mixing. 5. Gradually add the dry mix to the wet mix. Alternate with the apple cider. Stir until just combined. Don’t overmix. 6. Gently fold in the chopped apples. This gives the cookies a tasty crunch. 7. Scoop tablespoon-sized balls of dough onto the baking sheets. Leave enough space between cookies for spreading. 8. Bake for 12-15 minutes. Look for lightly golden edges and set centers. 9. Let the cookies cool on the sheets for 5 minutes. Then, transfer them to a wire rack to cool completely. 10. After cooling, drizzle caramel sauce on top for a sweet finish. Check your cookies at 12 minutes. If edges are golden and centers look set, they are done. If still soft, bake for a few more minutes. Remember, cookies will continue to firm up as they cool. Enjoy the process and the delicious smell in your kitchen! To make the best Apple Cider Cheesecake Cookies, follow a few simple steps. First, use softened butter and cream cheese. This helps create a smooth blend. Mix until the dough is light and fluffy. Chill the dough for about 30 minutes before baking. This helps the cookies hold their shape. Use a cookie scoop for even-sized cookies. To keep your cookies moist, do not overbake them. Bake until the edges are golden, but the centers should look soft. Adding apple cider gives a nice flavor boost. Fresh chopped apples also add moisture. If you want extra flavor, consider adding a pinch of salt. This enhances the sweetness and brings out the apple taste. Avoid using cold ingredients. Cold butter or cream cheese can lead to dense cookies. Do not skip the chilling step, as it helps with spreading. Watch your baking time carefully. Overbaking will make the cookies dry. Lastly, make sure to measure your flour correctly. Too much flour can make your cookies tough. For the complete recipe, refer to the Full Recipe section. {{image_2}} You can mix up the flavors in these cookies. Try adding a pinch of ginger for warmth. Cloves can bring a nice depth too. If you like nuts, chop some pecans or walnuts to add a crunchy twist. You can also switch the apples. Use sweet apples like Fuji or tart ones like Honeycrisp. Each choice gives a new taste to the cookies. If you need gluten-free cookies, swap the all-purpose flour for a gluten-free blend. Look for one that includes xanthan gum for best results. For a dairy-free version, use coconut oil instead of butter and a dairy-free cream cheese. These swaps keep the cookies soft and delicious while fitting your diet. Sandwich these cookies for a fun treat! Spread cream cheese frosting between two cookies. You can also drizzle caramel sauce on top and serve them warm. Pair with a scoop of vanilla ice cream for an added delight. Stack them on a nice plate and add a sprinkle of cinnamon for a festive touch. These ideas make your cookies even more special and fun to share. To keep your Apple Cider Cheesecake Cookies fresh, let them cool first. Place them in a single layer in a container. You can use plastic wrap or a lid to cover them. Store them at room temperature for up to one week. If you want to keep them longer, freezing is a great option. I recommend using airtight containers for storage. Glass jars work well and look nice on a counter. You can also use plastic containers with tight lids. Avoid using paper bags, as they let air in and dry the cookies out. To freeze, place the cookies in a single layer on a baking sheet. Freeze for about two hours until solid. Then, transfer them to a freezer bag or container. They can stay frozen for up to three months. When you’re ready to enjoy them, thaw in the fridge or at room temperature. To reheat, place them in a preheated oven at 350°F (175°C) for about five minutes. This brings back the soft texture and warmth. For the full recipe, check out the details above. Serve these cookies warm for the best taste. Stack them on a nice plate. Drizzle caramel sauce on top. A sprinkle of cinnamon adds charm. They look great and taste even better! Yes, you can make the dough ahead of time. Cover it and chill in the fridge. This helps the flavors meld together. It also makes it easier to scoop out later. You can bake them fresh when you’re ready! Check the edges for color. If they are dark brown, they may be overbaked. The centers should look slightly soft and not too dry. If they feel hard when cooling, they are likely overdone. These cookies pair well with warm apple cider. A glass of milk also complements them nicely. Try them with a cup of coffee for an adult treat. They are tasty enough to be enjoyed alone, too! You now have a clear plan to make delicious Apple Cider Cheesecake Cookies. We covered the needed ingredients, how to bake them, and tips to perfect your cookies. Enjoy the creative variations and smart storage tips to keep them fresh. Remember, avoid common mistakes for the best results. Follow these steps, and you will impress your friends and family with tasty treats. Happy baking!

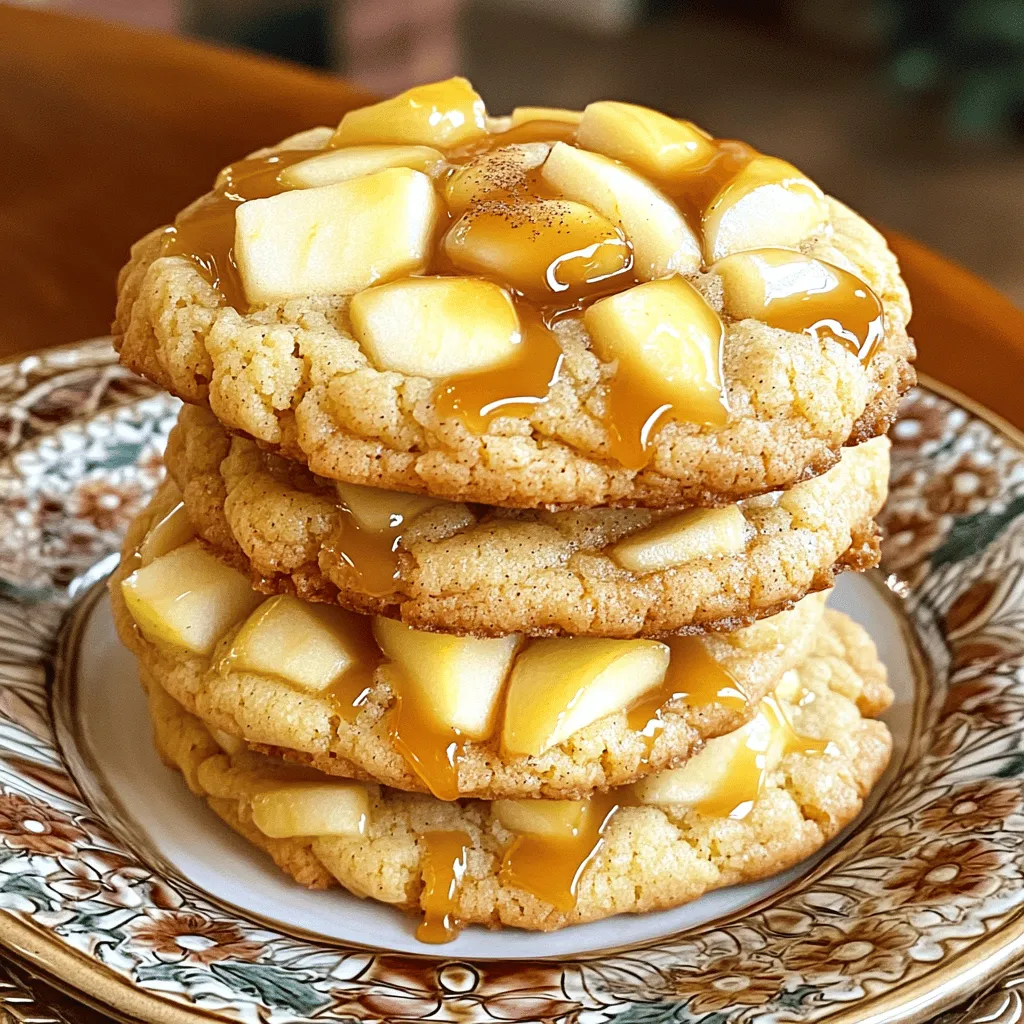
Are you ready to enjoy a fall favorite? Apple Cider Cheesecake Cookies blend sweet and tangy flavors into a soft, chewy treat you’ll love. With easy steps and simple ingredients, …

Read more

Categories Desserts

Peanut Butter Coffee Latte Tasty and Easy Recipe

July 27, 2025 by Chef Jamie
To make a Peanut Butter Coffee Latte, gather these simple ingredients: - 1 cup brewed coffee (hot or cold) - 2 tablespoons creamy peanut butter - 1 tablespoon maple syrup or honey - 1/2 cup milk (dairy, almond, oat, etc.) - 1/2 teaspoon vanilla extract - Optional: pinch of cinnamon - Optional: whipped cream - Optional: crushed peanuts for garnish These ingredients work together to create a rich, nutty flavor. The peanut butter adds creaminess, while the coffee provides a nice kick. Maple syrup or honey gives it sweetness, and vanilla adds warmth. You can adjust the milk type to your taste. For a fun twist, add a pinch of cinnamon. Topping it with whipped cream and crushed peanuts makes it even better! For the full recipe, check out the details provided. This drink is not just tasty; it's also easy to make! To start, you need to brew your coffee. You can use a drip coffee maker, French press, or pour-over method. Each method gives a different taste. A good rule of thumb is to use 1 to 2 tablespoons of coffee for every 6 ounces of water. This ratio ensures a nice, rich flavor. Next, let's make the peanut butter milk. In a small saucepan, combine 1/2 cup of milk and 2 tablespoons of peanut butter. Heat this on medium. Stir constantly. You want the peanut butter to dissolve well into the milk. This step is key! If it’s not smooth, your latte won’t be creamy. Now it’s time to blend! In your blender, add the brewed coffee, 1 tablespoon of maple syrup, 1/2 teaspoon of vanilla extract, and a pinch of cinnamon if you like. Blend this mix for a few seconds. Then, pour in your warm peanut butter milk. Blend again until it’s frothy. Make sure everything is combined well. This step creates a delightful texture for your latte. To make your Peanut Butter Coffee Latte even tastier, try adding a pinch of salt. It brings out the sweetness. You could also mix in a dash of cocoa powder for a chocolatey twist. If you like spices, add a sprinkle of nutmeg or a hint of cardamom. When sweetening, start with one tablespoon of maple syrup. You can always add more if needed. If your latte is too thick, add more milk. For a thinner drink, use less peanut butter. To create a frothy texture, blend the latte for about 10 seconds. The longer you blend, the frothier it gets. For a creamier drink, heat the milk gently, avoiding boiling. This keeps the milk smooth. A common mistake is overheating the milk. It can change the taste and texture. Always heat it slowly and stir. Another mistake is not blending long enough. If you stop too soon, the peanut butter may not mix well. Blend until the mix is smooth and frothy for best results. {{image_2}} To make an iced peanut butter coffee latte, you need a few simple steps. First, brew your coffee and let it cool. You can use cold brew for a stronger flavor. Gather these ingredients: - 1 cup brewed coffee - 2 tablespoons creamy peanut butter - 1 tablespoon maple syrup or honey - 1/2 cup milk (dairy, almond, oat, etc.) - Ice cubes - Optional: whipped cream and crushed peanuts 1. Brew your coffee and let it cool down. 2. In a small bowl, mix the milk and peanut butter until smooth. 3. Fill a glass with ice cubes and pour in the cooled coffee. 4. Add the peanut butter milk and maple syrup. Stir well. 5. Top with whipped cream and crushed peanuts if desired. For summer, try adding chocolate syrup or a splash of coconut milk for a tropical twist. You can even blend it for a frosty treat. If you prefer a smoothie-like drink, blending is the way to go. Adjust the recipe a bit for a creamier texture. You will need: - 1 cup brewed coffee - 2 tablespoons creamy peanut butter - 1 tablespoon maple syrup or honey - 1/2 cup milk (or a nut milk for a lighter option) - 1/2 banana (for extra creaminess) - Optional: ice cubes 1. Brew your coffee and let it cool slightly. 2. In a blender, combine the cooled coffee, peanut butter, milk, and banana. 3. Add maple syrup to taste and blend until smooth. 4. If you want it colder, add ice cubes and blend again. Serve it in a tall glass and enjoy it as a breakfast treat or afternoon pick-me-up. You can make this latte healthier by swapping some ingredients. Here are a few ideas: - Instead of maple syrup, use stevia or agave syrup to cut sugar. - Choose almond, oat, or soy milk for fewer calories. - Add a scoop of protein powder to make it a meal replacement. These changes keep the flavor bold while boosting the nutrition. Enjoy experimenting with these healthy options and find your perfect mix! To store brewed coffee, let it cool first. Place it in an airtight container. Keep it in the fridge for up to three days. For milk, store it in its original container. Ensure it seals well. Milk stays fresh for about a week after opening. Peanut butter should be kept in a cool, dry place. If you have opened a jar, keep it tightly closed. This keeps it tasty and prevents it from drying out. When reheating your latte, use a microwave or a small saucepan. Heat it gently to avoid burning. Stir well while reheating to mix flavors. If your latte separates after refrigeration, blend it briefly. This restores its creamy texture. Brewed coffee lasts about three days in the fridge. For the best taste, drink it fresh. Milk should be used within a week of opening. Peanut butter can last for months if unopened. Once opened, use it within three months for the best flavor. Always check for freshness before using any ingredient. Yes, you can use powdered peanut butter. It will change the texture a bit. To use it, mix two tablespoons of powdered peanut butter with one tablespoon of water. This will create a creamy paste. Add it to your latte mix just like creamy peanut butter. Many milk options work well. Almond, oat, and soy milk are popular choices. Each adds a unique flavor. Almond milk gives a nutty taste, while oat milk adds creaminess. You can choose one that fits your taste or dietary needs. Maple syrup is a great option. Honey works well too. You can also use agave nectar or coconut sugar. These natural sweeteners make your latte tasty without refined sugars. Just adjust the amount to your preference. Yes, it’s easy to make this latte vegan. Use maple syrup instead of honey. Choose plant-based milk like almond or oat. Make sure your peanut butter is also vegan-friendly. With these swaps, you can enjoy a delicious vegan treat. You can find this latte at many coffee shops. Some cafes offer it on their menu. You can also check local specialty coffee spots. If you want to make it at home, follow the Full Recipe for a quick and tasty version! This blog post shared a simple recipe for a Peanut Butter Coffee Latte. You learned about the key ingredients and how to brew the coffee. I detailed steps for making a creamy blend and offered tips to avoid common mistakes. You also discovered fun variations and how to store any leftovers. Enjoy making this unique drink and find your own favorite twists. The blend of coffee and peanut butter offers a tasty boost.

Imagine sipping creamy, rich coffee infused with the nutty goodness of peanut butter. Sounds amazing, right? In this post, I’ll share a simple, tasty recipe for a Peanut Butter Coffee …

Read more

Categories Breakfast

Easy Sweet Potato Soup Flavorful and Creamy Recipe

July 26, 2025 by Chef Jamie
When making my easy sweet potato soup, I focus on fresh and simple ingredients. Here’s what you need: - 2 medium sweet potatoes, peeled and diced - 1 tablespoon olive oil - 1 onion, chopped - 2 cloves garlic, minced - 1 inch ginger, grated - 4 cups vegetable broth - 1 teaspoon ground cumin - 1 teaspoon ground cinnamon - Salt and pepper to taste - 1/2 cup coconut milk (optional for creaminess) - Fresh cilantro, for garnish Sweet potatoes are the star of this soup. They add natural sweetness and creaminess. Onion, garlic, and ginger give the soup depth. Vegetable broth brings all the flavors together. Spice it up with cumin and cinnamon. Finally, coconut milk adds a smooth texture, making each bite delightful. I love using fresh cilantro as a garnish. It brightens the dish and adds a pop of color. This soup is both simple and satisfying. You can find the full recipe to make this comforting dish at home. To start, you need to chop and prepare the sweet potatoes, onion, garlic, and ginger. - Sweet Potatoes: Peel the sweet potatoes using a sharp knife or peeler. Then, cut them into small cubes, about one inch each. This helps them cook evenly. - Onion: Slice the onion in half. Lay it flat and slice it thinly. Make sure to keep your fingers tucked in while you chop! - Garlic: Take two garlic cloves. Smash them with the flat side of a knife and chop them finely. - Ginger: Grab a small piece of ginger. Use a spoon to peel the skin off. Then, grate it using a box grater or a microplane. Now, let’s sauté the aromatics. Heat one tablespoon of olive oil in a large pot over medium heat. Add the chopped onion and cook for about 5-7 minutes. Stir often until the onion turns soft and clear. Next, add the minced garlic and grated ginger. Cook for one more minute. You want to smell those lovely spices! Next, it’s time to cook the soup. Add the diced sweet potatoes to the pot. Sprinkle in one teaspoon of ground cumin and one teaspoon of ground cinnamon. Stir everything well to coat the sweet potatoes in spices. Now, pour in four cups of vegetable broth. Bring the mixture to a boil. Once it boils, turn the heat down and let it simmer for 20-25 minutes. You want the sweet potatoes to be tender. After cooking, it’s time to puree the soup. You can use an immersion blender directly in the pot. If you don’t have one, carefully transfer the soup to a regular blender in batches. Blend until the soup is smooth and creamy. To finish, stir in half a cup of coconut milk. This gives the soup a rich and creamy texture. Now, taste the soup and adjust the seasoning. Add salt and pepper to your liking. If the soup needs warming, heat it again over low heat. You want it nice and hot before serving. Enjoy your cozy sweet potato bliss soup! To make your sweet potato soup shine, start by sautéing the onion well. Cook it in olive oil until it’s soft and clear, about 5-7 minutes. This step adds depth and sweetness to your soup. After that, add garlic and ginger for extra flavor. Cook them for just a minute to keep their fresh taste. For the perfect soup texture, use an immersion blender. It’s easy and quick. If you use a regular blender, let the soup cool a bit first. Blend it in small batches to avoid spills. The goal is a smooth and creamy soup, so blend until there are no lumps. For a lovely presentation, serve the soup in bright bowls. Drizzle some coconut milk on top for a creamy swirl. Then, sprinkle fresh cilantro for a pop of color. It looks great and adds a fresh taste. Pair your sweet potato soup with crusty bread or a simple salad. A slice of sourdough or a green salad with lemon dressing complements the soup well. You can also serve it with a dollop of yogurt for creaminess and tang. One common mistake is overcooking the sweet potatoes. Cook them until they are just tender. If they become too soft, the soup may turn watery. Keep an eye on them while simmering. Another pitfall is not balancing spices. Too much cumin or cinnamon can overpower the dish. Start with the recommended amounts and taste as you go. Adjust as needed for a well-rounded flavor. This method keeps your soup delicious and enjoyable. {{image_2}} You can change the flavor of your sweet potato soup by using different herbs and spices. Try adding smoked paprika for a smoky taste or nutmeg for warmth. If you like it spicy, add a pinch of red pepper flakes. If you want to switch out the coconut milk, you can use almond milk or cashew cream. Both will keep the soup creamy. For broth, vegetable broth works best, but chicken broth is also a great choice if you want a richer flavor. This soup is easy to make vegan or vegetarian. It’s already vegan if you skip the coconut milk. You can add a scoop of plant-based yogurt for creaminess. For a vegetarian option, simply keep the coconut milk or add regular yogurt. If you need it gluten-free, you’re in luck! This soup is gluten-free as it stands. Just make sure any toppings or side dishes are also gluten-free. Use gluten-free bread or crackers for dipping alongside the soup. For a twist, you can serve this soup with a side salad or some fresh bread. These pair well and add a nice crunch to your meal. If you want to explore more variations, check the Full Recipe for creative ideas! To keep your sweet potato soup fresh, use airtight containers. Let the soup cool before sealing. Store it in the fridge for up to five days. If you want to keep it longer, freeze the soup in freezer-safe bags or containers. It can last up to three months in the freezer. When you reheat your soup, do it gently. For the stovetop, warm it in a pot over low heat. Stir often to avoid burning. This method keeps the flavors nice and rich. If you use a microwave, heat it in short bursts. Start with one minute, then stir and check. Repeat until hot. This way, the texture stays smooth and creamy. Yes, you can use canned sweet potatoes. They offer a quick option. However, canned sweet potatoes are softer than fresh ones. This means you won't need to cook them as long. You can skip the step of boiling them in broth. Just add them to the pot with the spices and broth. Blend everything until smooth. This will save time, but the flavor may be less fresh. Easy Sweet Potato Soup is very healthy. Sweet potatoes are rich in vitamins A and C. They also provide fiber, which is good for digestion. The soup has garlic and ginger, both known for their health benefits. Olive oil adds healthy fats. The coconut milk adds flavor and creaminess, but you can skip it for a lighter soup. Overall, this soup is nutritious and delicious. Absolutely! You can make this soup ahead of time. It stores well in the fridge for up to five days. Let the soup cool completely before placing it in an airtight container. If you want to keep it longer, freeze it for up to three months. When you are ready to eat it, just thaw and reheat it on the stove or in the microwave. To enhance the soup’s flavor, consider adding red pepper flakes for some heat. A splash of lemon juice can brighten the taste. You might also try adding a pinch of nutmeg for warmth. If you like herbs, fresh thyme or rosemary can add depth. Experiment with these options to find what you like best! For the full recipe, check out the Cozy Sweet Potato Bliss Soup. Easy Sweet Potato Soup provides a warm blend of flavors and nutrients. You learned about the key ingredients, from sweet potatoes to coconut milk. I explained preparation steps, cooking methods, and tips to enhance taste. I shared ways to modify the recipe for different diets. This soup is simple to make and enjoy. Remember to adjust spices and get creative with garnishes. Whether you share with friends or savor it alone, this soup is sure to please. Keep these tips handy for future meals!

Are you ready to make a comforting bowl of Easy Sweet Potato Soup? This rich and creamy recipe is packed with flavor and simple ingredients. With just a few steps, …

Read more

Categories Dinner

Healthy Pumpkin Muffins Delicious and Easy Recipe

July 26, 2025 by Chef Jamie
To make healthy pumpkin muffins, you need these main ingredients: - 1 cup pumpkin puree (canned or fresh) - 1/2 cup Greek yogurt - 1/2 cup honey or maple syrup - 2 large eggs - 1 teaspoon vanilla extract - 1 1/2 cups whole wheat flour - 1 teaspoon baking powder - 1 teaspoon baking soda - 1 teaspoon cinnamon - 1/2 teaspoon nutmeg - 1/4 teaspoon ginger - 1/4 teaspoon salt Pumpkin puree gives the muffins their moist texture and rich flavor. Greek yogurt adds creaminess and protein. Honey or maple syrup sweetens the muffins naturally. Whole wheat flour makes them heartier and healthier. You can make your muffins even more exciting by adding: - 1/2 cup chopped nuts (walnuts or pecans) - 1/4 cup chocolate chips Nuts add a nice crunch and healthy fats. Chocolate chips bring a sweet twist. You can mix and match based on what you like. If you want to make the muffins even healthier, try these swaps: - Substitute Greek yogurt with unsweetened applesauce for a lower-calorie option. - Use coconut oil instead of butter for a dairy-free choice. - Replace honey or maple syrup with stevia for a low-sugar version. These substitutions keep the muffins tasty while making them fit various diets. For the complete recipe, refer to the Full Recipe section. Start by preheating your oven to 350°F (175°C). Line a muffin tin with liners or spray it with cooking oil. In a large bowl, mix pumpkin puree, Greek yogurt, honey or maple syrup, eggs, and vanilla extract. Whisk well until the mix is smooth. In another bowl, combine whole wheat flour, baking powder, baking soda, cinnamon, nutmeg, ginger, and salt. Mix these dry ingredients together. Slowly add them to your wet mix, folding gently. Be careful not to overmix. If you want some crunch, fold in chopped nuts or chocolate chips. Now, fill each muffin cup about 3/4 full with the batter. Bake them in your preheated oven for 18-22 minutes. Insert a toothpick into the center of a muffin. If it comes out clean, they’re done! If not, give them a few more minutes. Let the muffins cool in the tin for 5 minutes. Then, transfer them to a wire rack to cool completely. For a tasty touch, serve them warm with a sprinkle of powdered sugar or cinnamon. You can store leftovers in an airtight container for up to a week. These muffins also freeze well. Enjoy them with your favorite tea or coffee! For the full recipe, check out Healthy Pumpkin Muffins. To get soft and fluffy muffins, do not overmix the batter. Mix until just combined. This keeps air bubbles in the mix. Use room temperature eggs and yogurt for better texture. Use whole wheat flour for a hearty bite. If you want a lighter texture, you can add a bit of almond flour or oat flour. Store your muffins in an airtight container. This keeps them fresh and moist. You can place parchment paper between muffins to prevent sticking. Keep them at room temperature for up to a week. For longer storage, freeze them. Wrap each muffin in plastic wrap and place in a freezer bag. To enjoy your muffins warm, try reheating them in the oven. Preheat the oven to 350°F (175°C). Place the muffins on a baking sheet for about 5-10 minutes. You can also use a microwave. Heat each muffin for about 15-20 seconds. This makes them soft and warm, just like fresh-baked muffins. For the full recipe, check out Healthy Pumpkin Muffins. {{image_2}} To make gluten-free pumpkin muffins, swap whole wheat flour for gluten-free flour. You can use a blend made for baking. This blend helps keep the texture light and fluffy. Also, check that your baking powder is gluten-free. Follow the same steps in the full recipe. The muffins will still be tasty and moist! For vegan pumpkin muffins, replace eggs with flaxseed meal or applesauce. Mix 1 tablespoon of flaxseed meal with 2.5 tablespoons of water and let it sit for five minutes. Use 1/4 cup of applesauce for each egg. Swap Greek yogurt for a dairy-free yogurt. Maple syrup will work well in place of honey. These changes make your muffins plant-based without losing flavor. You can add different spices for more flavor. Try cloves or allspice for a warm touch. Add-ins like dried cranberries or raisins can give a nice sweetness. If you love chocolate, mix in some chocolate chips. For a nutty crunch, use pecans or walnuts. These changes create new tastes and keep your muffins exciting. Enjoy experimenting! Healthy pumpkin muffins are not just tasty; they are also nutritious. Each muffin packs a punch with vitamins and minerals. They contain about 150 calories each, which makes them a great snack. You get protein from Greek yogurt and eggs. Whole wheat flour adds fiber, helping with digestion. The pumpkin provides vitamin A, which is good for your eyes. - Pumpkin Puree: Rich in antioxidants, it helps boost your immune system. - Greek Yogurt: It adds protein and probiotics, which are great for gut health. - Honey or Maple Syrup: These sweeteners are natural and provide quick energy. - Whole Wheat Flour: This flour is full of fiber, keeping you full longer. - Spices: Cinnamon, nutmeg, and ginger add flavor and have anti-inflammatory properties. Traditional muffins often use white flour and sugar. This makes them high in calories and low in nutrients. Our healthy pumpkin muffins use whole wheat flour and natural sweeteners. This switch makes them a better choice. They taste just as good, but they are much healthier. You can enjoy these muffins without the guilt! For the full recipe, check above. The muffins stay fresh for about a week. Store them in an airtight container. You can freeze them for up to three months. Just thaw and enjoy later! Yes! Fresh pumpkin works well. Just make sure to cook it and mash it. Aim for one cup of pureed pumpkin for the best flavor. You can use regular yogurt or sour cream. They give a similar creaminess. For a dairy-free option, try coconut yogurt or applesauce. Use flaxseed meal or chia seeds. Mix one tablespoon with two and a half tablespoons of water. Let it sit for five minutes to thicken. This will replace one egg. You can find the full recipe of Healthy Pumpkin Muffins in the recipe section above. It has all the details you need to bake these tasty treats! You learned about healthy pumpkin muffins, from key ingredients to step-by-step baking. I shared tips for the best texture and storage ideas, ensuring freshness. We explored variations, like gluten-free and vegan options, so you can enjoy these muffins any way you like. Knowing the nutrition helps you make good choices, too. Now you have a solid plan to bake delicious, healthy muffins. Enjoy your cooking, and share your creations with friends and family!

Ready to bake something special? Let’s dive into healthy pumpkin muffins that are both delicious and easy to make! These treats are perfect for breakfast or a snack. Packed with …

Read more

Categories Breakfast

Applesauce Cake with Cinnamon Cream Cheese Frosting Delight

July 26, 2025 by Chef Jamie
To create a moist and tasty applesauce cake, gather these simple ingredients: - 2 cups unsweetened applesauce - 1 cup brown sugar - 1/2 cup granulated sugar - 1/2 cup vegetable oil - 3 large eggs - 2 cups all-purpose flour - 1 teaspoon baking powder - 1 teaspoon baking soda - 2 teaspoons ground cinnamon - 1/2 teaspoon salt - 1 teaspoon vanilla extract These ingredients mix together to create a cake that is rich in flavor and easy to make. The applesauce gives moisture, while the sugars add sweetness. For the creamy topping, you will need: - 8 ounces cream cheese, softened - 1/2 cup unsalted butter, softened - 2 cups powdered sugar - 1 teaspoon ground cinnamon - 1-2 tablespoons milk (as needed for consistency) This frosting is smooth and adds a lovely cinnamon taste. It pairs perfectly with the cake. You can customize your cake with these fun add-ins: - Chopped nuts (like walnuts or pecans) for crunch - Raisins or dried cranberries for extra sweetness - Substitute applesauce with mashed bananas for a different flavor Feel free to swap ingredients based on your taste. These options help you make the cake your own. For the frosting, if you want a dairy-free option, use a plant-based cream cheese. Check out the full recipe for more tips! Start by preheating your oven to 350°F (175°C). Grease and flour a 9x13 inch baking pan. In a large mixing bowl, combine 2 cups of unsweetened applesauce, 1 cup of brown sugar, 1/2 cup of granulated sugar, and 1/2 cup of vegetable oil. Mix until well combined. Next, beat in 3 large eggs one at a time. Make sure each egg blends in before adding the next. Stir in 1 teaspoon of vanilla extract. In another bowl, whisk together 2 cups of all-purpose flour, 1 teaspoon of baking powder, 1 teaspoon of baking soda, 2 teaspoons of ground cinnamon, and 1/2 teaspoon of salt. Gradually add this dry mix to the wet mixture. Stir until just combined. Be careful not to overmix, or your cake may turn out dense. Pour the batter into the prepared baking pan. Smooth the top with a spatula to ensure even baking. While the cake bakes, let’s make the frosting. In a mixing bowl, beat 8 ounces of softened cream cheese and 1/2 cup of softened unsalted butter together. Blend until creamy and smooth. Slowly add 2 cups of powdered sugar and 1 teaspoon of ground cinnamon. Mix until fully combined. If the frosting is too thick, add milk 1 tablespoon at a time. Keep mixing until you reach the right spreadable consistency. Bake the cake in the preheated oven for 30-35 minutes. Check if it's done by inserting a toothpick into the center. If it comes out clean, it’s ready. Once baked, let the cake cool in the pan for about 10 minutes. Then, transfer it to a wire rack to cool completely. When the cake is cool, spread the frosting evenly over the top. For the final touch, slice the cake into squares and serve on a decorative plate. Dust a little extra cinnamon on top for a beautiful finish. For the full recipe, visit the recipe section above. Enjoy your delicious applesauce cake! To get a soft and moist applesauce cake, you need to mix the batter just right. Mix wet ingredients well, but don’t overdo it when adding dry ones. Stir until you see no dry flour. This helps keep the cake light and fluffy. Using fresh applesauce adds more moisture, so it’s a great choice. When frosting your cake, make sure it is completely cool. If you frost too soon, the heat will melt the cream cheese frosting. Use a spatula to spread the frosting evenly. Start in the center and work your way to the edges. If you want a smooth look, dip the spatula in warm water first. Slice the cake into squares for easy serving. Place each square on a decorative plate. For a fun touch, dust a bit of cinnamon on top. You can also add thin apple slices as a garnish. This makes the cake look inviting and fresh. For the best taste, serve it with a warm cup of tea or coffee. You can find the full recipe for this delightful cake, which includes all the steps and tips needed for success. {{image_2}} You can change the spices for fun flavors! Try using nutmeg or ginger alongside cinnamon. A mix of all three adds warmth and depth. For a zesty twist, add a hint of cardamom. Each spice brings its own charm to the cake. For gluten-free options, use a gluten-free flour blend. Make sure it has a good binding agent. For dairy-free, swap the cream cheese with a vegan cream cheese. Coconut cream also works well in frosting. These changes let more people enjoy this treat. Want a fancy look? Make a layer cake! Just double the batter and bake in two round pans. Stack the layers with frosting in between. This adds height and makes it more special for events. Don’t forget to frost the top and sides too! For the full recipe of the applesauce cake with cinnamon cream cheese frosting, check out the earlier sections. Each variation gives you a chance to create something unique and delicious! To keep your applesauce cake fresh, wrap it well. Use plastic wrap or foil. Store it in an airtight container. This helps keep moisture in and flavors bright. Place the cake in a cool, dry place. Avoid direct sunlight or heat. If you keep it this way, it should last for about three days. You can freeze applesauce cake for later enjoyment. First, let the cake cool completely. Wrap it tightly in plastic wrap. Then, place it in a freezer bag. Be sure to remove as much air as possible. You can also freeze the frosting. Place it in a small container, or bag, and seal it well. The cake and frosting can last up to three months in the freezer. When stored properly, applesauce cake stays fresh for several days. If you freeze it, thaw it overnight in the fridge. To reheat, use a microwave or oven. In the microwave, heat a slice for 15-20 seconds. In the oven, wrap it in foil and warm it at 350°F for about 10 minutes. The cake will taste just as good as when you first made it! Yes, you can use store-bought applesauce. It saves time and works well. Look for unsweetened applesauce for the best flavor. This will keep your cake from being too sweet. Store-bought options come in many flavors. You can try cinnamon or spiced applesauce for a fun twist. To check if the cake is done, use a toothpick. Insert it into the center of the cake. If it comes out clean, the cake is ready. This usually takes 30 to 35 minutes. If there is batter on the toothpick, bake for a few more minutes. Keep an eye on it to avoid overbaking. You can use Greek yogurt or mascarpone cheese instead of cream cheese. Both will give a creamy texture. If you prefer a dairy-free option, try using whipped coconut cream. This will still taste great with the cinnamon. Adjust the sugar in the frosting to match the sweetness you like. For the complete recipe, refer to the Full Recipe section above. This article covered how to make a delicious applesauce cake with cinnamon cream cheese frosting. You learned about key ingredients, step-by-step instructions, and helpful tips for perfecting the cake. I shared variations to fit different diets and storage methods to keep your cake fresh. Remember, baking is fun, and you can tweak recipes to match your taste. Enjoy making this cake for yourself or loved ones!

Are you craving a sweet and moist dessert? You’ll love this Applesauce Cake with Cinnamon Cream Cheese Frosting! This cake is easy to make and packed with flavor. Perfect for …

Read more

Categories Desserts

Slow Cooker Hatch Green Chile Verde Flavorful Delight

July 26, 2025 by Chef Jamie
- 2 lbs boneless, skinless chicken thighs - 4 cups Hatch green chiles, roasted and chopped - 1 onion, diced - 4 cloves garlic, minced These main ingredients create the base of your dish. The chicken thighs are juicy and tender. The Hatch green chiles add a smoky flavor and a bit of heat. Diced onion and minced garlic bring depth and aroma to the pot. - 2 cups vegetable broth - 1 tablespoon ground cumin - 1 tablespoon dried oregano - 1 teaspoon smoked paprika - Salt and pepper to taste This mix of flavors enhances the dish. The vegetable broth keeps everything moist and adds richness. Cumin and oregano provide warmth and earthiness. Smoked paprika gives a unique twist. Adjust salt and pepper to your taste for the perfect balance. - 2 tablespoons lime juice - Fresh cilantro, chopped (for garnish) - Tortillas, for serving A splash of lime juice brightens the flavors. Fresh cilantro adds a burst of freshness to each bite. Serve with warm tortillas. You can use them to scoop or build your own tacos. For the full recipe, check out Slow Cooker Hatch Green Chile Verde. Enjoy cooking! - Place chicken thighs in the slow cooker. - Add onion and garlic on top. First, I start by placing the chicken thighs in the slow cooker. I like using boneless and skinless thighs. They cook well and stay moist. Next, I add the diced onion and minced garlic. This combination adds a strong base flavor to the dish. - Incorporate roasted Hatch green chiles. - Mix broth and spices, then pour over ingredients. Now, it’s time for the star of the show: the roasted Hatch green chiles. I use about four cups. They bring a unique flavor and mild heat. I pour them over the chicken and onions. Then, I mix the vegetable broth with ground cumin, dried oregano, and smoked paprika in a bowl. This mix gives a warm, earthy taste. After stirring, I pour the broth mixture over everything in the slow cooker. - Cover and set slow cooker (low for 6-8 hours or high for 3-4 hours). - Shred chicken and return to cooker, stir in lime juice. I cover the slow cooker and set it to cook. I choose low heat for 6 to 8 hours or high heat for 3 to 4 hours. I love the low setting for a richer flavor. When the chicken is tender, I take it out and shred it with two forks. I return the shredded chicken to the slow cooker and stir in lime juice for a fresh kick. This step brightens the flavors and makes the dish pop. For the full recipe, check [Full Recipe]. Choosing the best Hatch green chiles is key. Look for chiles that are firm and bright. They should smell fresh and earthy. If you can, roast them for a smoky flavor. This step enhances the dish's depth. Adjusting seasoning to taste can make a big difference. I often taste the dish near the end of cooking. If it needs more heat, add a pinch of chili powder. For added brightness, squeeze in lime juice. Cooking on low allows flavors to meld. Your dish will taste richer with longer cooking times. It’s perfect for busy days when you want a hearty meal ready when you are. Cooking on high is faster but may not blend flavors as well. If you’re short on time, set the slow cooker to high for a quicker meal. To ensure tender chicken, check the internal temperature. It should reach 165°F. After cooking, shred the chicken back into the sauce. This helps the meat soak up all the flavors. Presentation matters! Serve the Chile Verde in deep bowls for a cozy feel. Garnish with fresh cilantro for a pop of color. Warm tortillas make the perfect side. Guests can build their own tacos or use tortillas to scoop the verde. Other great sides include rice or a fresh salad. They balance the richness of the dish and add texture. For the full recipe, be sure to check the earlier section! {{image_2}} You can switch proteins in this dish. Beef or pork works well. For a vegetarian option, try beans or tofu. Both will soak up all the delicious flavors. Just add the same spices and chiles, and you’ll have a great meal. Want to kick up the flavor? Add more spices like chili powder. This will give your dish a nice heat. You can also mix in extra veggies like bell peppers. They add sweetness and color to your meal. Get creative with how you serve this dish! You can turn it into tacos, burritos, or nachos. Just pile the Chile Verde onto your favorite base. For toppings, consider adding avocado or sour cream. These will make each bite extra tasty. For the complete guide, check out the Full Recipe. To store leftovers, let them cool first. Place the Slow Cooker Hatch Green Chile Verde in an airtight container. This keeps it fresh. The dish lasts about 3 to 4 days in the fridge. Always check for any off smells before eating. For longer storage, freeze the chile verde. Use a freezer-safe container or bag. Remove as much air as possible before sealing. It can last up to 3 months in the freezer. To thaw, place it in the fridge overnight. You can also use the microwave for quick thawing. When reheating, you want to keep the flavor and texture. The slow cooker works best for this. Set it on low for about 1 to 2 hours. You can also use a stovetop. Heat it gently over low heat, stirring often. This way, you’ll enjoy every bite just like the first time. Hatch Green Chile Verde is a rich and spicy stew. It comes from Hatch, New Mexico, known for its unique green chiles. The dish typically features tender chicken simmered with roasted chiles, garlic, onion, and spices. This blend creates a warm, earthy flavor that fills your kitchen with an amazing aroma. The dish is perfect for tacos, burritos, or just enjoyed in a bowl. Yes, you can use other chiles if you can't find Hatch chiles. Some good options are poblano, Anaheim, or jalapeño. Poblano chiles offer a mild flavor, while jalapeños bring more heat. Be sure to adjust the amount based on your heat preference. Each type of chili brings a unique taste and depth to the dish. You’ll know the chicken is done when it is tender and easy to shred. After cooking, check the chicken with a fork. If it pulls apart easily, it’s ready. You can also use a meat thermometer; the chicken should reach an internal temperature of 165°F. Enjoy the tender chicken in your Hatch Green Chile Verde for the best flavor. This blog post covered all the key steps for making Slow Cooker Hatch Green Chile Verde. You learned about the main ingredients and how to prepare them. We discussed cooking times and tips to achieve great flavor. In the end, enjoy the dish your way, whether in tacos or burritos. Get creative with toppings and ingredients! With these tips, you’ll make this meal a hit every time.

If you’re looking for a hearty meal that bursts with flavor, look no further! Slow Cooker Hatch Green Chile Verde is a simple dish that warms the soul. With tender …

Read more

Categories Dinner

Caramel Pear Upside Down Cake Delightful and Easy Recipe

July 26, 2025 by Chef Jamie
The ingredients for Caramel Pear Upside Down Cake are simple and fresh. Here’s what you need: - 3 ripe pears, peeled, cored, and sliced - 1 cup brown sugar - 1/2 cup unsalted butter (1 stick) - 1 cup all-purpose flour - 1 teaspoon baking powder - 1/4 teaspoon salt - 1/2 cup granulated sugar - 2 large eggs - 1 teaspoon vanilla extract - 1/2 cup milk - 1 teaspoon ground cinnamon - Optional: whipped cream for serving Gathering these ingredients is easy. Choose ripe pears for the best flavor. Brown sugar adds rich sweetness. The butter gives the cake a nice, moist texture. All-purpose flour and baking powder help the cake rise. Eggs and milk bring everything together. Ground cinnamon adds warmth. You can top it with whipped cream for extra delight. You can find the full recipe to create this cake easily. - Melt 1/2 cup unsalted butter and 1 cup brown sugar in a saucepan. - Stir the mixture until the sugar dissolves completely to form a smooth caramel. - Pour the warm caramel into a greased 9-inch round cake pan. - Create a circular pattern with 3 sliced pears on top of the caramel, slightly overlapping them. - In a bowl, whisk together 1 cup all-purpose flour, 1 teaspoon baking powder, 1/4 teaspoon salt, and 1 teaspoon ground cinnamon. - In a separate bowl, cream together 1/2 cup granulated sugar and the remaining 1/2 cup butter until light and fluffy. - Beat in 2 large eggs one at a time, mixing well after each addition, and stir in 1 teaspoon vanilla extract. - Gradually combine the dry and wet ingredients, alternating with 1/2 cup milk, starting and ending with the flour mixture. - Pour the batter over the arranged pears in the cake pan, spreading it evenly over the fruit. You can find the Full Recipe for more detailed steps and timing. - Preheat your oven to 350°F (175°C). This helps the cake rise evenly. - Bake for 35-40 minutes. This timing works well for a moist cake. - Check doneness with a toothpick. Insert it in the center; it should come out clean. - Serve the cake warm for the best flavor. - Top with whipped cream for a creamy touch. - Pair with vanilla ice cream for a delightful dessert. - If the cake sinks, it may need more baking time. - Use a toothpick to check if the center is fully baked. - A round cake pan works best for even cooking. - A rubber spatula helps spread batter smoothly. - Let the cake cool for 10 minutes before flipping. This helps it release easily. For the complete recipe, refer to the [Full Recipe]. {{image_2}} You can easily swap out pears for other fruits. Try using ripe apples or sweet peaches for a change. These fruits will add their own special twist to the cake. If you prefer, you can also use canned fruit. Just drain them well before arranging them in the pan. For those watching sugar intake, consider using alternative sweeteners. You might try honey, maple syrup, or a sugar substitute. Each option will bring a different flavor to the cake. Make sure to adjust the amount based on sweetness levels. Want to add unique flavors? Try mixing in spices or extracts. A pinch of nutmeg or a splash of almond extract can elevate the taste. You can also experiment with different spices to find your favorite blend. Adding nuts or chocolate can enhance the cake's texture and taste. Chopped walnuts or pecans create a nice crunch. If you love chocolate, fold in some chocolate chips into the batter for a rich surprise. If you need gluten-free options, use gluten-free flour. Many blends work well in this recipe, maintaining the cake's texture. Just ensure your baking powder is gluten-free too. For a vegan version, substitute eggs with flaxseed meal or applesauce. You can replace milk with almond or coconut milk. Use a plant-based butter for the caramel. These swaps make this cake suitable for many diets. For the full recipe, check out the Caramel Pear Upside Down Cake section above. To keep your caramel pear upside down cake fresh, wrap it tightly in plastic wrap. You can also place it in an airtight container. Store it in the fridge. It stays good for up to four days. This method helps keep the cake moist and flavorful. When you want to enjoy your cake again, gently reheat it. Use the microwave for about 15-20 seconds per slice. If you prefer the oven, preheat it to 350°F (175°C). Place the cake on a baking sheet and heat for about 10 minutes. This keeps the texture soft and tasty. To freeze your cake, slice it first. Wrap each slice in plastic wrap and then in foil. Place the slices in a freezer-safe bag. They can last for up to three months in the freezer. When you are ready to eat, thaw the slices in the fridge overnight for the best flavor. The cake lasts about 3 to 5 days in the fridge. Store it in an airtight container. You can freeze the cake for up to 3 months. Wrap it well in plastic wrap and foil for best results. Yes, you can make the cake a day in advance. Bake and cool the cake, then cover it. Keep it in the fridge until you're ready to serve. This adds flavor since the cake sits. Your cake might stick due to not greasing the pan well. Always grease the pan with butter or oil. Use parchment paper for extra protection. Also, let the cake cool before flipping it. In this post, we covered how to make a delicious caramel pear upside-down cake. You learned about key ingredients and followed step-by-step instructions for the perfect bake. We shared baking tips, serving ideas, and ways to modify the recipe. I hope you feel confident to try it yourself. Remember, baking is fun, and it can be a tasty treat for yourself or guests. Enjoy every slice, and happy baking!

Looking for a sweet treat that’s as easy as it is delicious? My Caramel Pear Upside Down Cake is perfect for satisfying your cravings. Juicy pears, rich caramel, and a …

Read more

Categories Desserts
Older posts
Newer posts
← Previous Page1 … Page64 Page65 Page66 … Page134 Next →

TOSSED RECIPES

Simple meals, bold taste. Quick recipes made for real life — always fresh, always delicious. 🌿🍴

PAGES

Home About Contact Privacy Policy Terms & Conditions Cookie Policy GDPR Policy Copyright Policy Disclaimer

CATEGORIES

Appetizers Desserts Salads Breakfast Dinner

Contact

  • Pinterest
  • Mail
Copyright © 2026 Tossed Recipes. All rights reserved.