Honey Garlic Butter Chicken Mac and Cheese Delight

Are you ready to enjoy a dish that combines the comfort of mac and cheese with the sweet and savory flavors of honey garlic butter chicken? In this recipe, I’ll …
Are you ready to enjoy a dish that combines the comfort of mac and cheese with the sweet and savory flavors of honey garlic butter chicken? In this recipe, I’ll …
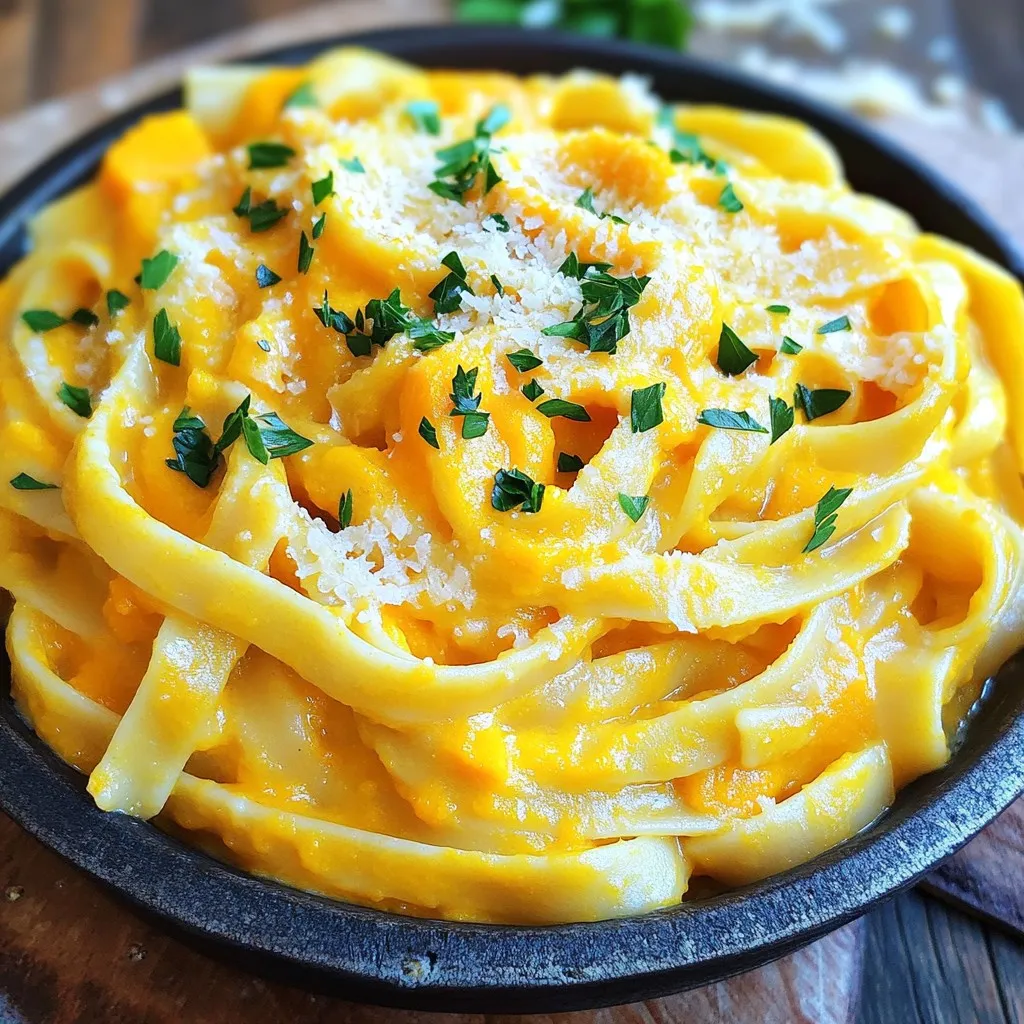
Welcome to your new favorite dish: Creamy Butternut Squash Alfredo Pasta! This recipe blends the sweet taste of butternut squash with rich cream to create a delightful meal. Whether you …
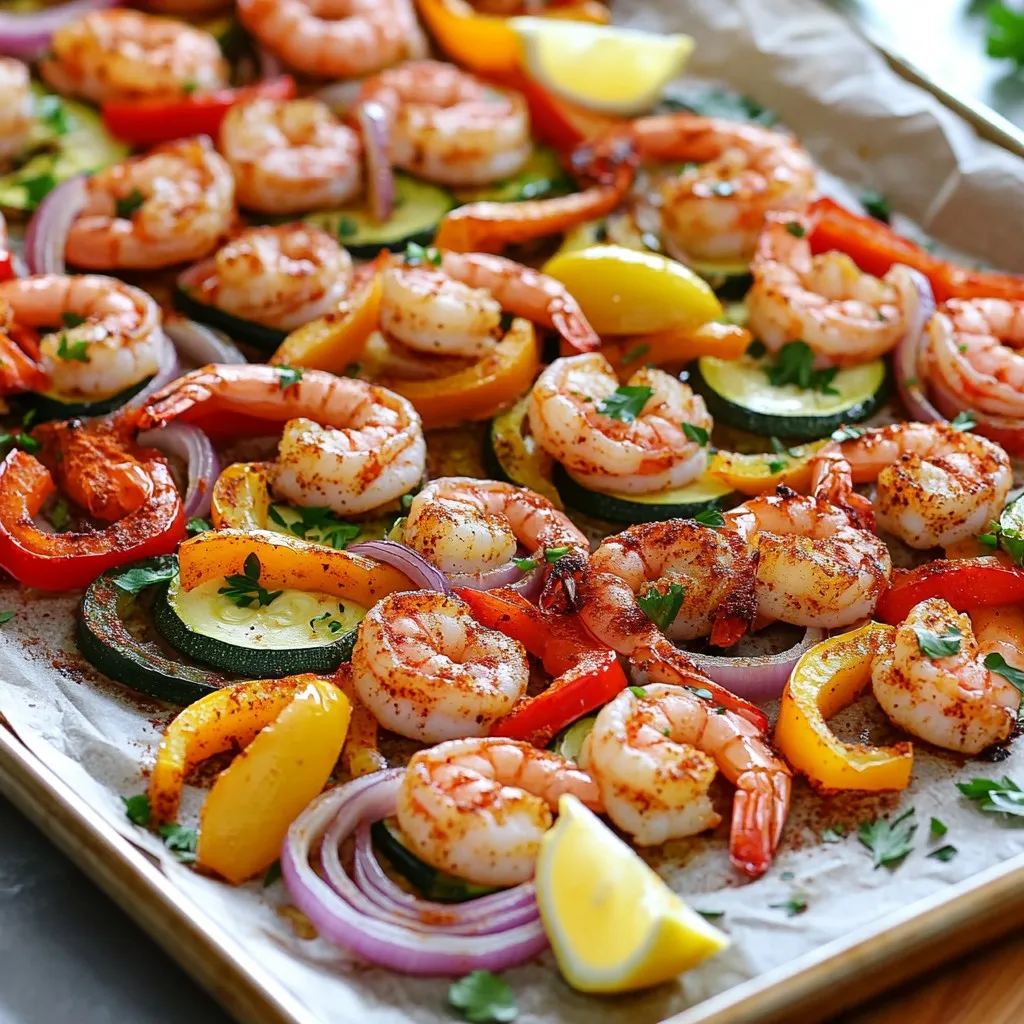
Looking for a quick, tasty meal? My Sheet Pan Cajun Shrimp & Veggies is easy to prepare and loaded with flavor. With just a few ingredients and simple steps, you …
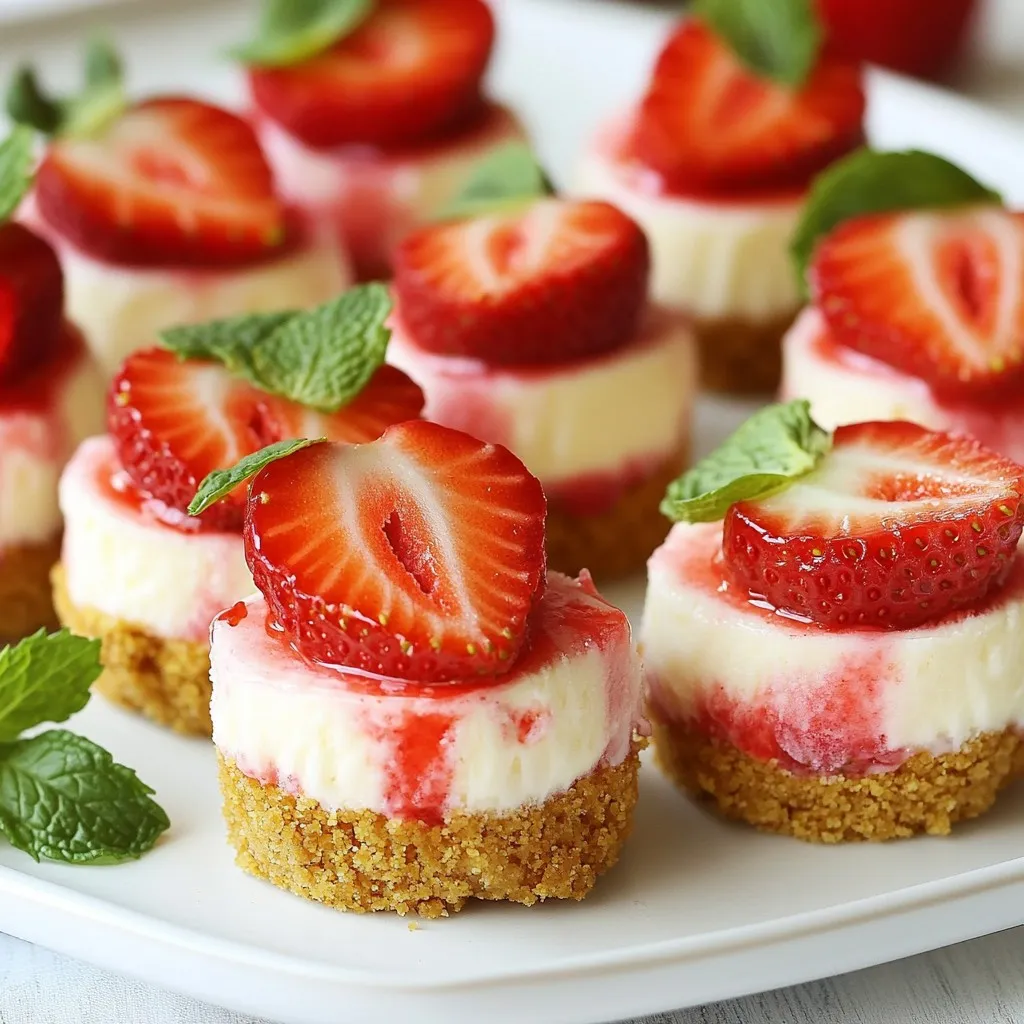
Craving a sweet treat that’s easy to make and oh-so-delicious? You’ll love these Frozen Strawberry Cheesecake Bites! They are perfect for a quick snack or a fun dessert. With fresh …
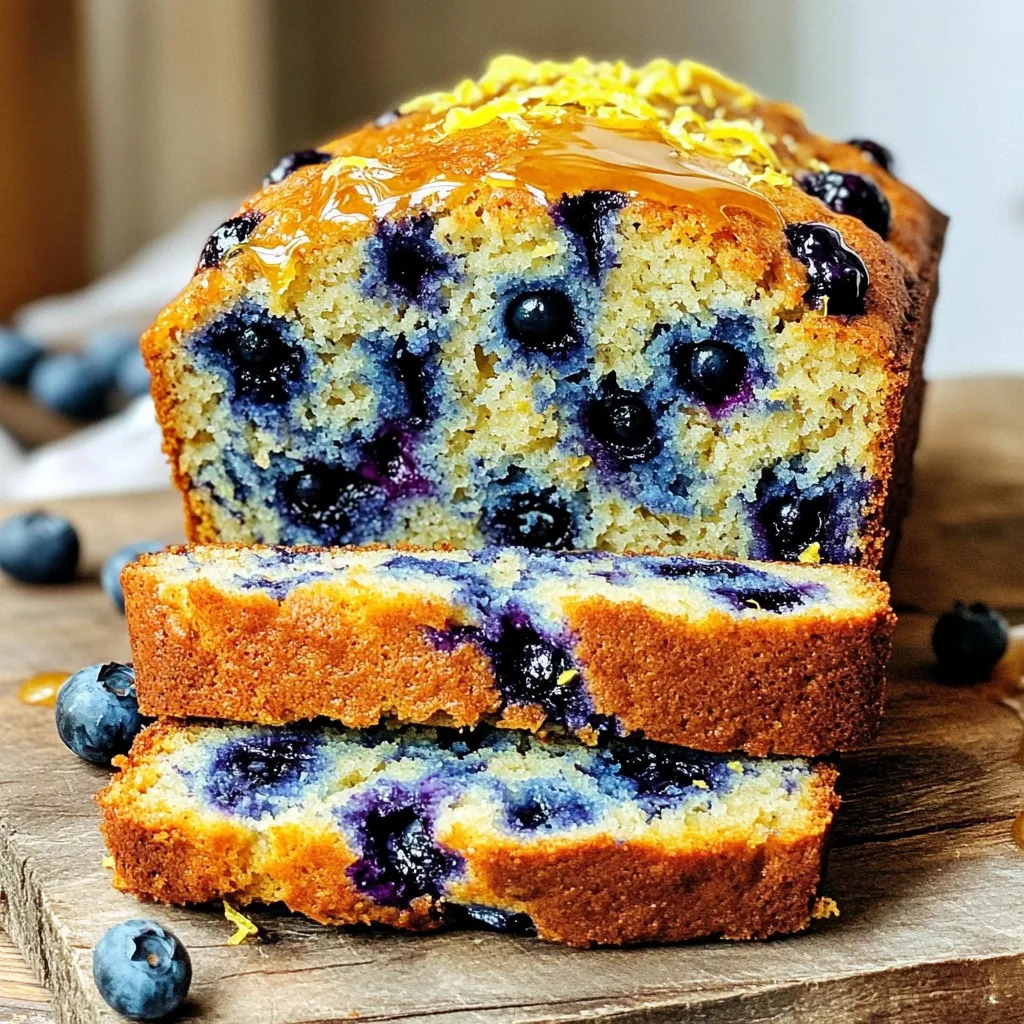
If you’re looking for a simple and tasty treat, try my Greek Yogurt Blueberry Lemon Bread! This recipe combines creamy Greek yogurt, fresh blueberries, and zesty lemon for a delicious …

Are you ready to enjoy a warm bowl of comfort? My Instant Pot Lasagna Soup recipe is quick, tasty, and packed with flavor. You can have rich layers of lasagna …

Get ready for a tropical treat with my Mango Coconut Chia Pudding Delight! This easy dish combines creamy coconut milk, juicy mango, and crunchy chia seeds for a burst of …
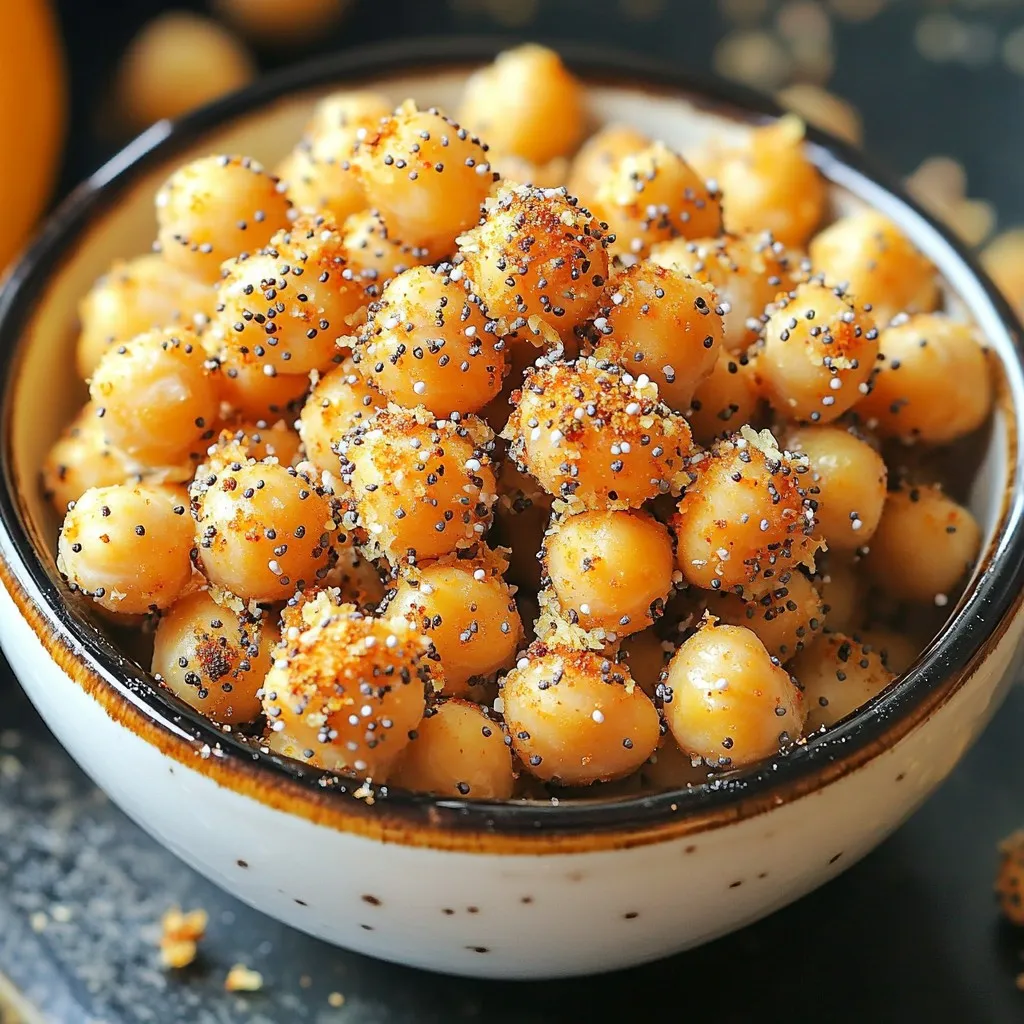
Looking for a fun and tasty snack? You’re in for a treat with Air Fryer Everything Bagel Chickpeas! This simple recipe packs a punch of flavor and crunch, all while …
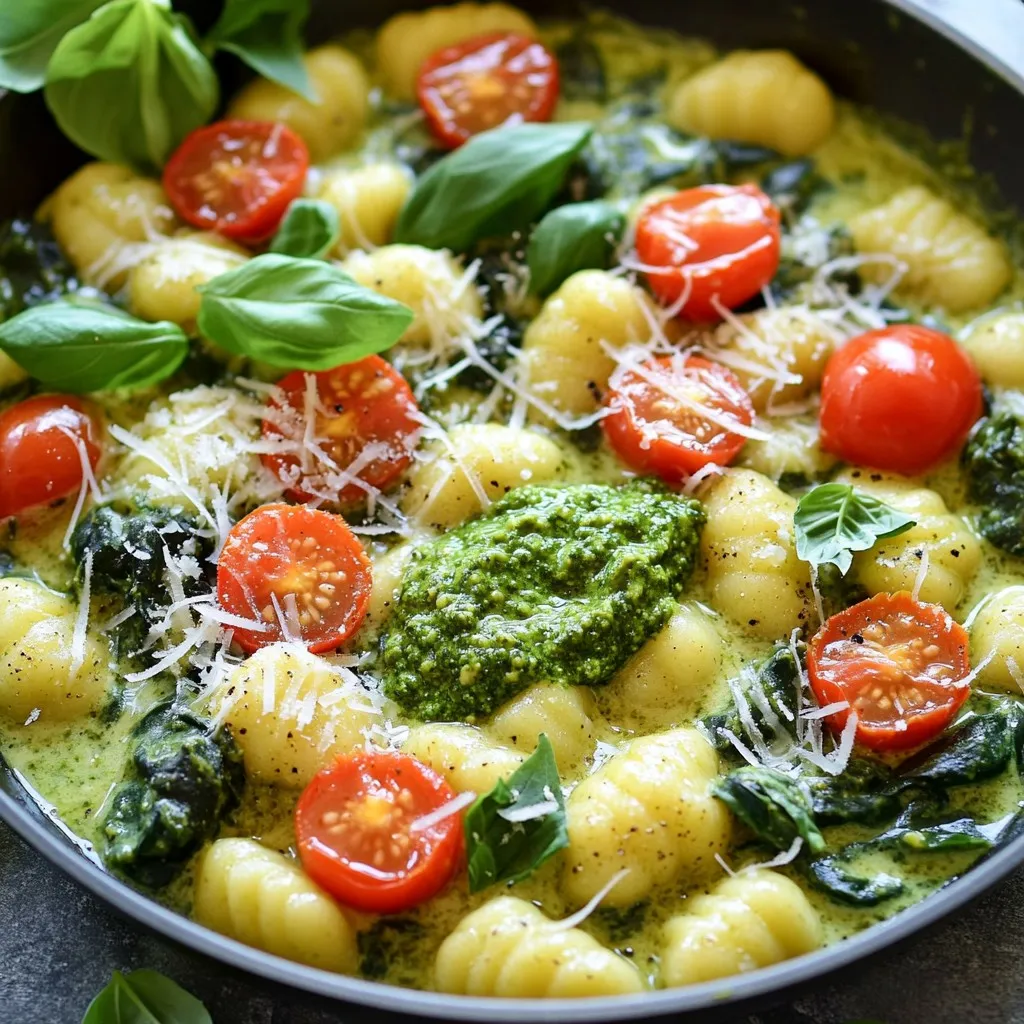
Are you craving a delicious meal that’s quick and simple? One-Pot Creamy Pesto Gnocchi delivers big flavor with little fuss! In this post, I’ll share my favorite ingredients, step-by-step cooking …

Are you ready to delight your taste buds with a simple yet flavorful dish? In this post, I’ll guide you through my easy Honey BBQ Chicken Bites recipe. With just …