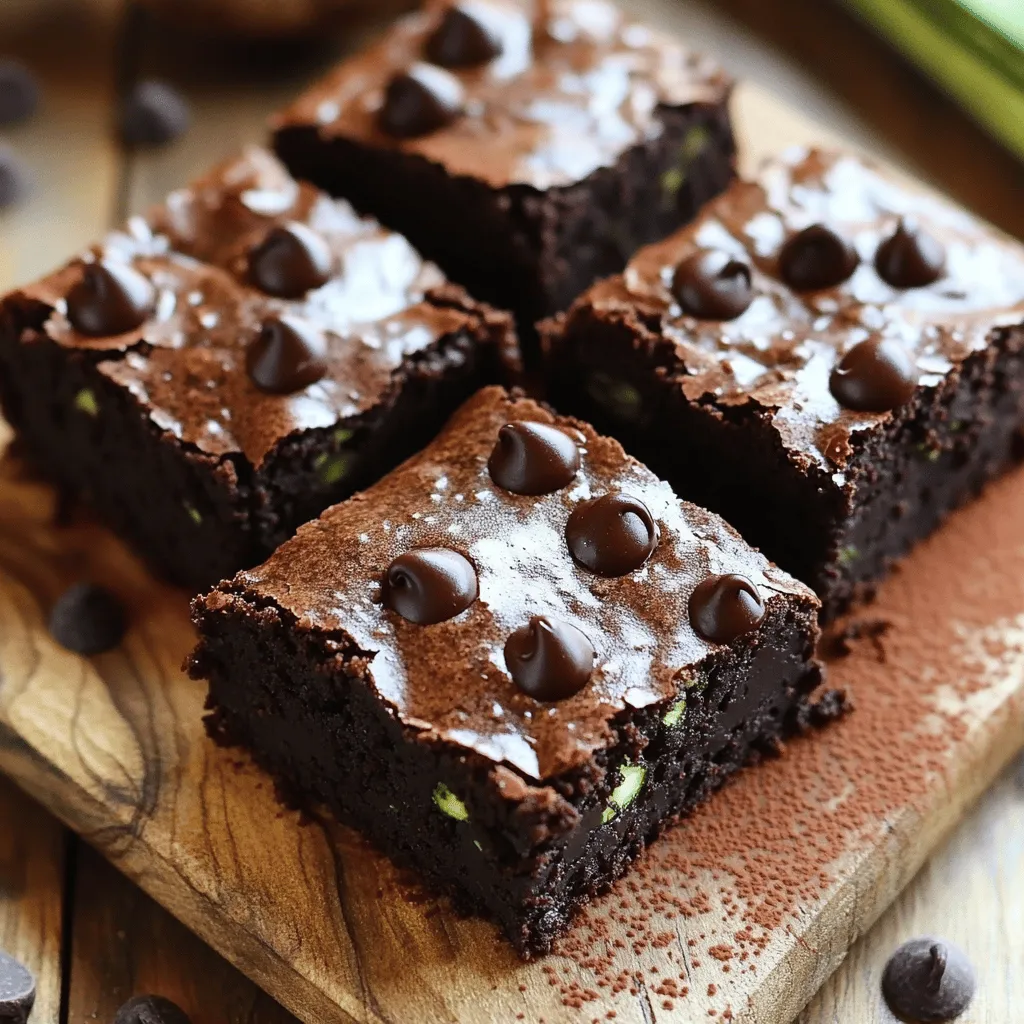
Skip to content
Tossed Recipes
  • Home
  • Appetizers
  • Desserts
  • Salads
  • Breakfast
  • Dinner
  • Privacy Policy
  • Contact
  • About

Chef Jamie

Air Fryer Summer Squash Crispy Fritters Recipe

July 2, 2025 by Chef Jamie
- 2 medium summer squashes, grated - 1 cup grated zucchini - 1/2 cup all-purpose flour - 1/4 cup cornmeal - 1/4 cup grated Parmesan cheese - 1 large egg, beaten - 2 cloves garlic, minced - 1 teaspoon onion powder - 1 teaspoon dried oregano - Salt and pepper to taste - Olive oil spray When making air fryer summer squash fritters, you need fresh ingredients. The summer squash brings a light, sweet flavor. Zucchini adds moisture and helps the fritters hold together. Flour and cornmeal give the fritters their crunchy texture. Parmesan adds a savory depth. The egg binds everything, while garlic and spices boost flavor. Use salt and pepper to taste for the best results. A light spray of olive oil helps achieve that golden crisp. - Air fryer - Mixing bowl - Kitchen towel You will need a few tools to make these fritters. An air fryer cooks them quickly and evenly. A mixing bowl lets you combine all the ingredients easily. A kitchen towel helps remove moisture from the grated squash. These simple items make the cooking process smooth. It’s all about keeping it easy and fun in the kitchen. 1. Start by grating the summer squash and zucchini. This helps them cook evenly. 2. Place the grated veggies in a bowl and sprinkle with salt. The salt pulls out moisture. 3. Let the mixture sit for ten minutes. This step is key for crispy fritters. 4. After ten minutes, grab a clean kitchen towel. Squeeze the squash to remove extra moisture. This will help the fritters crisp up. 1. In the same bowl, combine the dry and wet ingredients. Add the flour, cornmeal, and Parmesan cheese. 2. Next, mix in the beaten egg, minced garlic, onion powder, oregano, salt, and pepper. 3. Stir until everything is well blended. You want a thick mixture that holds together. 1. Preheat your air fryer to 375°F (190°C). This ensures even cooking. 2. If you like, line the basket with parchment paper. Lightly spray it with olive oil for a non-stick surface. 3. Use a tablespoon to scoop the mixture. Shape it into small patties, about 2 inches wide. 4. Place the patties in a single layer in the air fryer basket. Do not overcrowd them. 5. Lightly spray the top with olive oil. This adds to the crispiness. 6. Air fry the fritters for 10-12 minutes. Flip them halfway through for even browning. 7. When they turn golden brown, they’re ready. Let them cool for a minute before serving. This recipe is simple and fun to make. You can find the full recipe for crispy air fryer summer squash fritters above. To achieve crispy fritters, start by removing moisture. Grated summer squash and zucchini have a lot of water. Moisture makes fritters soggy. Sprinkle salt over the grated veggies and let them sit. This step pulls out extra liquid. After ten minutes, squeeze the mix in a kitchen towel. This makes a big difference in texture. For air fryer settings, preheat to 375°F (190°C). This temperature cooks the fritters evenly and makes them crispy. The cooking time is key too. Aim for 10 to 12 minutes. Flip the fritters halfway through for even browning. Your fritters should be golden brown and firm when done. Fritters taste great on their own but pair well with dips. Greek yogurt or sour cream adds creaminess. Fresh herbs like parsley or chives make a lovely garnish. For presentation, serve fritters warm on a plate. A colorful dish will make your meal stand out. Enjoy your crispy fritters with friends and family! {{image_2}} You can change a few ingredients in the fritters. Instead of zucchini, try using yellow squash or even carrots. Both add a nice taste and keep the dish fresh. For cheese, you can swap Parmesan with feta or cheddar. Each cheese brings out a unique flavor. Spices can also change the taste. Try adding smoked paprika for a smoky kick. Or, mix in some cumin for a warm flavor. These small changes can make your fritters exciting. If you don’t have an air fryer, baking is an option. Preheat your oven to 400°F (200°C). Place the fritters on a baking sheet lined with parchment paper. Bake for about 20 minutes, flipping halfway through. This will give you a nice, crispy finish. You can also pan-fry the fritters. Heat a skillet over medium heat and add a little olive oil. Cook the fritters for about 4-5 minutes on each side. This method will give you a different texture, crispy on the outside and soft inside. Want to make these fritters vegan? Replace the egg with flaxseed meal. Mix 1 tablespoon of flaxseed meal with 3 tablespoons of water. Let it sit for 5 minutes to thicken. For a gluten-free version, use almond flour or a gluten-free flour blend in place of all-purpose flour. To boost nutrition, add some chopped spinach or kale to the mix. You can also sprinkle in some chia or hemp seeds for extra fiber and protein. These changes keep the fritters healthy and tasty. For the full recipe, check out the details above! To keep your fritters fresh, place them in a storage container with a tight lid. Use parchment paper between layers to avoid sticking. Refrigerate them within two hours of cooking for the best taste. They can last up to three days in the fridge. To bring back the crispiness, reheat fritters in your air fryer. Set it to 350°F (175°C) and heat for about 5 minutes. This keeps them crunchy. For alternative methods, you can use a skillet on medium heat. Just add a bit of oil and heat each side for about 2-3 minutes. This also works well for leftover fritters. Enjoy them warm and crispy again! Can I use other types of squash? Yes, you can use other squash types. Zucchini works well. Acorn squash adds a sweet flavor. Just remember to adjust cooking time for thicker squash. How do I know when the fritters are done? Your fritters are done when they are golden brown and crispy. Flip them halfway through cooking for even browning. Use a fork to check the texture. They should feel firm. Can I freeze the fritters? You can freeze fritters! Let them cool first. Place them in an airtight container. They can last up to three months in the freezer. Reheat in the air fryer when ready to eat. What spices pair well with summer squash? Summer squash loves spices like garlic, onion powder, and oregano. You can also try cumin for warmth or basil for freshness. Experiment with your favorites! How do I prevent the fritters from sticking? To prevent sticking, spray your air fryer basket with olive oil. Use parchment paper for easy removal. Make sure not to overcrowd the basket. This helps the hot air circulate. Where can I find the full recipe? You can find the full recipe for crispy air fryer summer squash fritters above. It includes all ingredients and steps you need. Can I double the recipe for a larger batch? Yes, you can double the recipe! Just use more squash and other ingredients. Make sure your air fryer can handle the extra volume. Cook in batches if needed for best results. To sum up, you can make tasty air fryer summer squash fritters using simple ingredients. Grating the vegetables and removing moisture are key for great texture. Follow the steps carefully to mix and cook them well, and remember to try different flavor swaps. Storing and reheating leftovers is easy, too. Enjoy your crunchy fritters as a snack or meal. Now, it's time to get cooking and impress everyone with your new dish!

Ready to make the best summer squash fritters? With just a few simple ingredients, you can whip up crispy, delicious bites using your air fryer. This easy recipe combines grated …

Read more

Categories Appetizers

Easy Peach Galette Simple and Delicious Dessert

July 2, 2025 by Chef Jamie
- 3 ripe peaches, sliced - 1 tablespoon lemon juice - 1 tablespoon sugar - 1 teaspoon vanilla extract - 1 pre-made pie crust (store-bought or homemade) - 1 tablespoon cornstarch - 1 egg, beaten (for egg wash) - 1 tablespoon butter, cut into small pieces - 1 tablespoon brown sugar (for sprinkling) To make a peach galette, you need simple and fresh ingredients. The star of this dessert is the peaches. Use ripe peaches for the best flavor. Their sweetness shines through. A splash of lemon juice helps brighten the taste. Sugar adds extra sweetness, while vanilla gives a warm aroma. The pie crust serves as a cozy blanket for the juicy filling. You can choose a store-bought pie crust or make your own if you prefer. Cornstarch helps thicken the peach juices, keeping the filling from being too runny. An egg wash gives the crust a lovely golden color when baked. Small pieces of butter add richness, and brown sugar on top creates a sweet, crunchy finish. - Using frozen peaches instead of fresh - Alternative sweeteners in place of sugar - Gluten-free pie crust options If fresh peaches are hard to find, frozen peaches work great. Just thaw and drain them before using. You can also swap sugar for honey or maple syrup for a different taste. If you need a gluten-free option, use a gluten-free pie crust. These swaps keep the galette tasty while catering to your needs. For the full recipe, check out the details above. First, slice the peaches. You need three ripe peaches for this. Place the slices in a bowl. Add one tablespoon of lemon juice and one tablespoon of sugar. This mix will brighten the flavors. Then, add one teaspoon of cornstarch. The cornstarch helps thicken the juices. Gently toss everything together. Let it sit for about ten minutes. This allows the peaches to release their natural juices. Next, take your pie crust. You can use store-bought or homemade. Roll it out on a floured surface. Aim for a rough circle about twelve inches wide. This crust will hold your filling. Carefully transfer the rolled crust to a baking sheet lined with parchment paper. Make sure it’s centered. Now, spoon your peach filling into the center of the crust. Leave about a two-inch border around the edges. This space is for folding. Fold the edges of the crust over the peaches. Create some pleats for a rustic look. It’s okay if the center stays open; this adds to the charm. Brush the crust with a beaten egg. This gives it a lovely golden color. Dot the peach filling with small pieces of butter. Then, sprinkle one tablespoon of brown sugar on top. This step adds sweetness and helps caramelize the peaches. Preheat your oven to 375°F (190°C). Place the galette in the oven. Bake it for about 30 to 35 minutes. You want the crust to turn golden brown. The peaches should be bubbling with joy. Once baked, let the galette cool a bit before you slice. Enjoy your easy peach galette with a scoop of ice cream or whipped cream. For the full recipe, check the details provided. To get a flaky crust, use cold ingredients. Cold butter and water make a big difference. Don’t overwork the dough; mix just until combined. Chilling the crust is key. Place it in the fridge for at least 30 minutes. This helps the butter firm up, giving you that nice, flaky texture. A warm peach galette tastes amazing with ice cream. A scoop of vanilla ice cream on top adds creaminess. Whipped cream works well too. For presentation, add fresh mint leaves. They add color and a nice touch of flavor. You can also sprinkle some extra sugar on top for a little sparkle. One common mistake is overcooking the peaches. Keep an eye on them while baking. You want them soft but not mushy. Another mistake is not letting the filling rest. Allowing the mixture to sit for 10 minutes helps the flavors meld. This step is easy but makes a big difference in taste. {{image_2}} You can make your peach galette even better by mixing in other fruits. Try adding berries like blueberries or raspberries. Their sweetness and tartness will add a nice twist. Apples also work well. They provide a crunchy texture and balance the soft peaches. Add spices to boost the flavor. A sprinkle of cinnamon gives warmth and depth. Nutmeg is another great choice. It adds a sweet, nutty taste that pairs well with peaches. You can also play with fresh herbs. Thyme or basil can bring a unique taste. Just a pinch can make a big difference. Switch up the dough for a new experience. Puff pastry makes a flaky and light crust. It adds a fun texture to your galette. You can also use a sweet biscuit dough. This option gives a different flavor and is easy to make. Each dough can change how your galette tastes. Don't be afraid to experiment! For the complete recipe, check out the Full Recipe. To store leftovers in the fridge, let the peach galette cool down first. Then, wrap it in plastic wrap or place it in an airtight container. This helps keep it fresh. The galette stays good for up to three days in the fridge. When you want to enjoy it again, just take it out and let it sit at room temperature for a bit. You can freeze the unbaked galette if you want to use it later. After you assemble the galette, wrap it tightly in plastic wrap and then in foil. This way, it will not get freezer burn. It can stay frozen for about three months. When you are ready to bake it, take it out and let it thaw in the fridge overnight. To reheat the galette without drying it out, preheat your oven to 350°F (175°C). Place the galette on a baking sheet. Cover it loosely with aluminum foil. This will help keep moisture in. Bake for about 10-15 minutes or until it is warm. Enjoy it as a sweet treat! For the full recipe, check out the Easy Peach Galette. A peach galette is a simple, rustic dessert. It is a type of French pastry. You make it with fresh peaches and pie crust. Unlike a pie, it has no strict shape. The crust folds over the fruit, giving it a charming look. This dessert lets the peaches shine, with their sweet and juicy flavor. Yes, you can use many fruits in a galette! Seasonal fruits work best. Try berries, apples, or pears. You can mix fruits, too. For example, peaches and blueberries go well together. Just adjust the sugar based on the fruit's sweetness. A baked peach galette lasts about 2 to 3 days. Store it in the fridge. Make sure to cover it well. The crust may soften over time, but it will still taste good! You can prepare the galette ahead of time. Make the filling and crust, then store them separately. Keep them in the fridge for up to a day. When you are ready to serve, assemble and bake it fresh. This keeps the crust nice and crispy. You can serve a peach galette warm or cold. Warm is best if you want to enjoy it fresh from the oven. Cold is nice if you prefer a refreshing treat. Pair it with ice cream or whipped cream for extra flavor. In this post, we explored how to make a delicious peach galette using simple ingredients. You learned about key ingredients, substitutions, and step-by-step instructions. We also shared tips for perfecting your crust and different variations to try. Remember, storing your galette properly can keep it fresh longer. Explore new flavors and share it with friends. Enjoy creating this rustic dish as much as I do! Your kitchen will be filled with the sweet aroma of baked peaches.

If you crave a sweet, simple dessert, look no further than an Easy Peach Galette. This rustic French pastry is a breeze to make and bursts with juicy peach flavor. …

Read more

Categories Desserts

Zucchini Noodle Chicken Alfredo Creamy Dinner Delight

July 2, 2025 by Chef Jamie
- 2 medium zucchinis, spiralized into noodles - 2 boneless, skinless chicken breasts - 1 cup heavy cream - 1 tablespoon olive oil - 3 cloves garlic, minced - Salt and pepper to taste - 1 cup grated Parmesan cheese - 1/4 teaspoon nutmeg - Fresh parsley, chopped (for garnish) When I make Zucchini Noodle Chicken Alfredo, I love using fresh ingredients. The zucchini noodles give the dish a light feel, while the chicken adds protein. Heavy cream makes the sauce rich and creamy. The olive oil is key for cooking the chicken perfectly. Garlic brings a wonderful aroma and flavor. Don't forget the salt and pepper! They enhance every bite. Parmesan cheese adds a salty, nutty taste that you cannot skip. A hint of nutmeg gives the sauce depth. Finally, fresh parsley brightens up the dish and adds a pop of color. For the full recipe, check out the detailed steps to create this creamy dinner delight. 1. Grab 2 medium zucchinis. 2. Use a spiralizer to turn them into long, noodle-like strands. 3. Once spiralized, set the noodles aside. 1. Take 2 boneless, skinless chicken breasts. 2. Season them with salt and pepper on both sides. 3. Heat 1 tablespoon of olive oil in a large skillet over medium heat. 4. Add the chicken to the skillet. Cook for 6-7 minutes on each side. 5. Make sure the chicken turns golden brown and is fully cooked. 6. Remove the chicken and let it rest for a few minutes. 7. Slice the chicken into strips once it has cooled. 1. In the same skillet, add 3 minced garlic cloves. 2. Sauté the garlic for about 30 seconds until it smells good. 3. Pour in 1 cup of heavy cream and bring it to a gentle simmer. 4. Stir the cream with the garlic to mix well. 5. Slowly add 1 cup of grated Parmesan cheese. Stir until the cheese melts and the sauce is creamy. 6. Sprinkle in 1/4 teaspoon of nutmeg and mix everything well. 1. Toss the zucchini noodles into the skillet with the Alfredo sauce. 2. Coat the noodles fully in the sauce. 3. Cook the noodles for 2-3 minutes until they are just tender. 4. Add the sliced chicken to the skillet. Mix gently to combine all the ingredients. 5. Taste your dish and adjust seasonings if needed. 6. Serve hot, garnished with fresh chopped parsley. For the complete recipe, refer to the [Full Recipe]. To get the perfect creaminess, use heavy cream. It gives a rich texture. Stir the cream gently over low heat. This helps it blend well with the cheese. If you heat it too fast, it can curdle. To avoid curdling, add the cheese slowly. Keep stirring as you add it. This helps create a smooth sauce. Cook zucchini noodles just right. They need only 2-3 minutes in the sauce. If you cook them too long, they get mushy. To keep their texture, use fresh zucchinis. Spiralize them right before cooking. This way, they stay firm. You can adjust this dish for different diets. If you need a dairy-free option, use coconut cream. It offers a nice flavor. For cheese, nutritional yeast works well for a cheesy taste. If you need a gluten-free option, make sure the chicken and other ingredients are certified gluten-free. Enjoy your meal with these simple swaps! Don’t forget to check the Full Recipe for more details. {{image_2}} You can swap chicken for shrimp or tofu. Shrimp cooks fast, about 3-4 minutes. Just add them in after the garlic. Tofu takes longer. You should sauté it until golden. Cook it for about 8-10 minutes. Adjust your cooking times based on the protein you use. This keeps your meal delicious and safe to eat. Adding fresh herbs and spices can boost taste. Basil, thyme, or oregano work great. You can mix in one teaspoon of dried herbs for depth. Try adding spinach or mushrooms for extra veggies. Sauté them with garlic before adding the cream. Each addition gives a new twist to this dish. For the full recipe, check [Full Recipe]. To store your Zucchini Noodle Chicken Alfredo, let it cool first. Place it in an airtight container. This keeps the flavors fresh. It will last in the fridge for 3 to 4 days. Make sure to check for any signs of spoilage before serving. When reheating, use a skillet over low heat. This helps keep the creamy texture. Stir gently to avoid sticking. You can also use a microwave. Heat in short bursts and stir in between. If you want to freeze it, part the dish into smaller portions. Use freezer-safe containers or bags. It lasts up to 2 months in the freezer. Thaw in the fridge overnight before reheating. Zucchini noodles, or zoodles, are thin strands made from zucchini. You can create them using a spiralizer or a vegetable peeler. They are a great low-carb alternative to pasta. Zucchini noodles are packed with nutrients and are low in calories. They provide fiber, vitamins, and minerals. This makes them a healthy choice for any meal. They soak up sauces well and offer a pleasant crunch. Plus, they are easy to make and can be used in many dishes. Yes, you can make this dish vegan! Instead of chicken, try using tofu or tempeh. For the sauce, swap heavy cream with coconut milk or cashew cream. Nutritional yeast can replace Parmesan cheese for a cheesy flavor. Use plant-based butter or olive oil for cooking. Adding fresh herbs like basil or thyme can enhance the flavor. These swaps create a creamy, tasty vegan version while keeping it delicious. To avoid watery zucchini noodles, start by salting them. After spiralizing, sprinkle salt on the noodles and let them sit for 10 minutes. This helps draw out excess moisture. Pat them dry with a paper towel before cooking. Cooking them briefly in the sauce also helps. Tossing them for just 2-3 minutes allows them to soften without becoming soggy. This way, you'll enjoy a flavorful meal without watery noodles. This blog post showed you how to make a tasty chicken Alfredo with zucchini noodles. We covered the main ingredients and easy steps to prepare the dish. You learned tips for perfect sauce and cooking. We also explored variations and storage options. In conclusion, this dish is fun to make and good for you. Enjoy cooking it your way!

Are you ready to enjoy a creamy, delicious meal that’s good for you? My Zucchini Noodle Chicken Alfredo is a perfect choice! This dish uses fresh zucchini noodles and tender …

Read more

Categories Dinner

Baked Ranch Chicken Simple and Flavorful Delight

July 2, 2025 by Chef Jamie
For a tasty Baked Ranch Chicken, gather these items: - 4 boneless, skinless chicken breasts - 1 packet ranch dressing mix - 1 cup plain Greek yogurt - 1 cup breadcrumbs (panko for extra crunch) - 1 cup shredded cheddar cheese - 1 teaspoon garlic powder - 1 teaspoon onion powder - Salt and pepper to taste - Fresh herbs (parsley or chives) for garnish Each serving of Baked Ranch Chicken has about: - Calories: 350 - Protein: 30g - Fat: 15g - Carbohydrates: 25g - Fiber: 1g This dish gives a good mix of protein and flavor. When you choose chicken, look for bright, pink meat. It should feel firm and moist. For the yogurt, pick a brand that is thick and creamy. Check the expiry date, too. When selecting cheese, fresh is best. Look for blocks instead of pre-shredded cheese for the best taste. Fresh herbs add flavor, so choose vibrant ones with a strong scent. Start by washing your chicken breasts under cold water. Pat them dry with paper towels. This step is key for good texture. You want the chicken to be clean and free of moisture. Next, trim any excess fat you see. This helps with taste and looks. In a large mixing bowl, combine the plain Greek yogurt and the ranch dressing mix. Add garlic powder, onion powder, salt, and pepper. Mix well until it is smooth. This yogurt mixture gives the chicken a tasty flavor. It keeps the chicken moist as it cooks too. Take each chicken breast and dip it into the ranch yogurt mixture. Make sure it is fully covered. Then, roll the chicken in the breadcrumb mix, which has some cheddar cheese mixed in. Place the coated chicken in a greased baking dish. After all the chicken is in the dish, sprinkle the remaining cheese on top. Now, it’s time to bake! Preheat your oven to 400°F (200°C) and bake for 25-30 minutes. Your chicken is ready when it reaches 165°F (75°C) inside. It should look golden and crispy. Let it rest for a few minutes before serving. For a nice touch, add fresh herbs on top. This is part of the Full Recipe you will love. To keep the chicken juicy, you want to coat it well. The ranch yogurt mixture adds moisture. Make sure each piece is fully covered. This layer locks in the juices as it cooks. Avoid overcooking; it can dry out the chicken. Always check the internal temperature. It should reach 165°F (75°C). Bake the chicken at 400°F (200°C) for 25-30 minutes. This temperature gives you a crispy top and tender meat inside. Use a meat thermometer for best results. If your oven has hot spots, rotate the dish halfway through. This helps ensure even cooking. To add more flavor, consider these options: - Mix in herbs like thyme or oregano with the yogurt. - Try using spicy ranch dressing for heat. - Add lemon juice to brighten the taste. - For extra crunch, use crushed cornflakes in the breadcrumb mix. These simple changes can elevate your Baked Ranch Chicken. For the full recipe, see the section above. {{image_2}} You can switch up the cheese in Baked Ranch Chicken. Cheddar is great, but try mozzarella for a milder taste. Pepper jack adds a spicy kick. For a creamy touch, use cream cheese. Each cheese brings a new flavor, making your dish unique. Don't be afraid to mix cheeses, too! If you don’t have Greek yogurt, use sour cream instead. It gives a similar tangy taste. You can also try plain regular yogurt, but it will be a bit thinner. For a dairy-free option, use cashew cream or silken tofu. These options keep the dish creamy and delicious. You can cook Baked Ranch Chicken in different ways. An air fryer gives you a crispy outside and juicy inside. Cook at 380°F for about 20 minutes. Grilling adds a smoky flavor. Grill each chicken breast for about 6-7 minutes per side. Both methods keep the meal fun and tasty! For the complete Baked Ranch Chicken recipe, check out the Full Recipe. To keep your Baked Ranch Chicken fresh, let it cool first. Place leftovers in an airtight container. Store it in the fridge for up to three days. If you want to keep it longer, consider freezing it. Just make sure to wrap it well to avoid freezer burn. When it's time to eat again, reheat the chicken in the oven. Preheat your oven to 350°F (175°C). Place the chicken on a baking sheet. Cover it with foil to keep it moist. Heat for about 15-20 minutes, or until it's warm throughout. This method helps maintain its crispy topping. You can freeze Baked Ranch Chicken for up to three months. Wrap each piece tightly in plastic wrap, then in foil. Label the packages with the date. When you're ready to eat, thaw it in the fridge overnight. Reheat as directed above for the best taste and texture. Yes, you can use frozen chicken breasts. First, thaw them completely. You can do this in the fridge overnight or use the defrost setting on your microwave. Make sure to pat them dry before coating them with the ranch yogurt mixture. This helps the coating stick better. Baked Ranch Chicken pairs well with many sides. Here are some ideas: - Roasted vegetables like carrots or broccoli - A fresh green salad with your favorite dressing - Mashed potatoes or rice for a hearty meal - Garlic bread for a tasty addition These sides help balance the dish and add more flavors. Check the chicken’s internal temperature with a meat thermometer. It should reach 165°F (75°C) to be safe to eat. You can also cut into the thickest part. The meat should be white and juices should run clear, not pink. If you follow these tips, your chicken will be perfectly cooked. This blog post covered everything you need for Baked Ranch Chicken. We discussed the key ingredients, how to prep and cook the chicken, and made sure it stays juicy. I shared tips for flavor and variations to keep it fresh. Finally, I included storage advice to use leftovers wisely. Enjoy this easy and tasty recipe. Feel free to make it your own! Happy cooking!

Are you ready to elevate your dinner routine? Baked Ranch Chicken is both simple and packed with flavor. With just a few quality ingredients, you can create a dish that’s …

Read more

Categories Dinner

Zucchini Tomato Gratin Simple and Flavorful Recipe

July 1, 2025 by Chef Jamie
To make a tasty Zucchini Tomato Gratin, gather these ingredients: - 3 medium zucchinis, thinly sliced - 4 ripe tomatoes, thinly sliced - 1 medium onion, finely chopped - 3 cloves garlic, minced - 1 cup shredded mozzarella cheese - ½ cup grated Parmesan cheese - 1 teaspoon dried oregano - 1 teaspoon fresh basil, chopped (or ½ teaspoon dried basil) - 2 tablespoons olive oil - Salt and pepper to taste - ½ cup breadcrumbs (optional for topping) You will need a few tools to make this dish: - A large skillet for sautéing - A sharp knife for slicing - A cutting board for prep - A baking dish for layering - Aluminum foil for covering while baking - A mixing bowl for cheese When selecting zucchinis and tomatoes, look for these signs: - Choose zucchinis that are firm and smooth. Avoid any with soft spots. - Pick tomatoes that are bright and slightly soft to the touch. - If possible, buy local and seasonal produce for the best flavor. - Fresh herbs should be vibrant and fragrant. Always check for wilting leaves. These steps will help ensure your Zucchini Tomato Gratin is full of flavor. For the full recipe, check below. First, gather your ingredients. You need zucchinis, tomatoes, onion, and garlic. Wash all the vegetables well. Cut the zucchinis and tomatoes into thin slices. I like to use a sharp knife for this. Finely chop the onion and mince the garlic cloves. This step adds great flavor to the dish. Set the veggies aside when you finish. Grab a large baking dish. Start with a layer of zucchini slices at the bottom. This helps absorb juices and keeps the gratin moist. Next, add half of your onion-garlic mixture over the zucchini. Season with salt, pepper, and oregano. Then, add a layer of tomato slices. Repeat this process until all the veggies are used. Make sure to end with a layer of tomatoes on top. This creates a beautiful finish. In a bowl, mix your mozzarella and Parmesan cheese together. Sprinkle half of this cheese over the top layer of tomatoes. If you want a crunchy top, add breadcrumbs mixed with olive oil and any leftover cheese. This gives a great texture contrast. Now, it’s time to bake! Preheat your oven to 375°F (190°C). Cover your baking dish loosely with aluminum foil. Place it in the oven and bake for 25 minutes. After that, remove the foil. Let it bake for another 15 to 20 minutes. You will know it’s ready when the top is golden brown and bubbly. Once done, let the gratin cool for a few minutes. This helps the flavors settle. You can garnish with fresh basil for a pop of color. Enjoy your Zucchini Tomato Gratin! For the complete recipe, check the Full Recipe. For a great cheese melt, use fresh mozzarella. It melts better than pre-shredded cheese. Mix mozzarella with grated Parmesan for richer flavor. Make sure to layer cheese on top of the last tomato slice. This helps the cheese get golden and bubbly. Bake the dish uncovered for the last 15-20 minutes. This will help the cheese crisp up nicely. Seasoning makes a big difference in this dish. Use fresh herbs like basil and oregano for a bright taste. You can also add a pinch of red pepper flakes for heat. Try sprinkling some smoked paprika for a deeper flavor. Don't forget to taste and adjust salt and pepper. A little extra seasoning can take the dish to the next level. One common mistake is overcooking the vegetables. Zucchini can become mushy if you bake it too long. Another mistake is not layering properly. Make sure to alternate zucchini and tomato for even cooking. Also, avoid using too much cheese on the bottom. This can cause sogginess. Lastly, ensure the oven is preheated. A hot oven helps cook the dish evenly. For more details, check the Full Recipe. {{image_2}} You can easily swap ingredients to fit your diet. If you are gluten-free, use gluten-free breadcrumbs or skip the topping. For dairy-free options, try plant-based cheese instead of mozzarella and Parmesan. You can also use olive oil to replace butter for a vegan version. This dish stays tasty with these swaps. Different cheeses can change the taste of your gratin. Try goat cheese or feta for a tangy kick. If you want a sharper flavor, use aged cheddar or Gruyère cheese. Mixing cheeses adds depth and keeps your dish exciting. Experiment with what you have on hand for unique flavors. To make your gratin more filling, add proteins or grains. Cooked quinoa or rice can be layered with the vegetables. You could also add cooked chicken or sausage for extra protein. These additions make it a full meal. Adjust the baking time slightly if you add more ingredients. Check the gratin for doneness and enjoy every bite! For the complete recipe, see the Full Recipe section. To keep your zucchini tomato gratin fresh, let it cool. After it cools, cover it tightly with plastic wrap or transfer it to an airtight container. Store it in the fridge. It will stay good for about three to five days. When you want to enjoy your leftovers, preheat your oven to 350°F (175°C). Place the gratin in an oven-safe dish. Cover it with foil to keep it moist. Heat it for about 20 minutes. Check if it’s hot all the way through. If you want a crispy top, remove the foil for the last five minutes. If you want to keep the gratin longer, freezing is a great option. First, let it cool completely. Cut it into portions for easy use later. Wrap each piece in plastic wrap, then place them in a freezer bag. Squeeze out the air before sealing. Your gratin can last up to three months in the freezer. To reheat, thaw it in the fridge overnight before baking. Enjoy the full recipe for more tips! You can pair Zucchini Tomato Gratin with many dishes. A fresh side salad works well. Try a simple green salad with vinaigrette. Grilled chicken or fish also complements this dish. For a heartier meal, serve it with crusty bread. This adds a nice crunch to your meal. Yes, you can prepare Zucchini Tomato Gratin ahead. Just follow the recipe up to the baking step. Cover the dish tightly with foil or plastic wrap. Store it in the fridge for up to a day. When ready, bake it straight from the fridge. You may need to add a few extra minutes to the bake time. Absolutely! Zucchini Tomato Gratin is a vegetarian delight. This dish contains only fresh vegetables and cheese. It is a great way to enjoy seasonal produce without meat. Vegetarians will love the flavor and texture of this meal. To serve more people, simply double the ingredients. Use a larger baking dish to fit everything. Keep the same baking time, but check for doneness. If it looks undercooked, add a few extra minutes. For a crowd, this dish is both filling and tasty. You can find the Full Recipe for all the details. Zucchini Tomato Gratin is easy and fun to make. We covered the key ingredients and tools needed. Prepping veggies right leads to great taste. Layering the ingredients maximizes flavor, and baking them just right finishes the dish. Use tips to avoid common mistakes and achieve the perfect cheese melt. Feel free to swap out ingredients to fit your diet or add protein. Store any leftovers properly to enjoy them later. This dish is great for any meal, and it suits vegetarians too. Now, it’s your turn to try this recipe and enjoy a tasty gratin!

Are you ready to enjoy a fresh twist on comfort food? My Zucchini Tomato Gratin is both simple and flavorful. This dish combines tender zucchini and juicy tomatoes, topped with …

Read more

Categories Dinner

Zucchini Squares Flavorful and Easy Recipe Guide

July 1, 2025 by Chef Jamie
To make zucchini squares, gather these ingredients: - 2 medium zucchinis, grated - 1 cup all-purpose flour - 1 teaspoon baking powder - 1/2 teaspoon baking soda - 1 teaspoon garlic powder - 1/2 teaspoon salt - 1/4 teaspoon black pepper - 2 large eggs - 1/2 cup Greek yogurt - 1/2 cup shredded mozzarella cheese - 1/4 cup grated Parmesan cheese - 1/4 cup fresh parsley, chopped - Olive oil for greasing Each ingredient plays a key role in the flavor and texture of your zucchini squares. - Zucchini: This is the star of the dish. It adds moisture and a subtle taste. - All-purpose flour: This binds the ingredients and gives structure to the squares. - Baking powder and baking soda: These leavening agents make the squares light and fluffy. - Garlic powder: It adds a nice savory flavor that complements the zucchini. - Eggs: These bind everything together and add richness. - Greek yogurt: This keeps the squares moist and adds a slight tang. - Cheeses: Mozzarella gives creaminess, while Parmesan adds a sharp bite. - Parsley: This adds freshness and a pop of color. You can easily swap some ingredients based on what you have: - Zucchini: Try yellow squash or carrot if you’re out of zucchini. - All-purpose flour: Use whole wheat flour or almond flour for a different taste. - Greek yogurt: Sour cream or cottage cheese works well as a substitute. - Mozzarella cheese: Cheddar or feta can add a unique twist. - Eggs: Use a flax egg (1 tablespoon ground flaxseed + 2.5 tablespoons water) for a vegan option. The full recipe will guide you through making these delightful zucchini squares. To start, gather all your ingredients. You will need grated zucchini, flour, and eggs. First, preheat your oven to 375°F (190°C). Grease an 8x8 inch baking dish with olive oil. In a large bowl, mix the grated zucchini with a pinch of salt. Let it sit for 10 minutes. This step pulls out extra moisture. After 10 minutes, take a clean kitchen towel. Squeeze the zucchini to remove more liquid. Return it to the bowl. In another bowl, whisk together flour, baking powder, baking soda, garlic powder, salt, and black pepper. Then, in a third bowl, beat the eggs. Mix in Greek yogurt until smooth. Now, combine the wet and dry ingredients. Stir gently until blended. Be careful not to overmix. Fold in the drained zucchini, mozzarella, Parmesan, and parsley. Make sure everything is evenly mixed. Pour your batter into the greased dish. Spread it out evenly. Bake in the preheated oven for 25 to 30 minutes. The edges should turn golden brown during this time. To check if your zucchini squares are done, insert a toothpick in the center. If it comes out clean, they are ready. Let the squares cool for 5 minutes before cutting. This wait helps them set. Cut them into squares and serve warm or at room temperature. For a pretty touch, garnish with parsley or a sprinkle of cheese. For the full recipe, check out the [Full Recipe]. To cook zucchini well for baking, start with fresh, firm zucchinis. Wash them thoroughly and dry them. Grate the zucchinis using a box grater. I always squeeze out the extra water. This prevents the batter from becoming too wet. A clean kitchen towel works great for this. You want the zucchini to mix well without making the dough soggy. Store any leftover zucchini squares in an airtight container. They will keep well in the fridge for about three days. To reheat, place them in a preheated oven at 350°F (175°C) for about 10 minutes. This keeps them crispy. You can also use a microwave for quick reheating, but they may become softer. One common mistake is not squeezing enough moisture from the zucchini. This can make your squares soggy. Another mistake is overmixing the batter. Mix just until combined for the best texture. Lastly, don’t skip greasing the pan. This helps the squares come out easily after baking. Check out the Full Recipe for more tips and enjoy your cooking journey! {{image_2}} You can mix up your savory zucchini squares in many ways. Try adding cooked bacon or sausage for a meaty kick. You might also fold in some chopped sun-dried tomatoes or olives. Want more herbs? Add fresh basil or thyme for a bright flavor. For a spicy touch, sprinkle in some red pepper flakes. Each twist can change the taste and make your dish unique. If you have a sweet tooth, zucchini squares can also be a treat. Swap out some flour for oats or almond flour. Add brown sugar or honey for sweetness. You can even mix in some chocolate chips or nuts for extra crunch. A dash of cinnamon or vanilla extract can give your zucchini squares a cozy flavor. These sweet options can make a fun dessert or snack. For those needing gluten-free options, you can use almond or coconut flour instead of regular flour. Instead of eggs, try applesauce or mashed banana as a binder. Use plant-based yogurt to keep it vegan. This way, you can enjoy delicious squares that fit your diet. These alternatives keep the recipe tasty and satisfying for everyone. You can find the full recipe for savory zucchini squares [here](#). To keep your zucchini squares fresh, store them in an airtight container. Let them cool fully before placing them inside. I find that keeping them at room temperature for a few hours is fine. If you need to store them for longer, the fridge is best. Just wrap them in plastic wrap or foil to avoid drying out. Zucchini squares can last up to three days in the fridge. After that, they may lose their texture. Always check for any signs of spoilage before eating. If you notice an off smell or mold, it’s best to toss them. You can freeze zucchini squares for up to three months. First, let them cool completely. Next, cut them into squares. Wrap each square tightly in plastic wrap. Then, place them in a freezer bag or container. Be sure to label the bag with the date. To reheat, simply thaw in the fridge overnight and warm in the oven or microwave. This way, you can enjoy your delicious zucchini squares anytime! For the full recipe, check out the [Full Recipe]. Zucchini squares are a tasty and easy dish. They are made from grated zucchini, flour, and cheese. You mix these ingredients to form a batter and bake it. The result is a savory snack or side dish. They are soft and have a slight crunch. They are perfect for lunchboxes or as a party appetizer. Yes, you can make zucchini squares ahead of time. You can bake them, cool them, and store them. Place them in an airtight container in the fridge. They will stay fresh for up to three days. You can also freeze them for up to a month. Just thaw them before warming. This makes meal prep easier and saves time. To avoid soggy zucchini squares, follow a few tips. First, salt the grated zucchini and let it sit for ten minutes. This draws out excess moisture. Squeeze the zucchini in a clean towel to remove more liquid. Use the right amount of flour to balance moisture. Lastly, do not overmix the batter; this keeps the texture light. Following these steps will give you perfect, fluffy squares. Zucchini squares are tasty and easy to make. We covered key ingredients, step-by-step instructions, and helpful tips. You can even try different variations, like savory or sweet. Proper storage will keep your zucchini squares fresh. Remember, avoid common mistakes to get the best results. Enjoy making these delicious treats in your kitchen!

Want to impress your family and friends with a delicious dish? Zucchini squares are a fun and easy way to enjoy this versatile veggie! In this guide, I’ll walk you …

Read more

Categories Appetizers

Tasty Banana Zucchini Muffins Easy and Healthy Recipe

July 1, 2025 by Chef Jamie
To make tasty banana zucchini muffins, you need: - 1 cup ripe bananas, mashed (about 2 medium bananas) - 1 cup grated zucchini (excess moisture squeezed out) - 1/3 cup vegetable oil or melted coconut oil - 1/2 cup brown sugar - 1/4 cup granulated sugar - 2 large eggs - 1 teaspoon vanilla extract - 1 teaspoon baking soda - 1/2 teaspoon baking powder - 1/2 teaspoon salt - 1 teaspoon ground cinnamon - 1 1/2 cups all-purpose flour These ingredients create a moist and sweet muffin. Ripe bananas add natural sweetness. Grated zucchini gives a soft texture without altering the taste. You can make your muffins even better with these options: - 1/2 cup chopped walnuts - 1/2 cup chocolate chips - Spices like nutmeg or ginger Add walnuts for crunch or chocolate chips for sweetness. Using spices can enhance flavor, making the muffins more exciting. Here’s what you’ll need to bake these muffins: - Muffin tin - Mixing bowls - Whisk and spatula Having these tools ready makes the process smooth. A muffin tin shapes the muffins nicely, while mixing bowls help combine ingredients well. A whisk and spatula are great for mixing and folding in add-ins. Start by preheating your oven to 350°F (175°C). This step gets the oven ready for baking. While it heats, prepare your muffin tin. You can either grease it with cooking spray or line it with paper liners. Lining makes for easy clean-up and helps muffins pop out easily. In a large bowl, combine the mashed bananas and grated zucchini. Mix them together until they are well blended. Then add the oil, brown sugar, granulated sugar, eggs, and vanilla extract. Blend these wet ingredients until smooth and creamy. In a separate bowl, whisk together the dry ingredients. This includes baking soda, baking powder, salt, ground cinnamon, and flour. Make sure they are mixed well. Gradually add the dry mix to the wet mix. Stir gently to combine everything. Be careful not to overmix; this keeps your muffins soft. Now it’s time to fill your muffin tins. Use a spoon or a scoop to portion the batter into the prepared cups. Fill each cup about 3/4 full. This gives the muffins room to rise without overflowing. Bake your muffins in the preheated oven for 20-25 minutes. To check if they are done, insert a toothpick into the center of a muffin. If it comes out clean, they are ready! Let the muffins cool in the tin for about 5 minutes. Then move them to a wire rack to cool completely. This helps keep them from getting soggy. For the full recipe, check out the complete guide. To get the best texture in your muffins, avoid overmixing. Mix the wet and dry ingredients until just combined. Overmixing can make the muffins tough. When measuring flour, use the spoon-and-level method. Spoon flour into the measuring cup, then level it off with a knife. This method helps you avoid using too much flour. Too much flour can lead to dry muffins. You can enhance the flavor of your muffins with spices. Adding a pinch of nutmeg or ginger can make a big difference. These spices pair well with the zucchini and bananas. Using ripe bananas is key for great flavor. The riper the bananas, the sweeter they are. Look for bananas with brown spots. They will add natural sweetness to your muffins. You can easily make your muffins healthier. Try substituting half the oil with unsweetened applesauce. This swap cuts down on fat while keeping them moist. Reducing sugar is also simple. You can cut the brown sugar by a third without losing taste. This change makes the muffins lighter while keeping them tasty. For the full recipe, check the earlier section. Enjoy making your banana zucchini muffins! {{image_2}} You can change the taste of banana zucchini muffins in fun ways. One great idea is to add fruits like blueberries. Blueberries add a sweet burst, making each bite exciting. You can also mix in dried fruits. Try raisins or cranberries for added texture and sweetness. These changes keep your muffins fresh and new! If you need gluten-free muffins, it’s easy! Simply swap all-purpose flour for gluten-free flour. Make sure to check the flour’s label for baking tips. For vegan muffins, you can replace eggs with applesauce or flaxseed meal. Use plant-based oil instead of regular oil. These swaps help you enjoy tasty muffins no matter your diet! Pair your banana zucchini muffins with drinks for a yummy snack. Coffee or tea works perfectly. You can also spread a little butter or cream cheese on top. For a fun twist, serve muffins with yogurt and fresh fruit. These ideas make your muffins even more enjoyable! To keep your banana zucchini muffins fresh, store them in a cool, dry place. Use an airtight container to prevent moisture. You can also wrap them in plastic wrap for extra protection. This will keep them soft and tasty for days. A glass container or a plastic bin works well for storage. Freezing your muffins is simple and a great way to save them for later. First, let the muffins cool completely. Then, place them in a single layer on a baking sheet. Freeze them for about an hour. After that, transfer the muffins to a freezer bag or container. Remove as much air as you can to prevent freezer burn. When you want to eat a muffin, just take it out. Thaw it at room temperature for a few hours. If you want it warm, you can heat it in the oven at 350°F for about 10 minutes. At room temperature, banana zucchini muffins last about 3-5 days. If you store them properly, they can stay fresh longer. Look for signs of spoilage like mold or a sour smell. If you see any of these, it's best to toss them. For longer freshness, freezing is a great option. For more detailed instructions on making these muffins, check the Full Recipe. Yes, you can use frozen bananas. Just thaw them first. Frozen bananas work well because they become very soft. This makes them easy to mash. Using frozen bananas can save you time if you have them on hand. Remember to drain any extra liquid before mixing. This helps keep your muffins from getting too wet. To make moist muffins, focus on the ingredients and mixing. Use ripe bananas; they add natural sweetness and moisture. You can also use extra grated zucchini. Make sure to squeeze out some moisture, but not all. Adding a bit more oil can help too. Mixing gently is key. Overmixing can make muffins dry. If you want to make these muffins vegan, there are great egg substitutes. You can use 1/4 cup of applesauce for each egg. Another option is to use 1 tablespoon of ground flaxseed mixed with 2.5 tablespoons of water. Let this sit for five minutes to thicken. Both options work well and keep the muffins nice and fluffy. For the full recipe, check out the section above. In this blog post, we explored how to make delicious banana zucchini muffins. We covered the main ingredients, optional add-ins, and necessary kitchen tools. You learned step-by-step instructions for mixing and baking, plus tips for the perfect texture and flavor. Feel free to customize your muffins with variations and serve them creatively. Don’t forget to store them properly for lasting freshness. Enjoy making these healthy and tasty treats!

Looking for a delicious and healthy snack? These Tasty Banana Zucchini Muffins are the answer! Packed with ripe bananas and grated zucchini, they pack in flavor and nutrients. Whether you …

Read more

Categories Desserts

Zucchini Frittata Simple and Delicious Recipe

July 1, 2025 by Chef Jamie
To make a tasty zucchini frittata, you need fresh and simple ingredients. Here’s what you’ll need: - 4 large eggs - 1 medium zucchini, grated - 1/2 cup cherry tomatoes, halved - 1/4 cup feta cheese, crumbled - 2 tablespoons fresh basil, chopped - 1/4 cup onion, finely chopped - 2 tablespoons olive oil - Salt and pepper to taste - 1/4 teaspoon red pepper flakes (optional for a kick) Each ingredient plays a key role in adding flavor and texture. The eggs form the base, while zucchini brings freshness. Cherry tomatoes add sweetness, and feta cheese gives a nice tang. Fresh basil lifts the dish with its aroma. Onion adds depth, and olive oil helps to cook everything smoothly. You can find the full recipe for this delightful dish in the section above. Enjoy the process! 1. Preheat the oven to 375°F (190°C). This helps the frittata cook evenly. 2. Heat two tablespoons of olive oil in a large oven-safe skillet over medium heat. The oil keeps the frittata from sticking. 1. Sauté 1/4 cup of onion until it turns translucent. This takes about 3-4 minutes. 2. Add 1 medium grated zucchini to the pan. Cook until it softens, about 2-3 minutes. 3. Stir in 1/2 cup of halved cherry tomatoes. Let them cook for one more minute. 4. In a mixing bowl, whisk together 4 large eggs, salt, pepper, and 1/4 teaspoon red pepper flakes if you want some heat. 5. Pour the egg mixture over the veggies in the skillet. Stir gently to mix. 6. Sprinkle 1/4 cup of crumbled feta cheese and 2 tablespoons of chopped basil on top. 7. Cook on the stove for 2-3 minutes until the edges begin to set. 8. Transfer the skillet to the preheated oven. Bake for 15-20 minutes until the frittata is fully set and golden on top. For more details, you can follow the Full Recipe. To make the best zucchini frittata, start with fresh ingredients. Fresh eggs and ripe zucchini give great taste. You can also pick local produce for more flavor. Adjust the seasoning to fit your taste. If you love garlic, add minced garlic when you sauté the onions. Prefer a spicy kick? Toss in more red pepper flakes or hot sauce. Cooking is about making it yours. This frittata shines when served warm or at room temperature. You can slice it into wedges for easy serving. To create a full meal, pair it with mixed greens. A simple salad with olive oil and lemon juice works well. You can even add a few nuts for crunch. Want more? Try serving it with crusty bread or a light dip. Enjoy the balance of flavors and textures! {{image_2}} You can easily change the flavors in your frittata. For instance, if you don’t have feta cheese, you can use goat cheese or cheddar instead. Both options add a nice creaminess and taste. You can also switch up the veggies. Try adding bell peppers or spinach for more color and nutrients. Other great options include mushrooms or kale. Each vegetable brings a new twist to the dish. Want to kick up the taste? Adding herbs can make a big difference. Try using thyme or oregano to deepen the flavor of your frittata. Fresh herbs will brighten the dish and make it even more enjoyable. If you like some heat, add a dash of hot sauce. It will give your frittata a spicy kick. Adjust the amount to suit your taste. Enjoy experimenting! You can keep leftover frittata in an airtight container in the refrigerator. It stays fresh for up to 3 days. Make sure to let it cool completely before putting it away. This helps keep it tasty and safe to eat. When you're ready to enjoy your frittata again, you have a couple of options. You can reheat it in the oven or the microwave. If you use the oven, set it to a low heat until it's warmed through. For the microwave, heat it for 30 seconds at a time, checking often. Enjoy your frittata warm, just like when it was fresh! Can I make a zucchini frittata ahead of time? Yes, you can make a zucchini frittata ahead of time. Just cook it as directed, then let it cool. Store it in the fridge in an airtight container. You can eat it warm or cold. It tastes great either way! How do I know if the frittata is fully cooked? To check if your frittata is fully cooked, look for a golden top. The edges should be set, and the center will be firm. You can also insert a knife into the center. If it comes out clean, it’s done! What can I substitute for eggs in a frittata? You can use tofu or chickpea flour as an egg substitute. Both options work well. For tofu, blend it until smooth. For chickpea flour, mix it with water to create a batter. These substitutes will still give you a tasty dish! What to do if the frittata becomes soggy? If your frittata is soggy, it may have too much moisture. Make sure to drain any excess water from the zucchini before cooking. You can also cook it a bit longer in the oven. This will help to firm it up. How to achieve a fluffy texture in the frittata. To get a fluffy texture, whisk the eggs well before adding them to the pan. Incorporate air into the eggs while you whisk. Also, cook on medium-low heat. This will help the frittata rise and stay light. This blog post covered how to make a tasty zucchini frittata. We discussed the simple ingredients, preparation, and cooking steps. You learned tips for perfecting your dish and ideas for variations. We also covered how to store leftovers and answered common questions. In the end, this frittata is easy and fun to make. Use fresh ingredients and enjoy your delicious meal. Don't hesitate to try your own twists on this recipe!

Do you want a quick, tasty meal? This Zucchini Frittata is simple and delicious! With just a handful of fresh ingredients, you can whip up a dish that’s perfect for …

Read more

Categories Breakfast

Healthy Zucchini Muffins Delicious and Easy Recipe

July 1, 2025 by Chef Jamie
To make healthy zucchini muffins, you need these key items: - 1 cup grated zucchini (about 1 medium zucchini) - 1 cup whole wheat flour - 1/2 cup rolled oats These ingredients form the base of your muffins. Grated zucchini keeps them moist. Whole wheat flour adds fiber and nutrients. Rolled oats give a nice texture and extra health benefits. You can enhance your muffins with these tasty options: - 1/2 cup chopped walnuts or pecans - 1/2 cup dark chocolate chips Adding nuts gives a nice crunch. Dark chocolate chips bring a hint of sweetness. Both options make the muffins more fun to eat! You can swap some ingredients for healthier choices: - Use honey or maple syrup for sweetness. - Unsweetened applesauce can replace some oil. Honey gives a rich flavor while maple syrup adds a unique touch. Applesauce helps cut down on fat. These swaps keep your muffins tasty and healthy. For the full recipe, check out the complete guide! 1. Preheating the oven: Start by preheating your oven to 350°F (175°C). This ensures even cooking. A hot oven helps the muffins rise nicely. 2. Preparing the muffin tin: Line a muffin tin with paper liners or grease it with cooking spray. This prevents sticking and makes cleanup easy. 1. Combining zucchini mixture: In a large bowl, blend the grated zucchini, honey (or maple syrup), applesauce, eggs, and melted coconut oil. Mix until it's smooth. This mix adds moisture and flavor to your muffins. 2. Whisking dry ingredients: In another bowl, whisk together whole wheat flour, rolled oats, baking powder, baking soda, salt, and ground cinnamon. This mix gives structure to the muffins. 1. Filling muffin tins: Gradually add the dry mix to the wet mixture. Stir gently until just combined. Be careful not to overmix. Then, divide the batter evenly among the muffin cups, filling them about two-thirds full. 2. Determining baking time: Place the filled muffin tin in the oven. Bake for 18-20 minutes. Check for doneness by inserting a toothpick into the center. If it comes out clean, your muffins are ready! To keep your muffins moist, never overmix the batter. Overmixing makes muffins dense and dry. Mix just until you see no dry flour. Using fresh zucchini is key. Fresh zucchini has more moisture. Grate it right before using for the best results. Spices can elevate your muffins. Ground cinnamon is a great start. You might also try nutmeg or ginger for added warmth. Adding citrus zest can brighten the flavors. A teaspoon of lemon or orange zest works wonders in this recipe. If your muffins don’t rise, check your baking powder and soda. They should be fresh and active. If your muffins turn out dry, you can try adding more applesauce or zucchini next time. This will help add moisture. You can also reduce the baking time slightly for a softer texture. For the complete guide, don’t forget to check the Full Recipe. {{image_2}} You can make these muffins gluten-free! Use flours like almond flour or coconut flour. These options work well. You may need to adjust the baking time too. Gluten-free flours may make the muffins bake faster. Check them after 15 minutes to avoid overbaking. Want a vegan version? You can substitute eggs with flaxseed meal. Mix one tablespoon of flaxseed meal with three tablespoons of water. Let it sit for five minutes to thicken. For a dairy-free option, use almond milk instead of regular milk. This keeps the muffins moist and tasty. Feel free to get creative! You can add fruits like blueberries or bananas for added sweetness. These fruits blend well with zucchini. Experimenting with nut butter adds a nice twist too. Try almond or peanut butter for a richer flavor. This keeps your muffins fun and fresh! To keep your healthy zucchini muffins fresh, store them in an airtight container. This helps maintain their moisture and flavor. You can keep the muffins at room temperature for up to a week. If you want them to last longer, freezing is a great option. Just wrap each muffin in plastic wrap and place them in a freezer bag. They will stay good for about three months in the freezer. When you want to enjoy your muffins again, reheating is easy. The best way is to use a microwave. Heat for about 10 to 15 seconds for each muffin. You can also use an oven. Preheat it to 350°F (175°C) and warm the muffins for about 5 to 10 minutes. After reheating, I suggest serving them warm with a drizzle of honey or a dollop of Greek yogurt. This makes them taste fresh and delicious! These muffins stay fresh for about a week when stored properly. You know they are spoiled if you see mold or if they smell off. Always check before eating. Keeping an eye on them will help you enjoy your healthy zucchini muffins at their best! Yes, you can use regular flour. However, whole wheat flour is more nutritious. It has more fiber, which helps digestion. Regular flour has less nutrition and can make the muffins less filling. If you want a lighter muffin, use regular flour, but you may lose some health benefits. If you need an egg substitute, try using applesauce or mashed banana. Both work well to bind the muffins. You can also use flaxseed meal mixed with water. Just mix 1 tablespoon of flaxseed with 2.5 tablespoons of water. Let it sit for a few minutes before adding it to the batter. This will help create the right texture. Yes, this recipe is great for kids! It has healthy ingredients like zucchini and oats. These provide vitamins, minerals, and energy. The muffins taste sweet, so kids enjoy them. Plus, they can help you make them, which makes cooking fun! In this post, we covered how to make healthy zucchini muffins. You learned about essential ingredients, optional add-ins, and healthy swaps. We discussed step-by-step instructions for making the batter and baking. You now have tips for moist muffins and troubleshooting common issues. We also explored gluten-free and vegan options. Finally, you know how to store and reheat your muffins. Enjoy baking these delicious muffins with your favorite flavors! Have fun experimenting and sharing them with friends and family. They’ll love your healthy treats!

Are you ready to bake delicious and healthy zucchini muffins? This easy recipe combines fresh zucchini with whole wheat flour for a tasty treat you can feel good about! Packed …

Read more

Categories Breakfast

Zucchini Tomato Casserole Flavorful and Simple Dish

July 1, 2025 by Chef Jamie
- 3 medium zucchinis - 4 large tomatoes - 1 large onion - 2 cloves garlic - 1 cup mozzarella cheese - 1/2 cup Parmesan cheese - 1/4 cup fresh basil - 1 teaspoon dried oregano - 1 teaspoon salt - 1/2 teaspoon black pepper - 1 tablespoon olive oil - 1 cup breadcrumbs - Fresh basil leaves - Additional cheese types - Casserole dish - Skillet - Measuring cups and spoons Having the right ingredients is key to making a great Zucchini Tomato Casserole. I use fresh zucchinis and tomatoes for the best taste. Fresh herbs make a big difference, too. I like to chop a good amount of basil. It adds a burst of flavor. You need a big onion and garlic to enhance the dish. The mozzarella and Parmesan cheese melt together, creating a rich and creamy layer. Breadcrumbs on top give it a nice crunch. For tools, a casserole dish holds the layers well. A skillet helps to cook the veggies before baking. Measuring cups and spoons ensure you get the right amounts for a perfect dish. If you want to make it your own, add garnishes like more basil or different types of cheese. These small changes can make your casserole unique. Check out the Full Recipe for more details on how to prepare this dish! Start by slicing the zucchinis into thin rounds. This helps them cook evenly. Next, chop the tomatoes into chunks. A mix of juicy and firm tomatoes adds great flavor. Dice the onion into small pieces, then mince the garlic. Each of these ingredients boosts the taste of the dish. In a large skillet, pour in the olive oil and heat it over medium heat. Add the diced onion and minced garlic. Sauté until the onion looks clear, about 3-4 minutes. This step builds a tasty base. Now, add the sliced zucchinis and cook for 5-7 minutes. They should soften a bit. Next, stir in the chopped tomatoes, salt, pepper, and oregano. Let this mix simmer for another 5 minutes. The flavors will blend nicely. Grab a casserole dish and start layering. Place half of the zucchini-tomato mix at the bottom. Sprinkle half of the mozzarella cheese over the vegetables. Then, add half of the breadcrumbs, followed by half of the Parmesan cheese. Repeat these layers with the remaining mix and cheeses. This creates a yummy, cheesy casserole. Cover the dish with aluminum foil to keep moisture in while baking. Preheat your oven to 375°F (190°C). Bake the covered casserole for 25 minutes. After this, take off the foil and bake for another 15 minutes. This gives the top a golden brown color. For the best results, keep an eye on it. Once it’s bubbly and brown, remove it from the oven. Let it cool for a few minutes before serving. Top with fresh basil for extra flavor. Enjoy this simple and tasty dish! Find the full recipe in the previous section. To make your zucchini tomato casserole shine, start with fresh ingredients. Fresh zucchini and ripe tomatoes bring out the best taste. They add color, aroma, and a sweet flavor that canned or frozen ones can't match. When seasoning, use salt and pepper wisely. Start with a little, then taste. This helps you find the right balance. Don't forget herbs! Fresh basil and oregano elevate the dish. Add them during cooking for a deep flavor. Soggy bottoms can ruin your dish. To avoid this, make sure to sauté the zucchini until it's slightly soft, but not mushy. This helps remove excess moisture. Balancing cheese and breadcrumbs is key too. Use a mix of mozzarella and Parmesan for creaminess and flavor. Sprinkle enough breadcrumbs on top to create a nice crust. This gives a crunchy bite that contrasts with the soft veggies. Pair your casserole with a simple side salad. A crisp green salad complements the rich flavors. You can also serve it with crusty bread to soak up the sauce. For wine, a light red like Pinot Noir works well. It enhances the dish without overpowering it. Enjoy your meal with friends, and watch them smile! {{image_2}} You can make this casserole your own by trying different veggies. For a rich flavor, add eggplant or bell peppers. They cook well and add texture. You can also substitute spinach or kale for a leafy twist. These greens will bring a fresh, vibrant taste. Cheese plays a big role in this dish. You can use feta or goat cheese for a tangy kick. These cheeses melt nicely and give a new taste. If you want a dairy-free option, try plant-based cheese. It works well and keeps the dish creamy. To spice things up, try cayenne or red pepper flakes. These spices will add heat and excitement. You can also adjust herbs like thyme and rosemary. These herbs boost the flavor and aroma of the dish. Experiment to find your favorite blend. To keep your Zucchini Tomato Casserole fresh, follow these steps. First, let the casserole cool to room temperature. Then, cover it tightly with plastic wrap or aluminum foil. This helps prevent moisture loss and keeps flavors intact. Store it in the fridge for up to three days. Freezing is a great way to enjoy this dish later. Allow the casserole to cool completely. Then, cut it into portions. Wrap each portion in plastic wrap, then place them in a freezer-safe bag. Make sure to remove as much air as possible. You can freeze it for up to three months. When you're ready to eat, thaw it in the fridge overnight. Reheat in the oven at 350°F (175°C) for about 20-25 minutes. Cover it with foil to keep it moist. If you want a crispy top, remove the foil for the last few minutes. Enjoy every bite! Yes, you can prepare this dish in advance. Just cook the vegetables and layer them in the dish. Cover it tightly and store it in the fridge. This way, you save time on busy days. When you are ready, just bake it straight from the fridge. Zucchini Tomato Casserole is quite healthy. Zucchini is low in calories and high in fiber. Tomatoes are packed with vitamins and antioxidants. The dish also includes fresh herbs and garlic, which add flavor and health benefits. Together, these ingredients make a nutritious meal. To keep the casserole firm, use fresh vegetables. Avoid overcooking them before baking. You can also sprinkle breadcrumbs on top to absorb moisture. Baking it uncovered for part of the time helps it stay crisp. Yes, canned tomatoes work well in this dish. They save time and still add flavor. Make sure to drain excess liquid to avoid sogginess. Choose diced or crushed tomatoes for the best results. This casserole pairs nicely with a green salad or crusty bread. You can also serve it with grilled chicken or fish for protein. For a light meal, enjoy it with a side of steamed vegetables. You can find the full recipe for Zesty Zucchini Tomato Casserole in the Full Recipe section. This blog covered how to make a delicious Zucchini Tomato Casserole. You learned about the fresh ingredients, cooking steps, and tips for great flavor. Don't hesitate to try variations with different veggies or cheeses. Store leftover casserole correctly to enjoy it later. Cooking with fresh ingredients makes a big difference. Enjoy your cooking adventures, and remember to share your tasty results!

Are you ready for a simple, tasty dish that highlights summer’s finest produce? My Zucchini Tomato Casserole is just what you need! With fresh zucchini, juicy tomatoes, and gooey cheese, …

Read more

Categories Dinner
Older posts
Newer posts
← Previous Page1 … Page81 Page82 Page83 … Page126 Next →

TOSSED RECIPES

Simple meals, bold taste. Quick recipes made for real life — always fresh, always delicious. 🌿🍴

PAGES

Home About Contact Privacy Policy Terms & Conditions Cookie Policy GDPR Policy Copyright Policy Disclaimer

CATEGORIES

Appetizers Desserts Salads Breakfast Dinner

Contact

  • Pinterest
  • Mail
Copyright © 2025 Tossed Recipes. All rights reserved.