Easy No-Breading Air Fryer Parmesan Zucchini Recipe

Are you looking for a quick and tasty veggie dish? This Easy No-Breading Air Fryer Parmesan Zucchini Recipe is just what you need! With just a few simple ingredients, you’ll …
Are you looking for a quick and tasty veggie dish? This Easy No-Breading Air Fryer Parmesan Zucchini Recipe is just what you need! With just a few simple ingredients, you’ll …
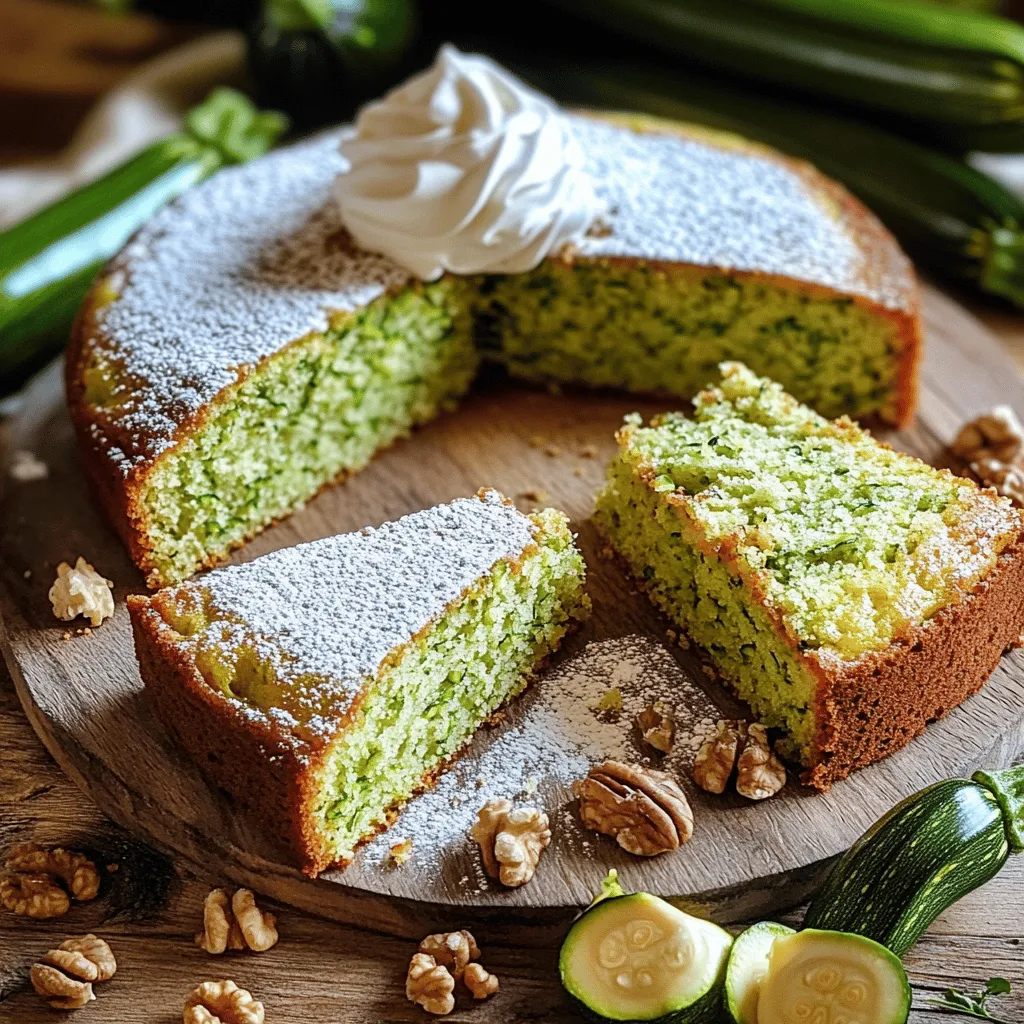
Are you ready to bake something truly delightful? This Zucchini Crazy Cake is super easy and packed with flavor. With just a few simple ingredients, you can create a moist …
![To make these Chocolate Zucchini Banana Bread Muffins, gather these key ingredients: - 1 cup zucchini, grated (about 1 medium zucchini) - 1 cup ripe bananas, mashed (about 2 large bananas) - 1/2 cup unsweetened cocoa powder - 1/2 cup granulated sugar - 1/4 cup brown sugar, packed - 1/2 cup vegetable oil - 2 large eggs - 1 teaspoon vanilla extract - 1 cup all-purpose flour - 1 teaspoon baking soda - 1/2 teaspoon baking powder - 1/4 teaspoon salt - 1/2 cup chocolate chips (semisweet or dark) You can customize these muffins by adding: - 1/4 cup nuts (walnuts or pecans), chopped - A pinch of cinnamon for warmth - Dried fruit like raisins or cranberries for sweetness One muffin has about: - Calories: 180 - Protein: 3g - Carbohydrates: 25g - Total Fat: 8g - Saturated Fat: 1g - Fiber: 2g - Sugars: 10g These muffins are a tasty treat, and with nutritious zucchini and bananas, they pack a flavor punch. They are perfect for breakfast or a snack! For the full recipe, check the earlier section. First, you need to preheat your oven. Set it to 350°F (175°C). Next, grab a muffin tin. You can line it with paper liners or lightly grease it with cooking spray. This step helps your muffins come out easily after baking. In a large bowl, mix your wet ingredients. Combine 1 cup of mashed bananas, 1/2 cup of granulated sugar, and 1/4 cup of brown sugar. Then add 1/2 cup of vegetable oil, 2 large eggs, and 1 teaspoon of vanilla extract. Whisk these together until it's smooth. In another bowl, sift together 1/2 cup of unsweetened cocoa powder, 1 cup of all-purpose flour, 1 teaspoon of baking soda, 1/2 teaspoon of baking powder, and 1/4 teaspoon of salt. Mix these dry ingredients until they are even. Now, you will combine the wet and dry mixtures. Gradually fold the dry ingredients into the wet banana mix. Stir just until they're combined. It’s okay if some lumps remain. Next, gently fold in 1 cup of grated zucchini and 1/2 cup of chocolate chips. If you want, you can also add 1/4 cup of chopped nuts. Once everything is mixed well, use a spoon or cookie scoop to fill each muffin cup about 3/4 full with the batter. Now they're ready to bake! Check the [Full Recipe] for more details. To get the best from your zucchini, squeeze it well. Use a clean kitchen towel. Grate the zucchini first, then place it in the towel. Twist the towel to remove excess moisture. This step helps your muffins stay fluffy and not soggy. To ensure your muffins don’t stick, prepare your muffin tin well. You can use paper liners or spray it lightly with cooking spray. If you want to be extra safe, dust the greased cups with a little flour. This gives you a better chance of perfect muffins. To keep your muffins moist, don’t overmix the batter. Stir gently until just combined. Adding ripe bananas also helps with moisture. If you want more, try adding applesauce. This keeps your muffins soft and tasty while they bake. For the full recipe, you can check the details provided above. {{image_2}} You can try different sweeteners in this muffin recipe. Instead of granulated sugar, use coconut sugar. It adds a nice caramel flavor. Honey or maple syrup work too. Remember to reduce the liquid in your recipe if you use liquid sweeteners. This keeps the muffins from becoming too wet. Making these muffins gluten-free is simple! Swap all-purpose flour with almond flour or a gluten-free blend. Just check that your baking powder is also gluten-free. This keeps your muffins light and fluffy. You may need to add a bit more moisture if using almond flour, as it absorbs more liquid. Feel free to get creative! Add vanilla or almond extract for extra flavor. You can also mix in dried fruits like raisins or cranberries. Chopped nuts, like walnuts or pecans, add a nice crunch. For a richer taste, try using dark chocolate chips or chunks. Each addition brings a new twist to your muffins. For the full recipe, check the section above. You can store your chocolate zucchini banana bread muffins at room temperature. Place them in an airtight container. These muffins stay fresh for about three days. Keep them in a cool, dry place to avoid moisture. If you want to keep your muffins longer, refrigerate them. Place muffins in a sealed container. They can last up to a week in the fridge. Just remember to let them warm up before serving. This keeps them soft and tasty. Freezing muffins is a great way to save them for later. Wrap each muffin tightly in plastic wrap. Place them in a freezer bag or container. They can stay good for up to three months. Thaw them overnight in the fridge or microwave them for a quick treat. For the full recipe, check out the details above! Yes, you can! Carrots and squash work well too. Both add moisture and flavor. Shred them just like zucchini. Keep in mind, the taste will change slightly. Carrots add a sweet note, while squash is mild. These muffins stay fresh for 3 to 4 days at room temperature. Store them in an airtight container. You can also refrigerate them to last up to a week. If you freeze them, they last about 3 months. Just thaw and enjoy! To boost the chocolate flavor, use high-quality cocoa powder. You can also add extra chocolate chips. Dark chocolate adds richness and depth. Try mixing in espresso powder for a coffee kick. A pinch of sea salt on top can bring out the sweetness too. For more details, check the Full Recipe. In this blog post, we covered how to make tasty muffins, starting with ingredients and nutritional information. You learned to prepare the oven, mix the batter, and apply tips for the best results. We also explored variations and storage options to keep your muffins fresh. Remember, experimenting with add-ins can make your muffins even better. Enjoy baking, and share your creations!](https://tossedrecipes.com/wp-content/uploads/2025/07/1caacf90-752a-42ea-b9fa-8e049cdc56fd.webp)
If you’ve ever craved a sweet treat that feels guilt-free, I have the perfect answer: Chocolate Zucchini Banana Bread Muffins! These muffins blend rich chocolate, moist zucchini, and ripe bananas …
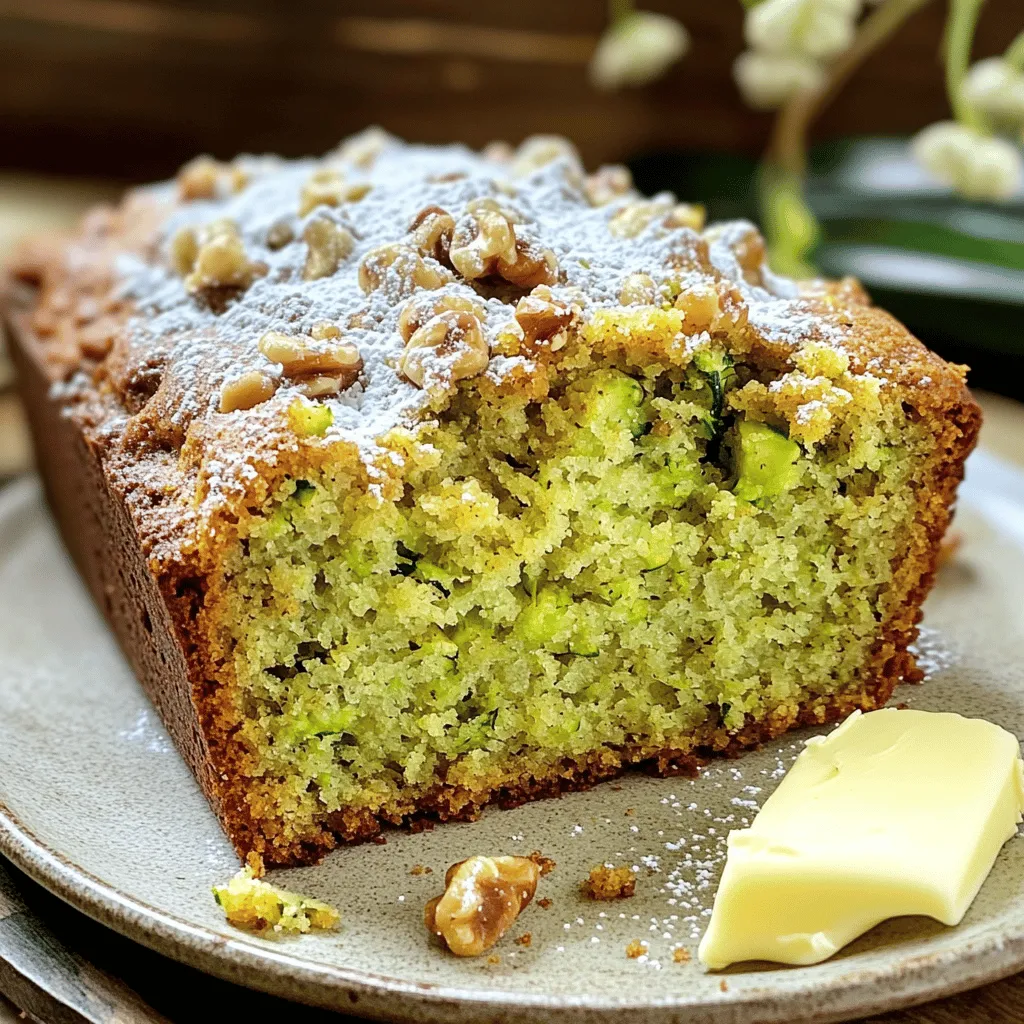
If you’re looking for a simple and delicious recipe, you’re in the right place! Joanna Gaines’s Zucchini Bread is the perfect blend of moist and flavorful. With fresh zucchini and …
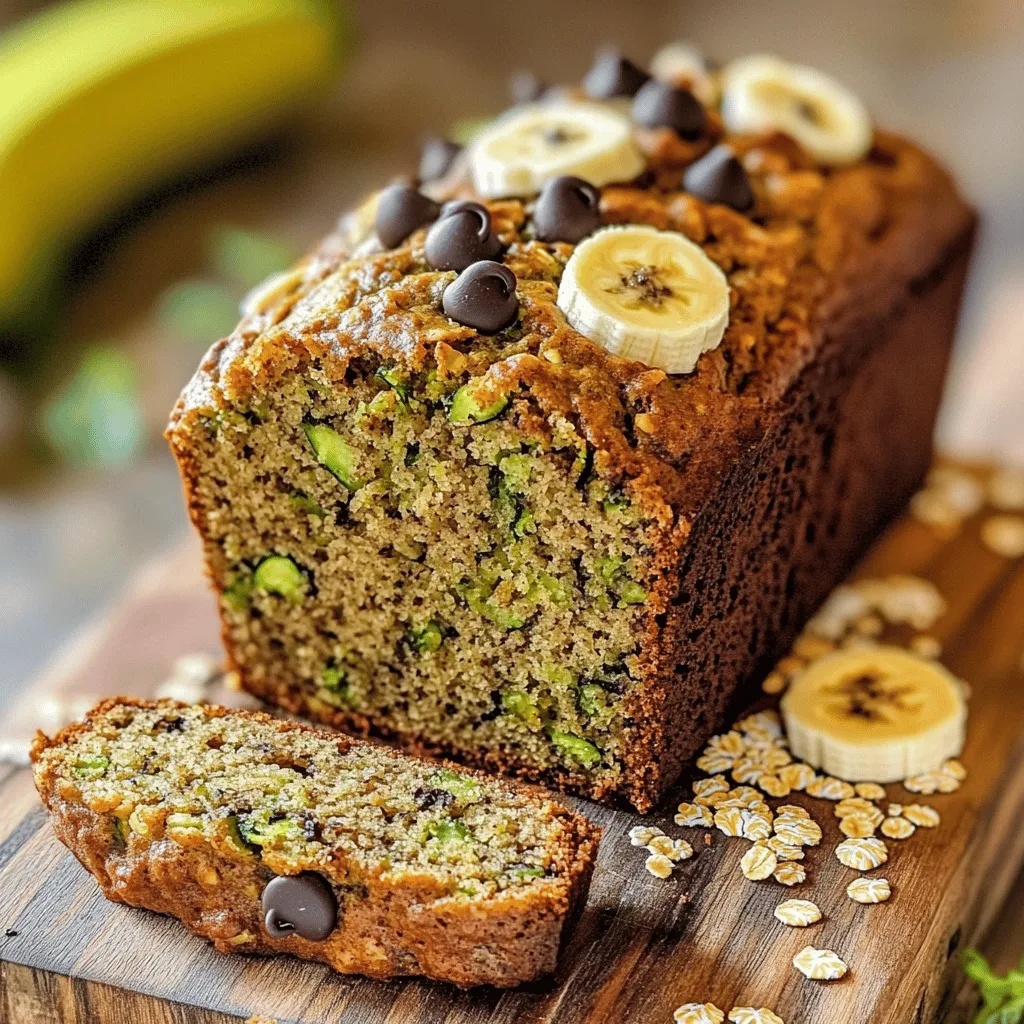
Are you ready to bake a delicious treat that’s also good for you? My Healthy Oatmeal Zucchini Banana Bread Recipe Delight combines wholesome ingredients like oats, zucchini, and ripe bananas. …
![To make these healthy mini carrot zucchini muffins, gather the following ingredients: - 1 cup grated zucchini (about 1 medium zucchini) - 1 cup grated carrots (about 2 medium carrots) - 1 ½ cups whole wheat flour - ½ cup rolled oats - 1 teaspoon baking powder - 1 teaspoon baking soda - ½ teaspoon salt - 1 teaspoon cinnamon - ½ teaspoon nutmeg (optional) - 1/3 cup honey or maple syrup - ½ cup unsweetened applesauce - 2 large eggs - 1 teaspoon vanilla extract - ½ cup chopped walnuts or pecans (optional) These ingredients work together to create a moist and tasty muffin. The grated zucchini and carrots add fiber and nutrients. Whole wheat flour and oats make the muffins filling. Baking powder and baking soda help them rise, while honey or maple syrup sweetens the mix. You can enhance your muffins with these optional add-ins: - Chopped walnuts or pecans - Nutmeg and other spices Adding nuts gives a nice crunch. Spices like nutmeg or even ginger can add warmth and depth to your muffins. Feel free to experiment with your favorite flavors! If you have dietary needs, here are some great substitutions: - Use gluten-free flour blends to make these muffins gluten-free. - For sugar substitutes, try using agave syrup or stevia. These swaps keep the muffins healthy while catering to different diets. Always check the ratios for the best results. You can find the full recipe to help guide you through the process. First, preheat your oven to 350°F (175°C). This step is key for even baking. While the oven heats, prepare your mini muffin pan. You can line it with paper liners or lightly grease it. This helps the muffins come out easily after baking. In a large bowl, combine the dry ingredients. Use 1½ cups of whole wheat flour, ½ cup of rolled oats, 1 teaspoon of baking powder, 1 teaspoon of baking soda, ½ teaspoon of salt, 1 teaspoon of cinnamon, and ½ teaspoon of nutmeg if you like. Mix these together well. This blend gives your muffins a great base. In another bowl, whisk your wet ingredients. Use ⅓ cup of honey or maple syrup, ½ cup of unsweetened applesauce, 2 large eggs, and 1 teaspoon of vanilla extract. Whisk until everything is combined. This mixture adds moisture and sweetness to your muffins. Now, fold the dry ingredients into the wet mixture. Be gentle here. You want to mix until just combined. Overmixing can make your muffins tough. If you want to add some crunch, fold in ½ cup of chopped walnuts or pecans at this stage. Spoon the batter into your prepared muffin pan. Fill each cup about ⅔ full. This allows space for the muffins to rise. Bake in the preheated oven for 12-15 minutes. To check doneness, insert a toothpick into the center of a muffin. If it comes out clean, they are ready. Let the muffins cool in the pan for about 5 minutes. Then transfer them to a wire rack to cool completely. For the full recipe, refer to the earlier section. Enjoy your healthy mini carrot zucchini muffins! To make your muffins moist, avoid overmixing. When you mix too much, your muffins can turn tough. Just stir until the dry and wet ingredients blend. Using fresh ingredients also helps. Fresh zucchini and carrots add moisture and flavor. You can add chocolate chips for a sweet twist. They create a rich taste that kids will love. You can also experiment with spices. Try adding ginger or cloves to change the flavor. Each spice adds a new layer of taste that can surprise you. If you want a vegan option, swap eggs for flax eggs. Mix one tablespoon of flaxseed meal with three tablespoons of water. Let it sit for five minutes to thicken. You can also replace honey with maple syrup for a vegan sweetener. For nut-free muffins, skip the walnuts or pecans. Use seeds like sunflower or pumpkin seeds instead. This keeps your muffins tasty and safe for everyone. Check out the Full Recipe for all the details you need! {{image_2}} You can change the flavor of your Healthy Mini Carrot Zucchini Muffins easily. For a savory twist, add herbs. Chopped chives or fresh dill can work well. These herbs add a nice touch and make the muffins unique. If you want a sweeter muffin, try adding fruits. Mashed bananas or diced apples bring moistness and natural sweetness. You can also mix in dried fruits like raisins or cranberries for a chewy texture. Making mini muffins is fun, but you can also bake regular ones. To make larger muffins, adjust the baking time. Regular-sized muffins need about 20-25 minutes. Always check with a toothpick to see if they are done. If you scale the recipe up, just multiply each ingredient. This way, you can make as many muffins as you need. You can change the veggies based on the season. In spring, try adding peas or asparagus. In fall, consider using pumpkin or butternut squash. These seasonal veggies give the muffins fresh flavors. For holidays, think about adding festive spices. During winter, add nutmeg or cloves for a warm taste. You can even top the muffins with a light glaze for a special touch. For the full recipe, check out the Healthy Mini Carrot Zucchini Muffins 🥕🧁 section. To keep your Healthy Mini Carrot Zucchini Muffins fresh, you have two main options: room temperature or refrigerated. - Room temperature: Store muffins in an airtight container. They last well for about 2 to 3 days. Keep them in a cool, dry place. - Refrigerated: If you want them to last longer, place the muffins in the fridge. They can stay fresh for about a week. For best results, use a clear glass or plastic container with a lid. This keeps them moist and flavorful. Freezing your muffins is a great way to enjoy them later. - How to freeze muffins: Allow the muffins to cool completely. Then, wrap each muffin in plastic wrap. Place the wrapped muffins in a freezer-safe bag or container. Be sure to remove as much air as possible to prevent freezer burn. - Thawing and reheating tips: When you want to eat one, take it out of the freezer. Let it thaw in the fridge overnight, or you can use the microwave. Heat for about 15-20 seconds to warm them up. These muffins are not only tasty but also last quite a while! - Room temperature: 2 to 3 days. - Refrigerated: Up to 1 week. - Frozen: You can keep them for about 3 months in the freezer. This way, you can enjoy your Healthy Mini Carrot Zucchini Muffins anytime! For the full recipe, check out [Full Recipe]. Yes, you can use whole grain flour. It adds more fiber and nutrients. The muffins may be denser, but they will still taste great. Just keep an eye on the moisture. Whole grain flour absorbs more liquid, so you might need a little extra applesauce or honey. Check for a few signs to know if your muffins are done. First, they should be golden brown on top. A toothpick inserted in the center should come out clean. If it has wet batter, bake for a few more minutes. Muffins should spring back when lightly touched. Absolutely! To make these muffins vegan, replace eggs with flax eggs. Mix 1 tablespoon of ground flaxseed with 2.5 tablespoons of water and let it sit for a few minutes. For honey, use maple syrup or agave nectar. These swaps keep the muffins moist. If you need an alternative to applesauce, consider using mashed bananas. They add natural sweetness and moisture. You can also use yogurt or pureed pumpkin. Each option brings its own flavor profile. Choose what fits your taste and what you have on hand. This article covered easy muffin baking. You learned about key ingredients like zucchini, whole wheat flour, and spices. I shared tips for moist muffins and options for dietary needs, like gluten-free or vegan choices. Variations and storage tips help you get creative and extend shelf life. For best results, use fresh ingredients and follow the steps closely. Now, you have all you need to bake tasty muffins that fit your needs. Enjoy your baking journey!](https://tossedrecipes.com/wp-content/uploads/2025/07/7637ddff-d2ac-4449-b1d6-06b3a3f24cc3.webp)
Are you looking for a tasty, healthy snack that’s easy to make? Meet these Healthy Mini Carrot Zucchini Muffins! Packed with nutritious ingredients like zucchini and carrots, they are perfect …
![To make this dish, you need fresh veggies that add great flavor. Here’s what you'll need: - 2 medium zucchinis, sliced into half-moons - 1 cup mushrooms, sliced (button or cremini) - 1 medium onion, thinly sliced - 2 cloves garlic, minced - 2 tablespoons olive oil - 1 teaspoon dried thyme - 1 teaspoon smoked paprika - Salt and pepper to taste - Fresh parsley, chopped (for garnish) Getting the right amounts is key to tasty sautéed veggies. Here’s a simple breakdown: - Zucchini: Two medium ones create good volume. - Mushrooms: One cup adds a nice texture. - Onion: One medium onion gives a sweet base. - Garlic: Two cloves bring a punch of flavor. - Olive oil: Two tablespoons help cook the veggies evenly. - Thyme and paprika: One teaspoon each adds depth to the dish. - Salt and pepper: Use them to taste for the best balance. If you want to switch things up, try these options: - Use yellow squash instead of zucchini for a different flavor. - Swap mushrooms for bell peppers or eggplant if you prefer. - Replace olive oil with avocado oil for a different taste. - Add fresh herbs like basil or oregano for a fresh twist. For the full recipe, check the [Full Recipe]. Start by washing the zucchinis and mushrooms. Cut the zucchinis into half-moons. Slice the mushrooms thinly. For the onion, remove the skin and slice it thin too. Mince the garlic cloves finely. Having all the veggies ready makes cooking easier and faster. Heat the olive oil in a large skillet over medium heat. Once hot, add the sliced onions. Sauté them for about 2-3 minutes until they soften. It’s important to stir often to avoid burning. Next, add the minced garlic. Cook for one more minute while stirring. You want the garlic to smell great but not burn. Now, it’s time for the mushrooms. Add them to the skillet and cook for about 4-5 minutes. They will release moisture and turn a nice golden brown. After that, add the sliced zucchini, dried thyme, and smoked paprika. Mix everything well. Sauté for another 5-7 minutes. The zucchini should be tender but still crisp. Season with salt and pepper to taste. For a bright finish, garnish with fresh parsley. You can find the full recipe above for more details. To get the best taste, use a large skillet. Heat the olive oil over medium heat. When the oil shimmers, it's ready. Add onions first; they need more time. Sauté them until soft, about 2-3 minutes. Then add garlic for a minute to bring out its flavor. Next, add mushrooms, which will let out moisture. Cook until they are golden brown. Finally, add zucchini and seasonings for the last sauté. Keep stirring for even cooking. Seasoning makes a big difference. Use dried thyme and smoked paprika for depth. Salt and pepper balance the flavors. You can also try a pinch of red pepper flakes for a kick. Fresh herbs like parsley add brightness. Always taste during cooking. Adjust seasonings to your liking for the best outcome. Serve the sautéed dish in a shallow bowl. Drizzle with extra olive oil for richness. A sprinkle of fresh parsley on top looks nice. Adding a lemon wedge gives a fresh zing. You can pair this dish with grilled chicken or fish. It's also great with rice or quinoa. For a vegetarian option, add chickpeas for protein. Check out the Full Recipe for more serving ideas! {{image_2}} You can easily add protein to this dish. Chicken, shrimp, or even tofu works great. Cook your protein first, then set it aside. Sauté the veggies as usual, then mix in your cooked protein at the end. This adds flavor and makes the meal more filling. Feel free to mix in other veggies. Bell peppers, carrots, or spinach add great taste and color. Just chop them up and add them at the right time. For example, bell peppers can go in with the onions. Spinach should join the mix towards the end, so it wilts perfectly. This recipe is quite flexible for special diets. For a vegan option, skip any animal protein. You can also replace olive oil with avocado oil for a different flavor. If you need gluten-free, this dish is naturally safe. Just make sure any added sauces or seasonings are gluten-free as well. For the full recipe, check out Sautéed Garden Delight: Zucchini, Mushrooms & Onions. To keep your sautéed zucchini, mushrooms, and onions fresh, let them cool first. Place them in an airtight container. This keeps moisture out and helps them stay crisp. Store the container in the fridge. They stay good for about 3-4 days. When you're ready to eat the leftovers, you have a few options. You can reheat them on the stove. Heat a skillet over medium heat, add a splash of olive oil, and warm them up for about 5 minutes. You can also use the microwave. Place them in a microwave-safe dish, cover it, and heat for 1-2 minutes. Make sure to stir halfway through for even heating. If you want to save some for later, freezing is a great option. First, cool the dish completely. Then, portion it into freezer-safe bags or containers. Make sure to remove as much air as possible to avoid freezer burn. You can freeze them for up to 2-3 months. When ready to eat, thaw in the fridge overnight and reheat. For more details, check our Full Recipe. Yes, you can use frozen vegetables for this dish. However, fresh veggies give the best taste and texture. If using frozen zucchini or mushrooms, add them directly to the pan. Cook them longer to ensure they heat through and lose excess water. I recommend using yellow onions for this recipe. They have a sweet flavor when cooked. You can also try red onions for a milder taste. White onions work too but can be sharper in flavor. To spice things up, add red pepper flakes or cayenne pepper. Start with a small pinch and adjust to your taste. You can also add sliced jalapeños for a fresh kick. For a smoky flavor, increase the smoked paprika in the recipe. For the full recipe, check [Full Recipe]. This blog post covered all you need to know. We explored fresh ingredients, measurements, and alternatives. I shared step-by-step instructions for preparing and cooking. You learned tips for sautéing and enhancing flavors. We even discussed tasty variations and storage info. Now, you have the tools to make a delicious dish. Enjoy experimenting with different flavors and personal touches. Happy cooking!](https://tossedrecipes.com/wp-content/uploads/2025/07/a29d7a02-f82f-4643-93a5-12702d3f46b2.webp)
Looking for a quick, tasty dish to boost your veggie intake? In this post, I’ll show you how to make a delicious sautéed zucchini, mushrooms, and onions dish. We’ll cover …
![To make Keto Lemon Zucchini Bread, you need: - 2 cups finely grated zucchini (about 2 medium zucchinis) - 1/4 cup unsweetened apple sauce - 1/2 cup almond flour - 1/2 cup coconut flour - 1/2 cup erythritol (or another keto-friendly sweetener) - 3 large eggs - 1/4 cup coconut oil, melted - 2 teaspoons baking powder - 1 teaspoon baking soda - 1/2 teaspoon salt - Zest of 1 lemon - 2 tablespoons lemon juice - 1 teaspoon vanilla extract Each slice of this delicious bread has about: - Calories: 120 - Total Fat: 8g - Carbohydrates: 6g - Fiber: 2g - Protein: 4g - Net Carbs: 4g These numbers make this recipe a great choice for anyone on a keto diet. Here’s what you will need for this recipe: - A 9x5-inch loaf pan - Mixing bowls (one large and one medium) - Whisk for mixing dry ingredients - Grater for the zucchini - Spatula for smoothing the batter - Toothpick to check for doneness - Parchment paper for easy removal Having these tools ready will help you bake the best Keto Lemon Zucchini Bread. Check the [Full Recipe] for detailed instructions on how to bring this dish to life. To start, gather your ingredients. You need two cups of finely grated zucchini. This is about two medium zucchinis. Use a clean kitchen towel to squeeze out extra water from the zucchini. This helps keep your bread from getting too soggy. Next, get a 9x5-inch loaf pan. Grease it or line it with parchment paper. This makes it easy to remove the bread later. 1. Preheat the Oven: Set your oven to 350°F (175°C). 2. Mix Zucchini and Apple Sauce: In a large bowl, mix the grated zucchini with 1/4 cup of unsweetened apple sauce. 3. Add Wet Ingredients: Crack three large eggs into the bowl. Pour in 1/4 cup of melted coconut oil, 2 tablespoons of lemon juice, the zest from one lemon, and 1 teaspoon of vanilla extract. Stir well. Make sure everything blends nicely. 4. Combine Dry Ingredients: In another bowl, whisk together 1/2 cup of almond flour, 1/2 cup of coconut flour, 1/2 cup of erythritol, 2 teaspoons of baking powder, 1 teaspoon of baking soda, and 1/2 teaspoon of salt. 5. Mix Dry and Wet: Slowly add the dry mix to the wet mix. Stir until just combined. Some lumps are okay; do not overmix. 6. Pour and Smooth: Pour the batter into your loaf pan. Use a spatula to smooth the top. 7. Bake: Place in the preheated oven. Bake for 50-60 minutes. Check with a toothpick in the center. It should come out clean. 8. Cool: Once baked, take it out of the oven. Let it cool in the pan for about 10 minutes. Then transfer it to a wire rack to cool completely before slicing. Enjoy your Keto Lemon Zucchini Bread warm or at room temperature. For a beautiful touch, dust it lightly with powdered erythritol. Add thin slices of lemon on the side for garnish. This makes the bread look fancy and adds extra flavor. You will love how moist and zesty this bread is. Get ready to impress your friends and family with this easy and delicious recipe! To get that perfect texture, start with your zucchini. Grate it finely. This helps the zucchini bake evenly. If your zucchini is very watery, squeeze it in a towel. This step removes extra moisture. Combine wet and dry ingredients gently. Mix until just combined. Overmixing can make your bread dense. One common mistake is not measuring ingredients correctly. Use a scale for accuracy. Another mistake is skipping the eggs. Eggs bind the bread and add moisture. Make sure to use fresh baking powder. Old baking powder can affect the rise. Lastly, don’t forget to let it cool. Cutting too soon may lead to a crumbly loaf. You can add fun flavors to your bread. Consider mixing in nuts, like walnuts or pecans. These add a nice crunch. You might also try dried fruits, like cranberries or blueberries. If you want more zest, add extra lemon zest or even some poppy seeds. These add both flavor and a lovely look. {{image_2}} If you want a gluten-free version, you can still enjoy this bread. Almond flour and coconut flour are already gluten-free, so you’re on the right path! Just make sure your baking powder is also gluten-free. This way, you can have a soft and tasty loaf without any gluten. You can mix up the flavor by using orange instead of lemon. Just replace the lemon zest and juice with fresh orange zest and juice. This change gives a sweet and citrusy twist. You might even add a pinch of cinnamon for warmth. It’s a fun way to switch things up! To make this bread vegan, swap the eggs for flax eggs. To make one flax egg, mix one tablespoon of ground flaxseed with three tablespoons of water. Let it sit for five minutes to thicken. You can also use unsweetened yogurt or silken tofu as an egg replacement. This keeps the bread moist and soft. Remember, using these substitutes might change the texture a bit, but it will still taste great. For the full recipe, check out the details above! After you bake your Keto Lemon Zucchini Bread, let it cool completely. Wrap it tightly in plastic wrap or aluminum foil. Store it in an airtight container at room temperature for up to three days. If you live in a hot area, keep it in the fridge for better freshness. Want to save some bread for later? You can freeze it! Cut the bread into slices. Wrap each slice in plastic wrap. Then, place the slices in a freezer-safe bag. This way, they won’t stick together. Your bread can last up to three months in the freezer. When you're ready to eat, just thaw it in the fridge overnight. To enjoy your Keto Lemon Zucchini Bread warm, you can reheat it easily. Place a slice in the microwave for about 15-20 seconds. You can also use a toaster oven at 350°F (175°C) for about 5 minutes. This will make the bread warm and soft again, just like fresh out of the oven. Find the full recipe for more delicious details! This bread is low-carb because it uses almond flour and coconut flour. Both of these flours have fewer carbs than regular flour. Also, we use erythritol as a sweetener, which has no calories. Together, these ingredients keep the carb count low while still tasting great. Each slice of this bread is a guilt-free treat that fits well into a keto diet. Yes, you can swap erythritol for other keto-friendly sweeteners. Stevia and monk fruit are great options too. Each sweetener has a different level of sweetness, so you may need to adjust the amount. Always taste your batter before baking to ensure it's sweet enough for your liking. This allows you to make it just right for your taste buds. This bread lasts for about a week when stored properly. Keep it in an airtight container at room temperature. If you want it to last longer, you can freeze it. Wrap individual slices tightly in plastic wrap, then place them in a freezer bag. This way, you can enjoy your Keto Lemon Zucchini Bread whenever you want. For the best taste, thaw it in the fridge or at room temperature before eating. Check out the Full Recipe for more details on storage! This guide on Keto Lemon Zucchini Bread covers ingredients, tools, and steps for success. You learned preparation tips, baking instructions, and cooling advice. I shared tricks for perfect texture and ways to avoid mistakes. You can explore gluten-free options, flavor swaps, and vegan choices. Finally, I detailed storage tips and answered common questions. With these tips, you can bake a tasty, low-carb bread that delights anyone. Enjoy your baking journey!](https://tossedrecipes.com/wp-content/uploads/2025/07/4c53338b-e11c-4713-9574-653ea9df7f9b.webp)
Craving a tasty treat that fits your keto lifestyle? Look no further! This Keto Lemon Zucchini Bread is simple to make and packed with flavor. The blend of zesty lemon …
. Grating zucchini properly is a must. Use a box grater or food processor for even pieces. The more moisture you extract, the better. If too much water remains, your cake can end up soggy. Baking time is also key. I bake my Chocolate Zucchini Bundt Cake for 50 to 60 minutes. Check with a toothpick inserted in the center. If it comes out clean, your cake is ready. Don’t open the oven door too soon. This can cause the cake to sink. Avoid overmixing the batter. Mix just until the ingredients combine. Overmixing can make your cake tough. It’s all about keeping it light and airy for that rich, moist texture. Prepping the bundt pan correctly is essential too. Make sure to grease and flour it well. This helps the cake slide out easily after baking. If you skip this step, you may face a messy disaster. Trust me, it’s worth the extra minute of prep. Try these tips, and you'll create a Chocolate Zucchini Bundt Cake that is rich, moist, and oh-so-delicious. For a complete guide, check the Full Recipe. {{image_2}} Gluten-Free Options You can make this cake gluten-free. Use a 1:1 gluten-free flour blend instead of regular flour. This swap keeps the cake moist and rich. Look for blends that include xanthan gum for the best texture. Vegan Alternatives To make a vegan version, replace eggs with flax eggs. Mix 1 tablespoon of flaxseed meal with 2.5 tablespoons of water. Let it sit until it thickens. Use unsweetened applesauce instead of oil for moisture. This option keeps the cake light and fluffy. Incorporating Spices (Nutmeg, Cardamom) Adding spices like nutmeg or cardamom can elevate your cake's flavor. Just a pinch of nutmeg brings warmth. Cardamom adds a unique twist. Start with 1/4 teaspoon each, and taste as you go. Using Different Types of Chocolate Experiment with different chocolates for a new flavor. Dark chocolate brings richness, while white chocolate adds sweetness. You can also mix chocolate types for a fun blend. Just remember to adjust the sugar in the recipe if you use sweeter chocolate. For the full recipe, check out the earlier sections. Enjoy creating your version! To keep your Chocolate Zucchini Bundt Cake fresh, use an airtight container. Wrap the cake in plastic wrap to seal in moisture. You can also place it in a cake dome. Store it at room temperature for up to three days. If you choose to refrigerate, it can last up to a week. Just remember, cold air can dry it out a bit. If you want to keep your cake longer, freezing is a great option. Slice the cake into pieces for easy thawing. Wrap each slice in plastic wrap, then place them in a freezer-safe bag. This keeps air out and prevents freezer burn. You can freeze the cake for up to three months. When you are ready to enjoy it, take the cake out and let it thaw in the fridge overnight. For the best taste, let it sit at room temperature for about an hour before serving. This way, it keeps its rich and moist texture. Can I use frozen zucchini? Yes, you can use frozen zucchini. Just make sure to thaw it and drain any excess water. This helps keep your cake moist. Fresh zucchini has less water, so the texture may differ slightly. How do I know when the cake is done? To check if your cake is done, insert a toothpick into the center. If it comes out clean or with a few crumbs, the cake is ready. Baking time can vary, so keep an eye on it after 50 minutes. What to do if the cake is too dry? If your cake turns out dry, try adding more moisture next time. You can add an extra egg or use more oil. Also, avoid overbaking, as that can dry it out too. Tips for avoiding a dense cake To keep your cake light, don’t overmix the batter. Mix until just combined. Also, ensure your baking powder and soda are fresh. They help the cake rise and stay fluffy. Best Pairings for the Cake This cake pairs well with a scoop of vanilla ice cream or whipped cream. You can also serve it with fresh berries for a fruity touch. A sprinkle of sea salt enhances the chocolate flavor too. Ideas for Dessert Presentation For an elegant look, dust the cooled cake with powdered sugar. Add a mint leaf and some chocolate chips on the side. Serving slices on pretty plates makes it pop for guests. For the full recipe, check out the Chocolate Zucchini Bundt Cake details above. In this post, we explored how to make a delicious Chocolate Zucchini Bundt Cake. We covered the key ingredients, like grated zucchini and various sugars. I shared step-by-step instructions for mixing and baking, plus useful tips to ensure perfect texture. We also discussed flavor variations and storage methods. Remember, this cake is versatile, so don’t hesitate to experiment. With the right care, you’ll create a moist, tasty treat that everyone will love. Happy baking!](https://tossedrecipes.com/wp-content/uploads/2025/07/bdf1a2e8-19ca-408e-8c4a-b008402b8a22.webp)
If you’re craving a sweet treat that’s both rich and surprisingly moist, you’ve hit the jackpot with this Chocolate Zucchini Bundt Cake recipe. This cake combines the richness of chocolate …
![To make a delightful Carrot-Zucchini Bread, gather these simple ingredients: - 1 cup grated carrots - 1 cup grated zucchini (with excess moisture squeezed out) - 1/2 cup unsweetened applesauce - 1/2 cup vegetable oil - 1 cup brown sugar - 2 large eggs - 1 teaspoon vanilla extract - 1 1/2 cups all-purpose flour - 1 teaspoon baking soda - 1 teaspoon baking powder - 1 teaspoon ground cinnamon - 1/2 teaspoon salt - 1/2 cup chopped walnuts or pecans (optional) - 1/2 cup raisins or cranberries (optional) These ingredients blend to create a moist and flavorful bread. The carrots and zucchini add natural sweetness and moisture. Applesauce also keeps the bread tender while reducing oil. You can adjust the nuts and dried fruits based on your tastes. This recipe is flexible! For the complete cooking method, refer to the Full Recipe. - Preheat oven to 350°F (175°C). - Grease a 9x5 inch loaf pan. To start, we need a hot oven. Preheating helps the bread rise. Greasing the pan stops it from sticking. Use butter or cooking spray for best results. - Combine grated carrots and zucchini. - Add applesauce, vegetable oil, brown sugar, eggs, and vanilla extract. In a large bowl, mix the grated carrots and zucchini. Make sure to squeeze out extra moisture from the zucchini. This step keeps the bread from getting soggy. Then, mix in applesauce, oil, brown sugar, eggs, and vanilla. Stir until it is smooth and well combined. - Whisk together flour, baking soda, baking powder, cinnamon, and salt. - Gradually mix dry ingredients into the wet mixture. In a different bowl, whisk flour, baking soda, baking powder, cinnamon, and salt. This way, all the dry ingredients blend well. Slowly add this mix into the wet mixture. Stir gently until just combined. Be careful; over-mixing can make the bread tough. - Fold in nuts and dried fruits if using. - Pour batter into the prepared loaf pan. - Bake for 50-60 minutes. If you want, fold in nuts or dried fruits. This adds texture and flavor. Pour the batter into the greased pan. Smooth the top with a spatula. Now, bake for 50-60 minutes. Check with a toothpick in the center. If it comes out clean, your bread is ready. To keep your carrot-zucchini bread moist but not soggy, squeeze the excess moisture from the zucchini. Use a clean kitchen towel or paper towels. Place the grated zucchini in the towel, twist it, and squeeze firmly. This simple step helps the bread rise well and cook evenly. Mixing your batter is key to good texture. Avoid over-mixing the ingredients. Stir just enough to blend them together. A few lumps are fine! This keeps the bread light and fluffy. If you mix too much, the bread can turn out dense. To check if your bread is done, use a toothpick. Insert it into the center of the loaf. If it comes out clean, your bread is ready. If not, bake it a few more minutes. After baking, let the bread cool in the pan for about ten minutes. Then, move it to a wire rack. This helps maintain moisture while allowing air to flow around it. {{image_2}} You can make this carrot-zucchini bread even better by trying different ingredients. For instance, swap out unsweetened applesauce for mashed banana. Both options keep the bread moist and add natural sweetness. If you want to change up the nuts, feel free to use any type you like. You can try pecans instead of walnuts. You can also add dried fruits like cranberries or apricots for a sweet touch. To boost the flavor, add a pinch of spices. Nutmeg and ginger work great in this recipe. They add warmth and depth to the bread. If you love chocolate, consider folding in chocolate chips. They melt slightly and create a deliciously rich flavor. These small changes can make your carrot-zucchini bread truly special. Making your carrot-zucchini bread healthier is easy. You can use whole wheat flour instead of all-purpose flour. Whole wheat flour has more nutrients and fiber. It adds a nice texture too. Another option is to reduce the sugar. You can cut the brown sugar in half without losing flavor. This keeps the bread tasty while lowering calories. For the full recipe, check out the [Full Recipe]. After baking, let the bread cool on a wire rack. This helps keep it moist. Once cool, wrap the bread in plastic wrap. Store it in an airtight container. This method keeps the bread fresh for up to four days. To save leftovers, freezing is a great option. Slice the bread before freezing. Wrap each slice in plastic wrap, then place them in a freezer bag. This way, you can take out only what you need. To thaw, leave the slices at room temperature for about an hour. You can also microwave them for about 15 seconds if you're in a hurry. When reheating, keep the bread moist. One method is to wrap a slice in a damp paper towel. Microwave it for about 10 seconds. You can also use an oven. Preheat it to 350°F (175°C) and heat the bread for 5-10 minutes. Enjoy your warm, soft carrot-zucchini bread! Yes, you can! Use gluten-free flour blends. Look for a blend that includes xanthan gum. This will help the bread rise and keep it soft. Always check labels to ensure they are gluten-free. Carrot-Zucchini Bread stays fresh for about 3 to 5 days at room temperature. Store it in an airtight container to keep it moist. You can also keep it in the fridge for up to a week. Yes, you can use frozen grated zucchini. Just remember to thaw it first. Squeeze out any extra water before adding it to the mix. This keeps your bread from getting soggy. This bread is tasty on its own. You can spread cream cheese or butter on top. For a sweet touch, try honey or jam. It pairs well with a cup of tea or coffee too. Absolutely! You can swap eggs with flaxseed meal mixed with water. Use nut butters instead of oil for a nut-free option. For dairy-free needs, try coconut oil or a dairy-free yogurt. Adjust to fit your needs! You learned how to make delicious carrot-zucchini bread. We covered the key ingredients and steps. I shared tips for texture and moisture, plus storage advice. You can also customize this recipe to fit your taste. Embrace your creativity and try new variations. Enjoy your baking journey, and let this bread bring joy to your table!](https://tossedrecipes.com/wp-content/uploads/2025/07/cf7b10fc-491a-46f9-bb5c-fb32df2d2a58.webp)
Looking for a tasty twist on traditional bread? Try this Carrot-Zucchini Bread! Packed with flavor and nutrients, it’s a great way to sneak in some veggies. This easy recipe combines …