Zucchini Fries Crispy and Delicious Snack Option
![To make tasty zucchini fries, you need a few key items. Here’s what you’ll need: - 2 medium zucchinis, cut into fry shapes - 1 cup breadcrumbs (panko for extra crunch) - ½ cup grated Parmesan cheese - 1 teaspoon garlic powder - 1 teaspoon onion powder - 1 teaspoon Italian seasoning - Salt and pepper to taste - 2 large eggs - ¼ cup all-purpose flour - Olive oil spray These ingredients create a great base for your fries. The zucchini gives a fresh taste, while the cheese adds a nice flavor. You can make your zucchini fries even tastier with these extras: - 1 teaspoon paprika for a smoky kick - ½ teaspoon cayenne pepper for some heat - Fresh herbs like basil or parsley for a burst of color These options let you personalize your fries. Experiment with flavors until you find the mix you love. Each serving of zucchini fries has about: - 150 calories - 10g fat - 12g carbs - 5g protein These numbers may vary based on what you add. Zucchini fries are a healthier choice than regular fries, making them a smart snack option. Enjoy your crispy treat with less guilt! First, wash the zucchinis well. Trim the ends, then cut them into fry shapes. Aim for pieces about the same size. This helps them cook evenly. Place the cut zucchini onto a clean towel. Pat them dry to remove extra moisture. Drying helps the fries get crispy. Now, gather your bowls. In a shallow bowl, mix breadcrumbs, Parmesan cheese, garlic powder, onion powder, Italian seasoning, salt, and pepper. This mix gives great flavor. In another bowl, beat the two eggs. In a third bowl, add the flour. Start coating the zucchini fries. First, dredge each fry in flour. Then dip it into the beaten eggs. Finally, coat it well with the breadcrumb mix. Press gently to make sure it sticks. This process is key to a crispy texture. Preheat your oven to 425°F (220°C). Line a baking sheet with parchment paper. Place each coated fry in a single layer on the sheet. Make sure they don’t touch each other. This allows hot air to circulate. Lightly spray the tops with olive oil spray. Bake for about 20-25 minutes or until they turn golden brown. Flip them halfway through to ensure even cooking. Once done, let them cool for a few minutes. You can now enjoy these crispy zucchini fries as a tasty snack. For the full recipe, check above! To get your zucchini fries crispy, use panko breadcrumbs. They add extra crunch. Make sure to coat each fry well. Press the coating on firmly. This helps it stick during baking. A light spray of olive oil on top boosts crispness. Bake at a high temperature for the best results. Don’t skip the flour step. It helps the egg stick. Avoid crowding the baking sheet. Each fry needs space to get crispy. Flipping them halfway through baking is key. This ensures even cooking on all sides. Lastly, make sure your oven is preheated. A hot oven cooks them just right. Cut your zucchini evenly. This helps them cook at the same rate. Use a single layer on your baking sheet. If they touch, they won’t crisp up well. Rotate the baking sheet halfway for even heat. Keep an eye on them as they bake. You want a nice golden brown color. Follow these tips for perfect zucchini fries every time! For the Full Recipe, check the cooking section above. {{image_2}} You can enjoy zucchini fries in two main ways: baked or fried. Baking is simple and healthier. You just place them in the oven. They get crispy without too much oil. Frying gives a rich flavor and crunch. You heat oil in a pan and cook until golden. But frying adds more fat and calories. Choose based on your mood or health goals. You can spice up your zucchini fries with many flavors. Want a kick? Add cayenne pepper or chili powder. For a cheesy twist, mix in more Parmesan or cheddar cheese. You can also try ranch seasoning for a fun taste. Each flavor option makes your fries unique and exciting. Feel free to experiment with different herbs and spices too! If you need gluten-free fries, swap regular flour for almond or coconut flour. Use gluten-free breadcrumbs for the crunch. For vegan options, replace eggs with a mixture of flaxseed and water. This will help the coating stick without eggs. These changes keep the taste great while meeting dietary needs. Enjoy your fries without worry! To store leftover zucchini fries, let them cool first. Place them in an airtight container. Keep them in the fridge for up to three days. You can also layer them with parchment paper to avoid sogginess. This helps keep them crispy. To reheat your zucchini fries, use the oven or an air fryer. Preheat your oven to 400°F (200°C). Spread the fries on a baking sheet in a single layer. Bake for about 10 minutes. This method helps restore their crispiness. Avoid using the microwave, as it can make them soft. You can freeze zucchini fries before or after cooking. If you freeze them before baking, arrange them in a single layer on a baking sheet. Once frozen, transfer them to a freezer bag. They can last for up to three months. For cooked fries, place them in an airtight container. Thaw them in the fridge overnight before reheating. Enjoy your crispy zucchini fries anytime! For the full recipe, check the instructions provided. To make zucchini fries crispy, start by using panko breadcrumbs. These crumbs are light and airy, allowing for more crunch. Dredge each zucchini fry in flour first. This helps the egg wash stick better. After dipping in eggs, coat heavily with the breadcrumb mix. Finally, spray with olive oil before baking to enhance crispiness. Yes, you can air fry zucchini fries! Preheat your air fryer to 400°F (200°C). Place the fries in a single layer without crowding. Air fry for about 10-15 minutes, shaking the basket halfway through. This method gives you a crispy outside and keeps the inside tender. Zucchini fries taste great with many dips. Try marinara sauce for a classic touch. Garlic aioli is creamy and flavorful. You can also serve them with ranch dressing for a cool contrast. Other options include spicy ketchup or a tangy yogurt dip. Yes, zucchini fries are a healthier choice than regular fries. They are lower in calories and carbs. Zucchini is packed with vitamins and minerals. By baking instead of frying, you cut down on extra fats. This makes zucchini fries a smart snack option. Zucchini fries last about 3 to 4 days in the fridge. Store them in an airtight container to keep them fresh. Reheat in the oven or air fryer for the best texture. Avoid microwaving, as it can make them soggy. Yes, yellow squash works well in place of zucchini. The flavor is mild and similar. Just cut it into fry shapes like zucchini. The cooking time should remain the same. Enjoy a colorful twist on your zucchini fries! For the full recipe, click here: [Full Recipe]. Zucchini fries are a tasty, fun snack. You can make them crispy using the right steps. We discussed essential ingredients, tips, and variations to suit your taste. Remember, baking can give you a healthier fry, while frying offers a different crunch. Store leftovers properly and reheat for the best texture. This dish is simple, healthy, and packed with flavor. Experiment with different coatings and flavors to find your perfect fry. Enjoy making and sharing your delicious zucchini fries!](https://tossedrecipes.com/wp-content/uploads/2025/07/25454f1e-048c-4456-b64c-e7d88678fca1.webp)
Looking for a tasty snack that’s easy to make? Zucchini fries are your answer! These crispy, golden delights are not only delicious but also a healthier alternative to regular fries. …
Looking for a tasty snack that’s easy to make? Zucchini fries are your answer! These crispy, golden delights are not only delicious but also a healthier alternative to regular fries. …

Looking for a quick and healthy treat? These 4-Ingredient Zucchini Cookies are simple to make and taste amazing! With just four pantry staples, you can whip up a batch of …

Are you ready for a comfort food treat that will wow your taste buds? These Mozzarella Ranch Chicken Bombs combine juicy ground chicken, gooey mozzarella, and tasty ranch flavors all …
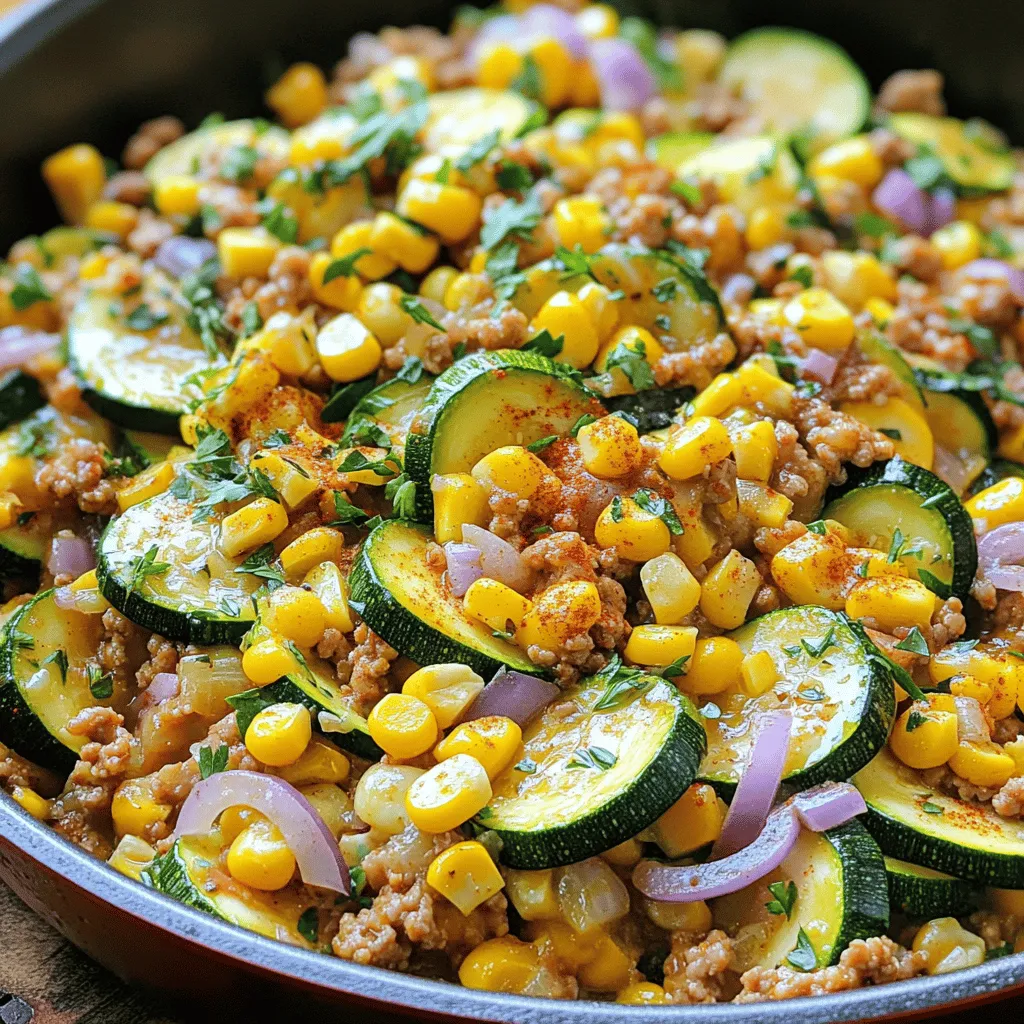
Looking for a quick and tasty meal? This Ground Turkey Skillet with Zucchini and Corn Delight is your answer. Packed with fresh veggies and lean protein, this one-pan dish keeps …

If you’re craving a quick and tasty side dish, Baked Parmesan Zucchini is a must-try! This crisp and flavorful recipe will impress your family and friends, without taking much time. …
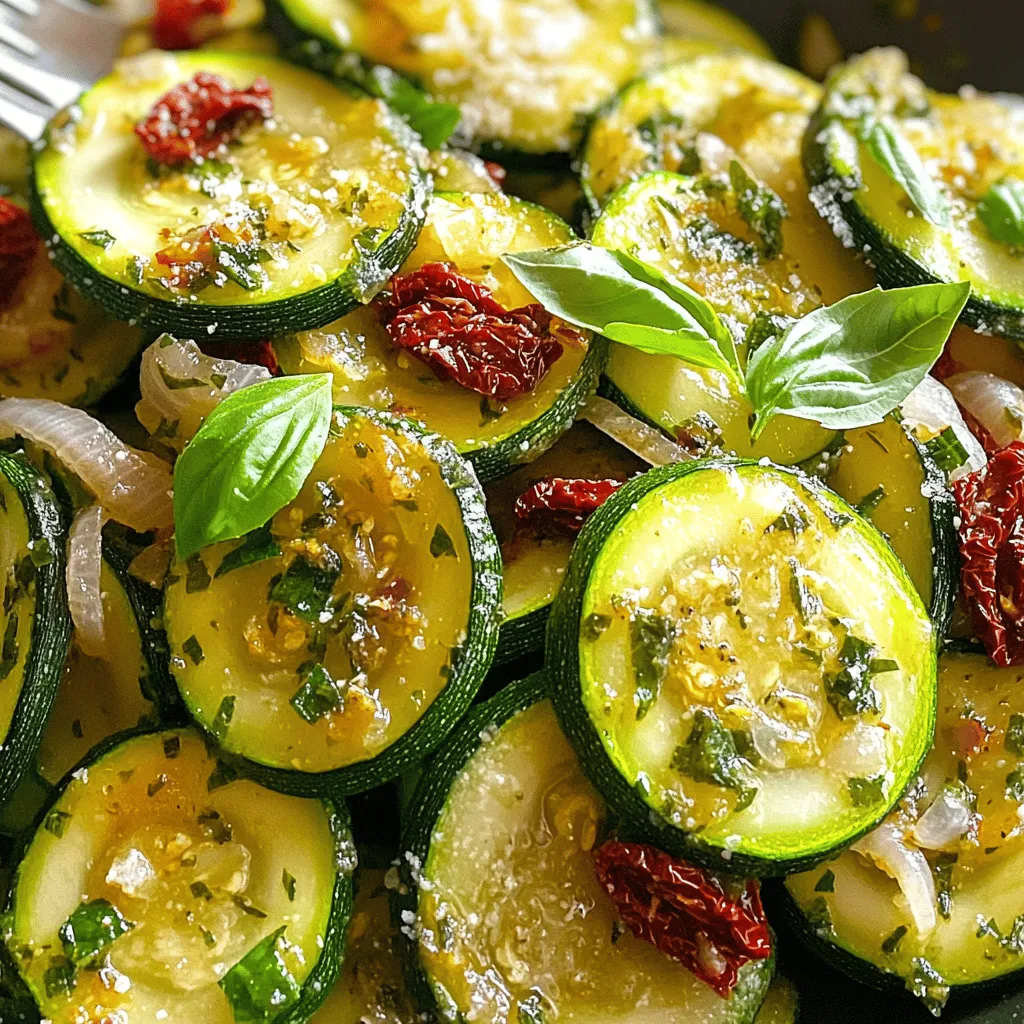
Are you ready to elevate your vegetable game? In Sauteed Zucchini with Sun Dried Tomatoes Delight, I’ll guide you through a simple yet flavorful recipe. This dish brings together fresh …
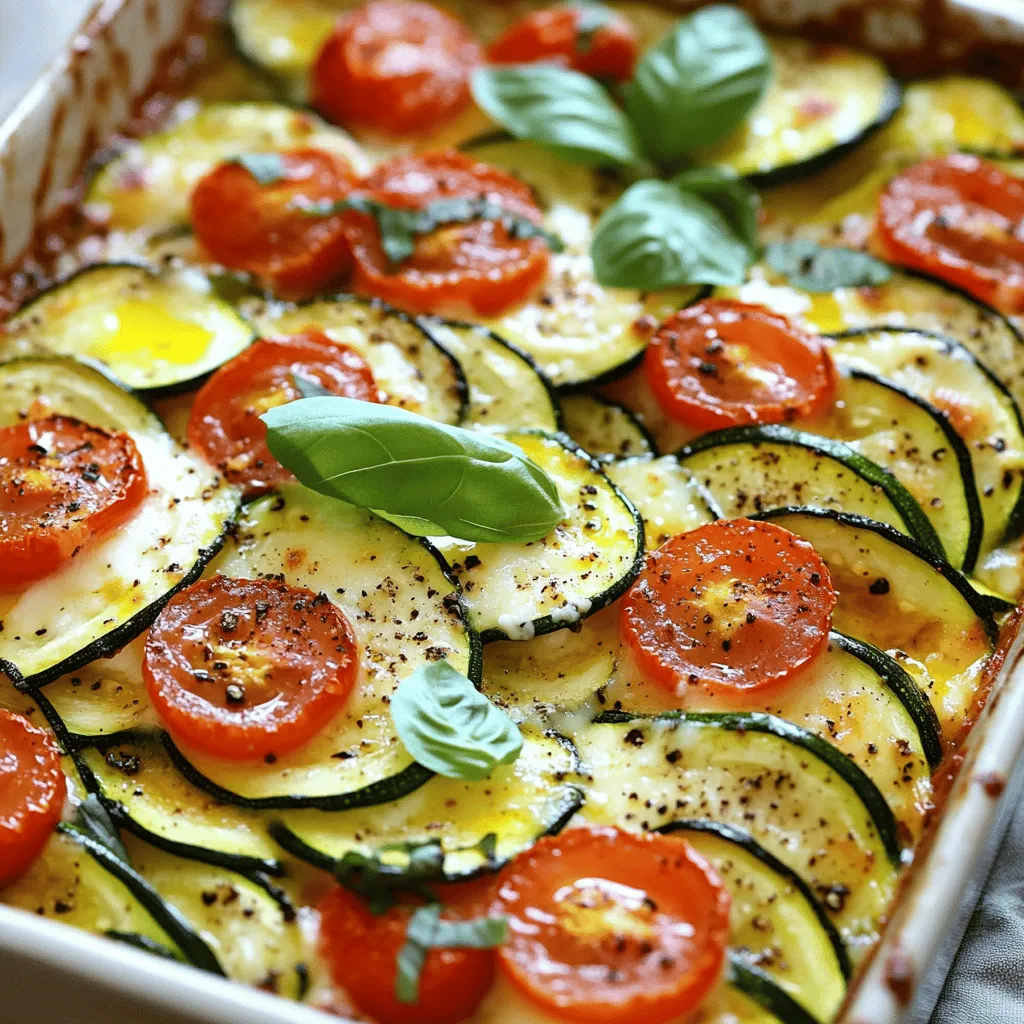
Ready to elevate your dinner with a delicious twist? This Baked Zucchini Parmesan Casserole will wow your taste buds and delight your guests. With layers of fresh zucchini, creamy cheese, …
![To make gluten-free chocolate zucchini bread, you need a few key ingredients. Each one plays a role in ensuring your bread is moist and flavorful. Here’s a complete list of what you’ll need: - Grated Zucchini: 1 ½ cups - Flours: 1 cup almond flour and ½ cup gluten-free all-purpose flour - Cocoa Powder: ½ cup (unsweetened) - Sweeteners: ½ cup coconut sugar and ½ cup maple syrup - Baking Essentials: 1 tsp baking soda, 1 tsp baking powder, and ½ tsp salt - Eggs: 2 large - Fats: ¼ cup melted coconut oil or vegetable oil - Flavor Enhancers: 1 tsp vanilla extract - Optional Mix-Ins: ½ cup chocolate chips (dairy-free if desired) The grated zucchini adds moisture and nutrition. Using almond flour and gluten-free flour keeps it light and fluffy. Cocoa powder gives the bread its rich chocolate flavor. Coconut sugar and maple syrup sweeten it well. Baking soda and baking powder help it rise. Eggs bind everything together while coconut oil adds richness. Vanilla extract enhances the flavor, and chocolate chips are a delicious bonus. For the full recipe, check out the specific instructions to bring this amazing bread to life. Each ingredient works in harmony to create a delightful treat that everyone will love. To start, grab your medium zucchini. Grate it until you have 1 ½ cups. This is about one medium zucchini. Place the grated zucchini in a bowl and sprinkle a pinch of salt on it. Let it sit for about 10 minutes. This helps draw out extra moisture. After 10 minutes, take a clean kitchen towel and squeeze the zucchini. Remove as much liquid as you can. This step is key to avoiding a soggy bread. Next, let's work on the dry ingredients. In a large mixing bowl, add the following: - 1 cup almond flour - ½ cup cocoa powder - ½ cup gluten-free all-purpose flour - 1 tsp baking soda - 1 tsp baking powder - ½ tsp salt Whisk these together well. You want a uniform mix with no lumps. This blend of flours gives the bread a rich flavor and great texture. Now, it’s time to mix the wet ingredients. In another bowl, combine: - ½ cup coconut sugar - ½ cup maple syrup - 2 large eggs - ¼ cup melted coconut oil - 1 tsp vanilla extract Mix these until they are well blended. The coconut sugar and maple syrup add sweetness and moisture. This mixture will help your bread rise and become fluffy. Now, we’ll bring everything together. Gradually add the wet mixture to the dry ingredients. Stir until no dry bits remain. Then, fold in the squeezed zucchini. Make sure it’s mixed in evenly. If you like chocolate chips, gently fold in ½ cup now. You can save some to sprinkle on top. Pour the batter into a greased 9x5-inch loaf pan. Smooth the top with a spatula. Sprinkle any reserved chocolate chips on top before baking. Bake in your preheated oven at 350°F for about 50-60 minutes. Check doneness with a toothpick. It should come out clean or with a few moist crumbs. Once done, let it cool in the pan for 10 minutes before moving it to a wire rack. Enjoy this delicious treat! Don't forget to check out the Full Recipe for all the details. Ensuring Proper Zucchini Preparation To get the best flavor, start with fresh zucchini. Grate it finely and sprinkle it with a pinch of salt. Let it rest for about 10 minutes. This helps draw out excess moisture. After resting, use a clean kitchen towel to squeeze out the liquid. This step is key to avoiding a soggy loaf. Selecting the Right Cocoa Powder Choose a high-quality unsweetened cocoa powder. This adds rich chocolate flavor without added sugars. I often use Dutch-processed cocoa for a smoother taste. Make sure it is gluten-free. Always check the label for safety. How to Avoid Soggy Bread To keep your bread moist but not soggy, watch the zucchini. If it’s too watery, it will leave your bread heavy. Squeeze out as much liquid as possible. Also, don’t skip the baking time. Every oven is different, so check your bread at 50 minutes. If a toothpick comes out clean, it’s ready. Serving Suggestions and Enhancements Once your bread cools, slice it into thick pieces. Serve it on a wooden cutting board for a rustic look. Drizzle extra melted chocolate on top for a treat. You can also add a dollop of coconut whipped cream for a creamy touch. This adds a lovely contrast to the rich chocolate. For a fun twist, try adding fresh berries on the side. This brightens up your plate and adds freshness. For the complete recipe, visit [Full Recipe]. {{image_2}} To make this gluten-free chocolate zucchini bread vegan, you can replace the eggs. A simple way is to use flaxseed meal. Mix one tablespoon of flaxseed meal with three tablespoons of water. Let it sit for about five minutes to thicken. This mix takes the place of one egg. You can also use unsweetened applesauce. Use 1/4 cup for each egg. For a dairy-free option, choose dairy-free chocolate chips. They add sweetness without any dairy. You can customize the flavor of your bread in many ways. Adding nuts brings a nice crunch. Try 1/2 cup of walnuts or pecans. If you want a different chocolate taste, use dark chocolate or white chocolate chips. You can also add spices like cinnamon or nutmeg. Just a pinch can make a big difference. For a twist, add 1/2 teaspoon of instant coffee. It enhances the chocolate flavor. When it comes to gluten-free flour blends, not all work the same. I recommend using a blend that includes almond flour and tapioca starch. These flours keep the bread moist and fluffy. Brands like Bob's Red Mill or King Arthur Flour offer great blends. Make sure to check labels for gluten-free certification. If you need a nut-free option, look for a blend with rice flour. It works well too. To keep your gluten-free chocolate zucchini bread fresh, follow these tips. After it cools, wrap it tightly in plastic wrap. This step helps keep moisture inside. You can also place it in an airtight container. Storing it at room temperature works well for a few days. If you want it to last longer, consider refrigeration. Just remember, cold air can dry it out, so wrap it well. If you want to save some for later, freezing is a great idea. First, let the bread cool completely. Then, slice it into individual pieces. Wrap each slice in plastic wrap. For extra protection, place the slices in a freezer bag. Remove as much air as possible before sealing. This method prevents freezer burn. When you're ready to enjoy it, let a slice thaw at room temperature or heat it in the microwave. Gluten-free chocolate zucchini bread can last about 3-4 days at room temperature. If you store it in the fridge, it should stay fresh for up to a week. In the freezer, it maintains its quality for about 2-3 months. After that time, it may lose flavor and texture. Always check for any signs of spoilage before enjoying your delicious bread. Yes, you can try other flours. Almond flour works well, but you can also use coconut flour. Just remember that coconut flour absorbs more moisture. If you use it, cut back on the amount. A mix of gluten-free flours can give a nice texture. Look for a blend that includes brown rice flour or oat flour for the best results. You can replace eggs easily. Use 1/4 cup unsweetened applesauce per egg. Flaxseed meal is another option. Mix 1 tablespoon of flaxseed meal with 2.5 tablespoons of water. Let it sit for five minutes until it thickens. Chia seeds work similarly. This makes your bread vegan while keeping it moist. Absolutely! This bread stores well. You can make it ahead and enjoy it later. Just let it cool completely before wrapping it tightly. Store it in an airtight container on the counter for up to three days. For longer storage, slice it and freeze each piece. Thaw slices as needed for a quick snack. To check for doneness, use a toothpick. Insert it into the center of the bread. If it comes out clean or with a few moist crumbs, the bread is done. If it has wet batter on it, bake for a few more minutes. Keep checking until it’s perfect. Yes, feel free to get creative! Chopped walnuts or pecans add a nice crunch. You could also mix in dried fruits like raisins or cranberries for sweetness. Just make sure not to add too many extras. This keeps the bread from getting too wet or dense. In this post, we explored how to make delicious gluten-free chocolate zucchini bread. We covered the complete ingredient list, step-by-step instructions, and tips for success. You learned about vegan variations, storage methods, and common questions. This recipe helps you enjoy a sweet treat while staying healthy. Feel free to experiment with flavors and share your results. Happy baking!](https://tossedrecipes.com/wp-content/uploads/2025/07/99f2c8e2-b1aa-42e0-9bbe-d2aeeb645748.webp)
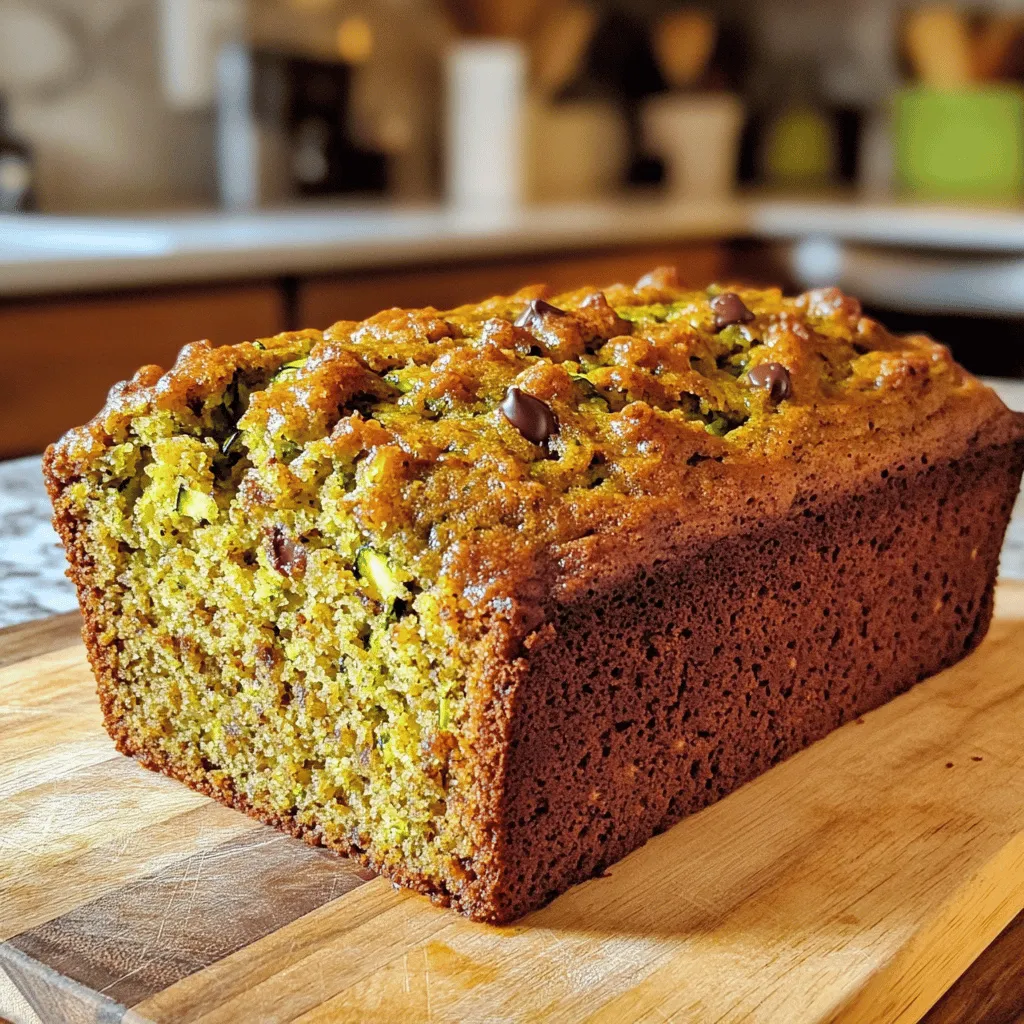
Are you craving a rich, moist treat that won’t disrupt your gluten-free lifestyle? Look no further! This Gluten-Free Chocolate Zucchini Bread is both delicious and easy to make. Packed with …
If you’re looking for a moist zucchini bread recipe that’s easy to make, you’re in the right place! Joanna Gaines’s Zucchini Bread is a perfect blend of flavors and textures. …
![To make a delicious chocolate zucchini cake, gather these ingredients: - 1 ½ cups all-purpose flour - ½ cup unsweetened cocoa powder - 1 tsp baking soda - ½ tsp baking powder - ½ tsp salt - 1 cup granulated sugar - ½ cup brown sugar, packed - ¾ cup vegetable oil - 3 large eggs - 2 tsp vanilla extract - 1 ½ cups grated zucchini (about 1 medium zucchini) - ½ cup semi-sweet chocolate chips (optional) - ¼ cup chopped walnuts (optional) Getting the right measurements is key. Too much flour can make the cake dry. Using precise amounts of cocoa powder and sugar gives the best flavor. If you want to try a variation, you can switch the chocolate chips with dried fruit or nuts. You could even add spices like cinnamon for warmth. Using fresh ingredients matters. Fresh zucchini adds moisture and a subtle taste. Old ingredients can change the cake's texture and taste. Check your baking soda and baking powder for freshness. They should be active to help the cake rise well. Using fresh vanilla extract enhances the cake’s flavor too. For the best results, always use the freshest ingredients you can find. You can find the full recipe with exact steps for baking this cake. To start, set your oven to 350°F (175°C). This temperature helps the cake bake evenly. Next, grab a 9x13 inch pan. You can either grease and flour it or use parchment paper. This step keeps the cake from sticking. In a large bowl, mix the granulated and brown sugars with the vegetable oil. Stir until the sugars blend well. This process adds moisture and sweetness. Now, add the eggs one at a time. Mix well after each egg to ensure they combine. Finally, stir in the vanilla extract for flavor. In another bowl, whisk together the flour, cocoa powder, baking soda, baking powder, and salt. This step adds structure and richness to your cake. Gradually mix the dry ingredients into the wet ingredients. Stir just until combined. Overmixing may make the cake tough. Fold in the grated zucchini gently. If you want, add chocolate chips or walnuts at this stage. These extras boost flavor and texture. Now, pour the batter into your prepared pan. Use a spatula to smooth the top. For the complete recipe, refer to the [Full Recipe]. To get great zucchini for your cake, start with fresh zucchini. Wash it well and trim the ends. Use a box grater or a food processor to grate it. Aim for small, thin pieces. This helps the zucchini blend well into the batter. Squeeze out excess moisture. Too much water can make your cake soggy. You can use a clean kitchen towel for this step. For a moist and fluffy cake, the texture is key. Mix the wet and dry ingredients gently. Overmixing can lead to a dense cake. When you fold in the grated zucchini, do it lightly. This keeps air in the batter, making the cake light. Adding chocolate chips or nuts can also enhance the texture. They add a nice crunch to each bite. One common mistake is skipping the moisture check on zucchini. Always squeeze out extra liquid, or your cake may become too wet. Another mistake is not using room temperature eggs. Cold eggs can affect how well the batter mixes. Lastly, don't forget to preheat your oven. A hot oven helps the cake rise and bake evenly. For more detailed steps, check out the Full Recipe. {{image_2}} You can make this cake gluten-free by swapping all-purpose flour for a gluten-free blend. Look for a mix that includes xanthan gum for the best results. This change keeps the cake moist and tasty, just like the original. You might need to bake it a bit longer, so check for doneness with a toothpick. To make a vegan chocolate zucchini cake, replace eggs with flax eggs. Mix one tablespoon of ground flaxseed with three tablespoons of water. Let it sit for five minutes until it thickens. Use plant-based oil and dairy-free chocolate chips. This keeps the cake rich and flavorful without any animal products. You can boost the flavor of your cake with a few simple tweaks. Adding a teaspoon of cinnamon or nutmeg gives it a warm, cozy taste. For a fun twist, mix in some shredded coconut or chopped nuts. You can also toss in extra chocolate chips for a richer chocolate kick. Try these ideas to make your cake unique and delicious! To keep your chocolate zucchini cake fresh, store it in an airtight container. Place the cake in a cool, dry spot. If you have cut pieces, wrap them well in plastic wrap before placing them in the container. This helps keep moisture in and prevents drying out. The cake stays good for up to four days this way. Freezing is a great option if you want to save some cake for later. First, let the cake cool completely. Then, slice it into pieces, or freeze it whole. Wrap each piece in plastic wrap, then place them in a freezer bag. You can also use a suitable container. This keeps the cake fresh for about three months. When you want a slice, just take it out and let it thaw in the fridge. When reheating your cake, do it gently to keep it moist. You can use a microwave or an oven. If using a microwave, warm a slice on low power for about 10-15 seconds. For the oven, preheat it to 350°F (175°C). Place the cake on a baking sheet and warm it for about 5-10 minutes. If you want, you can add a scoop of ice cream or whipped cream on top for an extra treat. Enjoy your delicious chocolate zucchini cake! Yes, you can substitute zucchini with other moist vegetables. Carrots work great in this recipe. You can also try using shredded pumpkin or even beets. Each choice gives a unique taste and texture. Just make sure to grate them well. The moisture level should be similar to zucchini. This keeps your cake moist and tasty. To check if your cake is done, use a toothpick. Insert it into the center of the cake. If it comes out clean, your cake is ready. It should not have wet batter sticking to it. Also, the edges should pull away from the pan slightly. If it looks set and springs back when touched, it’s perfect! Zucchini adds moisture without a lot of calories. It is low in fat yet high in vitamins. Zucchini is rich in vitamin A, which is good for your eyes. It also has fiber, which helps your digestion. Plus, it can help you feel full longer. This makes your cake a bit healthier. It’s a fun way to sneak in veggies! Check out the Full Recipe for more tips. This blog post covered everything you need for baking a delicious chocolate zucchini cake. We explored fresh ingredients, step-by-step instructions, and tips to avoid mistakes. You learned how to adjust for gluten-free or vegan diets and flavor your cake in fun ways. We also reviewed storage tips to keep your cake fresh. With this knowledge, you can confidently bake and enjoy a tasty treat. Keep experimenting and let your creativity shine!](https://tossedrecipes.com/wp-content/uploads/2025/07/d10c7ae7-fc9d-4681-a81b-7d0002406623.webp)
If you love rich, moist desserts, chocolate zucchini cake is a must-try. This treat tastes amazing while sneaking in veggies that add moisture and nutrition. I’ll take you through easy …