Skip to content
Tossed Recipes
  • Home
  • Appetizers
  • Desserts
  • Salads
  • Breakfast
  • Dinner
  • Privacy Policy
  • Contact
  • About

Chef Jamie

Soft Zucchini Taco Shells Flavorful and Healthy Recipe

July 2, 2025 by Chef Jamie
- 2 cups zucchini, grated - 1/2 cup almond flour - 1 large egg - 1/4 teaspoon garlic powder - 1/4 teaspoon onion powder - Salt and pepper to taste - 1 tablespoon fresh cilantro, chopped (optional) - 1 tablespoon olive oil (for cooking) Zucchini is the star of this recipe. It makes a great taco shell. The first step is to grate the zucchini. Grating makes it easier to mix. You will also want to squeeze out the moisture. Use a clean kitchen towel for this. Almond flour gives the shells a nice texture. It adds a nutty flavor too. You can use other flours if you prefer. Just make sure they work well with zucchini. The egg helps bind the mixture. It keeps the shells from breaking apart. Garlic and onion powders add great flavor. Adjust the salt and pepper to your taste. Cilantro adds a fresh touch, but it’s optional. Olive oil helps cook the shells without sticking. You can use a non-stick skillet for easier cooking. - Low-carb alternative to traditional tortilla shells - Rich in vitamins and minerals - High in fiber for better digestion Zucchini is a great choice for healthy eating. It is low in carbs, which makes it perfect for many diets. This veggie is packed with vitamins A and C. These vitamins boost your immune system. Zucchini also has potassium, which is good for your heart. The high fiber content helps with digestion. Eating fiber keeps you feeling full longer. This means you might eat less overall. It’s a win-win for your health! Try using these soft zucchini taco shells for your next meal. You will love their flavor and health benefits. Check out the Full Recipe for all the steps! Start by grating the zucchini. Place the grated zucchini in a clean kitchen towel. Squeeze the towel tightly to remove excess moisture. This step is key. If you skip it, your taco shells may fall apart. In a mixing bowl, combine the drained zucchini, almond flour, egg, garlic powder, onion powder, salt, and pepper. You can also add cilantro for a fresh touch. Mix until it forms a dough-like consistency. This should not be too wet or too dry. Next, preheat a non-stick skillet over medium heat. Add a drizzle of olive oil to coat the bottom. Using a measuring cup, scoop about 1/4 cup of the zucchini mixture. Flatten it into a round shape about 1/4 inch thick in the skillet. Repeat this until you fill the skillet, leaving space between each shell. Cook each shell for about 3-4 minutes until golden brown. Then, flip carefully and cook for another 3-4 minutes until set. Remove the shells and let them cool on a plate. Repeat until all the batter is used up. Once cooled, fill with your favorite toppings. For the full recipe, check the detailed instructions above. To make great taco shells, start with a clean kitchen towel. This helps you squeeze out the moisture from the zucchini. The drier the zucchini, the better your shells will hold their shape. Next, do not overcrowd the skillet while cooking. Give each shell space to cook evenly. This way, they will turn out golden and tasty. You can enhance the flavor of your zucchini taco shells by mixing in different herbs and spices. Basil, cumin, or even smoked paprika can add a fun twist. When you fill your shells, think about your toppings. Fresh avocado, spicy salsa, or grilled veggies work well. Try different combinations to find your favorite! One common mistake is not squeezing enough moisture from the zucchini. If you skip this step, your shells may fall apart. Another mistake is overcooking the shells. Keep an eye on them to prevent dryness. You want them to be soft and tender, not hard and brittle. Avoid these errors for the best results! {{image_2}} You can switch up the flour in your zucchini taco shells. Coconut flour works well as an alternative. It adds a hint of sweetness and a unique texture. Just remember, you’ll need less coconut flour than almond flour. Start with 1/4 cup and adjust as needed. Whole wheat flour is another great option. It boosts nutrition and adds a nutty flavor. Use it in equal parts with almond flour for a wholesome mix. This change makes your taco shells even healthier without losing taste. Want to amp up the flavor? Incorporate cheese into the mix! Shredded cheddar or mozzarella can add a creamy goodness. Just mix in about 1/2 cup when combining your ingredients. This will make your taco shells more savory and satisfying. You can also use different spices for varied taste. Try cumin for warmth or smoked paprika for a hint of smokiness. A pinch of chili powder can add some heat. Experiment with spices to find your perfect blend! If you want to keep it plant-based, there are easy swaps. You can use plant-based egg substitutes like flaxseed or chia eggs. Mix 1 tablespoon of flaxseed meal with 2.5 tablespoons of water, then let it sit until it thickens. Adding extra vegetables or legumes is another great option. Chopped spinach, bell peppers, or black beans can boost flavor and nutrients. Just be sure to adjust moisture levels in the mix so the shells hold together well. Enjoy creating your own fun variations! How do you store leftover taco shells? After cooking, let your zucchini taco shells cool completely. Place them in an airtight container. Use parchment paper between layers to prevent sticking. This keeps them fresh and ready for later meals. What are the recommended storage containers? Use glass or plastic containers with tight lids. Make sure they are clean and dry. This helps maintain their texture and flavor. What are the best practices for freezing taco shells? To freeze, cool the taco shells fully first. Then, wrap each shell in plastic wrap or foil. Place them in a freezer-safe bag or container. This prevents freezer burn and keeps them safe for later use. How do you thaw and reheat taco shells? To thaw, move the shells to the fridge overnight. For quick reheating, use a skillet on low heat. Heat each shell for about a minute on each side. This restores their softness and warmth. What is the expected duration for refrigerated vs. frozen shells? In the fridge, your taco shells last about three days. If frozen, they can stay good for up to three months. Just remember to label the container with the date. Yes, you can make zucchini taco shells ahead of time. After cooking, let them cool completely. Then, stack the shells with parchment paper between each layer to prevent sticking. Store them in an airtight container in the fridge for up to three days. If you want to keep them longer, freeze the shells instead. Just make sure to wrap them well in plastic wrap or foil. Thaw them in the fridge before using. Zucchini taco shells are gluten-free! This recipe uses almond flour, which is a great gluten-free option. Almond flour gives the shells a nice texture and is low in carbs. You can enjoy these shells even if you have gluten sensitivities or celiac disease. Always check your ingredients to make sure they are gluten-free. To keep your zucchini taco shells from falling apart, squeeze out as much moisture as you can from the grated zucchini. This step is crucial for a sturdy shell. Also, form the shells gently but firmly in the skillet. Cook them on medium heat, and do not flip them until they are golden brown. Once they cool, they will hold their shape better, ready for your tasty fillings. Zucchini taco shells offer a tasty and healthy alternative to traditional options. This post covered essential ingredients, step-by-step cooking methods, and smart tips to enhance flavor. I also shared ways to store and even freeze your taco shells for future meals. Remember, keep the moisture in check and don’t overcrowd the skillet. Experiment with different spices and toppings to make it your own. These shells are simple, versatile, and delicious! Enjoy your healthy taco nights with ease and creativity.

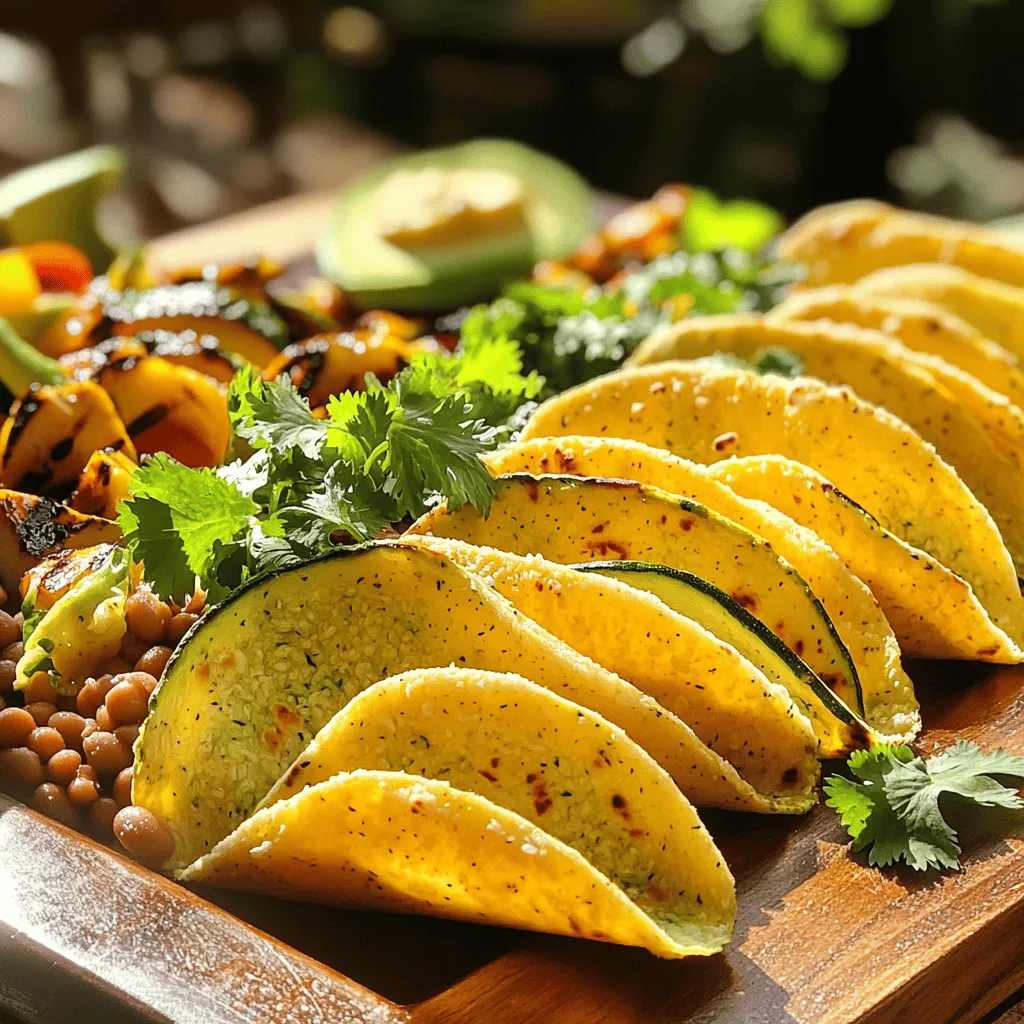
If you’re ready to switch up your taco game, these Soft Zucchini Taco Shells are a must-try! Packed with flavor and health benefits, they’re the perfect low-carb alternative to traditional …
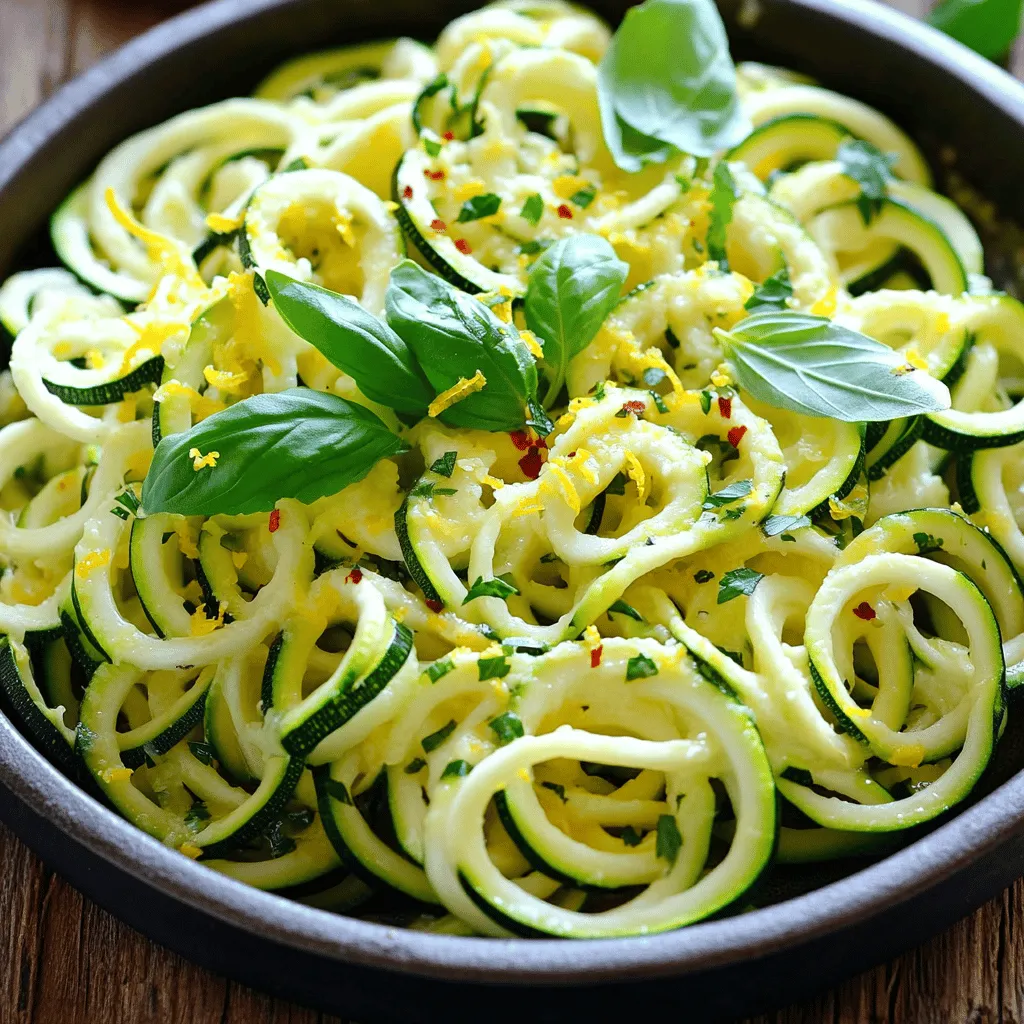
Read more

Categories Dinner

Cottage Cheese Blueberry Muffins Easy and Tasty Treat

July 2, 2025 by Chef Jamie
- 1 cup cottage cheese - 1/2 cup milk - 1/4 cup honey or maple syrup - 2 large eggs - 1 teaspoon vanilla extract - 1 1/2 cups all-purpose flour - 1/2 teaspoon baking soda - 1 tablespoon baking powder - 1/2 teaspoon salt - 1 1/2 cups fresh blueberries - Zest of 1 lemon - 1/4 teaspoon ground cinnamon (optional) - 1/4 cup granola (for topping, optional) In this recipe, cottage cheese is the star. It adds moisture and protein. You can use low-fat or full-fat cottage cheese based on your preference. Milk makes the batter smooth and creamy. I enjoy using honey, but maple syrup works great too. Next, we have eggs. They bind the ingredients and add richness. The vanilla extract gives a lovely flavor. For the dry mix, all-purpose flour is the best choice. Baking soda and baking powder help the muffins rise. Salt brings out the sweetness. Fresh blueberries burst with flavor. You can use frozen blueberries if fresh ones are not available. Lemon zest adds a bright note to the muffins. Ground cinnamon is optional, but it adds warmth. Finally, granola on top gives a nice crunch. - Lemon zest for flavor - Granola for a crunchy topping Feel free to skip the cinnamon or granola if you prefer a simpler muffin. You can adjust the sweetness and flavors based on your taste. This recipe is all about making these muffins your own! For the full recipe, check out the detailed instructions. - Preheat your oven to 375°F (190°C). - Line a muffin tin with paper liners or lightly grease it. - In a large bowl, combine 1 cup cottage cheese, 1/2 cup milk, 1/4 cup honey, 2 eggs, and 1 teaspoon vanilla extract. Mix well until blended. - In another bowl, whisk together 1 1/2 cups flour, 1/2 teaspoon baking soda, 1 tablespoon baking powder, 1/2 teaspoon salt, lemon zest, and 1/4 teaspoon cinnamon if you choose to use it. - Gradually add the dry mixture to the wet mixture. Stir gently until just combined. - Fold in 1 1/2 cups blueberries carefully to avoid breaking them. - Spoon the batter into the muffin tin, filling each cup about two-thirds full. Optionally, sprinkle 1/4 cup granola on top for a fun crunch. - Bake for 18-20 minutes, or until a toothpick comes out clean. - Let the muffins cool in the pan for 5 minutes, then transfer them to a wire rack. This simple process gives you tasty cottage cheese blueberry muffins that are perfect for breakfast or a snack. For the full details, check the Full Recipe. Enjoy! To get the best muffins, avoid overmixing the batter. Mix just until the dry and wet ingredients blend. Overmixing makes muffins dense and tough. Fresh blueberries are best for flavor and texture. If you use frozen blueberries, do not thaw them. Add them straight to the batter to keep them from turning mushy. Adding lemon zest brightens the muffins. It gives them a fresh taste. You can also add ground cinnamon for warmth. It pairs well with blueberries. For serving, try a dollop of cottage cheese or Greek yogurt on the side. Top with a few fresh blueberries for color and fun. One big mistake is not preheating the oven. Always preheat it to 375°F (190°C) before baking. This helps the muffins rise and cook evenly. Another mistake is measuring ingredients incorrectly. Use measuring cups and spoons for accuracy. This makes a big difference in your muffins’ taste and texture. {{image_2}} You can switch things up by using Greek yogurt instead of cottage cheese. Greek yogurt gives muffins a creamy texture and adds protein. You can also change sweeteners. For instance, use agave syrup instead of honey. This change can make your muffins less sweet and give a different flavor. Feel free to get creative with flavor additions. You can mix in nuts like walnuts or pecans for a crunchy bite. Adding extra fruits like raspberries or sliced bananas can also enhance the taste. Spices like nutmeg or cardamom can take the muffins to a new level. Just a pinch can add warmth and depth. If you need gluten-free options, use almond flour or oat flour instead of all-purpose flour. This swap keeps the muffins soft and tasty. For vegan adaptations, replace eggs with flax eggs or applesauce. Use plant-based milk and keep the honey out. This way, everyone can enjoy these tasty treats. For the full recipe, refer to the previous section to get started on your Cottage Cheese Blueberry Muffins. To keep your cottage cheese blueberry muffins fresh, store them in an airtight container. This helps avoid drying out. If you want to refrigerate them, place the muffins in the container for up to a week. Make sure they cool completely before sealing. If you want to keep them longer, freezing is a great option. Wrap each muffin in plastic wrap or foil, then place them in a freezer bag. They can stay fresh for up to three months in the freezer. When you're ready to enjoy your muffins again, reheating is simple. Preheat your oven to 350°F (175°C). Place the muffins on a baking sheet and heat for about 5-10 minutes. This method helps keep them warm and soft. If you want to use the microwave, heat each muffin for 20-30 seconds. To keep them moist, cover them with a damp paper towel. This step helps prevent them from drying out. Enjoy your delicious muffins warm! Cottage cheese blueberry muffins have a soft and moist texture. The cottage cheese adds creaminess. You will also notice a slight chew from the flour. The blueberries burst with juice, making each bite refreshing. They are not dense like some muffins; instead, they feel light and airy. This texture makes them perfect for breakfast or a snack. Yes, you can use many fruits in this recipe. Raspberries, strawberries, or chopped apples work great. You can even mix fruits for fun flavors. Consider adding bananas for natural sweetness. Each fruit adds its unique taste and texture. Just be sure to adjust the sweetness if your fruit is very sweet. Cottage cheese blueberry muffins can last about 3 to 5 days. Store them in an airtight container at room temperature. If you want to keep them longer, freeze them. They freeze well and can last for up to 3 months. Just reheat them in the oven or microwave before serving. Yes, you can prepare the batter in advance. Mix the wet and dry ingredients separately. Store them in the fridge for up to 24 hours. When you are ready, combine them and fold in the blueberries. This saves time when you want fresh muffins quickly. Enjoy the ease of prep without losing flavor! Make delicious cottage cheese blueberry muffins with easy steps. We covered ingredients, mixing, and baking techniques. Remember to avoid overmixing for the best texture. Try adding lemon zest or granola for extra flavor. You can also make smart swaps for dietary needs. In conclusion, these muffins are simple, tasty, and customizable. You can enjoy them fresh or store for later. Happy baking!

Have you ever craved a sweet treat that’s also good for you? These Cottage Cheese Blueberry Muffins are the answer! They’re easy to make and packed with flavor. With fresh …

Read more

Categories Breakfast

Easy Baked Zucchini Sticks Crispy and Flavorful Snack

July 2, 2025 by Chef Jamie
To make crispy baked zucchini sticks, gather these ingredients: - 2 medium zucchinis, cut into sticks - 1 cup breadcrumbs (whole wheat is best) - 1/2 cup grated Parmesan cheese - 1 teaspoon garlic powder - 1 teaspoon onion powder - 1/2 teaspoon paprika - 2 large eggs - Salt and pepper to taste - Olive oil spray (for a lighter option) These ingredients create a tasty, crunchy snack that everyone will love. You can tweak this recipe to suit your taste. Here are some ideas: - Add Italian herbs like oregano or basil for a fresh flavor. - Mix in some chili powder for a bit of heat. - Swap Parmesan with cheddar for a different cheese taste. Feel free to experiment and find your favorite version! If you have dietary needs, here are some good swaps: - Use gluten-free breadcrumbs for a gluten-free option. - Replace eggs with a flaxseed mixture (1 tablespoon flaxseed meal + 3 tablespoons water) for a vegan choice. - Use nutritional yeast instead of cheese for a dairy-free flavor boost. These substitutions keep the dish delicious while fitting your needs. First, you need to gather all your ingredients. For this dish, use: - 2 medium zucchinis, cut into sticks - 1 cup breadcrumbs, preferably whole wheat - 1/2 cup grated Parmesan cheese - 1 teaspoon garlic powder - 1 teaspoon onion powder - 1/2 teaspoon paprika - 2 large eggs - Salt and pepper to taste - Olive oil spray Now, preheat your oven to 425°F (220°C). Line a baking sheet with parchment paper. This makes cleanup easy! In a shallow bowl, mix the breadcrumbs, Parmesan cheese, garlic powder, onion powder, paprika, salt, and pepper. Stir until everything is well combined. In another bowl, beat the eggs until smooth. Next, dip each zucchini stick in the egg mixture. Let any extra egg drip off. Then, coat the stick in the breadcrumb mix. Press gently to help it stick. Place the coated sticks on the baking sheet in a single layer. Make sure they don’t touch each other. This helps them bake evenly. Once your zucchini sticks are ready, lightly spray the tops with olive oil spray. This step helps them crisp up nicely. Now, place the baking sheet in the oven. Bake for 20-25 minutes. Halfway through, flip the sticks for even baking. You want them golden brown and crispy! After baking, carefully remove the sheet from the oven. Let the sticks cool slightly. This cooling time helps them firm up a bit. Now they are ready to eat! If you want to try different cooking methods, you can fry or grill these zucchini sticks. For frying, heat oil in a pan. Fry the sticks until golden brown. For grilling, place them on a preheated grill. Cook until they have nice grill marks and are tender. These methods add a unique twist to the dish. You can find the full recipe in the previous section. Enjoy your crunchy, flavorful snack! To get your zucchini sticks extra crispy, start by choosing the right zucchini. Look for firm, fresh zucchinis. Cut them evenly to ensure uniform cooking. The coating is key too. Use whole wheat breadcrumbs for a crunchier bite. After dipping in eggs, let excess drip off. This helps the breadcrumbs stick better. Bake them on parchment paper to avoid sticking. Spraying olive oil on top gives them that golden finish. Flip the sticks halfway through baking for even crispiness. You can add many flavors to your zucchini sticks. Mix in some Italian herbs like oregano or basil into the breadcrumbs. For a spicy kick, add cayenne pepper or red pepper flakes. If you love cheese, mix more grated Parmesan or try cheddar in the breadcrumb mix. You can also use lemon zest for a fresh taste. Get creative and make them your own! Dips make these zucchini sticks even better. A simple marinara sauce is classic and tasty. You can also try ranch dressing for a cool, creamy dip. If you like a bit of heat, serve with sriracha mayo. For something unique, mix yogurt with herbs for a fresh dip. Experiment with different flavors to find your favorite. These dips will make your snack even more enjoyable! For the full recipe, check out the earlier section on ingredients and instructions. {{image_2}} To make cheesy garlic zucchini sticks, add more cheese. Use a mix of mozzarella and Parmesan for a gooey texture. You can also toss in some minced garlic for a strong flavor. Just sprinkle it in the breadcrumb mix. This variation makes the sticks extra cheesy and full of flavor. If you like heat, try spicy zucchini sticks. Add cayenne pepper or red pepper flakes to the breadcrumb mix. You can also use a spicy seasoning blend. This will give your sticks a nice kick. Serve them with a cooling dip like ranch to balance the spice. For gluten-free zucchini sticks, swap regular breadcrumbs for gluten-free ones. You can find these at most stores. Another option is to use ground almonds or crushed cornflakes. They will still give you that crunchy bite. With this change, everyone can enjoy this tasty snack! Try these variations to enjoy different flavors. Each one keeps the crispy and flavorful essence that makes them so good. For the full recipe, check back to ensure you have all the steps right! To keep your baked zucchini sticks fresh, place them in an airtight container. Make sure they cool down first. Store them in the fridge for up to three days. If you want to eat them later, you can also wrap them in plastic wrap. This keeps them from drying out. Reheating zucchini sticks can be tricky. I prefer using the oven for the best results. Preheat your oven to 375°F (190°C). Spread the sticks on a baking sheet in a single layer. Heat for about 10 minutes or until they are warm and crispy again. You can also use an air fryer at 350°F (175°C) for about 5 minutes. This method keeps them nice and crunchy. If you want to freeze your zucchini sticks, make sure they are fully cooled first. Arrange them in a single layer on a baking sheet. Freeze them for about one hour. Once frozen, you can transfer them to a freezer bag. They can last up to three months in the freezer. When you are ready to eat, bake them straight from the freezer at 425°F (220°C) for about 25-30 minutes. This way, you can enjoy a delicious snack anytime! For the full recipe, check out the Crispy Cheesy Baked Zucchini Sticks section. No, I don't recommend using frozen zucchini. Frozen zucchini has more water, which makes it soggy. Fresh zucchini gives a better crunch. If you only have frozen, let it thaw and drain excess water. To make your zucchini sticks extra crispy, follow these tips: - Use whole wheat breadcrumbs for added texture. - Coat each stick well with the breadcrumb mix. - Don’t skip the olive oil spray; it helps them crisp up. - Bake them in a single layer, without touching, for even cooking. Flip them halfway for both sides to get golden brown. Baked zucchini sticks taste great with many dips. Here are some favorites: - Marinara sauce offers a classic Italian flavor. - Ranch dressing adds a creamy touch. - Spicy mayo gives a nice kick. - Hummus is a healthy, tasty choice. Explore these dips for a fun snack time! For the full recipe, check out the instructions above. You now have a clear guide for delicious zucchini sticks. We covered ingredients, cooking steps, and tips to make them crispy. You learned about fun variations and how to store leftovers. Remember, you can customize according to your tastes or dietary needs. Whether you enjoy them cheesy, spicy, or plain, zucchini sticks can fit any meal. Now, go ahead and try making your own tasty zucchini sticks!

If you crave a tasty snack that’s both simple and healthy, you’re in the right place! I’ll show you how to make Easy Baked Zucchini Sticks that are crispy and …

Read more

Categories Appetizers

Garlic Butter Chicken Bites Tasty Flavor Explosion

July 2, 2025 by Chef Jamie
- 1 lb (450g) chicken breast - 4 tablespoons unsalted butter - 4 cloves garlic - 1 teaspoon dried oregano - 1 teaspoon dried thyme - 1 teaspoon paprika - Salt and pepper to taste - 2 tablespoons fresh parsley, chopped (for garnish) - Lemon wedges (for serving) In this dish, chicken is the star. Chicken breast is best for its tenderness. I love using fresh garlic; it gives the best flavor. Unsalted butter adds richness and helps the garlic shine. Let’s talk about seasonings. Dried oregano and thyme add earthy notes. A sprinkle of paprika gives a warm kick. Salt and pepper enhance all the flavors. Don’t forget the parsley! It adds a fresh pop of color. Lemon wedges are important too. They bring a zesty brightness that makes each bite sing. These simple ingredients come together to create a flavor explosion. Find the Full Recipe to see how to make it all come together. First, we need to season the chicken. Take your 1 lb of chicken breast and cut it into bite-sized pieces. Sprinkle salt, pepper, paprika, and a pinch of dried oregano all over the chicken. Mix it well so every piece is coated with the spices. This step builds a lot of flavor for your bites. Next, melt the butter. Grab a large skillet and place it over medium heat. Add 4 tablespoons of unsalted butter. Watch it closely as it melts and foams. You want it to melt without turning brown. This butter will give your chicken a rich taste. Now, let’s sauté the garlic. Add 4 minced cloves of garlic to the melted butter. Stir it for about 1-2 minutes until it smells amazing. Be careful not to let the garlic burn, as burnt garlic can taste bitter. Then, it’s time to cook the chicken. Place the seasoned chicken pieces into the skillet. Cook them for about 5-7 minutes, stirring often. You want them to turn golden brown and be fully cooked. This is when the chicken absorbs all the garlic butter goodness. After the chicken is cooked, add herbs for extra flavor. Sprinkle 1 teaspoon of dried thyme and the remaining oregano over the chicken. Stir it well so the herbs mix in, creating a lovely aroma and taste. Now for the fun part—plating the chicken bites. Carefully transfer the golden chicken bites to a serving plate. This is where you can make it look pretty. For the final touch, garnish with fresh parsley. Take 2 tablespoons of chopped parsley and sprinkle it over the chicken. It adds a pop of color. Serve with lemon wedges on the side for a zesty kick. Enjoy every bite of your garlic butter chicken bites! For the full recipe, check out the details above. - Best practices for sautéing garlic Sauté garlic over medium heat. Use unsalted butter for a rich taste. Keep an eye on it. Stir often, and don’t let it brown. Burnt garlic can taste bitter. - How to achieve juicy chicken bites Cut chicken into even pieces. This ensures they cook at the same rate. Season well with salt, pepper, and paprika for flavor. Sauté chicken until golden brown, about 5-7 minutes. Don’t overcrowd the pan; it can steam instead of sear. - Adjusting flavors to suit your taste Feel free to tweak the seasonings. Add more oregano or thyme if you love herbs. For a kick, try adding chili flakes. Taste as you go to find your perfect blend. - Alternatives to traditional herbs and spices If you want a twist, use fresh herbs like basil or cilantro. You can also try lemon zest for a bright flavor. Get creative with spices like cumin or curry powder. Each change can lead to a new flavor explosion! For the full recipe and guidance on making these bites, check out the Full Recipe. {{image_2}} You can make this dish healthier with a few swaps. - Using chicken thighs instead of breasts: Chicken thighs have more flavor. They stay juicy, even with cooking. If you want a richer taste, thighs are a great choice. - Low-fat butter substitutes: You can use olive oil or a light butter spread. These options cut fat but keep the dish tasty. Want to kick up the taste? Here are some fun ways to add flavor. - Adding chili flakes for spice: If you like heat, sprinkle in some chili flakes. This simple addition makes the bites pop with flavor. Adjust the amount based on your spice level. - Incorporating different herbs like basil or cilantro: Fresh herbs brighten up the dish. You can mix in basil, cilantro, or even thyme for a twist. Experiment with your favorite herbs to find a blend you love. How you serve the chicken bites can change the meal. - Pairing garlic butter chicken bites with sides: Consider serving these bites with rice, veggies, or a fresh salad. Each side adds a nice touch and balances the meal. - Transforming into a chicken pasta dish: You can also toss the chicken bites with pasta. Add some cream or a light sauce for a full meal. This twist takes the dish to a new level. Explore the Full Recipe for more ways to enjoy these garlic butter chicken bites! You can prepare the chicken bites in advance. Season the chicken and store it in the fridge. This keeps the flavors fresh. You can make them up to a day ahead of time. If you cook the chicken, it stays good in the fridge for about 3 to 4 days. Make sure to seal it in an airtight container. Freezing chicken bites is easy. Let them cool completely before freezing. Place them in a single layer on a baking sheet. Freeze them for a few hours until solid. Then, transfer them to a freezer bag. Remove as much air as possible to avoid freezer burn. When you're ready to eat, reheating is key. You can use an oven or a skillet. For the oven, preheat it to 350°F (175°C). Bake for about 15 minutes. For a skillet, heat a little butter over medium heat and cook until warmed through. This keeps the chicken bites tasty and juicy. Garlic butter chicken bites last about 3 to 4 days in the fridge. To keep them fresh, store them in an airtight container. This helps prevent them from drying out. Reheat them in a skillet for the best flavor. Yes, you can use frozen chicken for this recipe. Just make sure to thaw it completely before cooking. This helps the chicken cook evenly and absorb all the tasty garlic butter flavor. Several sides pair well with garlic butter chicken bites. Here are some great options: - Steamed vegetables like broccoli or green beans - Garlic bread for a crunchy contrast - A fresh salad for a light touch - Rice or quinoa to soak up the garlic butter To make this recipe dairy-free, swap the unsalted butter with a dairy-free alternative. You can use olive oil or plant-based butter. Both will still keep the chicken juicy and tasty. The Full Recipe details are easy to follow. Gather these ingredients: - 1 lb (450g) chicken breast, cut into bite-sized pieces - 4 tablespoons unsalted butter - 4 cloves garlic, minced - 1 teaspoon dried oregano - 1 teaspoon dried thyme - 1 teaspoon paprika - Salt and pepper to taste - 2 tablespoons fresh parsley, chopped (for garnish) - Lemon wedges (for serving) This dish is quick to prepare and full of flavor. Enjoy making it! In this article, we explored how to make garlic butter chicken bites. We covered key ingredients, from chicken to spices. You learned step-by-step instructions for preparing and cooking. I provided tips for juicy results and creative flavor variations. Remember, this dish is versatile and easy to adjust to your taste. Enjoy experimenting with sides and storage options. Your next meal will impress with these tasty chicken bites!

Are you ready for a flavor explosion? Garlic Butter Chicken Bites deliver savory, juicy goodness that will wow your taste buds. With just a few simple ingredients, you can whip …

Read more

Categories Appetizers

Zucchini Noodles Perfectly Cooked Healthy and Simple Dish

July 2, 2025 by Chef Jamie
- 4 medium zucchinis, spiralized - 2 tablespoons olive oil - 4 cloves garlic, minced - 1 teaspoon red pepper flakes (adjust to taste) - Zest and juice of 1 lemon - Salt and pepper to taste - Fresh basil leaves, chopped (for garnish) - Grated Parmesan cheese (optional, for serving) - Additional vegetables to mix in - Alternative herbs for garnish - Different cheese options - Spiralizer or vegetable peeler - Large skillet - Cooking spoon - Serving platter When I make zucchini noodles, I love using fresh, high-quality ingredients. The zucchinis are the stars of the dish. They add a light and fresh taste. Olive oil gives a nice richness. Garlic adds a punch of flavor. Red pepper flakes bring heat, but you can adjust that to your liking. A squeeze of lemon juice and zest adds brightness. I often like to mix in other vegetables too. Cherry tomatoes or bell peppers can add color and flavor. Fresh herbs like parsley or oregano can change the taste. For cheese lovers, Parmesan is a great option. It adds creaminess and a savory touch. To make this dish, you need just a few tools. A spiralizer or vegetable peeler helps you create the noodles. A large skillet is essential for cooking. A cooking spoon makes mixing easy. Finally, a serving platter dresses up the table. For the full recipe, check out the Zesty Lemon Garlic Zucchini Noodles. - Start by spiralizing the zucchinis. Use a spiralizer or a vegetable peeler. Set the noodles aside. - For even cuts, keep the zucchini steady. Turn it slowly as you spiralize. This helps make long, perfect noodles. - Heat olive oil in a large skillet over medium heat. - Add minced garlic and red pepper flakes. Sauté for 1-2 minutes until fragrant, but don’t let the garlic burn. - Toss in the spiralized zucchini noodles. Cook for 2-3 minutes. You want them warm but still crunchy. - Add lemon zest and juice. Mix well to coat all the noodles. - Season with salt and pepper to taste. Adjust to your liking. - Transfer the noodles to a serving platter. Garnish with fresh basil and grated Parmesan cheese, if desired. For the complete recipe, check out the Full Recipe section! To get the best texture in your zucchini noodles, cook them for a short time. Aim for about 2-3 minutes over medium heat. This keeps them firm and not mushy. Start with hot olive oil and add garlic first. This step adds flavor and warms the pan. To avoid soggy noodles, do not overcook them. Drain excess water from zucchini before cooking. You can also sprinkle some salt on them and let them sit for 10 minutes. This helps draw out moisture. Pat them dry before cooking to keep them crisp. For tasty zucchini noodles, use simple seasonings. A mix of salt, pepper, and red pepper flakes works well. You can also try Italian seasoning or garlic powder for a twist. When it comes to sauces, light options are best. Lemon juice and olive oil make a zesty dressing. You can also use pesto or marinara for a richer flavor. Just remember to keep the sauce light to balance the dish. Store leftover zucchini noodles in an airtight container. They can last for about 2-3 days in the fridge. To reheat, use a skillet over low heat. This keeps them from getting too soft. If you have extra noodles, try mixing them with eggs for a quick frittata. You can also toss them into soups or stir-fries for added texture. These ideas give you more ways to enjoy your zucchini noodles. For the full recipe, check out the Zesty Lemon Garlic Zucchini Noodles. {{image_2}} Zucchini noodles are fun to play with. You can switch up the flavors and textures easily. Here are some variations you can try. - Light and creamy sauces: Use a simple mix of Greek yogurt and herbs. It adds a nice touch. - Tomato-based options: A classic marinara sauce works well. It gives a hearty feel. - Pesto or dairy-free alternatives: Try basil pesto for a fresh taste. You can also use avocado for a creamy twist. - Nuts and seeds for crunch: Add toasted pine nuts or sesame seeds. They give a nice crunch. - Protein additions like shrimp or chicken: Grilled shrimp adds a tasty protein boost. Chicken makes it filling. - Vegan cheese options: Nutritional yeast can add cheesy flavor without dairy. It’s a great choice for vegans. - Italian-inspired variations: Top with fresh tomatoes and basil. It’s a classic pairing. - Asian flavor profiles: Use soy sauce, ginger, and sesame oil for a different taste. It’s a fun twist. - Mediterranean twists: Add olives and feta cheese for a salty kick. This gives a fresh vibe. Explore these variations to find your favorite way to enjoy zucchini noodles. For a complete recipe, check out the Full Recipe. To keep leftover zucchini noodles fresh, store them in an airtight container. Make sure they cool down first. I recommend using glass or BPA-free plastic containers. This helps prevent moisture loss. Place a paper towel inside the container to absorb excess moisture. This keeps the zucchini noodles from getting soggy. You can freeze zucchini noodles to use later. First, blanch them in boiling water for one minute. This stops the enzymes that cause spoilage. After blanching, place them in ice water for a quick cool-down. Drain and dry them well. Then, pack the noodles in freezer bags, removing as much air as possible. When you want to use them, thaw in the fridge overnight. They can also be cooked straight from frozen, just add a couple of extra minutes to the cooking time. Zucchini noodles stay fresh in the fridge for about 3 to 5 days. If they start to look slimy or smell off, it’s time to toss them. Always check for discoloration or a mushy texture. These are signs of spoilage. Storing them correctly helps ensure you enjoy your zesty lemon garlic zucchini noodles as long as possible. To avoid mushy zucchini noodles, focus on cooking time. Cook them for just 2 to 3 minutes. This keeps them crunchy. Heat the olive oil first, then add minced garlic and red pepper flakes. Sauté until fragrant. Add the noodles next, tossing them gently. Stir constantly to keep them from overcooking. Remember, a little crunch adds a nice texture to your dish. Yes, you can prep zucchini noodles in advance. Spiralize the zucchinis and store them in an airtight container. Keep them in the fridge for up to 3 days. For best results, cook them just before serving. If you cook them ahead, they may lose their crunch. To reheat, quickly sauté them in a skillet for about a minute. Zucchini noodles pair well with many dishes. You can serve them with marinara sauce or pesto. They also go great with grilled chicken or shrimp. Add some veggies like bell peppers or cherry tomatoes for more flavor. Consider topping them with fresh herbs or cheese for a tasty finish. Yes, zucchini noodles are very healthy. They are low in calories and high in fiber. This makes them a great choice for a light meal. They also provide vitamins A and C. Eating zucchini noodles can help you feel full without consuming too many carbs. Enjoy them as a nutritious alternative to pasta. Zucchini noodles are easy to make and fun to eat. You learned how to prepare them, cook them well, and store extras. Use the lemon for flavor and choose from various sauces and toppings. These noodles fit many dishes and diets. They are healthy and full of flavor. Try these tips to enjoy zucchini noodles perfectly every time. You will impress your family and friends with your tasty meal. Now, get cooking and have fun!

Are you looking to make a delicious and healthy meal in no time? Zucchini noodles, or zoodles, are the perfect answer! With just a few fresh ingredients, you can whip …

Read more

Categories Dinner

Parmesan Crusted Chicken Juicy and Flavorful Dish

July 2, 2025 by Chef Jamie
- 4 boneless, skinless chicken breasts - 1 cup grated Parmesan cheese - 1 cup breadcrumbs (preferably panko) I love using chicken breasts for this dish. They are tender and cook evenly. The grated Parmesan cheese brings a rich, nutty flavor that pairs perfectly with the chicken. I prefer panko breadcrumbs because they give a nice crunch. - 2 teaspoons garlic powder - 1 teaspoon dried Italian herbs (oregano, basil, thyme) - Salt and pepper to taste Garlic powder adds a warm, savory taste. The dried Italian herbs make the dish vibrant and aromatic. Don’t forget the salt and pepper; they bring out all the flavors. - 2 large eggs - 1 tablespoon Dijon mustard - 2 tablespoons olive oil - Fresh parsley, chopped (for garnish) The egg and Dijon mustard mix helps the coating stick well to the chicken. Olive oil adds flavor and helps the crust become crispy. Finally, I use fresh parsley as a garnish to add a pop of color and freshness to the dish. For the complete recipe, check out the Full Recipe section. 1. Preheat your oven to 400°F (200°C). This high heat helps the chicken cook evenly. 2. Line a baking sheet with parchment paper. This makes cleanup a breeze. 3. In a shallow bowl, whisk together 2 large eggs and 1 tablespoon of Dijon mustard. Mix until smooth and creamy. 1. Take your chicken breasts. Dip each piece into the egg mixture. Make sure it’s fully coated. 2. Next, dredge the chicken in the Parmesan breadcrumb mixture. Press down lightly so the crumbs stick well. 3. Repeat this process for all chicken breasts. This will create a nice, thick crust. 1. Place the coated chicken on your prepared baking sheet. Drizzle with 2 tablespoons of olive oil. This adds extra crunch. 2. Bake in the preheated oven for 25-30 minutes. Aim for a golden brown color on the crust. 3. To check if it’s done, cut into the thickest part. The juices should run clear, and the inside should be white. 4. Let the chicken rest for 5 minutes after baking. This helps keep it juicy. 5. Garnish with fresh parsley before serving for a pop of color. For the full recipe, check out the detailed guide provided earlier in this article. To get that perfect crust, use panko breadcrumbs. They are lighter and crispier than regular breadcrumbs. This makes a big difference in texture. Drizzle olive oil on top before baking. This helps the crust turn golden and adds extra flavor. Marinating chicken adds great flavor. You can use fresh herbs like rosemary or thyme. Let the chicken marinate for at least 30 minutes. For best results, try to marinate for a few hours. This gives the herbs time to infuse their taste. Plating is key to making your dish look great. Serve the chicken on a large platter. A sprinkle of fresh parsley adds color. You can also add lemon wedges on the side. This not only looks nice but adds a fresh taste too. For the full recipe, please check the earlier sections for step-by-step guidance. {{image_2}} You can make Parmesan crusted chicken even more exciting. Try adding spices like paprika or cayenne. These spices give the chicken a nice kick. You can also swap Parmesan cheese for other cheeses. Mozzarella or cheddar works well too. They each bring a unique taste to your dish. If you want a healthier meal, consider baking instead of frying. Baking keeps the chicken tender without extra oil. You can also use whole grain breadcrumbs. They add fiber and a nutty flavor. This makes your meal a bit more nutritious while still being delicious. The right sides make your meal shine! I recommend pairing this chicken with roasted vegetables. Think broccoli, green beans, or carrots. They add color and nutrients. For carbs, rice or pasta works great. Both soak up any juices and balance the flavors. You can find the full recipe to help you create a full meal experience. After you enjoy your Parmesan crusted chicken, store the leftovers properly. First, let the chicken cool down to room temperature. Place it in an airtight container. This helps keep it fresh for longer. The chicken can stay in the fridge for up to 3 days. If you want to keep it longer, consider freezing. When it's time to eat the leftovers, reheating them right is key. The oven is the best option. Preheat your oven to 350°F (175°C). Place the chicken on a baking sheet. Cover it with foil to keep it moist. Bake for about 15-20 minutes. This keeps the crust crispy. If you use a microwave, heat it in short bursts. Check every 30 seconds to avoid sogginess. If you want to freeze your Parmesan crusted chicken, wrap each piece tightly in plastic wrap. Then, place them in a freezer-safe bag. Make sure to remove as much air as possible. This helps prevent freezer burn. It can last for about 2 months. When you're ready to eat, thaw it in the fridge overnight. This ensures even reheating and keeps the crust crunchy. You can find the full recipe to get started on this delicious dish. To check for doneness, look for a golden brown crust. The chicken should feel firm and not jiggle. The juices should run clear when you cut into it. The best way to be sure is to use a meat thermometer. Insert it into the thickest part of the chicken. It should reach 165°F (75°C) for safe eating. This way, you confirm it’s fully cooked. Yes, you can prep Parmesan crusted chicken in advance. Coat the chicken and place it on the baking sheet. Cover it and store it in the fridge. You can keep it this way for up to 24 hours. When you are ready to cook, just pop it in the oven. For reheating, I recommend using the oven. It helps keep the crust crispy. Heat it at 350°F (175°C) for about 10-15 minutes. Parmesan crusted chicken pairs well with many sides. You can serve it with a fresh salad or roasted vegetables. Some quick recipes include: - Garlic mashed potatoes: Boil potatoes, mash with garlic, and add butter. - Steamed broccoli: Cook in a pot with a little water until tender. - Pasta with olive oil: Toss cooked pasta with olive oil, salt, and pepper. These sides balance the flavors and make for a great meal. For complete cooking guidance, check out the full recipe. It includes all the steps and tips you need to make the perfect Parmesan crusted chicken. This blog post covered how to make Parmesan crusted chicken using simple ingredients and steps. You learned about the main items like chicken, Parmesan, and breadcrumbs, as well as seasonings and cooking tips. I shared methods for perfecting the crust, marinating for flavor, and even serving suggestions. Don’t forget the storage tips for leftovers! With this knowledge, you can enjoy a tasty meal that’s easy to prepare. Dive in and impress your family with a delicious dish tonight!

Welcome to a delicious journey! Today, I’m excited to share my recipe for Parmesan Crusted Chicken, a dish that is juicy and full of flavor. This simple yet tasty meal …

Read more

Categories Dinner

Air Fryer Summer Squash Crispy Fritters Recipe

July 2, 2025 by Chef Jamie
- 2 medium summer squashes, grated - 1 cup grated zucchini - 1/2 cup all-purpose flour - 1/4 cup cornmeal - 1/4 cup grated Parmesan cheese - 1 large egg, beaten - 2 cloves garlic, minced - 1 teaspoon onion powder - 1 teaspoon dried oregano - Salt and pepper to taste - Olive oil spray When making air fryer summer squash fritters, you need fresh ingredients. The summer squash brings a light, sweet flavor. Zucchini adds moisture and helps the fritters hold together. Flour and cornmeal give the fritters their crunchy texture. Parmesan adds a savory depth. The egg binds everything, while garlic and spices boost flavor. Use salt and pepper to taste for the best results. A light spray of olive oil helps achieve that golden crisp. - Air fryer - Mixing bowl - Kitchen towel You will need a few tools to make these fritters. An air fryer cooks them quickly and evenly. A mixing bowl lets you combine all the ingredients easily. A kitchen towel helps remove moisture from the grated squash. These simple items make the cooking process smooth. It’s all about keeping it easy and fun in the kitchen. 1. Start by grating the summer squash and zucchini. This helps them cook evenly. 2. Place the grated veggies in a bowl and sprinkle with salt. The salt pulls out moisture. 3. Let the mixture sit for ten minutes. This step is key for crispy fritters. 4. After ten minutes, grab a clean kitchen towel. Squeeze the squash to remove extra moisture. This will help the fritters crisp up. 1. In the same bowl, combine the dry and wet ingredients. Add the flour, cornmeal, and Parmesan cheese. 2. Next, mix in the beaten egg, minced garlic, onion powder, oregano, salt, and pepper. 3. Stir until everything is well blended. You want a thick mixture that holds together. 1. Preheat your air fryer to 375°F (190°C). This ensures even cooking. 2. If you like, line the basket with parchment paper. Lightly spray it with olive oil for a non-stick surface. 3. Use a tablespoon to scoop the mixture. Shape it into small patties, about 2 inches wide. 4. Place the patties in a single layer in the air fryer basket. Do not overcrowd them. 5. Lightly spray the top with olive oil. This adds to the crispiness. 6. Air fry the fritters for 10-12 minutes. Flip them halfway through for even browning. 7. When they turn golden brown, they’re ready. Let them cool for a minute before serving. This recipe is simple and fun to make. You can find the full recipe for crispy air fryer summer squash fritters above. To achieve crispy fritters, start by removing moisture. Grated summer squash and zucchini have a lot of water. Moisture makes fritters soggy. Sprinkle salt over the grated veggies and let them sit. This step pulls out extra liquid. After ten minutes, squeeze the mix in a kitchen towel. This makes a big difference in texture. For air fryer settings, preheat to 375°F (190°C). This temperature cooks the fritters evenly and makes them crispy. The cooking time is key too. Aim for 10 to 12 minutes. Flip the fritters halfway through for even browning. Your fritters should be golden brown and firm when done. Fritters taste great on their own but pair well with dips. Greek yogurt or sour cream adds creaminess. Fresh herbs like parsley or chives make a lovely garnish. For presentation, serve fritters warm on a plate. A colorful dish will make your meal stand out. Enjoy your crispy fritters with friends and family! {{image_2}} You can change a few ingredients in the fritters. Instead of zucchini, try using yellow squash or even carrots. Both add a nice taste and keep the dish fresh. For cheese, you can swap Parmesan with feta or cheddar. Each cheese brings out a unique flavor. Spices can also change the taste. Try adding smoked paprika for a smoky kick. Or, mix in some cumin for a warm flavor. These small changes can make your fritters exciting. If you don’t have an air fryer, baking is an option. Preheat your oven to 400°F (200°C). Place the fritters on a baking sheet lined with parchment paper. Bake for about 20 minutes, flipping halfway through. This will give you a nice, crispy finish. You can also pan-fry the fritters. Heat a skillet over medium heat and add a little olive oil. Cook the fritters for about 4-5 minutes on each side. This method will give you a different texture, crispy on the outside and soft inside. Want to make these fritters vegan? Replace the egg with flaxseed meal. Mix 1 tablespoon of flaxseed meal with 3 tablespoons of water. Let it sit for 5 minutes to thicken. For a gluten-free version, use almond flour or a gluten-free flour blend in place of all-purpose flour. To boost nutrition, add some chopped spinach or kale to the mix. You can also sprinkle in some chia or hemp seeds for extra fiber and protein. These changes keep the fritters healthy and tasty. For the full recipe, check out the details above! To keep your fritters fresh, place them in a storage container with a tight lid. Use parchment paper between layers to avoid sticking. Refrigerate them within two hours of cooking for the best taste. They can last up to three days in the fridge. To bring back the crispiness, reheat fritters in your air fryer. Set it to 350°F (175°C) and heat for about 5 minutes. This keeps them crunchy. For alternative methods, you can use a skillet on medium heat. Just add a bit of oil and heat each side for about 2-3 minutes. This also works well for leftover fritters. Enjoy them warm and crispy again! Can I use other types of squash? Yes, you can use other squash types. Zucchini works well. Acorn squash adds a sweet flavor. Just remember to adjust cooking time for thicker squash. How do I know when the fritters are done? Your fritters are done when they are golden brown and crispy. Flip them halfway through cooking for even browning. Use a fork to check the texture. They should feel firm. Can I freeze the fritters? You can freeze fritters! Let them cool first. Place them in an airtight container. They can last up to three months in the freezer. Reheat in the air fryer when ready to eat. What spices pair well with summer squash? Summer squash loves spices like garlic, onion powder, and oregano. You can also try cumin for warmth or basil for freshness. Experiment with your favorites! How do I prevent the fritters from sticking? To prevent sticking, spray your air fryer basket with olive oil. Use parchment paper for easy removal. Make sure not to overcrowd the basket. This helps the hot air circulate. Where can I find the full recipe? You can find the full recipe for crispy air fryer summer squash fritters above. It includes all ingredients and steps you need. Can I double the recipe for a larger batch? Yes, you can double the recipe! Just use more squash and other ingredients. Make sure your air fryer can handle the extra volume. Cook in batches if needed for best results. To sum up, you can make tasty air fryer summer squash fritters using simple ingredients. Grating the vegetables and removing moisture are key for great texture. Follow the steps carefully to mix and cook them well, and remember to try different flavor swaps. Storing and reheating leftovers is easy, too. Enjoy your crunchy fritters as a snack or meal. Now, it's time to get cooking and impress everyone with your new dish!

Ready to make the best summer squash fritters? With just a few simple ingredients, you can whip up crispy, delicious bites using your air fryer. This easy recipe combines grated …

Read more

Categories Appetizers

Easy Peach Galette Simple and Delicious Dessert

July 2, 2025 by Chef Jamie
- 3 ripe peaches, sliced - 1 tablespoon lemon juice - 1 tablespoon sugar - 1 teaspoon vanilla extract - 1 pre-made pie crust (store-bought or homemade) - 1 tablespoon cornstarch - 1 egg, beaten (for egg wash) - 1 tablespoon butter, cut into small pieces - 1 tablespoon brown sugar (for sprinkling) To make a peach galette, you need simple and fresh ingredients. The star of this dessert is the peaches. Use ripe peaches for the best flavor. Their sweetness shines through. A splash of lemon juice helps brighten the taste. Sugar adds extra sweetness, while vanilla gives a warm aroma. The pie crust serves as a cozy blanket for the juicy filling. You can choose a store-bought pie crust or make your own if you prefer. Cornstarch helps thicken the peach juices, keeping the filling from being too runny. An egg wash gives the crust a lovely golden color when baked. Small pieces of butter add richness, and brown sugar on top creates a sweet, crunchy finish. - Using frozen peaches instead of fresh - Alternative sweeteners in place of sugar - Gluten-free pie crust options If fresh peaches are hard to find, frozen peaches work great. Just thaw and drain them before using. You can also swap sugar for honey or maple syrup for a different taste. If you need a gluten-free option, use a gluten-free pie crust. These swaps keep the galette tasty while catering to your needs. For the full recipe, check out the details above. First, slice the peaches. You need three ripe peaches for this. Place the slices in a bowl. Add one tablespoon of lemon juice and one tablespoon of sugar. This mix will brighten the flavors. Then, add one teaspoon of cornstarch. The cornstarch helps thicken the juices. Gently toss everything together. Let it sit for about ten minutes. This allows the peaches to release their natural juices. Next, take your pie crust. You can use store-bought or homemade. Roll it out on a floured surface. Aim for a rough circle about twelve inches wide. This crust will hold your filling. Carefully transfer the rolled crust to a baking sheet lined with parchment paper. Make sure it’s centered. Now, spoon your peach filling into the center of the crust. Leave about a two-inch border around the edges. This space is for folding. Fold the edges of the crust over the peaches. Create some pleats for a rustic look. It’s okay if the center stays open; this adds to the charm. Brush the crust with a beaten egg. This gives it a lovely golden color. Dot the peach filling with small pieces of butter. Then, sprinkle one tablespoon of brown sugar on top. This step adds sweetness and helps caramelize the peaches. Preheat your oven to 375°F (190°C). Place the galette in the oven. Bake it for about 30 to 35 minutes. You want the crust to turn golden brown. The peaches should be bubbling with joy. Once baked, let the galette cool a bit before you slice. Enjoy your easy peach galette with a scoop of ice cream or whipped cream. For the full recipe, check the details provided. To get a flaky crust, use cold ingredients. Cold butter and water make a big difference. Don’t overwork the dough; mix just until combined. Chilling the crust is key. Place it in the fridge for at least 30 minutes. This helps the butter firm up, giving you that nice, flaky texture. A warm peach galette tastes amazing with ice cream. A scoop of vanilla ice cream on top adds creaminess. Whipped cream works well too. For presentation, add fresh mint leaves. They add color and a nice touch of flavor. You can also sprinkle some extra sugar on top for a little sparkle. One common mistake is overcooking the peaches. Keep an eye on them while baking. You want them soft but not mushy. Another mistake is not letting the filling rest. Allowing the mixture to sit for 10 minutes helps the flavors meld. This step is easy but makes a big difference in taste. {{image_2}} You can make your peach galette even better by mixing in other fruits. Try adding berries like blueberries or raspberries. Their sweetness and tartness will add a nice twist. Apples also work well. They provide a crunchy texture and balance the soft peaches. Add spices to boost the flavor. A sprinkle of cinnamon gives warmth and depth. Nutmeg is another great choice. It adds a sweet, nutty taste that pairs well with peaches. You can also play with fresh herbs. Thyme or basil can bring a unique taste. Just a pinch can make a big difference. Switch up the dough for a new experience. Puff pastry makes a flaky and light crust. It adds a fun texture to your galette. You can also use a sweet biscuit dough. This option gives a different flavor and is easy to make. Each dough can change how your galette tastes. Don't be afraid to experiment! For the complete recipe, check out the Full Recipe. To store leftovers in the fridge, let the peach galette cool down first. Then, wrap it in plastic wrap or place it in an airtight container. This helps keep it fresh. The galette stays good for up to three days in the fridge. When you want to enjoy it again, just take it out and let it sit at room temperature for a bit. You can freeze the unbaked galette if you want to use it later. After you assemble the galette, wrap it tightly in plastic wrap and then in foil. This way, it will not get freezer burn. It can stay frozen for about three months. When you are ready to bake it, take it out and let it thaw in the fridge overnight. To reheat the galette without drying it out, preheat your oven to 350°F (175°C). Place the galette on a baking sheet. Cover it loosely with aluminum foil. This will help keep moisture in. Bake for about 10-15 minutes or until it is warm. Enjoy it as a sweet treat! For the full recipe, check out the Easy Peach Galette. A peach galette is a simple, rustic dessert. It is a type of French pastry. You make it with fresh peaches and pie crust. Unlike a pie, it has no strict shape. The crust folds over the fruit, giving it a charming look. This dessert lets the peaches shine, with their sweet and juicy flavor. Yes, you can use many fruits in a galette! Seasonal fruits work best. Try berries, apples, or pears. You can mix fruits, too. For example, peaches and blueberries go well together. Just adjust the sugar based on the fruit's sweetness. A baked peach galette lasts about 2 to 3 days. Store it in the fridge. Make sure to cover it well. The crust may soften over time, but it will still taste good! You can prepare the galette ahead of time. Make the filling and crust, then store them separately. Keep them in the fridge for up to a day. When you are ready to serve, assemble and bake it fresh. This keeps the crust nice and crispy. You can serve a peach galette warm or cold. Warm is best if you want to enjoy it fresh from the oven. Cold is nice if you prefer a refreshing treat. Pair it with ice cream or whipped cream for extra flavor. In this post, we explored how to make a delicious peach galette using simple ingredients. You learned about key ingredients, substitutions, and step-by-step instructions. We also shared tips for perfecting your crust and different variations to try. Remember, storing your galette properly can keep it fresh longer. Explore new flavors and share it with friends. Enjoy creating this rustic dish as much as I do! Your kitchen will be filled with the sweet aroma of baked peaches.

If you crave a sweet, simple dessert, look no further than an Easy Peach Galette. This rustic French pastry is a breeze to make and bursts with juicy peach flavor. …

Read more

Categories Desserts

Zucchini Noodle Chicken Alfredo Creamy Dinner Delight

July 2, 2025 by Chef Jamie
- 2 medium zucchinis, spiralized into noodles - 2 boneless, skinless chicken breasts - 1 cup heavy cream - 1 tablespoon olive oil - 3 cloves garlic, minced - Salt and pepper to taste - 1 cup grated Parmesan cheese - 1/4 teaspoon nutmeg - Fresh parsley, chopped (for garnish) When I make Zucchini Noodle Chicken Alfredo, I love using fresh ingredients. The zucchini noodles give the dish a light feel, while the chicken adds protein. Heavy cream makes the sauce rich and creamy. The olive oil is key for cooking the chicken perfectly. Garlic brings a wonderful aroma and flavor. Don't forget the salt and pepper! They enhance every bite. Parmesan cheese adds a salty, nutty taste that you cannot skip. A hint of nutmeg gives the sauce depth. Finally, fresh parsley brightens up the dish and adds a pop of color. For the full recipe, check out the detailed steps to create this creamy dinner delight. 1. Grab 2 medium zucchinis. 2. Use a spiralizer to turn them into long, noodle-like strands. 3. Once spiralized, set the noodles aside. 1. Take 2 boneless, skinless chicken breasts. 2. Season them with salt and pepper on both sides. 3. Heat 1 tablespoon of olive oil in a large skillet over medium heat. 4. Add the chicken to the skillet. Cook for 6-7 minutes on each side. 5. Make sure the chicken turns golden brown and is fully cooked. 6. Remove the chicken and let it rest for a few minutes. 7. Slice the chicken into strips once it has cooled. 1. In the same skillet, add 3 minced garlic cloves. 2. Sauté the garlic for about 30 seconds until it smells good. 3. Pour in 1 cup of heavy cream and bring it to a gentle simmer. 4. Stir the cream with the garlic to mix well. 5. Slowly add 1 cup of grated Parmesan cheese. Stir until the cheese melts and the sauce is creamy. 6. Sprinkle in 1/4 teaspoon of nutmeg and mix everything well. 1. Toss the zucchini noodles into the skillet with the Alfredo sauce. 2. Coat the noodles fully in the sauce. 3. Cook the noodles for 2-3 minutes until they are just tender. 4. Add the sliced chicken to the skillet. Mix gently to combine all the ingredients. 5. Taste your dish and adjust seasonings if needed. 6. Serve hot, garnished with fresh chopped parsley. For the complete recipe, refer to the [Full Recipe]. To get the perfect creaminess, use heavy cream. It gives a rich texture. Stir the cream gently over low heat. This helps it blend well with the cheese. If you heat it too fast, it can curdle. To avoid curdling, add the cheese slowly. Keep stirring as you add it. This helps create a smooth sauce. Cook zucchini noodles just right. They need only 2-3 minutes in the sauce. If you cook them too long, they get mushy. To keep their texture, use fresh zucchinis. Spiralize them right before cooking. This way, they stay firm. You can adjust this dish for different diets. If you need a dairy-free option, use coconut cream. It offers a nice flavor. For cheese, nutritional yeast works well for a cheesy taste. If you need a gluten-free option, make sure the chicken and other ingredients are certified gluten-free. Enjoy your meal with these simple swaps! Don’t forget to check the Full Recipe for more details. {{image_2}} You can swap chicken for shrimp or tofu. Shrimp cooks fast, about 3-4 minutes. Just add them in after the garlic. Tofu takes longer. You should sauté it until golden. Cook it for about 8-10 minutes. Adjust your cooking times based on the protein you use. This keeps your meal delicious and safe to eat. Adding fresh herbs and spices can boost taste. Basil, thyme, or oregano work great. You can mix in one teaspoon of dried herbs for depth. Try adding spinach or mushrooms for extra veggies. Sauté them with garlic before adding the cream. Each addition gives a new twist to this dish. For the full recipe, check [Full Recipe]. To store your Zucchini Noodle Chicken Alfredo, let it cool first. Place it in an airtight container. This keeps the flavors fresh. It will last in the fridge for 3 to 4 days. Make sure to check for any signs of spoilage before serving. When reheating, use a skillet over low heat. This helps keep the creamy texture. Stir gently to avoid sticking. You can also use a microwave. Heat in short bursts and stir in between. If you want to freeze it, part the dish into smaller portions. Use freezer-safe containers or bags. It lasts up to 2 months in the freezer. Thaw in the fridge overnight before reheating. Zucchini noodles, or zoodles, are thin strands made from zucchini. You can create them using a spiralizer or a vegetable peeler. They are a great low-carb alternative to pasta. Zucchini noodles are packed with nutrients and are low in calories. They provide fiber, vitamins, and minerals. This makes them a healthy choice for any meal. They soak up sauces well and offer a pleasant crunch. Plus, they are easy to make and can be used in many dishes. Yes, you can make this dish vegan! Instead of chicken, try using tofu or tempeh. For the sauce, swap heavy cream with coconut milk or cashew cream. Nutritional yeast can replace Parmesan cheese for a cheesy flavor. Use plant-based butter or olive oil for cooking. Adding fresh herbs like basil or thyme can enhance the flavor. These swaps create a creamy, tasty vegan version while keeping it delicious. To avoid watery zucchini noodles, start by salting them. After spiralizing, sprinkle salt on the noodles and let them sit for 10 minutes. This helps draw out excess moisture. Pat them dry with a paper towel before cooking. Cooking them briefly in the sauce also helps. Tossing them for just 2-3 minutes allows them to soften without becoming soggy. This way, you'll enjoy a flavorful meal without watery noodles. This blog post showed you how to make a tasty chicken Alfredo with zucchini noodles. We covered the main ingredients and easy steps to prepare the dish. You learned tips for perfect sauce and cooking. We also explored variations and storage options. In conclusion, this dish is fun to make and good for you. Enjoy cooking it your way!

Are you ready to enjoy a creamy, delicious meal that’s good for you? My Zucchini Noodle Chicken Alfredo is a perfect choice! This dish uses fresh zucchini noodles and tender …

Read more

Categories Dinner

Baked Ranch Chicken Simple and Flavorful Delight

July 2, 2025 by Chef Jamie
For a tasty Baked Ranch Chicken, gather these items: - 4 boneless, skinless chicken breasts - 1 packet ranch dressing mix - 1 cup plain Greek yogurt - 1 cup breadcrumbs (panko for extra crunch) - 1 cup shredded cheddar cheese - 1 teaspoon garlic powder - 1 teaspoon onion powder - Salt and pepper to taste - Fresh herbs (parsley or chives) for garnish Each serving of Baked Ranch Chicken has about: - Calories: 350 - Protein: 30g - Fat: 15g - Carbohydrates: 25g - Fiber: 1g This dish gives a good mix of protein and flavor. When you choose chicken, look for bright, pink meat. It should feel firm and moist. For the yogurt, pick a brand that is thick and creamy. Check the expiry date, too. When selecting cheese, fresh is best. Look for blocks instead of pre-shredded cheese for the best taste. Fresh herbs add flavor, so choose vibrant ones with a strong scent. Start by washing your chicken breasts under cold water. Pat them dry with paper towels. This step is key for good texture. You want the chicken to be clean and free of moisture. Next, trim any excess fat you see. This helps with taste and looks. In a large mixing bowl, combine the plain Greek yogurt and the ranch dressing mix. Add garlic powder, onion powder, salt, and pepper. Mix well until it is smooth. This yogurt mixture gives the chicken a tasty flavor. It keeps the chicken moist as it cooks too. Take each chicken breast and dip it into the ranch yogurt mixture. Make sure it is fully covered. Then, roll the chicken in the breadcrumb mix, which has some cheddar cheese mixed in. Place the coated chicken in a greased baking dish. After all the chicken is in the dish, sprinkle the remaining cheese on top. Now, it’s time to bake! Preheat your oven to 400°F (200°C) and bake for 25-30 minutes. Your chicken is ready when it reaches 165°F (75°C) inside. It should look golden and crispy. Let it rest for a few minutes before serving. For a nice touch, add fresh herbs on top. This is part of the Full Recipe you will love. To keep the chicken juicy, you want to coat it well. The ranch yogurt mixture adds moisture. Make sure each piece is fully covered. This layer locks in the juices as it cooks. Avoid overcooking; it can dry out the chicken. Always check the internal temperature. It should reach 165°F (75°C). Bake the chicken at 400°F (200°C) for 25-30 minutes. This temperature gives you a crispy top and tender meat inside. Use a meat thermometer for best results. If your oven has hot spots, rotate the dish halfway through. This helps ensure even cooking. To add more flavor, consider these options: - Mix in herbs like thyme or oregano with the yogurt. - Try using spicy ranch dressing for heat. - Add lemon juice to brighten the taste. - For extra crunch, use crushed cornflakes in the breadcrumb mix. These simple changes can elevate your Baked Ranch Chicken. For the full recipe, see the section above. {{image_2}} You can switch up the cheese in Baked Ranch Chicken. Cheddar is great, but try mozzarella for a milder taste. Pepper jack adds a spicy kick. For a creamy touch, use cream cheese. Each cheese brings a new flavor, making your dish unique. Don't be afraid to mix cheeses, too! If you don’t have Greek yogurt, use sour cream instead. It gives a similar tangy taste. You can also try plain regular yogurt, but it will be a bit thinner. For a dairy-free option, use cashew cream or silken tofu. These options keep the dish creamy and delicious. You can cook Baked Ranch Chicken in different ways. An air fryer gives you a crispy outside and juicy inside. Cook at 380°F for about 20 minutes. Grilling adds a smoky flavor. Grill each chicken breast for about 6-7 minutes per side. Both methods keep the meal fun and tasty! For the complete Baked Ranch Chicken recipe, check out the Full Recipe. To keep your Baked Ranch Chicken fresh, let it cool first. Place leftovers in an airtight container. Store it in the fridge for up to three days. If you want to keep it longer, consider freezing it. Just make sure to wrap it well to avoid freezer burn. When it's time to eat again, reheat the chicken in the oven. Preheat your oven to 350°F (175°C). Place the chicken on a baking sheet. Cover it with foil to keep it moist. Heat for about 15-20 minutes, or until it's warm throughout. This method helps maintain its crispy topping. You can freeze Baked Ranch Chicken for up to three months. Wrap each piece tightly in plastic wrap, then in foil. Label the packages with the date. When you're ready to eat, thaw it in the fridge overnight. Reheat as directed above for the best taste and texture. Yes, you can use frozen chicken breasts. First, thaw them completely. You can do this in the fridge overnight or use the defrost setting on your microwave. Make sure to pat them dry before coating them with the ranch yogurt mixture. This helps the coating stick better. Baked Ranch Chicken pairs well with many sides. Here are some ideas: - Roasted vegetables like carrots or broccoli - A fresh green salad with your favorite dressing - Mashed potatoes or rice for a hearty meal - Garlic bread for a tasty addition These sides help balance the dish and add more flavors. Check the chicken’s internal temperature with a meat thermometer. It should reach 165°F (75°C) to be safe to eat. You can also cut into the thickest part. The meat should be white and juices should run clear, not pink. If you follow these tips, your chicken will be perfectly cooked. This blog post covered everything you need for Baked Ranch Chicken. We discussed the key ingredients, how to prep and cook the chicken, and made sure it stays juicy. I shared tips for flavor and variations to keep it fresh. Finally, I included storage advice to use leftovers wisely. Enjoy this easy and tasty recipe. Feel free to make it your own! Happy cooking!

Are you ready to elevate your dinner routine? Baked Ranch Chicken is both simple and packed with flavor. With just a few quality ingredients, you can create a dish that’s …

Read more

Categories Dinner
Older posts
Newer posts
← Previous Page1 … Page85 Page86 Page87 … Page134 Next →

TOSSED RECIPES

Simple meals, bold taste. Quick recipes made for real life — always fresh, always delicious. 🌿🍴

PAGES

Home About Contact Privacy Policy Terms & Conditions Cookie Policy GDPR Policy Copyright Policy Disclaimer

CATEGORIES

Appetizers Desserts Salads Breakfast Dinner

Contact

  • Pinterest
  • Mail
Copyright © 2026 Tossed Recipes. All rights reserved.