Zucchini Tomato Gratin Simple and Flavorful Recipe

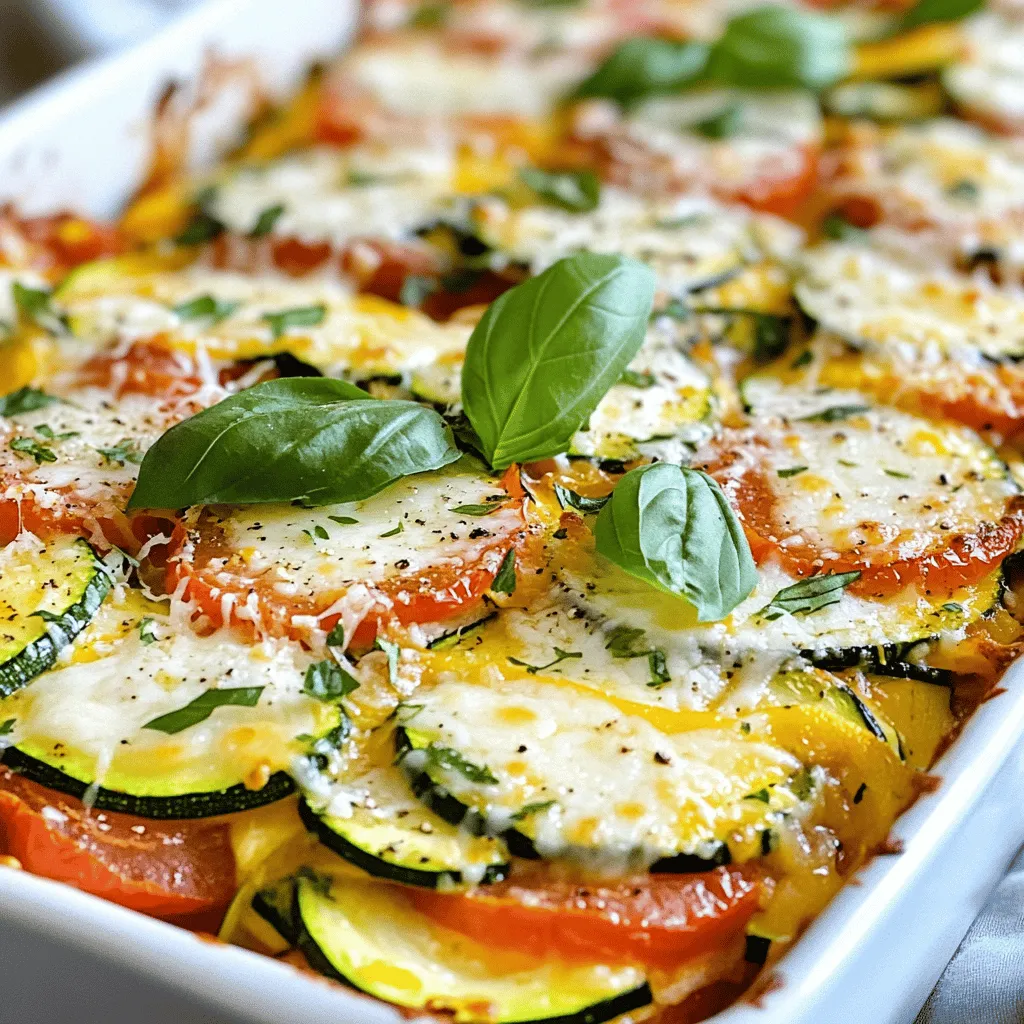
Are you ready to enjoy a fresh twist on comfort food? My Zucchini Tomato Gratin is both simple and flavorful. This dish combines tender zucchini and juicy tomatoes, topped with …
Are you ready to enjoy a fresh twist on comfort food? My Zucchini Tomato Gratin is both simple and flavorful. This dish combines tender zucchini and juicy tomatoes, topped with …
![To make zucchini squares, gather these ingredients: - 2 medium zucchinis, grated - 1 cup all-purpose flour - 1 teaspoon baking powder - 1/2 teaspoon baking soda - 1 teaspoon garlic powder - 1/2 teaspoon salt - 1/4 teaspoon black pepper - 2 large eggs - 1/2 cup Greek yogurt - 1/2 cup shredded mozzarella cheese - 1/4 cup grated Parmesan cheese - 1/4 cup fresh parsley, chopped - Olive oil for greasing Each ingredient plays a key role in the flavor and texture of your zucchini squares. - Zucchini: This is the star of the dish. It adds moisture and a subtle taste. - All-purpose flour: This binds the ingredients and gives structure to the squares. - Baking powder and baking soda: These leavening agents make the squares light and fluffy. - Garlic powder: It adds a nice savory flavor that complements the zucchini. - Eggs: These bind everything together and add richness. - Greek yogurt: This keeps the squares moist and adds a slight tang. - Cheeses: Mozzarella gives creaminess, while Parmesan adds a sharp bite. - Parsley: This adds freshness and a pop of color. You can easily swap some ingredients based on what you have: - Zucchini: Try yellow squash or carrot if you’re out of zucchini. - All-purpose flour: Use whole wheat flour or almond flour for a different taste. - Greek yogurt: Sour cream or cottage cheese works well as a substitute. - Mozzarella cheese: Cheddar or feta can add a unique twist. - Eggs: Use a flax egg (1 tablespoon ground flaxseed + 2.5 tablespoons water) for a vegan option. The full recipe will guide you through making these delightful zucchini squares. To start, gather all your ingredients. You will need grated zucchini, flour, and eggs. First, preheat your oven to 375°F (190°C). Grease an 8x8 inch baking dish with olive oil. In a large bowl, mix the grated zucchini with a pinch of salt. Let it sit for 10 minutes. This step pulls out extra moisture. After 10 minutes, take a clean kitchen towel. Squeeze the zucchini to remove more liquid. Return it to the bowl. In another bowl, whisk together flour, baking powder, baking soda, garlic powder, salt, and black pepper. Then, in a third bowl, beat the eggs. Mix in Greek yogurt until smooth. Now, combine the wet and dry ingredients. Stir gently until blended. Be careful not to overmix. Fold in the drained zucchini, mozzarella, Parmesan, and parsley. Make sure everything is evenly mixed. Pour your batter into the greased dish. Spread it out evenly. Bake in the preheated oven for 25 to 30 minutes. The edges should turn golden brown during this time. To check if your zucchini squares are done, insert a toothpick in the center. If it comes out clean, they are ready. Let the squares cool for 5 minutes before cutting. This wait helps them set. Cut them into squares and serve warm or at room temperature. For a pretty touch, garnish with parsley or a sprinkle of cheese. For the full recipe, check out the [Full Recipe]. To cook zucchini well for baking, start with fresh, firm zucchinis. Wash them thoroughly and dry them. Grate the zucchinis using a box grater. I always squeeze out the extra water. This prevents the batter from becoming too wet. A clean kitchen towel works great for this. You want the zucchini to mix well without making the dough soggy. Store any leftover zucchini squares in an airtight container. They will keep well in the fridge for about three days. To reheat, place them in a preheated oven at 350°F (175°C) for about 10 minutes. This keeps them crispy. You can also use a microwave for quick reheating, but they may become softer. One common mistake is not squeezing enough moisture from the zucchini. This can make your squares soggy. Another mistake is overmixing the batter. Mix just until combined for the best texture. Lastly, don’t skip greasing the pan. This helps the squares come out easily after baking. Check out the Full Recipe for more tips and enjoy your cooking journey! {{image_2}} You can mix up your savory zucchini squares in many ways. Try adding cooked bacon or sausage for a meaty kick. You might also fold in some chopped sun-dried tomatoes or olives. Want more herbs? Add fresh basil or thyme for a bright flavor. For a spicy touch, sprinkle in some red pepper flakes. Each twist can change the taste and make your dish unique. If you have a sweet tooth, zucchini squares can also be a treat. Swap out some flour for oats or almond flour. Add brown sugar or honey for sweetness. You can even mix in some chocolate chips or nuts for extra crunch. A dash of cinnamon or vanilla extract can give your zucchini squares a cozy flavor. These sweet options can make a fun dessert or snack. For those needing gluten-free options, you can use almond or coconut flour instead of regular flour. Instead of eggs, try applesauce or mashed banana as a binder. Use plant-based yogurt to keep it vegan. This way, you can enjoy delicious squares that fit your diet. These alternatives keep the recipe tasty and satisfying for everyone. You can find the full recipe for savory zucchini squares [here](#). To keep your zucchini squares fresh, store them in an airtight container. Let them cool fully before placing them inside. I find that keeping them at room temperature for a few hours is fine. If you need to store them for longer, the fridge is best. Just wrap them in plastic wrap or foil to avoid drying out. Zucchini squares can last up to three days in the fridge. After that, they may lose their texture. Always check for any signs of spoilage before eating. If you notice an off smell or mold, it’s best to toss them. You can freeze zucchini squares for up to three months. First, let them cool completely. Next, cut them into squares. Wrap each square tightly in plastic wrap. Then, place them in a freezer bag or container. Be sure to label the bag with the date. To reheat, simply thaw in the fridge overnight and warm in the oven or microwave. This way, you can enjoy your delicious zucchini squares anytime! For the full recipe, check out the [Full Recipe]. Zucchini squares are a tasty and easy dish. They are made from grated zucchini, flour, and cheese. You mix these ingredients to form a batter and bake it. The result is a savory snack or side dish. They are soft and have a slight crunch. They are perfect for lunchboxes or as a party appetizer. Yes, you can make zucchini squares ahead of time. You can bake them, cool them, and store them. Place them in an airtight container in the fridge. They will stay fresh for up to three days. You can also freeze them for up to a month. Just thaw them before warming. This makes meal prep easier and saves time. To avoid soggy zucchini squares, follow a few tips. First, salt the grated zucchini and let it sit for ten minutes. This draws out excess moisture. Squeeze the zucchini in a clean towel to remove more liquid. Use the right amount of flour to balance moisture. Lastly, do not overmix the batter; this keeps the texture light. Following these steps will give you perfect, fluffy squares. Zucchini squares are tasty and easy to make. We covered key ingredients, step-by-step instructions, and helpful tips. You can even try different variations, like savory or sweet. Proper storage will keep your zucchini squares fresh. Remember, avoid common mistakes to get the best results. Enjoy making these delicious treats in your kitchen!](https://tossedrecipes.com/wp-content/uploads/2025/07/58e0da0a-ca7e-4362-bf25-d4d475076468.webp)
Want to impress your family and friends with a delicious dish? Zucchini squares are a fun and easy way to enjoy this versatile veggie! In this guide, I’ll walk you …

Looking for a delicious and healthy snack? These Tasty Banana Zucchini Muffins are the answer! Packed with ripe bananas and grated zucchini, they pack in flavor and nutrients. Whether you …

Do you want a quick, tasty meal? This Zucchini Frittata is simple and delicious! With just a handful of fresh ingredients, you can whip up a dish that’s perfect for …

Are you ready to bake delicious and healthy zucchini muffins? This easy recipe combines fresh zucchini with whole wheat flour for a tasty treat you can feel good about! Packed …
Are you ready for a simple, tasty dish that highlights summer’s finest produce? My Zucchini Tomato Casserole is just what you need! With fresh zucchini, juicy tomatoes, and gooey cheese, …
![To make the best zucchini bread, you need these key items: - 2 cups grated zucchini (about 2 medium zucchinis) - 1 ½ cups all-purpose flour - 1 cup granulated sugar - ½ cup packed brown sugar - ½ cup vegetable oil - 3 large eggs - 1 teaspoon vanilla extract - 1 teaspoon baking soda - ½ teaspoon baking powder - ½ teaspoon salt - 1 teaspoon ground cinnamon - ¼ teaspoon ground nutmeg These ingredients blend well to create a moist and tasty bread. Zucchini adds sweetness and moisture, while the sugars create a rich flavor. Flour gives it structure, and eggs help bind it all together. You can change the flavor with these fun extras: - ½ cup chopped walnuts or pecans - ½ cup raisins or chocolate chips Adding nuts gives crunch, while chocolate chips or raisins add sweetness. Feel free to mix and match based on what you like. To make zucchini bread, gather these tools: - 9x5-inch loaf pan - Mixing bowls - Whisk - Grater - Spatula - Toothpick These simple tools make the process easy. A good grater helps to shred the zucchini quickly. A whisk ensures a smooth batter, and the toothpick checks for doneness. For the complete recipe and instructions, check out the Full Recipe. First, set your oven to 350°F (175°C). This temperature is perfect for baking. While it heats, grab a 9x5-inch loaf pan. Grease it with butter or oil. Then, dust it with flour to prevent sticking. This step ensures your zucchini bread releases easily after baking. In a big bowl, combine 1 cup of granulated sugar, ½ cup of brown sugar, and ½ cup of vegetable oil. Whisk these together until they blend well. Now, add in 3 large eggs, one by one. Mix well after each egg. Finally, stir in 1 teaspoon of vanilla extract. This mix will bring moisture and flavor to your bread. In another bowl, combine 1 ½ cups of all-purpose flour, 1 teaspoon of baking soda, ½ teaspoon of baking powder, ½ teaspoon of salt, 1 teaspoon of ground cinnamon, and ¼ teaspoon of ground nutmeg. Mix these dry ingredients well. Next, fold the dry mix into your wet mixture. Do this gently to keep the bread light. If you want, you can add ½ cup of chopped walnuts or pecans and ½ cup of raisins or chocolate chips at this stage. These are fun additions! Pour the batter into your prepared loaf pan. Smooth the top with a spatula. Place it in the oven and bake for 55-65 minutes. To check if it's done, insert a toothpick into the center. If it comes out clean, your bread is ready! Let it cool in the pan for about 10 minutes. After that, move it to a wire rack to cool completely. Enjoy the delicious smell filling your kitchen! For the full recipe, check the recipe section. Grating zucchini is key to your bread's success. Use a box grater or a food processor for quick results. Make sure to remove excess water. This keeps your bread from being too soggy. After grating, place the zucchini in a clean kitchen towel. Squeeze out the moisture until it's dry. This step ensures your bread has the right texture. One common mistake is overmixing the batter. This can lead to dense bread. Mix just until you see no dry flour. Another mistake is not using enough zucchini. I recommend sticking to the two cups in the recipe. Too little zucchini means less moisture and flavor. Finally, don’t skip the spices. Cinnamon and nutmeg add warmth and depth to your bread. To get a light and fluffy zucchini bread, use fresh ingredients. Check the dates on your baking soda and powder. Old ingredients can affect the rise. Also, room temperature eggs mix better into the batter. For a tender crumb, fold in the dry mix gently. This method keeps air in your batter, leading to a perfect rise. Follow these tips, and you’ll enjoy a delicious loaf every time! For more details, check the Full Recipe. {{image_2}} You can make a nut-free version of zucchini bread easily. Just skip the nuts. This keeps the bread light and safe for those with nut allergies. The flavor still shines through with the zucchini and spices. You’ll enjoy a moist, soft loaf. To make gluten-free zucchini bread, swap out the all-purpose flour for a gluten-free blend. Look for blends that contain xanthan gum, as this helps with texture. Mix the dry ingredients well to ensure an even bake. Your bread will be just as tasty, and you'll still get that moist texture. Adding spices and extracts can elevate your zucchini bread. Try adding ginger for a warm kick or cardamom for a unique twist. You can also use almond or coconut extract for a different flavor profile. Just a teaspoon can add a lot of depth to your bread. Experiment and find your favorite blend! For the complete details on how to make the Best Zucchini Bread, check out the [Full Recipe]. To keep your zucchini bread fresh, let it cool completely. Then, wrap it in plastic wrap or foil. Place it in an airtight container. You can keep it at room temperature for up to three days. If you live in a humid area, store it in the fridge. This will help prevent mold. Freezing zucchini bread is easy. First, make sure it is fully cooled. Wrap it tightly in plastic wrap. Then, place it in a freezer-safe bag or container. Label it with the date. You can freeze it for up to three months. When you want to eat it, just thaw it in the fridge overnight. Reheating zucchini bread is simple. You can use the microwave or the oven. For the microwave, heat a slice for about 15-20 seconds. If you prefer the oven, preheat it to 350°F (175°C). Wrap the bread in foil to keep it moist. Heat for about 10 minutes. Enjoy your warm, tasty zucchini bread just like when it was fresh! You can check if your zucchini bread is done by using a toothpick. Insert it into the center. If it comes out clean, your bread is ready. If it has wet batter on it, bake a bit longer. The edges should also pull away from the pan slightly when it's done. Yes, you can use yellow squash. It has a similar texture and flavor. Just make sure to grate it like zucchini. Your bread will still turn out tasty, but it might have a slightly different color. To make your zucchini bread more moist, add extra zucchini or some applesauce. You can also use more oil or butter. Avoid overbaking, as this can dry it out. Checking for doneness helps keep it moist. The best toppings for zucchini bread include cream cheese, butter, or a sprinkle of cinnamon. You can also try a light glaze made from powdered sugar. These toppings add flavor and make every slice special. You can find the full recipe for the Best Zucchini Bread in this article. It has all the steps and tips you need to make a delicious loaf! This blog post covered the key ingredients and tools for making zucchini bread. I provided step-by-step instructions for success, along with tips to avoid mistakes. We explored tasty variations and learned how to store and reheat your bread. Zucchini bread is simple and fun to make. With these tips, you can bake a delicious treat every time. Enjoy experimenting with different flavors and share your tasty results!](https://tossedrecipes.com/wp-content/uploads/2025/07/402ad513-dd65-4f26-a0a9-8ea090da6ee5.webp)
Are you ready to bake the most delicious zucchini bread? This easy guide will show you how to make the best zucchini bread with simple steps and tasty tips. You’ll …
![To make Baked Tuscan Chicken, you need fresh and tasty ingredients. Here’s what you will use: - 4 boneless, skinless chicken breasts - 1 cup cherry tomatoes, halved - 1 cup baby spinach - 1/2 cup sun-dried tomatoes, chopped - 1/2 cup mozzarella cheese, shredded - 1/3 cup grated Parmesan cheese - 3 cloves garlic, minced - 1 teaspoon dried Italian herbs (oregano, thyme, basil) - 1/4 cup olive oil - Salt and pepper to taste - Fresh basil leaves for garnish (optional) These ingredients work well together. They bring bright flavors and colors to your dish. Measuring ingredients correctly is key. Use a dry measuring cup for solids and a liquid cup for liquids. For example, pack the sun-dried tomatoes into the cup before chopping them. When you measure olive oil, pour it into a liquid measuring cup. This ensures you have just the right amount for flavor. You can change some ingredients if you like. If you do not have fresh spinach, try kale or arugula. Instead of chicken breasts, use thighs for a juicier dish. You can also use feta or provolone cheese instead of mozzarella. If you want a lighter option, use less cheese or replace it with nutritional yeast. This gives a cheesy taste without the calories. Start by preheating your oven to 400°F (200°C). This step is key for even cooking. Next, take a large bowl. Mix olive oil, minced garlic, dried Italian herbs, salt, and pepper. This blend gives the chicken its rich flavor. Now, add your chicken breasts to the bowl. Make sure they are well-coated in the mixture. If you have time, let the chicken marinate for about 15 minutes. This extra time helps the flavors soak in. While the chicken marinates, you can prepare your baking dish. Arrange the marinated chicken breasts in a single layer. This helps them cook evenly. Next, gather your other ingredients: halved cherry tomatoes, baby spinach, and chopped sun-dried tomatoes. Scatter these across the chicken. The veggies add color and taste to your dish. Now it’s time to add the cheese. Sprinkle the shredded mozzarella and grated Parmesan on top of the chicken and veggies. This will melt beautifully during baking. Place the baking dish in the preheated oven. Bake for 25-30 minutes. You’ll know it’s done when the chicken is cooked through and the cheese is bubbly and golden. Once baked, let it rest for about 5 minutes. This helps keep the juices in. Garnish with fresh basil leaves before serving. Enjoy this vibrant meal that is full of flavor! For the full recipe, check the recipe section above. To make your chicken juicy, choose quality meat. Look for fresh, boneless, skinless chicken breasts. Marinate them for at least 15 minutes. This step adds flavor. Use a mix of olive oil, garlic, and herbs. Don’t rush this step; let the meat soak up those tasty spices. When baking, keep the chicken in a single layer. This helps it cook evenly and stay moist. One common mistake is overcooking the chicken. Use a meat thermometer to check doneness. Chicken should reach 165°F (75°C) inside. Another mistake is skipping the resting time after baking. Letting it rest for 5 minutes keeps the juices inside. Lastly, don’t forget to season well. Salt and pepper enhance every bite. You can add extra flavors easily. Try adding olives or capers for a briny kick. Fresh herbs like thyme or rosemary boost the dish's taste. If you love spice, sprinkle in some red pepper flakes. For a creamier texture, mix in a splash of heavy cream before baking. Feel free to experiment; cooking should be fun! For the full recipe, check the section above. {{image_2}} If you want to cut carbs, skip the sun-dried tomatoes. Instead, use sliced zucchini or mushrooms. These veggies add great flavor and keep it light. You can also serve the chicken over a bed of leafy greens instead of pasta or rice. Seasonal vegetables can change the dish's taste. In spring, try asparagus or peas. In summer, add bell peppers or eggplant. In fall, roasted butternut squash works well too. Just chop them up and mix them in with the chicken before baking. Cheese can change the flavor of your Baked Tuscan Chicken. If you want a stronger taste, use feta or goat cheese. For a creamier texture, add cream cheese or ricotta. Experimenting with cheeses keeps the dish fresh and exciting. For the [Full Recipe], refer back to the top for all the details! After you enjoy your meal, let any leftovers cool. Place them in an airtight container. Make sure to store them in the fridge. They will stay fresh for up to three days. Label the container with the date. This helps you keep track of how long it has been stored. To reheat your Baked Tuscan Chicken, use the oven for the best results. Preheat the oven to 350°F (175°C). Place the chicken on a baking sheet. Cover it with foil to keep it moist. Heat for about 15-20 minutes, or until it is hot. You can also use a microwave if you are in a hurry. Just heat it in 30-second intervals until warm. If you want to save your meal for later, freezing is a good option. First, let the chicken cool completely. Wrap each piece tightly in plastic wrap. Then, place them in a freezer-safe bag or container. Make sure to remove as much air as possible. This helps prevent freezer burn. You can freeze the chicken for up to three months. When you're ready to eat, thaw it in the fridge overnight before reheating. For the full recipe, check the detailed steps provided. You can serve Baked Tuscan Chicken with a side of pasta. A simple spaghetti works great. Garlic bread or a fresh salad also pairs nicely. Try a Caesar or mixed greens salad for a crisp bite. Roasted vegetables like zucchini or bell peppers add color and nutrition. Serve with a glass of white wine for a special touch. Yes, you can make Baked Tuscan Chicken ahead. Prepare the dish and store it in the fridge before baking. Cover it tightly to keep it fresh. You can also bake it, let it cool, and store leftovers in the fridge. Just warm it up before serving. It tastes great even the next day! Baked Tuscan Chicken is a healthy choice. Chicken breasts are lean protein. The dish includes fresh vegetables like spinach and tomatoes, which are full of vitamins. You use olive oil, which is heart-healthy. You can control the cheese amount to reduce calories. Overall, it’s a balanced meal that’s good for you. For a complete guide, refer to the Full Recipe. In this article, we explored the key ingredients for Baked Tuscan Chicken, how to measure them, and smart substitutions. I outlined clear steps for preparing, marinating, and baking your chicken to perfection. We shared tips for avoiding common mistakes and enhancing flavors. You can even try different variations for a unique twist. Lastly, I explained how to store leftovers and answer common questions. Follow these steps for a tasty, easy dish that your family will love. Enjoy making this meal and the smiles it brings!](https://tossedrecipes.com/wp-content/uploads/2025/06/cd5faa29-a1af-47f8-921b-3664ae15eb15.webp)
If you’re looking for a dinner that bursts with flavor, try Baked Tuscan Chicken. This dish combines juicy chicken with fresh herbs and simple ingredients, making it easy to prepare. …

Looking for a fresh and tasty dish this summer? Try my Summer Garden Crustless Zucchini Pie! Packed with fresh veggies and cheese, this pie is easy to make and perfect …

Are you ready to elevate your veggie game? In this guide, I’ll show you how to make Oven Fried Squash that’s both crispy and simple! With just a few fresh …