Easy Skillet Tilapia Quick and Flavorful Meal
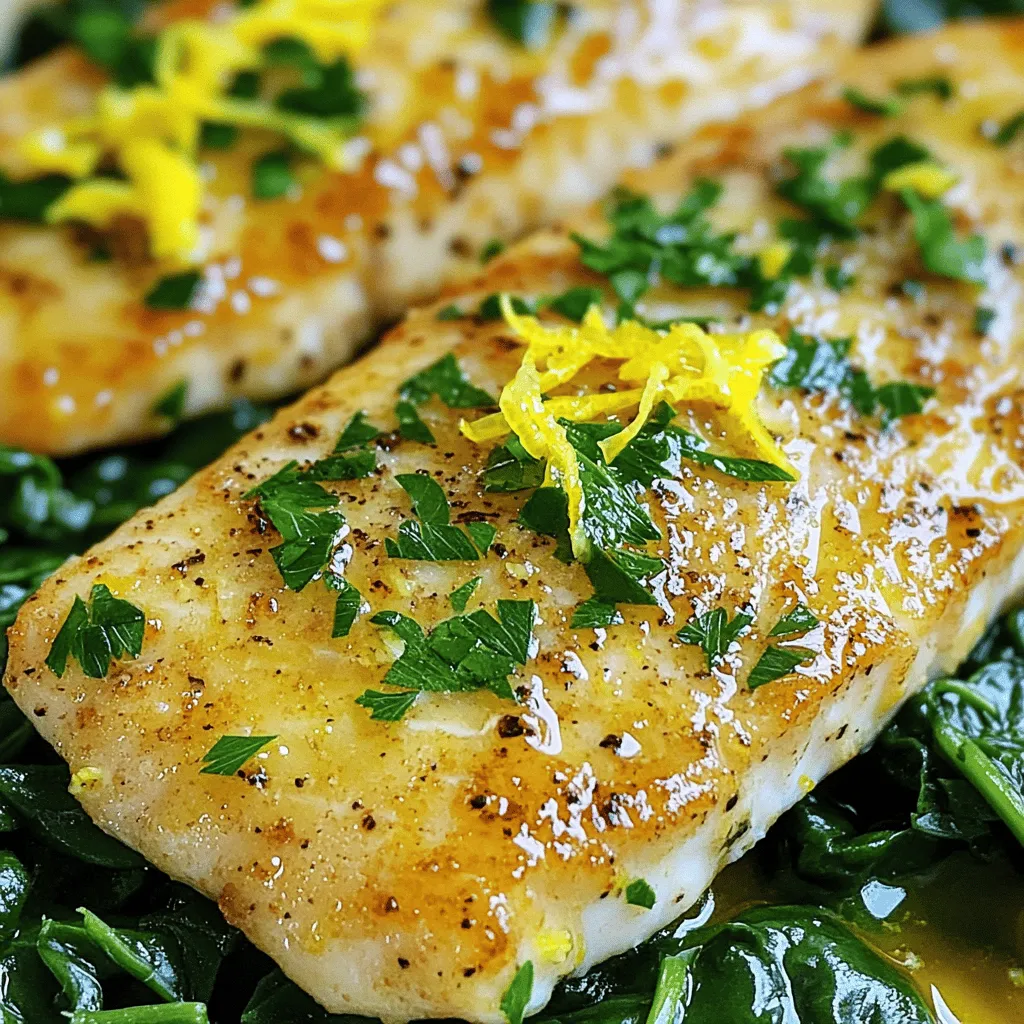
Looking for a quick and tasty dinner? My Easy Skillet Tilapia is the answer! With just a few simple ingredients, you can whip up a flavorful meal in no time. …
Looking for a quick and tasty dinner? My Easy Skillet Tilapia is the answer! With just a few simple ingredients, you can whip up a flavorful meal in no time. …
![- 2 large flatbreads - 1 cup cooked chicken breast, shredded - 1 cup Romaine lettuce, chopped To make Chicken Caesar Flatbread, you need simple yet fresh ingredients. You start with flatbreads as your base. Choose large ones for a hearty meal. Next, use cooked chicken breast. Shredded chicken works best. It adds protein and texture. Romaine lettuce gives a nice crunch and freshness. - 1/2 cup Caesar dressing (homemade or store-bought) - 1/2 cup cherry tomatoes, halved - 1/4 cup grated Parmesan cheese - 1/4 cup croutons (optional) - Freshly cracked black pepper, to taste - Fresh basil leaves, for garnish The dressing brings all the flavors together. You can use store-bought Caesar dressing or make your own. Next, add halved cherry tomatoes for sweetness. Grated Parmesan cheese adds a salty kick. If you like crunch, sprinkle croutons on top. Finish with cracked black pepper for spice. Fresh basil leaves make a beautiful garnish. This recipe is about freshness and flavor, making each bite delightful. For the full details, check the Full Recipe. - Preheat your oven to 400°F (200°C). - Place flatbreads on a baking sheet lined with parchment paper. First, heating the oven makes sure your flatbreads cook evenly. Parchment paper helps with easy cleanup later. I love this step because it sets the kitchen's mood for cooking. - Spread Caesar dressing evenly over each flatbread. - Add shredded chicken, Romaine lettuce, and cherry tomatoes. Next, I like to spread the Caesar dressing. It gives a rich taste to the flatbreads. Then, layer the shredded chicken on top. Use a good amount so each bite is tasty. After that, sprinkle on some Romaine lettuce and halved cherry tomatoes. This adds crunch and freshness. - Sprinkle grated Parmesan and optional croutons on top. - Bake for 8-10 minutes until crispy and cheese melts. Now, sprinkle grated Parmesan cheese over the toppings. If you want extra crunch, add croutons too. Bake in the oven for 8 to 10 minutes. You want it crispy and the cheese to melt perfectly. Once done, let them cool for a minute. Serve with a sprinkle of black pepper and fresh basil. This simple process makes Chicken Caesar Flatbread a fun dish to share. For the full recipe, you can check the earlier section. To make the best Chicken Caesar Flatbread, focus on cooking time and temperature. Set your oven to 400°F (200°C). This heat crisps the flatbread perfectly. Bake for 8-10 minutes. Keep an eye on them to avoid burning. For crispy flatbreads, use thin flatbreads. Thin ones crisp up better than thick ones. Layer your toppings evenly. This helps heat flow and reduces sogginess. Don't overload the flatbreads with too many toppings. Less is often more. Pair your Chicken Caesar Flatbread with a side salad. A light side salad adds freshness and balance. You can also serve it with carrot sticks or chips for crunch. For a fun presentation, cut the flatbreads into small squares. This makes them easy to pick up. Arrange them on a colorful plate. Garnish with fresh basil leaves for a pop of color. You can also drizzle extra Caesar dressing around the plate for a visual treat. If you want to explore more, check out the Full Recipe for detailed steps. {{image_2}} You can switch up the protein in your Chicken Caesar Flatbread for fun. If you like seafood, try grilled shrimp instead of chicken. It adds a nice touch of flavor. Tofu is a great option too, especially if you're vegan or vegetarian. It soaks up the dressing well and still gives a good texture. For busy days, using rotisserie chicken can save you time. You just shred it and layer it on your flatbread. The dressing can change the whole taste of your flatbread. While Caesar dressing is classic, you can explore other dressings too. A lemon garlic dressing can add a fresh zing. You can also try ranch or a balsamic vinaigrette for a new twist. If you want a vegan option, there are many Caesar dressings made without dairy. These options are creamy and full of flavor, making them perfect for plant-based diets. Adding more toppings can take your flatbread to the next level. Sliced avocado not only tastes good but also adds healthy fats. Bell peppers give a nice crunch and color. If you love cheese, you can mix it up by adding feta or mozzarella. These cheeses will make your flatbread richer and creamier. The more you customize, the more fun it is to eat! For the full recipe, you can check out the [Full Recipe]. To store leftover Chicken Caesar Flatbread, let it cool first. Place the flatbread in an airtight container. This keeps it fresh for up to three days. If you have extra toppings, store them separately. This avoids sogginess and keeps flavors intact. You can use glass or plastic containers. Ensure they are tightly sealed to minimize air exposure. When you’re ready to eat, reheating is key. Use an oven for the best results. Preheat the oven to 350°F (175°C). Place the flatbread on a baking sheet. Heat it for about 10 minutes. This keeps the flatbread crispy. You can also use a microwave, but it may make the flatbread soft. If using a microwave, heat for 30 seconds to 1 minute. Check for warmth throughout. Enjoy your Chicken Caesar Flatbread again with its tasty flavors! Chicken Caesar Flatbread is a tasty dish that combines classic flavors. It features flatbreads topped with shredded chicken, Romaine lettuce, and creamy Caesar dressing. Cherry tomatoes add a sweet burst, while Parmesan cheese gives a rich taste. You can even add croutons for crunch. This dish is simple to make and is great for lunch or dinner. Yes, you can prep ingredients in advance! Chop the lettuce and tomatoes a few hours before. Store them in airtight containers to keep them fresh. You can also shred the chicken ahead of time. Then, when you're ready to eat, just layer the ingredients on the flatbreads and bake. This saves time and keeps it easy. Chicken Caesar Flatbread can be a healthy choice! It has lean protein from the chicken and fiber from the lettuce. To make it even healthier, use whole wheat flatbreads and a lighter Caesar dressing. You can also add extra veggies like peppers or cucumbers. These swaps help boost nutrients while keeping the flavors you love. In this blog post, I shared how to make Chicken Caesar Flatbread. We covered the key ingredients, easy steps, and helpful tips for perfecting your dish. You learned about variations and storage tips. Chicken Caesar Flatbread is tasty and fun to make. Experiment with your favorite proteins and dressings. Enjoy making this meal for yourself or your friends and family. It’s simple, quick, and delivers big flavor!](https://tossedrecipes.com/wp-content/uploads/2025/06/02783f7a-d990-4e45-b586-2f052924f8aa.webp)
Are you looking for a quick and tasty meal that won’t let you down? Chicken Caesar Flatbread is the perfect choice! It’s easy to make, packed with flavor, and great …
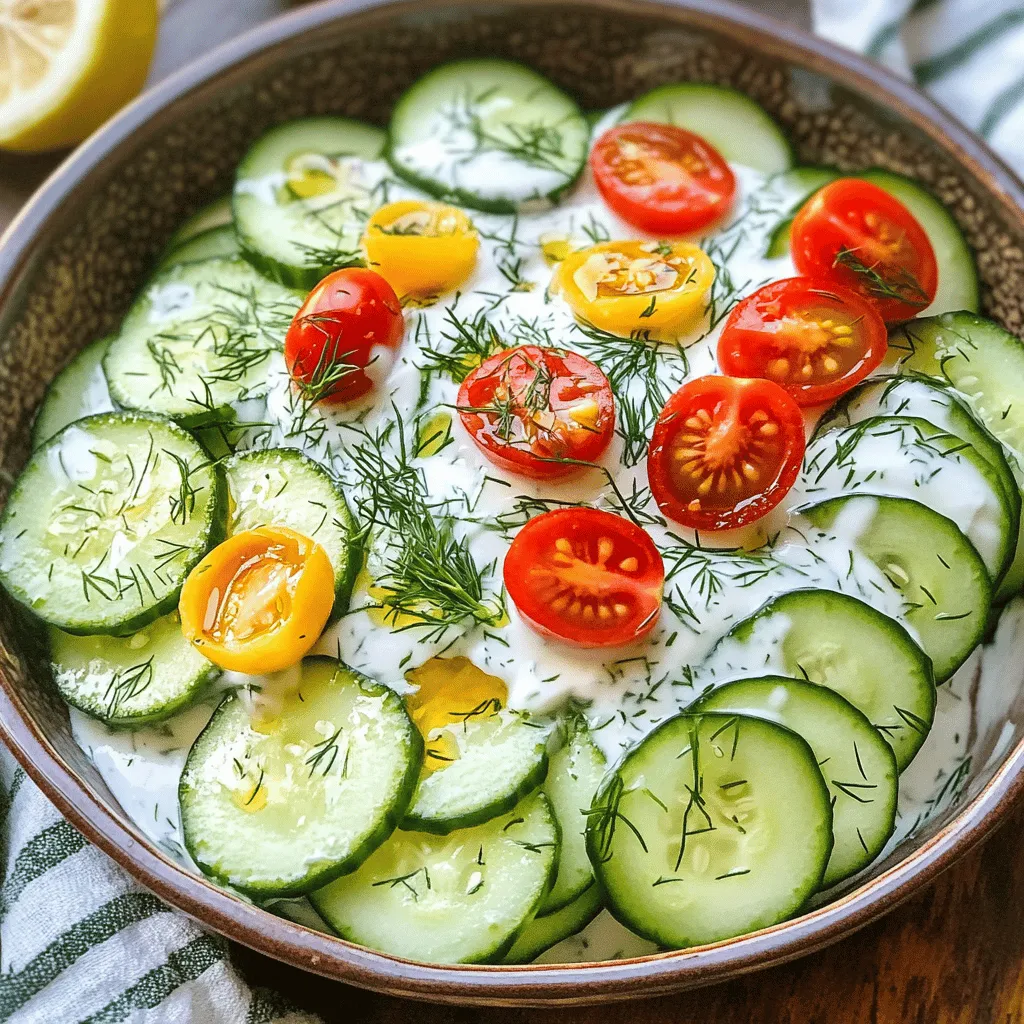
Looking for a cool and refreshing dish? This Creamy Cucumber Salad is the perfect blend of crisp cucumbers, tangy yogurt, and fragrant dill. It’s simple to make and features fresh …
![To make Raspberry Yogurt Clusters, you need just a few fresh ingredients. Here’s what you’ll need: - 2 cups fresh raspberries - 1 cup Greek yogurt (plain or vanilla) - 2 tablespoons honey or maple syrup - 1 teaspoon vanilla extract - Pinch of salt These ingredients create a tasty and healthy snack. Fresh raspberries give a burst of flavor and nutrients. Greek yogurt adds creaminess and protein, while honey or maple syrup provides sweetness. The vanilla extract adds a lovely aroma, and the salt enhances all the flavors. You can also add a few extras to make these clusters even better. Consider these optional ingredients: - 1/4 cup granola for crunch - Chopped nuts or seeds for added texture - Dark chocolate chips for a sweet twist Granola gives a nice crunch. Nuts add healthy fats and extra protein. Chocolate chips can satisfy your sweet tooth while still keeping it fun. Let’s look at the health benefits of the main ingredients: - Raspberries: These berries are low in calories and high in fiber. They are rich in vitamins C and K, which boost your immune system and help with bone health. - Greek Yogurt: Packed with protein, Greek yogurt helps with muscle growth and keeps you full longer. It also has probiotics, which are good for gut health. - Honey or Maple Syrup: While they add sweetness, these natural sweeteners also contain antioxidants. They can help reduce inflammation in the body. Using these ingredients gives you a snack that is not only delicious but also good for you. For the full recipe, check the earlier section. First, take 2 cups of fresh raspberries. Rinse them gently under cold water. Be careful not to crush them. Use a paper towel to pat them dry. This helps keep the yogurt stick better. Set the raspberries aside for later. Next, grab a medium bowl. Add 1 cup of Greek yogurt, either plain or vanilla. Then, mix in 2 tablespoons of honey or maple syrup. This adds a nice sweetness. Add 1 teaspoon of vanilla extract for flavor. Finally, sprinkle in a pinch of salt. Stir the mixture until it is smooth and creamy. Now, it's time to coat the raspberries. Take a raspberry and dip it into the yogurt mixture. Make sure it is fully covered. Use a fork to lift it out. Let any extra yogurt drip off. Place the coated raspberry on a parchment-lined baking sheet. Repeat this for all raspberries. If you want, you can sprinkle 1/4 cup of granola on top for extra crunch. Once done, put the baking sheet in the freezer. Freeze the clusters for at least 2-3 hours, or until they are hard. When ready, remove them from the freezer. Let them sit for about 5 minutes before serving. Enjoy your tasty frozen snack! For the full recipe, check the details above. To get a nice coat on your raspberries, use thick yogurt. Greek yogurt works best. Dip each raspberry carefully in the yogurt. Make sure it gets fully covered. Use a fork to lift it out. This helps shake off extra yogurt. The thicker coating will freeze better and taste creamier. When freezing, keep the clusters spaced out. Place them on a parchment-lined sheet. This prevents them from sticking together. Freeze them for at least 2-3 hours. If you want them ready quickly, put them in the back of the freezer. This area stays the coldest and helps them freeze faster. You can add more flavor to your clusters easily. Try mixing in spices like cinnamon or nutmeg into the yogurt. You can also add zest from a lemon or lime. This gives a fresh kick that pairs well with raspberries. If you like crunch, sprinkle some granola on top before freezing. This adds texture and taste to every bite. For a fun twist, consider adding mini chocolate chips or nuts for extra flavor. {{image_2}} You can make a dairy-free version of raspberry yogurt clusters. Instead of Greek yogurt, use coconut yogurt or almond yogurt. These options work well with the other ingredients. The taste remains smooth and creamy. Just follow the same steps in the full recipe. This keeps your snack tasty and friendly for those with dairy allergies. Raspberries are great, but you can try other fruits too. Strawberries, blueberries, or blackberries are all good choices. Just make sure the fruit is fresh and ripe. You can also change the toppings. Instead of granola, try nuts or seeds for crunch. Chopped dark chocolate adds a fun twist. Each fruit and topping gives a new flavor to your clusters. You can play with flavors to make your clusters unique. Add a dash of cinnamon to the yogurt for warmth. For a fruity kick, mix in a spoon of lemon zest. You could even try adding a little peanut butter for richness. These small changes can create new taste experiences. Enjoy discovering what combinations you love most! To store your frozen raspberry yogurt clusters, place them in an airtight container. Ensure there is no extra air in the container. This step helps keep them fresh and tasty. You can also use a freezer-safe bag. Just make sure to remove as much air as possible. Label the container with the date to help you remember when you made them. Frozen raspberry yogurt clusters can last in the freezer for up to three months. After this time, they may lose some flavor and texture. To keep them fresh, avoid placing them near strong-smelling foods in the freezer. This helps prevent any unwanted flavors from mixing. Always check for ice crystals or freezer burn before eating. If you see these signs, it’s best to throw the clusters away. You do not need to reheat raspberry yogurt clusters. They are best enjoyed straight from the freezer. However, if you want a softer texture, let them sit at room temperature for about five minutes before eating. This simple step makes them easier to enjoy without losing their delicious taste. Yes, you can use frozen raspberries. They work well in this recipe. Just thaw them first. Thawing helps to prevent excess water from making the yogurt too runny. Be gentle when handling thawed raspberries to avoid squishing them. Greek yogurt is the best choice for this recipe. It is thick and creamy, giving the clusters a nice texture. You can also use plain or vanilla yogurt. Both options add a tasty flavor that pairs well with raspberries. You can keep the clusters in the freezer for up to three months. Make sure to store them in an airtight container. This will help keep them fresh and prevent freezer burn. Yes, Raspberry Yogurt Clusters are a healthy snack. They are low in calories and high in nutrients. Raspberries are full of vitamins and fiber. Greek yogurt adds protein and probiotics, which are good for your gut. Absolutely, you can add protein powder! Just mix in a scoop when you combine the yogurt with the other ingredients. This will boost the protein content and keep you feeling full longer. Adjust the sweetness if needed, as some protein powders may be sweet. Check the [Full Recipe] for more details. Raspberry yogurt clusters are easy to make and fun to eat. You learned about the main ingredients, preparation steps, and helpful tips. We discussed variations like dairy-free options and ways to store them for later. Remember, you can customize these clusters with your favorite flavors. Just keep your ingredients fresh and follow the steps closely for the best results. Enjoy making tasty snacks that are healthy, quick, and satisfying!](https://tossedrecipes.com/wp-content/uploads/2025/06/0ecefdd4-1b2a-41b3-8995-4d116b6bcbe6.webp)
Looking for a tasty and healthy treat? You’ll love Raspberry Yogurt Clusters! This easy frozen snack is perfect for hot days or a quick bite. With just a few simple …
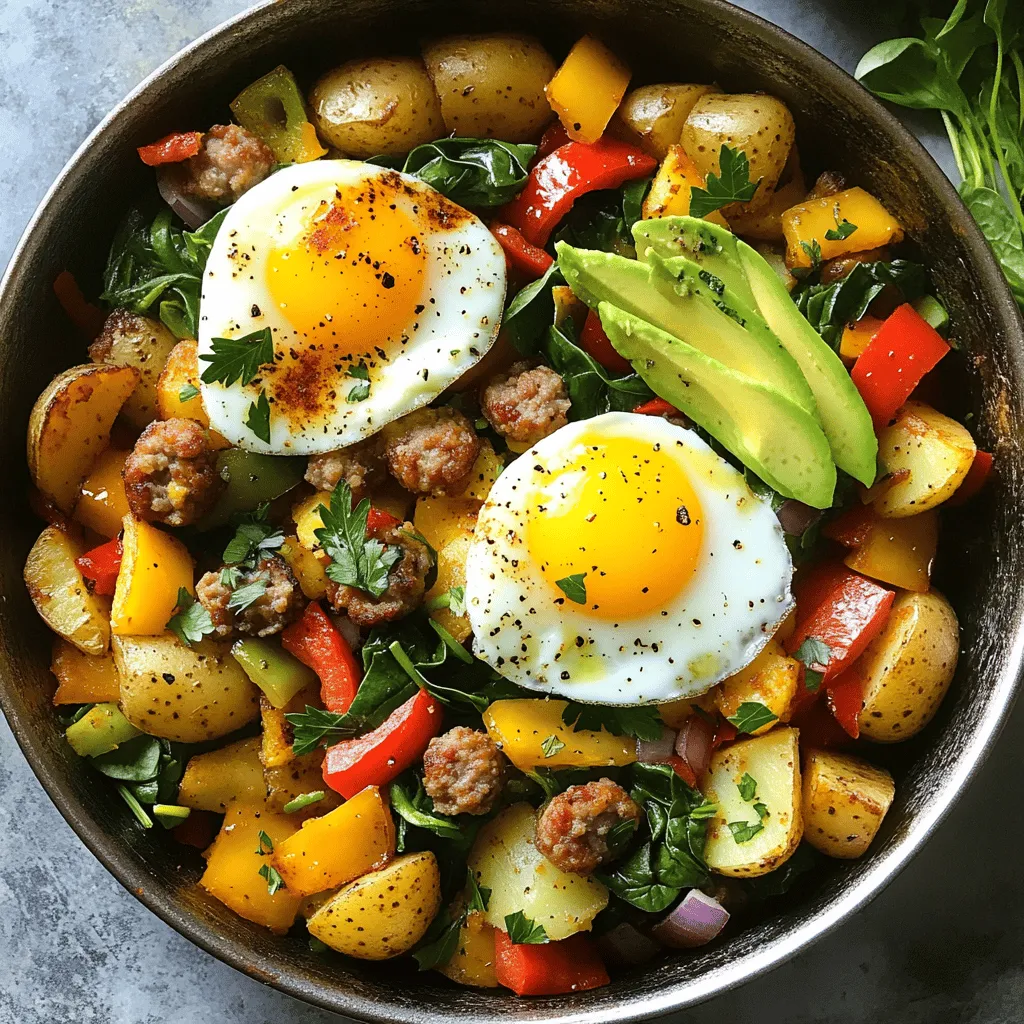
Start your day with a burst of flavor! Loaded Breakfast Hash is the perfect way to kick off your morning. With crispy potatoes, savory sausage, and perfectly cooked eggs, this …
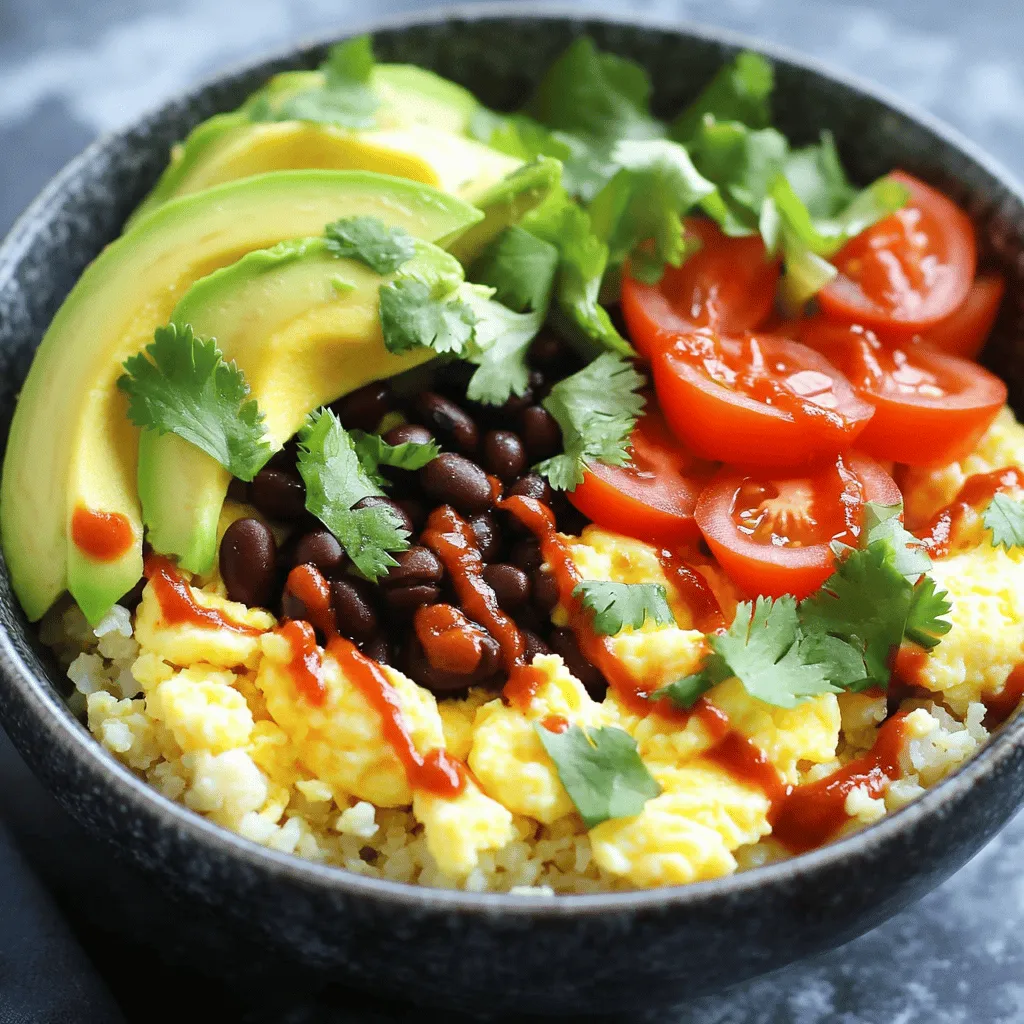
Start your day with a burst of flavor and energy! My Low Carb Breakfast Burrito Bowl is packed with ingredients that keep you full without the extra carbs. In this …
![Cooking is simple when you have the right ingredients. For this air fryer chicken and vegetables, you'll need: - 2 boneless, skinless chicken breasts, cut into bite-sized pieces - 1 cup bell peppers (red, yellow, green), sliced - 1 medium zucchini, sliced into half-moons - 1 cup broccoli florets - 1 tablespoon olive oil - Seasonings: garlic powder, paprika, oregano, salt, and pepper - Garnish: fresh parsley, chopped These fresh ingredients bring out the best flavors. The chicken gives you protein, while the veggies add color and nutrients. Using olive oil keeps this meal healthy. You can easily find these items at your local store. Each ingredient plays a role in making this dish tasty and nutritious. For the full recipe, check out the [Full Recipe]. First, grab a large bowl. In this bowl, combine the chicken pieces with one tablespoon of olive oil. Next, add the garlic powder, paprika, oregano, salt, and pepper. These spices bring a lot of flavor. Toss the chicken well to coat it evenly with the oil and spices. This step is crucial because it helps the chicken become tasty and juicy. Now it’s time to mix in the vegetables. Add one cup of sliced bell peppers, one medium zucchini cut into half-moons, and one cup of broccoli florets. Stir everything together until the veggies are coated with the seasoned oil. This mix not only adds color but also boosts your meal's nutrition and flavor. Before cooking, preheat your air fryer to 400°F (200°C). This step takes about five minutes. Once it’s ready, place the chicken and vegetable mixture into the air fryer basket. Make sure to spread it out in a single layer. If your air fryer is small, you might need to cook in batches. Cook the mixture for 12 to 15 minutes. Halfway through cooking, shake the basket gently. This helps the chicken and veggies cook evenly. The chicken should reach an internal temperature of 165°F (74°C) when done. The vegetables should be tender but still slightly crisp. For the full recipe, refer to the instructions above. To get that perfect crunch, use minimal oil. Just a little goes a long way. I like to spray the chicken and veggies lightly. This helps achieve that crispy finish we all want. Don't forget to shake the basket halfway through cooking. This simple step redistributes heat and ensures even cooking. Cooking time is key for juicy chicken. Always monitor the chicken's internal temperature. It should reach 165°F (74°C). If your air fryer is larger or smaller, adjust the time. You may need to cook a bit longer or shorter. Always trust your thermometer for best results. For serving, I recommend using a large platter. This makes the dish look appealing. After cooking, drizzle a touch of olive oil on top. Sprinkle some fresh parsley for a splash of color. This simple touch makes your meal look gourmet. If you want to impress, these small details matter! {{image_2}} You can change up the veggies in this meal. Seasonal vegetables work great. Try asparagus in spring or sweet carrots in fall. They add fresh flavors and colors. You can also use frozen vegetables. They are quick and easy. Just toss them in the bowl with the chicken. Add more taste by using different spices. Cayenne gives a nice heat. Italian seasoning brings a herby flavor. You can also use a marinade. Marinades soak into the chicken and veggies, adding depth. Let them sit for 30 minutes before cooking. This step boosts the flavor even more. If you want a change, swap chicken for turkey or shrimp. Both options cook well in the air fryer. For a meatless meal, try tofu. It soaks up flavors well. Press the tofu to remove excess water. Cut it into cubes and mix it with your spices. Each protein brings unique taste and texture. Check the Full Recipe for more ideas on how to make this dish your own. After enjoying your air fryer chicken and vegetables, store any leftovers in an airtight container. This keeps them fresh. I recommend eating them within three days for the best taste and texture. For reheating, use your air fryer. It helps keep everything crispy. Set it to 350°F (175°C) and reheat for about 5-7 minutes. If you need speed, the microwave works too. Just heat for one to two minutes. However, this may make your veggies soft. Yes, you can use frozen chicken and vegetables. Just remember a few tips. - Chicken: If using frozen chicken, cut it into smaller pieces. This helps it cook evenly. - Vegetables: Frozen veggies can go straight into the air fryer. They may need a few extra minutes to cook. Check that the chicken reaches 165°F (74°C). The veggies should be tender and warm. To check if the chicken is done, use a meat thermometer. Insert it into the thickest part. It should read 165°F (74°C). Look for these signs: - The chicken should be golden brown. - The juices should run clear, not pink. If you see these cues, your chicken is ready to enjoy! Many sides go well with air fryer chicken and vegetables. Here are some tasty options: - Rice: White, brown, or even cauliflower rice works well. - Quinoa: This is a great protein-packed choice. - Salad: A fresh green salad adds crunch and color. - Bread: Serve with crusty bread or rolls for a filling meal. Mix and match these sides to find your favorite pairings! This blog post covered a simple air fryer recipe with chicken and vegetables. You learned about the key ingredients, step-by-step instructions, and helpful tips for a perfect dish. Remember to watch cooking times and enjoy variations to keep it exciting. Whether you stick with chicken or try tofu, this recipe is flexible. Store leftovers properly and use the air fryer for reheating. Enjoy cooking and experimenting with this easy and tasty meal!](https://tossedrecipes.com/wp-content/uploads/2025/06/4d61b457-44a7-4524-8de3-1f0cff199e03.webp)
Looking to spice up your dinner routine with a quick and healthy option? Air Fryer Chicken and Vegetables are not just simple to prepare but also packed with flavor! In …
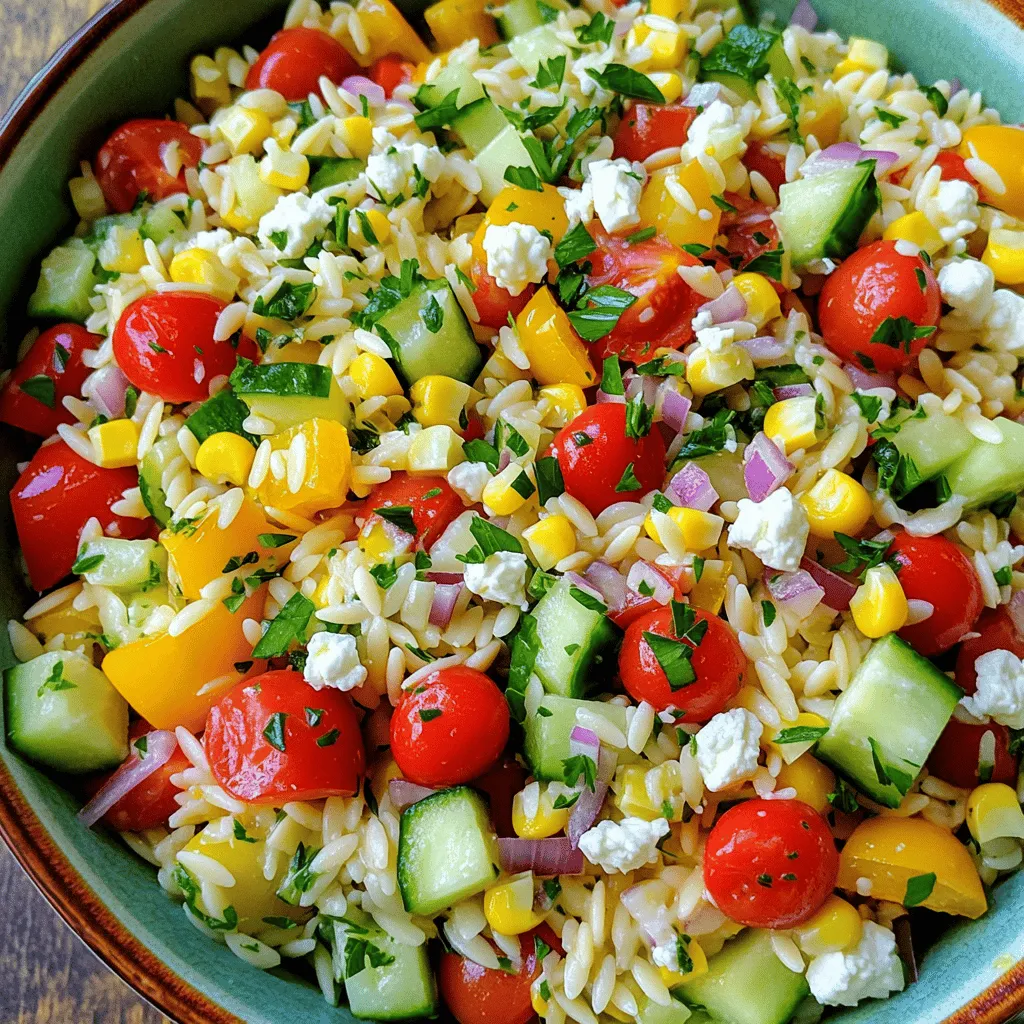
Are you ready to brighten your table with a fun and tasty dish? This Rainbow Orzo Salad is not just a feast for the eyes, but also packed with fresh …

Looking for a quick and tasty dinner? You’ve found it! One Pan Balsamic Chicken is easy to make and packed with flavor. In just a few simple steps, you’ll have …
. To store leftover stuffed shells, let them cool first. Place them in an airtight container. This keeps them fresh. They will last for about 3 to 4 days in the fridge. When you want to reheat, preheat your oven to 350°F (175°C). Place the shells in a baking dish. Cover them with foil to keep moisture in. Bake for about 20 minutes or until warm. To freeze your stuffed shells, follow these steps. First, let them cool completely. Then, arrange the shells in a single layer on a baking sheet. Freeze them for about 1 to 2 hours. Once they are firm, place them in a freezer-safe container or bag. This method prevents them from sticking together. For reheating, move the shells from the freezer to the fridge the night before. Thaw them overnight. Once thawed, follow the reheating steps mentioned above. In the fridge, your stuffed shells will last about 3 to 4 days. Make sure to check for any signs of spoilage. In the freezer, they can last for up to 2 to 3 months. After that, they may lose flavor. To enjoy the best taste, try to eat them within this time frame. For the full recipe, check the details above! To make Creamy Garlic Mushroom Stuffed Shells from scratch, follow these steps: 1. Cook the pasta: Boil the jumbo shells in salted water until al dente. 2. Sauté mushrooms: Heat olive oil in a skillet, add chopped mushrooms, and cook until golden. Add minced garlic and cook for two minutes. 3. Mix the filling: In a bowl, combine ricotta, cooked spinach, sautéed mushrooms, and half of the cheese. Mix well. 4. Make the sauce: In the same skillet, add heavy cream and melt the remaining cheese until creamy. 5. Stuff the shells: Fill each shell with the cheese mixture and place them in a baking dish. 6. Bake: Pour sauce over the shells and bake at 375°F for about 30-35 minutes. Common mistakes to avoid: - Overcooking the pasta: Cook shells until just al dente; they will finish cooking in the oven. - Not cooling the shells: Let them cool before stuffing to avoid burns and make handling easier. - Skipping the seasoning: Don’t forget to add salt and pepper for flavor. Yes, you can prepare Creamy Garlic Mushroom Stuffed Shells ahead of time. Suitable storage options: - Refrigerate: Assemble the dish, cover it tightly with foil, and store in the fridge for up to 24 hours. - Freeze: You can also freeze unbaked stuffed shells. Wrap the dish well and store for up to three months. Time-saving tips: - Prep the filling: Make the filling and sauce the day before. - Cook shells in advance: You can cook the shells early in the day and stuff them later. Creamy Garlic Mushroom Stuffed Shells pair well with several sides. Recommended side dishes: - Garlic bread: The perfect crunchy contrast to the creamy shells. - Roasted vegetables: Carrots and broccoli add color and nutrition. Salad pairing ideas: - Caesar salad: Crisp romaine with creamy dressing complements the dish. - Mixed greens: Light vinaigrette adds freshness and balances richness. For the full recipe, check out the details provided above. Enjoy your cooking adventure! Stuffed shells are tasty and fun to make. You can use jumbo pasta shells with a rich cheese filling and sautéed mushrooms. Optional ingredients like spinach and herbs can enhance the flavor. Follow the steps carefully for perfect results, and enjoy the tips for storage and serving suggestions. In the end, experimenting with variations keeps the dish exciting. You can adapt it with different sauces or make it vegan. These small changes can make a big impact. Enjoy your cooking journey and share it with others!](https://tossedrecipes.com/wp-content/uploads/2025/06/aa1c3bfb-a0fe-455b-ba1e-8ba858b3e5d9.webp)
Get ready to delight your taste buds with Creamy Garlic Mushroom Stuffed Shells! This dish brings together jumbo pasta shells filled with a rich cheese and sautéed mushroom mixture. It’s …