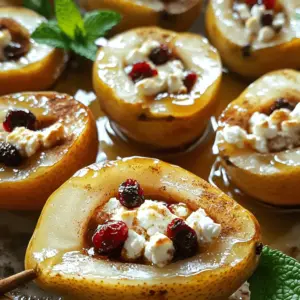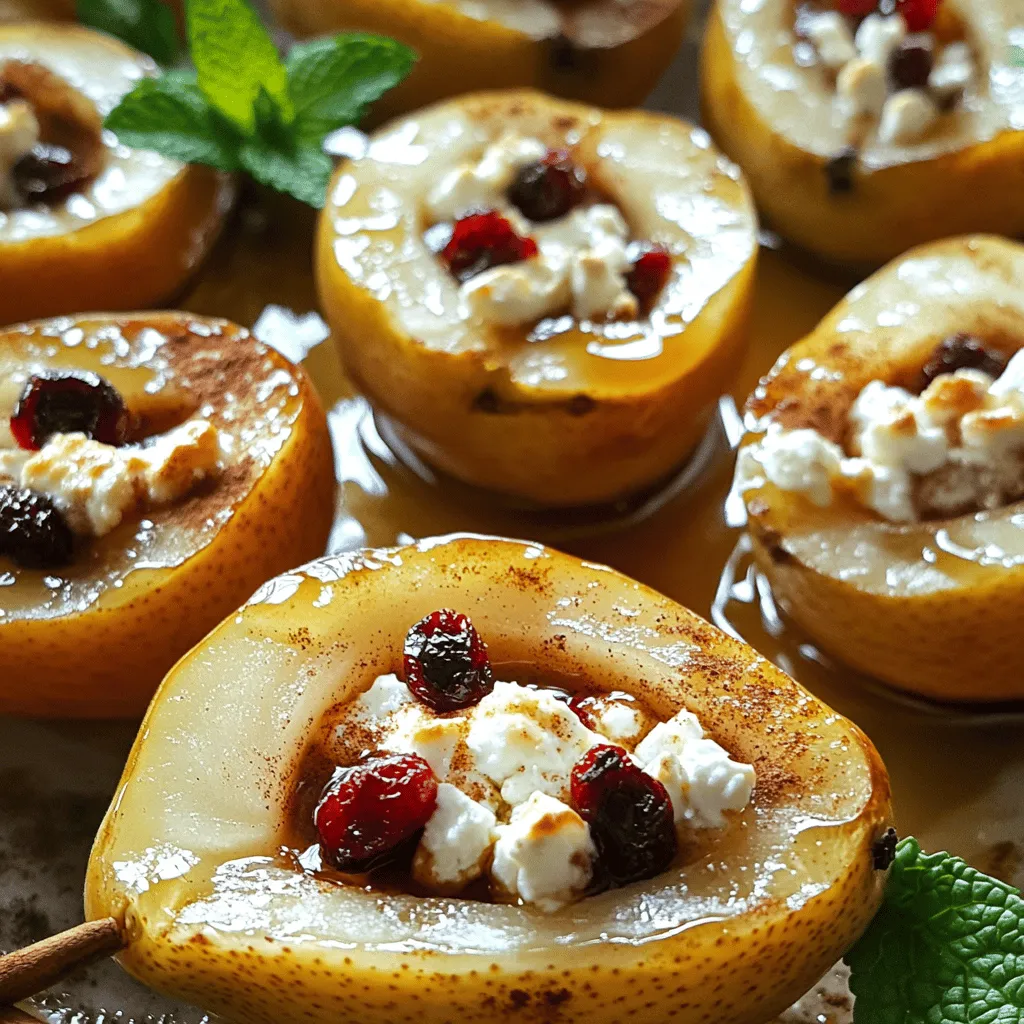
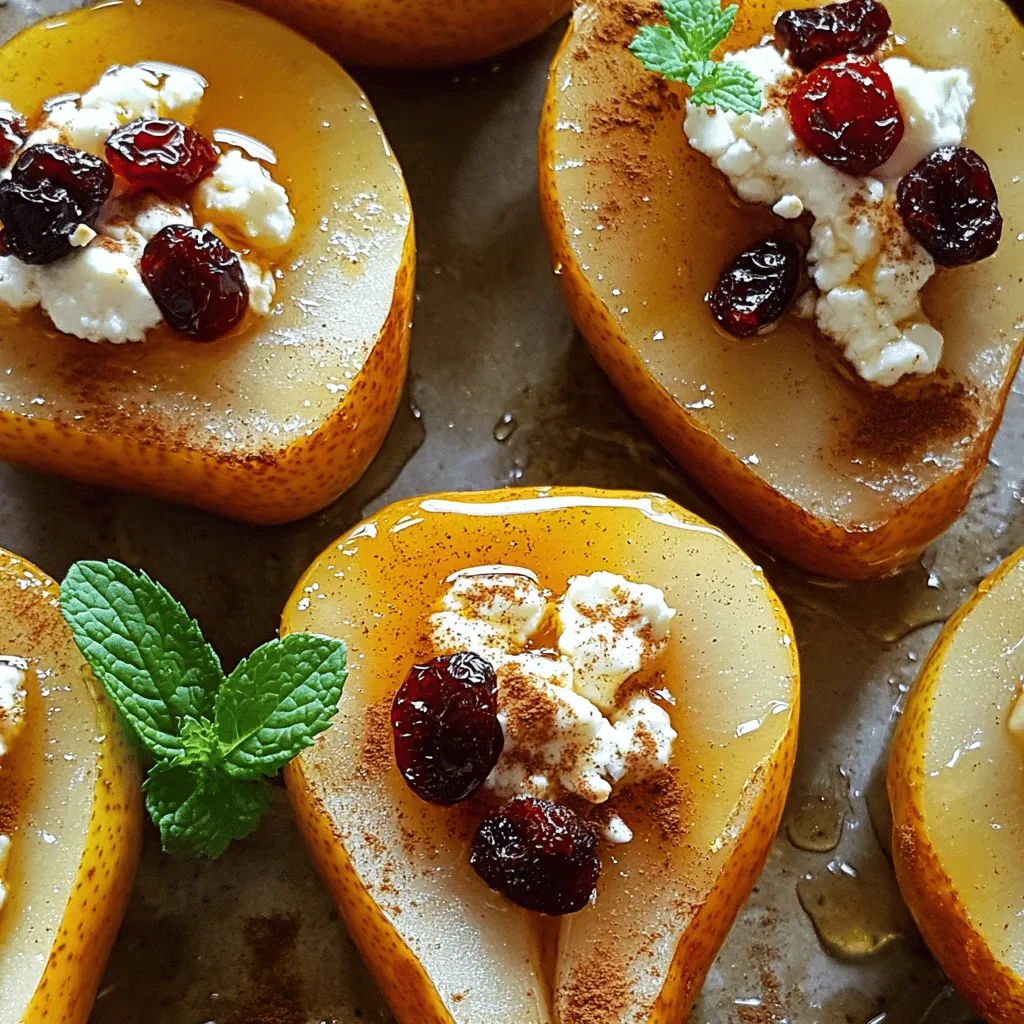
If you’re looking for a simple yet delicious dessert, baked pears with feta, honey, and cranberries are the answer. This dish brings together sweet, savory, and tangy flavors in a way that is both easy and elegant. In this post, I’ll share all the ingredients, step-by-step instructions, and tips for making this delightful treat. Let’s dive in and make your taste buds sing!
Ingredients
List of Ingredients
– 4 ripe but firm pears, halved and cored
– 1 cup crumbled feta cheese
– 1/2 cup dried cranberries
– 1/4 cup honey
– 2 tablespoons chopped walnuts (optional)
– 1 teaspoon cinnamon
– 1 tablespoon fresh lemon juice
– Fresh mint leaves for garnish
Measurement Details
When you pick pears, choose ones that feel firm yet slightly soft at the stem. This means they are ripe and ready to bake. For the feta, crumbling it yourself gives better texture than store-bought crumbles. Use dried cranberries for sweetness and a pop of color. Honey adds a rich flavor, so pour generously. If you love nuts, walnuts add crunch but are optional.
Ingredient Substitutions
If you don’t have feta, try goat cheese or even ricotta. These cheeses melt well and add a nice flavor. For the cranberries, raisins or chopped dried apricots work too. If you want less sugar, use maple syrup instead of honey. This gives a unique taste that pairs well with pears. Fresh mint is great but not necessary. You can also use basil for a different twist. For the spices, try nutmeg or allspice for an exciting change.
For the full recipe, check the Baked Pears Delight section.
Step-by-Step Instructions
Preparation Instructions
To start, gather your ingredients. You’ll need ripe pears, feta cheese, cranberries, honey, and a few more things. First, preheat your oven to 350°F (175°C). Next, take each pear and cut it in half. Remove the core carefully. This step is important for the filling. In a small bowl, mix the crumbled feta, dried cranberries, chopped walnuts, and cinnamon. This filling adds flavor and texture.
Drizzle lemon juice over the pear halves. This keeps them from turning brown. Then, scoop the feta mixture into each pear half. Press down gently to pack the filling. This makes sure every bite has flavor.
Baking Process
Now, arrange the stuffed pears in a baking dish with the cut sides facing up. Drizzle honey over each pear. Honey adds sweetness and helps with browning. Cover the baking dish with aluminum foil to keep moisture in. Bake for 25 minutes. After that, remove the foil and bake for another 10-15 minutes. You want the pears to be tender and the tops golden. Keep an eye on them to prevent burning.
Serving Suggestions
Once done, take the pears out of the oven. Let them cool for a few minutes. This step helps the flavors settle. Garnish each pear with fresh mint leaves for a pop of color. These baked pears can be served warm as a dessert or a snack. You can also pair them with a scoop of vanilla ice cream for a delicious treat. For the full recipe, refer to the previous section. Enjoy your tasty creation!
Tips & Tricks
Best Practices for Perfectly Baked Pears
To get the best baked pears, start with ripe but firm pears. They should feel slightly soft, but not mushy. Cut them in half and core them evenly. This helps them bake nicely. When mixing the filling, use fresh feta cheese for a creamy texture. Mix in the cranberries and walnuts well. This adds great flavor and crunch. Drizzle lemon juice on the pear halves. This keeps them from turning brown and adds brightness.
Common Mistakes to Avoid
One big mistake is overbaking the pears. Keep an eye on them in the oven. They should be tender, not falling apart. Another mistake is using too much honey. It can make the dish overly sweet. Use just enough to enhance the flavor. Also, don’t skip the mint garnish. It adds a fresh touch and makes the dish look great. Finally, avoid using unripe pears. They won’t cook well and can be hard to eat.
Enhancements for Flavor and Presentation
To make your baked pears even better, try adding nuts. Chopped pecans or almonds work well. They add extra crunch and flavor. You can also sprinkle a bit of extra cinnamon on top before serving. This gives a warm, inviting scent. For a beautiful finish, drizzle more honey over the pears after baking. It looks lovely and adds sweetness. Lastly, serve them warm with a scoop of vanilla ice cream. This makes the dish feel special. For the complete recipe, check the Full Recipe section.
Variations
Alternative Ingredients
You can swap in different cheeses for a unique flavor. Try goat cheese or ricotta instead of feta. For a sweeter twist, use brown sugar instead of honey. You can also add fresh fruit like apples or figs for a new taste. If you want a crunch, consider adding pecans or hazelnuts.
Different Cooking Methods
While baking is classic, you can grill or sauté pears too. Grilling gives them a smoky flavor. Simply cut the pears in half, brush with oil, and grill for about five minutes. Sautéing works well too. Just cook the pear halves in a pan with butter for a few minutes.
Serving with Additional Sides or Sauces
Baked pears pair well with many sides. Serve them with vanilla ice cream for a sweet treat. You can also add a dollop of whipped cream on top. A drizzle of balsamic glaze adds a nice tangy touch. For something different, try serving them alongside a cheese platter. The mix of flavors will amaze your guests.
For the full recipe, check out the Baked Pears Delight section above.
Storage Info
How to Store Leftovers
To store leftovers, let the baked pears cool completely. Place them in an airtight container. Keep the container in the fridge. They stay fresh for up to three days. If you want to enjoy them later, store them without honey. This way, they won’t get too soggy.
Freezing and Reheating Tips
You can freeze baked pears, but it’s best to do so without the honey. Wrap each pear half in plastic wrap. Then, place them in a freezer bag. They can last up to three months in the freezer. When you’re ready to eat, thaw them in the fridge overnight. Reheat in the oven at 350°F (175°C) for about 10 minutes. This warms them up without losing their taste.
Shelf Life and Best Practices
Baked pears with feta, honey, and cranberries taste best fresh. However, they can last in the fridge for three days. When stored properly, they maintain flavor and texture. For the best taste, enjoy them within the same week. Always check for any signs of spoilage before eating. Keeping them sealed tight helps preserve their yummy taste. If you follow these tips, you’ll enjoy your baked pears for days! For the full recipe, check the earlier section.
FAQs
How do I know when baked pears are done?
You can tell baked pears are done when they feel soft. Use a fork to test them. If the fork goes in easily, they are ready. The tops should look golden and slightly caramelized too. This means the feta and honey have mixed well.
Can I use other types of cheese in this recipe?
Yes, you can use other cheeses. Goat cheese adds a tangy flavor. Cream cheese gives a rich taste. You can even try blue cheese for a bold kick. Just remember, different cheeses can change the taste. Choose one that you enjoy.
What are some good pairings for baked pears with feta?
Baked pears with feta pair well with nuts, like walnuts or pecans. You can also serve them with a scoop of vanilla ice cream. A drizzle of balsamic glaze can add a nice touch. For drinks, try a sweet white wine or herbal tea. These pairings will make your dish shine. For the full recipe, check out the Baked Pears Delight section.
In this article, we explored the ingredients, steps, and tips for baked pears. We detailed how to prepare, bake, and serve them. You learned about ingredient substitutions and common mistakes. We also shared how to store leftovers and answered your most asked questions. Remember, baking is about fun and creativity. Enjoy experimenting with flavors and methods. Your perfect baked pears await!