Appetizers

Bang Bang Cauliflower Crispy and Flavorful Recipe
Looking for a tasty twist on your veggie game? This Bang Bang Cauliflower recipe brings crispy, flavorful fun to your table! With just a handful

Air Fryer Sliced Potatoes Crispy and Easy Recipe
Are you craving a simple yet tasty snack? Look no further! This easy recipe for Air Fryer Sliced Potatoes will give you crispy, golden slices
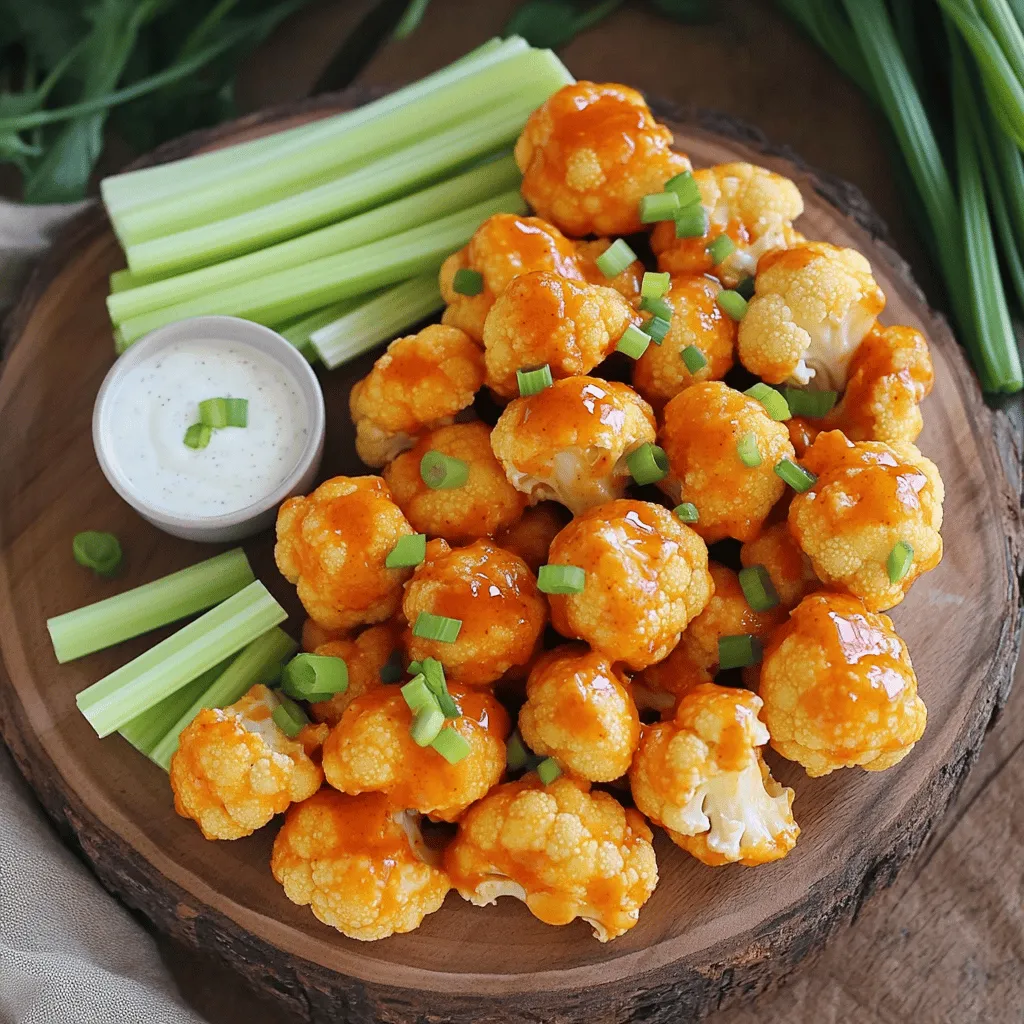
. First, you need to cut your cauliflower into bite-sized florets. This helps them cook evenly and stay crispy. Aim for pieces about one to two inches wide. Next, make a batter. In a large bowl, mix together flour, garlic powder, paprika, salt, and black pepper. Then, add milk to this mixture and whisk until it’s smooth. The batter should be thick enough to coat the florets. Now, take each floret and dip it into the batter. Let any excess drip off. After that, roll the battered floret in breadcrumbs. Press lightly to make sure the breadcrumbs stick. This step is key for that crispy texture. Before you cook, preheat your air fryer to 400°F (200°C). This ensures the cauliflower starts cooking right away. While the fryer heats, arrange your breaded florets in the fryer basket. Lay them in a single layer to avoid overcrowding. If you crowd the basket, some will end up soggy. After arranging, drizzle a bit of olive oil over the florets. This helps achieve that golden, crispy finish. You should air fry the cauliflower for about 12 to 15 minutes. Halfway through, shake the basket gently. This helps all sides crisp up nicely. Once they’re golden brown and crispy, they’re ready to eat. Carefully remove them from the air fryer and let them cool for a minute. Enjoy your crispy air fryer cauliflower bites! For the complete recipe, check out the Full Recipe. To get that perfect crispiness, avoid crowding the air fryer basket. When you overcrowd, the hot air can’t circulate well. This makes your cauliflower soggy instead of crispy. Spread the florets in a single layer. This helps them cook evenly and get that golden brown look we love. Drizzling the cauliflower with olive oil is key too. A light drizzle helps the coating crisp up nicely. It also adds a rich flavor to each bite. Too much oil can make it greasy, so just a tablespoon is enough. For a thicker batter, make sure to whisk the flour and milk well. You want it to be smooth but thick enough to coat the florets. If it’s too thin, the batter won’t stick. You can always add a little more flour to thicken it. To ensure breadcrumbs stick well, press the cauliflower lightly into the breadcrumbs. This helps them adhere better during cooking. Using Panko breadcrumbs gives an extra crunch. They are coarser than regular breadcrumbs and help create a delightful texture. When it comes to dips, you can’t go wrong with ranch or spicy mayo. These add a great kick and flavor to the crispy bites. You can also try a tangy yogurt dip to balance the flavor. For visual appeal, sprinkle fresh parsley on top before serving. It adds a pop of color and looks nice on the plate. Plus, it gives a fresh taste that pairs well with the crispy cauliflower. Enjoy your crispy air fryer cauliflower bites! For the complete recipe, check the Full Recipe section. {{image_2}} You can spice up your cauliflower bites in many ways. If you love heat, try adding cayenne pepper to the batter. Start with 1/4 teaspoon and adjust to your taste. This will give your bites a nice kick. For a cheesy flavor, sprinkle parmesan cheese into the breadcrumbs. It adds a rich taste that pairs well with the cauliflower. You can also mix in Italian herbs like oregano or basil for extra flavor. If you don’t have an air fryer, you can still enjoy crispy cauliflower. Baking is a great option. Preheat your oven to 425°F (220°C). Place the breaded florets on a baking sheet lined with parchment paper. Bake for about 25-30 minutes, turning them halfway for even browning. Stovetop frying is another fun way to cook them. Heat oil in a skillet over medium heat. Once hot, add the coated florets. Fry them for about 5-7 minutes on each side, until golden brown and crispy. If you want to make this dish vegan, simply use a plant-based milk instead of regular milk. You can also substitute the all-purpose flour with chickpea flour. This will keep it light and tasty. For those avoiding gluten, use gluten-free flour and gluten-free breadcrumbs. This way, everyone can enjoy these crispy bites without worry. For the full recipe, please refer to the original section above. To keep your air fryer cauliflower fresh, store it in an airtight container. This helps retain its flavor and crunch. Place the cooled florets in the fridge. They last about 3 to 4 days. To reheat your cauliflower, the air fryer works best. Preheat it to 350°F (175°C). Place the cauliflower in the basket for about 5-7 minutes. This brings back the crispiness. If you don’t have an air fryer, you can use the oven. Preheat the oven to 350°F (175°C) and spread the cauliflower on a baking sheet. Heat for around 10-15 minutes until warmed through. You can freeze both cooked and uncooked cauliflower. For uncooked, spread the florets on a tray and freeze them until solid. Then, transfer them to a freezer bag. This keeps them from sticking together. For cooked cauliflower, let it cool completely before freezing. Store it in a freezer-safe bag. It can last for about 2-3 months in the freezer. When you are ready to use it, thaw in the fridge overnight. For quicker thawing, place it in cold water for about 30 minutes. Cooking cauliflower in an air fryer takes about 12 to 15 minutes. This time varies based on the size of your florets. For small florets, check them at 12 minutes. For larger ones, you may need up to 15 minutes. Always shake the basket halfway through. This helps them cook evenly. Yes, you can use frozen cauliflower! Just remember to thaw it first. Pat it dry to remove excess moisture. This helps the batter stick better. Cooking time may be a bit longer for frozen cauliflower. Start checking at 15 minutes and adjust as needed. Air-fried cauliflower tastes great with many dips. Here are some tasty ideas: - Ranch dressing - Garlic aioli - Spicy sriracha sauce - Creamy tahini sauce - Sweet chili sauce Feel free to mix and match based on your taste! Yes, air-fried cauliflower bites are quite healthy! Cauliflower is low in calories and high in vitamins. It is rich in fiber, which helps with digestion. Air frying uses less oil than deep frying, making it better for your health. Enjoy these tasty bites guilt-free! For the Full Recipe, check earlier in the article. This blog post shared how to make delicious air-fried cauliflower bites. We covered key ingredients, from cauliflower and flour to seasonings like garlic and paprika. You learned step-by-step instructions for prepping, cooking, and achieving perfect crispiness. We also explored various options for flavor and preparation. In the end, experimenting with this recipe can lead to tasty, healthy snacks. Whether you serve them with dips or try different seasonings, the possibilities are endless. Enjoy creating your own version of this dish!](https://tossedrecipes.com/wp-content/uploads/2025/05/702e8f6d-e457-414d-b48a-3edcc1877c81.webp)
Air Fryer Cauliflower Crispy and Flavorful Delight
Looking for a tasty, healthy snack? Air fryer cauliflower is your answer! This crispy, flavorful delight offers a fun twist on your usual veggies. I’ll
. Enjoy the process of mixing and matching these ingredients to create something special! - Preheat your oven to 400°F (200°C). - Line a baking sheet with parchment paper. - In a large bowl, mix all the meatball ingredients well. - Shape the mixture into 1-inch meatballs. - Place them on the prepared baking sheet. - Bake for 15-20 minutes until they turn golden brown. - In a small bowl, whisk together mayonnaise, Sriracha, lemon juice, and a pinch of salt. - Let the meatballs cool briefly after baking. - Serve them warm with the spicy mayo dip on the side. You can find the full recipe for Korean BBQ meatballs with spicy mayo dip above. Enjoy the cooking! To make your Korean BBQ meatballs really pop, try these tips: - Experiment with different herbs like cilantro or basil. - Use freshly minced garlic and ginger for a bold taste. These small changes can uplift the flavor profile of your dish. You can choose different cooking methods for your meatballs: - Baking gives a nice, even cook and keeps the meatballs moist. - Pan-frying adds a crisp texture on the outside. Remember to adjust the cooking time based on the size of your meatballs. Smaller ones cook faster; larger ones may take longer. Think about how you want to serve your meatballs: - Pair them with rice or noodles for a complete meal. - You can also add them as a topping on salads for a fresh twist. Each option adds a new layer of enjoyment to your dish. For more details on making these tasty meatballs, check the Full Recipe. {{image_2}} You can change the meat in this recipe easily. Substitute ground chicken or turkey for a lighter choice. If you prefer plant-based meals, use plant-based meat alternatives. They work great and keep the flavors intact. Love spice? Adjust the Sriracha in the dip to make it mild or spicy. You can even add chili oil to the meatballs for extra heat. This gives you control over how much kick you want in every bite. Want to make your meatballs even better? Incorporate veggies like chopped bell peppers. They add crunch and color. You can also add cheese for a cheesy meatball variant. It melts beautifully and enhances the flavor. For the full recipe, check out the complete details above. To keep your Korean BBQ meatballs fresh, refrigerate them in an airtight container. They will stay good for up to 3 days. If you want to store them for longer, freeze the meatballs. This way, they will last for several months. When it’s time to enjoy your leftovers, reheat them in the oven. This method helps keep the meatballs nice and crispy. If you're in a hurry, you can use the microwave for quick reheating. Just be careful not to overcook them. Making these meatballs in bulk is a great idea. You can freeze them for quick meals later. Pair the meatballs with sides like rice, noodles, or veggies. This makes a complete meal that’s easy to prepare on busy days. For the full recipe, check out the previous sections! Yes, you can prepare these meatballs ahead of time. Just refrigerate or freeze them for later use. This saves you time on busy days. You can enjoy the same great taste even when made in advance. To make the dip less spicy, reduce the amount of Sriracha you add. You can also use mayonnaise only for a milder flavor. This way, everyone can enjoy the dip without the heat. You can serve these meatballs with steamed rice, fresh veggies, or a salad. This adds balance to your meal and makes it more satisfying. Pairing them with different sides can enhance their flavor. Yes, you can use lean meat for the meatballs. Just be mindful of moisture levels. Lean meat may cook differently, so check for doneness to ensure they stay juicy and flavorful. In this post, we explored how to make delicious meatballs. We covered key ingredients, step-by-step instructions, and tips for extra flavor. You learned how to whip up a tasty spicy mayo dip, along with ideas for variations. Meal prep and storage tips help you enjoy these meatballs later. Make these meatballs for your next meal and impress everyone with your skills!](https://tossedrecipes.com/wp-content/uploads/2025/05/3bbddf43-b473-4985-8074-2aa89f490ebd.webp)
Korean BBQ Meatballs with Spicy Mayo Dip Delight
Get ready to tantalize your taste buds with my Korean BBQ Meatballs and Spicy Mayo Dip! This dish packs bold flavors and is easy to

Cheesy Garlic Butter Bombs Savory and Easy Treat
Are you ready to indulge in a warm, cheesy delight? Today, I’m sharing my easy recipe for Cheesy Garlic Butter Bombs. These savory treats combine
Buffalo Cauliflower Wings Crispy and Flavorful Treat
Are you ready to indulge in a tasty treat? Buffalo Cauliflower Wings are crispy, bold, and bursting with flavor. Whether you’re a vegan or simply

Garlic Parmesan Broccoli Bites Tasty Veggie Snack
Looking for a tasty veggie snack that’s easy to make? Garlic Parmesan Broccoli Bites are your perfect solution! Packed with fresh broccoli, savory cheese, and
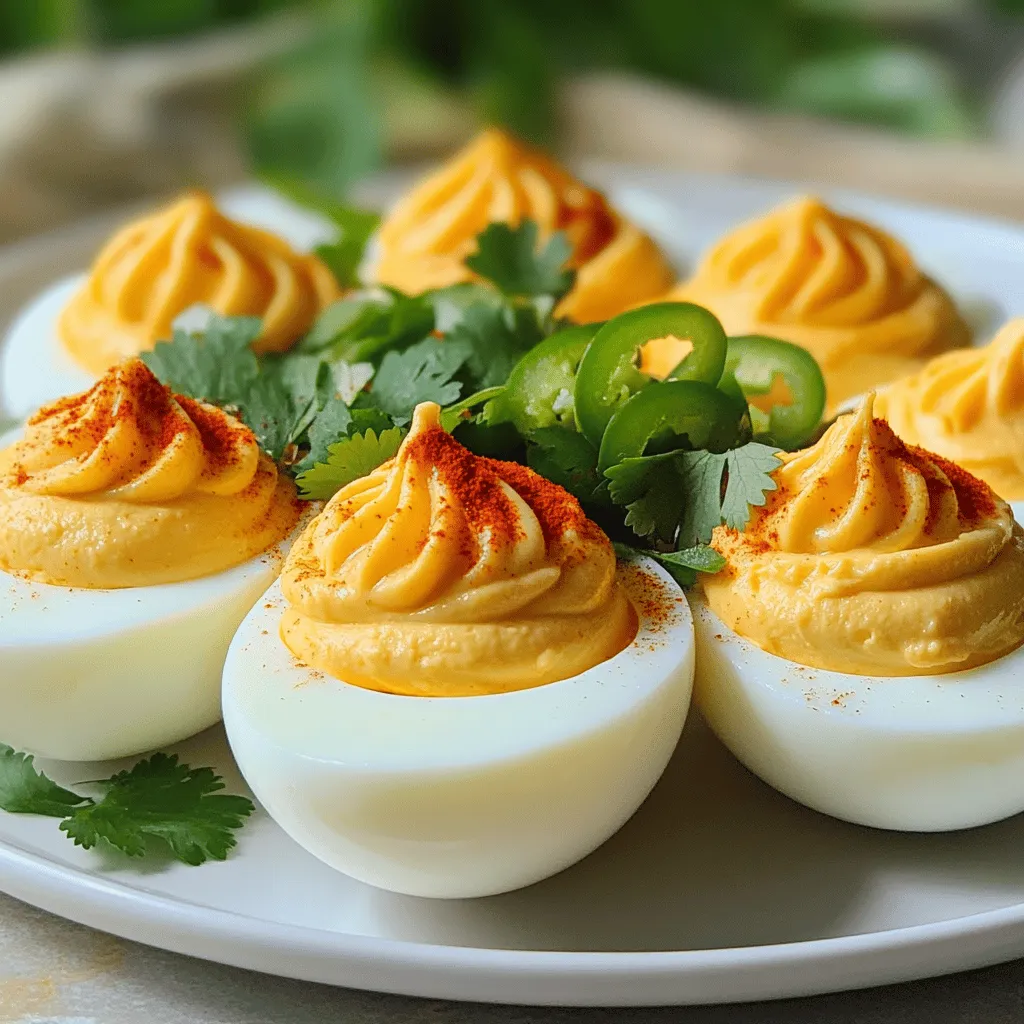
Spicy Chili Garlic Deviled Eggs Bold and Tasty Snack
Looking for a bold snack to spice up your next gathering? These Spicy Chili Garlic Deviled Eggs are just what you need! With the perfect

Bang Bang Cauliflower Irresistible Appetizer Recipe
Craving a fun and tasty appetizer? Look no further than Bang Bang Cauliflower! This dish is crispy, spicy, and simply irresistible. I’ll guide you through

Buffalo Cauliflower Wings Flavorful and Easy Recipe
Are you ready for a tasty twist on a classic favorite? Buffalo Cauliflower Wings are not only delicious but also easy to make! In this