Appetizers

To make Crispy Parmesan Roasted Cauliflower, you will need: - 1 medium head of cauliflower, cut into florets - 1/2 cup grated Parmesan cheese - 1/4 cup olive oil - 1 teaspoon garlic powder - 1 teaspoon onion powder - 1/2 teaspoon smoked paprika - Salt and pepper to taste - Fresh parsley, chopped (for garnish) Gather these tools to make cooking easy: - A large mixing bowl - A baking sheet - Parchment paper - A spatula or wooden spoon - A sharp knife for cutting You can add extra flavors if you wish: - A squeeze of lemon juice for brightness - A pinch of red pepper flakes for heat - Fresh herbs like thyme or rosemary for earthiness These ingredients and tools help create a tasty dish. Enjoy the process of making this delightful meal! For the complete recipe, check the Full Recipe. Start by washing the cauliflower. Remove any leaves and cut it into florets. Aim for even sizes for cooking. This helps all pieces cook at the same time. Place the florets in a large bowl. In a separate bowl, mix the olive oil, garlic powder, onion powder, smoked paprika, salt, and pepper. Stir well. This blend will give the cauliflower a burst of flavor. Pour the marinade over the florets. Toss them until each piece is well coated. Preheat your oven to 425°F (220°C). Line a baking sheet with parchment paper. Spread the marinated cauliflower in a single layer on the sheet. Now, sprinkle the grated Parmesan cheese on top. Roast the cauliflower for 25 to 30 minutes. Stir halfway through. Look for a golden brown color and crispy texture. Once done, take it out and let it cool for a few minutes. Garnish with chopped parsley before serving. You can find the full recipe above for more details. To get crispy Parmesan roasted cauliflower, follow a few key steps. First, make sure to cut the cauliflower into even florets. This helps them cook at the same rate. Second, don't skip the olive oil. It helps create a nice crispy texture. Third, roast the cauliflower at a high temperature, around 425°F (220°C). This allows the florets to brown well. Lastly, stir the cauliflower halfway through cooking. This ensures all sides get crispy. Crispy Parmesan roasted cauliflower is great as a snack or side dish. You can serve it with a dipping sauce, like ranch or garlic aioli. It pairs nicely with grilled meats or fish. You can also add it to a salad for extra crunch. If you want to impress guests, serve it on a large platter with fresh parsley on top. One common mistake is overcrowding the baking sheet. This traps steam and makes the cauliflower soggy. Spread the florets out for even roasting. Another mistake is not seasoning enough. Use salt and pepper generously for great flavor. Lastly, don’t skip the cheese! Parmesan adds a rich taste and crunch. For the full recipe, check out the complete guide. {{image_2}} You can switch up the cheese in this recipe. Try using Pecorino Romano for a sharper taste. Or, go for a mix of mozzarella and cheddar for a creamy texture. Each cheese adds a unique flavor to the dish. Spices can change the whole vibe of your cauliflower. Try adding cayenne pepper for heat. Or, use Italian seasoning for a herby touch. You can even mix in curry powder for a warm, earthy flavor. Experiment with what you love. To make this dish vegan, skip the cheese. Instead, use nutritional yeast. It gives a cheesy flavor without dairy. You can also add a bit of tahini for creaminess. Adjust the spices to enhance the taste. Enjoy this dish with a whole new twist! For the full recipe, please check the earlier sections. After enjoying your Crispy Parmesan Roasted Cauliflower, store any leftovers in an airtight container. Keep them in the fridge for up to three days. This helps keep the flavors fresh and the texture good. Avoid stacking them too high to prevent sogginess. To reheat, preheat your oven to 350°F (175°C). Spread the cauliflower on a baking sheet. Heat for about 10-15 minutes. This will help regain some crispiness. You can also use an air fryer for a quicker option. Just heat at 350°F for about 5 minutes. If you want to freeze the leftovers, make sure they are cool first. Place the cauliflower in a freezer-safe bag or container. It can last up to two months in the freezer. To use, thaw in the fridge overnight. Then, reheat as mentioned above. Yes, you can use frozen cauliflower. Just thaw it first. Pat it dry with paper towels. This step helps to keep the texture crisp. Frozen cauliflower cooks faster. Keep an eye on it to avoid overcooking. This recipe is already gluten-free! Just use fresh ingredients. Ensure your Parmesan cheese is free of gluten. Always check labels when buying store-bought items. You can serve this dish with many items. Here are some great options: - Grilled chicken or fish - A fresh salad - Quinoa or rice - A hearty soup These pairings enhance the flavors and make a complete meal. Enjoy experimenting with your plate! For the full recipe, check the section above. This blog post covered all the essentials for making Crispy Parmesan Roasted Cauliflower. We discussed the right ingredients, tools, and steps you need. Tips helped you avoid common mistakes for perfect crispiness. You learned about variations, storage, and answers to frequent questions. Trying new flavors or sticking with classics makes this dish fun. Enjoy your cooking adventure and share your results! You now have the tools to make this easy and tasty recipe at home.
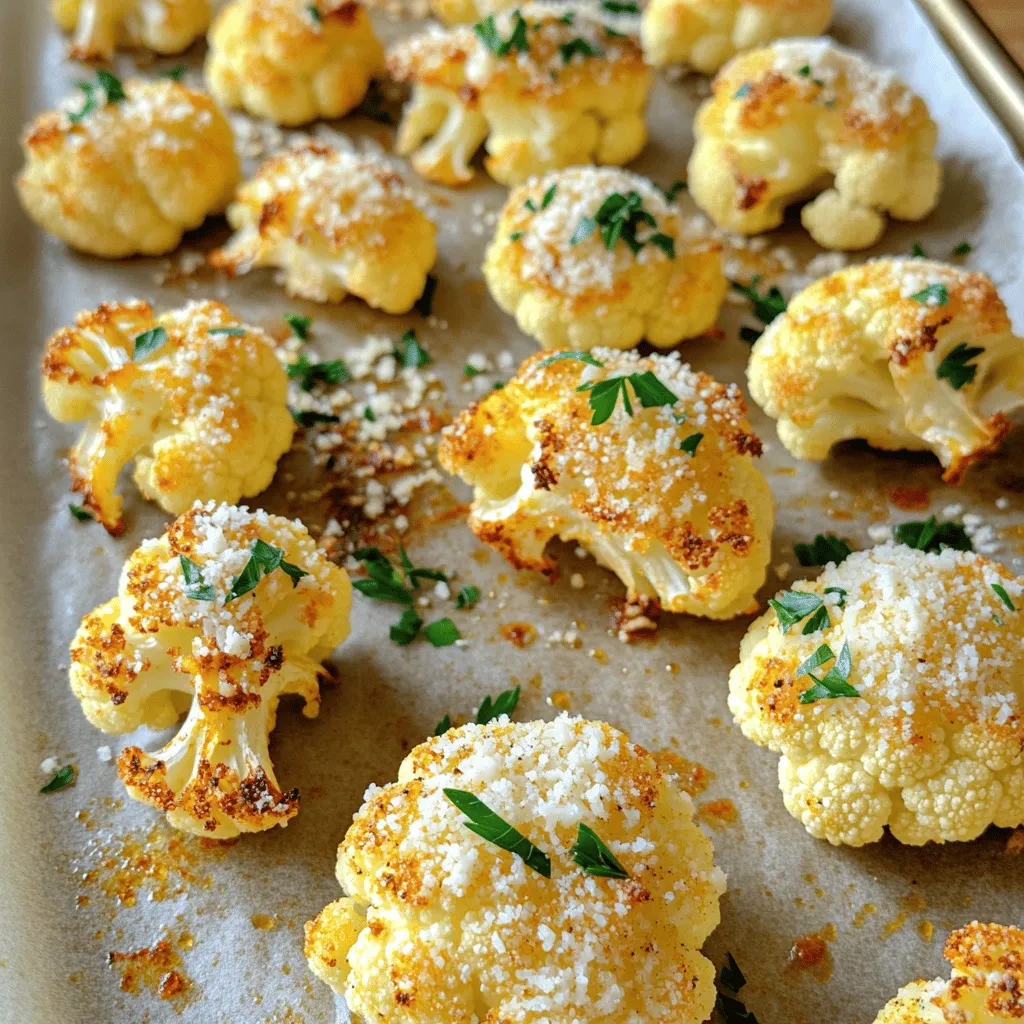
Crispy Parmesan Roasted Cauliflower Delightful Dish
If you’re searching for a tasty and healthy dish, you’ve found it! Crispy Parmesan Roasted Cauliflower is packed with flavor and crunch. With simple ingredients
- 4 medium-sized potatoes, boiled and mashed - 1 cup finely chopped spinach - 1 cup grated cheese (cheddar or your choice) - 1/2 cup finely chopped onions - 2 cloves garlic, minced - 1 teaspoon paprika - 1/2 teaspoon black pepper - Salt to taste - 1/2 cup breadcrumbs (for coating) - 1/4 cup all-purpose flour (for dusting) - Oil for frying To make stuffed potato cakes, you need precise amounts. Here’s a guide: - Potatoes: 4 medium-sized will yield a good amount of cake. - Spinach: 1 cup adds color and nutrients. Adjust more or less based on your taste. - Cheese: Choose 1 cup of your favorite cheese for a creamy texture. - Onions: 1/2 cup gives a nice bite. You can use less if you prefer. - Garlic: 2 cloves add strong flavor; feel free to reduce. - Paprika and black pepper: Just a teaspoon and half a teaspoon bring warmth. - Salt: Add to taste, but start with 1/2 teaspoon. - Breadcrumbs: 1/2 cup is enough for a crispy outside. - Flour: Use 1/4 cup to dust the cakes, helping them hold together. - Oil: Enough for frying, about 1/2 inch deep in the pan. You can swap ingredients if needed. Here are some ideas: - Potatoes: Sweet potatoes work well for a different taste. - Spinach: Kale or Swiss chard can replace spinach. - Cheese: Try feta or mozzarella for a twist. - Onions: Green onions or leeks can add a milder flavor. - Garlic: Garlic powder can substitute fresh garlic if necessary. - Breadcrumbs: Use crushed cornflakes for a gluten-free option. - Flour: Almond or coconut flour can be great for gluten-free diets. For the full recipe, check out the [Full Recipe]. To start, gather your ingredients. You need fresh potatoes, spinach, cheese, onions, garlic, and spices. First, boil the potatoes until they are soft. This usually takes about 15 minutes. After boiling, mash them in a large bowl. Next, add the chopped spinach, grated cheese, onions, garlic, paprika, black pepper, and salt. Mix everything well with a fork or your hands until it is even. Now it's time to shape the potato mixture. Divide it into 8 to 10 equal parts. Roll each part into a patty shape. This makes them easy to fry later. To help them stick together, dust each patty lightly with all-purpose flour. Finally, roll them in breadcrumbs for a crispy finish. Next, heat oil in a frying pan over medium heat. You want enough oil to cover the bottom of the pan. Once the oil is hot, carefully place the potato cakes in the pan. Fry them for about 4 to 5 minutes on each side. They should turn a nice golden brown color. Make sure not to crowd the pan. This helps them cook evenly. When they are done, place them on a paper towel to drain any extra oil. For serving, arrange the potato cakes on a nice platter. You can add a side of tangy yogurt or sour cream for dipping. This adds a creamy contrast to the crispy cakes. To make your dish pop, sprinkle some fresh herbs like cilantro or parsley on top. This gives it a lovely color and fresh taste. Enjoy your delicious stuffed potato cakes! For the full recipe, check out the details above. To make great stuffed potato cakes, avoid a few common mistakes. - Use starchy potatoes, like russets. They give a fluffy texture. - Don’t over-mash the potatoes. A few lumps add character. - Make sure the filling is not too wet. This keeps the cakes from falling apart. - Let the patties chill for 10 minutes before frying. This helps them hold their shape. When it comes to frying, you have two main options: pan-frying and deep-frying. - Pan-frying: Use a non-stick skillet with enough oil to cover the bottom. This method gives a nice, crispy edge while using less oil. - Deep-frying: Heat oil in a deep pot. This method cooks the cakes evenly and gives a great crunch. However, it requires more oil and careful monitoring. You can easily amp up the flavor of your potato cakes. - Add fresh herbs like chives or dill for a bright taste. - Mix in spices like cumin or chili powder for a kick. - Try incorporating cooked bacon or sausage for a meaty twist. - A splash of lemon juice can add freshness. For the full recipe on making these delightful stuffed potato cakes, check out the Full Recipe. {{image_2}} You can get creative with your stuffed potato cakes! Try adding different fillings. Here are some ideas: - Meats: Cooked bacon, sausage, or chicken can add a nice kick. - Vegetables: Diced bell peppers, mushrooms, or zucchini work great. - Spices: Experiment with cumin, chili powder, or fresh herbs for a new taste. Mix and match these options to find your favorite flavors. The sky’s the limit! You can make stuffed potato cakes to fit special diets. For a vegetarian version, skip the meat and add more veggies. Use plant-based cheese for a vegan take. If you need gluten-free options, replace breadcrumbs with ground oats or gluten-free breadcrumbs. Always read labels carefully to ensure they fit your needs. Seasonal vegetables can change the game for your potato cakes. In spring, use fresh peas or asparagus. Summer brings zucchini and corn, while fall is perfect for squash or pumpkin. In winter, try root vegetables like carrots or parsnips. Using what’s in season makes your cakes more flavorful and fresh. For the full recipe, you can refer back to the earlier section. Enjoy experimenting with these variations! To keep your stuffed potato cakes fresh, let them cool first. Place them in an airtight container. You can refrigerate them for up to three days. For longer storage, freeze them in a single layer. Once frozen, move them to a freezer bag. This helps save space and keeps them from sticking together. To enjoy crispy potato cakes again, reheat them in a skillet. Use medium heat and add a little oil. Cook for about three to five minutes on each side. This method keeps the outside crispy. You can also bake them at 375°F for about 10-15 minutes. This option works well if you prefer a healthier approach. Stuffed potato cakes last for about three days in the fridge. In the freezer, they can stay good for up to three months. Just remember to label your containers. This way, you can keep track of what you have and when you made it. Enjoy your delicious potato cakes later, just like they were fresh! For the full recipe, check out the details above. You need about 15 minutes to prep. Cooking takes around 15 minutes. So, total time is 30 minutes. You can enjoy stuffed potato cakes in no time! Yes, you can bake them for a healthier option. Preheat your oven to 400°F (200°C). Lightly coat the cakes with oil and place them on a baking sheet. Bake for about 20-25 minutes, flipping halfway. This method still gives you a tasty treat with less oil! Serve your stuffed potato cakes on a platter. Pair them with tangy yogurt or sour cream for dipping. You can also add a side of fresh salad for a nice crunch. Garnish with herbs like cilantro or parsley for a pop of color. Check out the Full Recipe for more ideas! This blog post covered everything you need to know about making stuffed potato cakes. You learned about the key ingredients, measurements, and possible substitutes for any diet. The step-by-step instructions guide you through preparation and cooking. Plus, the tips and variations help you create different flavors. Lastly, we discussed storing leftovers and reheating for the best texture. Enjoy your cooking adventure and have fun experimenting with these tasty dishes!
Quick & Easy Stuffed Potato Cakes Delightful Recipe
Craving a simple and tasty meal? Let’s dive into the world of stuffed potato cakes! This delightful recipe combines creamy potatoes, fresh spinach, and gooey
To make Chicken Parmesan Pillows, you need fresh and tasty ingredients. Here is the list of what to gather: - 2 cups cooked chicken, shredded - 1 cup ricotta cheese - 1 cup grated mozzarella cheese - 1/2 cup grated Parmesan cheese - 1 egg, beaten - 1 teaspoon garlic powder - 1 teaspoon Italian seasoning - 1 teaspoon salt - 1/2 teaspoon black pepper - 1 package (1 sheet) of puff pastry, thawed - 1/4 cup marinara sauce (for serving) - Fresh basil leaves for garnish Each ingredient plays a key role in the flavor and texture of the pillows. The chicken provides a hearty base, while the cheeses add creaminess. The egg helps bind everything together, making each bite satisfying. The spices bring warmth and zest, making these pillows burst with flavor. If you want to impress, choose quality ingredients. Fresh herbs and high-quality cheese can elevate your dish. You can find the full recipe to guide you through the cooking process. Remember, cooking is about enjoying the experience as much as the result. Happy cooking! First, preheat your oven to 400°F (200°C). This ensures even cooking. Next, line a baking sheet with parchment paper. This helps with easy cleanup. In a large bowl, combine the filling ingredients. You will need 2 cups of shredded chicken, 1 cup of ricotta cheese, 1 cup of grated mozzarella cheese, and 1/2 cup of grated Parmesan cheese. Add 1 beaten egg, 1 teaspoon of garlic powder, 1 teaspoon of Italian seasoning, 1 teaspoon of salt, and 1/2 teaspoon of black pepper. Mix everything well until it looks uniform. Now, roll out the puff pastry on a floured surface. Aim for a thickness of about 1/8 inch. Cut the pastry into squares, around 4x4 inches. Next, take a generous tablespoon of the chicken mixture and place it in the center of each pastry square. Fold the pastry over to form a triangle. Press the edges together to seal. For extra flair, you can crimp the edges with a fork. Arrange the filled pillows on the prepared baking sheet. Make sure they are spaced out. This helps them cook evenly. Bake in the preheated oven for 18-20 minutes. They should turn golden brown and puff up nicely. After baking, allow the pillows to cool slightly. Serve them warm, drizzled with marinara sauce or with it on the side. Garnish with fresh basil leaves for color and taste. Enjoy these tasty Chicken Parmesan Pillows! For the full recipe, check out the details above. - Ensuring pastry is fully sealed: If the pastry is not sealed well, the filling can leak. Press the edges together firmly. You can crimp them with a fork for extra security. - Not overcrowding the baking sheet: Give each pillow space to puff up. If they are too close, they will stick together and cook unevenly. - Adjusting seasoning to taste: Everyone has different tastes. Try the filling before sealing it. Add more salt, pepper, or seasoning if needed. - Alternative cheeses for filling: You can mix other cheeses into the filling. Try using feta or goat cheese for a unique twist. - Best sides to pair with Chicken Parmesan Pillows: A fresh salad or garlic bread complements these pillows well. You can also serve them with steamed veggies for a healthy touch. - Creative garnishing ideas: Fresh basil leaves add color and taste. You can also sprinkle some extra cheese on top for a rich finish. For a fun twist, drizzle a bit of pesto or balsamic glaze over the pillows. For the full recipe, check out Chicken Parmesan Pillows . {{image_2}} You can easily make Chicken Parmesan Pillows vegetarian. Just swap the chicken for spinach or mushrooms. Spinach adds a nice green color and is packed with nutrients. Mushrooms give a hearty texture and a rich flavor. You can sauté the spinach or mushrooms first to enhance their taste. This way, you keep all the fun and flavor without meat. Want to spice things up? Adding cayenne or crushed red pepper brings heat to your pillows. These spices are great for those who like a kick. You can also mix in sundried tomatoes or olives. Sundried tomatoes add a sweet and tangy taste, while olives give a salty bite. Each option makes your dish exciting and unique. Chicken Parmesan Pillows can be served in many ways. You can enjoy them as an appetizer or a main dish. If you choose to serve them as an appetizer, cut them smaller for easy bites. Pair them with a variety of dipping sauces. Marinara is the classic choice, but ranch or garlic aioli can also be great. Each style lets you play with flavors and presentation. To keep your Chicken Parmesan Pillows fresh, place them in an airtight container. Make sure they cool down first. This helps prevent sogginess. Store them in the fridge for up to three days. After that, the flavors may fade. Always check for any signs of spoilage before eating. You can freeze both unbaked and baked Chicken Parmesan Pillows. - Unbaked: Lay the filled pillows on a baking sheet. Freeze them until they are firm. Then, transfer them to a freezer bag. They can last up to three months in the freezer. - Baked: Allow the pillows to cool completely. Wrap them tightly in plastic wrap or foil. Store them in a freezer bag as well. To reheat, bake frozen unbaked pillows directly from the freezer. Preheat your oven to 400°F (200°C) and bake for 25-30 minutes. If reheating baked pillows, place them in a preheated oven at 350°F (175°C) for 15-20 minutes. You can also microwave them, but the texture may change. Always check that they are heated through before serving. You can prepare Chicken Parmesan Pillows before serving. Make the filling and assemble the pillows. Place them on a baking sheet. Cover with plastic wrap and store in the fridge for up to a day. When ready, bake them straight from the fridge. You might need to add a few extra minutes to the baking time. Yes, you can freeze these delightful pillows! Prepare them but do not bake. Place the unbaked pillows in a single layer on a baking sheet. Freeze until firm, then transfer to a freezer bag. They can last for up to three months. When you're ready to eat, bake them directly from the freezer. Just add a few extra minutes to the cooking time. You can get creative with the fillings! Try using cooked spinach and feta for a tasty twist. Or add mushrooms, sun-dried tomatoes, or even cooked sausage. Each option brings a new flavor. You can mix and match ingredients to your taste. These pillows bake in about 18 to 20 minutes. Preheat your oven to 400°F (200°C) for the best results. Watch for a golden brown color on the pillows. When they puff up, they are ready to enjoy! Pair your Chicken Parmesan Pillows with a fresh salad. A simple green salad or a Caesar salad works great. You can also serve them with marinara sauce for dipping. Fresh basil leaves make a lovely garnish too. Each side enhances the dish’s flavor. For the full recipe, check out the Chicken Parmesan Pillows section above! You now know how to make Chicken Parmesan Pillows with ease. We covered the ingredients, step-by-step instructions, and tips for success. These tasty treats can impress anyone who visits. You can even customize them to fit your taste or diet. Whether you serve them as an appetizer or a main dish, they are sure to please. Enjoy your cooking adventure, and remember, practice makes perfect!
Irresistible Chicken Parmesan Pillows Tasty and Easy
Are you ready to impress your family and friends with a fun twist on a classic? These Chicken Parmesan Pillows are not just tasty; they’re
- 1 large sweet onion (like a Vidalia) - 1 cup all-purpose flour - 1 teaspoon paprika - 1 teaspoon garlic powder - 1 teaspoon onion powder - 1/2 teaspoon cayenne pepper (adjust for spice preference) - 1/2 teaspoon salt - 1/2 teaspoon black pepper - 2 large eggs - 1 cup breadcrumbs (panko for extra crunch) - Olive oil spray The main star of this dish is the sweet onion. I love using a Vidalia onion for its gentle sweetness. It blooms beautifully and absorbs all the flavors. The flour and spices form a tasty coating. I use paprika, garlic powder, onion powder, cayenne pepper, salt, and black pepper for zest. Adjust the cayenne to fit your taste. Two large eggs help the coating stick to the onion. Panko breadcrumbs add that crispy texture we all crave. When you spray the blooming onion with olive oil, it creates a lovely golden color. - Calories per serving: Approximately 250 calories - Macronutrient breakdown: - Carbs: 35g - Protein: 6g - Fat: 10g This dish is a fun snack for sharing! Each serving is tasty, with a nice balance of carbs and protein. The calories come from the coating and the onion itself. Enjoy this crispy treat guilt-free! For the complete recipe, check out the [Full Recipe]. Preparing the onion for blooming Start with a large sweet onion, like a Vidalia. Cut off the top of the onion, and peel away the outer layers. Place the onion upside down on a cutting board. Use a sharp knife to slice down about an inch from the bottom. You want to create 8-12 petal-like sections. Be careful not to cut through the root. Once done, gently pull apart the petals to form the blooming shape. Setting up the coating stations Next, you need to set up your breading stations. In a medium bowl, mix together the flour, paprika, garlic powder, onion powder, cayenne pepper, salt, and black pepper. In a second bowl, whisk the two large eggs until they are combined. In a third bowl, pour in the breadcrumbs. Proper techniques for coating the onion Now it's time to coat your blooming onion. First, dip the onion into the flour mixture, ensuring all the petals get coated well. Shake off any extra flour. Then, move the onion to the bowl of beaten eggs, letting any excess egg drip back into the bowl. Finally, coat it with the breadcrumbs, pressing gently to help them stick. Preheating the air fryer Before you cook, preheat your air fryer to 370°F (188°C). This helps the onion cook evenly and get crispy. Cooking time and temperature settings Place the coated blooming onion in the air fryer basket. Make sure the petals are spread out for even cooking. Cook for 12-15 minutes, flipping halfway through. The onion should turn golden brown and become crispy. For a detailed recipe, check the Full Recipe. To make the best blooming onion, start with even coating. When you dip the onion in flour, make sure to cover all the petals. This step helps the flavors stick better. Shake off any extra flour. For the egg wash, let excess egg drip off before moving to the breadcrumbs. This ensures a nice crunch. Next, adjust seasoning to taste. I suggest tasting the flour mixture before coating the onion. If you like more heat, add extra cayenne pepper. For a milder flavor, cut back on the spice. Personalizing the seasoning makes your blooming onion truly yours. When choosing an air fryer for this recipe, consider the size and features. Brands like Philips, Ninja, and Cosori are great options. They offer reliable performance and even cooking. A model with a digital display can help you set precise times and temperatures. Look for air fryers with baskets that are easy to clean. Non-stick surfaces make your cooking experience smoother. Also, ensure the model fits your kitchen space. A compact design is perfect for smaller kitchens. Try my full recipe for a delicious blooming onion experience! {{image_2}} You can easily change the taste of your blooming onion. Spice variations are a fun way to do this. You might try different pepper types. Using jalapeño or smoked paprika adds a new kick. For a milder option, use sweet bell pepper powder. This small change can make a big difference. You can also explore alternative coatings. If you need gluten-free options, try almond flour or gluten-free breadcrumbs. These swaps keep the crunch while being safe for gluten-free diets. You can have great taste and texture without worry. Pairing sauces with your blooming onion adds more joy. A homemade spicy ranch is a popular choice. To make it, mix sour cream, ranch dressing, and hot sauce. Adjust the spice level to your liking. This sauce adds a creamy, zesty flavor that complements the onion's crunch. Other complementary sauces include sweet chili sauce or garlic aioli. Sweet chili gives a nice contrast with its sweetness. Garlic aioli offers a rich, savory taste that pairs well. These sauces make your blooming onion even more delightful. For the full recipe, check out the Air Fryer Blooming Onion section. To store your blooming onion, let it cool down to room temperature. This step prevents moisture buildup. Once cooled, wrap it in plastic wrap or place it in an airtight container. You can keep it in the fridge for up to three days. Make sure to consume it within that time for the best taste. When reheating, the goal is to keep the crispiness. The best method is using the air fryer again. Preheat your air fryer to 350°F (175°C). Place the blooming onion inside for about 5-7 minutes. This will help restore its crunch. You can also use an oven. Just place it on a baking sheet at 350°F (175°C) for 10-12 minutes. Avoid using the microwave, as it will make it soggy. Can I make a blooming onion without an air fryer? Yes, you can. You can deep fry a blooming onion in hot oil. Just heat oil to 350°F (175°C) and fry for about 5-7 minutes. This method gives a crispy texture, but it is less healthy than air frying. What type of onion is best for a blooming onion? A large sweet onion is best. I recommend using Vidalia onions. They are mild and sweet, which makes them perfect for this dish. Their size also helps create the best bloom effect. How do I know when the blooming onion is done? Look for a golden-brown color. The petals should be crispy. You can also check the softness of the onion by gently poking it with a fork. If it feels tender, it is ready. What are the best dipping sauces for a blooming onion? Some great choices are spicy ranch and homemade aioli. You can also try garlic sauce or a zesty BBQ sauce. These flavors pair well with the onion's sweetness. Can I prepare this recipe in advance? You can prepare the onion and coat it ahead of time. Store it in the fridge for a few hours before air frying. This makes it easy to cook when you are ready to serve. Just remember to spray it with olive oil just before cooking. For the full recipe, check the dedicated section above! In this post, we covered how to make a delicious blooming onion using simple ingredients and step-by-step instructions. We explored tips for perfecting your dish and discussed different flavor variations and sauces. Remember, practice makes perfect. Don’t worry if your first try isn’t ideal—just keep adjusting. Enjoy your blooming onion with friends or at family gatherings. It's fun and tasty! With these clear steps, you're ready to impress everyone. Happy cooking!
Air Fryer Blooming Onion Crispy and Flavorful Snack
If you’re looking for a fun and tasty snack, you’ve found the right recipe! Air Fryer Blooming Onion is crispy, flavorful, and sure to impress.
For the best cowboy caviar, gather these fresh ingredients: - 1 can black beans, rinsed and drained - 1 can corn, drained - 1 red bell pepper, diced - 1 green bell pepper, diced - 1 small red onion, finely chopped - 1 jalapeño, finely chopped (remove seeds for less heat) - 1 cup cherry tomatoes, halved - 1 avocado, diced - 1/4 cup fresh cilantro, chopped These ingredients give your cowboy caviar a bright and colorful look. Each one adds a unique taste. Black beans bring protein. Corn adds sweetness. Bell peppers give crunch. Red onion has a sharp bite. Jalapeño gives heat, but you can skip it if you want mild flavors. Cherry tomatoes add juiciness, and avocado provides creaminess. Fresh cilantro brings freshness and a hint of zest. Now, for the dressing, you need: - Juice of 2 limes - 3 tablespoons olive oil - 1 teaspoon cumin - Salt and pepper to taste This dressing is simple yet flavorful. Lime juice adds tang. Olive oil brings richness. Cumin gives a warm flavor. Salt and pepper enhance everything. Mix these well for the best results. To enjoy your cowboy caviar, serve it with: - Tortilla chips Tortilla chips are perfect for scooping. They add crunch and pair well with the fresh salad. You can also use veggie sticks for a healthier choice. For the Full Recipe, follow the step-by-step how to make this delicious dish. To start, you need to rinse and drain the black beans. Open the can and pour the beans into a colander. Rinse them under cold water. This helps remove extra salt and makes them taste fresh. Let them drain for a few minutes. Next, let’s talk about dicing techniques for the vegetables. For bell peppers, cut off the top and bottom first. Remove the seeds and white parts. Then, slice the pepper into strips. Finally, chop the strips into small pieces. For the red onion, peel away the skin and slice it in half. Make small cuts to dice it finely. This way, all the veggies will mix well. Now it’s time to combine the dry and fresh components. In a large bowl, mix the black beans, corn, diced bell peppers, chopped onion, jalapeño, and cherry tomatoes. Stir gently to blend the colors and textures. When adding avocado, be careful not to mash it. Dice the avocado into small cubes. After mixing the beans and veggies, gently fold in the avocado and cilantro. This keeps the avocado intact and adds a nice creaminess to the dish. To make the dressing, whisk together lime juice, olive oil, cumin, salt, and pepper in a small bowl. Start with the lime juice and olive oil, then add cumin, salt, and pepper. Whisk until well combined. Once the dressing is ready, pour it over the salad mix. Gently toss everything together until the salad is evenly coated. This helps all the flavors come together. Taste the salad and adjust the seasonings if needed. Cover the bowl and let it chill in the fridge for at least 30 minutes. This helps the flavors meld for a delicious cowboy caviar. For the full recipe, check out the detailed instructions. To add spice to your cowboy caviar, use more jalapeño. If you want less heat, remove the seeds. You can also add a pinch of cayenne pepper for a warm kick. Marinate your caviar for at least 30 minutes. This helps all the flavors mix together. When serving at parties, use a large bowl for the cowboy caviar. You can also put it in small cups for easy grabbing. For a nice look, choose colorful bowls. Garnish with extra cilantro or lime slices on top. This makes the dish more attractive. Prep your ingredients in bulk. Rinse and chop beans and veggies in advance. Store them in the fridge until you need them. This way, you save time on busy days. Keep your prepped ingredients in airtight containers. This keeps them fresh and ready to use. {{image_2}} You can change up your cowboy caviar with fun protein options. Adding diced chicken or shrimp gives it a hearty twist. Cook the protein first, then mix it in the salad. For a different flavor, try using black olives instead of avocado. They bring a salty, rich taste that pairs well with the other ingredients. If you want to make a vegan version, leave out the protein and stick to the fresh veggies. This dish is already gluten-free since it uses beans and veggies. If you need low-carb options, skip the corn and use more bell peppers. They add crunch without the carbs. You can explore different flavor profiles with your cowboy caviar. A Southwestern twist uses chipotle peppers for a smoky kick. For a Mediterranean flair, add feta cheese and oregano. Fresh herbs like basil or parsley can also brighten the dish, giving it a unique twist. You can find the full recipe for the best cowboy caviar at the link provided. Enjoy experimenting with these variations! To keep your cowboy caviar fresh, use an airtight container. Glass containers work well. They let you see the bright colors inside. If you do not have glass, plastic containers are fine, too. Always cover the top tightly to avoid air. This helps keep flavors strong and bright. To make your cowboy caviar last longer, chill it as soon as you finish. Storing it in the fridge right away keeps the veggies crisp. Keeping it cold also slows down spoilage. Cowboy caviar tastes great cold. If you have leftovers, eat them within three days for the best taste. When you do, check for any off smells or changes in color. If it looks or smells strange, it’s best to toss it. You can get creative with leftovers. Top grilled chicken or fish with cowboy caviar for added flavor. Mix it into a taco for a fresh twist. You can also add it to a salad for a colorful crunch. In the fridge, cowboy caviar lasts about three to five days. It may last a bit longer, but check for signs of spoilage. If you see brown avocado or mushy tomatoes, it's time to discard it. Trust your eyes and nose. If something seems off, throw it out. Enjoy your fresh and vibrant cowboy caviar! Cowboy caviar is a fresh, colorful dish. It combines beans, veggies, and spices. This dish comes from the American Southwest. It is not actually caviar from fish. Instead, it is a fun salad made with black beans and corn. You can enjoy it as a dip or side. Many people love its bright flavors and crunchy texture. Yes, you can make cowboy caviar ahead of time. It tastes even better after resting. I recommend making it at least 30 minutes before serving. This time allows the flavors to mix well. You can store it in the fridge. Just cover it tightly. You can keep it fresh for up to three days. Just remember, the avocado may brown. To avoid this, add the avocado right before serving. Cowboy caviar pairs well with many foods. You can serve it with tortilla chips for a crunchy snack. It also works as a topping for tacos or grilled meats. If you want, serve it alongside a fresh salad for a light meal. You can even add it to a bowl of rice for a hearty option. The possibilities are endless! For the full recipe, check out the Ultimate Cowboy Caviar . Cowboy caviar is a tasty and colorful dish you can easily make. You learned about fresh ingredients like beans, corn, and peppers. We discussed how to prepare, mix, and dress the salad. Tips like enhancing flavor and presentation can impress your guests. You can even modify the recipe for different diets or flavors. Remember to store it properly for the best taste. Enjoy making this fun dish for your next gathering!
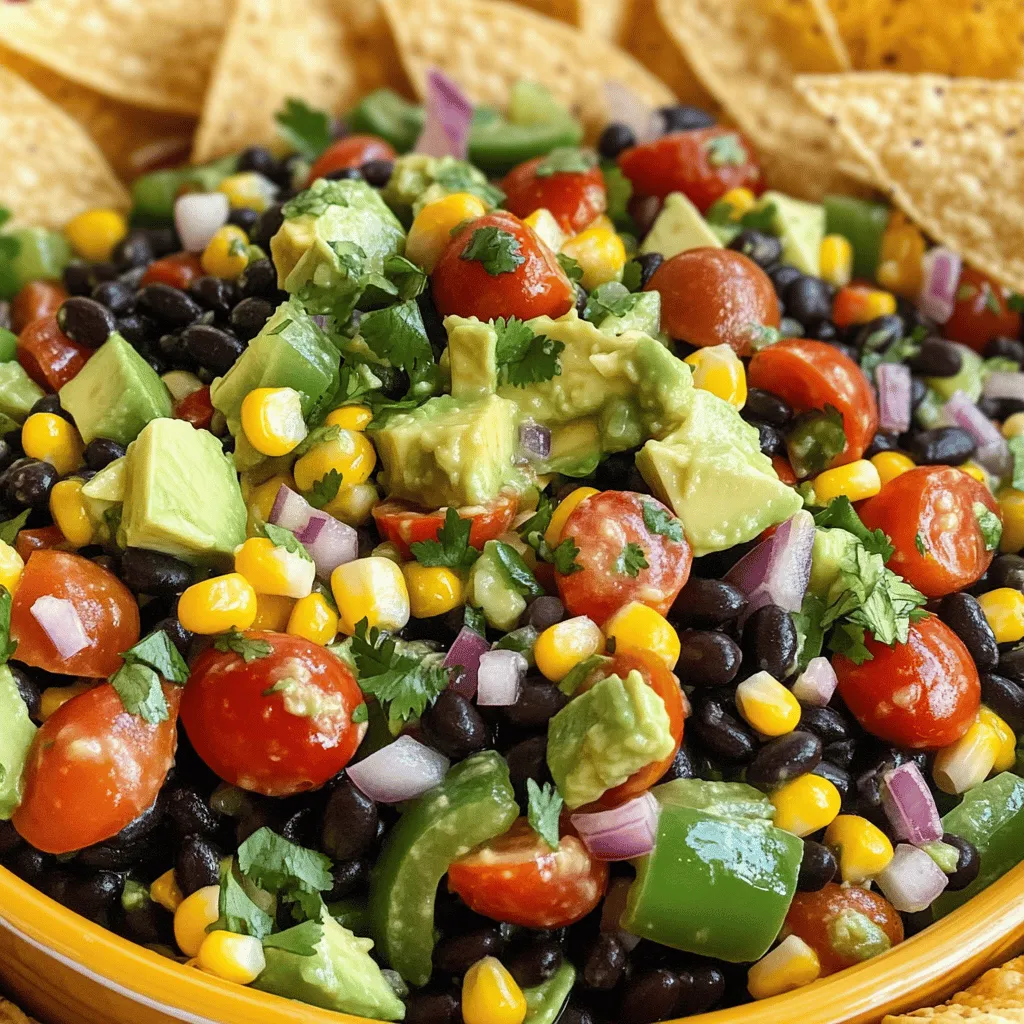
The Best Cowboy Caviar Flavorful and Fresh Recipe
Looking for a fresh and flavorful dish that will wow your guests? Look no further than Cowboy Caviar! This vibrant mix of black beans, corn,
- 1 cup fresh strawberries, hulled and diced - 1 cup fresh pineapple, diced - 1/4 cup red onion, finely chopped - 1/4 cup fresh cilantro, chopped - 1 jalapeño, seeded and minced (optional for heat) - 2 tablespoons lime juice - Salt to taste - Prep Time: 10 minutes - Total Time: 30 minutes - Servings: 4-6 The key to this Strawberry Pineapple Salsa is fresh ingredients. Start with ripe strawberries and juicy pineapple. They add both sweetness and a burst of flavor. I always pick bright, vibrant fruits for the best result. The red onion brings a nice crunch. I chop it finely so it blends well. Cilantro adds freshness and zesty notes. If you like heat, the jalapeño is a great choice. Just remember to seed and mince it carefully. For flavor enhancers, lime juice is a must. It brightens the salsa and balances the sweetness. Finally, salt brings all the flavors together. You can adjust it to your taste. The prep time is just 10 minutes, but chilling enhances the flavors. This recipe makes enough for 4 to 6 servings. It’s perfect for parties or a simple snack. You can find the Full Recipe linked for more details. How to hull and dice strawberries To hull strawberries, grab a sharp knife. Cut off the green tops. Then, cut the strawberries into small pieces. Aim for uniform cubes for a neat salsa. How to dice pineapple Start by cutting off the top and bottom of the pineapple. Stand it upright and slice off the skin. Cut the pineapple into quarters. Remove the tough core. Finally, chop the fruit into small cubes. Mixing strawberries, pineapple, and red onion In a bowl, add the diced strawberries and pineapple. Next, add the finely chopped red onion. This mix brings great flavor and a nice crunch. Adding cilantro and jalapeño Now, chop the fresh cilantro and add it to the bowl. If you like heat, add the minced jalapeño. It makes the salsa lively. Drizzling with lime juice Squeeze fresh lime juice over the salsa mix. This adds a tangy taste that brightens all the flavors. Gently folding the ingredients together Using a spatula, carefully fold the ingredients. You want everything to blend well without smashing the fruit. Chilling for enhanced flavor Cover the bowl and place it in the fridge. Let the salsa chill for 15-20 minutes. This time allows the flavors to come together nicely. For the full recipe, check the main article. Serve your Strawberry Pineapple Salsa in a colorful bowl. A bright dish makes the salsa pop. You can also garnish it with whole strawberries or fresh cilantro leaves. These small touches make it look fancy and inviting. This salsa goes well with many dishes. Try it with tortilla chips for a fresh snack. It also pairs nicely with grilled chicken or fish. The sweet and tangy flavors add a fun twist to your meals. Want to adjust the heat? Add jalapeño to spice things up. If you prefer a sweeter taste, try adding a touch of honey or agave. These simple changes can make your salsa truly unique. For the full recipe, check out the steps above. {{image_2}} You can switch things up with different fruits. Try using mango or kiwi for a fresh twist. These fruits add their own sweet and tangy notes, making the salsa even better. If you don't have red onion, use green onion or shallots instead. They give a milder taste, perfect for those who prefer less bite. This salsa is vegan-friendly, so no worries there! It fits perfectly into a plant-based diet. If you're looking for gluten-free options, you are in luck. Pair it with corn tortilla chips or use it as a topping on grilled meats. It’s great for everyone to enjoy! To give your salsa a Caribbean flair, add tropical fruits like papaya or mango. These fruits bring sunshine to your dish! You can also incorporate local herbs, such as basil or mint, for a unique flavor twist. These herbs can elevate your salsa to a whole new level. For the full recipe, check out the Sweet & Tangy Strawberry Pineapple Salsa . To keep your leftover salsa fresh, store it in the fridge right away. Use an airtight container to prevent air from getting in. Glass jars or plastic containers with tight lids are great options. Make sure to fill the container without leaving too much space. This helps keep the salsa from spoiling too fast. Strawberry Pineapple Salsa lasts about 3 to 5 days in the fridge. Be sure to check for signs of spoilage. If the salsa smells off, or if you see any mold, it’s best to throw it away. Fresh salsa should look bright and colorful. If it starts to look dull, it may not be safe to eat. Yes, you can freeze Strawberry Pineapple Salsa! To freeze it properly, use a freezer-safe container. Leave some space at the top for expansion. When you're ready to eat it, thaw the salsa in the fridge overnight. Avoid microwaving it, as this can change the texture. Enjoy your fresh salsa even after a few weeks! For the full recipe, refer back to the beginning of the article. What is the best way to prepare strawberries for salsa? To prepare strawberries, start by hulling them. This means removing the green leafy top. Next, chop them into small, equal pieces. This helps them mix well with other ingredients in the salsa. I like to use fresh, ripe strawberries for the best flavor. Can I use canned pineapple instead of fresh? Yes, you can use canned pineapple. Make sure to choose pineapple in juice or water, not syrup. Drain it well before adding it to your salsa. Fresh pineapple gives a brighter taste, but canned works in a pinch. Is this salsa suitable for meal prep? Yes, this salsa is great for meal prep. You can make it ahead of time and store it in the fridge. It stays fresh for about three days. The flavors get better the longer it sits. Just give it a good stir before serving. Can kids eat salsa with jalapeño? You can make a kid-friendly version by leaving out the jalapeño. Many kids enjoy the sweet fruit flavors without the added heat. If you want a little spice, consider using just a tiny bit or a milder pepper. Is Strawberry Pineapple Salsa healthy? Yes, this salsa is healthy! It has fresh fruits and veggies, which are low in calories. Strawberries and pineapple are full of vitamins and antioxidants. This salsa adds flavor without many calories or fat. What are the calorie counts for the recipe? The full recipe has about 100 calories per serving. Each serving gives you a tasty way to enjoy fresh produce. You can enjoy it guilt-free with chips or on grilled meats. For the full recipe, check the earlier section. In summary, I shared a simple and fresh recipe for Strawberry Pineapple Salsa. You learned about key ingredients, step-by-step instructions, and tips for serving. This salsa is quick to make and pairs well with many dishes. Remember, you can customize it with different fruits or spice levels. Enjoy this tasty treat and make it your own! With a bit of care in storage, you can enjoy this salsa for days. Dive in and taste the flavors come alive!
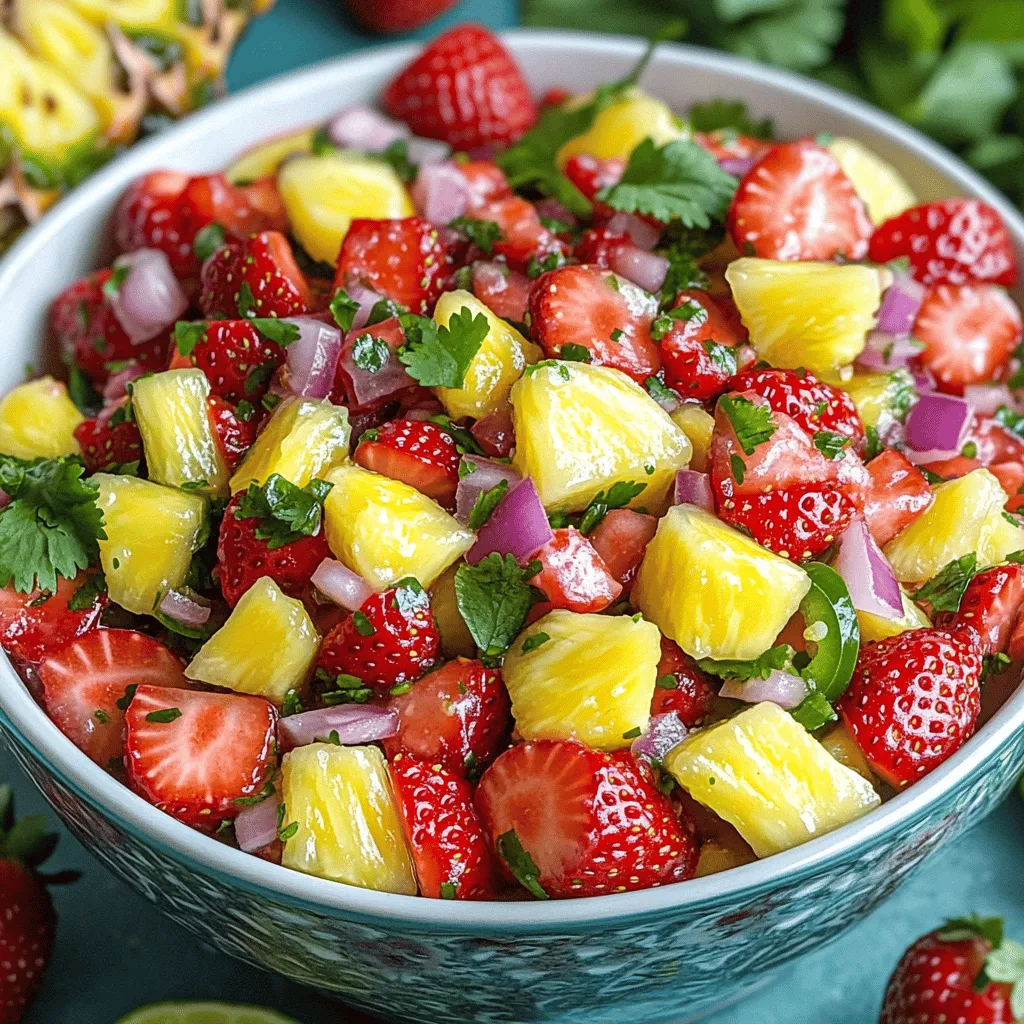
Strawberry Pineapple Salsa Fresh and Zesty Delight
Welcome to the world of fresh flavors! If you love bright, zesty dishes, Strawberry Pineapple Salsa is for you. This quick and easy recipe combines
To make a great birthday snack board, you need some key ingredients. Here’s what I recommend: - 1 cup assorted nuts (almonds, cashews, walnuts) - 1 cup bite-sized cheeses (cheddar, gouda, mozzarella) - 1 cup fresh fruits (grapes, strawberries, apple slices) - 1 cup colorful vegetables (carrot sticks, cucumber slices, bell pepper strips) - 1/2 cup hummus or dip (roasted red pepper hummus or tzatziki) - 1 pack of assorted crackers - 1/2 cup dark chocolate squares or chocolate-covered pretzels - Edible flowers (optional, for garnish) These items create a tasty mix. They are easy to find. They also add color and fun to your board. Want to take your snack board up a notch? Here are some fun ideas: - Dried fruits like apricots or cranberries for sweetness - Spiced nuts for a crunchy kick - Various dips, like guacamole or ranch, for more options - Fresh herbs like basil or mint for a pop of flavor These extras can make your board more exciting. Feel free to mix and match based on what you like. Choosing quality ingredients makes a big difference. Here are my tips: - Look for nuts that are fresh and unsalted. - Choose cheeses that are creamy and flavorful. - Select ripe fruits; they should smell sweet and juicy. - Pick fresh vegetables that are crisp and colorful. High-quality ingredients make the board taste better. They also look more appealing. If you want to create the best birthday snack board, remember these points. Check out the Full Recipe for all the details! Start with a large wooden or ceramic board. This will be your base. Make sure it's clean and dry. You want a strong surface to hold your snacks. Lay it out on a table where guests can easily reach it. Begin by placing bite-sized cheeses in groups around the board. Space them out for a nice look. Next, fill gaps with assorted nuts. Let some spill over for a fun vibe. Now, add fresh fruits like grapes and strawberries. Cluster them to create color pops. For veggies, arrange carrot sticks and cucumber slices in groups. You can even stand them in small jars to make them stand tall. Now, serve hummus or dip in a small bowl. Place it in the center for easy access. Stack assorted crackers in small piles around the board. This gives guests plenty of choices. Finally, sprinkle dark chocolate squares or chocolate-covered pretzels around the edges for a sweet treat. Garnish the board with a few edible flowers. This adds a festive touch. Remember to think about colors. Arrange them so no two similar colors are beside each other. This makes the board more inviting and fun. You can prepare this board in just 20 minutes. Check out the Full Recipe for more details on ingredients and serving suggestions. Start by mixing sweet, salty, and creamy. This gives each bite a fun twist. Pair crunchy vegetables with smooth dips for a nice contrast. For example, combine fresh fruits with creamy cheese. This adds depth to your board. Use a mix of nuts for crunch and a hint of salt. This balance will keep everyone happy and wanting more. Colors make your board pop! Use bright fruits like grapes and strawberries. Pair them with vibrant veggies like bell pepper strips. Arrange colors in a rainbow pattern or group similar shades together. This makes the board look fun and inviting. Don't forget to add edible flowers for a cheerful touch. They make everything feel more festive! When serving, keep it simple and fun. Use small plates for guests to grab snacks easily. Consider adding labels to show what each item is. This is useful for those with allergies or specific tastes. Encourage your guests to explore different flavors. You can even suggest fun pairings, like cheese with fruit or nuts with chocolate. For the full recipe, check out the details above. {{image_2}} A sweet snack board brings joy with candies, fruits, and desserts. You can include chocolate-covered strawberries or mini cupcakes. Consider adding sweet dips like chocolate sauce or caramel. They make each bite a treat. On the other hand, a savory board delights with cheeses, meats, and olives. Use different cheeses and cured meats for variety. Add dips like guacamole or ranch. Each item can pair well with crackers. Sweet and savory boards offer something for everyone. Make your board shine with seasonal themes. For spring, use pastel colors and fresh flowers. Add colorful fruits like berries and melons. In fall, think pumpkins and apples. Use warm spices and cozy flavors. A winter board can feature holiday treats like gingerbread cookies and spiced nuts. For summer, think bright colors with fresh veggies and fruity drinks. Seasonal boards keep your snack game fresh and fun. Kid-friendly boards should be colorful and playful. Include fun snacks like gummy bears, popcorn, and animal-shaped sandwiches. Use bright plates and fun themes, like a cartoon character. Adult boards can focus on gourmet options. Think artisan cheeses, olives, and charcuterie. You might add wine pairings or craft beer for an extra touch. Each theme allows you to create a unique experience. These variations make your birthday snack board a hit for all ages. For a full recipe, check out the details above. After your celebration, you may have leftovers. Store them in airtight containers. This keeps moisture out and keeps snacks fresh. Use separate containers for fruits, vegetables, and dips. This prevents sogginess and keeps flavors intact. To maintain freshness, store cheeses and meats in the fridge. Wrap them in wax paper or parchment. This allows them to breathe while staying moist. Keep nuts in a cool, dry place. If they feel soft, they may have absorbed moisture. For next-day enjoyment, take out the items from the fridge. Lay them out on a fresh board. You can recreate the fun look or mix it up! Serve dips in fresh bowls and add new fruits if desired. This makes it feel special again. For the full recipe and ideas, check out the complete guide! You can easily customize a snack board to fit dietary needs. Start by asking guests about their allergies or dietary choices. For gluten-free diets, use gluten-free crackers or veggies. If someone is vegan, replace cheese with plant-based options. You can use fruits, nuts, and dips that fit all diets. Consider adding more colorful veggies for crunch. Drinks can enhance the fun of your snack board. Sparkling water with fruit slices is a fresh choice. Lemonade or iced tea adds a sweet touch. For adults, light wines or cocktails work well. Keep flavors simple to match the snack board's variety. Always have drinks served cold for the best taste. Yes, you can prep many items ahead of time. Wash and cut fruits and veggies a day before. Store them in airtight containers in the fridge. You can also portion out nuts and cheese, making it easy to assemble later. Just wait to add dips and crackers until closer to serving. This keeps everything fresh and tasty. Follow the [Full Recipe] for a delicious birthday snack board that will impress! Creating a birthday snack board is fun and simple. We covered essential ingredients, preparation, and fun tips. You can make it colorful and tasty with just a few steps. Remember to balance flavors and textures for the best experience. Don’t forget to store leftovers properly for next time. With these ideas, your snack board will be a hit. Enjoy making and sharing these tasty treats at your next celebration!
Birthday Snack Board Delightful and Fun Ideas
Are you ready to elevate your birthday celebrations? A Birthday Snack Board is a fun way to serve snacks for guests of all ages. With
- 1 can (16 oz) refrigerated biscuit dough - 1 cup shredded mozzarella cheese - 1/2 cup cream cheese, softened - 1/4 cup unsalted butter, melted - 4 cloves garlic, minced - 1 tablespoon fresh parsley, chopped - 1 teaspoon Italian seasoning - 1/2 teaspoon salt - 1/4 teaspoon black pepper - Optional: pinch of red pepper flakes for heat - Baking sheet - Parchment paper - Mixing bowls - Brush for butter Gather these ingredients for your Garlic Butter Cheese Bombs. The biscuit dough makes a soft outer layer. The mozzarella and cream cheese create a gooey center. You will love the garlic butter, which adds rich flavor. Fresh parsley and Italian seasoning enhance the taste. Feel free to adjust the spices to your liking. For the best results, use a baking sheet lined with parchment paper. This helps to avoid sticking and makes cleanup easier. A mixing bowl will be handy for blending your cheese filling. Finally, a brush will help coat your cheese bombs in that delicious garlic butter. The Full Recipe is simple and quick, perfect for a cozy night in or a gathering with friends. Just gather these ingredients, and you’ll be ready to create a tasty treat that everyone will love! - Preheat your oven to 375°F (190°C). Line a baking sheet with parchment paper. - In a small bowl, mix melted butter, minced garlic, and chopped parsley. Set this aside. - In another bowl, combine shredded mozzarella and softened cream cheese. Add salt, pepper, and Italian seasoning. Mix well. - Open the biscuit dough and separate it into individual biscuits. Roll each biscuit into a small circle in your palm. - Place a generous spoonful of the cheese mixture in the center of each biscuit circle. - Fold the edges of the biscuit over the cheese filling. Pinch to seal, forming a ball. - Dip each cheese-filled biscuit ball into the garlic butter mixture. Make sure they are well coated. - Place the coated cheese bombs on the prepared baking sheet, leaving space between them. - Bake them for about 15-18 minutes until the tops are golden brown. Check for doneness by looking for that golden color. For the full recipe, check the section above. Enjoy the steps, and let your kitchen fill with the amazing aroma of garlic and cheese! To seal your dough well, pinch the edges tightly. This keeps the cheese filling inside. If you leave gaps, the cheese may leak out when baking. For even baking, place cheese bombs at least an inch apart. This allows hot air to flow around them. To achieve a golden crust, bake until they are a deep golden brown. This usually takes about 15 to 18 minutes. Keep an eye on them to avoid burning. To boost flavor, try adding spices like garlic powder or onion powder. Fresh herbs like thyme or chives work great too. If you want cheese alternatives, use cheddar or pepper jack for a kick. For a fun twist, swap out regular biscuits for flaky or buttermilk versions. These give a nice texture and taste. For a tasty presentation, serve cheese bombs warm on a bright platter. Garnish with extra parsley for a pop of color. Pair them with dips like marinara, ranch, or spicy salsa. They are also great with a fresh salad or soup. This makes for a balanced meal or a fun snack at gatherings. {{image_2}} You can play around with the cheese in Garlic Butter Cheese Bombs. Use cheddar for a sharp taste, or try pepper jack for a kick. Cream cheese gives a rich texture, but you might enjoy goat cheese for a tangy twist. If you need a gluten-free option, swap the biscuit dough with gluten-free dough. Many stores offer this, making it easy to enjoy these treats without worry. You can also use a naan or flatbread as a base. This change will give your bombs a unique flavor. Add vegetables like spinach or bell peppers for a fresh crunch. Diced jalapeños can spice things up. For meat lovers, cooked bacon or sausage makes a tasty addition. Just ensure you chop them small to fit inside the biscuit. You can make these cheese bombs in an air fryer. Preheat the air fryer to 375°F (190°C). Cook for about 10-12 minutes, checking halfway through. The result will be crispy on the outside and gooey on the inside. Grilling is another fun option. Form the cheese bombs and place them on skewers. Grill for about 8-10 minutes on medium heat. This method adds a smoky flavor that pairs well with the cheese. If you're short on time, try the stove-top method. Heat a skillet over medium heat. Place the cheese bombs in the skillet and cover with a lid. Cook for about 5-7 minutes per side until golden brown. This method is quick and gives a nice crust. For holidays, you can make themed cheese bombs. Add cranberry sauce for a festive touch during Thanksgiving. In winter, mix in some nutmeg or cinnamon for warmth. Incorporate spices like pumpkin spice for fall or peppermint for winter festivities. These flavors can make your cheese bombs feel special for any occasion. For dessert-style bombs, use sweet cheeses. Try mixing cream cheese with chocolate or caramel. You can also add a hint of vanilla for extra sweetness. Serve these with a drizzle of chocolate sauce for a delightful treat. For the full recipe, check the main article. To keep your garlic butter cheese bombs fresh, place them in an airtight container. This helps keep moisture in and protects from odors in your fridge. They will last for about 3 to 4 days. If you want to keep them longer, freezing is a great option. To reheat, I recommend using an oven set to 350°F (175°C). Place the cheese bombs on a baking sheet for about 10 minutes. This method warms them through and keeps the outside crisp. You can also use a microwave, but it may make them a bit soft. For the best flavor, always reheat with a bit of garlic butter brushed on top. If you want to freeze garlic butter cheese bombs, let them cool completely first. Then, wrap each bomb tightly in plastic wrap. Place the wrapped bombs in a freezer bag or container. They will stay good for about 2 months. To thaw, move them to the fridge overnight. For reheating, use the same oven method as before. This keeps them tasty and fresh. Garlic Butter Cheese Bombs are warm, cheesy bites wrapped in biscuit dough. They have a rich garlic butter flavor that makes them a perfect appetizer or snack. This dish likely comes from the popularity of stuffed bread rolls and has gained fame in many homes and restaurants. Yes, you can prepare Garlic Butter Cheese Bombs ahead of time. Store the uncooked cheese bombs in the fridge for up to 24 hours. Just cover them well to keep them fresh. You can also freeze them for up to three months. Just thaw them in the fridge before baking. To add spice, mix in some red pepper flakes into the cheese filling. You can also use pepper jack cheese for a kick. Serve your cheese bombs with spicy marinara or sriracha for dipping. These options will enhance the flavors and give you a nice heat. If your cheese bombs seem doughy, check the baking time. They should bake until golden brown. Ensure the dough is sealed well to avoid excess moisture. If they are still too soft, try rolling them thinner next time for a better texture. Yes, you can make vegetarian Garlic Butter Cheese Bombs by using only cheese and herbs. For gluten-free options, look for gluten-free biscuit dough or use a mix of almond flour and cheese. These adjustments allow everyone to enjoy this tasty treat. In this post, we explored how to make delicious Garlic Butter Cheese Bombs using simple ingredients and step-by-step instructions. You learned about key ingredients, helpful tips, and fun variations. These bombs are perfect for any gathering or a cozy night in. Experiment with the tips provided to make them your own. Whether you're a novice or an expert, these cheese bombs are sure to impress your friends and family. Enjoy your cooking!
Garlic Butter Cheese Bombs Irresistible Flavor Treat
Get ready to wow your taste buds with Garlic Butter Cheese Bombs! These tasty bites are stuffed with gooey cheese and bursting with flavor. They’re
- Refrigerated pizza dough - Cooked steak (ribeye or preferred cut) - Diced bell peppers (red and green) - Provolone cheese - Mozzarella cheese - Olive oil - Garlic powder - Italian seasoning - Salt and pepper When making Philly cheesesteak stuffed cheesy breadsticks, the ingredients matter. First, we need refrigerated pizza dough. It saves time and works great for this recipe. Next, we need cooked steak, like ribeye, which gives a rich flavor. You can also use other cuts if you prefer. Diced bell peppers, both red and green, add color and crunch. They mix well with the steak and cheese. For cheese, I love using provolone and mozzarella. Provolone has a sharp taste, while mozzarella melts beautifully. Together, they create a gooey, cheesy center. To bring all these flavors together, we add some simple seasonings. Olive oil helps sauté the veggies and adds richness. Garlic powder gives a nice kick, while Italian seasoning adds depth. Don’t forget salt and pepper to taste. These ingredients come together to create a tasty treat. For the full recipe, check out the detailed instructions to bring these delicious breadsticks to life! First, I heat a skillet over medium heat and add two tablespoons of olive oil. Once hot, I toss in 1/2 cup of diced onion and 1/2 cup of diced bell peppers. I sauté these until they soften, which takes about 4 to 5 minutes. Next, I add 1 cup of cooked steak, thinly sliced. You can use ribeye or any steak you like. I then sprinkle in 2 teaspoons of garlic powder, 1 teaspoon of Italian seasoning, and season it with salt and pepper. I mix everything well and let it cook for 2 to 3 minutes to warm through. Now, I roll out 1 package of refrigerated pizza dough on a lightly floured surface. I aim for a large rectangle, about 1/4 inch thick. After that, I cut the dough into strips, roughly 3 inches wide. At one end of each strip, I place a portion of the steak and veggie mixture. Then, I sprinkle a mix of provolone and mozzarella cheese on top. I roll the dough over the filling to form a stick, pinching the ends to seal it tightly. Next, I prepare a baking sheet by lining it with parchment paper. I place the stuffed breadsticks on the sheet, making sure to leave space between each one. I brush the tops with some olive oil and sprinkle a bit of garlic powder on top for extra flavor. Now, I bake them in a preheated oven at 400°F (200°C) for about 12 to 15 minutes. I know they are done when they turn golden brown. After removing them from the oven, I let the breadsticks cool for a couple of minutes. Finally, I serve them warm with marinara sauce for dipping. For the full recipe, check the earlier section. To roll pizza dough, start with a lightly floured surface. This helps prevent sticking. Use a rolling pin to flatten the dough evenly. Aim for a thickness of about 1/4 inch. If it springs back, let it rest a few minutes. This relaxes the gluten, making it easier to shape. Avoid overfilling your breadsticks. Too much filling can make them burst during baking. A good rule is to use about 2 tablespoons of filling per stick. This ensures you get a nice balance of dough and filling. Add some spices to kick up the taste. Try red pepper flakes for heat or smoked paprika for depth. Fresh herbs like parsley or basil can brighten the flavors. If you want a healthier option, swap regular cheese for low-fat versions. You can also use whole wheat pizza dough for added fiber. Serve your breadsticks warm with marinara sauce for dipping. The rich, tangy sauce pairs well with the flavors of the cheesesteak. For something different, try ranch or garlic sauce. These add a fun twist to each bite. You can also sprinkle some fresh herbs on top for extra flair. Make your meal special with these simple touches. For the full recipe, check out the complete guide! {{image_2}} You can mix things up with different fillings. If you want a vegetarian option, try mushrooms and spinach. A blend of cheeses adds great flavor too. For meat lovers, chicken or turkey work well. These options keep the recipe fresh and fun. Want to change the flavor? Try a garlic butter mix on your breadsticks. Just melt some butter, add garlic, and brush it on before baking. You can also make cheesy garlic knots. These knots are soft, gooey, and full of flavor. They can be a great twist on the classic breadstick. Turn these breadsticks into mini sliders. Just cut them in half and add toppings. You can use different cheese blends for more options. This way, you can impress your friends at any gathering. Each bite becomes a tasty treat! For the full recipe, check out the complete instructions. To keep your Philly cheesesteak stuffed cheesy breadsticks fresh, let them cool completely first. This helps avoid sogginess. Once cooled, place them in an airtight container. This container will keep them from drying out and protect their flavor. For the best taste and texture, reheat your breadsticks in the oven. Preheat it to 350°F (175°C). Place the breadsticks on a baking sheet and heat for about 10 minutes. This method keeps them crispy. If you use a microwave, they may turn chewy. If you're in a hurry, heat them in the microwave for 30-45 seconds, but expect a softer texture. If you want to save time, freeze uncooked breadsticks. Place them on a baking sheet and freeze until firm. Once firm, transfer them to a freezer bag. This way, you can bake them fresh later. For cooked breadsticks, let them cool and wrap each one in plastic wrap. Then, store them in a freezer bag. They will stay tasty for up to three months. Yes, you can make these breadsticks ahead of time. Prepare them up to the baking step. Then, cover them and store them in the fridge for up to 24 hours. When you are ready to bake, just take them out and let them sit for about 15 minutes. Preheat your oven and bake as usual. This way, you save time and still enjoy fresh breadsticks. The best steak for Philly cheesesteak is ribeye. Ribeye has great flavor and tenderness. You can also use sirloin or flank steak if you prefer. Just make sure to slice the steak thin. This will help it cook fast and mix well with the veggies and cheese. To make this recipe gluten-free, use gluten-free pizza dough. Many stores sell gluten-free options. You can also make your own dough if you like. Make sure to check all ingredients for gluten. This way, everyone can enjoy these tasty breadsticks. Yes, you can use homemade pizza dough. Just roll it out to about 1/4 inch thick. Follow the same steps as you would with the refrigerated dough. Homemade dough can add a fresh taste and texture to your breadsticks. If you want, you can find the full recipe for more details. This article covered how to make Philly cheesesteak stuffed cheesy breadsticks. We discussed essential ingredients and their roles, including dough, steak, and cheese. I provided step-by-step instructions for preparing the filling, assembling, and baking. I offered tips to perfect the dough and enhance flavor, plus variations for different tastes. Consider trying out these ideas for your next meal or snack. Enjoy the deliciousness of homemade breadsticks!
Philly Cheesesteak Stuffed Cheesy Breadsticks Delight
Get ready to indulge in a culinary adventure with my Philly Cheesesteak Stuffed Cheesy Breadsticks! These tasty treats combine tender steak, gooey cheese, and a
- 4 large russet potatoes - 1 cup shredded cheddar cheese - ¼ cup sliced green onions - ½ cup sour cream - 2 tablespoons hot sauce (e.g., Tabasco) - 1 teaspoon paprika - 1 teaspoon cayenne pepper - 1 teaspoon garlic powder - 1 teaspoon onion powder - ½ teaspoon salt - ½ teaspoon black pepper - 2 tablespoons vegetable oil - ¼ cup cooked and crumbled jalapeño cornbread Louisiana Voodoo Fries mix fun, flavor, and heat. The main star is the russet potato. I love using large russet potatoes because they make the best fries. They are starchy and crisp up well in the oven. The shredded cheddar cheese melts beautifully, giving fries a rich, creamy taste. Next, we add sliced green onions for a fresh crunch. The sour cream cools the heat from the hot sauce. Speaking of heat, the hot sauce gives these fries their "voodoo" kick. You can adjust the amount to fit your taste. Now, let’s talk about the seasonings. Paprika gives a sweet and smoky flavor. Cayenne pepper adds the heat. Garlic powder and onion powder bring depth to the dish. Salt and black pepper enhance all the other flavors. For those who want a little extra, I suggest two optional add-ons. Vegetable oil helps the fries crisp up in the oven. Crumbled jalapeño cornbread adds a fun crunch and a touch of sweetness. If you want the full experience, check out the Full Recipe to create your own Louisiana Voodoo Fries. Enjoy every bite! - Preheat the oven to 425°F (220°C). - Wash and cut the potatoes into fries. Start by setting your oven. This heat makes the fries crispy. Next, wash your russet potatoes. Scrub them well to remove dirt. Cut them into fries about 1/4-inch thick. Uniform size helps them cook evenly. - Toss fries with seasonings and oil. - Spread fries on a baking sheet and bake until crispy. In a large bowl, mix the fries with vegetable oil and spices. Use paprika, cayenne pepper, garlic powder, onion powder, salt, and black pepper. Make sure each fry gets coated well. This adds all the great flavors. Then, lay the fries on a baking sheet lined with parchment paper. Bake them for 30 to 35 minutes. Flip them halfway so they cook evenly. When they turn golden brown, they are ready. - Add cheese and bake until melted. - Drizzle with hot sauce and top with green onions. Once your fries are crispy, pull them out of the oven. Sprinkle shredded cheddar cheese on top. Put them back in the oven for about 5 minutes. Watch for the cheese to melt. After that, take them out and drizzle hot sauce on top. Finally, add sliced green onions for a fresh touch. If you want extra crunch, add crumbled jalapeño cornbread. Serve with sour cream on the side for dipping. For the full recipe, check the detailed steps above. To get that crispy texture, cut your fries evenly. This helps them cook at the same rate. Aim for 1/4-inch thickness. Thinner fries can get too crunchy, while thicker ones may stay soggy. Flipping the fries halfway during baking is key. This ensures even browning. I suggest setting a timer to remind you when to flip. Want to boost flavor? Try different cheeses on top. Cheddar is great, but pepper jack adds a nice kick. You can also mix spices to add more heat. Consider smoked paprika or a dash of chili powder. Just remember, a little goes a long way. Taste as you go, and adjust to your liking. These fries shine with the right dipping sauces. Sour cream is a classic choice, but ranch or spicy aioli works well too. For a heartier meal, add protein toppings like pulled pork or grilled chicken. They not only add flavor but also make the dish more filling. Don't be shy to mix and match! {{image_2}} For a tasty vegetarian twist, you can swap out the cheese. Use plant-based cheese instead. It melts well and adds flavor. You can also add roasted vegetables. Think bell peppers, zucchini, or mushrooms. They give a nice texture and flavor. If you want more heat, increase the cayenne pepper. You can also add jalapeños for extra spice. They bring a fresh kick to the dish. For a creamy finish, drizzle spicy aioli on top. It balances the heat nicely. To take your fries up a notch, think about adding chili or guacamole. These toppings make the dish heartier and richer. You can also sprinkle bacon bits on top. They add a crunchy, smoky flavor that everyone loves. For the complete experience, check out the Full Recipe. After enjoying your Louisiana Voodoo Fries, let them cool down. Place the fries in an airtight container. This keeps them fresh. Make sure the container seals tight. Then, store it in the refrigerator. This helps the fries stay tasty for a few days. To enjoy your fries again, the oven works best. Preheat your oven to 400°F (200°C). Spread the fries on a baking sheet. Bake for about 10-15 minutes, or until they are hot and crispy. If you prefer the microwave, place the fries on a plate. Heat for about 30 seconds to 1 minute. This method is faster, but your fries may get a bit soft. Leftover Louisiana Voodoo Fries stay safe for about 3-5 days in the fridge. Check for signs of spoilage. If they smell bad or look slimy, it’s time to toss them. Keeping an eye on your fries helps you enjoy them at their best. Louisiana Voodoo Fries are a spicy twist on classic fries. They mix crispy potatoes with rich flavors. This dish reflects the vibrant culture of Louisiana. It's a blend of Cajun and Creole tastes. You'll find spices like paprika and cayenne pepper. Topped with cheese and green onions, they are a treat. They make a perfect snack or side dish, bringing people together. You can find Louisiana Voodoo Fries at many local spots. Look for food trucks that serve Cajun food. Restaurants in New Orleans often have them on the menu. Some popular places include Coop's Place and The Voodoo BBQ. These spots serve great versions of this dish. Try them out for a true taste of Louisiana. Yes, you can make Louisiana Voodoo Fries in an air fryer! Just cut the potatoes and toss them in the spices. Preheat the air fryer to 400°F (200°C). Place the fries in a single layer and cook for 15-20 minutes. Shake the basket halfway through for even cooking. You won't need as much oil, so they stay healthier. Louisiana Voodoo Fries can be quite spicy, depending on the spices used. The cayenne pepper adds a nice heat. If you want less spice, cut back on the cayenne. You can also use mild hot sauce. Adding sour cream helps cool the heat too. Adjust the spice to fit your taste while keeping the flavor. Louisiana Voodoo Fries are a fun dish that combines many flavors. We covered main ingredients, like russet potatoes and cheddar cheese, and outlined steps for preparation and baking. The tips helped you make crispy fries while variations let you customize them further. Finally, storage info ensures your leftovers stay tasty. Enjoy trying out these fries at home. They are sure to impress your friends and family!
Louisiana Voodoo Fries Irresistible Flavor and Heat
Are you ready to spice up your snack game? Louisiana Voodoo Fries are a perfect blend of crispy, cheesy, and fiery that will set your