Appetizers

- 1 pound chicken tenders - 1/2 cup all-purpose flour - 1/2 teaspoon paprika - 1/2 teaspoon garlic powder - 1/2 teaspoon salt - 1/2 teaspoon black pepper - 2 large eggs - 1 cup panko breadcrumbs - 1/3 cup honey - 1/4 cup Sriracha sauce - 2 tablespoons soy sauce - 1 tablespoon lime juice - Cooking oil for frying For this recipe, I like to use simple measurements. You need one pound of chicken tenders. The flour, paprika, garlic powder, salt, and black pepper are all measured in half teaspoons. Eggs are large, and you need two of them. Use one cup of panko breadcrumbs for that great crunch. For the sauce, I recommend using one-third cup of honey, one-fourth cup of Sriracha sauce, two tablespoons of soy sauce, and one tablespoon of lime juice. Finally, you'll need cooking oil for frying. If you don't have chicken tenders, you can use chicken breasts cut into strips. For a gluten-free option, swap all-purpose flour and panko breadcrumbs with gluten-free versions. If you dislike Sriracha, try another hot sauce, or add more honey for sweetness. For the soy sauce, a tamari or coconut aminos can work well. If you don’t have lime, lemon juice is a good substitute. First, take your chicken tenders and pat them dry. This helps the coating stick. In a medium bowl, mix together the flour, paprika, garlic powder, salt, and black pepper. This blend adds great flavor. Set this bowl aside for later. Next, grab a separate bowl and whisk the two eggs. Dip each chicken tender first in the flour mix. Then, dip it in the egg wash. Finally, coat it with panko breadcrumbs. Press gently to ensure they stick well. This process makes your chicken crispy and delicious. In a small saucepan, mix the honey, Sriracha sauce, soy sauce, and lime juice. Heat this over medium until warm. Stir it well for about 2-3 minutes. The sauce brings a sweet and spicy kick to the dish. Once ready, remove it from heat and set aside. Now it’s time to fry! Heat about 1/4 inch of cooking oil in a large skillet over medium-high heat. Once hot, add the chicken tenders in batches. Don't crowd the pan, or they won’t cook evenly. Fry each side for 3-4 minutes until golden brown. Check that the chicken reaches an internal temperature of 165°F. After frying, take the chicken out and place it on paper towels. This helps drain any extra oil. While still hot, drizzle some of the Sriracha honey sauce over the tenders. This adds flavor right from the start. Plate your chicken tenders nicely. Serve them with the rest of the Sriracha honey sauce on the side. This makes for a fun dipping experience. You can pair them with rice or veggies for a complete meal. Enjoy your tasty creation! To get that nice, crunchy coating, start with dry chicken. Pat the tenders with paper towels to remove moisture. Use panko breadcrumbs for a crispier texture. Press the breadcrumbs onto the chicken firmly. This helps them stick better. Fry in hot oil for the best crunch. Keep the oil at 350°F for a golden finish. Sriracha brings heat, but you can control it. For a milder dish, use less Sriracha. Mixing honey with more soy sauce also tones down the spice. If you love heat, add more Sriracha or sprinkle red pepper flakes. Taste the sauce before pouring it on to find your perfect balance. Choose oils with high smoke points for frying. Canola or peanut oil works great here. They fry the chicken evenly and keep it crispy. Avoid olive oil, as it burns at lower temperatures. Always heat the oil before adding the chicken to ensure a good fry. {{image_2}} You can make baked Sriracha honey chicken tenders for a lighter meal. Preheat your oven to 400°F. Instead of frying, place the coated chicken on a baking sheet. Spray the tenders lightly with cooking oil. Bake for 20-25 minutes, flipping halfway through. This method gives you crispy, tasty tenders without the extra oil. Want a gluten-free option? Substitute all-purpose flour and panko breadcrumbs with gluten-free versions. Use gluten-free flour blends and gluten-free breadcrumbs. Follow the same steps in the recipe. These tenders will still be crispy and flavorful. You won’t miss the gluten at all! Feel free to add some extra flavors! You can mix in sesame seeds or chopped green onions into the panko. This adds crunch and a fresh taste. If you want more heat, add extra Sriracha to the sauce. For a sweet twist, mix in a little orange juice or zest. These changes make your chicken tenders even more exciting! To store leftover Sriracha honey chicken tenders, let them cool first. Place them in an airtight container. They will stay fresh in the fridge for up to three days. If you want to keep them longer, freeze them instead. To reheat the chicken tenders, use the oven for the best results. Preheat your oven to 375°F. Place the tenders on a baking sheet. Bake for about 10-15 minutes until they are hot and crispy again. You can also use a microwave, but the texture may not be as good. To freeze chicken tenders, first let them cool completely. Then, wrap them tightly in plastic wrap or use a freezer-safe bag. Label the bag with the date. You can freeze them for up to three months. When ready to eat, thaw them in the fridge overnight before reheating. Sriracha honey chicken tenders can last 3 to 4 days in the fridge. Store them in an airtight container. If you want to keep them longer, freeze them. They can last up to 3 months in the freezer. Just make sure to thaw them in the fridge before reheating. Yes, you can use chicken breasts! Just cut them into strips to match the size of tenders. This will help them cook evenly. The texture will be slightly different, but the flavor will still be great. These chicken tenders pair well with several sides. Here are some ideas: - Rice: Steamed white or brown rice works well. - Salad: A fresh garden salad adds crunch. - Veggies: Serve with roasted or sautéed vegetables. - Fries: Crispy fries or sweet potato fries are a tasty option. To spice up the Sriracha honey sauce, you can: - Add more Sriracha: Simply increase the amount you use. - Include red pepper flakes: Sprinkle in some flakes for extra heat. - Mix in hot sauce: Use a different hot sauce if you want more flavor. Adjust to your taste, and enjoy the heat! In this article, we explored the essential ingredients for Sriracha Honey Chicken Tenders and their measurements. We detailed step-by-step instructions to prepare, fry, and glaze the chicken. You learned tips for a crispy coating and how to adjust spice levels. We also covered storage options and variations like gluten-free and baked versions. With these tools, you can create a delicious dish that fits your taste. Enjoy cooking and sharing this tasty treat!
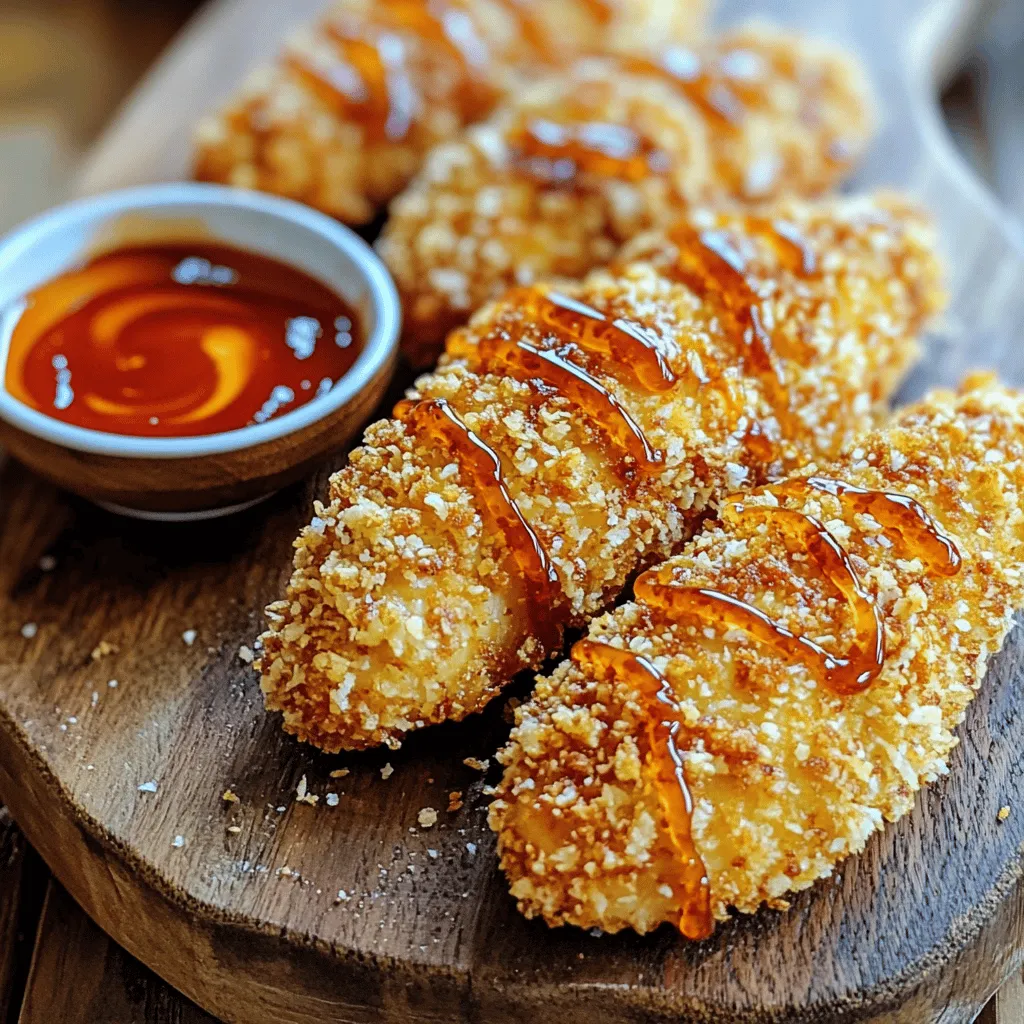
Sriracha Honey Chicken Tenders Flavorful and Easy Meal
Are you ready to spice up dinner? Sriracha Honey Chicken Tenders are a flavorful and easy meal you can whip up in no time. With
Caramelized onions are sweet and soft. They add flavor to many dishes. Start with these simple steps. 1. What do I need? You will need: - 4 large yellow onions, thinly sliced - 2 tablespoons olive oil - 2 tablespoons unsalted butter - 1 teaspoon sugar (preferably brown sugar) - Salt, to taste - Freshly cracked black pepper, to taste - Optional: Fresh thyme leaves for garnish 2. How do I prepare them? Heat the olive oil and butter in a large skillet over medium heat. Wait until the butter melts. Add the sliced onions and stir well. This helps coat them in the mix. 3. Why add sugar? You sprinkle sugar on the onions. This helps them caramelize better. The sugar brings out their natural sweetness. 4. How long do I cook them? Turn the heat down to medium-low. Cook the onions slowly. Stir them every 5-10 minutes. This keeps them from sticking and burning. 5. When are they done? After 20-25 minutes, they should be golden brown. You can keep cooking them for another 15-20 minutes. They will turn a deep caramel color. 6. How do I season them? Add salt and freshly cracked black pepper to taste. Stir well. If you want, sprinkle fresh thyme leaves on top for extra flavor. 7. What are some serving ideas? Serve your caramelized onions warm. They are great on burgers, steaks, or toasted bread with cheese. You can also use a small bowl for dipping. Enjoy the rich flavor of your homemade caramelized onions! Conclusion Error: Connection error.
SEO Title Error: Connection error.
Intro Error: Connection error. Perfect Caramelized Onions Caramelized onions are sweet and soft. They add flavor to many dishes. Start with these simple steps. 1.
To make these cinnamon sugar pretzel bites, gather the following: - 1 cup warm water (110°F) - 2 tablespoons sugar - 2 1/4 teaspoons active dry yeast (1 packet) - 3 cups all-purpose flour - 1 teaspoon salt - 1/4 cup baking soda - 1/2 cup unsalted butter, melted - 1/2 cup granulated sugar - 2 teaspoons ground cinnamon - Coarse sea salt for sprinkling These ingredients work together to create a soft and tasty treat. The warm water activates the yeast, helping the dough rise. The sugar adds sweetness, while the cinnamon sugar topping makes each bite special. If you need alternatives, here are a few options: - You can use gluten-free flour blends instead of all-purpose flour. Look for ones that work for baking. - For a vegan option, try using coconut oil or a plant-based butter instead of unsalted butter. This keeps the taste great while meeting dietary needs. These substitutions still let you enjoy the flavor and texture of the pretzel bites. Make sure you have these tools ready: - Mixing bowls for combining ingredients - Baking sheets to hold the pretzel bites while they bake - Slotted spoon for boiling and lifting the bites - Kitchen towel to cover the dough while it rises Having these tools on hand makes the process smooth and easy. You’ll feel like a pro in your kitchen! To start, mix 1 cup of warm water, 2 tablespoons of sugar, and 2 1/4 teaspoons of active dry yeast in a small bowl. Make sure the water is about 110°F for the yeast to work well. Let this sit for about 5 minutes. You want to see it froth and bubble. This shows your yeast is alive and ready to help your dough rise. In a large bowl, combine 3 cups of all-purpose flour and 1 teaspoon of salt. Slowly add the frothy yeast mixture to the flour. Stir until a dough forms. Now, knead the dough for about 5 minutes on a floured surface. You want it smooth and soft. Place the dough in a greased bowl and cover it with a kitchen towel. Let it rise in a warm spot for 1 hour, or until it doubles in size. After the dough has risen, punch it down to remove air. Divide the dough into small pieces, about 1 inch each. Roll each piece into a rope and then cut them into bite-sized pieces. In a large pot, bring 10 cups of water to a rolling boil. Add 1/4 cup of baking soda. Carefully drop the pretzel bites into this boiling solution for about 30 seconds. Use a slotted spoon to remove them and place them on a baking sheet. In a bowl, mix 1/2 cup of granulated sugar and 2 teaspoons of ground cinnamon. Brush the pretzel bites with 1/2 cup of melted unsalted butter. Sprinkle the cinnamon-sugar mixture over them, and add a touch of coarse sea salt. Preheat your oven to 425°F (220°C) and bake the bites for 12-15 minutes until they turn golden brown. Let them cool slightly before enjoying! To make your pretzel bites soft and chewy, knead the dough well. Kneading for about five minutes helps develop gluten. This makes your pretzels strong and fluffy. Use a floured surface to keep the dough from sticking. If you feel the dough is too sticky, add a bit more flour. For the best rise, find a warm spot for your dough. An oven that’s off but slightly warm is perfect. Cover the bowl with a kitchen towel to keep it cozy. Let it rise until it doubles in size, usually about an hour. You can spice up your pretzel bites by adding new flavors. Try mixing different spices into the dough, like nutmeg or cardamom. You can also change the toppings. Instead of just cinnamon sugar, consider adding cocoa powder or crushed nuts. Serve your pretzel bites with fun dips. Melted chocolate or cream cheese dips bring great flavors. You can also try a sweet honey mustard. These dips make every bite even better. Sometimes the dough can be too sticky or too dry. If it's sticky, add a little flour while kneading. For dry dough, add a tiny bit of warm water. If your pretzel bites don’t rise well, check the yeast. Make sure it's fresh and active. Also, ensure the water is warm but not hot when mixing. This keeps the yeast alive. Just remember, a good rise makes for light and airy pretzels. {{image_2}} To make gluten-free cinnamon sugar pretzel bites, you need the right flour. I recommend using brands like Bob's Red Mill or King Arthur Gluten-Free Measure for Measure flour. These blends work well in baking. When you switch to gluten-free flour, the dough may feel different. You might need to add a bit more warm water to help it come together. Keep an eye on the dough's texture. It should be soft but not sticky. For vegan cinnamon sugar pretzel bites, replace butter with a dairy-free option. Use coconut oil or vegan butter. Both give a nice flavor and texture. You also need to ensure the dough is vegan-friendly. Use a plant-based milk, like almond or oat milk, instead of warm water. This keeps your bites soft and tasty without any animal products. If you want to get fancy, try chocolate-dipped pretzel bites. After baking, dip the bites in melted chocolate. Dark or milk chocolate works great. You can also add sweet flavors like Nutella or caramel. Just spread a bit on top of each bite after baking. These gourmet ideas make your pretzel bites extra special and fun to eat! To keep your cinnamon sugar pretzel bites fresh, store them at room temperature. Place them in an airtight container. This method keeps them soft for a few days. If you want them to last longer, you can refrigerate them. However, they may lose some softness in the fridge. When it's time to enjoy your pretzel bites again, you have two great options. You can use an oven or a microwave. The oven is best for keeping the bites crispy. Preheat it to 350°F (175°C). Place the bites on a baking sheet for about 5-7 minutes. The microwave is quicker but may make them chewy. If you use it, heat them for about 10-15 seconds. Freezing is a smart choice if you want to save some bites for later. First, let the pretzel bites cool completely. Then, place them in a single layer on a baking sheet. Freeze them for about 1 hour. After they are firm, transfer them to a freezer-safe bag or container. To thaw, leave them in the fridge overnight. Reheat them in the oven or microwave as needed. This way, you can enjoy warm pretzel bites anytime! You can prepare the dough ahead of time. Just follow these steps: - Make the dough and let it rise. - Once it has risen, shape the bites. - Cover them tightly and place in the fridge for up to 24 hours. - When ready to bake, let them sit at room temperature for 30 minutes before boiling. This way, you have fresh pretzel bites with less last-minute fuss. Yes, you can use other options instead of baking soda. Some good substitutes are: - Baking powder: Use three times the amount of baking powder. - Lye: This is a traditional method for pretzels but requires careful handling. Both will change the flavor slightly, but they can work well in a pinch. Enjoying these bites is even better with a dip. Here are some tasty suggestions: - Cream cheese dip: A rich and smooth option. - Melted chocolate: Perfect for sweet lovers. - Caramel sauce: Adds a nice, buttery touch. Feel free to mix and match to find your favorite! Now you have the tools to make delicious cinnamon sugar pretzel bites. We covered the key ingredients, substitutions, and necessary tools. You learned step-by-step instructions for baking, plus tips for perfect texture and flavor. With variations for dietary needs and storage tips, you can enjoy these treats anytime. Remember to experiment with flavors and dips. This recipe is easy, fun, and sure to impress. Enjoy the baking process and share these bites with friends and family! Your kitchen will be filled with joy and tasty smells.
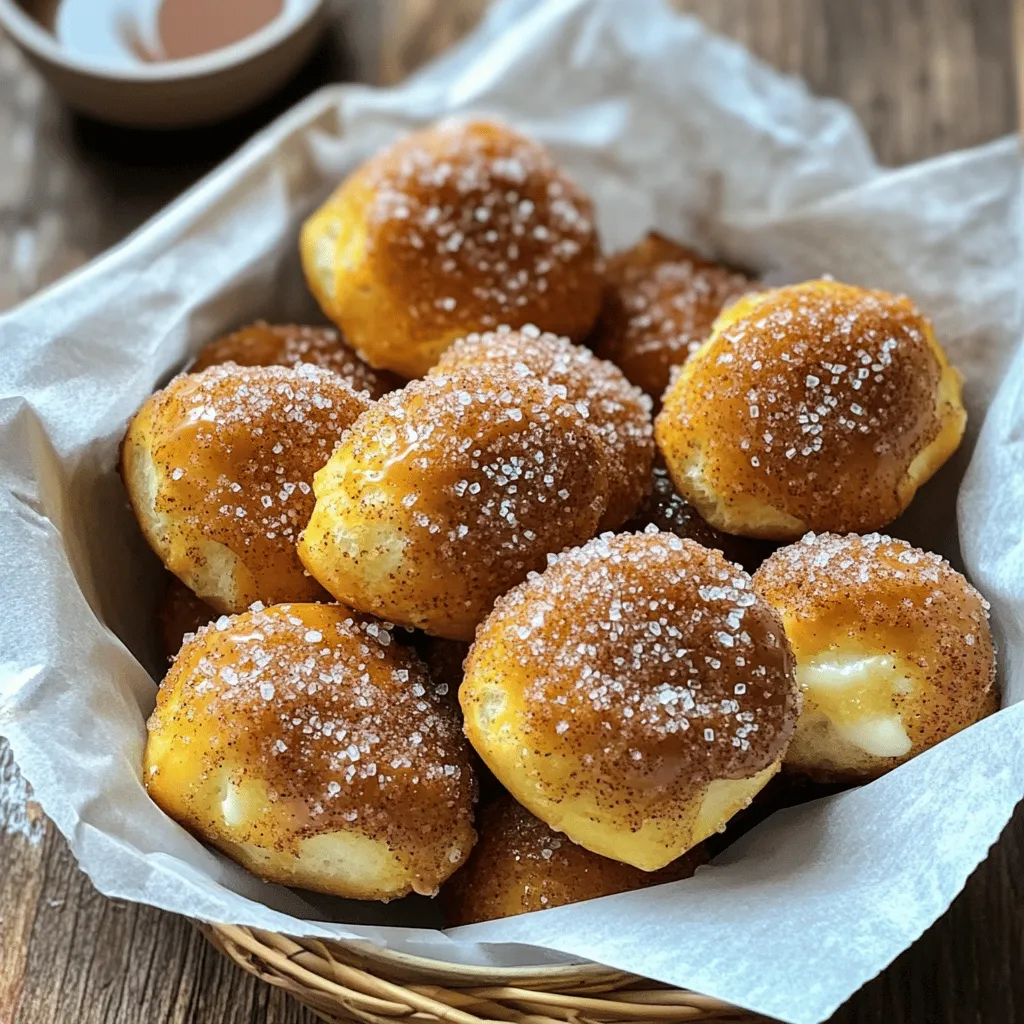
Cinnamon Sugar Pretzel Bites Soft and Delicious Snack
Craving a warm, soft snack that’s both sweet and satisfying? You’re in the right place! In this article, I’ll guide you through making Cinnamon Sugar
To make these tasty honey garlic chicken wings, you need the following items: - 2 pounds chicken wings - 1/4 cup honey - 1/4 cup soy sauce (low sodium is best) - 4 cloves garlic, minced - 1 teaspoon ground ginger - 1 teaspoon sesame oil - 1 tablespoon apple cider vinegar - Salt and pepper to taste Each of these ingredients plays a key role in creating a sweet and savory glaze. The honey gives a nice sweetness, while the soy sauce adds depth. Garlic and ginger provide a warm flavor that makes the wings irresistible. For a touch of flair, consider adding these garnishes: - Sesame seeds - Chopped green onions These garnishes not only add color but also enhance the dish's flavor. They give the wings a nice crunch and freshness. If you need to swap any items, here are some ideas: - Use agave syrup instead of honey for a vegan option. - Coconut aminos can replace soy sauce if you want a gluten-free choice. - If you lack fresh garlic, garlic powder works in a pinch. These substitutions allow you to customize the recipe to fit your diet or pantry. Enjoy making these wings your own! To make the marinade, gather a large mixing bowl. Add 1/4 cup of honey, 1/4 cup of soy sauce, and 4 minced garlic cloves. Then, mix in 1 teaspoon of ground ginger, 1 teaspoon of sesame oil, and 1 tablespoon of apple cider vinegar. Stir everything well until combined. This rich mixture will soak into the chicken wings, adding great flavor. Take 2 pounds of chicken wings and place them in the bowl with the marinade. Make sure all the wings are well-coated. Cover the bowl with plastic wrap or a lid. Refrigerate for at least 30 minutes. For the best taste, let them marinate for up to 2 hours. This step helps the wings absorb all the tasty flavors. First, preheat your air fryer to 375°F (190°C). After marinating, remove the wings from the bowl. Let any excess marinade drip off. Now, season the wings with salt and pepper to taste. Arrange them in a single layer in the air fryer basket. Don’t overcrowd the basket; it’s best to cook in batches. Cook the wings for 25-30 minutes. Flip them halfway through cooking for even crispiness. While the wings are cooking, take the leftover marinade and pour it into a small saucepan. Bring it to a boil, then reduce the heat and let it simmer for about 5 minutes. This will thicken the sauce slightly. Once the wings are golden and crispy, drizzle the thickened marinade over them. Toss gently to coat. Serve the wings hot, topped with sesame seeds and chopped green onions for a perfect finish. Enjoy your delicious honey garlic wings! To make your wings crispy, start with dry chicken. Pat the wings with paper towels before marinating. This helps the skin crisp up in the air fryer. Cook the wings in a single layer. If they touch, they won't get as crispy. Flip them halfway through cooking. This ensures even crispiness on all sides. Marinate your wings for at least 30 minutes. For the best flavor, aim for 2 hours. Use fresh garlic for a stronger taste. The mixture of honey and soy sauce gives a sweet and salty balance. Adding ground ginger and sesame oil adds depth. Don't skip the apple cider vinegar. It brightens the flavor and balances the sweetness. Cleaning your air fryer is easy! Always let it cool down first. Remove the basket and tray. Soak them in warm, soapy water. Use a soft sponge to clean any stuck food. Avoid metal scrubbers. They can scratch your air fryer. Wipe the inside of the air fryer with a damp cloth. Keep it clean for longer use. {{image_2}} If you like heat, add chili flakes or hot sauce to the marinade. A teaspoon of cayenne pepper can spice things up. You can also use sriracha for a tangy kick. Adjust the heat to match your taste. This adds a new layer to the sweet honey and garlic combo. You don't have to stick with chicken wings. You can use chicken thighs or drumsticks instead. The cooking time may change slightly, so keep an eye on them. For a lighter option, try these flavors with shrimp. Just adjust cooking time to avoid overcooking. Want to skip meat? Use cauliflower florets for a veggie twist. Toss them in the same marinade and cook in the air fryer. You can also try tofu for a protein-packed option. Just press the tofu to remove moisture before marinating. Both options will soak up the sweet and savory flavors. To keep your leftover wings fresh, let them cool first. Place them in an airtight container. You can store them in the fridge for up to 3 days. If you want them to last longer, consider freezing them. When you want to enjoy your wings again, use your air fryer for the best results. Preheat the air fryer to 375°F (190°C). Place the wings in a single layer. Heat them for about 10 minutes, flipping halfway. This method keeps them crispy and tasty. If you want to prepare ahead, freeze the marinated wings. After coating them in the honey garlic mix, place them in a freezer-safe bag. Remove as much air as possible before sealing. They can stay in the freezer for up to 3 months. When ready, thaw them in the fridge overnight before cooking. Yes, you can use frozen chicken wings. Just remember to thaw them first. Thaw them in the fridge overnight. This helps the wings cook evenly. If you use frozen wings, you may need to add extra cooking time. Check the internal temperature; it should reach 165°F (75°C). Marinate the wings for at least 30 minutes. For the best flavor, aim for 2 hours. A longer marination time allows the flavors to soak in. If time is tight, even a quick 30-minute soak works well. Just make sure all wings are coated in the marinade. You can serve honey garlic chicken wings with many sides. Some great options include: - Celery sticks - Carrot sticks - Ranch or blue cheese dressing - A fresh garden salad - Steamed rice or fried rice These sides complement the sweet and savory flavors of the wings. Enjoy! Honey garlic chicken wings are easy and tasty. You learned about the main ingredients, tips, and cooking steps. You can use the air fryer for crispness and flavor. Variations, like spicy or veggie options, add fun twists. Storing leftovers or reheating is simple. Now you’re ready to make your wings perfect each time. Enjoy making them your way!
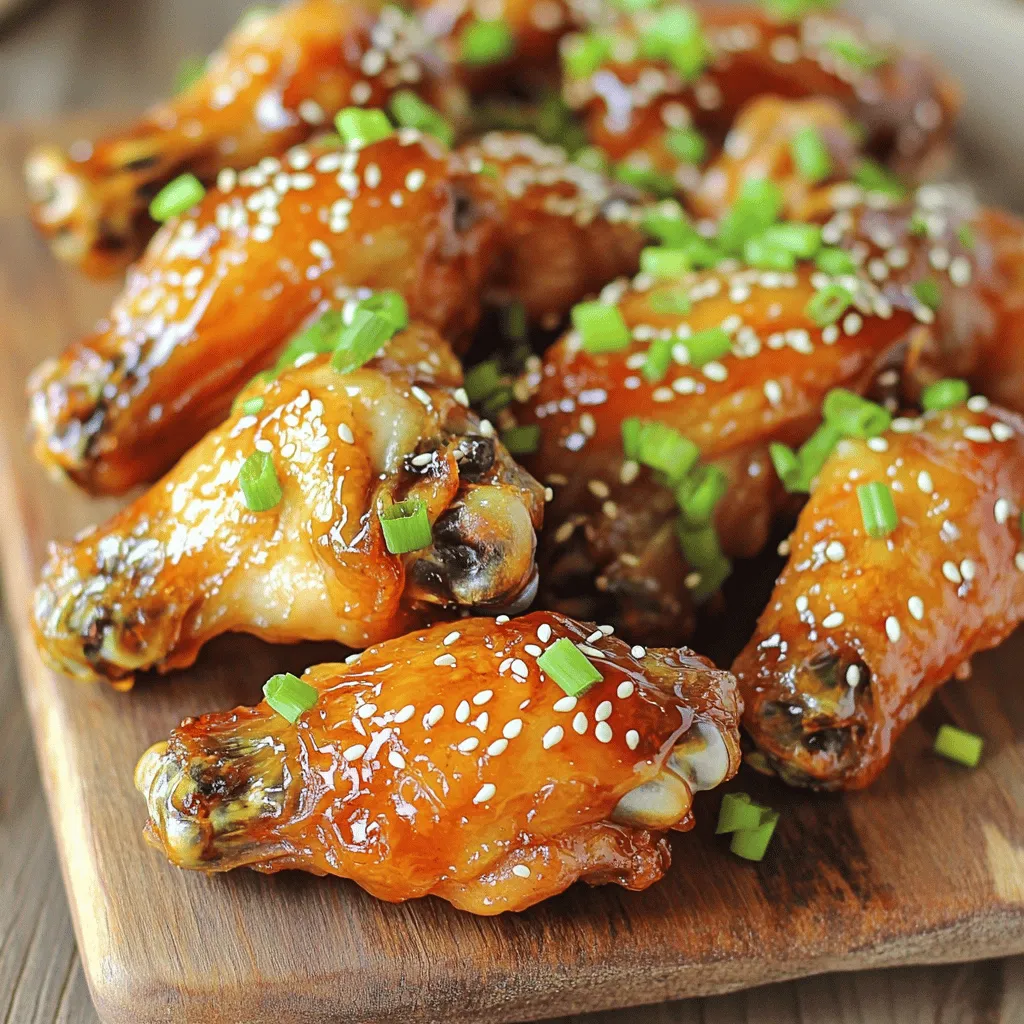
Air Fryer Honey Garlic Chicken Wings Delightful Dish
Are you ready to take your dinner game to the next level? Air Fryer Honey Garlic Chicken Wings are a simple dish packed with flavor.
- 2 large onions - 2 tablespoons olive oil - 1 teaspoon salt - 1 teaspoon sugar - 1 cup sour cream - 1 cup cream cheese - 2 tablespoons fresh chives - 1 tablespoon fresh thyme - Freshly cracked black pepper The main ingredients of this caramelized onion dip create a rich and tasty flavor. The large onions are key for that sweet, deep taste. Olive oil helps to cook the onions evenly. Salt brings out their natural flavor, while sugar aids in caramelization. Sour cream and cream cheese provide a creamy base. Fresh chives and thyme add a nice herbal note. Finally, black pepper gives a little kick. - Additional herbs and spices - Garnishes for serving You can personalize your dip with optional ingredients. Try adding herbs like parsley or dill for extra flavor. Spices like smoked paprika can enhance the taste too. For garnishes, consider extra chives or a drizzle of olive oil. These touches make your dip look pretty and inviting. Enjoy exploring these options to make the dip your own! To start, you need to slice the onions. Take 2 large onions and cut them thinly. This helps them cook evenly. In a large skillet, add 2 tablespoons of olive oil. Turn the heat to medium and throw in the sliced onions. Sprinkle 1 teaspoon of salt over them. Cook for about 10 minutes, stirring often. The onions will begin to soften and turn translucent. Next, add 1 teaspoon of sugar to the onions. The sugar helps them caramelize. Reduce the heat to low. This step is key to getting that deep golden color. Stir the onions every few minutes. Cook them for 25 to 30 minutes until they are sweet and golden brown. Keep an eye on them so they don’t burn. Once the onions are done, remove them from heat and let them cool a bit. In a mixing bowl, combine 1 cup of softened cream cheese and 1 cup of sour cream. Blend them until smooth. Now, fold in the caramelized onions. Add 2 tablespoons of chopped fresh chives and 1 tablespoon of fresh thyme leaves. Season with freshly cracked black pepper to taste. Mix gently to keep the texture nice. Transfer your dip to a serving bowl. It’s best to refrigerate it for at least 30 minutes. This lets the flavors blend well together. When you’re ready to serve, you can pair it with fresh veggies, pita chips, or crusty bread. For a nice look, add more chives on top and drizzle with olive oil. Enjoy your rich and flavorful dip! To get the best caramelized onions, pay close attention to cooking time and temperature. Start with medium heat, then lower it after the onions soften. This helps them turn golden brown. Stir often at first, then less frequently as they cook. Aim for about 25-30 minutes for perfect flavor and color. The dip should be thick but smooth. To get this texture, use softened cream cheese. Blend it well with sour cream until creamy. If you want it thicker, add more cream cheese. If it's too thick, mix in a splash of milk or cream. Serve your dip with fresh veggies, pita chips, or crusty bread. For a nice look, garnish with extra chives and a drizzle of olive oil. This adds color and flavor, making the dish more inviting. You can also serve it in a pretty bowl to impress your guests. {{image_2}} You can change the taste of your dip easily. Here are some ideas: - Add cheese: Mix in shredded cheese like cheddar or Parmesan. This adds a rich, creamy layer. - Use spices: Try adding garlic powder or smoked paprika for a kick. A hint of cayenne can also spice things up. - Change the herbs: Swap chives or thyme for basil or dill. Each herb brings a new flavor. Making this dip fit your diet is simple. Here’s how: - Low-fat option: Use light sour cream and reduced-fat cream cheese. You won’t lose flavor, but you’ll cut calories. - Vegan choice: Replace dairy with cashew cream or store-bought vegan cream cheese. This way, everyone can enjoy it. You can serve this dip in fun ways. Consider these options: - As a spread: Use the dip on toast or sandwiches. It adds a tasty layer to your lunch. - Incorporate into dishes: Mix the dip into pasta or use it as a sauce for chicken. This adds a creamy twist to any meal. To keep your dip fresh in the fridge, store it in an airtight container. This helps seal in the flavors. Make sure to let the dip cool completely before sealing. A glass container works great for this dip. It keeps the taste intact and allows easy serving. If you want to save some dip for later, you can freeze it. Use a freezer-safe container or a heavy-duty freezer bag. Leave some space for the dip to expand as it freezes. When you want to enjoy it again, thaw the dip in the fridge overnight. To reheat, warm it gently in a skillet over low heat. Stir well to mix the texture back together. To keep your dip at its best, try to eat it within a week. Check for freshness by looking for any changes in color or smell. If you see mold or it smells sour, it's time to toss it. Trust your senses; they guide you well in the kitchen. Caramelizing onions takes about 35 to 40 minutes. Start with medium heat for 10 minutes, stirring often. Then lower the heat and cook for about 25 to 30 more minutes until they turn golden brown. This slow cooking brings out their natural sweetness. Yes, you can make this dip a day ahead. After mixing, store it in the fridge in an airtight container. Flavors will blend and improve overnight. Just remember to let it sit at room temperature for a bit before serving. This dip pairs well with many items. You can serve it with fresh veggies like carrots and cucumbers. Pita chips and crusty bread also make great choices. For a fun twist, try it with potato chips or crackers. While fresh onions are best, you can use frozen ones. Just remember to thaw and drain them well. They may not caramelize as nicely, but they can still work in a pinch. To spice things up, add some cayenne pepper or hot sauce. You can also mix in diced jalapeños or red pepper flakes. Start small and taste as you go to find your perfect heat level. If you need a substitute for cream cheese, you can use Greek yogurt or ricotta cheese. They provide a similar creamy texture. For a vegan option, try blended silken tofu or a dairy-free cream cheese alternative. This blog post showed you how to make a tasty caramelized onion dip. We discussed ingredients, step-by-step instructions, and helpful tips. You learned different ways to personalize the dip and how to store it. Try this recipe for your next gathering. It’s simple and ready to impress your guests. Enjoy experimenting with flavors and serving styles. Cooking should be fun, and this dip is sure to be a hit!
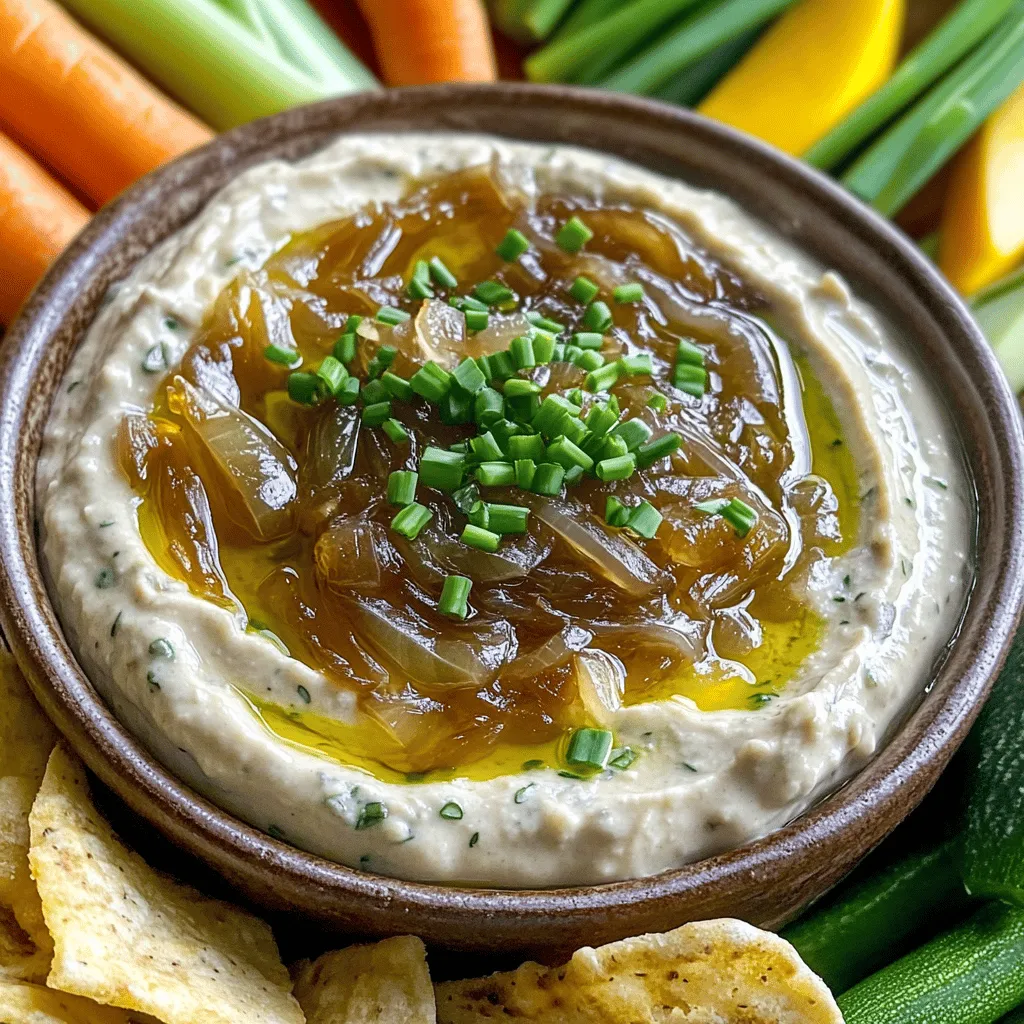
Caramelized Onion Dip Rich and Flavorful Delight
Are you ready to elevate your snack game? My Caramelized Onion Dip is rich, creamy, and bursting with flavor. This dip transforms humble onions into
- All-purpose flour and yeast details: You need 3 cups of all-purpose flour. It gives the bread a nice texture. Use 1 tablespoon of instant yeast to help the bread rise well. - Spices and flavor enhancers: Add 1 teaspoon of salt for taste. Use 2 tablespoons of sugar to balance flavors. For a kick, mix in 1 teaspoon of garlic powder. 1 teaspoon of dried oregano adds a warm, earthy taste. - Types of cheese used: This recipe calls for 1 cup of shredded mozzarella cheese. It melts beautifully and gives a gooey texture. Also, add 1/2 cup of grated Parmesan cheese for a savory finish on top. - Additional garnishes: Fresh parsley, chopped, is perfect for garnishing. It adds a pop of color and a fresh taste. You can also serve the bread with marinara sauce for dipping. To start, grab a large mixing bowl. In it, combine the following dry ingredients: - 3 cups all-purpose flour - 1 tablespoon instant yeast - 1 teaspoon salt - 2 tablespoons sugar - 1 teaspoon garlic powder - 1 teaspoon dried oregano Mix these well. This step is key for even flavor. Next, you need another bowl. In this bowl, mix the wet ingredients: - 1 cup warm milk (110°F) - 1/2 cup pumpkin puree - 1/4 cup unsalted butter, melted Stir until smooth. Then, slowly add this mixture to the dry ingredients. Stir until a soft dough forms. Now, it’s time to knead. Flour your surface lightly. Knead the dough for about 5 to 7 minutes. The dough should feel smooth and elastic. Once you finish kneading, place the dough in a lightly greased bowl. Cover it with a kitchen towel. Let it rise in a warm spot for 1 hour. It should double in size. After the dough has risen, it’s time to shape it. Start by punching the dough down gently. Next, divide it into small balls. Aim for golf ball size. Flatten each ball slightly. Place a spoonful of shredded mozzarella cheese in the center. Wrap the dough around the cheese and seal it well. This is your filling technique. Now, take a greased loaf pan. Arrange the cheese-filled dough balls in layers. Let them overlap slightly. This gives the bread a nice pull-apart texture. Top it off by sprinkling 1/2 cup grated Parmesan cheese on top. Cover the pan with a towel and let it rise for another 30 minutes. While the dough rises, preheat your oven to 375°F (190°C). Once the dough has risen again, it’s baking time! Place the pan in the oven. Bake for 25 to 30 minutes. The top should turn golden brown. To check if it’s done, tap the bread lightly. It should sound hollow. This is a good sign! Let the bread cool slightly before pulling it apart. Enjoy this warm, cheesy treat with friends or family. To make great dough, kneading is key. Knead the dough for 5-7 minutes. This makes it smooth and stretchy. Use a floured surface to prevent sticking. If the dough feels too sticky, add a little flour. Be careful not to add too much, as this can make the bread tough. For the best rise, find a warm spot. An oven turned off but slightly warm is perfect. Cover the dough with a towel. This helps keep it warm and moist. Let it rise until it doubles in size, which usually takes about 1 hour. You can add your favorite herbs and spices to change the taste. Try adding thyme or rosemary for a fresh twist. Garlic powder gives a nice kick, and oregano adds depth. For cheese, mozzarella is great, but you can also use cheddar or gouda. Mixing cheeses can bring more flavor. If you want a stronger taste, add blue cheese or feta. To jazz it up, toss in some sun-dried tomatoes or olives. These add pop and make your bread unique. Serving is just as fun as making this bread. To impress, present it warm on a nice plate. Garnish with fresh parsley on top for color. You can also pull it apart right at the table for a fun touch. Pair this bread with dips like marinara sauce or garlic butter. It adds a tasty element to each bite. This bread is best served warm, right out of the oven. It's perfect for gatherings or cozy nights at home. {{image_2}} You can mix up the cheese in this bread. Cheddar adds a sharp flavor. Gouda brings a creamy richness. Both will give your pull-apart bread a new twist. If you want a plant-based option, try vegan cheese. Look for brands that melt well. You may need to adjust the baking time based on the cheese used. Take your bread to the next level with add-ins. Fresh herbs like rosemary or thyme can boost flavor. You can also add veggies like spinach or sun-dried tomatoes for extra taste. You can choose between sweet or savory. For sweet, consider adding cinnamon or nutmeg. These spices will give your bread a warm autumn taste. For savory, stick with garlic and herbs. If you need a gluten-free option, use gluten-free flour. Almond flour, rice flour, or a blend works well. You may need to add more liquid to get the right dough consistency. Adjust the yeast and salt to fit the new flour. Keep an eye on the baking time. Gluten-free bread can bake faster, so check for doneness early. To keep your cheesy pull-apart pumpkin bread fresh, store it in a sealed bag. This keeps moisture in and prevents it from drying out. You can keep it at room temperature for about two days. If your kitchen is warm, consider putting it in the fridge. However, this may change the texture, making it less soft. For long-term storage, freezing is your best option. Wrap the bread tightly in plastic wrap, then place it in a freezer bag. This helps prevent freezer burn. You can freeze it for up to three months. When you're ready to eat it, take it out and let it thaw in the fridge overnight. To reheat, warm it in the oven at 350°F (175°C) for about 10-15 minutes. This will bring back its soft, cheesy goodness. The shelf life of your cheesy pull-apart pumpkin bread is about 2-3 days at room temperature. In the fridge, it can last about a week. Look for signs of spoilage, such as mold, a sour smell, or a dry texture. If you notice any of these, it’s best to toss the bread. Always trust your senses when it comes to food safety! Yes, you can prepare the dough ahead. Make the dough and let it rise. Then, shape the bread and place it in the pan. Cover it with plastic wrap and store it in the fridge overnight. Before baking, let it sit at room temperature for 30 minutes. This gives it a nice rise. If you don’t have pumpkin puree, you can use mashed sweet potatoes or butternut squash. Both have a similar texture and flavor. You can also use applesauce, but it will make the bread sweeter. Adjust the sugar if you go this route. Check the bread at 25 minutes. It should be golden brown on top. Tap the bread; it should sound hollow. If it’s not done, bake for a few more minutes. Use a toothpick in the center to check. If it comes out clean, the bread is ready. Yes, you can use bread flour. It will make the bread chewier and denser. The texture will be different, but still tasty. Just remember to adjust water if the dough feels too dry. This blog post covered how to make a delicious cheesy pull-apart pumpkin bread. We explored the right ingredients, step-by-step instructions, and helpful tips to perfect your loaf. You learned how to customize flavors and make seasonal variations too. In closing, enjoy the process of baking and make this recipe your own. With practice, your bread will impress family and friends. Trust your skills, and happy baking!
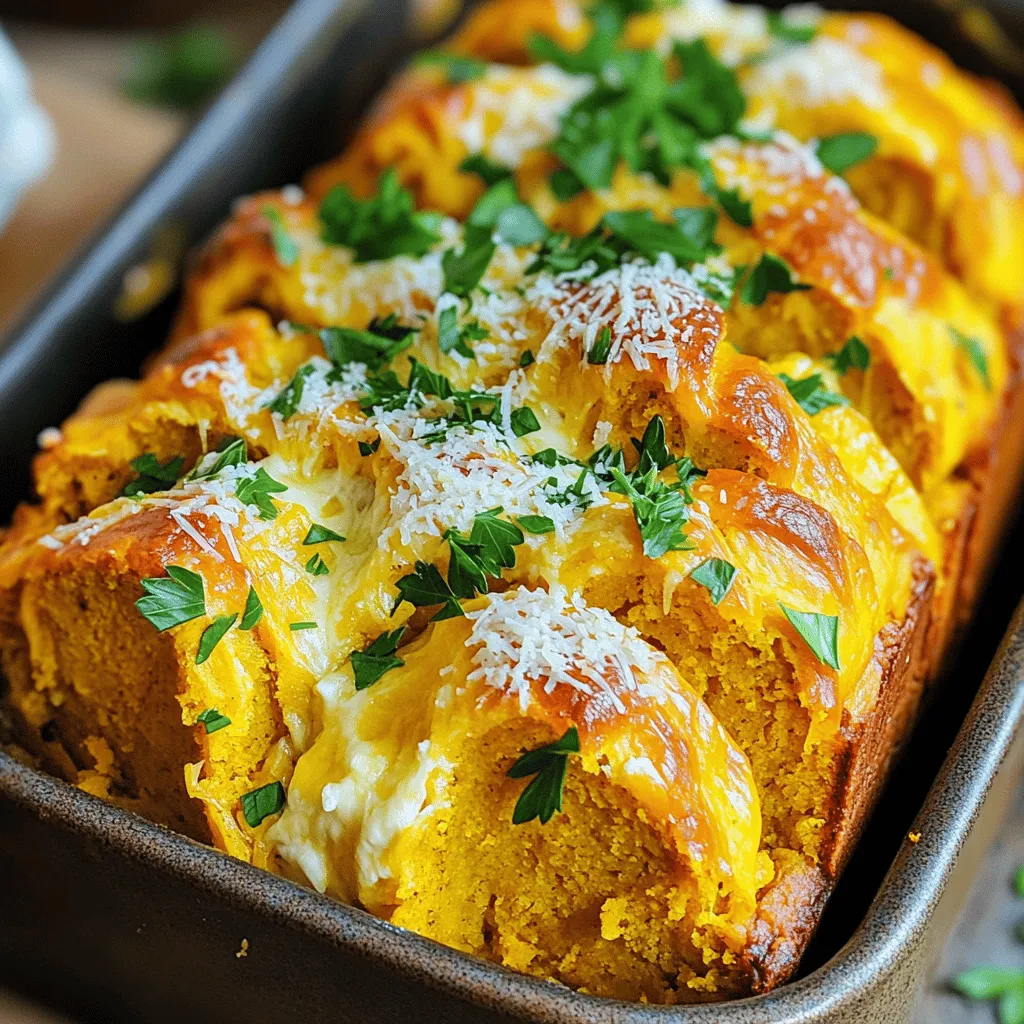
Cheesy Pull-Apart Pumpkin Bread Irresistible Treat
Are you ready to impress your friends with an irresistible treat? This Cheesy Pull-Apart Pumpkin Bread combines warm pumpkin flavor with gooey cheese for a
- 2 cups shredded cheddar cheese - 1 tablespoon sesame seeds - 1 tablespoon poppy seeds - 1 teaspoon dried onion flakes - 1 teaspoon dried garlic flakes - 1/2 teaspoon coarse sea salt - 1/2 teaspoon black pepper - Optional: 1 tablespoon nutritional yeast for an extra cheesy flavor Let’s break down each ingredient. Shredded cheddar cheese is the star of the show. It melts well and gives a rich, sharp flavor. You want to use a good quality cheese for the best taste. Sesame seeds add a nice crunch and a nutty flavor. They also give the chips that classic bagel look. Poppy seeds are tiny but pack a punch. They add a subtle crunch and a hint of flavor that makes these chips even more special. Dried onion flakes and dried garlic flakes bring depth to the flavor. They make the chips taste like a true everything bagel. Coarse sea salt enhances all the flavors. It makes each bite pop and adds a savory touch. Black pepper gives a nice kick. It balances the richness of the cheese and adds warmth. For an optional but tasty boost, consider adding nutritional yeast. This ingredient gives an extra cheesy taste without extra carbs. It’s great for those who want to enjoy more flavor while keeping it keto. Start by preheating your oven to 400°F (200°C). This is key for even cooking. While the oven heats, line your baking sheet with parchment paper. This will help the chips release easily after baking. Make sure the paper covers the whole sheet. This step ensures no cheese sticks to the pan. In a medium bowl, combine the shredded cheddar cheese with the sesame seeds, poppy seeds, dried onion flakes, dried garlic flakes, coarse sea salt, and black pepper. If you want a cheesier taste, add nutritional yeast. Stir everything well. Aim for a thick, cohesive mix. If the cheese feels too dry, try adding a bit more cheese. This will help the chips stick together. Now, scoop about a tablespoon of the cheese mixture. Place it on your baking sheet, leaving about 2 inches between each mound. Flatten each mound slightly with the back of your spoon. This helps them bake evenly. Bake the chips for 8-10 minutes. Look for golden edges and bubbly centers. Once they look perfect, take them out and let them cool for a couple of minutes on the sheet. They will harden as they cool, which gives them that great crunch. After a few minutes, move them to a wire rack to cool completely. This step is crucial for achieving maximum crispness. To make sure your cheese chips turn out crispy, focus on flattening. After you scoop the cheese mixture, use the back of a spoon to flatten each mound. Aim for about a quarter-inch thickness. This helps them bake evenly. Cooling is just as important. Let the chips cool on the baking sheet for a couple of minutes. You’ll notice they harden as they cool. Once they are slightly firm, transfer them to a wire rack. This allows air to flow around them, keeping them crispy. Want to boost the flavor? Try adding spices like smoked paprika or cayenne pepper. A pinch of each can give your chips a nice kick. Fresh herbs like dill or chives also work well. Mix them in for extra taste. For pairing, think of dips. A creamy avocado dip or a spicy salsa pairs perfectly. You could also use sour cream mixed with herbs. These options add different flavors and fun to your snack time. {{image_2}} You can switch cheddar cheese for other types. Aged gouda adds a nutty flavor. Mozzarella gives a milder taste and a great stretch. For a sharper bite, try parmesan. Each cheese changes the flavor and texture. This lets you explore new tastes while keeping it keto. You can mix up the seasoning for fun flavors. Try adding smoked paprika for a smoky twist. Italian herbs like oregano or basil can give a fresh taste. Switch out sesame or poppy seeds for crushed red pepper for some heat. Customizing your seasoning helps match your mood and taste. Experiment, and find your favorite blend! To keep your keto everything bagel cheese chips fresh, store them in an airtight container. This will help maintain their crunch. If you use a zip-top bag, press out as much air as you can. You want to keep moisture out, as it makes the chips soggy. For best results, use glass containers. They seal tightly and do not hold odors. A metal tin also works well, just ensure it’s sealed. Store the chips in a cool, dry place. Avoid leaving them near heat sources or in direct sunlight. If your chips lose their crunch, don’t worry! You can easily restore their crispness. Preheat your oven to 350°F (175°C). Place the chips on a baking sheet in a single layer. Heat them for about 5 minutes. This will help bring back their crunch. To avoid sogginess, never use a microwave to reheat these chips. Microwaves add moisture, making them soft. Always choose the oven for the best results. Enjoy your chips fresh and crunchy every time! Yes, you can use other low-carb cheeses. Mozzarella works great for a milder taste. Pepper jack adds a spicy kick. Parmesan gives a nice sharpness. Just remember, different cheeses melt differently. This can change the chip's texture. These chips can last about a week if stored properly. Keep them in an airtight container. This helps keep them crispy. If you notice they become soft, try reheating them in the oven for a few minutes. Yes, these chips are keto-friendly. They are low in carbs and high in fat. Here’s the breakdown: - Cheddar cheese: Low in carbs, high in fat - Sesame seeds and poppy seeds: Provide healthy fats and fiber - Spices: Add flavor without carbs These chips fit well into a ketogenic diet. Absolutely! You can prepare them ahead of time. Just bake the chips and let them cool. Store in an airtight container. This keeps them fresh. If you want to serve them later, reheat them briefly to regain crunch. In this post, we explored delicious baked cheese chips and how to make them. I shared the key ingredients, along with helpful tips and variations. You learned how to mix, bake, and keep chips crispy. Remember, the cheese type and seasonings can change the flavor. Use the storage tips to enjoy your chips longer. With these ideas, making snacks can be both fun and tasty. Enjoy your cheese chip journey and make it your own!
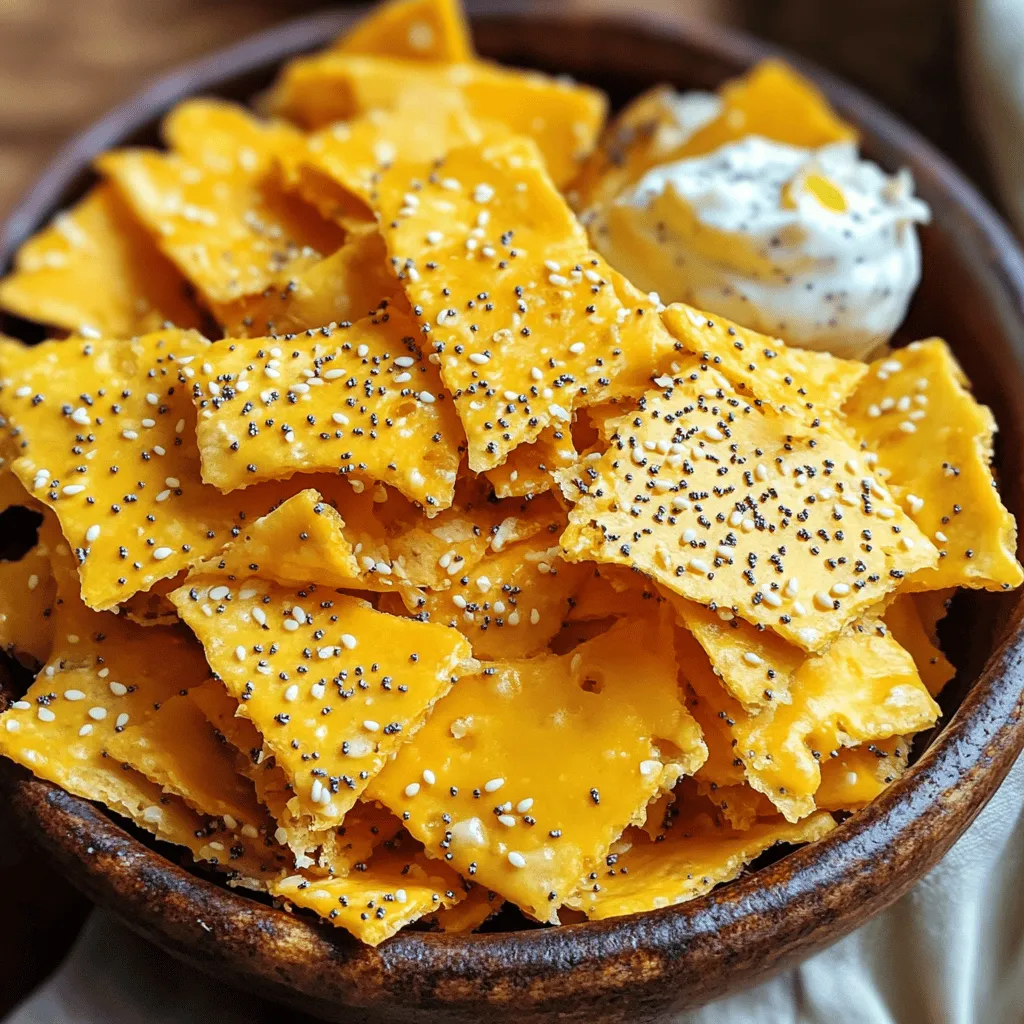
Keto Everything Bagel Cheese Chips Crunchy Delight
Craving a crunchy snack that fits perfectly into your keto diet? Look no further than my Keto Everything Bagel Cheese Chips! They are easy to
- 2 large onions, thinly sliced - 2 tablespoons olive oil - 1 teaspoon salt - 1 teaspoon sugar - 1 cup sour cream - 1 cup cream cheese, softened - 2 tablespoons fresh chives, finely chopped - 1 tablespoon fresh thyme leaves - Freshly cracked black pepper to taste - Garlic powder - Additional herbs (e.g., parsley, dill) - Spicy elements (e.g., cayenne pepper, hot sauce) The key to a great caramelized onion dip is in its ingredients. Onions form the base flavor. I prefer large ones for a sweet taste. Olive oil helps cook the onions. Salt draws out moisture. Sugar aids in caramelization, giving the onions their rich color and flavor. Sour cream and cream cheese create a creamy texture. Chives and thyme add freshness and depth. Black pepper enhances the taste. For a twist, consider adding garlic powder for extra flavor. Fresh herbs like parsley or dill can also brighten the dip. If you like spice, try cayenne pepper or hot sauce. These options help you customize the dip to your taste. First, grab two large onions. Thinly slice them to make sure they cook evenly. In a large skillet, heat two tablespoons of olive oil over medium heat. Add the onions and sprinkle one teaspoon of salt on top. This will help draw out moisture. Cook the onions for about ten minutes, stirring often. You want them to soften but not brown yet. Once the onions are soft, it's time to caramelize them. Add one teaspoon of sugar to the skillet. This sugar helps to create that rich, sweet flavor you love. Now, reduce the heat to low. Keep cooking the onions for about 25 to 30 minutes. Stir them every few minutes. You will see them turn a deep golden brown. That’s when the magic happens! After your onions are beautifully caramelized, remove them from heat and let them cool a bit. In a mixing bowl, combine one cup of softened cream cheese and one cup of sour cream. Blend these two until they are smooth. Now, fold in the caramelized onions. Add in two tablespoons of finely chopped chives and one tablespoon of fresh thyme leaves. Season with freshly cracked black pepper to taste. For the best flavor, transfer the dip to a serving bowl. Refrigerate it for at least 30 minutes. This chilling time allows all those lovely flavors to meld together. Enjoy your delicious dip with fresh veggies, pita chips, or crusty bread! To get sweet, rich onions, heat is key. Start on medium heat to soften the onions. Stir often for the first ten minutes. Once they soften, add sugar and lower the heat. Cook slowly on low heat. Stir every few minutes for about 30 minutes. You want deep golden brown onions. This slow cooking brings out their sweetness. For extra flavor, try adding garlic powder or fresh herbs. Fresh parsley or dill can brighten the dip. Let the dip chill for at least 30 minutes. Chilling helps the flavors blend well. The longer it sits, the better it tastes. Serve your dip in a pretty bowl. Pair it with fresh veggies, pita chips, or crusty bread. This makes it fun to eat. For a fancy touch, garnish with more chives and a drizzle of olive oil. This adds color and makes it look special. {{image_2}} You can easily change the taste of your caramelized onion dip. Try a Spanish-style dip by adding roasted red peppers. This gives the dip a sweet and smoky flavor. For an Italian twist, mix in sun-dried tomatoes and fresh basil. Both options add a unique taste while keeping the creamy richness. If you're looking for lighter choices, consider using low-fat cream cheese. Greek yogurt is another great substitute for sour cream. It adds protein and keeps the dip creamy. For vegan options, cashew cream is a fantastic choice. You can also use soft tofu blended until smooth. These alternatives keep the dip delicious while being mindful of calories. This dip pairs well with many dippers. Fresh veggies like carrots, bell peppers, and cucumbers work great. You can also serve it with pita chips or crusty bread. For a full spread, add cheeses and cured meats. They complement the rich flavor of the dip and make for a delightful snack. To keep your caramelized onion dip fresh, store it in the fridge. Place it in an airtight container. This will help keep the flavors intact. Use a glass or plastic container that seals well. Make sure to cover the dip tightly to avoid drying out. You can freeze this dip for later use. To do this, place it in a freezer-safe container. Leave some space at the top for expansion. The dip stays good for about three months in the freezer. When you're ready to enjoy it, thaw it in the fridge overnight. Reheat it gently in the microwave or on the stove. Stir well to restore its creamy texture. In the fridge, your dip will last about five days. Always check for signs of spoilage. Look for changes in color or an off smell. If you see any mold, discard it immediately. Enjoy your dip fresh for the best taste! Yes, you can make caramelized onion dip ahead. This dip tastes even better after resting. Prepare it a day in advance. Store it in an airtight container in the fridge. Before serving, let it sit at room temperature for about 30 minutes. This helps the flavors shine. If your dip is too thin, here are simple tips to thicken it: - Add more cream cheese. Blend in an extra ounce or two. - Use sour cream. Mix in a bit more until you reach your desired thickness. - Consider adding Greek yogurt. It gives creaminess and extra protein. If you want a different option, try these alternatives: - Greek yogurt offers a tangy flavor and fewer calories. - Silken tofu works well for vegan diets and adds smoothness. - Cottage cheese blended until smooth can be a healthier choice. Caramelized onion dip is not spicy by default. The sweet onions create a rich, savory flavor. If you like heat, try adding: - A pinch of cayenne pepper for warmth. - A few dashes of hot sauce for a kick. - Fresh jalapeños for a spicy twist. This dip can easily be customized to fit your taste! This dip recipe combines simple ingredients for a tasty treat. You start with onions, which you caramelize for deep flavor. Mixing them with sour cream and cream cheese creates a creamy base. You can make this dip your own with optional herbs, spices, or healthier alternatives. Remember to store leftovers properly and enjoy this dish with various dippers. Next time you want a crowd-pleaser, try this dip. It’s sure to impress!
Caramelized Onion Dip Savory and Rich Flavor Treat
Caramelized onion dip is a game-changer for your snack table! With its savory and rich flavor, it’s sure to impress family and friends. You can
- 1 ripe mango, diced - 1 ripe avocado, diced - 1 can (15 oz) black beans, rinsed and drained - 1 small red onion, finely chopped - 1 red bell pepper, diced - 1 jalapeño, deseeded and minced - 2 tablespoons fresh lime juice - 1 tablespoon olive oil - 1/4 cup fresh cilantro, chopped This salsa shines with fresh flavors. I love using ripe mango and avocado. They bring sweetness and creaminess. Black beans add protein and heartiness. Red onion and red bell pepper provide crunch and color. The jalapeño adds a nice kick. Fresh lime juice gives it a zesty touch. Olive oil smooths everything out. Finally, fresh cilantro ties all the flavors together. - Salt and pepper to taste Salt and pepper are key to enhancing the flavors. I suggest starting with a little. You can always add more if needed. Taste the salsa after mixing to get it just right. - Serving size: 4-6 This recipe serves 4 to 6 people. It’s perfect for a party or a family meal. Just adjust the amounts if you need more. You can double or halve the recipe easily. Enjoy making this bright and tasty salsa! To start, grab a large mixing bowl. In this bowl, combine the following ingredients: - 1 ripe mango, diced - 1 ripe avocado, diced - 1 can (15 oz) black beans, rinsed and drained - 1 small red onion, finely chopped - 1 red bell pepper, diced - 1 jalapeño, deseeded and minced Mix these colorful ingredients together. Take your time to ensure everything is well combined. Next, we need to make the dressing. In a small bowl, whisk together: - 2 tablespoons fresh lime juice - 1 tablespoon olive oil - Salt and pepper to taste Whisk until everything blends nicely. This dressing adds a zesty touch to the salsa. Now it’s time to bring everything together. Pour the dressing over your salsa mixture. Gently toss everything together. Be careful not to mash the avocado; we want it to stay in nice chunks. After that, fold in the chopped cilantro. This herb adds a fresh flavor to the salsa. Ensure the cilantro is evenly mixed throughout. Let the salsa sit for about 10 minutes at room temperature. This waiting time helps the flavors meld together. The longer you let it sit, the more the tastes pop. After 10 minutes, taste your salsa. Adjust seasoning with more salt, pepper, or lime juice if needed. This step is vital to ensure your salsa shines! To make great mango avocado black bean salsa, you need ripe mango and avocado. Look for mangoes that feel soft but not mushy. The skin should be slightly wrinkled, which means it’s sweet. For avocados, press gently. It should yield slightly if it’s ready. Fresh ingredients are always better than canned ones. Fresh mango and avocado taste brighter. They also add a nice texture. Canned black beans are okay to use. Just rinse and drain them well. This keeps the salsa light and fresh. To boost the flavor, add more lime juice. It adds zing and makes the salsa taste bright. If you want some heat, try using more jalapeño or a spicier pepper. You can also leave the seeds in for extra kick. Don’t be afraid to taste as you go. You can always adjust the ingredients to match your flavor preference. Serve your salsa in a fun bowl. Bright colors make it pop! You can place tortilla chips around the bowl for dipping. This makes a great snack for parties. For a fancy touch, serve the salsa on grilled chicken or fish. The colors look beautiful, and it adds flavor. You can also sprinkle extra cilantro on top for a fresh look. {{image_2}} You can easily swap ingredients to fit your needs. If you cannot eat black beans, try chickpeas or kidney beans. They add a nice texture and flavor. For onions, use green onions or shallots for a milder taste. Want to add a fruit twist? Try mixing in corn or diced pineapple. These fruits add sweetness and crunch. Want to kick up your salsa? Add chili powder, cumin, or smoked paprika for extra depth. These spices give your salsa a unique touch. You can also use fresh herbs. Mint or parsley will add a fresh flavor that pairs well with mango and avocado. Experiment with what you like best! This salsa shines as a topping for grilled chicken or fish. Serve it with tortilla chips for a fun snack. It also works great in tacos or as a salad topping. You can even mix it into rice or quinoa for a tasty side dish. The options are endless! To store leftover salsa, place it in an airtight container. Make sure you press out any air before sealing. This keeps the salsa fresh for up to three days in the fridge. The flavors will continue to meld, but the avocado may brown slightly. To slow this down, add a bit more lime juice on top before sealing. For long-term storage, freezing is a great option. Use a freezer-safe container or a freezer bag. Leave some space at the top, as the salsa will expand when frozen. You can keep it in the freezer for up to three months. When ready to use, thaw it in the fridge overnight. Look for signs of spoilage before using your salsa. If the salsa smells sour or has a strange color, it’s best to toss it. Also, if you see any mold, do not eat it. Fresh salsa should have bright colors and a strong, fresh scent. How long does Mango Avocado Black Bean Salsa last in the fridge? This salsa lasts about 2 to 3 days in the fridge. After that, the avocado may brown and the flavors will fade. Can I use frozen ingredients to make salsa? Yes, you can use frozen mango or black beans. Just thaw them first. Fresh ingredients taste best, but frozen can work in a pinch. What can I use instead of cilantro? If you dislike cilantro, try parsley or green onions. These herbs add freshness without the strong taste of cilantro. Is this salsa healthy? Absolutely! This salsa is full of nutrients. It has healthy fats from avocado and fiber from black beans. It is a great snack or topping! How can I make this salsa spicier? To add heat, chop more jalapeño or use a spicier pepper like serrano. You can also add a dash of hot sauce for an extra kick. This blog post covered how to make a delicious salsa using fresh ingredients. You learned about ripe mango, avocado, black beans, and tasty seasonings. I shared steps for preparing, mixing, and letting flavors blend. You now have tips for choosing the best ingredients and creative serving ideas. Remember, you can customize the salsa with various ingredients or spices. Enjoy making this salsa, and don't hesitate to try different flavors. It’s a fun way to add zing to your meals!
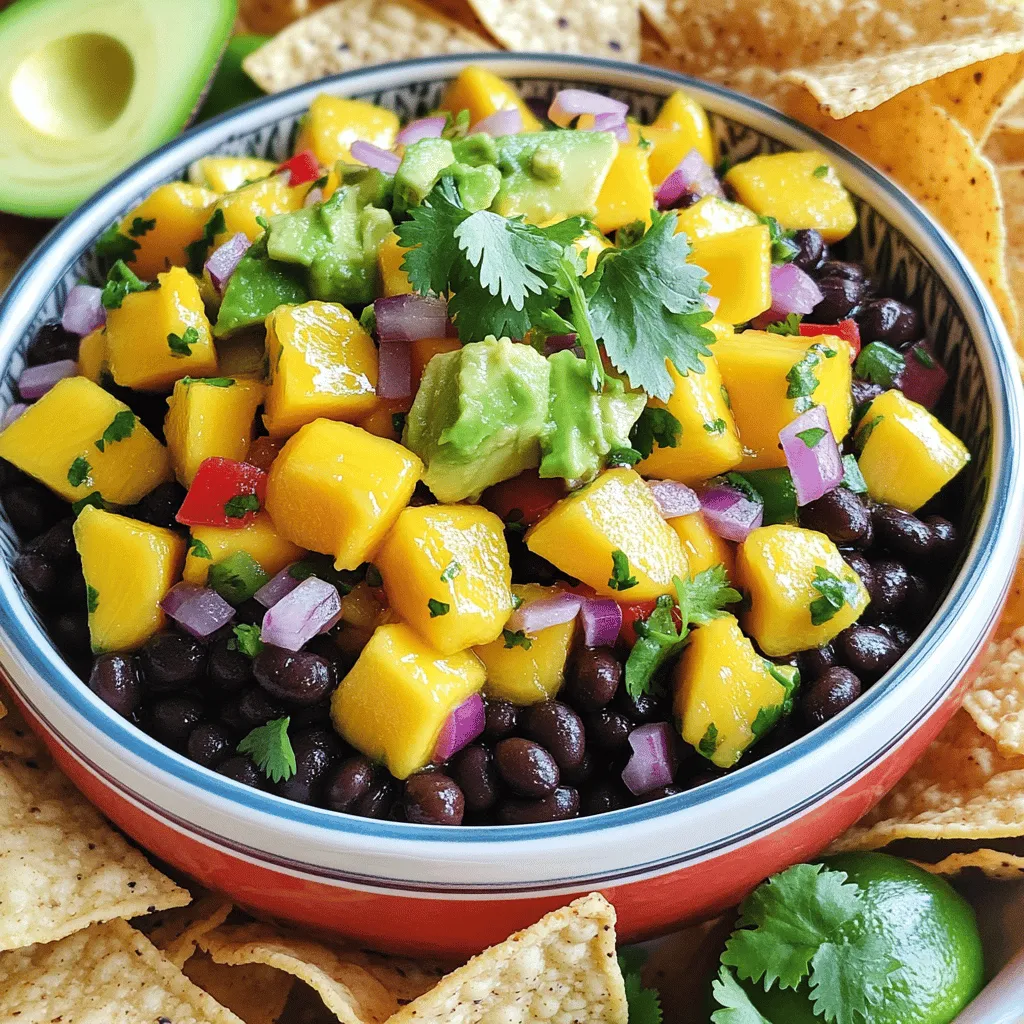
Mango Avocado Black Bean Salsa Flavorful and Fresh
Mango Avocado Black Bean Salsa is a burst of flavor that’s easy to make. With ripe mango, creamy avocado, and hearty black beans, this dish
- 10 tomatillos, husked and quartered - 1 medium red onion, quartered - 2 cloves garlic, unpeeled - 1-2 jalapeños, halved and seeds removed (adjust for spice level) - 1 tablespoon olive oil - Salt to taste - Fresh cilantro, chopped (about ¼ cup) - Juice of 1 lime For this easy roasted tomatillo salsa, tomatillos are the star. They give a bright, tangy flavor. Choose firm, green tomatillos for the best results. The red onion adds sweetness, while garlic gives depth. Jalapeños add heat. You can adjust the amount based on your taste. If you like it spicy, keep some seeds in. The olive oil helps the veggies roast nicely. A bit of salt brings out all the flavors. Fresh cilantro adds a zing. Finally, lime juice brightens the salsa. This balance of flavors makes this dip very tasty. You can add more ingredients to spice it up! For example, diced mango or pineapple can bring in sweetness. Check out the Full Recipe for all the details on making this salsa. First, you need to preheat your oven to 425°F (220°C). This step is key for roasting. Next, prepare the vegetables. Start by husking the tomatillos and cutting them into quarters. Quarter the red onion, too. For the garlic, leave the skins on. Halve the jalapeños and remove the seeds if you want less heat. Now, it’s time to roast. Spread the tomatillos, onion, garlic, and jalapeños on a baking sheet. Drizzle olive oil over the mix and sprinkle with salt. Toss everything well to coat. Roast in the oven for 20 to 25 minutes. You want the tomatillos to get soft and slightly charred. Once the veggies are roasted, let them cool for a few minutes. After cooling, remove the skins from the garlic. Place the roasted vegetables in a blender or food processor. Add chopped cilantro and lime juice. Pulse until you reach your desired consistency. You can make it smooth or leave it chunky for texture. Taste the salsa and adjust the seasoning if you need to. Now, it’s time to adjust the flavors. You might want to add a pinch of salt or more lime juice. Once you have the taste just right, transfer your salsa to a bowl. Let it sit for at least 30 minutes. This wait helps the flavors meld together. Enjoy your fresh and zesty roasted tomatillo salsa! For the full recipe, check out the complete instructions. Choosing the right tomatillos When picking tomatillos, look for firm ones with a bright green color. They should have dry husks that peel back easily. Avoid any that feel soft or have dark spots. Fresh tomatillos give your salsa a bright and tangy flavor. Adjusting spice levels with jalapeños To change the heat, use one or two jalapeños. Remove the seeds for less heat. If you want it spicier, leave some seeds in. Always taste as you go. This way, you make sure it’s just right for you. Best ways to serve salsa Serve this salsa in a bowl with tortilla chips for a great snack. It pairs well with tacos, grilled meats, or even on top of eggs. You can also use it as a topping for quesadillas or burritos. The options are endless! Pairing with dishes or snacks This salsa works well with many dishes. Try it with grilled chicken or fish for a fresh twist. It also adds a nice kick to salads. For a fun appetizer, serve it with cream cheese on crackers. Each bite will burst with flavor! {{image_2}} You can change the flavor of your salsa by adding fruits like mango or pineapple. These fruits give a sweet twist to the tart tomatillos. Just chop them into small pieces and mix them in with the roasted ingredients. The sweetness balances the heat from the jalapeños. You can also try different herbs or spices. For example, swapping cilantro for fresh basil gives a new taste. Adding a pinch of cumin or smoked paprika can deepen the flavor. Grilling tomatillos instead of roasting can add a smoky taste. To grill, place the tomatillos and other veggies on a hot grill for about 10-15 minutes. Turn them until they char slightly. This method keeps the salsa fresh and bright. You can also use fresh tomatillos if you want a raw salsa. Blend them with garlic, onion, and lime for a zesty, vibrant dip. Each method brings a unique flavor to your salsa, so feel free to experiment. Check out the Full Recipe for more details! To keep your roasted tomatillo salsa fresh, use airtight containers. Glass jars work great. They seal well and let you see the salsa inside. You can also use plastic containers, but make sure they close tightly. For refrigeration, simply put your salsa in the fridge right after it cools. It stays fresh and tasty for up to a week. If you want to store it longer, freezing is an option. Just pour it into a freezer-safe container. Leave some space at the top since it may expand when frozen. In the fridge, your salsa lasts about a week. Look for any signs of spoilage. If it smells off or shows mold, it’s time to throw it away. Fresh salsa should smell bright and zesty. The color should stay vibrant too. If it looks dull or changes color, it may not be safe to eat. For the best flavor, enjoy your salsa within the first few days. It tastes even better as the flavors mix and meld. Can I make it ahead of time? Yes, you can make the salsa ahead of time. It tastes even better after sitting in the fridge. Just let it cool and store it in an airtight container. It will stay fresh for about three days. What do I serve it with? This salsa pairs well with many dishes. Serve it with tortilla chips for a crunchy snack. You can also use it as a topping for tacos, grilled chicken, or fish. It adds a bright flavor to any meal. How do I adjust the spice level? To change the spice level, use jalapeños with fewer seeds. If you want it milder, remove all seeds and membranes. For extra heat, add more jalapeños or a pinch of cayenne pepper. Taste as you go to get it just right. What to do if salsa is too runny? If your salsa is too runny, add a bit of chopped onion or more tomatillos. You can also let it sit longer to thicken. Another option is to blend in a small amount of cornmeal. This will help absorb extra liquid. How to add more flavor if needed? If your salsa needs more flavor, try adding a pinch of salt or more lime juice. Fresh cilantro can boost the taste too. You can also add a dash of cumin or smoked paprika for an extra kick. Taste and adjust until it’s perfect. To wrap up, we explored how to make delicious salsa with tomatillos. We covered the key ingredients, steps for preparation, and how to boost flavors. Remember, you can adjust spice levels to suit your taste. Experiment with fruits and herbs to create unique variations. Storage is key for freshness, so check for signs of spoilage. Enjoy your homemade salsa with your favorite dishes. Now, go ahead and make salsa that will impress everyone!
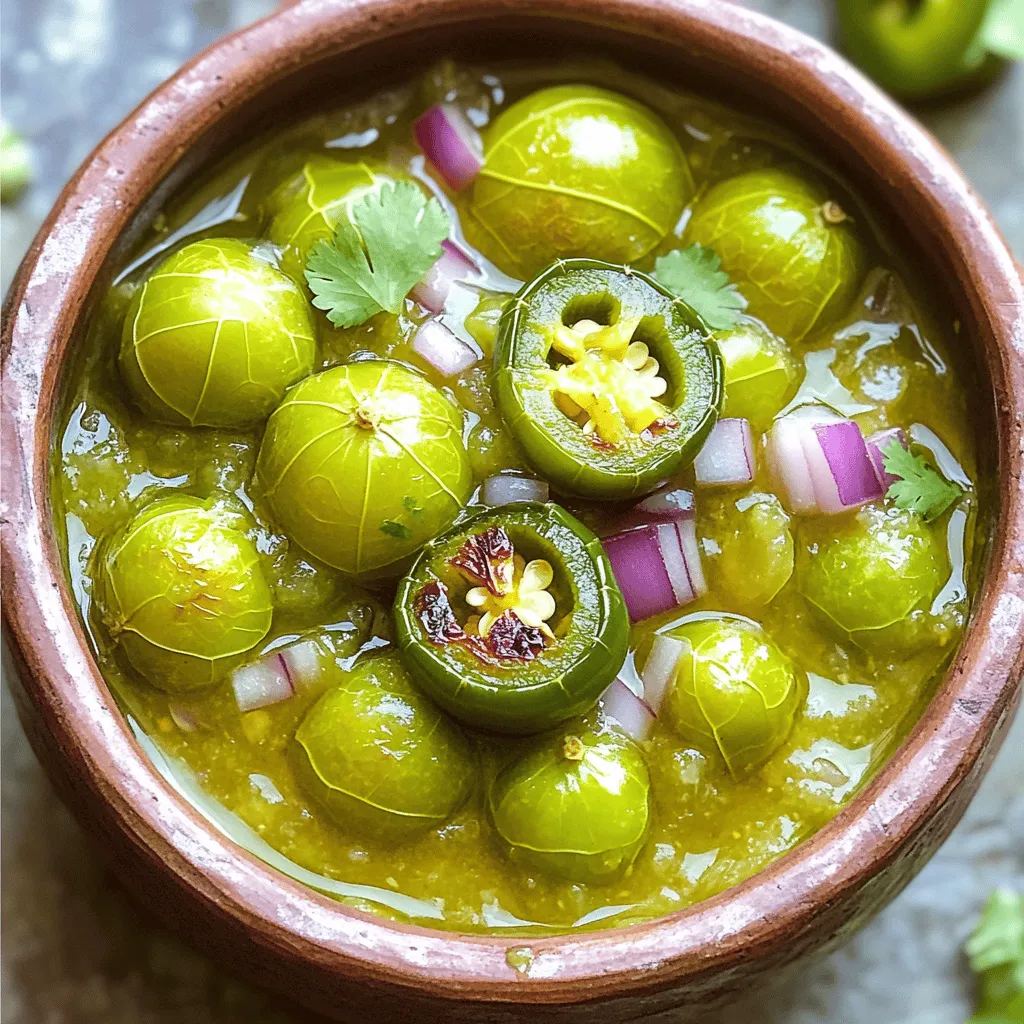
Easy Roasted Tomatillo Salsa Flavorful and Simple Dip
Looking for a tasty dip that’s easy to make? This Easy Roasted Tomatillo Salsa will wow your taste buds! Packed with flavor and simple to