Breakfast

To make Easy Sausage Egg & Cheese Roll-Ups, you need simple and tasty ingredients. Here’s what you need: - 6 small flour tortillas - 6 breakfast sausages, cooked and crumbled - 4 large eggs - 1/4 cup milk - 1 cup shredded cheddar cheese - 1/2 teaspoon garlic powder - 1/2 teaspoon onion powder - Salt and pepper to taste - 2 tablespoons chopped fresh chives (optional) - Salsa for dipping (optional) These ingredients come together to create a yummy meal. The tortillas hold everything in, while the eggs and sausage give it a hearty flavor. The cheese melts beautifully, making each bite creamy. If you enjoy a bit of zest, add salsa for dipping. You can also use fresh chives for a touch of color and taste. Follow the [Full Recipe] for step-by-step instructions to bring this dish to life. Start by whisking together the eggs, milk, garlic powder, onion powder, salt, and pepper in a medium bowl. Whisk until everything blends well. This step is key for a smooth, tasty egg base. Next, heat a non-stick skillet over medium heat. Pour the egg mixture into the skillet. Cook the eggs, stirring occasionally. Keep an eye on them. You want them just set, about 3-4 minutes. Remove the skillet from the heat once they are ready. Now, it's time to add the fun parts! Fold in the crumbled sausage and shredded cheese into the cooked eggs. Stir until the cheese melts and combines with the eggs and sausage. If you're using chives, sprinkle them in for a fresh taste. This mix makes your roll-ups super flavorful. Lay a tortilla flat on a clean surface. Spoon a generous amount of the sausage and egg mixture onto the center of the tortilla. Don’t be shy; you want a good filling! Now, roll the tortilla tightly. As you roll, fold in the sides to keep everything inside. This technique helps secure the filling. Repeat this with each tortilla and the remaining filling. For the next step, preheat the skillet over medium heat again. Place the roll-ups seam side down in the skillet. Cook for about 2-3 minutes until they turn golden and crispy. Flip the roll-ups and cook the other side for another 2-3 minutes. Once done, remove them from the skillet. Let them cool for a minute before slicing in half. Enjoy your Easy Sausage Egg & Cheese Roll-Ups warm, maybe with salsa for dipping. For the complete recipe, check out the Full Recipe section. To get the best eggs for your roll-ups, avoid overcooking. Overcooked eggs become dry and rubbery. Cook them just until they look slightly wet in the skillet. They will continue cooking off the heat. For fluffy eggs, whisk them well before cooking. Add a splash of milk to make them lighter. The milk adds creaminess and helps with texture. To ensure secure roll-ups, start with the right amount of filling. Too much filling makes it hard to roll. Spoon just enough to cover the center of the tortilla. As you roll, tuck in the sides to keep everything inside. This method creates a tidier wrap and prevents spills when you cook. For dips and sides, salsa is a perfect choice. It adds a fresh kick to each bite. You can also serve these roll-ups with guacamole or sour cream. Pair them with fruit for a balanced meal. Fresh fruit adds natural sweetness and brightens your plate. You might even try serving them with a side of hash browns for a classic breakfast vibe. {{image_2}} You can easily change the cheese in this recipe. Try using mozzarella or pepper jack. Each cheese has a different taste. This lets you customize your roll-ups. You can also try different sausage types. Turkey sausage or spicy Italian sausage work great. These swaps will change the flavor, giving you new options. Want to add more nutrition? Try mixing in some vegetables! Bell peppers or spinach are great choices. They add color and flavor. You could also use herbs like basil or parsley. Fresh herbs give a nice touch and aroma to the roll-ups. Feel free to get creative with your fillings! You can cook these roll-ups in different ways. Baking them is a healthier option. Just preheat the oven to 375°F (190°C). Place the roll-ups seam side down on a baking sheet. Bake for about 15-20 minutes until golden brown. If you have an air fryer, use it! Set it to 375°F (190°C) and cook for 8-10 minutes. This will give you a crispy outside while keeping the inside warm. These methods can make your cooking fun and varied! To keep your roll-ups fresh, store them in the fridge. Place them in an airtight container. This helps keep out moisture and odors. You can also wrap them in plastic wrap. This keeps them safe and tasty for later. You can freeze roll-ups before or after cooking. If you freeze them before cooking, wrap each roll-up in foil. This keeps them from sticking together. If you freeze them after cooking, let them cool first. Then, place in a freezer bag. When you’re ready to eat, reheat in the oven or microwave. In the fridge, roll-ups last about 3-4 days. Check for signs of spoilage. Look for changes in color or texture. If they smell off, it's best to toss them. For frozen roll-ups, they can last up to 2 months. Enjoy your Easy Sausage Egg & Cheese Roll-Ups at their best! To make these roll-ups, follow these steps: 1. Whisk the eggs: In a bowl, mix eggs, milk, garlic powder, onion powder, salt, and pepper. 2. Cook the eggs: Heat a skillet and pour in the egg mix. Stir until just set, about 3-4 minutes. 3. Add sausage and cheese: Fold in cooked sausage and shredded cheese until melted. 4. Prepare the tortillas: Lay a tortilla flat, then spoon the egg mixture onto the center. 5. Roll the tortillas: Fold in the sides and roll tightly. 6. Cook the roll-ups: Heat the skillet again and place the roll-ups seam-side down. Cook until golden, 2-3 minutes per side. 7. Serve: Let them cool for a minute, slice in half, and enjoy! This quick process makes it easy to create a tasty meal. For more detailed steps, check the Full Recipe. Yes, you can prepare these roll-ups in advance. Here’s how: - Cook the filling: Make the sausage and egg mixture. Let it cool before storing. - Store in the fridge: Keep the filling in an airtight container for up to 2 days. - Assemble when ready: Roll them up just before cooking. This keeps them fresh and tasty. You can also freeze them for longer storage. Just make sure to wrap them tightly. These roll-ups pair well with many sides. Here are some ideas: - Dips: Serve with salsa or guacamole for extra flavor. - Fruits: Fresh fruit adds a nice touch. Try berries or sliced apples. - Salads: A simple green salad can balance the meal. - Drinks: Pair with juice or coffee for a complete breakfast. These options make your meal more fun and enjoyable! To recap, this blog post guides you through making tasty sausage, egg, and cheese roll-ups. You learned about the ingredients needed, step-by-step instructions, and tips for perfecting the dish. We explored various methods for cooking and storing leftovers. In your kitchen, these roll-ups can bring joy and are easy to modify for your taste. Experiment with different fillings and methods. Enjoy these quick meals for breakfast or snacks. Simple, fun, and delicious are what these roll-ups are all about.
Easy Sausage Egg & Cheese Roll-Ups Quick Recipe Guide
Are you looking for a quick and tasty breakfast option? Look no further! My Easy Sausage Egg & Cheese Roll-Ups are the perfect solution for
To make high protein overnight oats, you need a few key items: - 1 cup rolled oats - 1 cup almond milk (or any milk of your choice) - 1 scoop vanilla protein powder - 1 tablespoon chia seeds - 1 tablespoon natural peanut butter (or almond butter) - 1 tablespoon maple syrup (or honey) - ½ teaspoon cinnamon - 1 small banana, sliced - Fresh berries (strawberries, blueberries, or raspberries) for topping These ingredients work together to create a tasty and filling meal. The oats provide fiber. The protein powder and nut butter add protein and healthy fat. Chia seeds offer extra nutrition and help with texture. High protein ingredients like protein powder and nut butter are great for energy. Protein helps build muscles and keeps you full. Choosing a good protein powder can make a big difference. Look for one with no added sugars. Nut butters like peanut or almond are also tasty. They add creaminess and a rich flavor. Plus, they give you healthy fats. This mix makes your breakfast not only delicious but also nutritious. Toppings can make your oats even better. Fresh berries add color and sweetness. Strawberries, blueberries, and raspberries are all great choices. They add vitamins and antioxidants. You can also sprinkle extra chia seeds on top. This adds a nice crunch and boosts fiber. A drizzle of honey or maple syrup can sweeten it up. Just a little makes a big difference in taste. These toppings turn a simple dish into a gourmet breakfast! {{ingredient_image_1}} To start, gather all your ingredients. You will need: - 1 cup rolled oats - 1 cup almond milk (or any milk of your choice) - 1 scoop vanilla protein powder - 1 tablespoon chia seeds - 1 tablespoon natural peanut butter (or almond butter) - 1 tablespoon maple syrup (or honey) - ½ teaspoon cinnamon - 1 small banana, sliced - Fresh berries (strawberries, blueberries, or raspberries) for topping In a large mixing bowl, add the rolled oats, almond milk, protein powder, chia seeds, peanut butter, maple syrup, and cinnamon. Mix these well. Make sure everything blends together smoothly. Next, divide your oat mixture into two jars or containers. I like using mason jars; they look great! Add the sliced banana to each jar. Press the banana slices gently under the oat mixture. This helps the banana flavor infuse into the oats. Now, cover the jars with lids or plastic wrap. Place them in the fridge overnight. This soaking time is key. It lets the oats soften and absorb the flavors. In the morning, stir the oats well. If they seem too thick, add a splash of almond milk. Top with fresh berries before serving. They add color and more nutrition! Enjoy your delicious and filling breakfast. To make high protein overnight oats, start with a big bowl. Add rolled oats, almond milk, and protein powder. Then, mix in chia seeds, peanut butter, maple syrup, and cinnamon. Stir until everything blends well. This step is key. A good mix helps the oats soak up flavors. For creamy oats, focus on the milk. You can add more almond milk if needed. Stirring before serving also helps. If the oats are too thick, a splash of milk fixes that. Each jar should feel soft and moist, not dry. The right texture makes your meal enjoyable. Make your oats unique by adding your favorite fruits or nuts. You can swap bananas for apples or add nuts for crunch. If you love chocolate, use cocoa powder or chocolate protein powder. Try different sweeteners like honey or agave syrup. This way, each bowl feels special and fits your taste. Pro Tips Customize Your Milk: Experiment with different types of milk like coconut or oat milk for varied flavors and creaminess. Protein Powder Variations: Try different flavors of protein powder, such as chocolate or strawberry, to change the taste profile of your oats. Chia Seed Benefits: Soaking chia seeds overnight enhances their nutritional benefits and improves the texture of your oats. Make It a Meal Prep Star: Prepare multiple jars at once and store them in the fridge for easy, healthy breakfasts throughout the week. {{image_2}} You can use many types of protein powder in your oats. Choose whey protein for a creamy texture and a nice taste. Plant-based options like pea or soy protein work great too. If you prefer a low-carb diet, try collagen powder. Each type adds unique flavors and benefits. Mixing different powders can keep your oats exciting. To boost flavor, add spices or extracts. A splash of vanilla or almond extract can make a big difference. You can also mix in cocoa powder for a chocolate kick. For extra sweetness, try maple syrup or honey. Nuts and seeds, like walnuts or pumpkin seeds, can add crunch and nutrients too. Seasonal fruits make your oats fresh and fun. In spring, add strawberries or cherries for a burst of color. Summer is perfect for blueberries and peaches. Fall calls for apples and pears, while winter is great for citrus fruits. Don’t forget to toss in some nuts! Almonds, pecans, or walnuts add flavor and health benefits. To store your high protein overnight oats, use a glass jar or a plastic container. Make sure to cover it well with a lid or plastic wrap. This keeps the oats fresh and stops them from drying out. It’s best to store them in the fridge. Your oats can last in the fridge for up to five days. If you want to freeze them, do it before adding fresh fruit. The oats can stay frozen for about three months. Just thaw them in the fridge overnight before eating. If you prefer warm oats, just heat them in the microwave. Stir them well and add a splash of almond milk for creaminess. Serve with fresh berries on top for a tasty finish. Enjoy your meal in style by using mason jars! Yes, you can use any milk you like. Almond milk is great, but try oat, soy, or coconut milk too. Each adds a different flavor. Feel free to experiment until you find your favorite! To make your oats gluten-free, choose certified gluten-free rolled oats. Many oats contain gluten due to cross-contamination. Always check the labels to ensure they are safe for your diet. High protein breakfasts help keep you full longer. They can boost energy levels and aid in muscle repair. Eating protein in the morning may also help with weight management by reducing cravings later. Overnight oats last about 3 to 5 days in the fridge. Store them in airtight containers to keep them fresh. Just remember, the longer they sit, the softer they become. Yes, you can skip the protein powder. Use extra nut butter or yogurt for added protein instead. You can also add seeds like hemp or sunflower seeds to enhance nutrition. High protein overnight oats are easy to make and tasty to eat. We covered essential ingredients, preparation, and storage tips. You can personalize your oats with various toppings and flavors. Experiment with types of protein powder and seasonal fruits for new tastes. Remember, these oats are convenient for busy mornings. With the right mix, you can create a quick, healthy meal. Enjoy your creation and feel good knowing you’ve made a smart choice for breakfast.
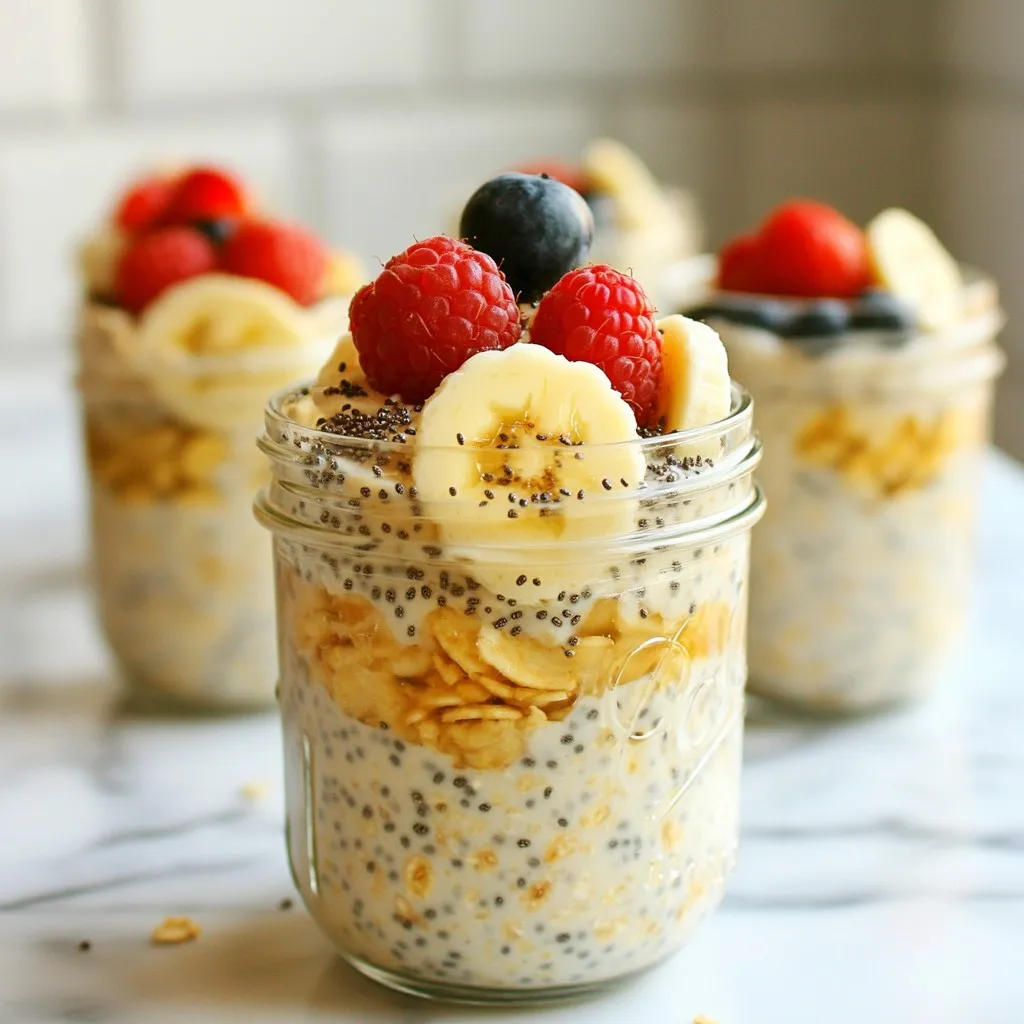
High Protein Overnight Oats Simple and Nutritious Meal
Are you looking for a delicious, high-protein breakfast that’s easy to prep? High Protein Overnight Oats are the answer! Packed with nutrients, these oats can
To make a Hearty Steak Egg and Cheese Bagel Sandwich, gather these items: - Everything bagel - Flank steak - Large egg - Cheddar cheese - Olive oil - Seasoning: Salt and pepper - Optional toppings: Sriracha or hot sauce, fresh chives Each ingredient plays a key role. The everything bagel brings flavor, while the flank steak adds protein. The large egg gives richness, and cheddar cheese melts beautifully to enhance it all. Olive oil helps in cooking and adds a slight flavor. Salt and pepper are essential for seasoning, and the optional toppings let you customize your heat level and freshness. Make sure your ingredients are fresh for the best taste. You can find the full recipe online if you want detailed instructions. To cook the flank steak, start by seasoning it well. Use salt and pepper for a rich flavor. This simple seasoning lets the meat shine. Heat one tablespoon of olive oil in a skillet over medium-high heat. When the oil is hot, add the steak. Cook it for about 4 to 5 minutes on each side. This timing gives you medium-rare steak, which is tender and juicy. If you prefer it more done, add a minute or two. After cooking, let it rest for a few minutes. This helps keep the juices inside. When ready, slice the steak thinly against the grain. For the egg, crack it into the same skillet after removing the steak. Lower the heat to medium. You can choose to fry the egg sunny-side up or over-easy. If you like a runny yolk, sunny-side up is best. For a firmer yolk, flip it over after a minute. Season the egg with a bit of salt and pepper. This adds flavor and brings it all together. To toast the bagel, slice it in half. Place the bagel halves in the toaster or skillet. Toast them until they turn golden brown and slightly crispy. If you’re using a skillet, keep an eye on them to avoid burning. You can also grill or broil the bagel for a different twist. Just ensure they get that nice, crunchy texture. Now it’s time to build your sandwich! Take one toasted half and layer on the sliced steak first. Then, add a slice of cheddar cheese on top of the steak. The warmth from the steak will start to melt the cheese. Finally, place the fried egg on top. If you like heat, drizzle some sriracha or hot sauce over the egg. This adds a nice kick. Top it off with the other half of the bagel. For a fresh touch, sprinkle some chopped chives on top. Enjoy your hearty steak egg and cheese bagel sandwich! For the complete cooking process, refer to the Full Recipe. How to achieve the perfect steak texture To get the best steak, start with flank steak. It is tender when cooked right. Season it with salt and pepper. Heat olive oil in a skillet on medium-high heat. Cook the steak for 4-5 minutes on each side. For medium-rare, a warm pink center is perfect. Let it rest before slicing. This helps keep the juices inside. Frying eggs without sticking Use the same skillet after cooking the steak. Lower the heat to medium. Add a little oil if needed. Crack the egg gently into the pan. Cook until the edges are firm but the yolk is runny. Season with salt and pepper. For no sticking, make sure the pan is hot enough. If it sticks, it may not be hot enough. Pairing with sides (salads, chips) Serve your sandwich with a side. Mixed greens give a fresh touch. You can also pair it with chips for crunch. Try sweet potato fries for a fun twist. These sides balance the sandwich's rich flavors. Creative presentation ideas Wrap the sandwich in parchment paper. It adds a rustic feel. Serve it on a wooden board for a nice look. A small dish of dipping sauce can also be fun. Try adding fresh herbs for color and flair. Making in advance You can prepare the steak and eggs ahead. Cook them, then store them in the fridge. Assemble the bagel just before eating. This keeps the bagel fresh and the egg warm. Best reheating methods To reheat, use a microwave for quick warming. A toaster oven works best for keeping the bagel crispy. Heat the sandwich wrapped in foil to keep it moist. Enjoy it fresh, just like when you first made it. {{image_2}} You can switch the flank steak for chicken or turkey. Both options are lean and cook quickly. Season them like the steak to keep flavors bold. For a vegetarian or vegan twist, use marinated tofu or tempeh. These options can soak up spices well and provide a nice texture. If you want different cheese flavors, try pepper jack for a kick. Swiss cheese adds a nutty touch, while gouda brings creaminess. For those avoiding dairy, look for dairy-free cheese. Many brands have great options that melt nicely and taste good. You can explore different bagel types, such as plain or sesame. Whole grain bagels add a nice nutty flavor and are healthier. If you need gluten-free options, look for gluten-free bagels made with almond or rice flour. Each bagel type gives a unique taste and texture to your sandwich. After enjoying your hearty steak egg and cheese bagel sandwich, store leftovers in a sealed container. Refrigerate within two hours to keep it safe. This sandwich will last for about 2 days in the fridge. If you want to keep it longer, freezing is a great option. Yes, you can freeze this sandwich! However, I recommend freezing the components separately. Wrap the steak, egg, and bagel halves in plastic wrap. Then, place them in a freezer bag. This method helps keep flavors fresh. The individual parts can last for up to 3 months in the freezer. When it’s time to eat, you can reheat in the microwave or toaster oven. For the microwave, use medium power and heat for about 1 minute. Check if it's warm enough. If not, add 20 seconds more. In a toaster oven, set it to 350°F. Heat for about 10 minutes, which will help keep the bagel crispy. Always check that the egg is warm throughout. This keeps your sandwich tasty and enjoyable! The best way to cook flank steak is by pan-searing. This method gives great flavor and texture. It’s quick and easy. Here are the steps: - Season the steak with salt and pepper. - Heat olive oil in a skillet over medium-high heat. - Cook for about 4-5 minutes on each side. - Aim for medium-rare for tenderness. - Let it rest before slicing thinly against the grain. Yes, you can make this sandwich ahead of time. Here are some tips for meal prep: - Cook the steak and eggs in advance. - Store them in the fridge for up to three days. - Toast the bagel fresh when you are ready to eat. - Assemble just before serving to keep it fresh. If you don’t have an everything bagel, don’t worry! Here are some great substitutes: - Use a plain bagel for a simple taste. - Try a sesame bagel for a nutty flavor. - A whole grain bagel adds extra fiber. - Even a toasted English muffin works well. You can make this sandwich spicy with a few easy ideas: - Add sriracha sauce or your favorite hot sauce. - Mix chopped jalapeños into the egg. - Use pepper jack cheese for a spicy kick. - Sprinkle red pepper flakes on top for extra heat. The calorie count may vary based on ingredients. Here is a general breakdown: - Flank steak (4 oz): about 200 calories - Large egg: about 70 calories - Cheddar cheese: about 110 calories - Everything bagel: around 300 calories - Total: approximately 680 calories Keep in mind that toppings may add calories. You can find the full recipe for this delicious dish [here](#). In this post, we explored how to create a delicious steak bagel sandwich. We covered key ingredients, cooking tips, and variations. You learned how to cook steak, fry eggs, and toast bagels perfectly. I also shared helpful tips for meal prep and storing leftovers. With these steps, you can make a tasty meal that suits your taste. Enjoy your cooking and feel free to experiment with flavors!
Hearty Steak Egg and Cheese Bagel Sandwich Delight
Get ready to elevate your breakfast with a Hearty Steak Egg and Cheese Bagel Sandwich Delight! This sandwich combines juicy flank steak, perfectly fried eggs,
- 1 cup pancake mix - 3/4 cup milk - 1 large egg - 1 cup mini breakfast sausage links, cooked - 1 tablespoon maple syrup (plus extra for serving) - 1 teaspoon vanilla extract - Cooking spray or butter (for greasing) - Fresh fruit (such as blueberries or strawberries) for garnish To make mini pancake sausage bites, you need simple ingredients. First, grab pancake mix. This forms the base of your bites. You will also need milk to make the batter smooth. An egg helps bind everything together. The mini breakfast sausage links add protein and flavor. Don’t forget maple syrup for sweetness. A splash of vanilla extract gives a lovely aroma. Use cooking spray or butter to grease your skillet. Finally, fresh fruit makes a great garnish and adds color. - Additional toppings (e.g., whipped cream, chocolate chips) - Different flavored syrups You can customize your mini pancake sausage bites with optional ingredients. Try adding whipped cream for a fun touch. Chocolate chips can make them even sweeter. Different flavored syrups can also add variety. Consider blueberry or strawberry syrup for a fruity twist. These options let you create a breakfast treat just for you. To make the batter, first mix the pancake mix, milk, and egg in a bowl. Add maple syrup and vanilla extract for flavor. Whisk until the batter is smooth. A smooth batter helps create fluffy pancakes. If you have lumps, your pancakes might not cook evenly. Before you cook, preheat your non-stick skillet over medium heat. Grease it lightly with cooking spray or butter. This step helps prevent sticking. For each pancake, pour about 1 tablespoon of batter onto the skillet. Leave some space between them to allow for spreading. Now, place one mini breakfast sausage link in the center of each pancake. Cover the sausage with a little extra batter. This way, the sausage cooks well inside the pancake. Ensure it is fully covered to keep it moist and flavorful. Cook each pancake for about 1-2 minutes. Look for bubbles on the surface; this means it’s time to flip. Use a spatula to turn the pancake gently. Be careful not to break it. Cook the other side for another 1-2 minutes until golden brown. Enjoy your Mini Pancake Sausage Bites warm! For the full recipe, refer to the section above. - Adjusting the batter consistency: Get the right batter thickness for fluffy bites. If it’s too thick, add a touch more milk. If it’s too runny, mix in a bit more pancake mix. The batter should flow easily but hold its shape. - Achieving uniform size: Use a tablespoon for pouring the batter. This helps keep each pancake the same size. Uniformity makes for a better presentation and consistent cooking. - Pairing with various syrups: Maple syrup is a classic choice. Try fruit syrups like blueberry or strawberry for a twist. Honey also works well and adds a nice sweetness. - Creative garnishing ideas: Fresh fruit like blueberries or strawberries brightens the plate. You can also add a sprinkle of powdered sugar for an extra touch. - Keeping pancakes warm: Use a warm oven set to low heat. Place cooked bites on a baking sheet to keep them warm while you finish cooking the rest. - Efficient cooking methods: Cook several pancakes at once if your skillet allows. This saves time and makes breakfast prep easier. Just be sure not to overcrowd the pan. {{image_2}} You can switch up the flavors of your mini pancakes. Try using different pancake mixes. Buttermilk gives a classic taste, while chocolate chip adds a sweet twist. For a warm touch, sprinkle in spices like cinnamon or nutmeg. These spices can elevate the flavor and make each bite special. If you want a lighter option, consider using turkey or chicken sausage instead of pork. This change reduces fat and calories while still providing protein. You can also look for gluten-free pancake mix options. This way, those with dietary restrictions can enjoy the fun. Serving your mini pancake sausage bites can be fun! Try skewering them for a finger food option. This makes them easy to grab and eat. You can also create a breakfast platter. Arrange the bites with fruit and syrup for a colorful breakfast spread that looks great on your table. These variations make the dish even more delightful. For the full recipe, check out the earlier section. To store leftovers, place them in an airtight container. Keep the container in the fridge. These bites stay fresh for about three days. When reheating, use a microwave or skillet. In the microwave, heat for 20-30 seconds. In a skillet, warm them over low heat for 1-2 minutes. This keeps them soft and tasty. For long-term storage, you can freeze the bites. Place them in a single layer on a baking sheet. Freeze for about an hour until solid. After that, transfer them to a freezer-safe bag. They can last up to two months in the freezer. When you want to enjoy them, thaw in the fridge overnight. You can also reheat from frozen in the microwave, but it may take longer. To reheat mini pancake sausage bites, use an oven or a skillet. Preheat the oven to 350°F (175°C). Place the bites on a baking sheet. Heat for about 10 minutes. This keeps them crispy outside and warm inside. If using a skillet, warm over low heat. Flip the bites gently until heated through. Avoid microwaving, as it can make them soggy. Yes, you can make these pancakes ahead of time. Cook the bites and let them cool completely. Place them in an airtight container. Store in the fridge for up to three days. For longer storage, freeze them in a single layer. Once frozen, transfer to a zip-top bag. Reheat them as needed for quick breakfasts. Mini pancake sausage bites pair well with various sides. Fresh fruit like berries adds color and flavor. Yogurt can provide a creamy dip. You can also serve them with extra maple syrup. For a savory touch, consider scrambled eggs or cheese. Mixing sweet and savory makes the meal more exciting. These options will enhance your breakfast experience. This blog post covered how to make delicious mini pancake sausage bites. We discussed essential and optional ingredients, like pancake mix and maple syrup. The step-by-step instructions helped with batter preparation and cooking. Tips on serving and storage make it easy to enjoy later. In the end, these bites are fun and easy to create. With a few tweaks, you can make them your own. Enjoy your cooking adventure, and share these tasty bites with friends and family!
Mini Pancake Sausage Bites Delightful Breakfast Treat
Ready to elevate your breakfast game? Mini Pancake Sausage Bites are a fun and tasty treat for your morning routine. You can whip up these
To make English muffin breakfast pizza, you will need: - 2 whole English muffins, split in half - 4 large eggs - 1/2 cup shredded mozzarella cheese - 1/2 cup cherry tomatoes, halved - 1/4 cup cooked breakfast sausage, crumbled (optional) - 1/4 cup bell pepper, diced - 1/4 teaspoon oregano - 1/4 teaspoon salt - 1/4 teaspoon black pepper - Fresh basil leaves for garnish - Olive oil for drizzling This list includes everything you need for a simple and tasty meal. You can easily swap ingredients to fit your taste. Try using: - Whole wheat muffins for a healthier option - Cheddar or feta cheese for different flavors - Spinach or zucchini instead of bell peppers - Turkey sausage or bacon instead of pork sausage These changes keep the dish fun and fresh while still being easy to make. Using fresh herbs can add more flavor. Fresh basil gives a nice touch. Dried herbs are also great for convenience. Oregano works well dried. If you use dried herbs, use less than fresh. Start with half the amount. This helps prevent overpowering the dish. Start by preheating your oven to 375°F (190°C). Grab a baking sheet and line it with parchment paper. This step helps with easy cleanup. Now, split your English muffins in half. Place each muffin half cut side up on the baking sheet. Drizzle a little olive oil on top. This adds flavor and helps them get crispy. Next, take a skillet and heat it on medium. Crack the eggs into the skillet one at a time. Cook them until the whites are set and the yolks are still a bit runny. This usually takes about 3–4 minutes. You can cook them longer if you like firmer yolks. The runny yolk adds a nice touch to the pizza. While the eggs cook, sprinkle shredded mozzarella cheese evenly over each muffin half. Then, add the cherry tomato halves, diced bell peppers, and crumbled sausage if you’re using it. Carefully place one cooked egg on each muffin half. Season everything with oregano, salt, and black pepper. Finally, put the baking sheet in the oven. Bake for 10–12 minutes until the cheese melts and the edges of the muffins turn golden. Once done, let them cool for a minute. You can garnish with fresh basil leaves for a lovely finish. For the full recipe, check out the details above. To get the best eggs, crack them gently into a hot skillet. Cook them over medium heat for about 3 to 4 minutes. The whites should be set, but the yolks need to stay a bit runny. If you want firmer yolks, just cook them a little longer. This step is key for a tasty breakfast pizza. Choosing the right toppings can make your breakfast pizza shine. Use fresh cherry tomatoes for sweetness. Diced bell peppers add crunch and color. You can sprinkle in crumbled breakfast sausage for extra flavor. Don't forget the mozzarella cheese; it melts beautifully and ties everything together. For herbs, fresh basil adds a bright finish. You can even try different cheeses for a twist! Serve your English muffin breakfast pizza on a rustic wooden board for a fun look. Drizzle a bit of olive oil over the top for added richness. A sprinkle of extra basil gives it a fresh touch. Enjoy it with a side of fruit or a simple salad to balance the meal. This way, you create a wholesome breakfast experience that’s both filling and delicious. {{image_2}} You can make this breakfast pizza without meat. Swap the sausage for more veggies. Try adding spinach, mushrooms, or zucchini. You can also toss in some artichoke hearts for a unique taste. This way, you keep it hearty and delicious. If you need a gluten-free option, use gluten-free English muffins. They come in many brands and flavors. You can also try using polenta rounds or cauliflower crusts. Both options work well and still taste great when topped with eggs and cheese. For a little heat, add some sliced jalapeños or crushed red pepper flakes. You can also mix in spicy sausage instead of regular sausage. A drizzle of hot sauce before serving adds a nice kick. Adjust spice levels to your taste, so it’s just right for you. For more details, check the Full Recipe. If you have any leftover English muffin breakfast pizza, store it in an airtight container. Keep it in the fridge for up to three days. Make sure it cools down before putting it away. This helps prevent sogginess. To reheat, place the pizza on a baking sheet in the oven. Set it to 350°F (175°C) and heat for about 10 minutes. This warms it through and keeps the crust crispy. You can also use a microwave, but it may make the muffin soft. You can freeze leftover breakfast pizza for later. Wrap each piece tightly in plastic wrap, then place them in a freezer bag. This way, they stay fresh for up to a month. To enjoy, thaw in the fridge overnight and reheat as mentioned above. Yes, you can use other cheeses! Cheddar, gouda, or even feta can work well. Each cheese adds its own flavor and texture. Experiment to find your favorite mix. If you like a bit of spice, try pepper jack cheese. It melts nicely and adds a kick. To make this recipe ahead, prepare the muffins and toppings first. Split and toast the muffins lightly. Cook the veggies and sausage, then store them in the fridge. When ready to bake, just add the eggs and cheese. You can bake them fresh for breakfast or brunch. You can add many fun toppings! Try spinach, mushrooms, or even avocado. You can also use different meats, like ham or bacon. For a twist, top with salsa or hot sauce. Each topping brings new flavors to your breakfast pizza. This blog post shared key ingredients for tasty muffins, pizza, and eggs. We explored fresh and dried herbs, plus great ingredient swaps. Step-by-step, you learned how to prepare, cook, and assemble your meals. Tips included perfecting your egg cook and serving options. We also covered variations for all diets and gave storage suggestions. Remember, cooking is fun! Use these ideas to make your meals even better. Enjoy trying different flavors and combinations.
English Muffin Breakfast Pizza Easy and Tasty Meal
Looking for a quick and delicious breakfast idea? Try my English Muffin Breakfast Pizza! It’s easy to make and packed with flavor. You can customize
- 6 large eggs - 1 cup milk - 1 tablespoon olive oil - 1 medium onion, finely chopped - 1 red bell pepper, finely chopped - 1 cup cooked sausage, crumbled - 1 cup shredded cheddar cheese - 6 large flour tortillas - Salt and pepper to taste - Fresh parsley for garnish (optional) To make these roll-ups, you need simple and fresh ingredients. Start with large eggs and milk. The eggs give the rolls a fluffy texture. Milk adds creaminess. Next, grab olive oil, onion, and bell pepper. The oil helps cook the veggies. Onions and bell peppers add flavor and color. For protein, use cooked sausage. Crumbled breakfast sausage works well, but turkey sausage is a great choice too. Cheese is next; shredded cheddar melts beautifully. Finally, you need large flour tortillas to wrap everything up. Don’t forget salt and pepper for taste. Fresh parsley is optional, but it makes your dish look nice. Once you gather these ingredients, you're ready to create Easy Sausage Egg & Cheese Roll-Ups. For the full recipe, check out the instructions in the next section! 1. Whisk together eggs and milk: Start by cracking six large eggs into a mixing bowl. Add one cup of milk and a pinch of salt and pepper. Whisk until well combined. This mixture will make the eggs fluffy and creamy. 2. Heat olive oil and sauté vegetables: Next, take a large skillet and pour in one tablespoon of olive oil. Heat it over medium heat. Once hot, add one finely chopped medium onion and one chopped red bell pepper. Sauté these for about 3-4 minutes. You want them soft but not mushy. 1. Cook sausage and combine with egg mixture: Now, stir in one cup of cooked sausage that you’ve crumbled. Cook for an additional 2-3 minutes. This ensures the sausage is heated through. Then, pour your egg mixture into the skillet. Stir gently with a spatula. Cook until the eggs are just set, about 4-5 minutes. 2. Add cheese and prepare the tortillas: Once the eggs are set, remove the skillet from the heat. Stir in one cup of shredded cheddar cheese. Let it melt into the mixture. While this cools a bit, lay out your six large flour tortillas on a clean surface. 1. Describe rolling process and baking options: Spoon an even amount of the sausage and egg mixture onto the center of each tortilla. Roll the tortillas tightly around the filling. Make sure to fold in the sides as you roll. This keeps the filling secure. Optionally, place the roll-ups seam side down on a baking sheet. If you like, you can bake them in a preheated oven at 350°F (175°C) for 5-7 minutes. This will crisp up the outside. For a full recipe, refer to the [Full Recipe]. - Ensuring the right egg consistency: For creamy eggs, cook gently. Stir the eggs often while they cook. Stop when they are just set, but still soft. Overcooking makes them dry. Aim for a velvety texture. - Best practices for sautéing vegetables: Use medium heat for even cooking. Add onions first. Cook until they become clear. Then, add bell peppers. Sauté until tender. This brings out their natural sweetness. - Presentation tips for serving roll-ups: Cut each roll-up in half at an angle. This looks nice on a platter. Place them seam side down. Garnish with fresh parsley for color. - Pairing ideas: Serve with salsa for a fresh taste. Hot sauce adds a spicy kick. Both make your roll-ups even better. Enjoy them warm for the best flavor. For the full recipe, check the [Full Recipe]. {{image_2}} You can switch the sausage for turkey sausage. It has less fat but still packs flavor. If you want a vegetarian option, try using mushrooms or black beans. These options keep the dish hearty and tasty without meat. Cheddar cheese is great, but you can try other kinds too. Pepper jack gives a spicy kick. Monterey jack melts well and adds creaminess. For a strong flavor, use feta or goat cheese. These choices make your roll-ups unique and fun. Want to jazz things up? Add some veggies like spinach or zucchini. They boost nutrition and color. You can also mix in spices, like cumin or smoked paprika, for extra taste. These small changes can turn a simple dish into something special. For the full recipe, check out the details above! To keep your sausage egg and cheese roll-ups fresh, store them in the fridge. Place them in an airtight container. They will stay good for about 3 to 4 days. When you want to eat them, just take one out and warm it up in the microwave. You can also use the oven to reheat them for a crispier texture. Just wrap them in foil and bake at 350°F until warm. If you want to save some for later, freezing is a great option. First, let the roll-ups cool completely. Then, wrap each one in plastic wrap. Next, place them in a freezer bag. They can last for up to 2 months in the freezer. When you’re ready to eat, thaw them in the fridge overnight. To reheat, use the microwave or oven. For the best results, bake them at 350°F until heated through. This keeps them tasty and fresh! Check out the Full Recipe for more tips on making these delicious roll-ups. You can make simple changes to the recipe. Here are some ideas: - Use whole grain tortillas: They add fiber and nutrients. - Choose leaner sausage: Turkey sausage has less fat than pork sausage. - Add more veggies: Spinach, mushrooms, or zucchini can boost nutrients. - Reduce cheese: Use less cheese or a lower-fat option. - Use egg whites: Substitute some whole eggs with egg whites to cut cholesterol. These swaps can help make your roll-ups a healthier choice without losing flavor. Yes, you can! Meal prepping makes cooking easier. Here’s how: - Make the filling ahead: Cook the sausage, veggies, and eggs. Let it cool, then store it in the fridge for up to 3 days. - Assemble when ready: Just roll up the filling in tortillas when you want to eat. - Freeze for later: You can freeze the filling in airtight containers. Just thaw overnight in the fridge before using. Prepping in advance saves time and effort on busy mornings. Pair your roll-ups with these tasty sides: - Fresh fruit: Sliced strawberries, melons, or blueberries add sweetness. - Yogurt: A side of plain or flavored yogurt gives a creamy contrast. - Salad: A light green salad with a citrus dressing adds freshness. - Salsa or hot sauce: These add a kick and enhance the flavor. These side dishes complement your roll-ups and make for a well-rounded meal. For the full recipe, check out the section above. These Easy Sausage Egg & Cheese Roll-Ups are simple and tasty. You learned about the ingredients, preparation, and cooking steps needed to make them. I shared tips, tricks, and variations to suit your taste. Remember, you can personalize these roll-ups with different meats and veggies. Enjoy these roll-ups for breakfast or any meal. They are easy to store, freeze, and reheat too. Try them today and have fun in the kitchen!
Easy Sausage Egg & Cheese Roll-Ups Simple Recipe
Craving a quick and tasty meal? You’re in the right place! My Easy Sausage Egg & Cheese Roll-Ups are simple, fun, and perfect for breakfast
- 4 slices of sourdough bread - 2 tablespoons butter, softened - 4 slices of cheddar cheese - 2 slices of cooked turkey bacon (or vegetarian bacon) - 2 eggs - ½ avocado, sliced - Salt and pepper to taste - Fresh chives, chopped (for garnish) I choose sourdough bread for its tangy flavor and crisp texture. It holds up well when grilled, creating a nice crunch. Cheddar cheese adds a rich, creamy taste that melts beautifully. Turkey bacon gives a savory touch without being too heavy. For a vegetarian option, use plant-based bacon. Eggs provide protein and a silky texture, while avocado brings creaminess and healthy fats. Fresh chives add color and a mild onion flavor, making the dish pop. For bread, I recommend a good artisan sourdough. Look for one with a thick crust and airy inside. For cheese, go for sharp cheddar, as it has a stronger flavor. When it comes to bacon, choose brands with natural ingredients. If you pick turkey bacon, look for ones that are lower in sodium. Fresh chives should be vibrant and crisp. This attention to quality makes your breakfast grilled cheese taste even better. To make the ultimate breakfast grilled cheese, follow these easy steps: 1. Fry the Eggs: Start by frying two eggs sunny-side up in a non-stick skillet over medium heat. Use salt and pepper to season. Cook until the whites are set but the yolks are still runny. Remove the eggs and set them aside. 2. Cook the Bacon: In the same skillet, add two slices of turkey bacon. Fry them until crispy, about 2-3 minutes on each side. Remove them and set aside. 3. Butter the Bread: Take four slices of sourdough bread. Spread softened butter on one side of each slice. 4. Heat the Skillet: Place a large skillet over medium-low heat. Put two slices of the buttered bread, buttered-side down, into the skillet. 5. Layer the Ingredients: On the bread in the skillet, add two slices of cheddar cheese. Then, place the crispy turkey bacon on top. Next, add the fried eggs and sliced avocado. Finish with two more slices of cheddar cheese. 6. Top with Bread: Carefully place the other two slices of sourdough bread on top, buttered-side up. 7. Cook the Sandwiches: Cook for 3-4 minutes. The bottom should turn golden brown, and the cheese should start to melt. Use a spatula to flip the sandwiches and cook the other side for another 3-4 minutes until golden and the cheese is fully melted. 8. Serve and Enjoy: Remove the sandwiches from the skillet and let them cool for a minute. Cut them in half and sprinkle with chopped chives for a fresh touch. - Frying Eggs: Use medium heat. This helps to set the whites without overcooking the yolks. Keep an eye on them to achieve the perfect runny yolk. - Toasting Bread: Medium-low heat works best for a perfect grilled cheese. It allows the bread to toast evenly while the cheese melts. - Eggs: Look for whites that are fully cooked but still tender. The yolk should be bright and runny. - Bread: A golden brown color on both sides means your grilled cheese is ready. You should see melted cheese oozing out when you cut into it. These steps ensure you create a delicious and satisfying meal. You can find the full recipe for the Ultimate Breakfast Grilled Cheese in the recipe section above. Enjoy your cooking! To make your breakfast grilled cheese truly great, follow these tips: - Use fresh ingredients: Fresh sourdough and cheese melt better. - Butter both sides: Spread butter on the outside of the bread for a golden crust. - Low heat is key: Cooking on medium-low heat melts cheese without burning the bread. - Cover the skillet: A lid traps heat and helps melt the cheese faster. - Layer wisely: Place cheese on both sides of the filling for extra gooeyness. Having the right tools makes cooking easier and more fun. Here are some must-haves: - Non-stick skillet: This helps prevent sticking and ensures even cooking. - Spatula: Use a sturdy spatula for flipping without damaging the sandwich. - Sharp knife: A sharp knife makes cutting the sandwich easy and neat. - Measuring spoons: These help with butter and seasoning for perfect flavor. Avoid these common pitfalls for the best results: - Too high heat: This can burn the bread before the cheese melts. - Skipping seasoning: A pinch of salt and pepper makes a big difference. - Overstuffing: Too many fillings make it hard to cook evenly and can lead to spills. - Not letting it rest: Allow the grilled cheese to cool for a minute before cutting. This helps the cheese set. For a detailed recipe, refer to the Full Recipe section above. {{image_2}} You can really have fun with your breakfast grilled cheese. Instead of sourdough, try using whole wheat or rye bread. This can change the flavor and texture. You can also swap the cheese. Try using gouda or pepper jack for a kick. Want something sweet? Add a layer of apple slices for a fruity twist. If you follow a special diet, there are easy swaps. For gluten-free options, choose gluten-free bread. This way, you can still enjoy the grilled cheese. If you want to go dairy-free, use vegan cheese. There are many brands that melt well. For a meat-free option, use tofu or tempeh instead of bacon. Experimenting with herbs and spices can change your grilled cheese game. Add a sprinkle of garlic powder or paprika for extra flavor. Fresh herbs like basil or parsley can also add freshness. Mix cheeses for a creamy bite. Combine mozzarella with cheddar for a rich taste. Don't be afraid to try new things. Each new combo can lead to a new favorite dish! For the full recipe, check out the Ultimate Breakfast Grilled Cheese. After enjoying your Ultimate Breakfast Grilled Cheese, you may have leftovers. To keep them fresh, let the sandwiches cool to room temperature. Once cooled, wrap them in plastic wrap or place them in an airtight container. This keeps moisture in and prevents them from drying out. Store them in the fridge for up to three days for the best taste. To reheat your breakfast grilled cheese, you have a few options. The best method is to use a skillet. Heat a non-stick skillet over low heat. Place the sandwich in the skillet and cover it with a lid. This helps the cheese melt without burning the bread. Heat for about 5-7 minutes, flipping halfway through. You can also use a toaster oven set to 350°F (175°C) for about 10 minutes. This method keeps the sandwich crispy and warm. If you want to save your breakfast grilled cheese for later, freezing is a great option. Wrap each sandwich tightly in plastic wrap, then place them in a freezer-safe bag. This prevents freezer burn. You can freeze them for up to one month. When you’re ready to eat, thaw in the fridge overnight. Then, follow the reheating steps to enjoy them as if they were fresh. You can easily swap out the turkey bacon for vegetarian bacon. Use any plant-based option you like. You can also add extra veggies, like spinach or mushrooms. Grilled peppers or zucchini add great flavor. Just make sure to keep the cheese for that melty goodness. This grilled cheese pairs well with many sides. You can serve it with fresh fruit, like berries or sliced apples. A simple side salad works great too. Many enjoy a hot cup of tomato soup or marinara sauce for dipping. The mix of flavors is a hit! Yes, you can prep some ingredients ahead of time. You can cook the eggs and bacon the night before. Just store them in the fridge. You can also slice the avocado and cheese early. When you're ready, assemble and cook for a fresh meal! Check out the Full Recipe for more details. In this blog post, we explored the ultimate breakfast grilled cheese, from choosing top ingredients to cooking tips. I shared the importance of brands and quality while highlighting techniques for the right texture. You learned creative twists and common mistakes to avoid. This tasty dish is versatile, allowing for dietary swaps and flavor experiments. Now you have the tools to create a perfect breakfast grilled cheese that satisfies any craving. Enjoy making your own delicious versions at home!
Ultimate Breakfast Grilled Cheese Savory and Easy Meal
Are you ready to elevate your breakfast game? The Ultimate Breakfast Grilled Cheese is not just a meal; it’s a savory delight that sets your
To make a loaded breakfast hash, you'll need: - 4 medium potatoes, diced - 1 bell pepper (red or green), chopped - 1 small onion, diced - 1 cup cherry tomatoes, halved - 1 cup spinach, roughly chopped - 4 large eggs These main ingredients form the base of your dish. The potatoes give a hearty feel. Bell pepper and onion add sweetness and crunch. Cherry tomatoes bring a burst of flavor, while spinach adds color and nutrition. The eggs serve as the star, adding richness. For flavor, use: - 1 teaspoon paprika - 1 teaspoon garlic powder - Salt and pepper to taste Seasonings are key in this dish. Paprika adds warmth, while garlic powder gives depth. Adjust salt and pepper to your liking. These simple spices elevate the whole meal. To finish, gather: - 2 tablespoons olive oil - 1/2 cup shredded cheese (cheddar or a blend) - Fresh herbs (parsley or chives) for garnish Toppings make your hash shine. Olive oil helps cook the potatoes perfectly. Cheese melts into gooey goodness. Fresh herbs brighten the dish and add a pop of color. You can find the Full Recipe to guide you further in making this delightful meal. First, heat 1 tablespoon of olive oil in a large skillet over medium heat. Next, add the diced potatoes. Season them with salt, pepper, paprika, and garlic powder. Stir to coat the potatoes evenly. Cook for about 10–15 minutes. Stir occasionally until the potatoes turn golden brown and become tender. Now, stir in the chopped bell pepper and onion. Keep cooking for another 5 minutes until the vegetables soften. After that, add the halved cherry tomatoes and spinach. Cook for an extra 2–3 minutes until the spinach wilts. Create 4 small wells in the hash. Crack an egg into each well. Cover the skillet with a lid. Let it cook for about 5 minutes. The egg whites should be set, but the yolks remain runny. If you want firmer yolks, cook them longer. Sprinkle shredded cheese over the entire hash. Cover the skillet for an additional minute. This will help the cheese melt nicely. Remove the skillet from the heat. Sprinkle fresh herbs over the top for added flavor. You can also add more salt and pepper if you like. Enjoy your Loaded Breakfast Hash! For the complete recipe, refer to the [Full Recipe]. For the best breakfast hash, choose starchy potatoes. I recommend using russet or Yukon Gold potatoes. They have a nice texture and crisp up well. Waxy potatoes like red potatoes can get mushy. Diced potatoes should be about the same size for even cooking. Aim for ½-inch cubes to ensure quick and uniform cooking. To cook eggs just right, you need to control the heat. For runny yolks, cover the skillet and cook for about 5 minutes. Check the whites; they should be set. If you want firmer yolks, let them cook a bit longer. Keep an eye on them to prevent overcooking. You can also crack the eggs into a bowl first, then slide them into the wells. Spice up your hash with extra flavors. Try adding a pinch of cayenne pepper for heat. Fresh herbs like thyme or rosemary elevate the taste. You can also toss in cooked bacon or sausage for a meatier option. A splash of hot sauce can really wake it up too. Don't shy away from experimenting to find your favorite combo! {{image_2}} You can make a tasty vegetarian version. Simply skip the meat. Instead, add more veggies. Try mushrooms, zucchini, or even sweet potatoes. These will boost flavor and texture. You can still enjoy all the spices. Just follow the same cooking steps from the Full Recipe. This version is healthy and filling. If you need a gluten-free meal, it's easy. Just check your seasonings. Some may have gluten. Use fresh herbs and spices instead. You can stick to the core ingredients like potatoes, eggs, and veggies. This way, you keep the dish safe and delicious. Explore flavors from around the world! Add spices like curry powder for an Indian twist. Or try smoked paprika for a Spanish flair. You can also use feta cheese for a Greek touch. Each option brings a new taste. This makes your breakfast exciting and unique! To keep your loaded breakfast hash fresh, store it in an airtight container. Let it cool to room temperature first. Cover the container tightly to prevent air from getting in. This helps keep the flavors strong. You can store it in the fridge for up to three days. When reheating, you want to keep the texture right. The best way is to use a skillet. Heat it on low and add a splash of water. Cover the skillet with a lid. This adds steam, keeping the hash moist. Stir occasionally until warm. You can also use a microwave. Place the hash in a bowl, cover it, and heat for about one to two minutes. Stir halfway to help it heat evenly. If you want to save some for later, freezing works great. First, let the hash cool fully. Then, place it in a freezer-safe container or bag. Remove as much air as you can. Label the bag with the date. You can freeze it for up to three months. To thaw, just move it to the fridge overnight. Reheat as mentioned above for the best taste. Yes, you can make Loaded Breakfast Hash in advance. To prep for the week, cook the hash without the eggs. Store it in an airtight container in the fridge. When ready to eat, add fresh eggs and cook. This method saves time on busy mornings. You can also reheat the hash in a skillet or microwave. Just add a splash of water to keep it moist. If you want a vegan or egg-free option, use silken tofu. Mash it and add it to the hash. You can also use chickpea flour. Mix it with water to make a batter and pour it in the wells. Another tasty choice is to use scrambled firm tofu, seasoned with turmeric and spices. This still gives you a protein boost while keeping it plant-based. To add heat, use jalapeños or diced chili peppers. Mix them in with the other veggies. For a different kick, sprinkle in some red pepper flakes. You can also use hot sauce for an easy heat boost. Try adding a spicy cheese, like pepper jack, for more flavor. Adjust the spice level to suit your taste. Absolutely! Loaded Breakfast Hash is not just for breakfast. You can serve it for dinner or brunch. Add some cooked sausage or bacon to make it heartier. Pair it with a fresh salad for balance. This dish works at any meal time, making it versatile and fun. Enjoy it any time you crave a warm, filling meal. This blog post covered how to make a delicious Loaded Breakfast Hash. We discussed the main ingredients like potatoes, bell peppers, and eggs. I shared step-by-step instructions, tips for perfecting your dish, and how to store leftovers. Remember, you can customize this dish with different flavors and make it fit your diet. I hope you enjoy creating your own version. Happy cooking!
Loaded Breakfast Hash Flavorful Morning Fuel
Start your day with a burst of flavor and energy! This Loaded Breakfast Hash is a delicious mix of diced potatoes, colorful veggies, and sunny
To make fluffy Japanese souffle pancakes, you need a few simple ingredients: - 2 large eggs, separated - 2 tablespoons granulated sugar - 1 tablespoon milk - 1/4 teaspoon vanilla extract - 1/4 teaspoon baking powder - 1/4 cup all-purpose flour - A pinch of salt - Butter, for greasing the pan - Maple syrup and fresh berries, for serving These ingredients create a light and airy pancake that melts in your mouth. The egg whites provide the fluffiness, while the yolks add richness. Having the right tools makes cooking easier and more fun. Here’s what you need: - Mixing bowls - A whisk - A spatula - A non-stick skillet - A ring mold for pancakes - A lid for the skillet Using a ring mold helps the pancakes keep their shape. A non-stick skillet makes flipping easy. You can add fun flavors to your pancakes. Here are a few ideas: - Zest from lemon or orange - Chocolate chips - Matcha powder - Fresh fruit, like blueberries or bananas These add-ins bring new tastes to the dish. Feel free to experiment and make your pancakes unique. For the complete recipe, check the Full Recipe section. To start, gather your ingredients. You'll need egg yolks, sugar, milk, vanilla, baking powder, flour, and salt. In a bowl, whisk the egg yolks with sugar, milk, and vanilla. Make sure it is smooth and creamy. Next, sift the flour and baking powder into the bowl. Fold it gently into the yolk mixture. This step is key for fluffiness. Set this mixture aside. In another bowl, whisk the egg whites and salt. You'll want to beat them until soft peaks form. Slowly add sugar while whisking. Continue until you get stiff peaks. Gently fold the whipped egg whites into the yolk mixture. Do this in three parts. Be careful not to lose the airiness of the mixture. It should feel light and fluffy. Now, it’s time to cook! Preheat a non-stick skillet over low heat. Grease it lightly with butter. Use a ring mold to shape your pancakes. Pour about 1/4 cup of the batter into the mold. Cover the skillet with a lid. Cook for about 4-5 minutes. You want the bottom to turn golden brown. After that, carefully flip the pancake. You might need to loosen it from the mold gently. Cover again and cook for another 4-5 minutes. This will ensure the pancake cooks through. Repeat this process for the rest of the batter. Add more butter to the skillet as needed. Once all the pancakes are cooked, stack 2-3 on a plate. Drizzle them with maple syrup. Top with fresh berries for a nice touch. You can also add whipped cream if you like. Enjoy your fluffy Japanese souffle pancake delight in every bite! For the full recipe, check the section above. To make your pancakes super fluffy, use fresh eggs. The fresher the eggs, the better the rise. When whisking the egg whites, ensure your bowl is clean and dry. This helps form nice peaks. Fold the whipped egg whites into the yolk mixture gently. This keeps the bubbles intact. If you mix too hard, you lose fluffiness. Use a ring mold to shape the pancakes. This gives them height and helps with cooking. One common mistake is not sifting the flour. Sifting helps remove lumps and adds air. Another mistake is cooking on too high heat. Low heat cooks them evenly and keeps them fluffy. Avoid opening the lid too soon. This can deflate the pancakes. Lastly, be careful when flipping. If they stick, gently loosen them with a spatula before flipping. To achieve golden edges, ensure your skillet is hot but not too hot. Grease the skillet lightly with butter. This helps the pancakes brown nicely. Use a lid to trap steam while cooking. This keeps the pancakes moist and fluffy. If you want extra color, add a tiny bit of sugar to the batter. This will help caramelize the edges as they cook. For more tips and the full recipe, refer to the Fluffy Japanese Souffle Pancake. {{image_2}} You can add fruits to your souffle pancakes for extra flavor. Berries work well. Blueberries, strawberries, or raspberries give a sweet burst. Simply fold in some fresh fruit before cooking. You can also use fruit purees. Try mixing in banana or peach puree into the batter. This adds a lovely taste and color. If you love savory foods, try making savory souffle pancakes. Add cheese, herbs, or even cooked bacon. Grated cheese, like cheddar or feta, melts perfectly. Fresh herbs, like chives or parsley, add a nice touch. Mix these into the batter for a tasty, unique meal. These can serve as a fun brunch option. Want a vegan option? You can replace eggs with flaxseed meal. Mix 1 tablespoon of flaxseed meal with 2.5 tablespoons of water. Let it sit for a few minutes to thicken. Use almond milk instead of regular milk. Sift in flour and baking powder just like in the full recipe. This way, everyone can enjoy these fluffy pancakes. To keep your fluffy Japanese souffle pancakes fresh, place them in an airtight container. Layer parchment paper between each pancake to prevent sticking. Store them in the fridge for up to two days. If you want to keep them longer, freezing is a great option. When you are ready to enjoy your pancakes again, reheating them properly is key. You can use a skillet over low heat. This method warms them through and keeps them fluffy. Cover the skillet with a lid for even heating. You can also microwave them for about 15-20 seconds. Just be careful not to overheat, as they can become tough. To freeze your pancakes, let them cool completely first. Then, stack them with parchment paper in between and wrap them tightly in plastic wrap. Place the wrapped stack in a freezer bag. They will keep well for up to two months. When you want to enjoy them, simply thaw in the fridge overnight before reheating. Enjoy your fluffy pancakes anytime! For the full recipe, check out the details above. Japanese souffle pancakes are unique because they are super fluffy and airy. They use whipped egg whites to create a light texture. This method makes them rise high and stay soft. You will find they are thicker than regular pancakes. They also have a delicate, cloud-like feel. Topping them with syrup or berries enhances their taste. Yes, you can make souffle pancakes without eggs. You can use egg substitutes like flaxseed meal or aquafaba. Flaxseed meal is made by mixing ground flaxseeds with water. Aquafaba is the liquid from canned chickpeas. These substitutes can help create a fluffy texture. However, the taste may change slightly. You can find the best Japanese souffle pancakes in specialty cafes or Japanese restaurants. Big cities often have places that focus on these treats. You can also look online for recipes to make them at home. I suggest trying my Full Recipe for a delicious experience! Creating fluffy Japanese souffle pancakes is easy once you know the steps. I shared key ingredients, tools, and optional flavors. You learned how to prepare, cook, and serve these pancakes for maximum delight. I also covered tips to avoid mistakes and techniques for perfect edges. With variations for everyone and storage tips, you can enjoy these pancakes anytime. Experiment confidently and enjoy the joy of making these light, fluffy treats. Happy cooking!
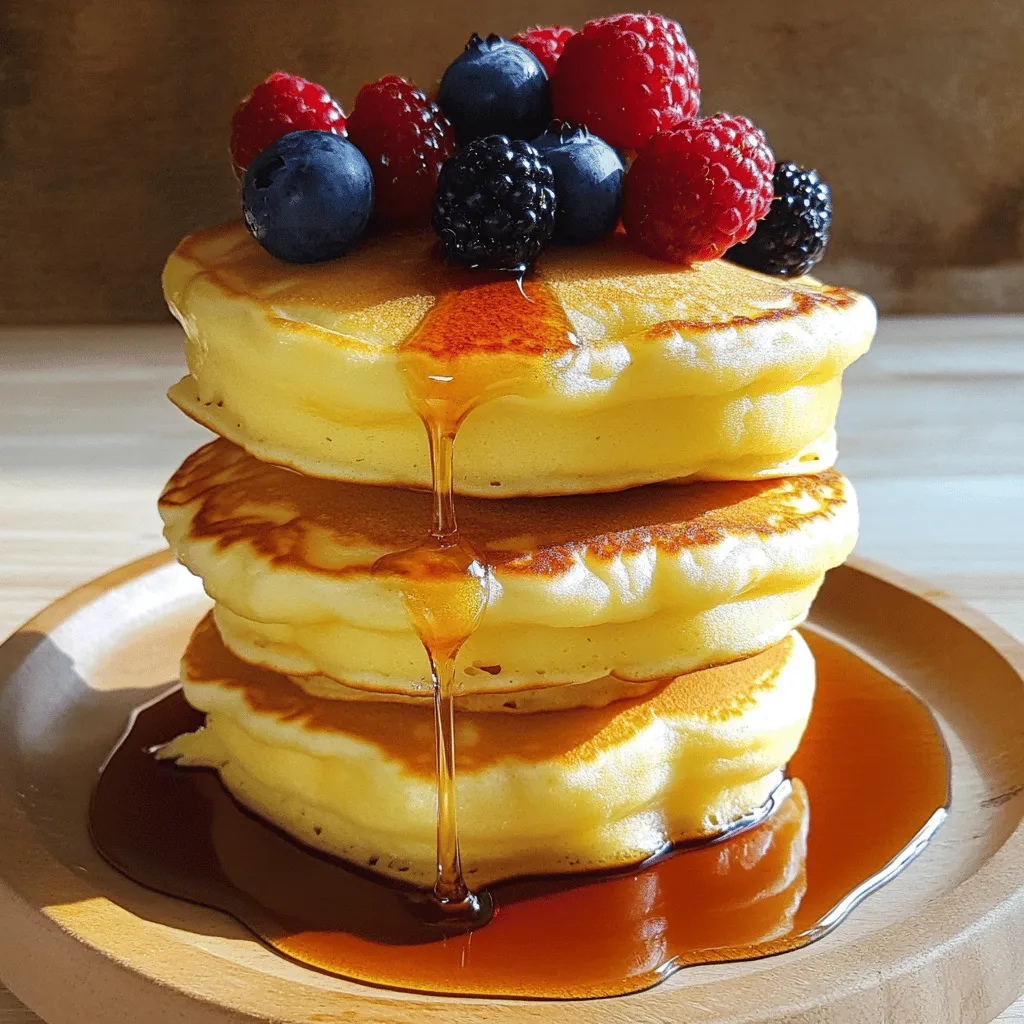
Fluffy Japanese Souffle Pancake Delight in Every Bite
If you crave a light, airy treat that melts in your mouth, you’re in the right place! Fluffy Japanese Souffle Pancakes are an amazing twist
- 6 corn tortillas - 4 large eggs - 1 cup black beans, drained and rinsed - 1 cup shredded cheddar cheese - 1 cup diced bell peppers (red and green) - 1/2 cup chopped green onions - 1 teaspoon ground cumin - 1 teaspoon smoked paprika - Salt and pepper to taste - 1 cup salsa verde - 1 avocado, sliced (for topping) - Fresh cilantro (for garnish) Each ingredient adds flavor and nutrition. The corn tortillas hold everything together. They give a nice base for the enchiladas. Eggs provide protein and a rich taste. Black beans add fiber and heartiness. Cheddar cheese melts beautifully, creating a creamy texture. Bell peppers add color and sweetness. Green onions give a fresh crunch. Cumin and smoked paprika add warmth and depth. Salsa verde brings tang and a kick. Avocado and cilantro finish the dish with creaminess and bright flavor. When choosing tortillas, look for soft and pliable ones. For eggs, buy organic if possible; they taste better. Choose black beans that are firm and shiny. When picking bell peppers, look for vibrant colors and smooth skin. Green onions should be bright with no wilting. Fresh herbs like cilantro should smell fragrant and look lively. Always check expiration dates on packaged items. Fresh ingredients make the best enchiladas. For the full recipe, check here: [Full Recipe]. To make breakfast enchiladas, you need to prep your ingredients first. Gather all items before you start cooking. This way, you can cook smoothly. The main steps include whisking eggs, sautéing veggies, and assembling the enchiladas. 1. Preheat the oven. Set it to 350°F (175°C) and grease a baking dish. 2. Whisk the eggs. In a bowl, mix 4 large eggs. Add ground cumin, smoked paprika, salt, and pepper. 3. Sauté the bell peppers. Heat oil in a skillet over medium heat. Cook 1 cup of diced bell peppers for about 3-4 minutes. 4. Scramble the eggs. Pour the egg mixture into the skillet. Stir and cook until the eggs are set. 5. Add black beans and cheese. Fold in 1 cup of black beans and half of 1 cup shredded cheese. 6. Assemble the enchiladas. Take a corn tortilla, add 1/4 cup of the egg mix, and roll it up. Place it seam-side down in the baking dish. Repeat for all tortillas. 7. Top with salsa. Pour 1 cup of salsa verde over the enchiladas. Add the rest of the cheese on top. 8. Bake them. Place in the oven for 20-25 minutes until the cheese bubbles. 9. Cool and serve. Let them sit for a few minutes before serving. 10. Garnish. Add avocado slices and fresh cilantro on top before serving. Cook your enchiladas at 350°F (175°C) for 20-25 minutes. This ensures the cheese melts and the flavors blend. Prep time is around 15 minutes, and the total time is about 45 minutes. The recipe serves four, making it great for a family breakfast or brunch. For the Full Recipe, check the detailed instructions above! To make your Breakfast Enchiladas shine, focus on fresh ingredients. Use ripe avocados and vibrant bell peppers for the best flavor. When scrambling eggs, keep the heat low. This helps keep the eggs soft and fluffy, making each bite delightful. For added depth, try mixing in some spices, like chili powder or onion powder. Feel free to switch up the cheese too; Monterey Jack adds a nice twist. Many cooks overstuff their tortillas. This can lead to a messy dish. Aim for about 1/4 cup of filling per tortilla. Another mistake is not warming the tortillas first. Softening them makes rolling easier and helps prevent tears. Also, avoid skipping the garnishes. Fresh cilantro and avocado elevate the dish’s look and taste. You don’t need fancy tools for these enchiladas, but a few key items help. A good non-stick skillet is essential for scrambling the eggs. A sturdy baking dish, about 9x13 inches, works well for baking. Use a whisk for mixing the eggs and a spatula for folding in the beans and cheese. A sharp knife and cutting board will make chopping veggies quick and easy. For the full recipe, check out the detailed instructions. {{image_2}} You can switch ingredients to meet dietary needs. For gluten-free options, use corn tortillas. If you need a low-carb version, try zucchini or eggplant slices instead of tortillas. For a protein boost, add cooked chicken or turkey. You can also include tofu for a vegan choice, replacing eggs and cheese. To spice things up, add jalapeños or chili powder to your egg mixture. A dash of cayenne pepper or red pepper flakes gives a nice kick. You can also try different salsas, like mango or pineapple salsa, for a fruity touch. If you love heat, drizzle hot sauce on top before serving. Pair your enchiladas with fresh fruit or a simple salad. A side of refried beans adds a hearty touch. For a refreshing twist, serve them with a yogurt dip or guacamole. You can also add a light corn salad with lime dressing for extra crunch. Explore the Full Recipe for more delicious ideas! To keep your leftover enchiladas fresh, store them in an airtight container. This will prevent them from drying out. Let them cool before putting them away. If you leave them out too long, they may spoil. You can also wrap them tightly in plastic wrap or foil. When you're ready to enjoy your leftover enchiladas, preheat your oven to 350°F (175°C). Place the enchiladas in a baking dish. Cover them with foil to keep moisture in. Heat for about 15-20 minutes, or until they are hot throughout. You can also microwave them if you're in a hurry. Just heat them for 1-2 minutes, checking often. You can freeze Breakfast Enchiladas for later. Wrap each enchilada in plastic wrap and then in foil. This keeps them fresh for up to three months. When you're ready to eat them, thaw overnight in the fridge. Reheat them as mentioned above. Enjoy your tasty meal whenever you want! For the full recipe, check out the complete guide. If you don't have corn tortillas, you can use flour tortillas. They work well too. You may also try whole wheat tortillas for a healthier option. Just be aware that flour tortillas can be softer. This may change the texture of your enchiladas. Yes, you can make Breakfast Enchiladas ahead of time. Just prepare them up to the baking point. Cover and store them in the fridge for a day. When you're ready, bake them as directed. This saves time on busy mornings. To make this recipe vegetarian, swap the eggs for tofu or chickpea flour. For a vegan version, use a tofu scramble with spices for flavor. You can also replace cheese with a plant-based option. This keeps the meal tasty and filling. For the full recipe, follow the instructions above! In this post, I covered how to make tasty Breakfast Enchiladas. We explored key ingredients and tips for choosing fresh ones. I provided step-by-step instructions to guide you through cooking. You learned tips for avoiding common mistakes and how to use kitchen tools effectively. I shared fun variations and storage tips for leftovers. With these insights, you can create delicious enchiladas that everyone will enjoy. Cooking is fun and with practice, you’ll get even better! Enjoy your meals.
Breakfast Enchiladas Flavorful Start to Your Day
Start your day right with my simple and tasty Breakfast Enchiladas. These hearty wraps pack flavor and nutrients to kick off your morning. With fresh