Desserts
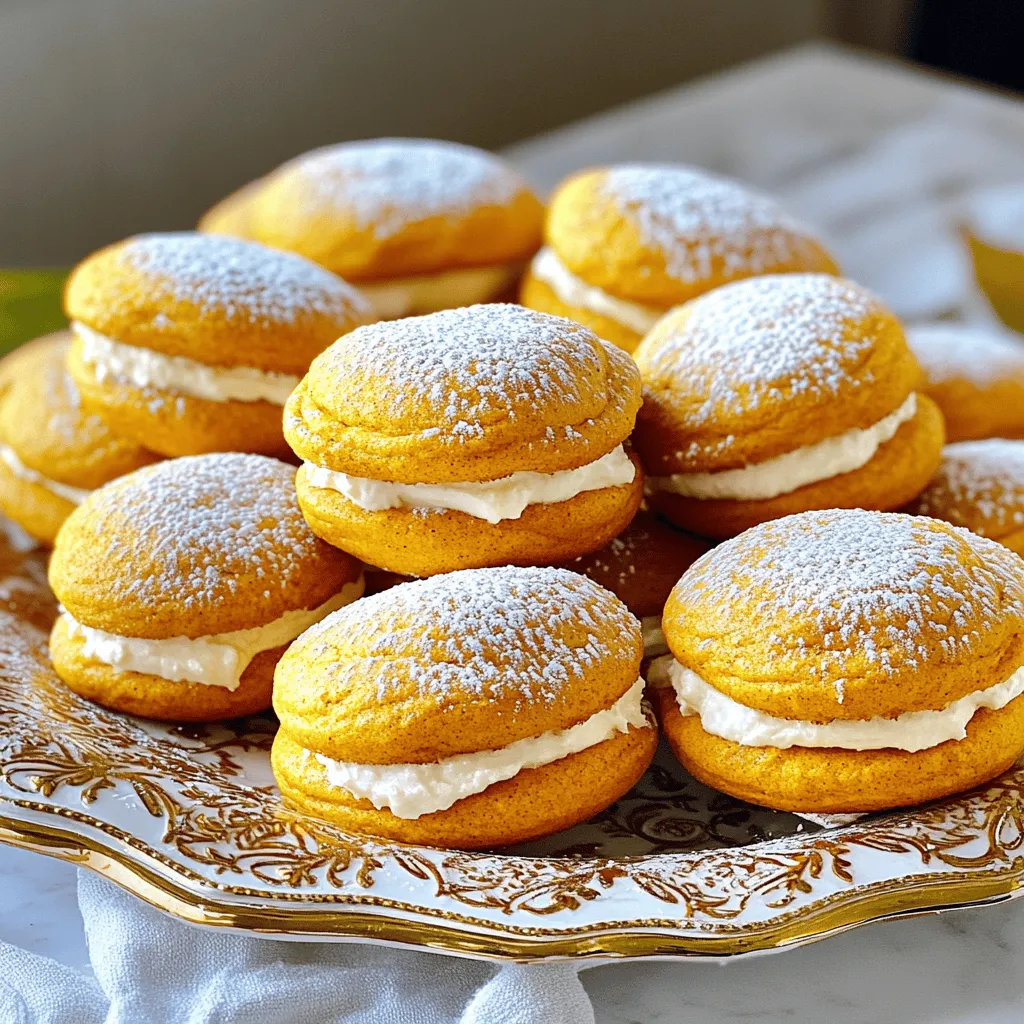
Pumpkin Spice Whoopie Pies Irresistible Fall Treat
Fall is here, and that means it’s time for a delicious treat: Pumpkin Spice Whoopie Pies! These soft, spiced cookies filled with creamy goodness are
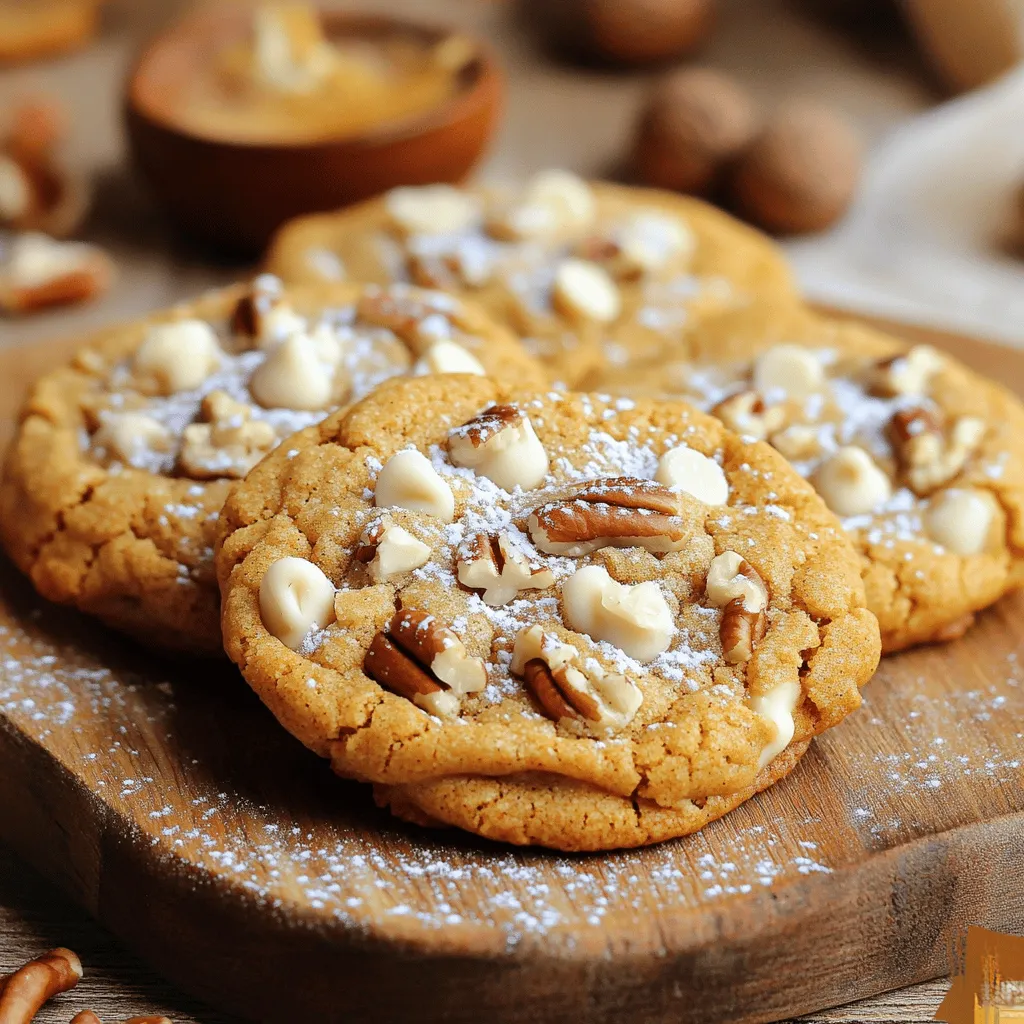
Pumpkin Spice Cream Cheese Cookies Perfectly Delicious
Are you ready to dive into the cozy world of Pumpkin Spice Cream Cheese Cookies? If you love warm, rich flavors and soft, chewy cookies,
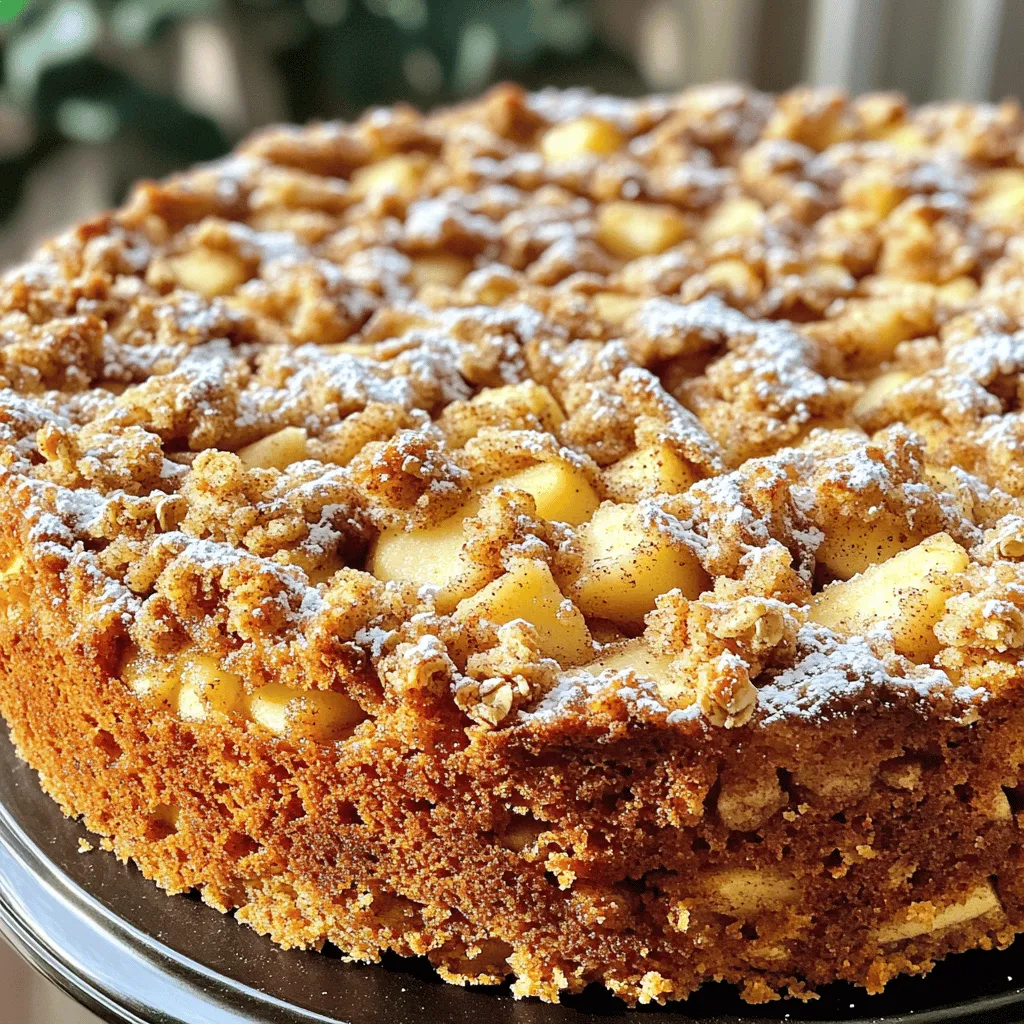
Cinnamon Apple Crumb Cake Easy and Delicious Recipe
Are you ready to indulge in a slice of heaven? My Cinnamon Apple Crumb Cake is easy to make and bursting with flavor. With warm

Chocolate Chip Zucchini Bread Tasty and Simple Recipe
Craving a delightful treat that’s both tasty and easy to make? Look no further! This Chocolate Chip Zucchini Bread combines the rich flavor of chocolate
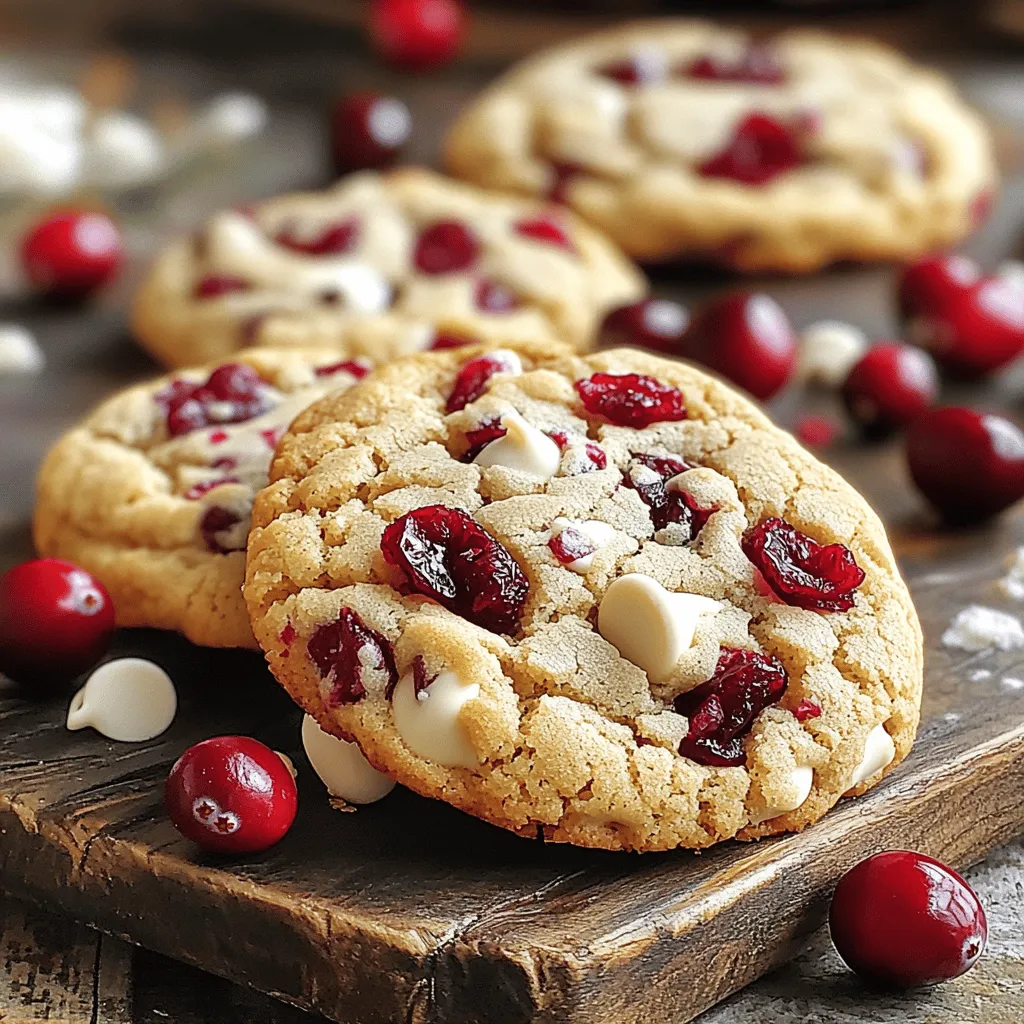
White Chocolate Cranberry Cookies Dreamy Holiday Treat
If you’re dreaming of a sweet treat that captures the flavor of the holidays, you’ve landed in the right place! In this post, I’m excited
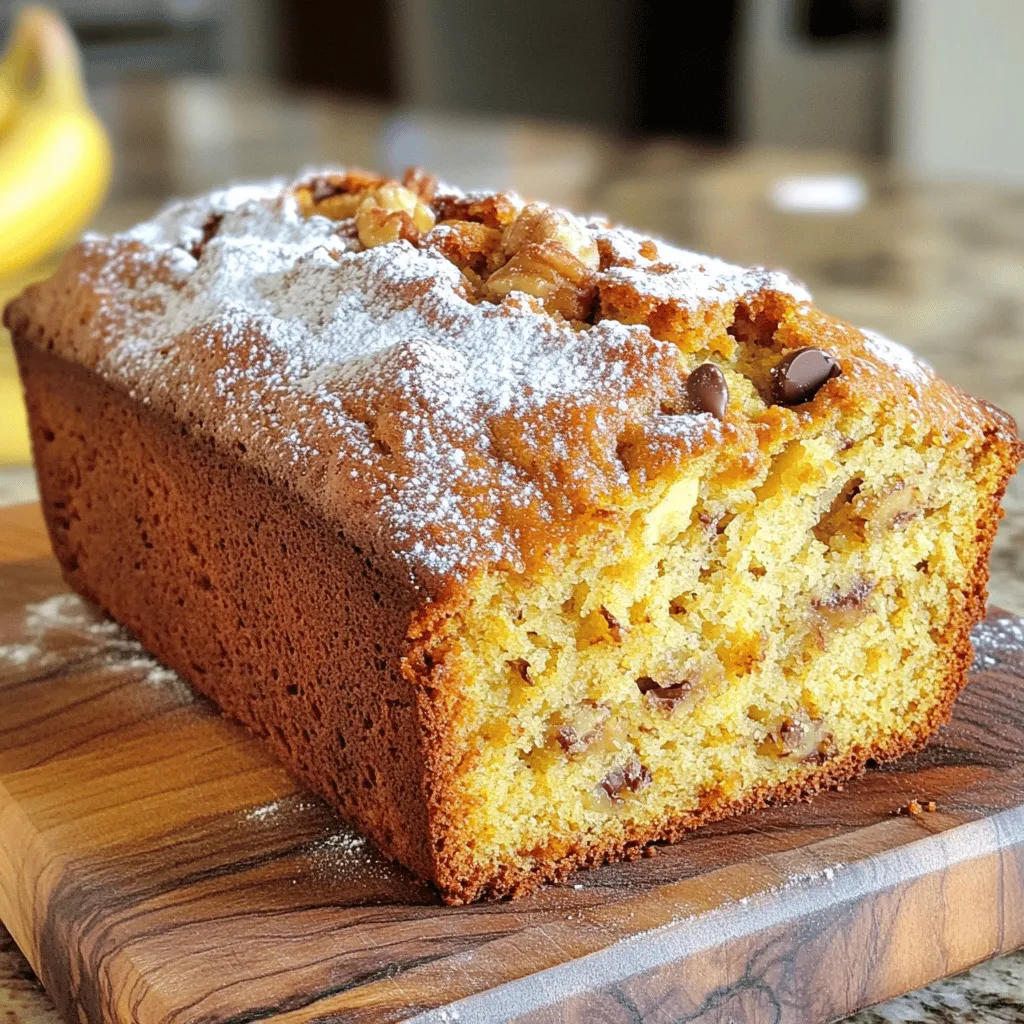
Greek Yogurt Banana Bread Healthy and Flavorful Recipe
Get ready to enjoy a slice of Greek Yogurt Banana Bread that’s both healthy and delicious! With ripe bananas and creamy Greek yogurt, this recipe

No Bake Oreo Truffles Simple and Decadent Dessert
Craving a sweet treat that’s both easy and satisfying? You’re in the right place! These No Bake Oreo Truffles combine just four simple ingredients—Oreo cookies,
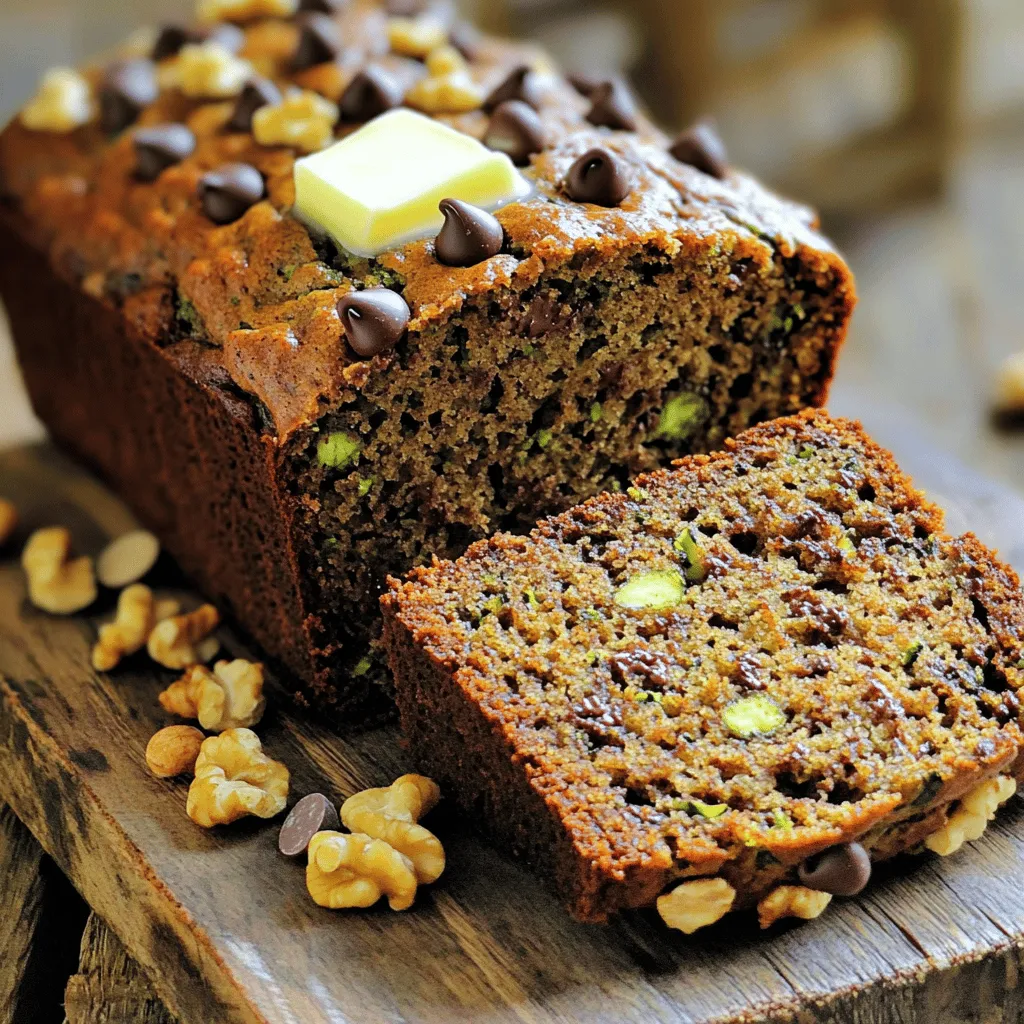
Chocolate Chip Zucchini Bread Flavorful and Easy Recipe
Are you ready to bake something delicious? Chocolate Chip Zucchini Bread is easy and full of flavor. Whether you’re a seasoned baker or just starting
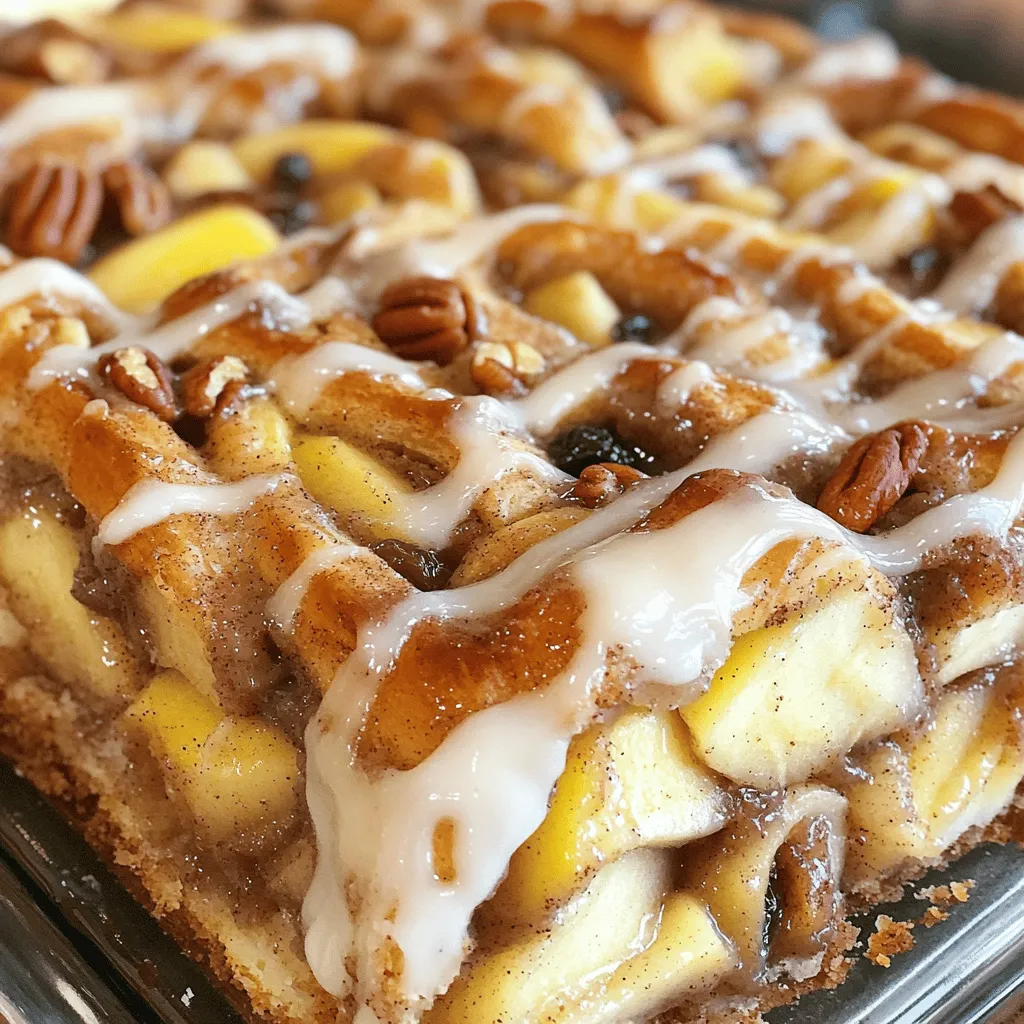
Cinnamon Roll Apple Bake Easy and Delicious Recipe
Looking for a simple, tasty dessert that makes your home smell amazing? You’ve found it! This Cinnamon Roll Apple Bake combines gooey cinnamon rolls and
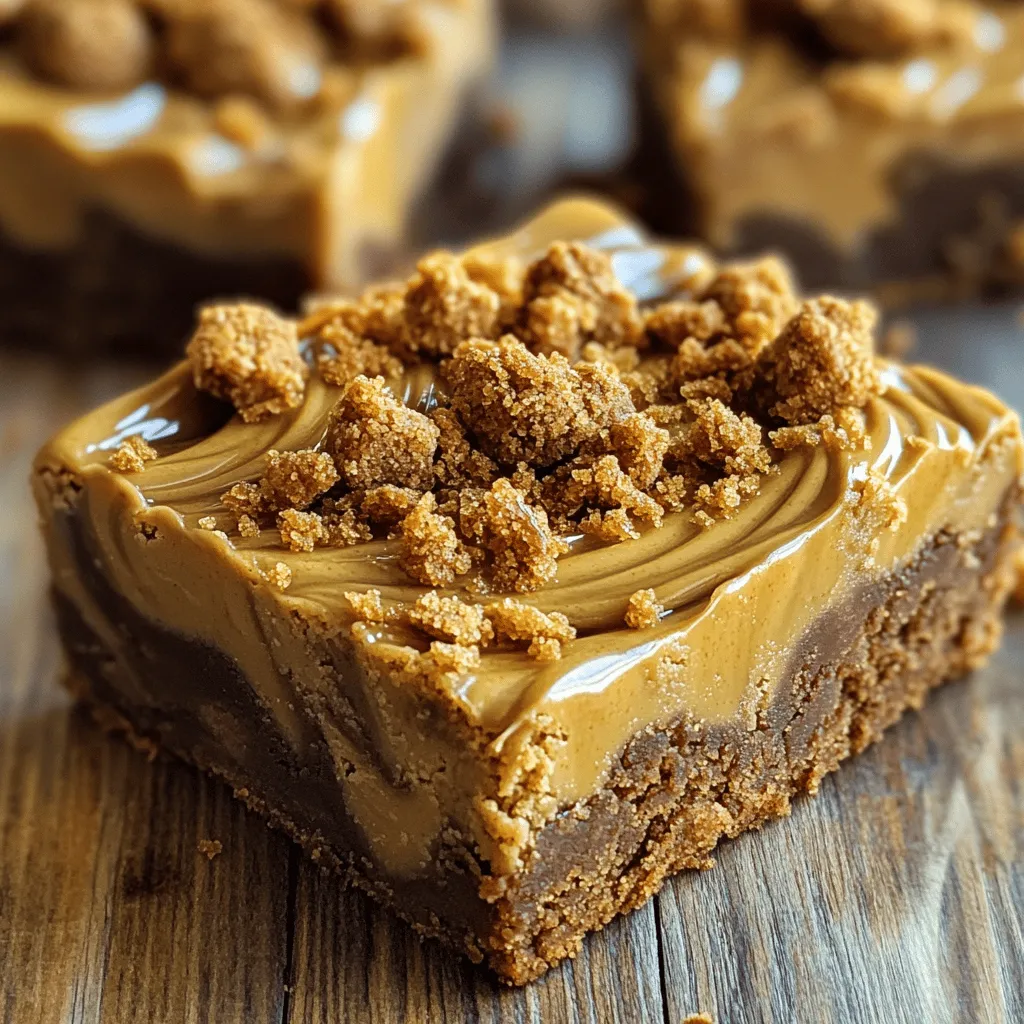
Biscoff Blondies Delightful Treat to Savor Anytime
Craving something sweet? Biscoff blondies are here to satisfy your taste buds! These delicious treats blend rich, buttery flavors with the iconic caramel notes of