Desserts
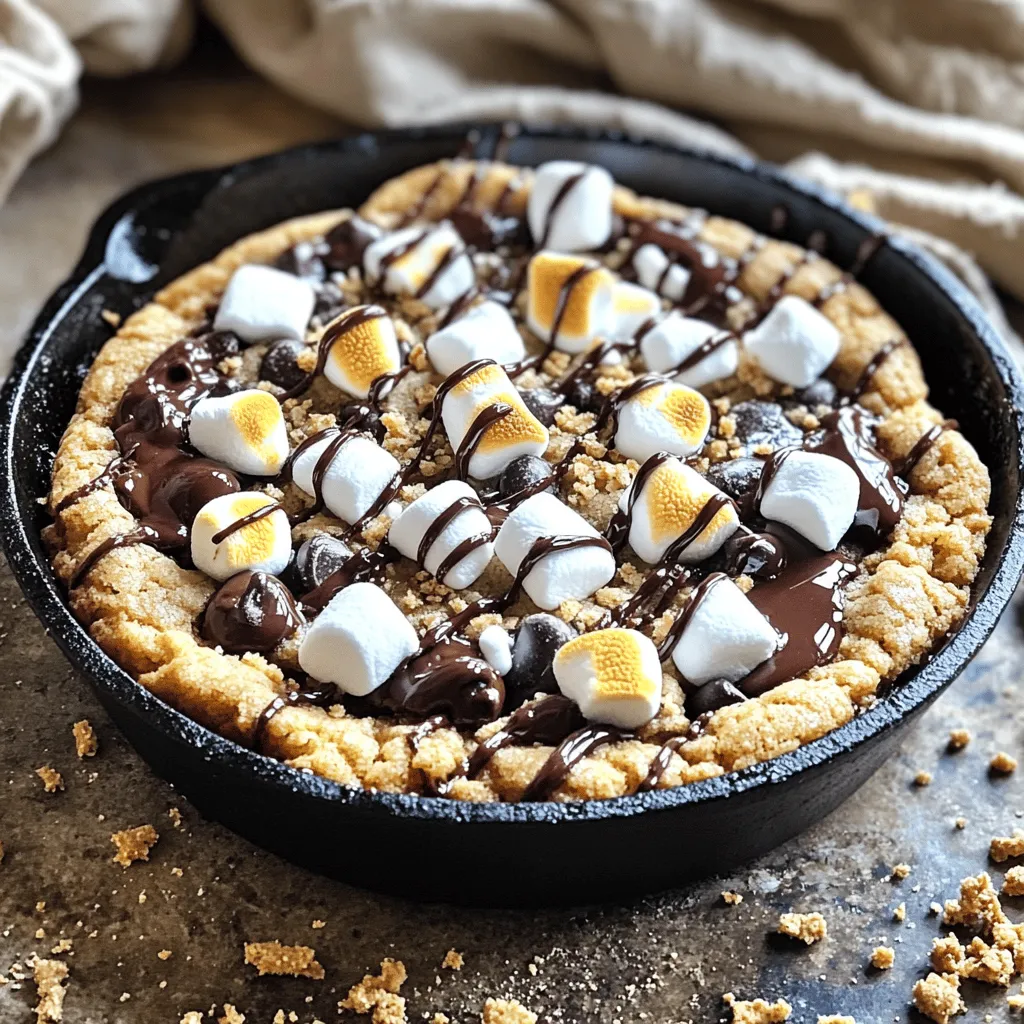
S’mores Chocolate Chip Skillet Cookie Delight
Are you ready to take your dessert game to the next level? Meet the S’mores Chocolate Chip Skillet Cookie Delight! This warm, gooey treat combines
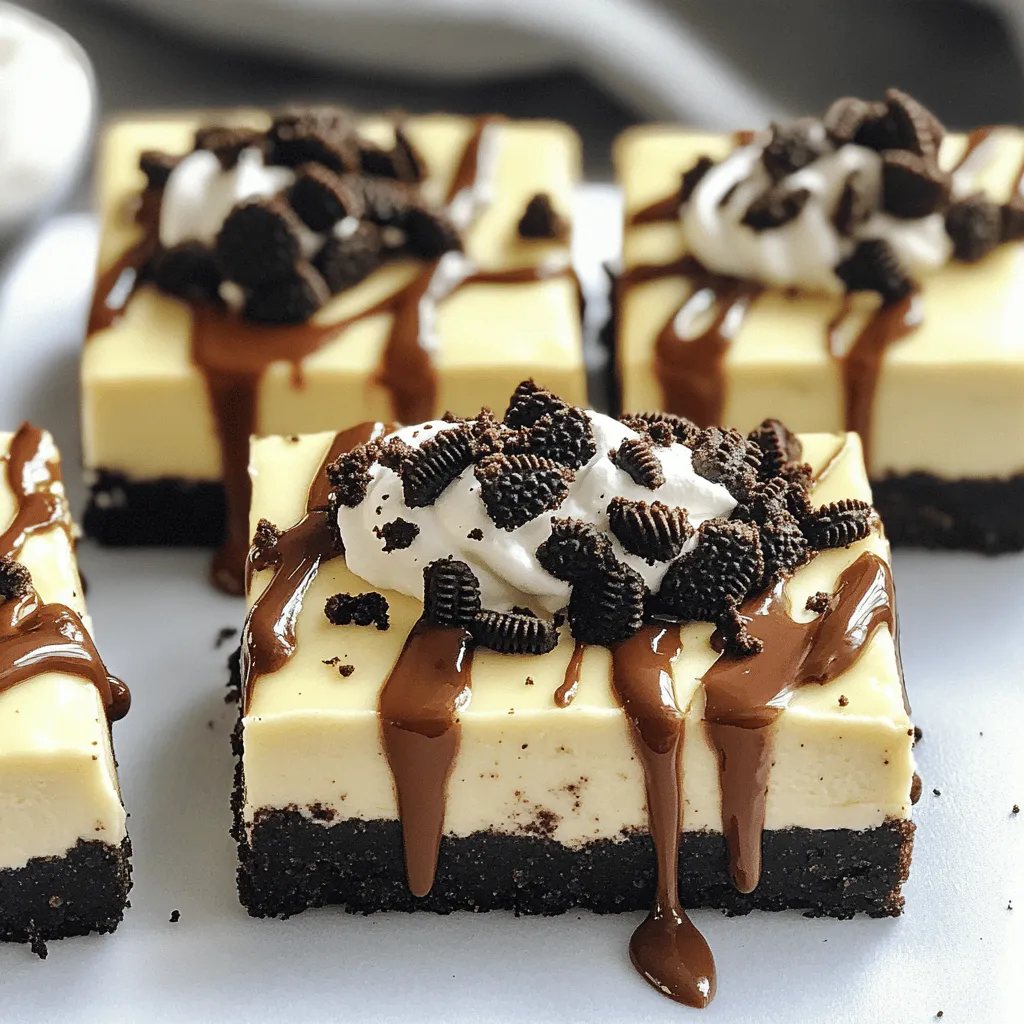
No Bake Oreo Cheesecake Bars Rich and Creamy Delight
Craving something sweet and easy? You’ll love these No Bake Oreo Cheesecake Bars! They’re rich, creamy, and perfect for any dessert lover. I’ll show you
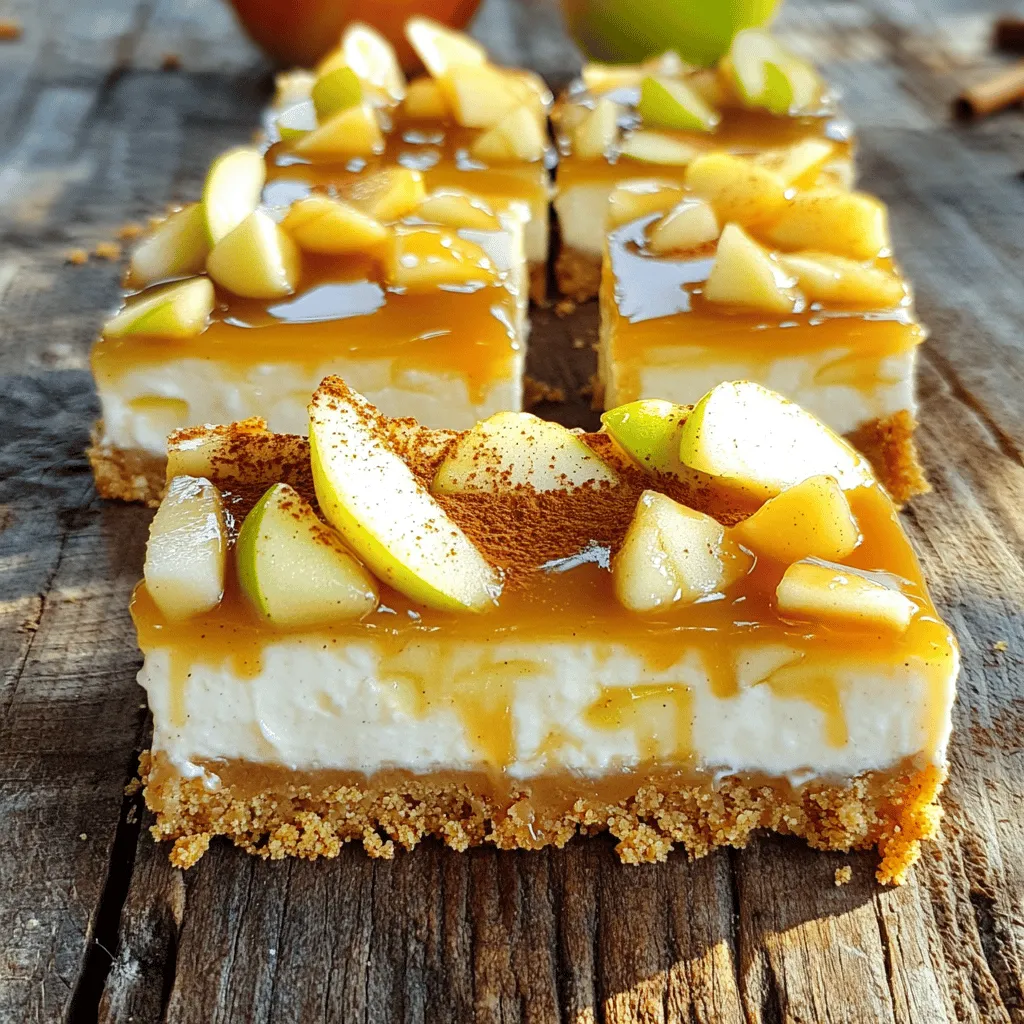
Caramel Apple Cheesecake Bars Delightful Dessert Treat
Are you ready for a dessert that blends creamy cheesecake with the sweetness of apples? In this post, I’ll show you how to make Caramel
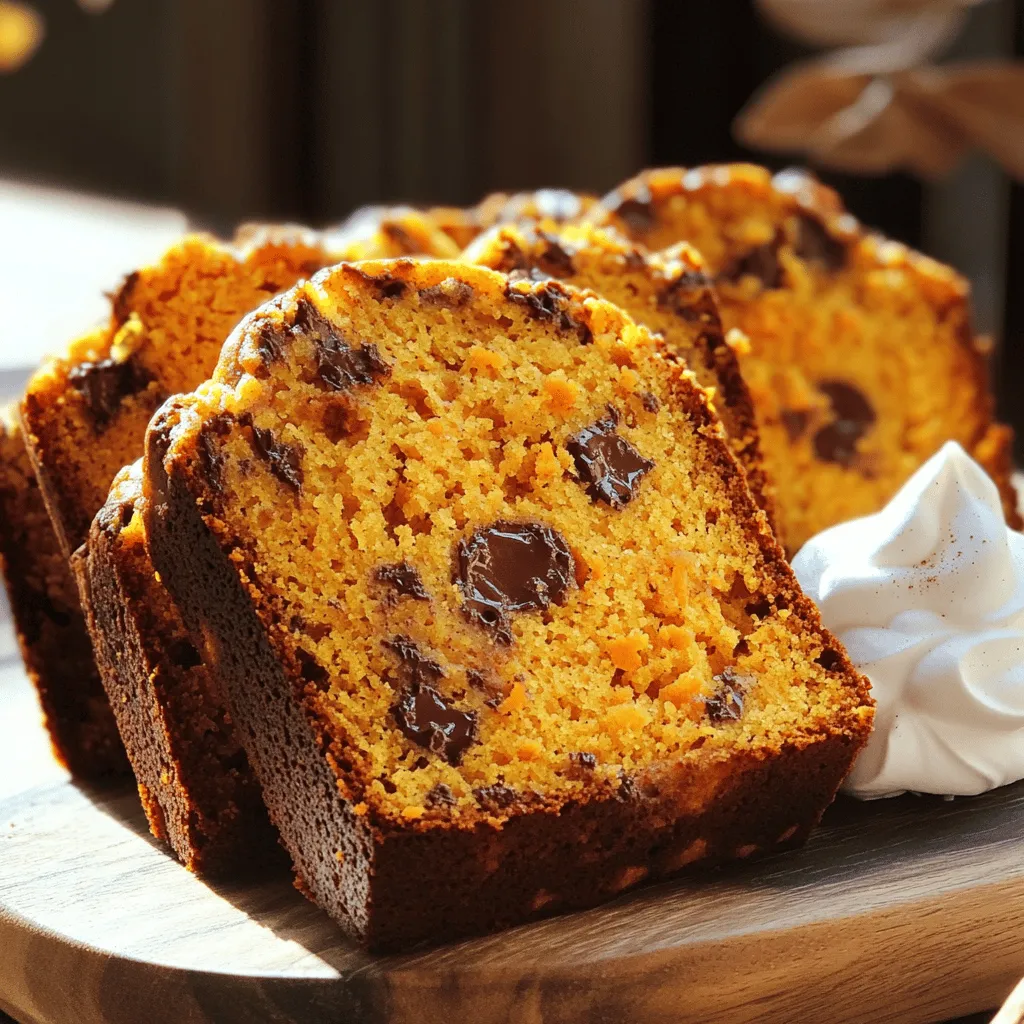
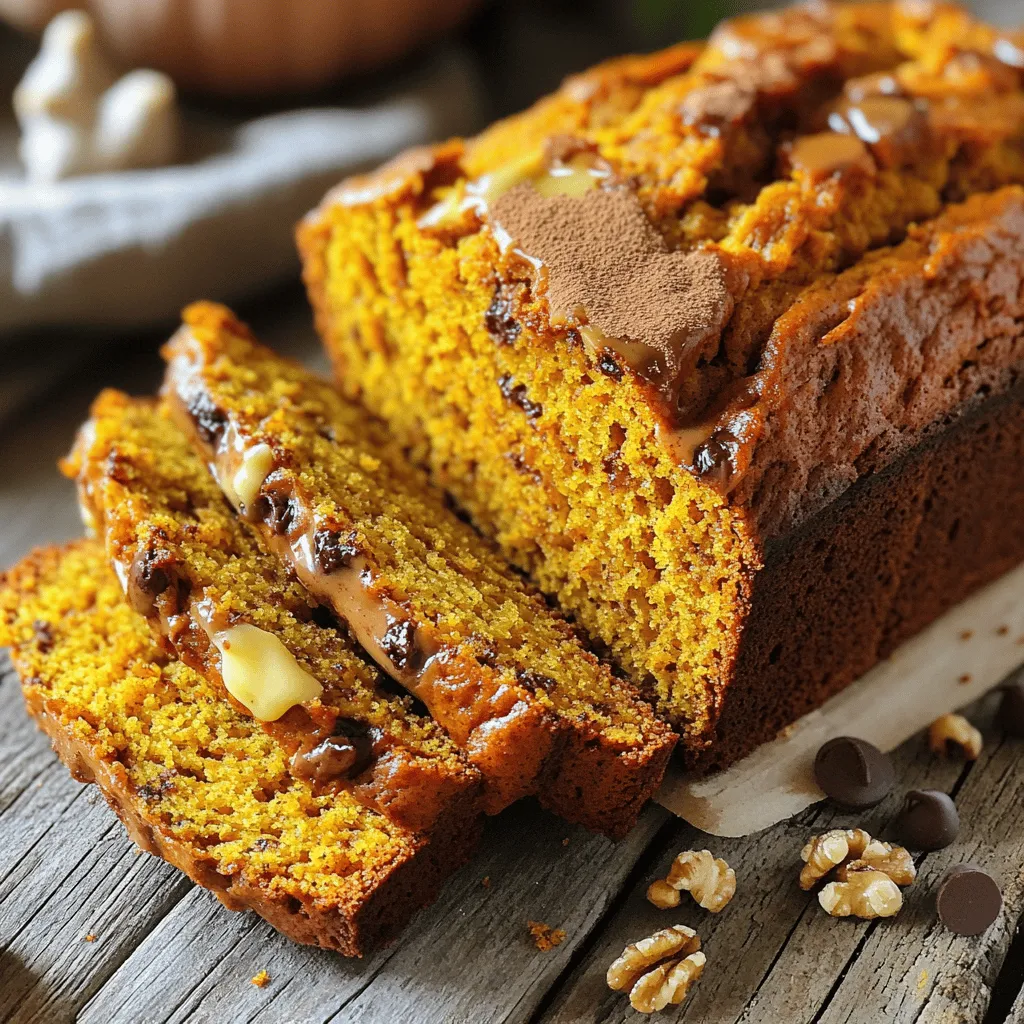
Chocolate Chip Pumpkin Bread Easy and Flavorful Recipe
Are you ready to fall in love with a new treat? This easy and flavorful Chocolate Chip Pumpkin Bread combines the warm spices of fall
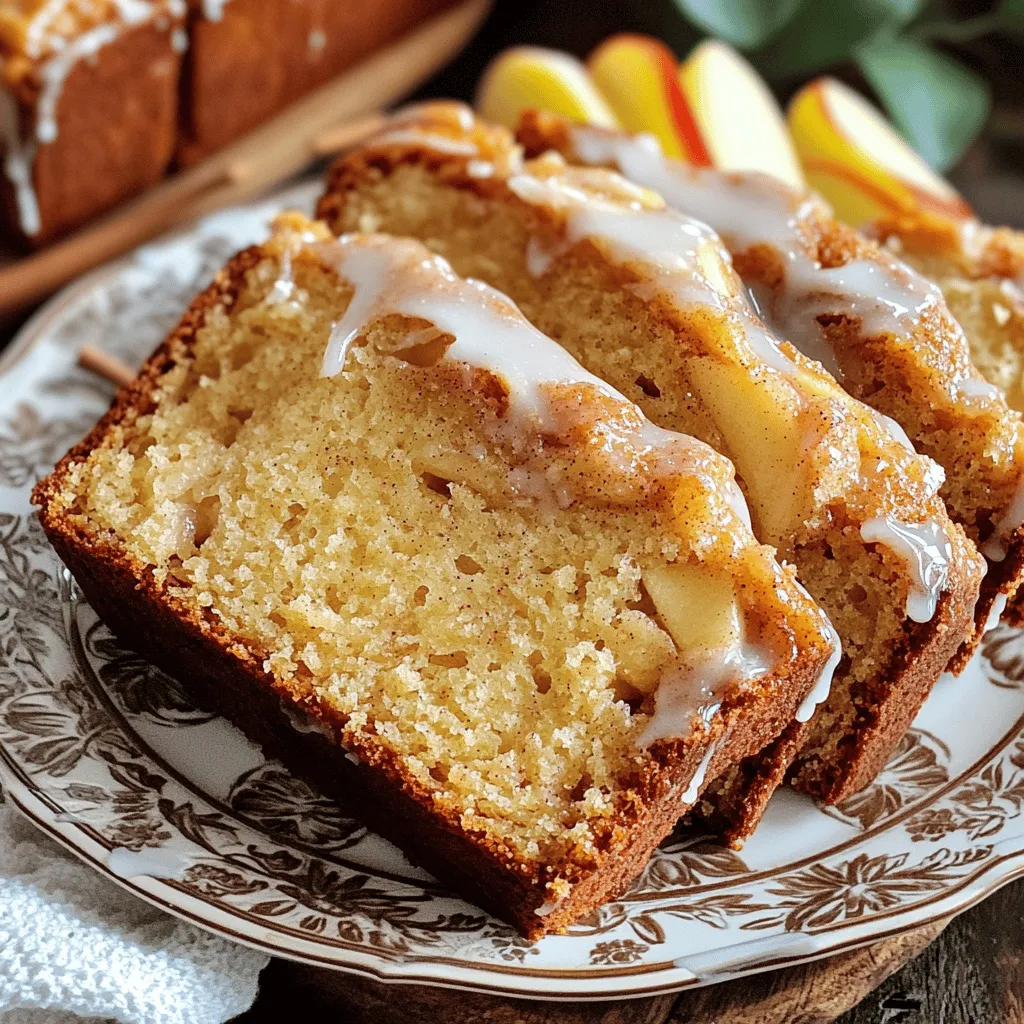
Amish Apple Fritter Bread Delightfully Simple Recipe
If you crave a warm, sweet treat, Amish Apple Fritter Bread is for you. This delightfully simple recipe combines soft bread, tender apples, and a
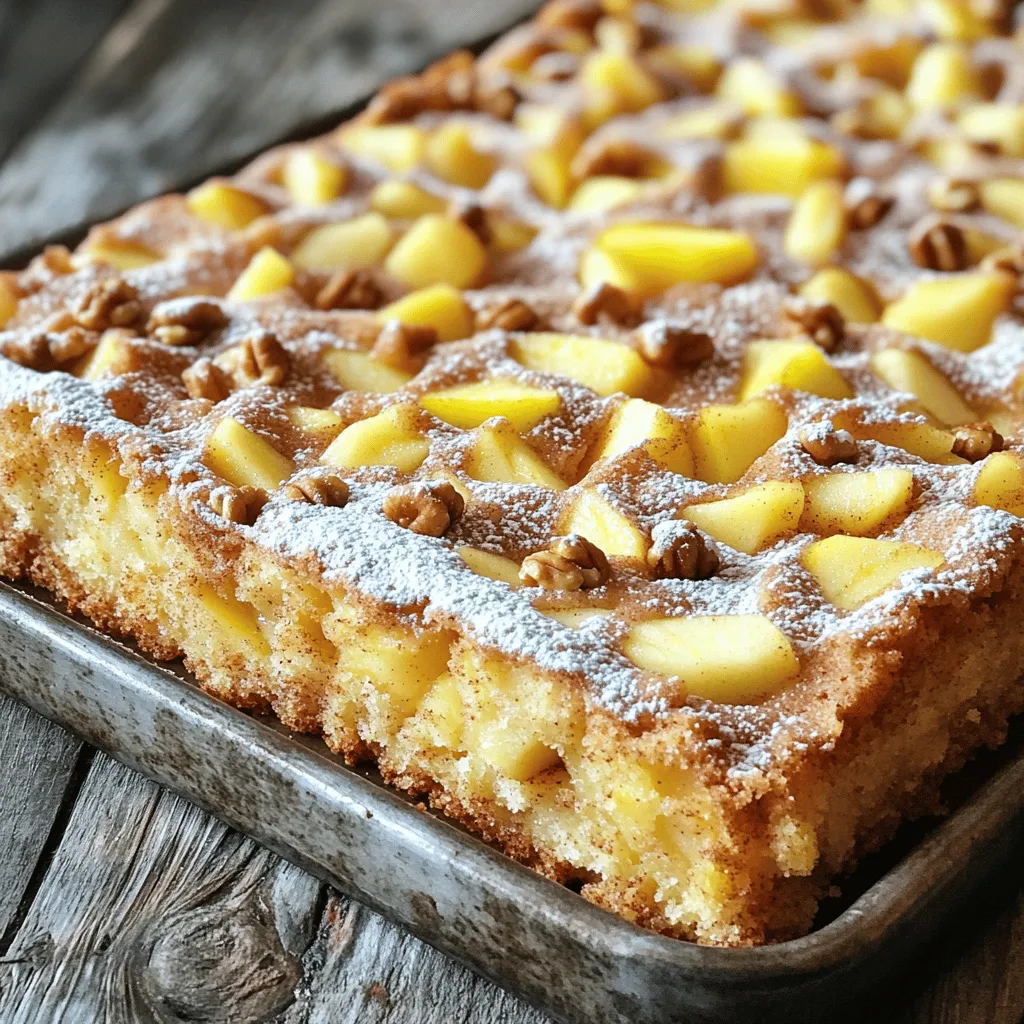
Apple Cinnamon Sheet Cake Irresistible and Simple Treat
Looking for a simple yet delicious dessert? My Apple Cinnamon Sheet Cake is the perfect treat! With warm spices and sweet apples, this cake is
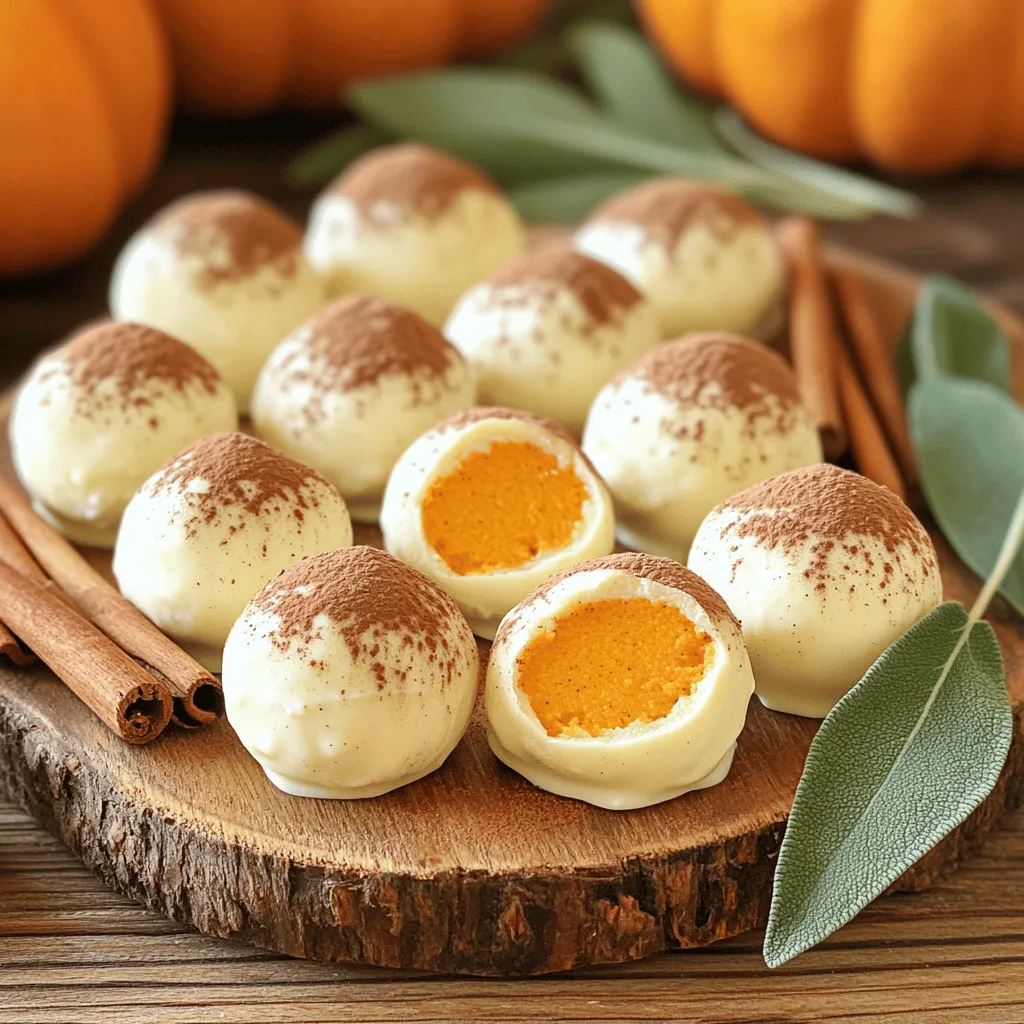
Pumpkin Cheesecake Truffles Irresistible Sweet Treat
Are you ready to indulge in a sweet treat that combines the best of fall flavors? Pumpkin Cheesecake Truffles are the perfect blend of creamy
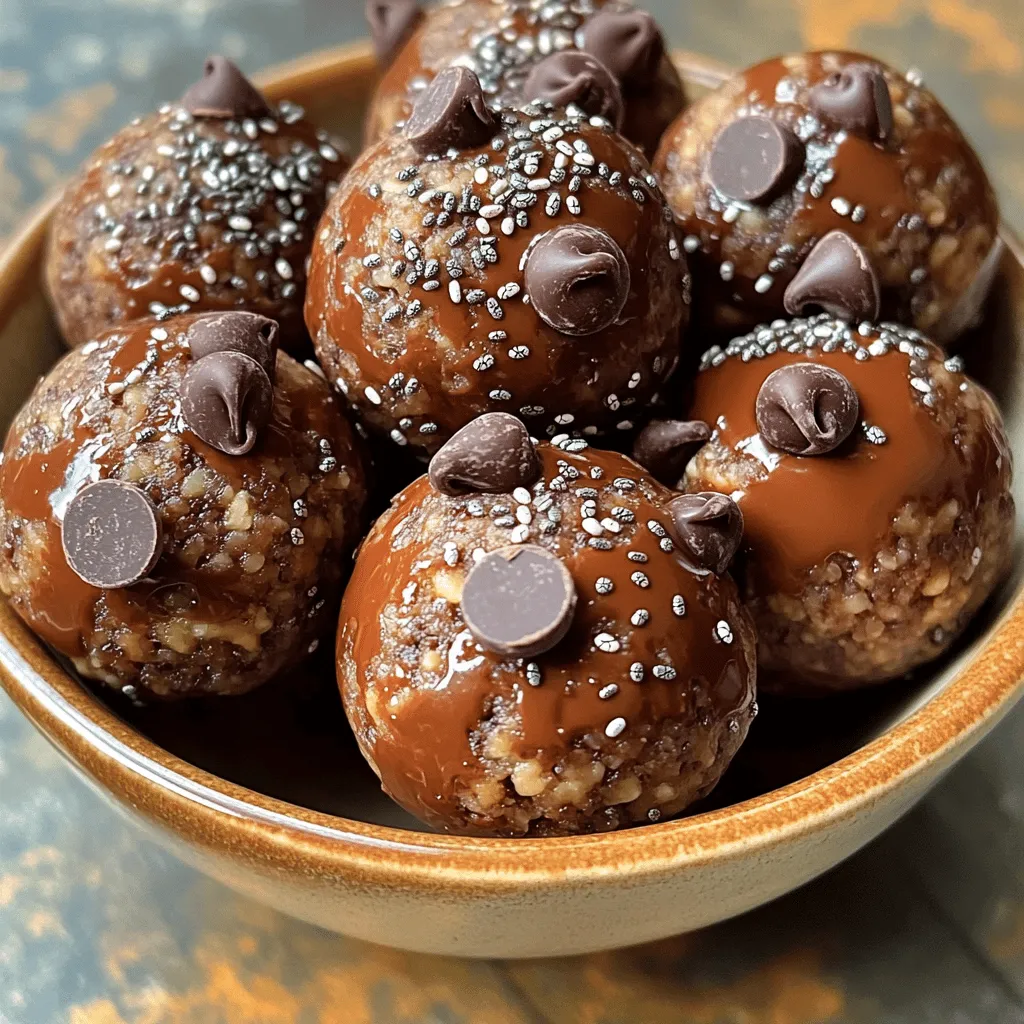
Chocolate Peanut Butter Energy Balls Easy and Healthy Snack
Are you looking for a quick, tasty snack that packs a nutritional punch? Chocolate Peanut Butter Energy Balls are the perfect solution! With just a
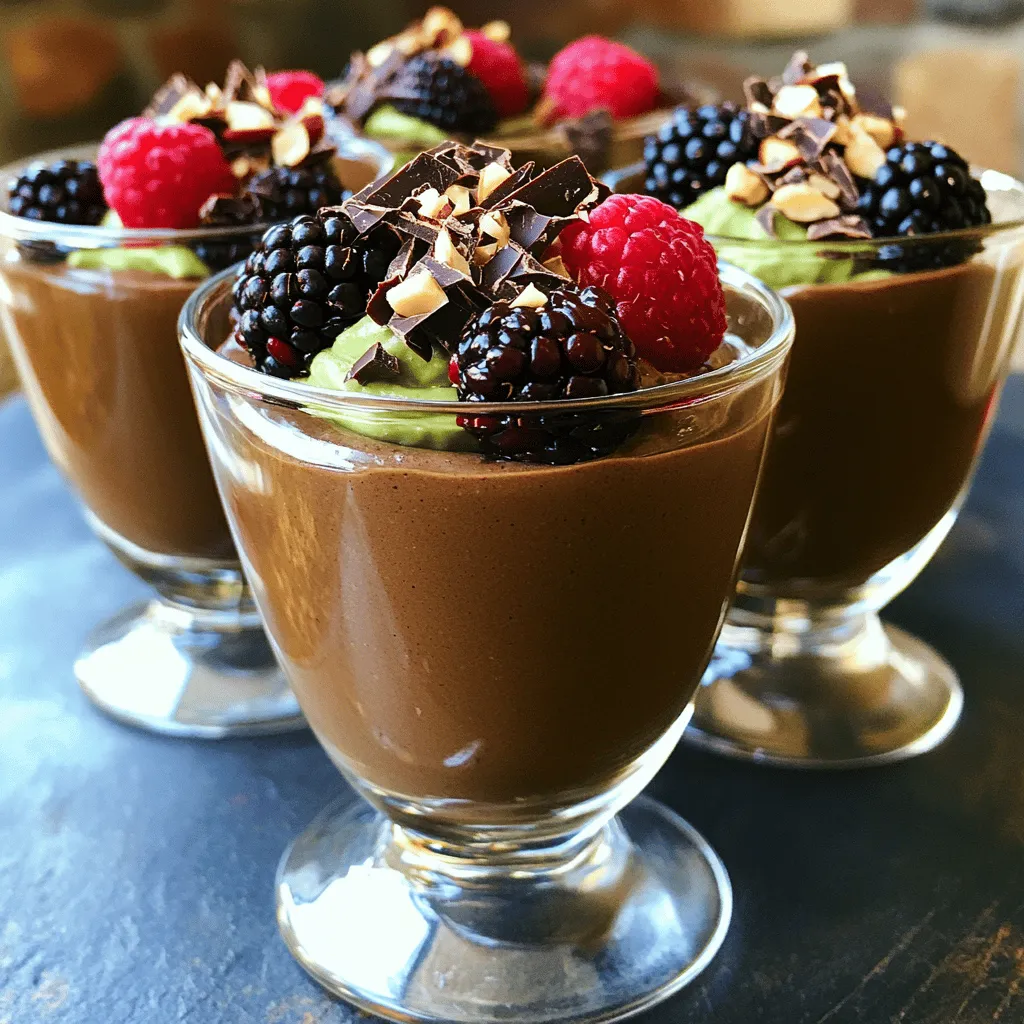
Avocado Chocolate Mousse Rich and Creamy Delight
Indulging in a rich and creamy dessert doesn’t have to mean guilt. With this Avocado Chocolate Mousse, you can enjoy a delicious treat that’s both
Grandma’s Classic Pumpkin Bread Comforting Home Recipe
Baking Grandma’s Classic Pumpkin Bread brings back warm memories and delicious scents. This recipe is easy and uses simple ingredients. You’ll love how pumpkin puree,