Desserts
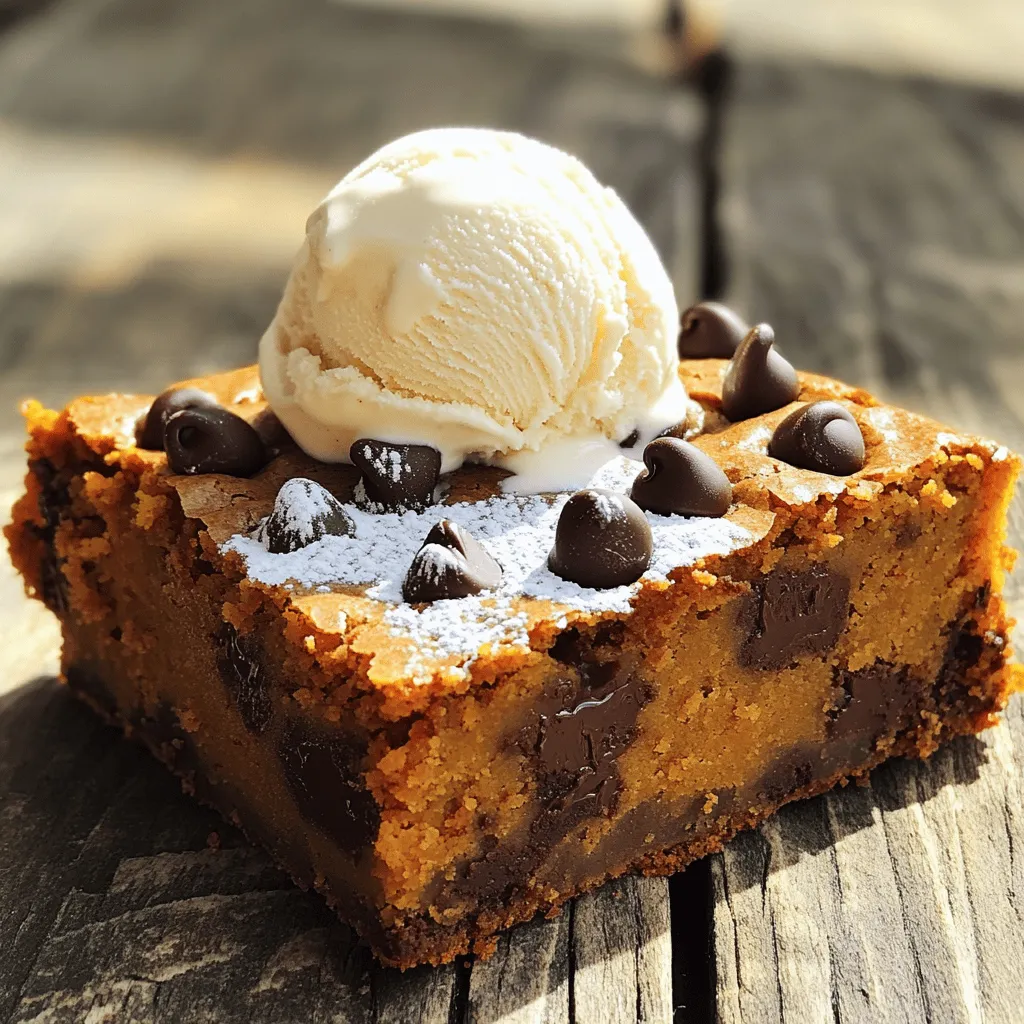
Chocolate Chip Pumpkin Blondies Irresistible Treat
Are you ready to explore a delicious spin on fall desserts? These Chocolate Chip Pumpkin Blondies are the perfect blend of sweet and savory. With
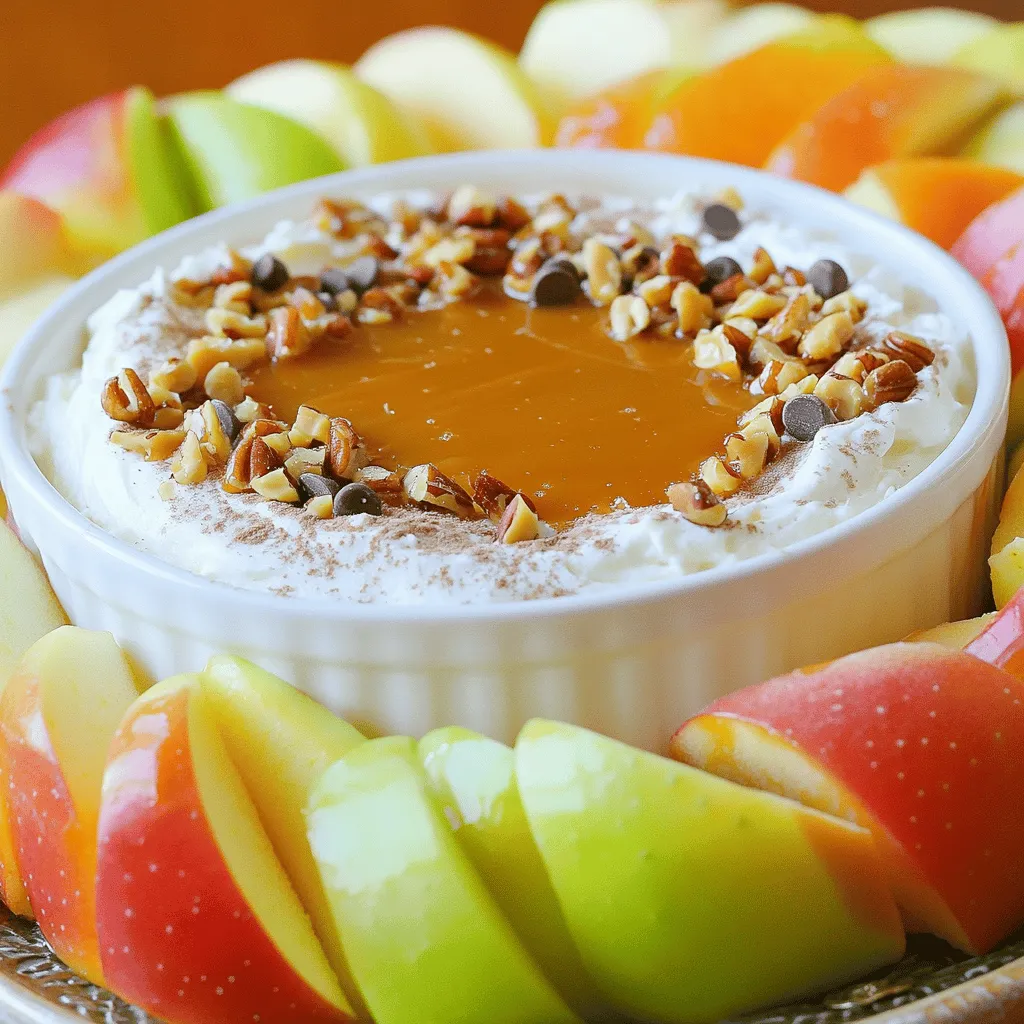
Caramel Apple Dip Irresistible and Easy Recipe
Get ready to indulge in a crowd-pleaser! This easy caramel apple dip is perfect for any gathering. With just a few simple ingredients, you can
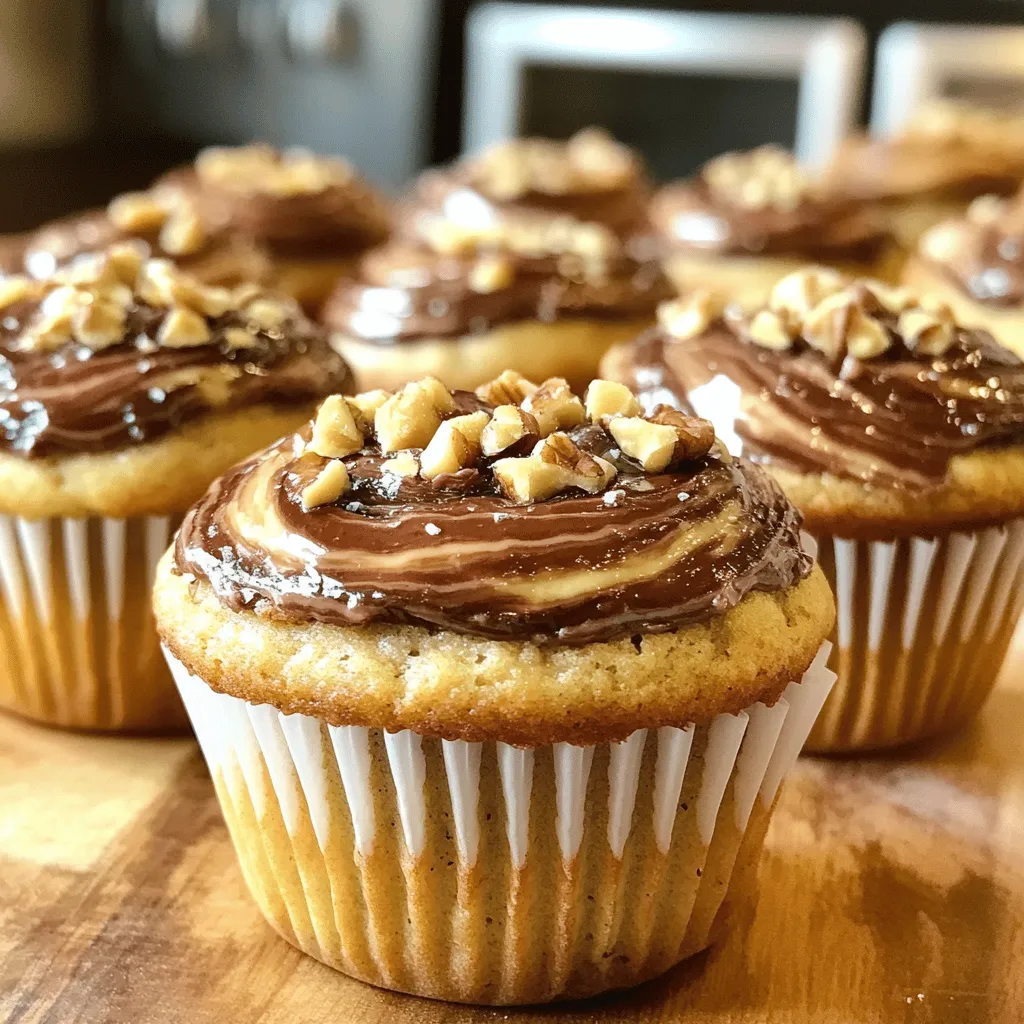
Banana Nutella Swirl Muffins Irresistible and Easy
You’re in for a treat! Today, I’m sharing my easy recipe for Banana Nutella Swirl Muffins. These muffins are sweet, moist, and packed with flavor.
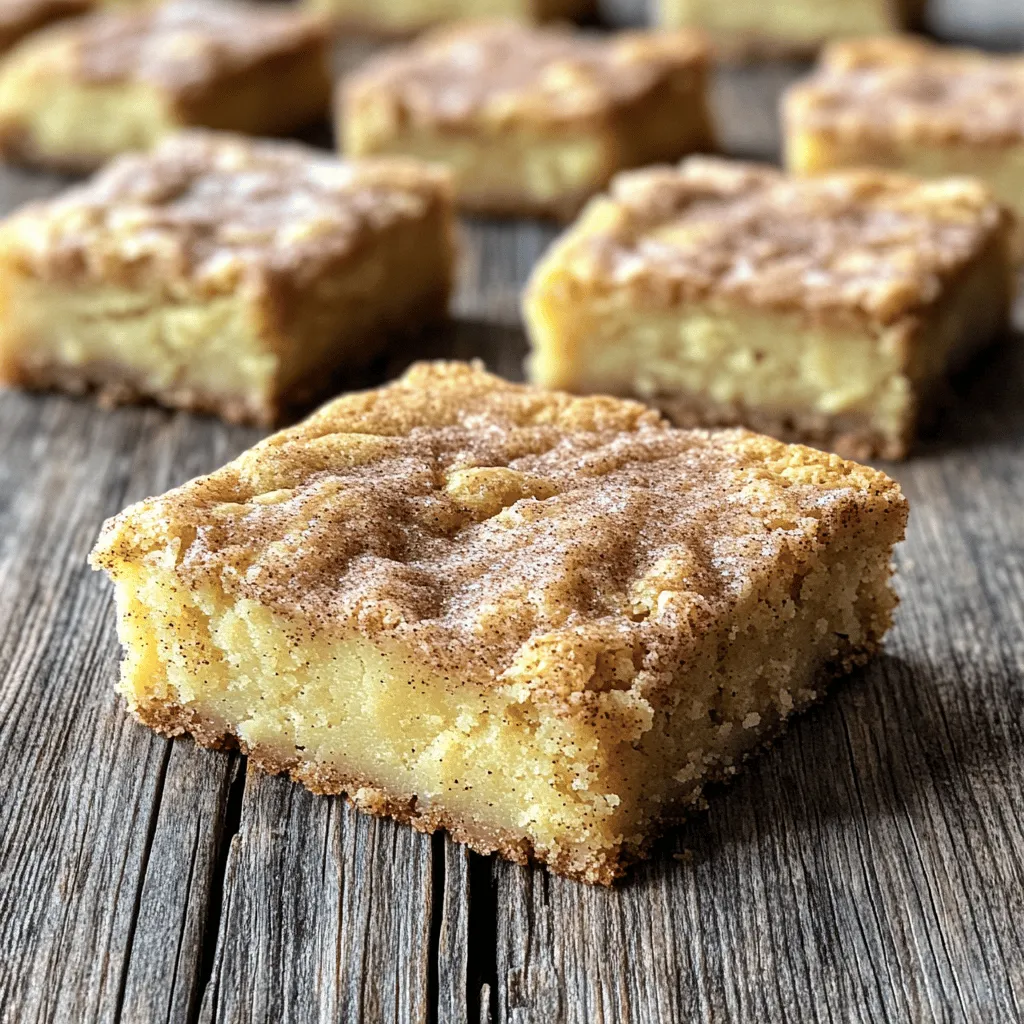
Chewy Snickerdoodle Blondies Irresistible Dessert Delight
If you’re craving a treat that is both chewy and sweet, look no further than these Chewy Snickerdoodle Blondies. They blend a classic snickerdoodle flavor
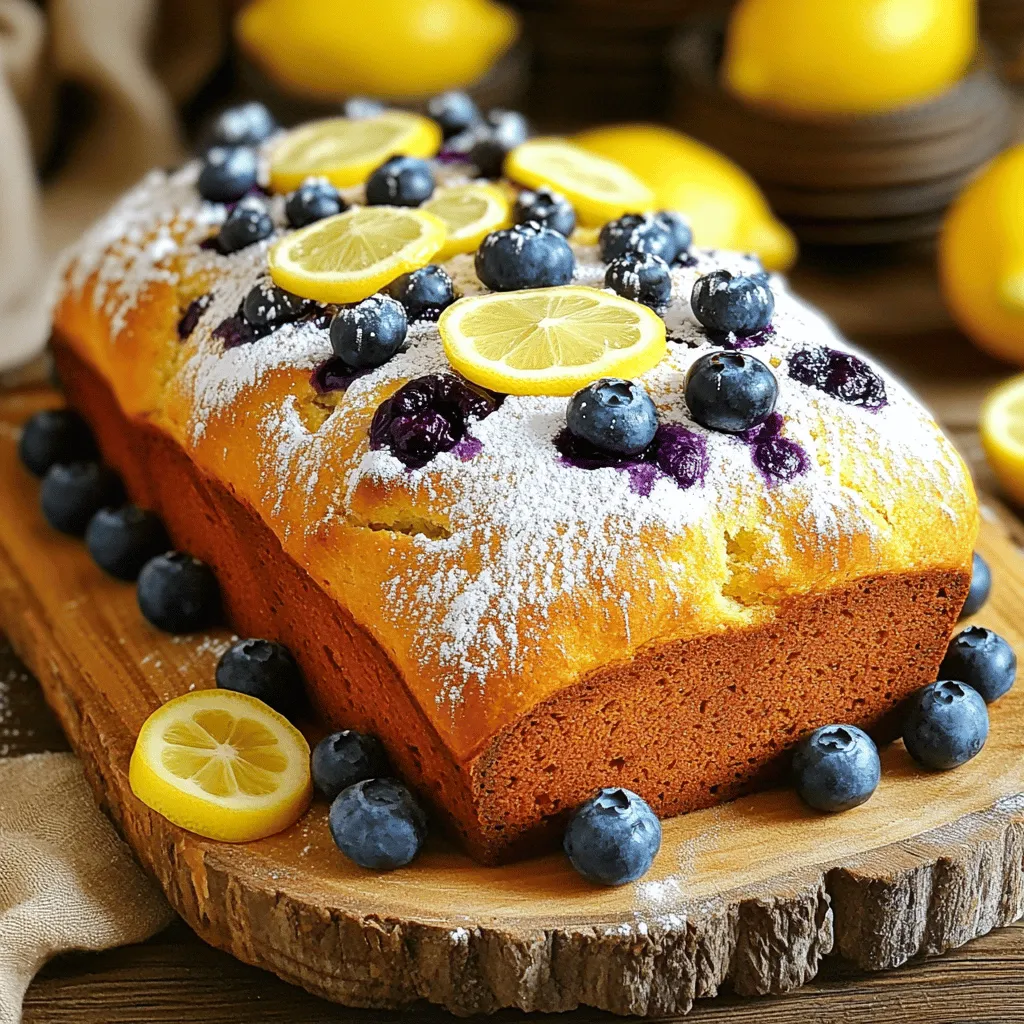
Lemon Blueberry Bread Flavorful and Easy Recipe
Baking Lemon Blueberry Bread is simple and satisfying. This recipe blends the zesty taste of lemon with sweet blueberries, creating a treat that’s perfect for
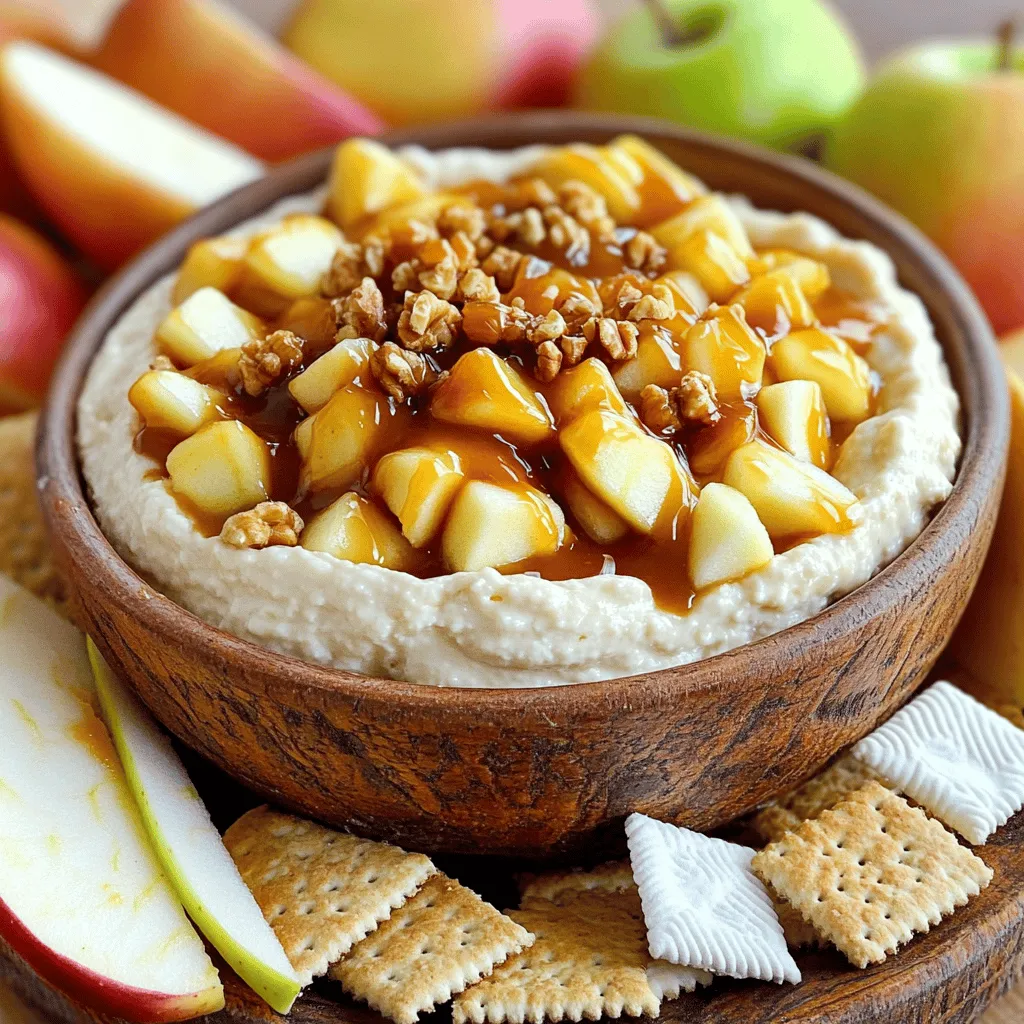
Caramel Apple Cheesecake Dip Easy and Delicious Treat
Do you crave a sweet treat that’s quick and fun to make? Caramel Apple Cheesecake Dip is just the answer! This easy recipe combines smooth
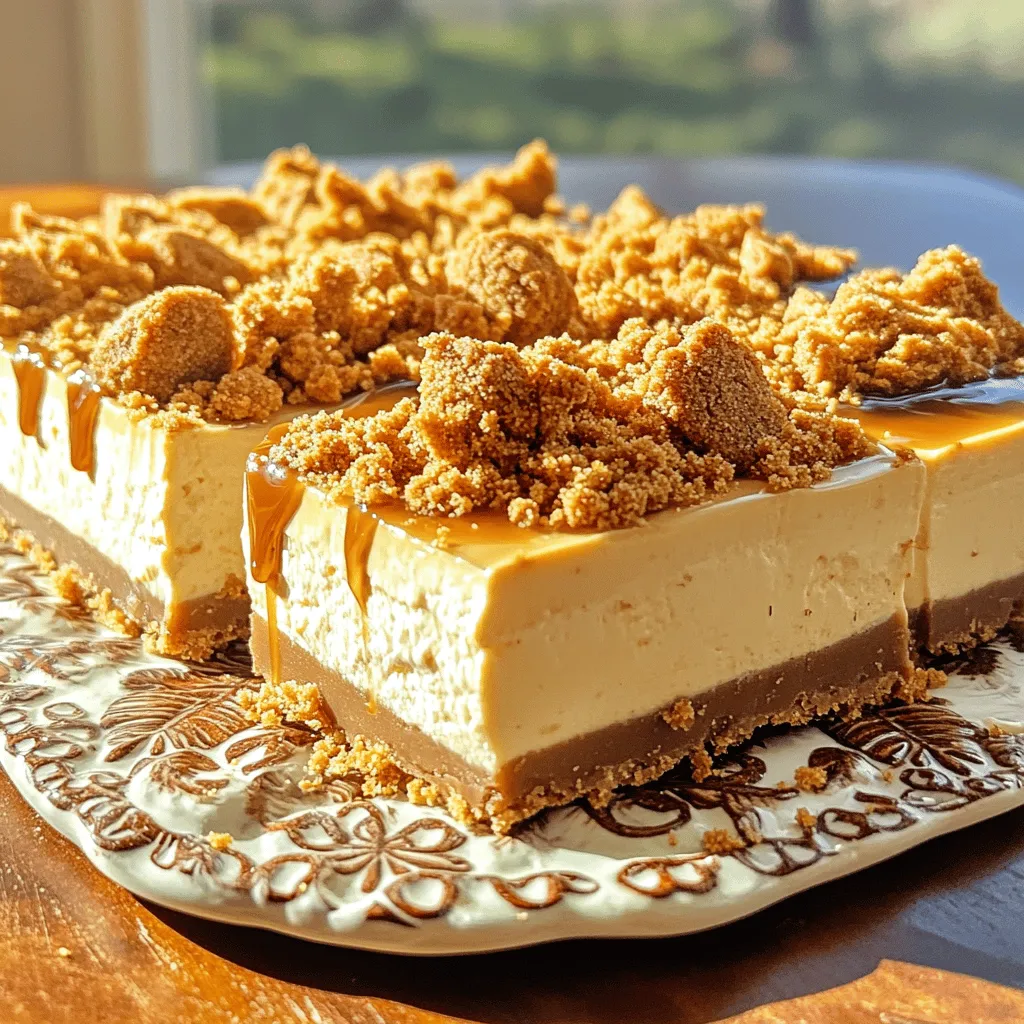
No-Bake Biscoff Cheesecake Bars A Simple Delight
Ready to indulge in a sweet treat that requires no baking? These No-Bake Biscoff Cheesecake Bars are easy to make and delicious, perfect for any
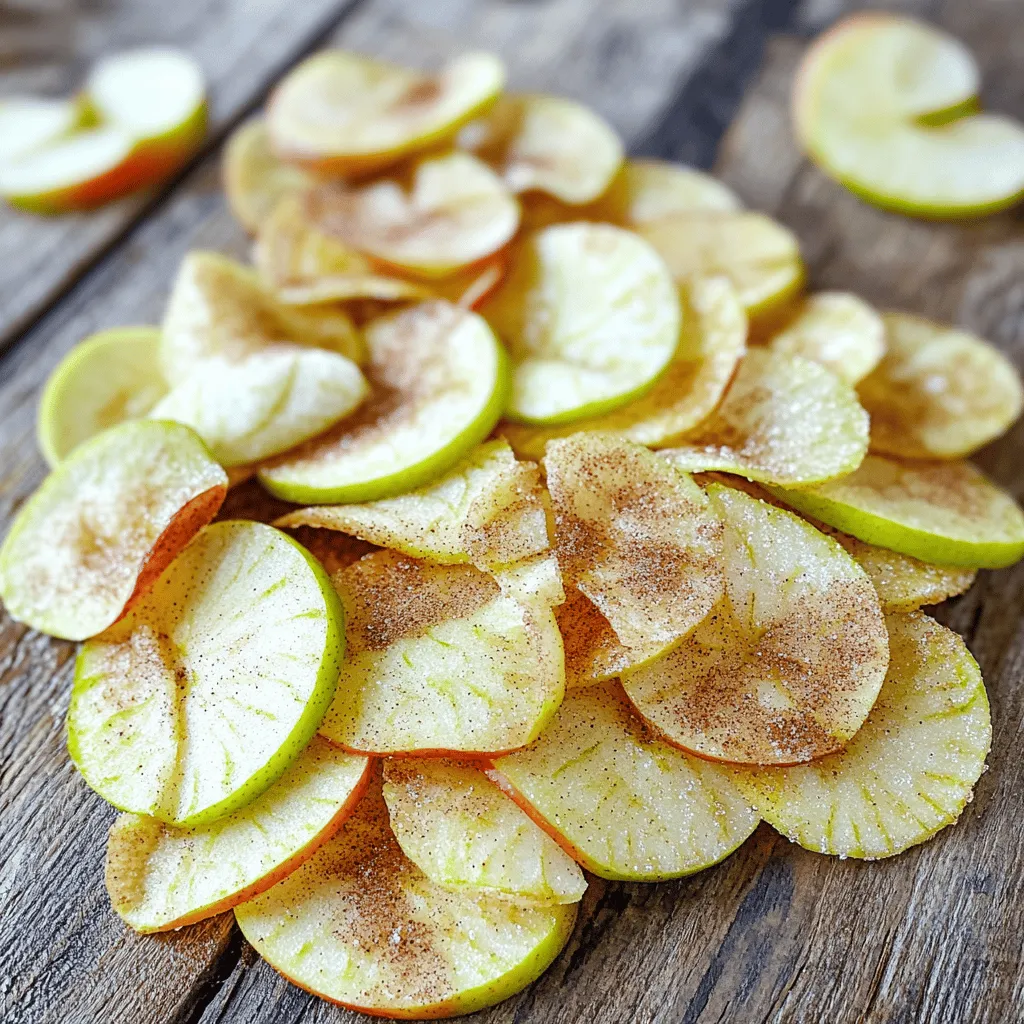
Air Fryer Apple Chips Crunchy and Healthy Snack
Looking for a tasty, healthy snack? You’re in the right place! I’ll show you how to make crunchy air fryer apple chips that are simple
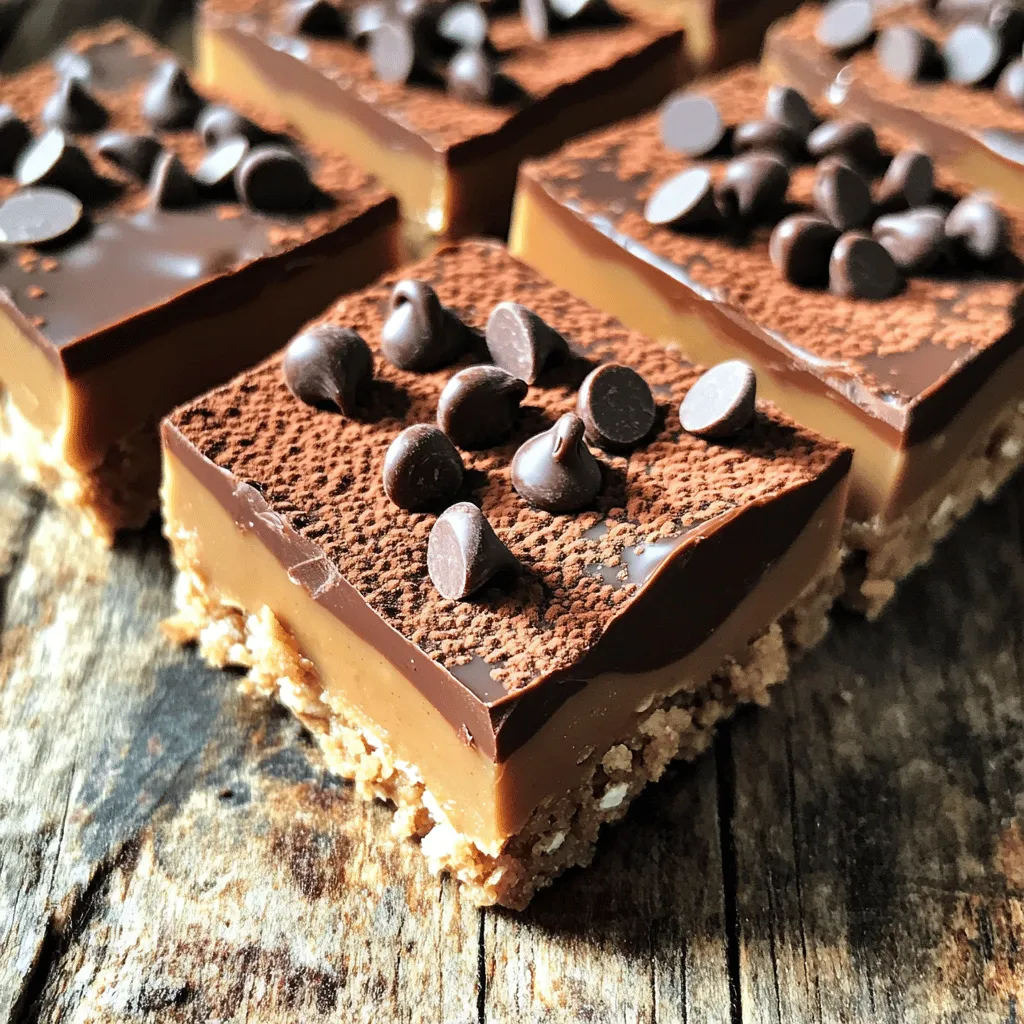
No-Bake Peanut Butter Bars Simple and Tasty Treat
Are you ready to whip up a sweet and easy treat? These No-Bake Peanut Butter Bars are simple to make and packed with flavor. With
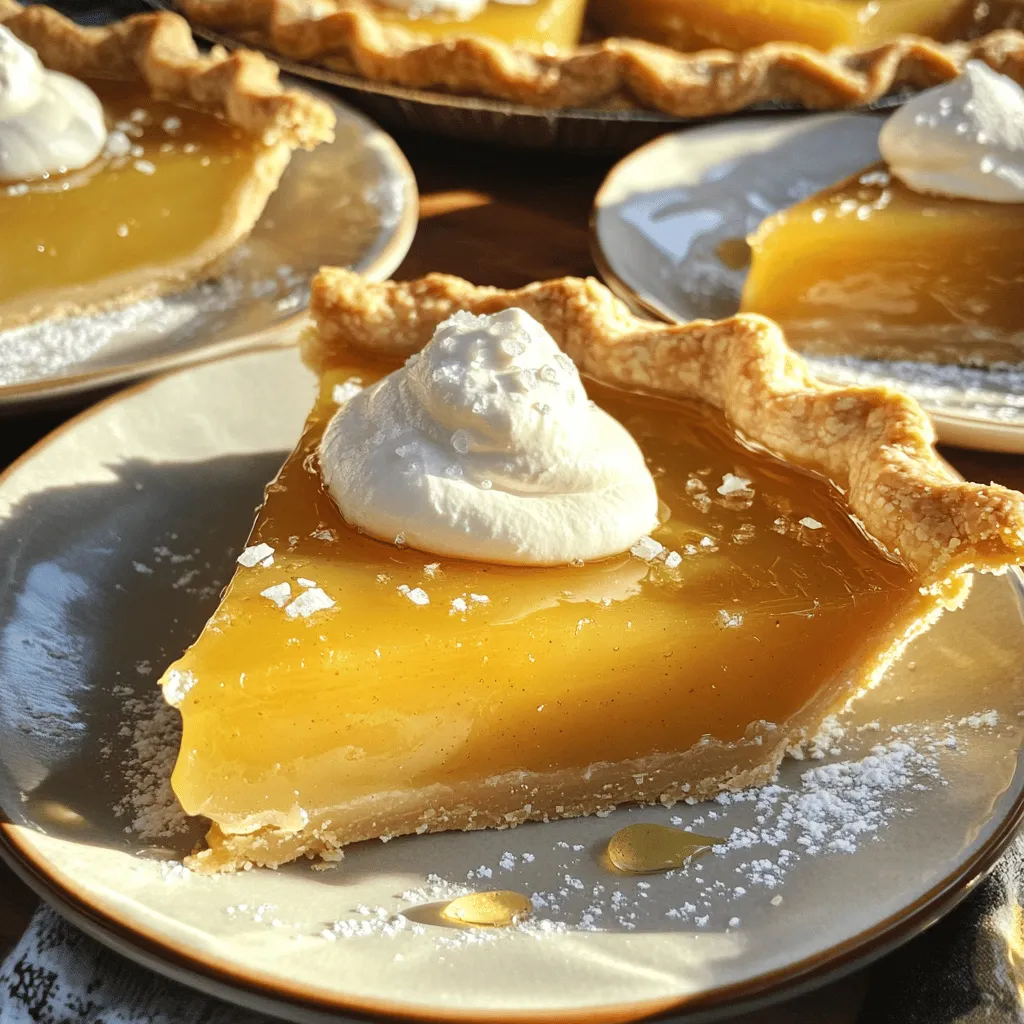
Salted Honey Pie Delicious Sweet and Savory Treat
Looking for a dessert that’s both sweet and savory? You’ll love Salted Honey Pie! This unique treat combines rich honey with a hint of salt