Desserts

To make these tasty pumpkin muffins, gather these ingredients: - 1 ½ cups all-purpose flour - 1 cup granulated sugar - 1 tsp baking soda - ½ tsp baking powder - ½ tsp salt - 1 tsp ground cinnamon - ½ tsp ground nutmeg - ½ tsp ground ginger - ½ cup vegetable oil - 2 large eggs - 1 cup canned pumpkin puree - 1 tsp vanilla extract - ½ cup chocolate chips (optional) - ¼ cup chopped pecans or walnuts (optional) You can add chocolate chips, pecans, or walnuts to your muffins. These add-ins can give your muffins extra flavor and texture. The chocolate chips make them sweeter. Pecans or walnuts add a nice crunch. You can mix and match these as you like. If you need to switch some ingredients, here are some ideas: - Use whole wheat flour for a healthier option. - Swap granulated sugar for brown sugar for a more caramel flavor. - You can use applesauce instead of vegetable oil to cut fat. - For a dairy-free option, skip the eggs and use flaxseed meal mixed with water. These substitutions keep your muffins delicious while making them fit your needs. Start by preheating your oven to 350°F (175°C). Line a muffin tin with paper liners or grease it with non-stick spray. In a large bowl, whisk together: - 1 ½ cups all-purpose flour - 1 cup granulated sugar - 1 tsp baking soda - ½ tsp baking powder - ½ tsp salt - 1 tsp ground cinnamon - ½ tsp ground nutmeg - ½ tsp ground ginger Mix these dry ingredients until they blend well. In another bowl, whisk together: - ½ cup vegetable oil - 2 large eggs - 1 cup canned pumpkin puree - 1 tsp vanilla extract Make sure this mixture is smooth. Now, pour the wet mix into the dry mix. Stir gently until just combined. Lumps are fine; overmixing is not. If you want, fold in: - ½ cup chocolate chips (optional) - ¼ cup chopped pecans or walnuts (optional) Divide the batter evenly among the muffin cups. Fill each about ¾ full. Place the muffin tin in the oven and bake for 18-20 minutes. Check if they are done by inserting a toothpick in the center. If it comes out clean, they are ready. Once baked, take the muffins out of the oven. Let them cool in the tin for 5 minutes. Then, transfer them to a wire rack. Allow them to cool completely. For serving, enjoy them warm with a spread of butter or cream cheese. Pair them with a hot cup of coffee for a cozy treat. To get soft and moist muffins, use the right flour. All-purpose flour works best. Mix your dry and wet ingredients separately. This keeps the muffins light. When you combine them, stir gently. Overmixing makes them tough. Small lumps in the batter are just fine. You can spice up your muffins with extra flavors. Try adding a bit of allspice or cloves for warmth. If you like sweet, add a bit more sugar. Taste your batter before baking to adjust. You may also add vanilla extract for depth. One common mistake is not preheating the oven. Always preheat to 350°F (175°C) first. Another mistake is filling the muffin cups too full. Fill them about ¾ full for the best rise. Lastly, avoid opening the oven door too soon. This can cause your muffins to sink. {{image_2}} You can easily make gluten-free pumpkin muffins. Just swap all-purpose flour for a gluten-free blend. This keeps the texture light but safe for gluten-free diets. Look for blends that include xanthan gum for best results. You can use the same amount of gluten-free flour as the recipe calls for. To make vegan pumpkin muffins, replace eggs with flax eggs. Mix one tablespoon of flaxseed meal with three tablespoons of water. Let it sit until it thickens. Use a plant-based oil, like coconut or canola, in place of vegetable oil. A dairy-free milk can also replace any liquid. This keeps the muffins moist and delicious. You can add other flavors to your pumpkin muffins. Try mixing in diced apples for a fruity twist. Apples add moisture and a sweet crunch. If you love chocolate, fold in chocolate chips. This brings a rich taste to the muffins. You can also add nuts or spices, like cranberries or cardamom, for more flavor. To keep your pumpkin muffins fresh, place them in an airtight container. This method helps keep moisture in. You can store them at room temperature for up to two days. For longer storage, put them in the fridge. They will last for about one week in the fridge. If you want to save your muffins for later, freezing works great. First, let the muffins cool completely. Then, wrap each one in plastic wrap. Place the wrapped muffins in a freezer-safe bag or container. They can last for about three months in the freezer. When you are ready to eat them, simply thaw at room temperature. To enjoy your pumpkin muffins warm, reheating is easy. Preheat your oven to 350°F (175°C). Place the muffins on a baking sheet for about 5-10 minutes. You can also use the microwave. Heat them for 10-15 seconds. Enjoy them warm for the best taste! To make muffins fluffy, you need to mix dry and wet ingredients well. Use baking soda and baking powder in the right amounts. These help the muffins rise. Also, do not overmix the batter. Mix until just combined. This keeps air in the batter, making it light. Yes, you can use fresh pumpkin. Just cook and puree it first. Make sure the puree is smooth and not watery. Fresh pumpkin can give a richer taste. It may also add more texture. However, canned pumpkin is easier and quicker to use. You can keep pumpkin muffins for about a week at room temp. Store them in an airtight container. If you want them to last longer, freeze them. They freeze well for up to three months. Just thaw them before eating. We explored making Dunkin copycat pumpkin muffins, covering key ingredients and adjustments. I shared step-by-step instructions to ensure your muffins turn out perfectly. You now have tips for texture and flavor, plus variations for dietary needs. Storage methods keep your muffins fresh and tasty. Enjoy your baking journey and impress friends with these delightful treats! Remember, your kitchen is a place for creativity.
Dunkin Copycat Pumpkin Muffins Fresh and Tasty Recipe
Craving that warm, spicy taste of autumn? You’re in the right place! With my Dunkin Copycat Pumpkin Muffins recipe, you can whip up these delightful
To make these delightful Apple Pumpkin Streusel Muffins, you need the following main ingredients: - 1 cup pumpkin puree - 1 cup apples, peeled and diced - 2 cups all-purpose flour - 1 teaspoon baking powder - 1 teaspoon baking soda - ½ teaspoon salt - 2 teaspoons ground cinnamon - ½ teaspoon ground nutmeg - 1 cup granulated sugar - ½ cup brown sugar, packed - 2 large eggs - ½ cup vegetable oil - ½ cup milk - 1 teaspoon vanilla extract If you need substitutes, here are some ideas: - You can use unsweetened applesauce instead of pumpkin puree for a lighter muffin. - Swap the all-purpose flour with a gluten-free blend to make it gluten-free. - For a dairy-free option, use almond milk instead of regular milk. For the tasty streusel topping, gather these ingredients: - ½ cup rolled oats - ½ cup all-purpose flour - ¼ cup brown sugar, packed - ½ teaspoon ground cinnamon - ¼ cup cold butter, cubed You can make the streusel topping ahead of time. Just mix the ingredients and store them in the fridge. This way, when you are ready to bake, it will be ready to sprinkle right on top of your muffins. {{ingredient_image_1}} First, preheat your oven to 375°F (190°C). This step is key for even baking. While the oven heats, prepare your muffin tin. You can either line it with paper liners or grease it with butter. Greasing helps the muffins come out easily after baking. For the streusel topping, grab a medium bowl. Combine ½ cup rolled oats, ½ cup all-purpose flour, ¼ cup brown sugar, and ½ teaspoon ground cinnamon. Mixing these ingredients gives the topping a nice flavor. Next, add ¼ cup of cold butter, cubed. Use your fingers or a pastry cutter to mix until it looks like coarse crumbs. This texture adds crunch to your muffins. Now, let's make the muffin batter. In a large bowl, whisk together 2 cups all-purpose flour, 1 teaspoon baking powder, 1 teaspoon baking soda, ½ teaspoon salt, 2 teaspoons ground cinnamon, and ½ teaspoon ground nutmeg. This mixture makes the muffins rise and taste great. In another bowl, beat together 1 cup granulated sugar, ½ cup packed brown sugar, 2 large eggs, ½ cup vegetable oil, ½ cup milk, 1 cup pumpkin puree, and 1 teaspoon vanilla extract. This mix creates a moist batter. After it’s well combined, pour the wet ingredients into the dry ingredients. Gently fold until just combined. Finally, add in the 1 cup diced apples for sweetness and texture. Using a spoon or an ice cream scoop, fill each muffin cup about ¾ full with the batter. This gives them space to rise. Next, generously sprinkle the streusel topping over each muffin. The streusel will bake into a nice, crunchy layer. Bake your muffins in the preheated oven for 18-20 minutes. To check if they are done, insert a toothpick into the center of a muffin. If it comes out clean, they are ready. Once done, remove the muffins from the oven and let them cool in the pan for about 5 minutes. After that, transfer them to a wire rack to cool completely. Enjoy the warm, delicious smell as they cool! To get the best texture for your Apple Pumpkin Streusel Muffins, follow these steps: - Use room temperature ingredients: This helps create a smooth batter. - Mix gently: Fold wet and dry ingredients until just combined. Over-mixing makes muffins tough. - Check your oven: Every oven is different. Use an oven thermometer to ensure accurate temperature. Measuring ingredients accurately is key. Use a kitchen scale for precise measurements. For dry ingredients like flour, spoon it into a cup and level it off with a knife. This prevents packing, which can make your muffins dense. Serve your muffins warm for the best flavor. Dust them with powdered sugar for a sweet touch. Pair them with a small bowl of whipped cream or sliced apples. This adds freshness and a nice contrast to the rich muffins. For drinks, try serving these muffins with apple cider or a spiced latte. The warm flavors complement each other perfectly. To keep your muffins fresh, store them in an airtight container at room temperature. This helps maintain moisture and flavor. If you need to store them longer, consider freezing them. Wrap each muffin in plastic wrap and place them in a freezer bag. This keeps them fresh for up to three months. When you’re ready to enjoy, just thaw them at room temperature or warm them in the oven. Pro Tips Use Fresh Ingredients: For the best flavor and texture, use fresh, seasonal apples and high-quality pumpkin puree. Don’t Overmix: When combining wet and dry ingredients, mix until just combined to ensure your muffins remain light and fluffy. Cool Before Serving: Allow the muffins to cool slightly before serving to enhance their flavor and texture. Experiment with Spices: Feel free to adjust the spices according to your taste; adding ginger or cloves can give a nice twist to the flavor. {{image_2}} You can easily change the flavors in your Apple Pumpkin Streusel Muffins. Adding nuts like walnuts or pecans gives a nice crunch. Chopped nuts blend well with the soft muffin. They add a nutty flavor that complements the pumpkin. If you want a sweet twist, try adding chocolate chips or dried fruit. Chocolate chips melt and create gooey pockets of goodness. Dried fruit, like cranberries or raisins, adds a chewy texture. Both options make the muffins even more delicious. For those needing gluten-free options, replace all-purpose flour with a gluten-free blend. Almond flour or oat flour works well too. This change keeps the muffins tasty while meeting dietary needs. If you want to cut down on sugar, use substitutes like applesauce or ripe bananas. These options keep the muffins moist and sweet. You can also try using stevia or monk fruit for a healthier muffin. This way, you can enjoy a treat without the extra calories. To check if the muffins are done, use a toothpick. Insert it into the center of a muffin. If it comes out clean, they are ready. If there is batter on the toothpick, bake for a few more minutes and test again. This simple method helps ensure perfect muffins every time. Yes, you can make these muffins ahead of time. Allow them to cool completely after baking. Then, store them in an airtight container at room temperature for up to 2 days. For longer storage, wrap them in plastic and freeze. Just thaw before serving. You can use both fresh and canned pumpkin for these muffins. Canned pumpkin is convenient and consistent in texture. Fresh pumpkin gives a richer flavor but requires more work. If using fresh, roast and puree it first for the best results. Both options lead to delicious muffins. For a crispier streusel, use cold butter and mix it well with dry ingredients. Ensure the mixture looks like coarse crumbs. You can also bake the muffins a bit longer, but check frequently to avoid burning. Adding nuts can also enhance the crunchiness of the topping. After baking, you can add a dusting of powdered sugar for sweetness. A drizzle of caramel sauce adds richness. Consider serving with whipped cream or a scoop of vanilla ice cream for extra flavor. Chopped nuts or a sprinkle of cinnamon can also enhance the muffins’ taste. These muffins are packed with great flavors and textures. We covered key ingredients like pumpkin, apples, and spices. You learned how to prep the oven and muffin tin. Making the streusel topping was also simple. With tips for perfect results and fun variations, you can customize your muffins. Proper storage methods ensure they stay fresh. Enjoy baking these delicious treats, and experiment with your own ideas to make them even better.
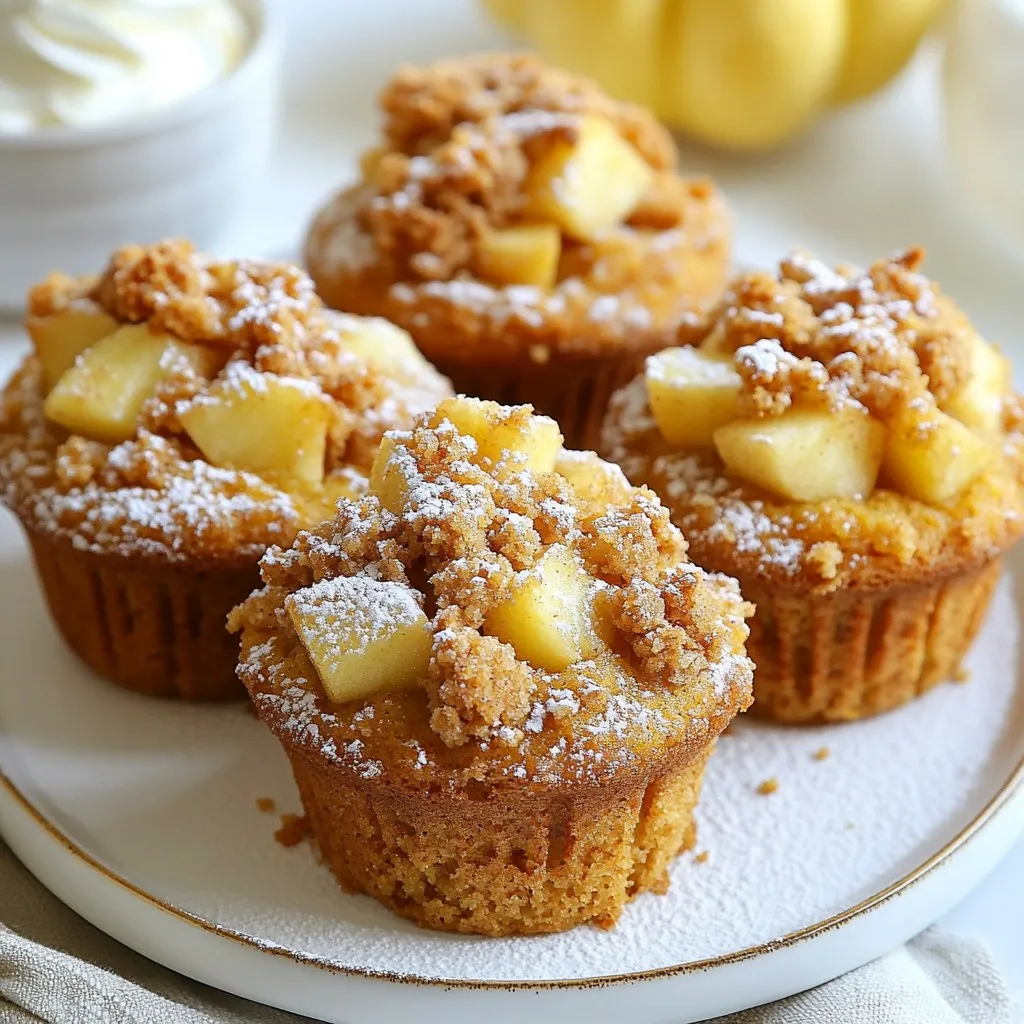
Apple Pumpkin Streusel Muffins Irresistible Flavor Treat
Get ready to delight your taste buds with Apple Pumpkin Streusel Muffins! This recipe combines warm spices, tender pumpkin, and tart apples for a treat
To make Vanilla Spiced Pumpkin Bread, you need a few simple ingredients. Here’s the list: - 1¾ cups all-purpose flour - 1 teaspoon baking soda - ½ teaspoon baking powder - 1 teaspoon ground cinnamon - ½ teaspoon ground nutmeg - ¼ teaspoon ground ginger - ½ teaspoon salt - 1 cup pumpkin puree - ½ cup granulated sugar - ¼ cup brown sugar, packed - ½ cup vegetable oil - 2 large eggs - 1 teaspoon pure vanilla extract - Optional: ½ cup chopped pecans - Optional: ½ cup chocolate chips Each ingredient plays a key role in making this bread tasty. The flour gives the bread its structure. The pumpkin puree adds moisture and flavor. The spices bring warmth and a cozy fall smell. The vanilla extract enhances sweetness and adds depth. You can customize the recipe by adding pecans or chocolate chips if you'd like. Nuts add a nice crunch, while chocolate gives a sweet surprise. Enjoy choosing the mix-ins that excite your taste buds! - Preheat oven to 350°F (175°C). - Prepare the loaf pan by greasing it well. - In a medium bowl, whisk together: - 1 ¾ cups all-purpose flour - 1 teaspoon baking soda - ½ teaspoon baking powder - 1 teaspoon ground cinnamon - ½ teaspoon ground nutmeg - ¼ teaspoon ground ginger - ½ teaspoon salt This mix gives your bread a warm, spiced flavor. - In a large bowl, mix: - 1 cup pumpkin puree - ½ cup granulated sugar - ¼ cup brown sugar, packed - ½ cup vegetable oil Stir until smooth. Add: - 2 large eggs, one at a time. Mix well after each egg. - Stir in 1 teaspoon pure vanilla extract until fully mixed. - Gradually add the dry mixture to the wet mixture. Stir gently until just combined. - If you want extra flavor, fold in: - ½ cup chopped pecans (optional) - ½ cup chocolate chips (optional) These add a nice crunch and sweetness. - Pour the batter into the prepared loaf pan. Smooth the top with a spatula. - Bake in the preheated oven for 55-65 minutes. Check for doneness by inserting a toothpick into the center. It should come out clean. - After baking, let the bread cool in the pan for about 10 minutes. Then, transfer it to a wire rack to cool completely. To bake Vanilla Spiced Pumpkin Bread just right, first ensure your oven is at 350°F (175°C). An oven thermometer can help. This keeps the bread from being too dry or too wet. To test for doneness, use a toothpick. Insert it into the center of the bread. If it comes out clean, your bread is ready. If not, give it a few more minutes. You can boost flavor with spices like allspice or cardamom. A splash of orange zest also adds brightness. Feel free to play around with different extracts too, like almond or hazelnut. Mix-ins can take your bread to the next level. Chopped apples or dried cranberries add sweetness. If you love texture, consider adding walnuts or pecans. Just fold them in gently before baking. When serving, slice the bread and enjoy it warm or at room temperature. Dust a bit of powdered sugar on top for a sweet touch. For a special treat, drizzle a warm cream cheese glaze over the top. You can also serve it with a dollop of whipped cream cheese for some extra creaminess. {{image_2}} You can change the spices in your pumpkin bread. Try adding gingerbread or chai spices. These flavors add warmth and depth. You can also swap out sweeteners. Instead of granulated sugar, try maple syrup or honey. Each sweetener gives a unique taste to the bread. If you need gluten-free options, use almond flour or oat flour. Both can work well in this recipe. For dairy-free, replace eggs with flax eggs or applesauce. Use coconut oil instead of vegetable oil. These swaps keep the bread moist and tasty. To make your bread even more festive, add cranberries or diced apples. Both bring a sweet and tart flavor that fits the fall theme. You can also transform this recipe into muffins or pancakes. Just adjust the baking time for each. Muffins cook faster, while pancakes need a hot skillet. Enjoy these variations to keep things exciting! To keep your vanilla spiced pumpkin bread fresh, store it at room temperature. Wrap it in plastic wrap or place it in an airtight container. This keeps moisture in and prevents it from drying out. If you plan to eat it later, refrigerate it. Make sure to wrap it well. For long-term storage, freeze the bread. Slice it first for easy thawing. Wrap each slice in plastic wrap, then place them in a freezer bag. When stored properly, this pumpkin bread lasts about 3 to 4 days at room temperature. In the fridge, it can last up to a week. If you freeze it, the bread stays good for about 3 months. Just remember to thaw it in the fridge before enjoying it. To bring back the fresh taste, reheat your pumpkin bread in the oven. Preheat your oven to 350°F (175°C). Place the slice on a baking sheet and heat for about 10 minutes. You can also use the microwave. Heat it for about 15 to 20 seconds. If you want a warm slice, serve it with butter or cream cheese. This adds a nice touch to the flavor! Can I use fresh pumpkin instead of puree? Yes, you can use fresh pumpkin. First, cook and mash it until smooth. Use the same amount as puree in the recipe. It adds a fresh taste to your bread. How do I know when the bread is done baking? To check if the bread is done, insert a toothpick into the center. If it comes out clean, the bread is ready. It usually takes 55 to 65 minutes to bake. Can I leave out the nuts or chocolate chips? Absolutely! You can skip the nuts and chocolate chips if you prefer. The bread will still taste great. You can also try other mix-ins if you like. What should I serve with Vanilla Spiced Pumpkin Bread? Serve it warm or at room temperature. A dusting of powdered sugar adds a nice touch. You can drizzle cream cheese glaze on top or serve it with whipped cream cheese for extra flavor. In this blog post, we covered how to make Vanilla Spiced Pumpkin Bread. We discussed the main ingredients, which add flavor and texture. You learned step-by-step instructions, tips for success, and fun variations. I shared storage advice and answered common questions to help you. Now, enjoy trying this recipe. It’s perfect for any season and great for sharing! Happy baking!
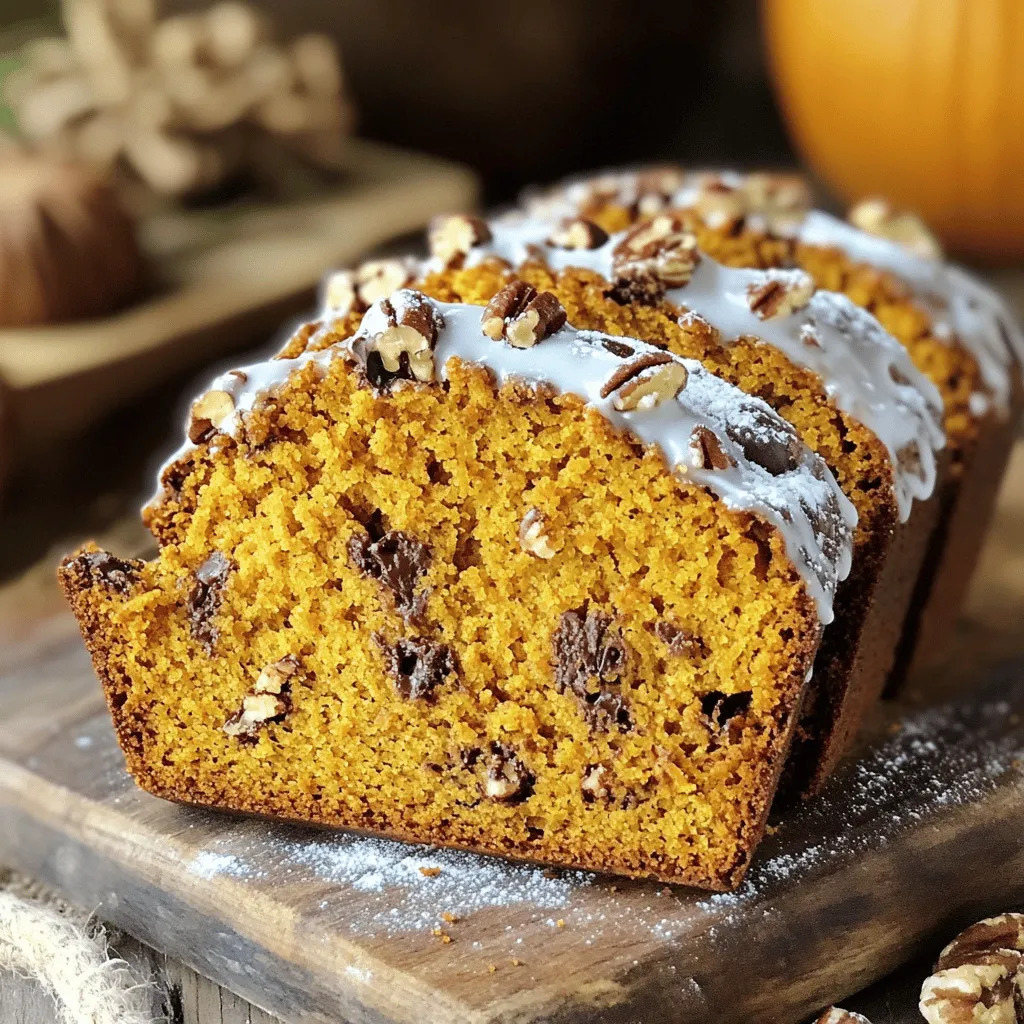
Vanilla Spiced Pumpkin Bread Irresistible Fall Treat
Fall is here, and it’s time to indulge in warm, cozy treats! If you love the rich flavors of pumpkin, cinnamon, and vanilla, then you’re
To make a S'mores Brownie Skillet, gather these simple ingredients: - 1 cup unsalted butter, melted - 1 1/4 cups granulated sugar - 3/4 cup brown sugar, packed - 4 large eggs - 1 teaspoon vanilla extract - 1 cup all-purpose flour - 1 cup unsweetened cocoa powder - 1/2 teaspoon baking powder - 1/2 teaspoon salt - 1 cup mini marshmallows - 1 cup graham cracker crumbs - 1/2 cup chocolate chips (semi-sweet or milk chocolate) - Extra mini marshmallows and graham cracker crumbs for topping Each ingredient plays a key role in creating rich and gooey brownies. The butter brings moisture, while sugars add sweetness and depth. Eggs bind the mix, giving it that classic brownie texture. Cocoa powder gives the chocolatey flavor. Graham crackers and marshmallows bring the s'mores vibe. The mini marshmallows melt beautifully, adding gooeyness. The chocolate chips enhance the chocolate flavor, making each bite dreamy. Use quality ingredients for the best taste. This recipe is easy to follow, making it perfect for cooks of all skill levels. Enjoy gathering these ingredients and preparing for a delightful treat! 1. Preheat and Prepare Skillet Start by preheating your oven to 350°F (175°C). While it heats, grab a 10-inch cast iron skillet. Grease it well with butter or non-stick spray. This helps prevent sticking. 2. Mix Wet Ingredients In a large mixing bowl, whisk together 1 cup of melted butter, 1 1/4 cups of granulated sugar, and 3/4 cup of brown sugar. Make sure everything is smooth and well combined. This mix adds rich flavor. 3. Combine Dry Ingredients In another bowl, sift together 1 cup of all-purpose flour, 1 cup of unsweetened cocoa powder, 1/2 teaspoon of baking powder, and 1/2 teaspoon of salt. Sifting helps remove lumps and mix the dry ingredients well. 4. Incorporate Ingredients Together Add 4 large eggs to the wet mixture one at a time. Stir well after each egg. Then mix in 1 teaspoon of vanilla extract. Gradually add the dry mix to the wet mix. Stir gently until just combined. Avoid overmixing to keep the brownies tender. 5. Bake and Broil Instructions Fold in 1 cup of mini marshmallows, 1 cup of graham cracker crumbs, and 1/2 cup of chocolate chips. Pour the batter into the greased skillet. Spread it evenly. Bake for about 25-30 minutes. Check with a toothpick; it should come out with a few moist crumbs. After baking, sprinkle more mini marshmallows and graham cracker crumbs on top. Broil on high for 1-2 minutes until the marshmallows are golden. Keep a close eye on it to avoid burning. Let it cool for a few minutes before serving. Enjoy your warm, gooey treat! Avoiding Overbaking Overbaking can ruin your brownies. Bake for 25 to 30 minutes. Check with a toothpick. It should have a few moist crumbs. If the toothpick comes out clean, you have baked too long. Always watch closely during the last few minutes of baking. Using Quality Ingredients Using good ingredients makes a big difference. Select high-quality chocolate chips and cocoa powder. The better the chocolate, the richer your brownies will taste. Also, use fresh eggs for the best texture. Fresh mini marshmallows help achieve that gooey s’mores effect. Serving Suggestions Serve your brownie skillet warm. Add scoops of vanilla ice cream on top. Sprinkle extra graham cracker crumbs over the ice cream. Drizzle with chocolate sauce for a sweet touch. This makes each bite a decadent treat. Enjoy sharing this delight with friends or family! {{image_2}} Different Flavors of Chocolate Chips You can play with chocolate chip flavors. Try dark chocolate chips for a richer taste. White chocolate chips add a sweet, creamy flavor. You can even mix them! This gives your brownies a fun twist. Adding Nuts for Crunch Nuts add a nice crunch. Chopped walnuts or pecans work well. Just fold them gently into the batter. This gives texture and extra flavor. Be sure to use fresh nuts for the best taste. Gluten-Free Substitution Ideas Want to make this dish gluten-free? Swap the all-purpose flour for almond flour or a gluten-free blend. Both options keep the brownies moist and tasty. Just make sure the other ingredients are also gluten-free. It’s an easy way to enjoy s’mores brownies without worry. Refrigeration Guidelines Store your S'mores Brownie Skillet in an airtight container. Let it cool first. Cover it tightly to keep it fresh. Place it in the fridge if you do not eat it right away. Reheating Tips To reheat, use your oven for the best results. Preheat your oven to 350°F (175°C). Place the skillet in the oven for about 10 minutes. You can also use a microwave. Heat it in short bursts of 15 seconds. Make sure it warms up, but does not get too hot. Shelf Life Expectations When stored properly, your S'mores Brownie Skillet lasts about 3 to 5 days in the fridge. After that, it may lose its taste and texture. If you want to keep it longer, consider freezing it. Wrap it tightly with plastic wrap, then foil. It can stay good in the freezer for about 2 months. Can I make this recipe ahead of time? Yes, you can prepare the batter a day before. Store it in the fridge. Just make sure to bake it fresh when you're ready to serve. This keeps the brownies gooey and warm. What can I substitute for eggs? If you need an egg substitute, use 1/4 cup applesauce for each egg. You can also use mashed bananas or a flaxseed mix. Just mix one tablespoon of ground flaxseed with two and a half tablespoons of water. Let it sit for a few minutes to thicken. How to make it more chocolatey? To boost the chocolate flavor, add an extra 1/4 cup of cocoa powder. You can also mix in more chocolate chips or use chocolate chunks. Dark chocolate can add a rich taste, too. This blog post covered everything you need to make a tasty S'mores Brownie Skillet. We went through the ingredients, step-by-step instructions, and tips to ensure your dish shines. Don’t forget to try the variations for a unique twist. Proper storage will keep your brownies fresh too. Enjoy baking this treat for yourself or to share with friends. It’s simple, fun, and delicious!
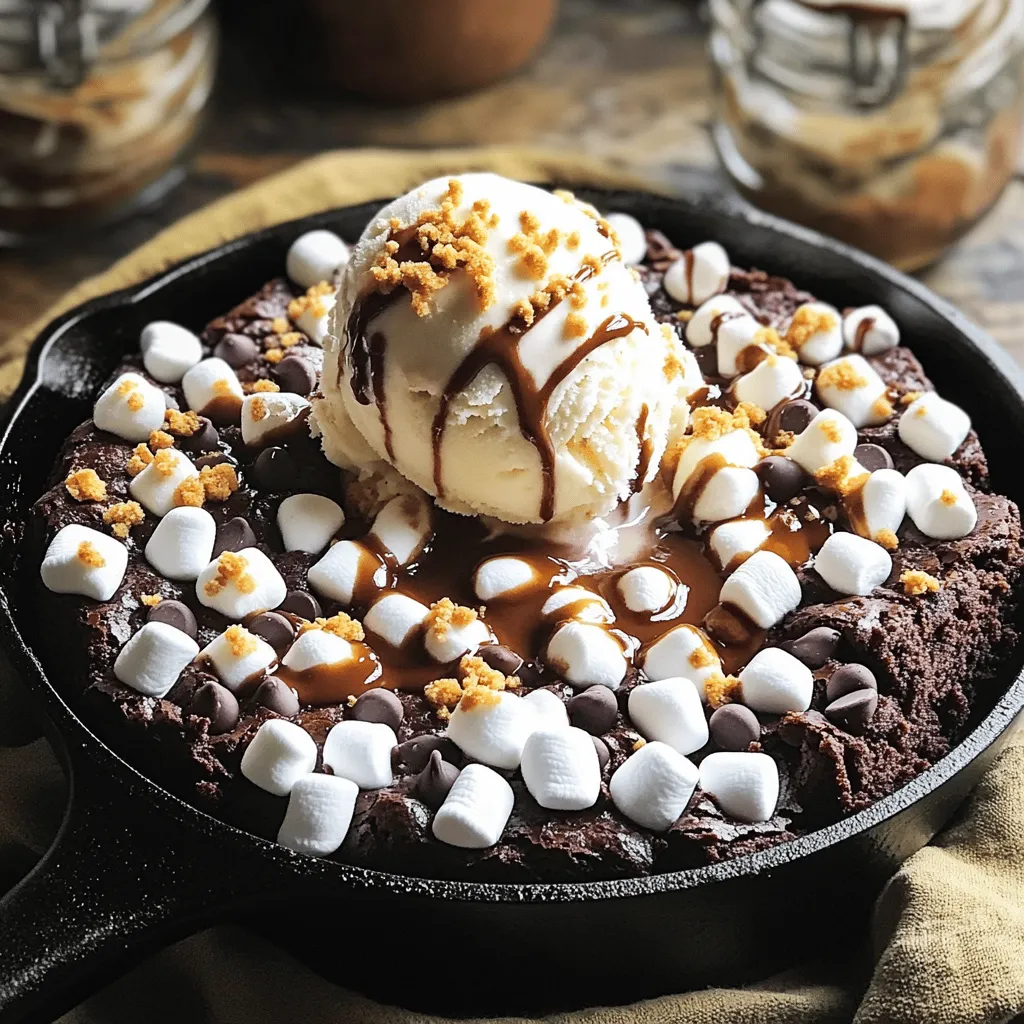
S’mores Brownie Skillet Rich and Decadent Delight
Indulge in a S’mores Brownie Skillet that will take your dessert game to the next level! Imagine warm, gooey brownies packed with rich chocolate, melty
- 1 cup rolled oats - 1/2 cup unsweetened shredded coconut - 1/4 cup almond butter - 1/4 cup honey or maple syrup - Zest of 1 lime - 2 tablespoons fresh lime juice - 1/4 teaspoon sea salt - 1/4 teaspoon pure vanilla extract - 2 tablespoons chia seeds (optional) - 1/4 cup mini dark chocolate chips (optional) The base of these energy bites is simple yet packed with flavor. Rolled oats provide a hearty texture. Unsweetened shredded coconut adds a tropical twist. Almond butter gives a creamy richness. You can switch to peanut or cashew butter if you like. Honey or maple syrup serves as a natural sweetener. Zest from the lime brightens the taste. Fresh lime juice adds zing. Sea salt balances the sweetness. Pure vanilla extract enhances the flavors. Chia seeds offer extra nutrition and are optional. Mini dark chocolate chips add a fun crunch and sweetness, also optional. You can mix and match these ingredients to suit your taste. - Try sunflower seed butter if you want a nut-free option. - Use agave syrup or coconut sugar for vegan sweeteners. - For gluten-free bites, choose certified gluten-free oats. These substitutions keep the recipe flexible. You can enjoy the energy bites, even if you have allergies or dietary needs. - Each serving has about 100 calories. - The bites provide a balance of carbs, fats, and protein. - Rolled oats and chia seeds add fiber and healthy fats. These energy bites also offer potential health benefits. They can boost your energy and help with focus. The wholesome ingredients make them a smart snack choice. - Mixing dry ingredients Start by taking a large mixing bowl. Add 1 cup of rolled oats and 1/2 cup of unsweetened shredded coconut. Stir them together well. This mix gives your energy bites great texture and flavor. - Preparing wet ingredients In a separate bowl, combine 1/4 cup of almond butter, 1/4 cup of honey or maple syrup, the zest of 1 lime, 2 tablespoons of fresh lime juice, 1/4 teaspoon of sea salt, and 1/4 teaspoon of pure vanilla extract. Mix these until smooth. This mixture adds moisture and a lovely taste. - Merging wet and dry mixtures Now, pour the wet ingredients into the dry mix. Stir everything together until it is well combined. The mixture should hold together nicely, with no dry oats left. - Folding in optional ingredients If you like, fold in 2 tablespoons of chia seeds and 1/4 cup of mini dark chocolate chips. These optional items add a fun twist and more nutrients. - Forming the energy bites Use your hands to shape the mixture into small balls, about 1 inch in diameter. If the mixture sticks to your hands, wet them slightly. This helps form perfect little bites. - Chilling instructions Place the energy bites on a parchment-lined baking sheet. Refrigerate them for at least 30 minutes. This step helps the bites firm up, making them easier to eat. After chilling, store them in an airtight container. To get the right texture for your Coconut Lime Energy Bites, focus on stickiness. If your mixture feels too sticky, try wetting your hands with a little water. This helps shape the bites without making a mess. If the mixture is too dry, add a splash of lime juice or a bit more almond butter. This will help bind it together. Rolling the bites can be fun! Use your palms to roll them into balls. Aim for one-inch sizes for the best bite. Make sure your hands are slightly damp to avoid sticking. This way, you’ll end up with smooth, round bites that look great. These energy bites pair well with drinks. Try them with a cold glass of coconut milk or a refreshing herbal tea. The flavors of lime and coconut bring out the best in both drinks. Presentation matters too! Arrange the bites on a colorful plate. You can sprinkle extra shredded coconut on top for flair. Add some lime wedges around the plate for a pretty touch. It makes a great snack for parties or a healthy treat for yourself. To save time, you can make these energy bites in advance. Prepare a batch and store them in the fridge. They stay fresh for about a week. For meal prep, keep them in an airtight container. This helps keep them soft and tasty. You can also freeze the bites for longer storage. Just thaw them in the fridge overnight before eating. This way, you always have a quick snack ready to go! {{image_2}} You can change the flavor of your Coconut Lime Energy Bites easily. Try adding different citrus zests like lemon or orange. These zests will give your bites a fresh twist. You can also mix in spices like cinnamon. Cinnamon adds warmth and depth. Just a pinch can make a big difference! If you follow a vegan diet, swap honey for maple syrup. This keeps your bites sweet and plant-based. You can also choose gluten-free oats for those avoiding gluten. Look for certified gluten-free oats to ensure safety. Want to try a different taste? Switch up the nut butter! Peanut butter or cashew butter works well too. If you prefer a different sweetener, use agave syrup or coconut nectar. These swaps keep the bites tasty and fun! To keep your Coconut Lime Energy Bites fresh, use an airtight container. This prevents moisture and keeps them tasty. Place the container in the fridge. A temperature of 35 to 40 degrees Fahrenheit works best for storage. In the fridge, these energy bites stay fresh for up to one week. If you want to keep them longer, use the freezer. They will last up to three months in the freezer. Just make sure to wrap them well to avoid freezer burn. You can enjoy these energy bites cold right from the fridge. If you prefer them warm, heat them in the microwave for about 10-15 seconds. This will make them soft and tasty. Just be careful not to overheat them, as they can become too gooey. Coconut Lime Energy Bites stay fresh for about one week in the fridge. Store them in an airtight container. You can also freeze them for up to three months. This way, you always have a tasty snack ready. Just let them thaw in the fridge before eating. Yes, you can make these bites without nuts. Substitute almond butter with sun butter or a seed butter. This keeps the bites creamy and tasty. Just make sure to check for allergies when serving them to others. You can change up the flavors easily! Try adding different zests like orange or lemon. You can also mix in spices like cinnamon or nutmeg. For a crunch, add seeds or dried fruit. This lets you make a unique snack each time. Absolutely! Coconut Lime Energy Bites are great for kids. They are sweet and fun to eat. Plus, they pack a nutritious punch. Just keep an eye on any nut allergies when sharing them. These Coconut Lime Energy Bites are easy to make and tasty too. We covered the simple ingredients and helpful substitutions to fit your needs. You can adjust the flavor and texture with different mix-ins or spices. Store them in an airtight container for freshness. These bites are perfect for snacks or on-the-go energy. Try them out and enjoy the benefits of a healthy treat!
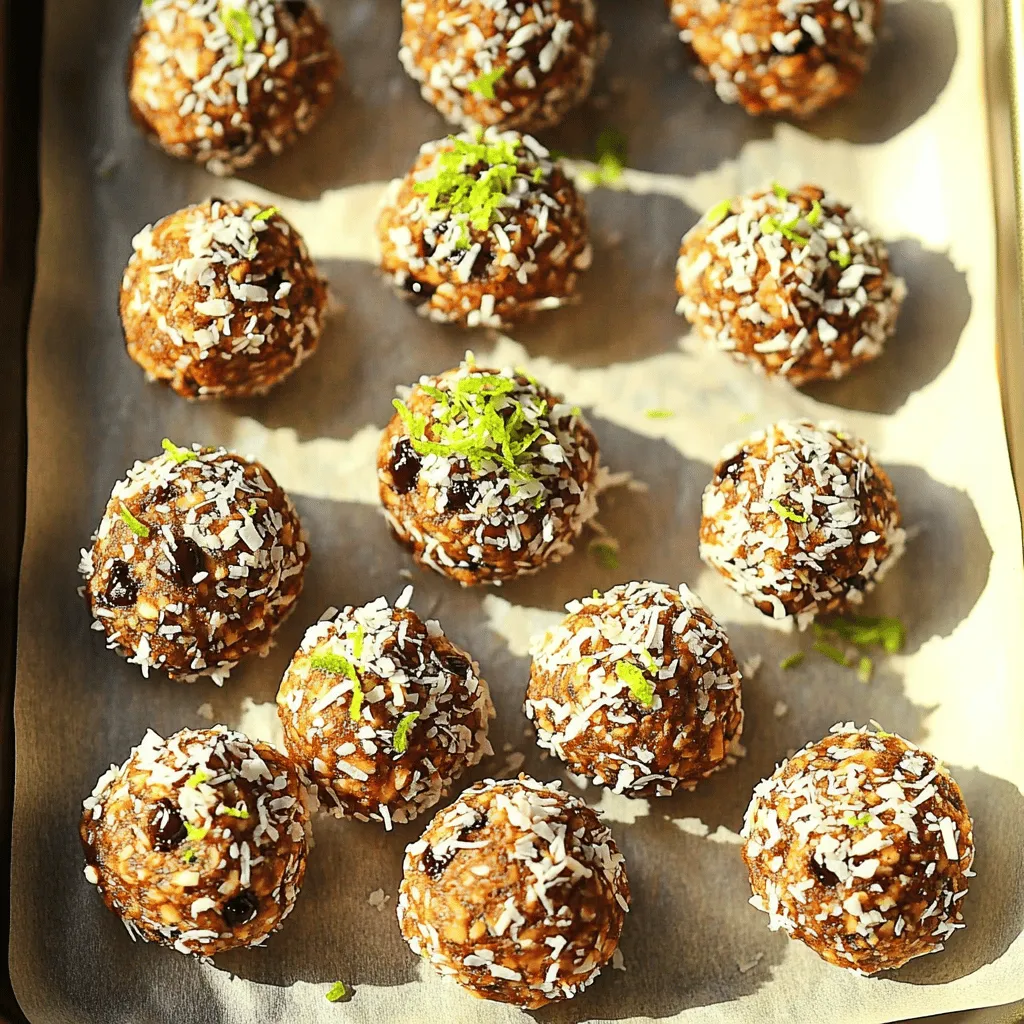
Coconut Lime Energy Bites Delicious and Easy Snack
Looking for a quick, tasty snack? You’ve come to the right place! These Coconut Lime Energy Bites are not only delicious but also easy to
To make these tasty Strawberry Pretzel Salad Cups, gather the following ingredients: - 1 cup crushed pretzels - 1/4 cup granulated sugar - 1/2 cup unsalted butter, melted - 8 oz cream cheese, softened - 1 cup powdered sugar - 1 cup whipped topping (or whipped cream) - 2 cups fresh strawberries, sliced - 1/2 cup strawberry gelatin powder - 1 1/2 cups boiling water - 1 cup cold water You can make these cups with a few swaps if needed. Use gluten-free pretzels for a gluten-free treat. If you don't have cream cheese, you can try ricotta cheese for a lighter taste. Coconut whipped cream works great if you're avoiding dairy. You can also use any berry gelatin if you want to change the flavor. These delightful cups are not just tasty but also provide some nutrition. Each serving has about: - Calories: 200 - Protein: 2g - Fat: 10g - Carbohydrates: 28g - Sugar: 12g These numbers can change based on your ingredient choices. Always check the labels for the most accurate data. Enjoy your tasty treat while being mindful of what you eat! To start, gather your ingredients. You need crushed pretzels, sugar, butter, cream cheese, powdered sugar, whipped topping, strawberries, gelatin powder, boiling water, and cold water. In a bowl, mix the crushed pretzels, granulated sugar, and melted butter. Stir until the pretzels are well coated. This mix makes a tasty crust. Next, press the pretzel mix firmly into muffin liners in a muffin tin. Make sure to create an even layer. Bake this at 350°F (175°C) for 10 minutes. After baking, let the crust cool completely. This step is key. A cool crust holds the filling better. Once the crust is cool, make the cream cheese layer. In a bowl, beat the softened cream cheese and powdered sugar together until smooth. Fold in the whipped topping gently. This mixture should be light and creamy. Spoon this mix evenly into the cooled pretzel crusts. Smooth the tops for a nice finish. Now, prepare the strawberry layer. In another bowl, mix the strawberry gelatin powder with boiling water. Stir until it dissolves fully. Add cold water and stir again. Let this cool slightly before adding the sliced strawberries. Carefully pour this mixture over the cream cheese layer in each cup, filling them to the top. Finally, refrigerate the cups for 2-3 hours. This lets the gelatin set. Once set, gently remove the salad cups from the muffin tin and serve chilled. Enjoy your delicious Strawberry Pretzel Salad Cups! To get the best texture, ensure your pretzel crust is firm. Press the crushed pretzels hard into the muffin liners. Bake them just until they are golden, about ten minutes. Let the crust cool completely before adding the cream cheese layer. This will keep the layers from mixing. For a beautiful display, use clear cups or dessert glasses. Layer the cream cheese mixture and strawberries neatly. Top with a dollop of whipped cream for extra flair. A sprig of mint can add a pop of color. Arrange them on a pretty platter for a fun look. One common mistake is not letting the crust cool. This can cause the layers to blend. Another error is pouring the gelatin too soon. Always let it cool slightly before adding strawberries. Lastly, avoid overmixing the cream cheese and whipped topping. This keeps the mixture light and fluffy. {{image_2}} You can swap strawberries for other fruits. Try blueberries, raspberries, or peaches. Each fruit adds its own flavor. For a tropical twist, use mango or pineapple. You can mix fruits to make it colorful. Just ensure they are fresh for the best taste. While strawberry gelatin shines in this recipe, you can try other flavors. Cherry, raspberry, or even lemon gelatin can work well. Each flavor brings a new taste to your cups. Just follow the same steps with your chosen gelatin. The process remains simple, and the results are still delicious. To make these cups gluten-free, use gluten-free pretzels. Many brands offer tasty options. For a vegan version, swap cream cheese for a plant-based alternative, like cashew cream. Use coconut whipped cream instead of regular whipped topping. This way, everyone can enjoy these delightful treats! Store your Strawberry Pretzel Salad Cups in an airtight container. This keeps them fresh and tasty. You can use plastic wrap as an extra layer. Make sure to place them in the fridge. Avoid stacking them, as this can cause them to break. These tasty cups can last for about 3 to 4 days in the fridge. The crust stays crunchy for a while, but the gelatin may soften over time. If you want the best flavor and texture, eat them sooner rather than later. You can freeze these cups if you have leftovers. Wrap each cup in plastic wrap, then place them in a freezer-safe bag. They can last up to a month in the freezer. When you're ready to eat, just thaw them in the fridge overnight. Enjoy them when they are cool and set! You can skip the gelatin and use fresh strawberries and cream. First, mash the berries and mix them with a little sugar. Next, fold the mashed strawberries into the cream cheese mixture. Spoon this mix over the pretzel crust. Chill for a while. The cups will still taste great! Yes, you can use frozen strawberries. Just thaw them first and drain any extra juice. This prevents the cups from being too watery. Slice the thawed strawberries and mix them in as you would fresh ones. They will still taste sweet and delicious! Serve the cups chilled for the best taste. You can also garnish them with extra sliced strawberries or whipped cream. This adds color and makes them look pretty. Place them on a tray for a fun presentation at parties or gatherings. Enjoy the smiles they bring! In this post, we covered how to make tasty Strawberry Pretzel Salad Cups. We listed the key ingredients and suggested substitutions to fit your needs. I shared step-by-step instructions for easy prep and baking. You also learned tips for perfect texture and common mistakes to avoid. Don’t forget the fun variations and storage tips! Enjoy your delicious cups and get creative with flavors. These treats are sure to impress anyone. Making them is simple, and they taste amazing!
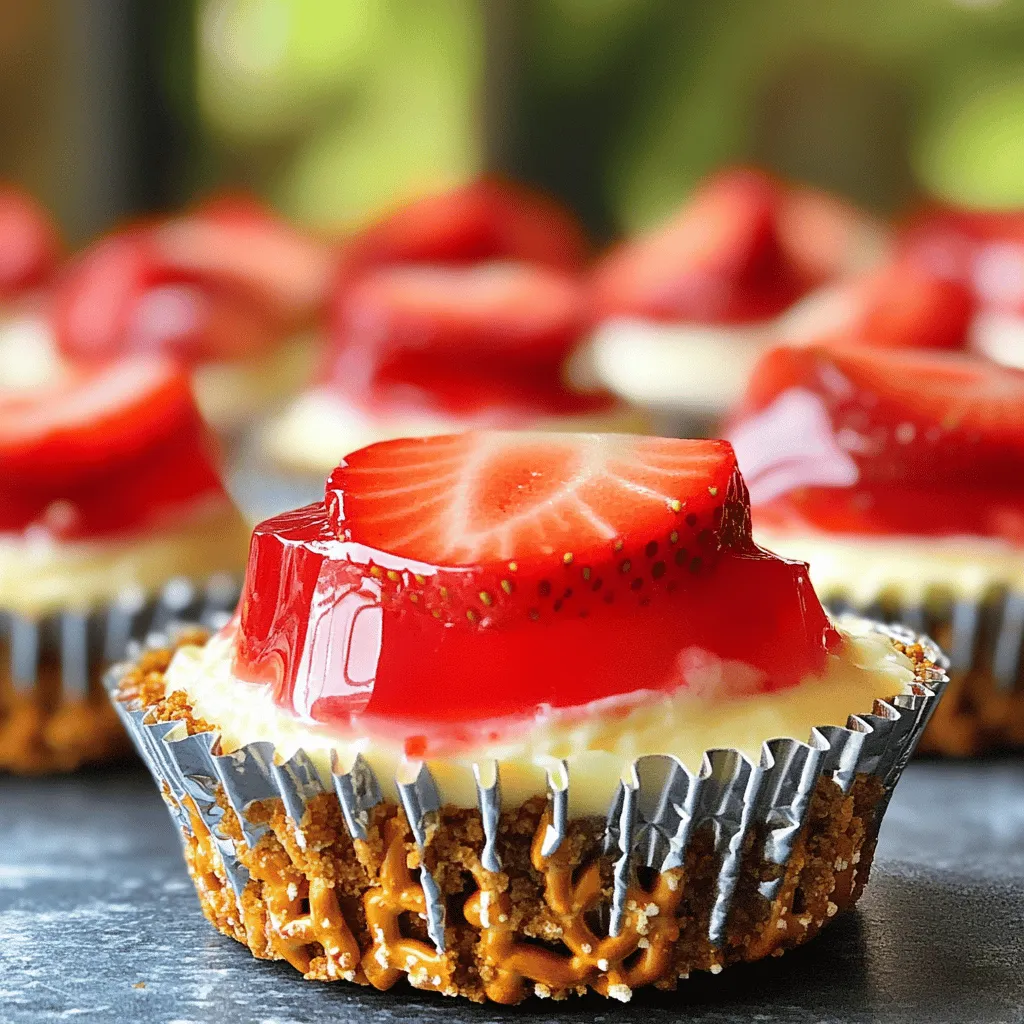
Strawberry Pretzel Salad Cups Delightful and Easy Treat
If you love sweet and salty treats, you’ll adore Strawberry Pretzel Salad Cups! This fun twist on a classic dessert is not only delightful but
To make these Maple Glazed Carrot Cake Donuts, you will need the following ingredients: - 1 cup all-purpose flour - 1/2 teaspoon baking powder - 1/2 teaspoon baking soda - 1 teaspoon ground cinnamon - 1/2 teaspoon ground nutmeg - 1/4 teaspoon salt - 1/2 cup granulated sugar - 1/4 cup brown sugar - 1/2 cup unsweetened applesauce - 2 large eggs - 1 teaspoon vanilla extract - 1 cup grated carrots - 1/2 cup chopped walnuts (optional) - 1/2 cup maple syrup - 1 cup powdered sugar - Optional: extra chopped walnuts for topping Each ingredient plays a key role. The flour gives structure, while the baking powder and baking soda help the donuts rise. The spices like cinnamon and nutmeg add warmth and flavor, making these donuts special. Carrots bring natural sweetness and moisture, while applesauce makes them tender. The optional walnuts add crunch. The maple syrup and powdered sugar create a sweet glaze that makes these donuts irresistible. Using fresh, high-quality ingredients will elevate your treat. 1. Preheat the oven and prepare the donut pan: Set your oven to 350°F (175°C). Spray your donut pan with cooking spray to prevent sticking. 2. Mix dry ingredients in a bowl: In a large bowl, combine 1 cup of all-purpose flour, 1/2 teaspoon of baking powder, 1/2 teaspoon of baking soda, 1 teaspoon of ground cinnamon, 1/2 teaspoon of ground nutmeg, and 1/4 teaspoon of salt. Whisk these together until they are well mixed. 3. Combine wet ingredients separately: In another bowl, mix 1/2 cup of granulated sugar, 1/4 cup of brown sugar, 1/2 cup of unsweetened applesauce, 2 large eggs, and 1 teaspoon of vanilla extract. Stir until smooth and creamy. 1. Gradually add dry to wet ingredients: Slowly pour the dry mix into the wet mix. Stir it gently until just combined. Don't overmix! 2. Fold in carrots and walnuts: Add 1 cup of grated carrots and, if you like, 1/2 cup of chopped walnuts. Use a spatula to fold them in until they are evenly spread in the batter. 1. Fill the donut pan and bake: Spoon the batter into the donut pan. Fill each cavity about 3/4 full. Bake for 12-15 minutes. Check for doneness with a toothpick; it should come out clean. 2. Cool and prepare glaze: Let the donuts cool in the pan for about 5 minutes. Then transfer them to a wire rack to cool completely. While they cool, make the glaze. In a small bowl, mix 1/2 cup of maple syrup with 1 cup of powdered sugar until smooth. Adjust the texture with water or more sugar if needed. 3. Glaze the donuts and add toppings: Once the donuts are cool, dip the tops into the maple glaze. Let any extra glaze drip off back into the bowl. Place them back on the wire rack. If you want, sprinkle extra chopped walnuts on top while the glaze is still wet for added crunch. - Ensuring donuts are fluffy: To keep your donuts light, make sure you don’t overmix the batter. Stir just until the ingredients combine. Overmixing can make the donuts dense. - Checking for doneness: Insert a toothpick in the center of a donut. If it comes out clean, they are done. The donuts should be golden brown and spring back when touched. - Achieving the perfect glaze consistency: Mix maple syrup and powdered sugar until smooth. If the glaze is too thick, add a tiny bit of water. If too thin, add more powdered sugar until you reach a pourable texture. - Timing for glazing: Glaze the donuts while they are still warm. This helps the glaze stick better. Let the glaze set for a few minutes before serving for the best look. - Pairing with beverages: These donuts pair well with coffee or chai tea. The warm spices in the cake balance nicely with the rich flavors of these drinks. - Presentation ideas: Place the donuts on a pretty plate. You can sprinkle extra chopped walnuts on top for extra flair. A light dusting of powdered sugar can also add a nice touch. {{image_2}} You can easily swap some ingredients in this recipe. For those needing gluten-free options, use almond flour or oat flour. Both add a nice flavor. If you have a sweet tooth but want less sugar, try using honey or agave syrup instead of granulated and brown sugar. To make your donuts even more exciting, add spices like ginger or cardamom. A few drops of vanilla or almond extract can really enhance the taste. You can also mix in dried fruits like raisins or cranberries. They add sweetness and texture. Nuts such as pecans or almonds can replace walnuts for a different crunch. If you want to switch up the glaze, cream cheese frosting works great. You can even drizzle chocolate or caramel on top for a rich flavor. Add sprinkles or coconut flakes for a fun look. These toppings make each bite even more delightful! To keep your maple glazed carrot cake donuts fresh, store them in an airtight container. This helps lock in moisture and keep them soft. I recommend using a container that fits them snugly. A glass jar or a plastic container works well. Just make sure they cool completely before sealing. If you want to freeze the donuts, first let them cool fully. Wrap each donut in plastic wrap. Then, place them in a freezer bag or airtight container. This keeps them safe from freezer burn. When you're ready to enjoy, just take a donut out and let it thaw at room temperature for about an hour. You can also warm it in the microwave for a few seconds. At room temperature, these donuts last about 2-3 days. They will stay fresh longer in the fridge, about 5-7 days. Just remember to keep them in an airtight container. This way, they stay tasty and moist! How long to bake Maple Glazed Carrot Cake Donuts? Bake these donuts for 12 to 15 minutes. They should be golden brown. A toothpick should come out clean when inserted. Can I make these donuts ahead of time? Yes, you can make these donuts a day ahead. Store them in an airtight container. Glaze them just before serving for the best taste. What can I use instead of eggs in this recipe? You can use unsweetened applesauce or mashed banana as an egg substitute. Use 1/4 cup for each egg. This keeps the donuts moist. Are carrot cake donuts healthy? Carrot cake donuts can be a healthier treat. They use carrots, which add fiber and vitamins. Using applesauce instead of oil cuts down on fat. Where can I buy Maple Glazed Carrot Cake Donuts? You may find these donuts at local bakeries or specialty shops. Some grocery stores also carry them in the bakery section. Can I use a different type of syrup for glazing? Yes, you can use honey or agave syrup if you prefer. Just adjust the sweetness to your liking. Maple syrup gives a unique flavor, but alternatives work well too. We covered how to make Maple Glazed Carrot Cake Donuts. You learned about the ingredients, steps, and tips for baking. Remember to store them right for the best taste. Try different flavors and toppings for fun. These donuts can be a treat for any day. Use this info to enjoy baking and sharing. Enjoy the process and have fun in the kitchen!
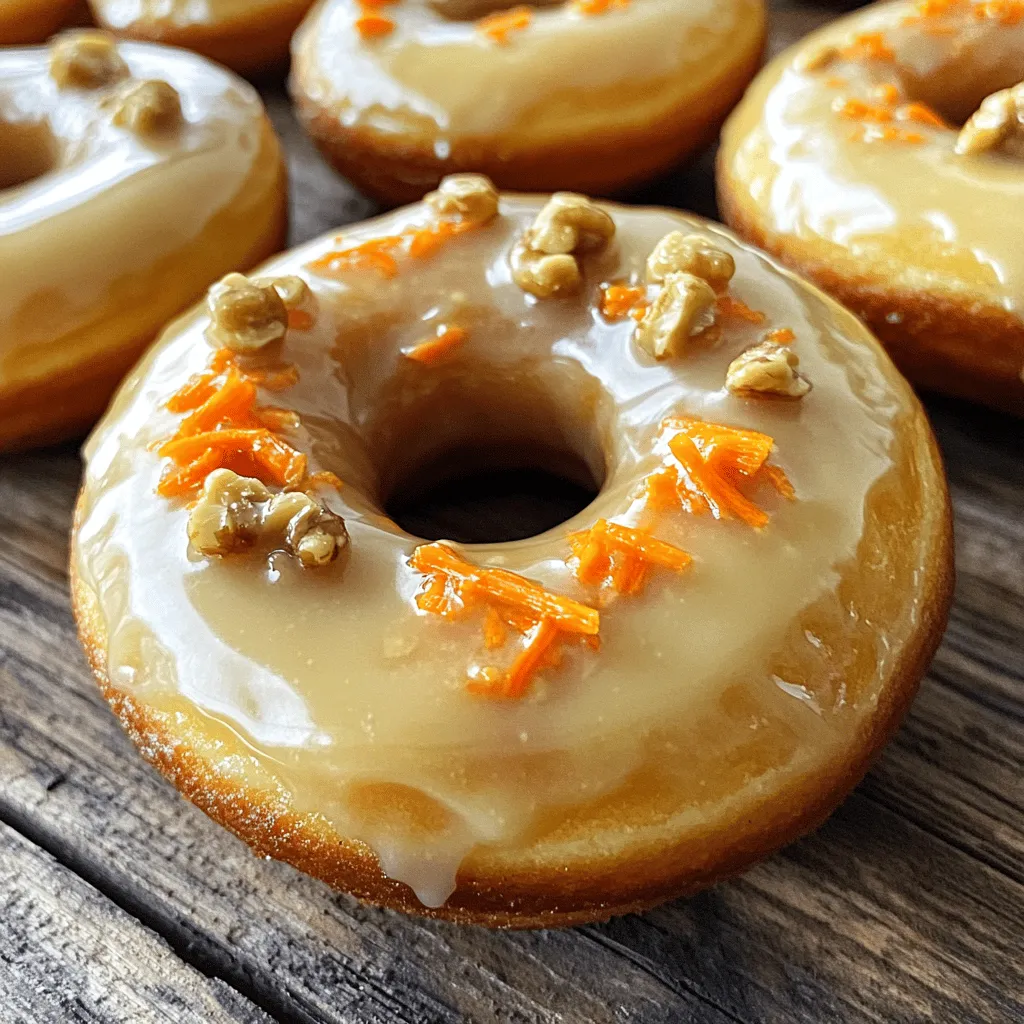
Maple Glazed Carrot Cake Donuts Delightful Treat
If you’re craving a sweet treat that blends comfort and joy, look no further. Maple Glazed Carrot Cake Donuts are your answer! These delightful donuts
- 1 cup canned pumpkin puree - 3/4 cup granulated sugar - 1/2 cup all-purpose flour - 1/4 cup unsweetened cocoa powder - 1 teaspoon baking powder - 1/2 teaspoon baking soda - 1 teaspoon ground cinnamon - 1/2 teaspoon ground nutmeg - 1/4 teaspoon ground ginger - 1/4 teaspoon salt - 4 large eggs - 1 teaspoon vanilla extract - 1 1/2 cups cream cheese, softened - 1 cup powdered sugar - 1/4 cup unsalted butter, softened - 1 teaspoon lemon juice - 1 teaspoon vanilla extract for frosting For this pumpkin roll, each ingredient plays a key role. The canned pumpkin puree gives the roll its rich flavor and moisture. Sugar adds sweetness and helps create a nice texture. All-purpose flour and cocoa powder hold it all together, while baking powder and baking soda help the cake rise. The spices bring warmth and depth. You will also need eggs for binding and vanilla for flavor. The cream cheese filling is a showstopper. It makes the roll creamy and dreamy. Powdered sugar adds the right sweetness, while butter and lemon juice enhance the filling's smoothness. - 15x10 inch jelly roll pan - Parchment paper - Mixing bowls - Whisk and spatula The right tools make cooking easier. A jelly roll pan is perfect for baking this cake. Parchment paper helps with easy removal. Mixing bowls, a whisk, and a spatula are must-haves for mixing and spreading. Using the right ingredients and equipment sets you up for success. For the full recipe, check out the details above. With these essentials in hand, you're ready to create an amazing pumpkin roll! 1. Preheat your oven to 375°F (190°C). Grab your jelly roll pan and line it with parchment paper. Make sure to leave some paper hanging over the edges. This helps when you take the cake out later. 2. In a big bowl, whisk together the canned pumpkin puree, granulated sugar, eggs, and vanilla extract. Mix until everything is smooth and well combined. This is where the magic begins! 3. In another bowl, sift together the flour, cocoa powder, baking powder, baking soda, cinnamon, nutmeg, ginger, and salt. These dry ingredients add flavor and texture. Slowly mix the dry ingredients into the wet pumpkin mix. Stir gently until just blended. Overmixing can ruin the fluffiness! 1. Pour the batter into your prepared jelly roll pan. Spread it evenly with a spatula so it bakes nicely. 2. Bake the cake for 12-15 minutes. Check for doneness by gently pressing the center. It should spring back when touched. If not, give it a couple more minutes. 1. While the cake bakes, prepare a clean kitchen towel. Dust it generously with powdered sugar. This prevents sticking and adds sweetness. 2. Once the cake is done, take it out of the oven. Quickly invert the cake onto the powdered sugar-dusted towel. Peel off the parchment paper gently. Starting at one end, roll the cake and towel together tightly. This helps shape it without cracking. Let it cool completely in this rolled state. 1. In a medium bowl, beat together the softened cream cheese, powdered sugar, unsalted butter, lemon juice, and vanilla extract. Mix until creamy and smooth. This filling is rich and adds a lot of flavor! 2. Once the cake has cooled, unroll it carefully. Remove the towel. Spread the cream cheese mixture evenly across the surface of the cake. 3. Carefully re-roll the cake without the towel, starting from one of the short ends. Wrap it in plastic wrap and refrigerate for at least 1 hour before serving. This helps it hold its shape. 4. Slice into 1-inch pieces and serve. Enjoy this delightful treat! For the full recipe, check out the details above. When making your pumpkin roll, avoid overmixing the batter. Overmixing can lead to a tough cake. Mix just until combined for a soft texture. Another mistake is not dusting the towel with enough powdered sugar. This helps prevent sticking. A generous layer of sugar keeps your roll intact. It’s key to ensure the cake is cooled properly. If it’s still warm, it may crack. Let it cool completely in the rolled state. Also, consider using parchment paper versus a towel for rolling. Parchment can make it easier to lift the cake without tearing. For a beautiful finish, dust the top of the roll with powdered sugar. This adds sweetness and looks great. You can also serve the roll on a decorative platter. A sprinkle of cinnamon adds a festive touch and enhances the flavor. Enjoy your pumpkin roll at gatherings or cozy family dinners! {{image_2}} You can make your pumpkin roll even more exciting. Try adding chocolate chips or nuts for extra texture. Chocolate chips bring a lovely sweetness. Nuts add a nice crunch. Swap out some spices to create unique flavors. For example, use cardamom instead of cinnamon. This change will give your roll a warm, exotic taste. You can also try adding a hint of allspice or cloves. These spices pair well with pumpkin and add depth. If you need gluten-free options, use almond flour or a gluten-free blend instead of all-purpose flour. This change works very well and keeps the roll moist. For vegan versions, replace the eggs with flaxseed meal mixed with water. Use dairy-free cream cheese for the filling. You can also swap out the butter with coconut oil. These options keep the richness while making the dessert plant-based. You can get creative with the filling. Instead of the classic cream cheese, try flavored cream cheese. Options like maple or cinnamon cream cheese add a nice twist. Another fun idea is to use fruit preserves. Raspberry or apricot preserves give a fruity burst. Spread them over the cake before rolling for a surprise in every slice. For the full recipe, check out the Spiced Pumpkin Roll Delight. To keep your pumpkin roll fresh, store any leftovers in the fridge. Wrap the roll tightly in plastic wrap. This keeps it moist and tasty. If you want to save some for later, freezing is a great option. Slice the roll into individual pieces before freezing. Place the slices in an airtight container or wrap them in plastic wrap. When you want to enjoy a slice, take it out and let it thaw in the fridge for a few hours. You can also microwave it for a few seconds if you're in a rush. The pumpkin roll stays fresh in the fridge for about 4 to 5 days. If frozen, it can last for about 2 to 3 months. Check for signs of spoilage before eating. Look for any mold or an off smell. If it looks dry or has changed color, it’s best to throw it away. Always trust your senses to ensure you're enjoying a safe treat! To fix a cracked pumpkin roll, you can try a few tricks. First, bake the roll at the right temperature. If your oven runs hot, consider reducing the heat slightly. A lower temperature helps the cake rise evenly and prevents cracks. When rolling, use a damp towel to keep the cake moist. This way, it stays soft and more pliable. If a crack still occurs, don’t worry! You can cover it with frosting. Yes, you can make this pumpkin roll ahead of time. Bake your roll and let it cool completely. Then, wrap it tightly in plastic wrap. Store it in the fridge for up to three days. If you want to keep it longer, freeze it. Just be sure to wrap it well to prevent freezer burn. Thaw it in the fridge overnight before serving. To slice a pumpkin roll cleanly, use a sharp serrated knife. Start at one end and cut gently. Avoid pressing down too hard, as this squishes the roll. If you find it hard to cut, try warming the knife under hot water. Dry it off and then slice. This helps create nice, even pieces. Yes, you can use fresh pumpkin instead of canned. Start by cooking your pumpkin. Cut it in half, scoop out the seeds, and roast it until tender. Once cooled, mash or blend it until smooth. Use this fresh puree in your recipe just like you would the canned version. Keep in mind that fresh pumpkin may have more moisture, so adjust your flour slightly if needed. Making a pumpkin roll requires simple steps and key ingredients. You learned how to prepare, bake, and roll it without cracking. I shared tips to avoid mistakes and suggested fun variations. Lastly, storing your pumpkin roll keeps it fresh longer. Now, you can impress friends and family with this delicious treat. Enjoy making your pumpkin roll, and don't hesitate to get creative! Happy baking!
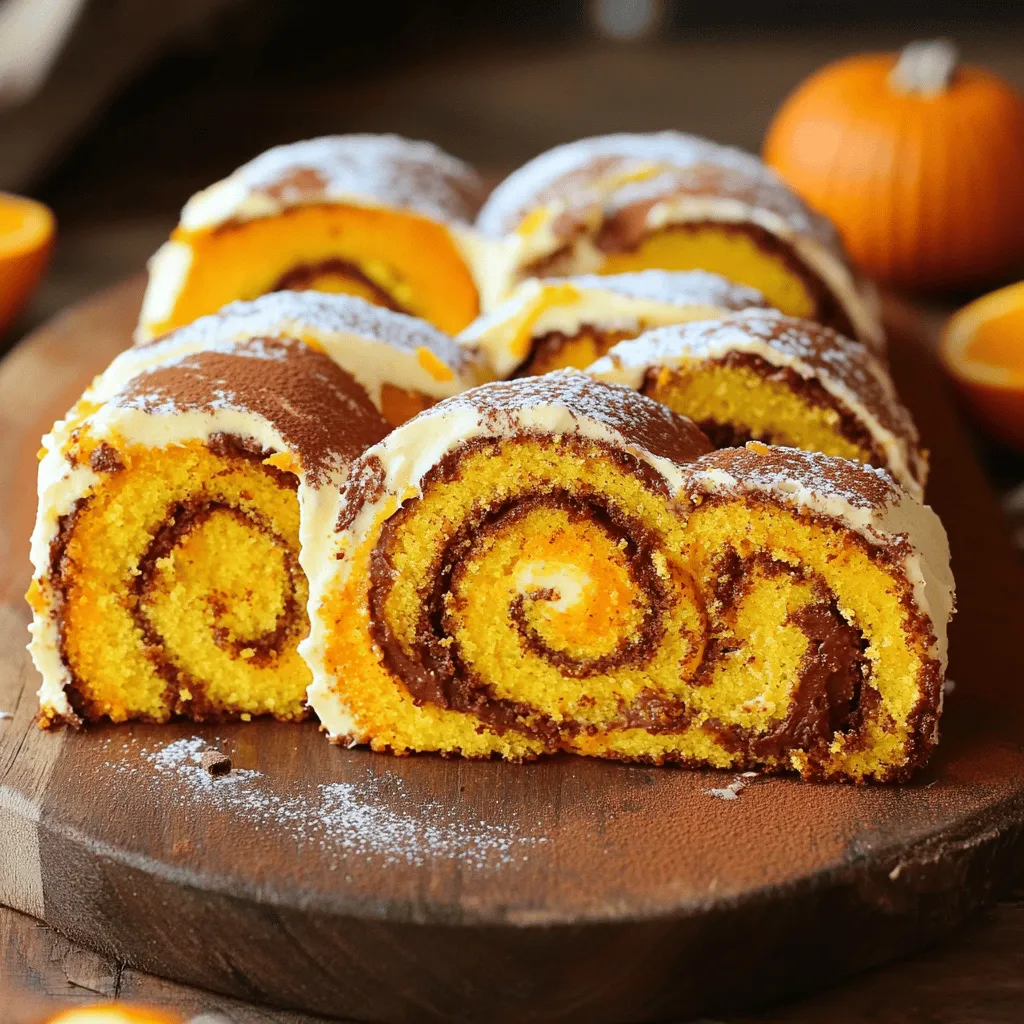
Pumpkin Roll Recipe Easy and Delightful Dessert
Are you craving a sweet treat that’s both easy to make and delicious? Look no further! This Pumpkin Roll Recipe combines soft, spiced cake with
- 1 ½ cups all-purpose flour - ½ cup cocoa powder - 1 teaspoon baking soda - ½ teaspoon baking powder - ½ teaspoon salt - ½ cup unsalted butter, softened - 1 cup brown sugar, packed - 1 large egg - 1 teaspoon vanilla extract - ½ cup buttermilk (or milk with a splash of vinegar) - 1 cup powdered sugar - ½ cup cream cheese, softened - 2 tablespoons butter, softened - 1 teaspoon vanilla extract (for filling) - 1 cup orange and black sprinkles (for decoration) If you have allergies, you can use gluten-free flour instead of regular flour. For a vegan option, try using plant-based butter and a flax egg. You can make your own buttermilk by mixing milk with a splash of vinegar. For a fun twist, consider adding seasonal ingredients. Try pumpkin puree instead of some of the butter for a fall flavor. You can also mix in spices like cinnamon or nutmeg for extra warmth. Making these swaps will keep your Halloween whoopie pies tasty and festive, no matter your dietary needs! 1. First, preheat your oven to 350°F (175°C). This will help the whoopie pies bake evenly. 2. Line two baking sheets with parchment paper. This keeps the pies from sticking. 3. In a bowl, whisk together these dry ingredients: - 1 ½ cups all-purpose flour - ½ cup cocoa powder - 1 teaspoon baking soda - ½ teaspoon baking powder - ½ teaspoon salt 4. Set the dry mix aside. In a large bowl, beat together: - ½ cup unsalted butter, softened - 1 cup brown sugar, packed This should be light and fluffy. 5. Now, add 1 large egg and 1 teaspoon vanilla extract to your butter mixture. Mix until smooth. 6. Gradually mix in the dry ingredients and ½ cup buttermilk. Start and end with the dry mix. Combine until just mixed. 1. Using a tablespoon or cookie scoop, drop the batter onto the prepared baking sheets. Space them well. 2. Bake for 10-12 minutes. Use a toothpick to check if they’re done. If it comes out clean, they are ready. 3. Let them cool on the sheets for 5 minutes. Then, transfer them to a wire rack to cool fully. This helps them firm up. 1. While your cookies cool, prepare the filling. In a bowl, beat together: - ½ cup cream cheese, softened - 2 tablespoons butter, softened - 1 cup powdered sugar - 1 teaspoon vanilla extract Mix until it’s smooth and creamy. 2. Once the cookies are cool, take one cookie and spread a generous amount of filling on its flat side. 3. Top it with another cookie to make a sandwich. 4. Roll the edges in these fun decorations: - 1 cup orange and black sprinkles This adds a festive touch to your Halloween whoopie pies. For the complete recipe, check the Full Recipe section. To make perfect Halloween whoopie pies, pay attention to texture. You want them soft and cake-like. Here are some tips: - Use fresh ingredients. Old baking soda or baking powder can ruin your pies. - Mix well but don’t overmix. Combine wet and dry ingredients just until you see no flour. - Check your oven temperature. An oven thermometer ensures accurate heat levels. Avoid common mistakes during baking: - Don’t overcrowd the baking sheets. Leave space for spreading. - Cool before filling. If you fill them warm, the cream can melt. Get creative when decorating whoopie pies for Halloween! Here are some fun ideas: - Use themed sprinkles. Orange and black sprinkles are perfect for this time of year. - Try adding edible eyes. They create a spooky, fun look. - Pipe filling in fun shapes. Swirls or ghosts add flair to your pies. For toppings, think about: - Candy corn or mini chocolate bars. These can add texture and flavor. - Colored frosting. Use green or purple for a witchy vibe. These tips will make your whoopie pies festive and fun! Check out the Full Recipe for step-by-step instructions. {{image_2}} When it comes to Halloween whoopie pies, the fun doesn't stop at just one flavor. You can create many seasonal variations to make your pies stand out! Pumpkin Whoopie Pies For a fall twist, try pumpkin whoopie pies. Simply replace some cocoa powder with pumpkin puree. Use about 1 cup of pumpkin. Add warm spices like cinnamon and nutmeg. These spices give a cozy flavor perfect for Halloween. Candy Corn Filling A candy corn filling adds a festive touch. Mix cream cheese with melted candy corn for a sweet, creamy filling. This adds a pop of color and fun. Your whoopie pies will look so cheerful and bright! Using Different Types of Extracts or Flavors You can swap vanilla extract for almond extract. Almond gives a nice nutty flavor. Or, try peppermint extract for a cool twist. Just remember, a little goes a long way! Incorporating Different Types of Chocolate or Fillings For chocolate lovers, add dark or white chocolate chips to the batter. This gives a rich taste and extra texture. You can also fill your whoopie pies with flavored frosting or whipped cream. Think about using peanut butter or caramel for a sweet surprise. These variations keep your Halloween whoopie pies exciting and tasty. Don't hesitate to mix and match flavors! You can make the perfect treat for your Halloween gathering. For the full recipe, check out the details above. To keep your Halloween whoopie pies fresh, store them in an airtight container. This helps prevent them from drying out. Place parchment paper between layers to avoid sticking. Keep them in a cool, dry place. If you live in a warm area, the fridge may be best. They can stay fresh for about three days this way. You can freeze whoopie pies for longer storage. Wrap each pie tightly in plastic wrap, then place them in a freezer-safe bag. This helps prevent freezer burn. Whoopie pies can be frozen for up to three months. To thaw, take them out and let them sit at room temperature for about an hour. Enjoy them later as a sweet treat! For the Full Recipe, check back to see how to create these delightful pies. To make whoopie pies from scratch, first gather your ingredients. You will mix dry and wet ingredients separately. Then, combine them to create a smooth batter. Drop spoonfuls of the batter onto baking sheets. Bake until they are soft and cooked through. Once cooled, make the filling and assemble your pies. You can find the full recipe in this article. Halloween whoopie pies can last about 3-5 days at room temperature. Store them in an airtight container to keep them fresh. If you want them to last longer, you can refrigerate them. Just make sure to let them sit at room temperature for a bit before serving. Yes, you can easily customize whoopie pies! Try adding different extracts, like peppermint or almond, to the batter. You can also change the filling. Use flavored cream cheese, or even whipped cream. For a fun twist, add candy or chocolate chips to the filling. Your options are endless! To serve whoopie pies at a party, arrange them on a spooky-themed platter. Use Halloween decorations like cobwebs or small pumpkins around them. This makes your display festive and fun. You can also stack the whoopie pies for a taller, eye-catching look. You learned how to make delicious Halloween whoopie pies using simple, fun steps. We recapped the key ingredients and tips for baking. From customizing flavors to storing them, you now have all the tools to create your perfect treat. Remember, making these pies can be a blast for any festive occasion. Enjoy the process and share your tasty creations with others. Happy baking!
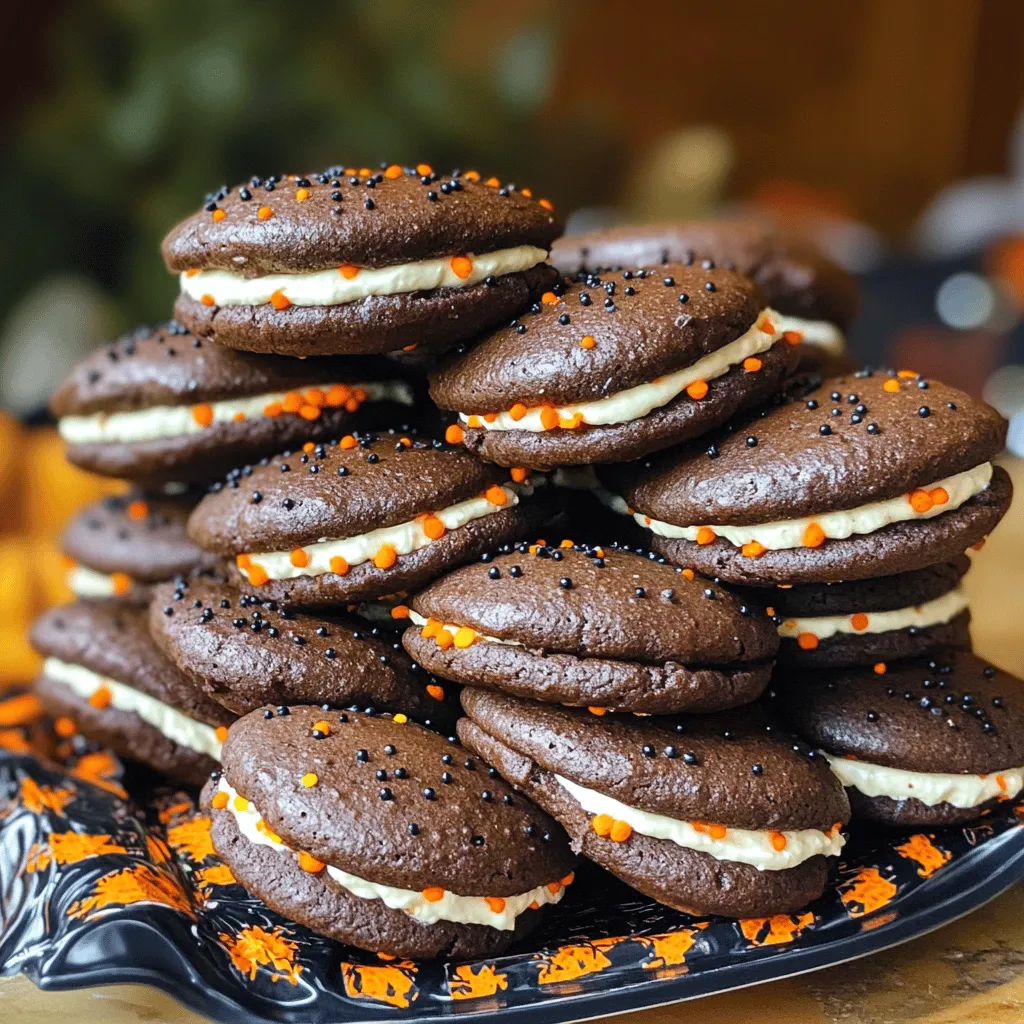
Halloween Whoopie Pies Delightful Seasonal Treat
Get ready for a spooky treat that everyone will love—Halloween Whoopie Pies! These soft, cake-like cookies filled with cream cheese make a perfect festive dessert.
To make gluten-free pumpkin donuts, you'll need some key ingredients. They create the rich taste and fluffy texture you want. Here’s what you’ll need: - 1 cup gluten-free all-purpose flour - 1/2 cup pumpkin puree (canned or fresh) - 1/2 cup almond flour - 1/2 cup sugar (coconut sugar can be a great alternative) - 1/4 cup maple syrup - 1 teaspoon baking powder - 1/2 teaspoon baking soda - 1 teaspoon ground cinnamon - 1/4 teaspoon nutmeg - 1/4 teaspoon cloves - 1/2 teaspoon salt - 2 large eggs - 1/4 cup coconut oil or melted butter - 1 teaspoon vanilla extract - Optional: Chocolate glaze or maple glaze for topping These ingredients come together to create a warm and inviting flavor that fills your kitchen. The pumpkin puree adds moisture and a lovely orange hue. The spices bring in fall vibes and warmth. If you want to switch things up, you can use some alternative ingredients. Here are a few ideas: - Flour: Use oat flour or brown rice flour instead of gluten-free all-purpose flour. - Sweeteners: Honey or agave syrup can replace maple syrup. - Dairy-Free: Use almond or soy milk if you want a dairy-free option. - Egg Replacement: Use flax eggs or chia eggs for a vegan version. These alternatives still create great-tasting donuts. You can easily adapt the recipe to suit your needs or preferences. Knowing how to store your ingredients can make your baking easier. Here are some tips: - Gluten-Free Flour: Store in a cool, dry place. A sealed container keeps it fresh. - Pumpkin Puree: Opened cans can be stored in the fridge for about a week. Use a tight lid to keep it fresh. - Eggs: Keep them in the fridge. They last a few weeks when stored properly. - Spices: Keep in a cool, dark place. They stay fresh for longer this way. These storage tips ensure your ingredients stay fresh and ready for your next baking adventure. By knowing how to handle them, you can always whip up a batch of delicious gluten-free pumpkin donuts! Start by preheating your oven to 350°F (175°C). Grease your donut pan with coconut oil or baking spray. Make sure to coat it well. This step helps the donuts come out easily after baking. In a large mixing bowl, combine the following dry ingredients: - 1 cup gluten-free all-purpose flour - 1/2 cup almond flour - 1/2 cup sugar - 1 teaspoon baking powder - 1/2 teaspoon baking soda - 1 teaspoon ground cinnamon - 1/4 teaspoon nutmeg - 1/4 teaspoon cloves - 1/2 teaspoon salt Stir these together until they are mixed well. This ensures a good blend of flavors. In a separate bowl, whisk together: - 1/2 cup pumpkin puree - 1/4 cup maple syrup - 2 large eggs - 1/4 cup melted coconut oil or butter - 1 teaspoon vanilla extract Make sure this mixture is smooth. The wet ingredients add moisture and flavor to your donuts. Gradually add the wet mixture to the dry ingredients. Stir gently until just combined. Be careful not to overmix. Next, transfer the batter into a piping bag or a ziplock bag. Snip off one corner. Pipe the batter into your prepared donut pan, filling each cavity about 2/3 full. Place your donut pan in the preheated oven. Bake for 12-15 minutes. Check with a toothpick. If it comes out clean, your donuts are done. Let the donuts cool in the pan for about 5 minutes. Then, transfer them to a wire rack to cool completely. Once cooled, dip the tops in chocolate glaze or maple glaze if you like. Allow the glaze to set for a few minutes before enjoying your treats. For more details, refer to the Full Recipe. Baking gluten-free donuts can be tricky. Here are some common errors to watch out for: - Overmixing the batter: This can make your donuts tough. Mix until just combined. - Not measuring flour correctly: Too much flour leads to dry donuts. Use a scale if possible. - Skipping the resting time: Letting the batter sit helps flavors meld and improves texture. To get that light and fluffy texture, follow these tips: - Use a blend of flours: A mix of gluten-free all-purpose flour and almond flour works best for flavor and texture. - Check the doneness: A toothpick should come out clean. If it’s wet, give them more time. - Don’t overcrowd the pan: Fill each cavity two-thirds full to allow room for rising. Decorating your donuts can be fun! Here are some ideas to inspire you: - Glaze options: Try chocolate glaze or maple glaze for a sweet finish. - Sprinkles: Add colorful sprinkles for a festive touch. They make your donuts pop! - Powdered sugar: A simple dusting adds elegance and sweetness. For the full recipe, check the details above. Enjoy your baking! {{image_2}} You can tweak your pumpkin donuts for unique flavors. Try adding chocolate chips for a sweet burst. You could also mix in nuts like walnuts or pecans for some crunch. For a spicy kick, add a dash of cayenne pepper or extra cinnamon. Pumpkin spice lovers can enhance the spice mix with ginger or allspice. You can even swirl in some cream cheese for a rich flavor twist. Each option makes these donuts special and fun! Glazes can really change your donut game. A simple glaze made from powdered sugar and milk is easy and sweet. For a more decadent treat, melt dark chocolate and dip the tops. If you want a healthier glaze, mix maple syrup with a little almond milk. You can also try a cinnamon sugar coating for a classic taste. Each glaze adds a new layer of flavor that you will love. Switching flours can change your donuts' texture and taste. Instead of all-purpose gluten-free flour, try oat flour for a heartier donut. Coconut flour is another great option, but use less since it absorbs more moisture. You can also mix different flours for a balanced texture. Almond flour adds nutty flavor and moisture. Experimenting with flours can make your pumpkin donuts even more delicious! For the full recipe, check the link. To keep your gluten-free pumpkin donuts fresh, store them in an airtight container. This helps prevent them from drying out. You can keep them at room temperature for up to two days. If you want them to last longer, move them to the fridge. Just remember to let them come to room temperature before enjoying again. If you have extras, freezing is a great option. Wrap each donut in plastic wrap. Then, place them in a freezer-safe bag or container. This keeps them fresh for up to three months. When you're ready to eat, just take out what you need. Let them thaw on the counter for about 30 minutes. For the best taste, reheat your donuts in the oven. Preheat your oven to 350°F (175°C). Place the donuts on a baking sheet and warm them for about 5 to 7 minutes. This makes them soft and warm, just like fresh! If you prefer, you can microwave them for about 10-15 seconds. Enjoy them fresh out of the oven or microwave, just like the first time you made them with the full recipe. Yes, you can make these donuts vegan. To do this, replace the eggs with a flaxseed meal. Mix 1 tablespoon of flaxseed meal with 3 tablespoons of water. Let it sit for about 5 minutes until it thickens. This mixture works great as an egg substitute. Gluten-free pumpkin donuts can last about 3 days at room temperature. Store them in an airtight container to keep them fresh. If you want them to last longer, consider freezing them. Yes, many stores now sell gluten-free pumpkin donuts. Look for brands that specialize in gluten-free baked goods. Check the ingredient list to ensure it's safe for your diet. You can use several substitutes for eggs. Options include flaxseed meal, applesauce, or mashed bananas. Use 1/4 cup of applesauce or mashed banana to replace one egg. These options add moisture and a little sweetness. To check if the donuts are fully baked, insert a toothpick into the center. If it comes out clean, the donuts are done. If there is batter stuck to the toothpick, bake for a few more minutes. You now have a complete guide to baking gluten-free pumpkin donuts. We covered essential ingredients, step-by-step instructions, and helpful tips. Remember to avoid common mistakes for the best texture. You can also try fun flavor and glaze variations. Store your leftovers properly to enjoy them later. With these clear directions, you can bake delicious donuts with ease. Now, get in the kitchen and enjoy your baking adventure!
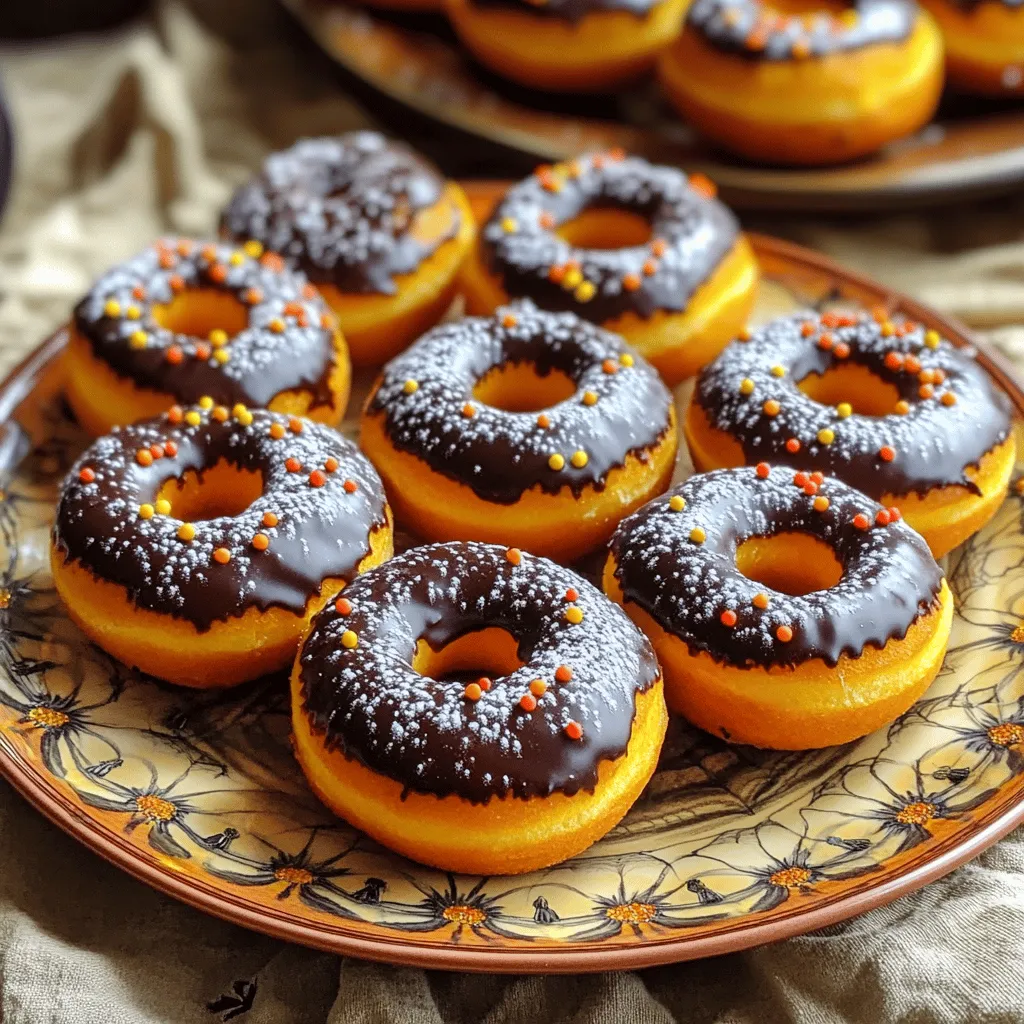
Gluten-Free Pumpkin Donuts Simple and Delicious Treat
If you’re craving a sweet treat that fits your gluten-free lifestyle, these Gluten-Free Pumpkin Donuts are for you! With cozy spices and pumpkin flavor, they