Desserts

To make Apple Fritter Bites, you need the following key ingredients: - 2 medium-sized apples (Granny Smith or Honeycrisp), peeled and diced - 1 cup all-purpose flour - 1/2 cup granulated sugar - 1 teaspoon baking powder - 1/2 teaspoon cinnamon - 1/4 teaspoon nutmeg - Pinch of salt - 1/2 cup milk - 1 large egg - 1 teaspoon vanilla extract - 1/4 cup powdered sugar (for glaze) - 1 tablespoon apple juice (for glaze) - Oil, for frying For those who want to add a twist, consider these optional ingredients: - A dash of ground ginger for extra warmth - Chopped nuts, like walnuts or pecans, for a crunch - A sprinkle of lemon zest to brighten flavors If you have any dietary needs, you can make simple substitutions: - Use gluten-free flour for a gluten-free version. - Swap the egg for a flax egg or unsweetened applesauce for a vegan twist. - Substitute almond milk for regular milk for a dairy-free option. These choices help you create a tasty treat that fits your needs! To start, you need to prepare the apples. Use two medium-sized apples, like Granny Smith or Honeycrisp. First, peel the apples. Then, dice them into small pieces. This makes them easy to mix into the batter. Set them aside for now. Next, grab a large bowl. In this bowl, combine the dry ingredients. Add 1 cup of all-purpose flour, 1/2 cup of granulated sugar, 1 teaspoon of baking powder, 1/2 teaspoon of cinnamon, 1/4 teaspoon of nutmeg, and a pinch of salt. Mix these well to blend the flavors. Now, take another bowl for the wet ingredients. Whisk together 1/2 cup of milk, 1 large egg, and 1 teaspoon of vanilla extract. Make sure everything is mixed and smooth. This will help create a fluffy batter. Now it's time to cook! Heat oil in a deep skillet or pot. Aim for a temperature of about 350°F (175°C). You can use a thermometer to check. Once the oil is hot, use a tablespoon to scoop the batter. Carefully drop the batter into the hot oil. Don't overcrowd the pan; fry just a few at a time. Fry the fritter bites for about 2-3 minutes on each side. Look for a golden brown color. When they are done, remove them and let them drain on paper towels. To make the glaze, mix 1/4 cup of powdered sugar with 1 tablespoon of apple juice in a small bowl. Stir until it is smooth. Drizzle this glaze over the warm fritter bites just before you serve them. This easy recipe gives you delightful Apple Fritter Bites that are sure to please everyone! For the full recipe, check the detailed instructions above. - Best apples to use: I recommend using Granny Smith or Honeycrisp apples. These apples offer a nice balance of tartness and sweetness. Their firm texture holds up well during frying, giving you that perfect bite. - Temperature control for frying: Heat your oil to about 350°F (175°C). Use a thermometer for accuracy. If the oil is too hot, the outside cooks too fast, leaving the inside raw. If it’s too cold, the fritters absorb too much oil. - Ensuring even cooking: Fry a few fritters at a time. Overcrowding the pan lowers the oil temperature. This can lead to uneven cooking. Flip the fritters gently to ensure both sides get that golden-brown color. - Presentation ideas for serving: Serve Apple Fritter Bites warm on a nice platter. Dust them with powdered sugar for a sweet touch. You can add a few apple slices for a pop of color. - Pairing with drinks or sides: These bites go well with a hot cup of cider or coffee. You could also serve them with vanilla ice cream for a delightful dessert. - Storing for later enjoyment: If you have leftovers, store them in an airtight container at room temperature. They taste best on the first day, but you can keep them for up to two days. For longer storage, check the section on freezing. These tips will help you make the best Apple Fritter Bites. For the full recipe, feel free to check the main article! {{image_2}} To make Apple Fritter Bites gluten-free, you can use alternative flours. Some great choices are almond flour or gluten-free all-purpose flour. These flours help to keep the bites light and tasty. When you switch to a gluten-free flour, you may need to add a little more liquid. This helps to keep a nice texture. Start with an extra tablespoon of milk if the batter seems too thick. If you want to make vegan Apple Fritter Bites, you can easily replace the dairy and egg. Use plant-based milk, like almond or oat milk, instead of regular milk. For the egg, try using a flax egg. Mix one tablespoon of ground flaxseed with three tablespoons of water. Let it sit for a few minutes until it thickens. To boost the flavor in your vegan version, add a pinch more cinnamon or nutmeg. You can even mix in some vanilla extract to enhance the taste. These small changes make your fritter bites just as delightful! For the full recipe, you can refer to the detailed instructions above. To keep your Apple Fritter Bites fresh, store them in an airtight container. Line the bottom with paper towels to absorb any extra moisture. This helps them stay crisp. Place a layer of fritter bites, then cover them with another paper towel. Repeat this until you fill the container. Keep it in the fridge for up to three days. When you want to reheat them, use an oven or toaster oven. Preheat to 350°F (175°C). Place the fritter bites on a baking sheet. Heat for about 5 to 7 minutes. This method keeps them warm and crispy. If you want to freeze your fritter bites, make sure they are completely cool first. Lay them out in a single layer on a baking sheet. Freeze them for about an hour, then transfer them to a freezer-safe bag. Remove as much air as possible to prevent freezer burn. They can last for up to three months in the freezer. To reheat from frozen, first, preheat your oven to 350°F (175°C). Place the frozen fritter bites on a baking sheet. Bake for about 10 to 12 minutes until they are hot all the way through. You can also fry them again for a crispy finish, but be sure to check the temperature of the oil. Enjoy them warm for the best taste! How to make Apple Fritter Bites without frying? You can bake Apple Fritter Bites instead of frying them. Preheat your oven to 375°F (190°C). Line a baking sheet with parchment paper. Scoop the batter onto the sheet, leaving space between each bite. Bake for about 15-20 minutes or until golden brown. This method cuts oil and makes the bites lighter. Can I use other fruits in the recipe? Yes, you can swap apples for other fruits. Pears or peaches work well too. Make sure to adjust the sugar based on the fruit's sweetness. You can also blend fruits for a fun twist. Just keep an eye on the moisture they add to the batter. What is the best way to decorate Apple Fritter Bites? The best way to decorate these bites is with a simple glaze. Mix powdered sugar with apple juice for a smooth glaze. Drizzle this over the warm fritters for a shiny finish. You can also sprinkle extra powdered sugar on top or add a few apple slices for a fresh look. For a festive touch, some cinnamon can add color and flavor. For the complete recipe, check out the [Full Recipe]. This blog post covers everything you need for delicious apple fritter bites. We explored key ingredients, step-by-step cooking instructions, and helpful tips. Plus, we discussed tasty variations and how to store your treats. In the end, you can enjoy this fun recipe with friends and family. Remember, you can customize it to fit your tastes. So, get cooking and enjoy every bite!
Apple Fritter Bites Delightful and Easy Recipe
Get ready to impress your friends and family with my easy Apple Fritter Bites recipe! These little treats pack all the flavor of classic apple
To make gourmet caramel apples, you need just a few simple items. Here’s what you will need: - 4 medium-sized Granny Smith apples - 2 cups granulated sugar - 1 cup light corn syrup - 1/2 cup unsalted butter - 1 cup sweetened condensed milk - 1 teaspoon vanilla extract - 1/2 teaspoon salt - Optional toppings: crushed nuts, mini chocolate chips, sprinkles, or shredded coconut - Popsicle sticks Choosing the right apple is key for a great caramel apple. I love Granny Smith apples for their tartness. Their firm texture holds up well against the warm caramel. They also create a nice balance with the sweet caramel. If you want a sweeter bite, you might try Fuji or Honeycrisp apples. These varieties add a lovely sweetness that pairs well with the rich caramel. Toppings can elevate your caramel apples from simple to stunning. Here are some fun ideas to try: - Crushed nuts add crunch and flavor. - Mini chocolate chips give a sweet twist. - Colorful sprinkles can make the apples festive. - Shredded coconut offers a tropical touch. Feel free to mix and match these toppings to create your unique caramel apple! For the full recipe, see the detailed instructions above. To start, you need to prepare your apples. Choose four medium-sized Granny Smith apples for the best taste. Wash each apple well to remove any dust or wax. Use a paper towel to dry them completely. This step is key for the caramel to stick. Now, insert a popsicle stick into the top of each apple. This makes them easy to hold while you dip them in caramel. Next, line a baking sheet with parchment paper. This will catch any drips and help the apples cool. Now, it’s time to cook the caramel. In a medium-sized saucepan, mix two cups of granulated sugar, one cup of light corn syrup, and half a cup of unsalted butter. Add one cup of sweetened condensed milk. Stir the mix over medium heat until it boils. Keep stirring for about five to seven minutes. You want the caramel to turn a deep golden color. This is when it reaches the right flavor and texture. After that, remove it from the heat. Stir in one teaspoon of vanilla extract and half a teaspoon of salt. Be careful, as it may bubble when you add the vanilla. Now for the fun part! Dip each apple into the warm caramel. Make sure to swirl it around for an even coat. Let any extra caramel drip off before placing the apple on the baking sheet. While the caramel is still warm, add toppings if you want. You can use crushed nuts, mini chocolate chips, sprinkles, or shredded coconut. This adds a nice touch and makes each apple unique. Once you have dipped all your apples, let them cool for about 30 minutes. This allows the caramel to set. Enjoy your gourmet caramel apples! For a full recipe, check out the recipe section above. When making caramel apples, avoid these common slip-ups: - Not drying the apples: Always wash and dry your apples well. Any moisture can stop the caramel from sticking. - Skipping the popsicle sticks: They make it easy to dip and eat your apples. Don't forget them! - Overheating the caramel: Caramel can burn quickly. Watch it closely, and stir often. - Not letting the caramel cool: If you dip too soon, the caramel will slide off. Let it cool a bit before dipping. To make your caramel even tastier, try these tips: - Add spices: A pinch of cinnamon or nutmeg can bring warmth to your flavor. - Use flavored extracts: Try almond or maple extract for a unique twist. - Mix in sea salt: A sprinkle of sea salt on top enhances the sweet flavor. It creates a delightful contrast. Make your caramel apples stand out with these fun ideas: - Chop nuts: Peanuts, almonds, or pecans add crunch and flavor. Roll the caramel apples in chopped nuts right after dipping. - Chocolate drizzle: Melt some chocolate and drizzle it over the caramel for a rich touch. - Use candies: Mini chocolate chips or sprinkles can add color and fun. Just sprinkle them on while the caramel is still warm. - Coconut flakes: Shredded coconut gives a tropical twist and a nice texture. Try these tips to create gourmet caramel apples that impress everyone! For the complete recipe, check out the Full Recipe section. {{image_2}} You can choose many types of apples for your gourmet caramel apples. I love using Granny Smith apples because they are tart and crisp. Their strong taste balances well with sweet caramel. Other great choices include Honeycrisp, Fuji, or Gala. Each apple brings its own flavor and texture. Try a mix of apples for fun! You can also consider using smaller apples for bite-sized treats. Toppings can make your caramel apples more exciting. You can sprinkle crushed nuts, like peanuts or almonds, for a crunchy bite. Mini chocolate chips add sweetness and richness. Sprinkles give a fun, colorful look. Shredded coconut can add a tropical twist. You can even dip the apples in melted chocolate after the caramel sets. This adds an extra layer of flavor and style. You can enhance caramel flavor with simple infusions. Try adding cinnamon or nutmeg to your caramel mix for warmth. A splash of bourbon can give a rich, deep taste. For a fruity twist, add orange or lemon zest to the caramel. These flavors make each bite unique. Experiment and find your favorite combination. These variations will make your gourmet caramel apples stand out. For the full recipe, check the Gourmet Caramel Apples section above. To store leftover caramel apples, wrap each apple in plastic wrap. This helps keep them fresh. You can also place them in an airtight container. Make sure the container is big enough to avoid squishing the apples. Store them in the fridge for up to a week. For best freshness, eat the caramel apples within a few days. The longer you wait, the softer the caramel gets. If you notice the apples getting sticky, it’s time to enjoy them. Keep them away from moisture. This helps prevent the caramel from becoming too gooey. If your caramel apples lose their charm, you can reheat them. Place them in the microwave for a few seconds. Use a low power setting to avoid melting the apple. Keep a close eye on them to prevent overcooking. If the caramel is too hard, you can also dip the apple back into warm caramel. This gives it a fresh look and taste. For the full recipe, check the previous sections. Yes, you can use different types of sugar. Brown sugar adds a rich flavor. You can mix granulated sugar with brown sugar for depth. Each type of sugar changes the taste and texture. Just keep in mind that it might alter the final outcome slightly. To keep the caramel soft, don’t cook it too long. Follow the time in the recipe closely. You can also add a bit of cream or milk to the caramel. This will help keep it smooth and gooey. If it does harden, you can gently reheat it. Use low heat and stir often to bring it back to a dipping consistency. If your caramel is too thin, cook it a little longer. Keep stirring until it thickens up. You can also add more sugar to the mix. Just be careful to not burn it. If you want a quick fix, let it cool slightly before dipping. This will make it easier to coat the apples. You learned how to make tasty caramel apples using fresh apples and the right ingredients. Choosing your apple type is key for flavor. Adding fun toppings can make them even better. You now have step-by-step instructions to guide you. Plus, you know common mistakes to avoid and how to store any leftovers. Remember, caramel needs care to get it just right. Enjoy whipping up these treats and impress your friends!
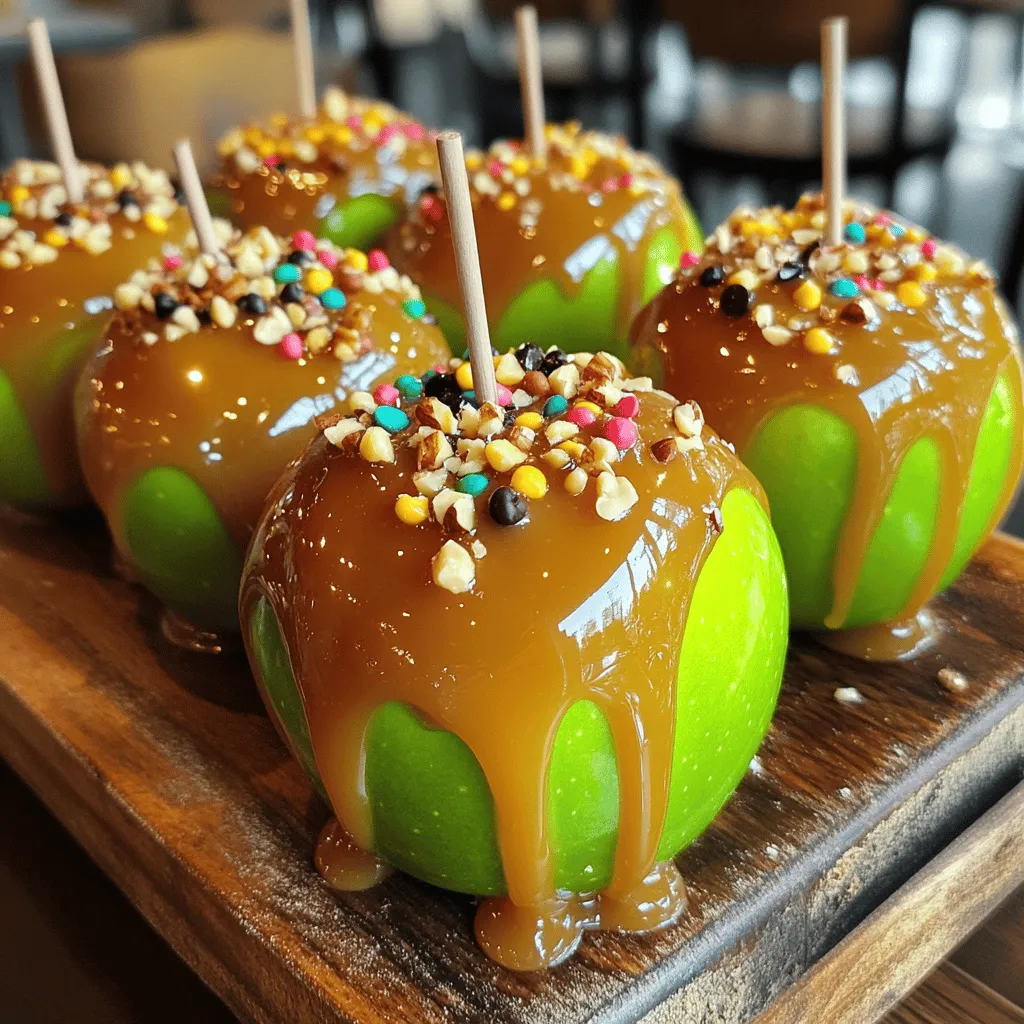
How to Make Gourmet Caramel Apples Delicious Treats
Are you ready to turn ordinary apples into gourmet treats? In this guide, I’ll show you how to make delicious caramel apples that wow your
- 1 cup apple cider - 2 cups all-purpose flour - 1 cup granulated sugar - 1/2 cup unsweetened applesauce - 1 large egg - 1/4 cup unsalted butter, melted and cooled The main ingredients create a base for these doughnut holes. Apple cider adds a sweet, tangy flavor. All-purpose flour provides structure. Sugar gives them sweetness, while applesauce keeps them moist. The egg binds the mixture. Melted butter adds richness and flavor. - 2 teaspoons baking powder - 1 teaspoon baking soda - 1 teaspoon ground cinnamon - 1/2 teaspoon nutmeg - 1/2 teaspoon salt These spices and leavening agents are key for taste and texture. Baking powder and soda help the doughnut holes rise. Cinnamon adds warmth, and nutmeg gives a hint of spice. Salt balances the sweetness and enhances flavors. - 1/2 cup granulated sugar (for rolling) - 1 tablespoon ground cinnamon (for rolling) The coating makes these doughnut holes special. Rolling them in sugar and cinnamon creates a sweet crust. This adds a delightful crunch that contrasts with the soft inside. Each bite bursts with flavor, making them irresistible. Try the Full Recipe for all the steps to create these delicious treats! 1. Preheat your oven to 350°F (175°C). Lightly grease a mini muffin pan or use a silicone mold. 2. In a small saucepan, boil the apple cider over medium heat. Then, reduce it to a simmer. Let it cook down to about 1/2 cup. This takes about 10-15 minutes. Once done, let it cool slightly. 3. In a large mixing bowl, whisk together the flour, 1 cup sugar, baking powder, baking soda, cinnamon, nutmeg, and salt. Make sure these dry ingredients mix well. 4. In another bowl, mix the applesauce, egg, vanilla extract, and melted butter. Once your apple cider cools a bit, stir it into this mixture. 5. Now, combine the wet and dry ingredients. Stir gently until just mixed. It's okay if a few lumps remain. Do not overmix. 6. Using a small cookie scoop or spoon, fill each mold about 2/3 full with the batter. 7. Bake for 10-12 minutes. Check for doneness with a toothpick. If it comes out clean, they are ready. Allow them to cool in the pan for about 5 minutes. Then, transfer them to a wire rack. 8. In a shallow bowl, mix the remaining 1/2 cup of sugar with 1 tablespoon of ground cinnamon. 9. While still warm, roll each doughnut hole in the cinnamon-sugar mixture. Ensure they are well coated. 10. Serve warm or let them cool completely on the rack. Enjoy your delicious treats! For the full recipe, check out the details above. To make your doughnut holes perfect, avoid overmixing the batter. When you mix, do it gently. A few lumps are okay. Overmixing can make them tough and chewy. You want them light and fluffy. Checking for doneness is also key. Bake them for 10 to 12 minutes. Use a toothpick to test. Insert it into the center. If it comes out clean, they are ready. If it has batter on it, bake for a few more minutes. When serving, make them look great! Arrange the doughnut holes in a pretty bowl or on a plate. You can dust them with extra cinnamon sugar for a nice touch. Adding apple slices makes it festive and colorful. The best way to enjoy these doughnut holes is warm. They taste great fresh from the oven. You can also let them cool and enjoy them later. For drinks, apple cider pairs wonderfully with these doughnut holes. A hot cup of cider warms you up. You can also serve them with a glass of milk for a classic treat. For dips, try caramel sauce or chocolate sauce. These add a fun twist. You can also serve them with a sweet cream cheese dip. This will make your treats even more delightful. For the full recipe, check out the details provided earlier. {{image_2}} You can enhance the flavor of your doughnut holes. Try adding spices like ginger or cardamom. These spices bring warmth and depth to each bite. They add a nice twist to the classic cinnamon flavor. You can also mix in chocolate chips or nuts. Chocolate chips give a sweet surprise, while nuts add crunch. These additions make every doughnut hole unique. If you need gluten-free options, almond flour works great. It keeps the doughnut holes light and fluffy. For a sugar-free version, use a sugar substitute. There are many good options on the market today. These changes let everyone enjoy these treats without worry. You can adapt your doughnut holes for the seasons. For fall, consider a pumpkin spice version. Just add pumpkin puree and pumpkin spice to the mix. It brings a cozy flavor perfect for autumn. You can also swap out the apples for other fruits. Try using pears or cranberries for a fun twist. Each fruit adds its own special taste, keeping things fresh and exciting. For the full recipe, check out the [Full Recipe]. To keep your baked cinnamon sugar apple cider doughnut holes fresh, place them in an airtight container. This helps lock in moisture and flavor. You can also use a resealable plastic bag. Make sure to cool them completely before storing. If you leave them out at room temperature, they will stay fresh for about 2 days. If you want to save some for later, you can freeze them! First, let the doughnut holes cool fully. Then, place them in a single layer on a baking sheet. Freeze them for about 1 hour. Once frozen, transfer them into a freezer bag. Squeeze out excess air before sealing. To reheat, just pop them in the oven at 350°F (175°C) for about 10 minutes. They will taste fresh again! At room temperature, these doughnut holes last about 2 days. In the fridge, they can last up to a week. The cold air helps keep them fresh longer. But, they may lose some softness. For the best taste and texture, enjoy them fresh or within a few days. For the full recipe, check out the details above! To check for doneness, use a toothpick. Insert it into the center of a doughnut hole. If it comes out clean, they are ready. The baking time is about 10-12 minutes. Keep an eye on them. Overbaking can make them dry. Yes, you can prep these doughnut holes in advance. Mix the dry ingredients and the wet ones separately. Store each in airtight containers. You can also bake them a day ahead. Just let them cool completely before storing. To reheat, preheat your oven to 350°F. Place the doughnut holes on a baking sheet. Heat for about 5-7 minutes. This keeps them warm and soft. You can also microwave them for about 10 seconds. However, the oven gives better results. Yes, you can use regular doughnut pans. Just adjust the baking time. Larger doughnuts may need 12-15 minutes to bake. Check them with a toothpick, as mentioned before. Enjoy your delicious baked cinnamon sugar apple cider doughnut holes! For the full recipe, check the main section. You learned how to make delicious doughnut holes with simple ingredients and steps. By following our easy recipe, you can create a tasty treat everyone will love. Remember to check for doneness and avoid overmixing. Get creative with flavors or modifications to suit your tastes. Storing them right keeps them fresh longer. Enjoy your baking journey, and don’t forget to share these treats with friends! You might just inspire others to bake too. Happy baking!
Baked Cinnamon Sugar Apple Cider Doughnut Holes Delight
Get ready to enjoy a warm bite of fall with my Baked Cinnamon Sugar Apple Cider Doughnut Holes! These fluffy treats combine apple cider and
To make this banana chocolate chip pumpkin bread, you need a few key ingredients: - 1 cup ripe bananas, mashed (about 2-3 bananas) - 1 cup pumpkin puree (canned or fresh) - 1/2 cup granulated sugar - 1/2 cup brown sugar, packed Ripe bananas add natural sweetness and moisture. Pumpkin puree brings a warm, earthy flavor. The mix of granulated and brown sugar gives depth to the sweetness. For extra delight, consider these optional ingredients: - 1/2 cup chopped walnuts or pecans - 1 cup chocolate chips (dark or milk chocolate) Chopped nuts add crunch and a nutty flavor. You can choose dark or milk chocolate chips based on your taste. Both melt beautifully and enhance the bread's richness. To prepare this treat, you will need some essential tools: - Mixing bowls - Loaf pan - Oven thermometer Using mixing bowls helps keep your ingredients organized. A loaf pan shapes the bread perfectly. An oven thermometer ensures your oven heats evenly, helping your bread bake just right. For the complete details, check the Full Recipe. First, you need to preheat your oven to 350°F (175°C). This step is key for even baking. While the oven heats, prepare your loaf pan. You can grease a 9x5-inch loaf pan or use parchment paper. The parchment paper helps with easy removal after baking. In a large mixing bowl, combine 1 cup of mashed bananas, 1 cup of pumpkin puree, 1/2 cup of granulated sugar, and 1/2 cup of brown sugar. Mix these ingredients well until they blend smoothly. Next, add 2 large eggs one at a time, mixing each in fully. Then, stir in 1 1/2 teaspoons of vanilla extract. This mixture creates a rich base for the bread. In a separate bowl, whisk together 1 3/4 cups of all-purpose flour, 1 teaspoon of baking soda, 1/2 teaspoon of baking powder, 1 teaspoon of ground cinnamon, 1/2 teaspoon of nutmeg, and 1/4 teaspoon of salt. This blend adds fluffiness and flavor to your bread. Gradually add the dry mix to the wet ingredients. Stir gently until just combined. Be careful not to overmix; this keeps the bread soft. Now, fold in 1 cup of chocolate chips. If you like, add 1/2 cup of chopped walnuts or pecans for some crunch. Pour the batter into your prepared loaf pan. Smooth the top with a spatula. Bake the bread for 60 to 70 minutes. To check for doneness, insert a toothpick into the center. If it comes out clean, the bread is ready. Let it cool in the pan for about 10 minutes. Then, transfer it to a wire rack to cool completely. Enjoy your cozy treat! For the full recipe, refer to the earlier section. To get the best texture, avoid overmixing the batter. When you mix too much, the bread can become tough. After adding the dry ingredients, mix just until you see no dry flour. If the batter feels too thick, you can adjust it. Adding a splash of milk or more pumpkin puree helps make it smoother. To boost flavor, think about adding spices. A pinch of ginger or cloves gives warmth. You can also tweak the sugars. Using all brown sugar makes it richer. Mixing in some honey or maple syrup adds a unique twist. For serving, slice the banana chocolate chip pumpkin bread on a wooden board. Dust it with powdered sugar for a nice look. Adding a dollop of whipped cream or a scoop of vanilla ice cream makes it even better. You can also try topping it with a sprinkle of cinnamon or chopped nuts for extra flair. {{image_2}} You can switch up the flavors in your banana chocolate chip pumpkin bread. Try using different types of chocolate. Dark chocolate gives a rich taste, while milk chocolate is sweeter. You can also add dried fruits like raisins or cranberries. Seeds, such as sunflower or pumpkin seeds, add a nice crunch. These small changes can make your bread unique and tasty. If you want to make this bread vegan, replace the eggs with flaxseed meal or applesauce. You can also use a plant-based oil. For a gluten-free option, swap out all-purpose flour for a gluten-free blend. If you're watching your sugar, try using less sugar or a natural sweetener like honey or maple syrup. These adjustments let you enjoy the bread no matter your diet. You can make this bread fit the season. In fall, add a pinch of cloves or allspice for warmth. During the holidays, mix in some chopped nuts or dried fruit for a festive touch. You can even top the bread with a glaze made from powdered sugar and pumpkin spice. These seasonal add-ins keep things exciting and fresh. To keep your banana chocolate chip pumpkin bread fresh, you can store it at room temperature or in the fridge. - Room Temperature: If you plan to eat it within a few days, wrap it in plastic wrap or foil. This keeps the moisture in. - Refrigeration: If you want it to last longer, place it in an airtight container in the fridge. This helps slow spoilage. Using airtight containers is key. It prevents the bread from drying out or absorbing other odors. Freezing banana chocolate chip pumpkin bread is easy and a great way to save some for later. - How to Freeze: Let the bread cool completely. Then, wrap it tightly in plastic wrap. After that, place it in a freezer-safe bag or container. Label it with the date before freezing. - Thawing Tips: To thaw, simply take it out and leave it at room temperature for a few hours. For best quality, avoid using the microwave, as it can make the bread soggy. Knowing how long your bread lasts can help you enjoy it at its best. - Room Temperature: When stored at room temperature, the bread will stay fresh for about 3 to 4 days. - Refrigerated Storage: In the fridge, it can last up to a week. Watch for signs of spoilage, like mold or an off smell. If you notice these, it's best to toss the bread. For the Full Recipe, check the details above. Enjoy your baking! Yes, you can use frozen bananas. First, thaw them completely. After thawing, mash them until smooth. The moisture from frozen bananas makes your bread moist and sweet. To make this bread gluten-free, swap all-purpose flour for a gluten-free blend. Look for a blend that has xanthan gum. For best results, use a 1:1 ratio. If you don't have pumpkin puree, use applesauce or mashed sweet potatoes. For every cup of pumpkin puree, use one cup of your substitute. This keeps the texture right. Yes, you can. If using mini loaf pans, reduce the baking time. Bake for 25 to 35 minutes. Check for doneness with a toothpick. It should come out clean. To check if the bread is done, insert a toothpick into the center. If it comes out clean, it is ready. Look for a golden brown color on top as an extra sign. In this post, we explored how to make banana chocolate chip pumpkin bread. I shared the key ingredients and tools you’ll need. You learned step-by-step instructions from mixing to baking. I also provided tips to enhance flavor and texture. Remember, you can try variations and adjust for dietary needs. Store your bread properly to keep it fresh. Enjoy your baking journey and make this tasty bread a new favorite!
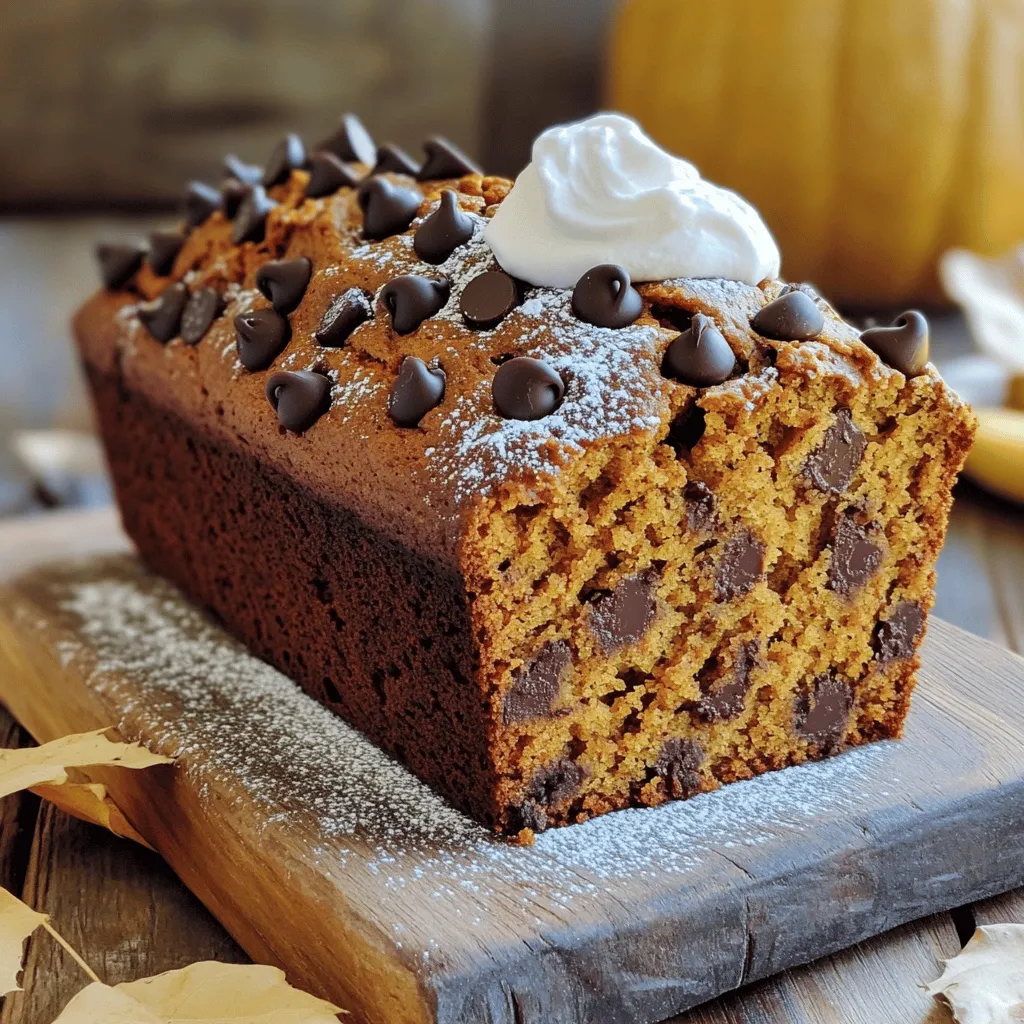
Banana Chocolate Chip Pumpkin Bread Cozy and Simple Treat
Craving a cozy treat? This Banana Chocolate Chip Pumpkin Bread combines rich flavors in a simple recipe. Imagine ripe bananas and smooth pumpkin puree coming
- Pumpkin puree - Granulated sugar - Brown sugar - Eggs - Vegetable oil Pumpkin puree is the star of the show. It gives the donuts a moist texture and rich flavor. Granulated and brown sugars add sweetness and depth. Eggs help bind the mixture, while vegetable oil keeps them soft. - All-purpose flour - Baking powder - Baking soda - Ground cinnamon - Ground nutmeg - Ground ginger - Salt All-purpose flour forms the base, giving structure. Baking powder and baking soda make the donuts rise. The spices—cinnamon, nutmeg, and ginger—bring warmth and fall vibes. Salt balances the sweetness and enhances flavors. - Powdered sugar - Milk - Optional: Sprinkles For the glaze, powdered sugar mixes with milk for a sweet finish. The glaze adds shine and sweetness. You can also add sprinkles for a fun touch. This makes each donut a festive treat. To see the complete list and detailed steps, check the Full Recipe for Mini Pumpkin Donuts. 1. Preheat your oven to 350°F (175°C). This is key for even baking. 2. Lightly grease a mini donut pan with cooking spray. This helps to avoid sticking. 3. In a large mixing bowl, combine the wet ingredients. Use pumpkin puree, granulated sugar, brown sugar, eggs, vegetable oil, and vanilla extract. Whisk until smooth. 4. In a separate bowl, mix the dry ingredients. Combine all-purpose flour, baking powder, baking soda, cinnamon, nutmeg, ginger, and salt. 1. Gradually add the dry ingredients to the wet mixture. Stir just until combined. Be careful not to overmix; this keeps the donuts light and fluffy. 2. Using a piping bag or spoon, fill each donut cavity about 3/4 full with the batter. This allows room for rising. 1. Bake the donuts in the preheated oven for 10-12 minutes. Perform the toothpick test by inserting a toothpick into the center. If it comes out clean, they are done. 2. Allow the donuts to cool in the pan for a few minutes. Then, transfer them to a wire rack to cool completely. 3. For the glaze, whisk together powdered sugar and enough milk to reach your desired consistency. Dip the cooled donuts in the glaze. Let any excess glaze drip off. 4. If you like, add sprinkles on top while the glaze is still wet. This adds a fun touch to your treats. You can find the Full Recipe for more detailed instructions and tips. To prevent overmixing the batter, mix until just combined. When you see some flour, stop stirring. Overmixing makes the donuts tough. For even baking, ensure your oven is preheated. Use a toothpick to check if they are done. Insert it into the center; it should come out clean. If some donuts bake faster, rotate the pan halfway through. For the perfect glaze consistency, whisk powdered sugar with milk. Start with one tablespoon of milk. Add more until you reach a smooth, thick glaze. Add sprinkles right after glazing. If the glaze sets too much, the sprinkles won’t stick. This adds a festive touch to your mini pumpkin donuts. Overbaking makes donuts dry. Underbaking leaves them gooey. Keep an eye on the baking time and do the toothpick test. Be careful with substitutions. Using the wrong type of sugar or flour can change the taste. Stick to the recipe for the best results. For the Full Recipe, check the link provided. Enjoy making these delicious mini pumpkin donuts! {{image_2}} Baked mini donuts are easy and quick to make. They use less oil and are lighter. However, they may not have the same rich taste as fried donuts. Fried mini donuts can be crispy and full of flavor. Yet, frying requires more care and attention. To fry mini donuts effectively, heat oil to 350°F (175°C). Use a deep pot for safety. Drop in the donuts gently. Fry until golden brown, about 2-3 minutes on each side. Remove them with a slotted spoon and drain on paper towels. This method gives you that delightful crunch. You can customize your mini donuts with fun flavors. Adding chocolate chips can make them a special treat. You might also try mixing in spices like cardamom or allspice for a unique twist. If you like nuts, chopped pecans or walnuts add a great crunch. These flavors work well with the pumpkin. Experiment with your favorite ingredients to find the perfect combo. Decorating your mini donuts can make them festive. For Halloween, use orange and black sprinkles. For Thanksgiving, try drizzling white frosting that looks like icing. You can choose between frosting and glazing. Frosting gives a thicker texture, while glazing is smoother. Both options let you be creative and playful with your designs. Let your imagination run wild! To keep mini pumpkin donuts fresh, store them at room temperature. Use an airtight container. This helps lock in moisture and flavor. Avoid plastic wrap, as it can make them soggy. Place a paper towel inside the container to absorb extra moisture. This method keeps your donuts soft and tasty for up to three days. For longer storage, you can freeze mini pumpkin donuts. Here's how: 1. Cool Completely: Let the donuts cool on a wire rack. 2. Wrap Individually: Wrap each donut in plastic wrap to prevent freezer burn. 3. Seal in a Bag: Place the wrapped donuts in a freezer bag or container. When you're ready to enjoy them, follow these steps for thawing and reheating: - Thawing: Remove the donuts from the freezer. Let them sit at room temperature for about an hour. - Reheating: You can warm them in the microwave for 15-20 seconds. This makes them taste fresh again. Mini pumpkin donuts last about three days at room temperature. If frozen, they can last up to three months. Always check for signs of spoilage: - Smell: If they smell off or sour, it's time to toss them. - Appearance: Look for mold or discoloration on the donuts. - Texture: If they feel dry or hard, they may not taste good anymore. For the best experience, enjoy them fresh or thawed! For the full recipe, check the detailed guide. You can use gluten-free all-purpose flour. Many brands offer blends that work well. Just make sure to check the label for the right mix of flours. You might also add a bit of xanthan gum to help with texture. This will keep your donuts soft and tasty. Yes, you can make the batter ahead. Store it in the fridge for up to a day. Just cover it well to prevent drying out. When you're ready, give it a good stir before you bake. This keeps the flavors fresh. These donuts pair great with warm drinks. Try coffee, tea, or hot cocoa. They also go well with sweet dips like caramel sauce. For a snack, enjoy them with apple slices or nuts. This adds a nice balance to the sweet donuts. You can find the Full Recipe for Mini Pumpkin Donuts online. It gives detailed steps and tips for making these treats. This will help you create the best mini donuts every time. In this post, we explored how to make mini pumpkin donuts from scratch. We covered all the key ingredients, step-by-step instructions, and tips for perfect baking and glazing. We also discussed variations, storage methods, and answered common questions. Making mini pumpkin donuts is fun and tasty. With a few simple steps, you can enjoy this treat anytime. Don't forget to share your creations and enjoy these delightful donuts with friends and family. Happy baking!
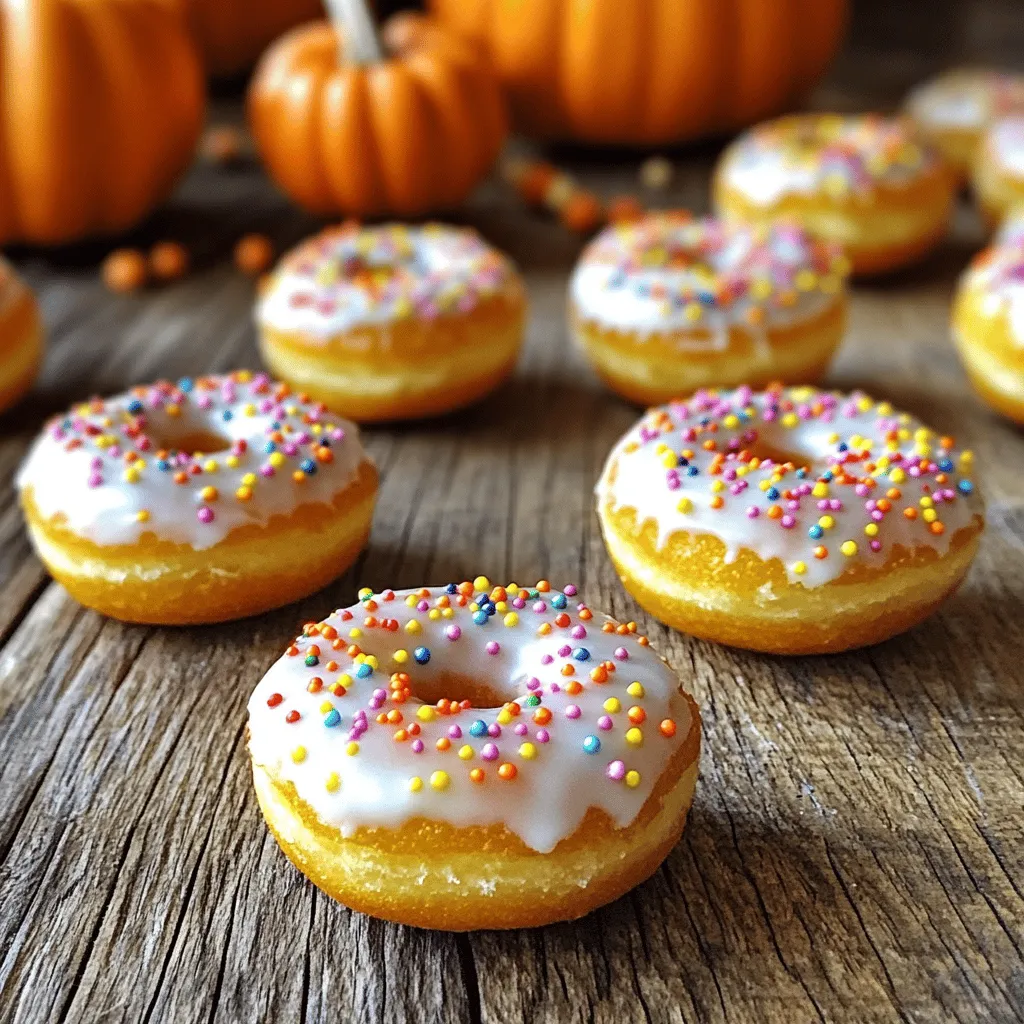
Mini Pumpkin Donuts Savory Fall Treat for Everyone
Are you ready to enjoy a sweet taste of fall? Mini pumpkin donuts are the perfect treat for everyone! Soft, fluffy, and packed with pumpkin
- 1 cup all-purpose flour - 1/2 cup granulated sugar - 1 teaspoon baking powder - 1/2 teaspoon baking soda - 1/4 teaspoon salt - 1 teaspoon ground cinnamon - 1/2 cup unsalted butter, melted - 1 large egg - 1/2 cup buttermilk (or alternative) - 1 cup peeled and diced apples (e.g., Granny Smith or Honeycrisp) - 1/2 cup brown sugar - 1 tablespoon ground cinnamon - 1/4 cup chopped walnuts (optional) - 1/2 cup cream cheese, softened - 1/4 cup powdered sugar - Muffin tin - Cupcake liners - Mixing bowls - Whisk and spatula - Electric mixer (for frosting) This recipe packs all the cozy flavors of apple pie into a cupcake format. You will love the tender cake, sweet apples, and creamy frosting. This recipe serves 12 cupcakes. When you gather all these ingredients, you set the stage for a delightful baking experience. Each item plays a role, from the apples giving freshness to the cinnamon adding warmth. The tools ensure a smooth process, making it easy to whip up these treats. Now, let's dive into the steps to create these apple cinnamon roll cupcakes! 1. Preheat the oven to 350°F (175°C). Line a muffin tin with cupcake liners. This helps with easy removal after baking. 2. In a large bowl, mix the dry ingredients. Combine 1 cup of all-purpose flour, 1/2 cup of granulated sugar, 1 teaspoon of baking powder, 1/2 teaspoon of baking soda, 1/4 teaspoon of salt, and 1 teaspoon of ground cinnamon. Whisk until everything is well blended. 3. In another bowl, combine the wet ingredients. Mix 1/2 cup of melted unsalted butter, 1 large egg, and 1/2 cup of buttermilk. Stir until smooth and creamy. 1. Pour the wet mixture into the dry ingredients. Stir gently until just combined. Be careful not to overmix; this keeps the cupcakes light. 2. Now, fold in 1 cup of peeled and diced apples and 1/4 cup of chopped walnuts if you like. Make sure they are evenly spread throughout the batter. 1. Spoon half of the batter into each cupcake liner. Fill them about halfway. This gives room for rising. 2. Next, sprinkle about 1 teaspoon of the cinnamon sugar filling (made from 1/2 cup of brown sugar and 1 tablespoon of ground cinnamon) on top of the batter in each liner. Then, cover with the remaining batter. 3. Finally, sprinkle the rest of the cinnamon sugar filling on top. Bake for 18-20 minutes. Check with a toothpick; it should come out clean when done. Let the cupcakes cool for 5 minutes in the tin. Then, move them to a wire rack. Enjoy the delightful aroma that fills your kitchen while they bake. For the full recipe, check out the detailed instructions above. To get soft and moist cupcakes, do not overmix your batter. When you combine the wet and dry ingredients, stir gently until just mixed. Overmixing makes the cupcakes tough. When you fold in the apples, do so with care. Use a spatula and gently lift the batter from the bottom. This keeps the apples intact and helps the texture stay light. For smooth cream cheese frosting, beat the softened cream cheese and powdered sugar well. Start on low speed to avoid splatters, then increase to medium. This makes it creamy and easy to spread. When decorating, use a piping bag for a neat look. You can add swirls or rosettes for style. A sprinkle of cinnamon on top adds a nice touch, too. To boost flavor, consider adding extra spices. A pinch of nutmeg or ginger can elevate your cupcakes. You can also try vanilla or almond extract for a twist. For apple varieties, feel free to mix it up. Honeycrisp apples add sweetness, while Granny Smith offers a tart bite. Each type will bring its own flavor to your cupcakes. For the Full Recipe, refer to the earlier section. Enjoy baking! {{image_2}} You can make these cupcakes healthier with a few easy swaps. Try using whole wheat flour instead of all-purpose flour. This change adds fiber and nutrients. You can also use alternative sweeteners like honey or maple syrup instead of granulated sugar. If you want dairy-free options, use almond milk or coconut milk for the buttermilk. These swaps keep the flavor while making the recipe a bit lighter. Want to mix things up? Add cranberries or raisins to the batter for a burst of flavor. These fruits pair well with apples and add a sweet chewiness. You can also experiment with different nuts. Walnuts add crunch, but pecans or almonds work well too. Each nut gives a unique taste and texture to your cupcakes. Make your cupcakes fit the season! In autumn, add pumpkin spice to the batter for a warm, cozy flavor. This spice mix brings a lovely aroma and taste. During spring or summer, add citrus zest from lemons or oranges for a fresh twist. The citrus brightens the flavor and gives a lively touch to your cupcakes. For the full recipe, check out the notes above. To keep your apple cinnamon roll cupcakes fresh, store them in the pantry or the fridge. In the pantry, put them in an airtight container. This keeps them soft and moist. If you store them in the fridge, they can last longer. Just remember to wrap them well to avoid drying out. If you want to freeze these cupcakes, first let them cool completely. Then, wrap each cupcake in plastic wrap. Finally, place them in a freezer bag. This method keeps them fresh for about three months. When you're ready to enjoy, thaw them in the fridge overnight. Apple cinnamon roll cupcakes can last up to five days in the pantry. If stored in the fridge, they can last about a week. Look for signs of spoilage like a change in smell or texture. If they become hard or dry, it's best to toss them. To reheat your cupcakes without drying them out, use a microwave. Heat them for about 10-15 seconds. This warms them gently without making them tough. You can also use an oven for a crispy top. Set it to 350°F and heat for about five minutes. Enjoy your cupcakes warm and delicious! Yes, you can make these cupcakes ahead of time. To do this, bake them and let them cool completely. Once cooled, store them in an airtight container. They will stay fresh for up to three days at room temperature. If you want to freeze them, wrap each cupcake in plastic wrap. Place them in a freezer-safe bag. They can last up to three months in the freezer. Before serving, let them thaw at room temperature. You can frost them just before serving for the best taste. Yes, you can use other fruits! Pears work great and add a nice flavor. You can also try diced peaches or berries. Just be aware that some fruits have more water. If you use juicy fruits, reduce the buttermilk slightly. This helps keep the batter from getting too runny. Each fruit brings its own taste, so feel free to experiment! If you're looking for something different, try a simple glaze. Mix powdered sugar with milk until smooth. Drizzle it over the cupcakes for a sweet finish. You can also use whipped cream for a lighter touch. A sprinkle of cinnamon sugar on top adds extra flavor. If you want a fun twist, use caramel sauce for drizzling. Each option makes these cupcakes even more fun! Yes, you can make these cupcakes vegan! Use plant-based butter instead of regular butter. For the egg, try a flaxseed egg. Mix one tablespoon of ground flaxseed with three tablespoons of water. Let it sit for five minutes to thicken. Replace buttermilk with plant milk mixed with vinegar, just like the recipe suggests. With these swaps, you can enjoy tasty vegan apple cinnamon roll cupcakes! This blog covered all you need for perfect apple cinnamon roll cupcakes. We discussed essential ingredients, key tools, and a full recipe guide to help you succeed. Tips for texture and frosting techniques made the process smoother. You also learned fun variations and storage methods to keep your cupcakes fresh. Try out different fruits or healthier options to make it your own. Happy baking! Enjoy your delicious treats!
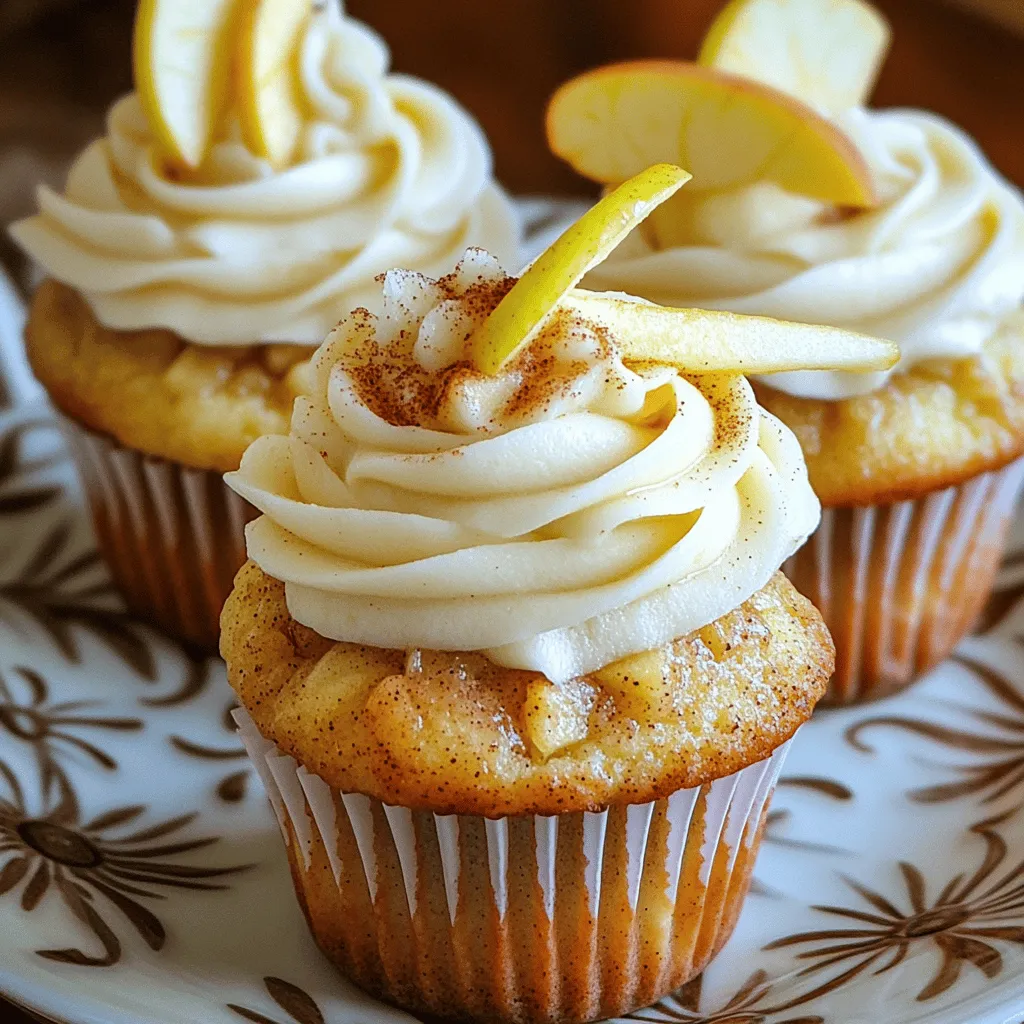
Irresistible Apple Cinnamon Roll Cupcakes Recipe
Get ready to fall in love with baking again! These Irresistible Apple Cinnamon Roll Cupcakes are a sweet twist on a classic. Imagine soft cupcakes
- 1 cup canned pumpkin puree - 1/2 cup vegetable oil - 1/2 cup brown sugar - 1/2 cup granulated sugar - 2 large eggs - 1 teaspoon vanilla extract - 1 1/2 cups all-purpose flour - 1 teaspoon baking soda - 1 teaspoon baking powder - 1 teaspoon ground cinnamon - 1/2 teaspoon ground nutmeg - 1/4 teaspoon ground ginger - 1/4 teaspoon salt - 1/2 cup chopped walnuts or pecans (optional) - 1/3 cup all-purpose flour - 1/4 cup brown sugar - 1/4 teaspoon ground cinnamon - 3 tablespoons cold unsalted butter, cubed To make these easy pumpkin muffins, gather your ingredients. Start with the wet ones. The canned pumpkin puree is a star here. It gives the muffins moisture and flavor. The oil adds richness. Brown sugar and granulated sugar sweeten the mix perfectly. The eggs help bind everything together. Don’t forget the vanilla extract; it adds a lovely aroma. Next, we move to the dry ingredients. All-purpose flour forms the base. Baking soda and baking powder help the muffins rise. The spices, like cinnamon, nutmeg, and ginger, add warmth and depth. Salt enhances all the flavors. If you like a bit of crunch, toss in some chopped walnuts or pecans. Finally, we create the crumb topping. This is what makes these muffins extra special. Combine flour, brown sugar, and cinnamon in a bowl. Then, mix in the cold butter. Use your fingers to work it into the dry mix until it looks like coarse crumbs. This will give your muffins a sweet, crunchy finish. For the complete recipe, check out the Full Recipe. - Preheat the oven to 350°F (175°C). - Grease or line the muffin tin with muffin liners. In a large bowl, combine the pumpkin puree, vegetable oil, brown sugar, granulated sugar, eggs, and vanilla extract. Mix until everything is blended well. This step gives your muffins a rich flavor. In another bowl, whisk together the flour, baking soda, baking powder, cinnamon, nutmeg, ginger, and salt. Mixing these dry ingredients well helps them combine evenly in your batter. Gradually add the dry ingredients to the wet mixture. Stir gently until just combined. If you want, fold in the chopped nuts for extra crunch. Be careful not to overmix; this keeps your muffins fluffy. In a small bowl, mix the flour, brown sugar, and cinnamon. Add the cold butter cubes. Use your fingers or a pastry cutter to work the butter into the flour mixture until it looks crumbly. This adds a sweet crunch on top of your muffins. Spoon the batter into the prepared muffin tin, filling each cup about two-thirds full. Sprinkle the crumb topping generously over each muffin. Bake them in the preheated oven for 18-22 minutes. Check with a toothpick; it should come out clean when done. For the full recipe, refer to the complete list of ingredients and steps provided above. Enjoy baking these delicious pumpkin muffins! To make the best pumpkin muffins, start with room temperature ingredients. This step helps them mix better. Cold ingredients can lead to uneven batter. Next, do not overmix the batter. Stir gently until just combined. Overmixing can make your muffins tough and dry. You want them light and fluffy. To boost flavor, consider adding extra spices. A pinch of allspice or cloves can add warmth. You can also mix in chocolate chips for a sweet twist. This adds richness to each bite. These muffins pair well with warm drinks. Try them with coffee, tea, or hot chocolate. You can also top them with a smear of cream cheese. This gives a nice creamy contrast to the spicy muffins. For a cozy touch, serve them on a rustic platter. Dust with powdered sugar and add a cinnamon stick for charm. For the full recipe, check the details above. {{image_2}} You can easily change up your pumpkin muffins by adding mix-ins. Chocolate chips bring a sweet, rich flavor. I love using dark chocolate chips because they balance the pumpkin well. Dried fruits like cranberries or raisins add a chewy texture. They also give a nice contrast to the soft muffin. You can pick your favorite mix-ins or even a combo! For those who need gluten-free options, you can use gluten-free flour blends. They work well in this recipe, keeping the muffins soft and moist. If you want to go vegan, replace the eggs with flax eggs. Just mix one tablespoon of ground flaxseed with three tablespoons of water. Let it sit until it thickens. For dairy-free, use almond milk in place of regular milk and coconut oil instead of butter. These swaps keep the flavors intact while catering to your needs. To make your muffins even more festive, try adding cranberries or orange zest. Dried cranberries add a tartness that pairs well with pumpkin. Just fold in about half a cup into the batter. Orange zest brightens the flavor and gives a hint of citrus. It’s perfect for those cozy holiday moments. These seasonal twists make your muffins unique and fun! For the full recipe, check out the Cozy Autumn Pumpkin Muffins. To store your pumpkin muffins at room temperature, place them in an airtight container. This keeps them fresh and moist. You can also use a zip-top bag. Make sure to remove as much air as possible. These muffins stay tasty for up to three days on the counter. If you notice any signs of mold, it's best to toss them out. If you want to save muffins for later, freezing is a great option. Allow the muffins to cool completely before freezing. Wrap each muffin tightly in plastic wrap. Then, place them in a freezer-safe bag. Label the bag with the date. Your muffins can last up to three months in the freezer. For thawing, take the muffins out of the freezer and leave them at room temperature. This usually takes about an hour. If you're in a hurry, you can use the microwave. Heat them for 15 to 20 seconds, just until warm. To keep your muffins moist when reheating, wrap them in a damp paper towel. Then, place them in the microwave for 10 to 15 seconds. This method adds a little steam, which helps to prevent dryness. Another option is to reheat them in the oven at 350°F (175°C) for 5 to 10 minutes. This gives a nice warm touch and keeps the crumb topping crispy. For more delicious pumpkin muffin goodness, check out the Full Recipe! These muffins last about 3 to 5 days at room temperature. Store them in an airtight container. For best taste, keep them in a cool place. If you place them in the fridge, they may last up to a week but can dry out. Yes, you can use fresh pumpkin. To make pumpkin puree, cut a pumpkin in half. Remove the seeds and strings. Roast the halves at 350°F (175°C) for 45 minutes. Once soft, scoop out the flesh and mash it until smooth. This will give a fresh, rich flavor. You can use white sugar as a substitute. However, it may change the taste. Brown sugar adds moisture and a slight caramel flavor. If you have maple syrup, you can use it too. Just reduce the liquid in your mix. Yes, these muffins freeze well. Cool them completely before freezing. Place them in a freezer bag or airtight container. They can last up to three months in the freezer. To thaw, leave them at room temperature or warm them in the oven. Check for doneness by inserting a toothpick into the center. If it comes out clean, the muffins are done. You can also press lightly on the top; it should spring back. If it leaves an indent, give them a few more minutes. We explored the key ingredients for making delicious muffins. You learned about wet and dry ingredients, plus a crumb topping. I shared step-by-step instructions for perfect baking. Tips helped you achieve the best texture and flavor. You can even try fun variations for seasonal flavors. Now, you know how to store and reheat muffins while keeping them fresh. With these insights, you can confidently bake tasty muffins that everyone will enjoy. Grab your ingredients and get started!
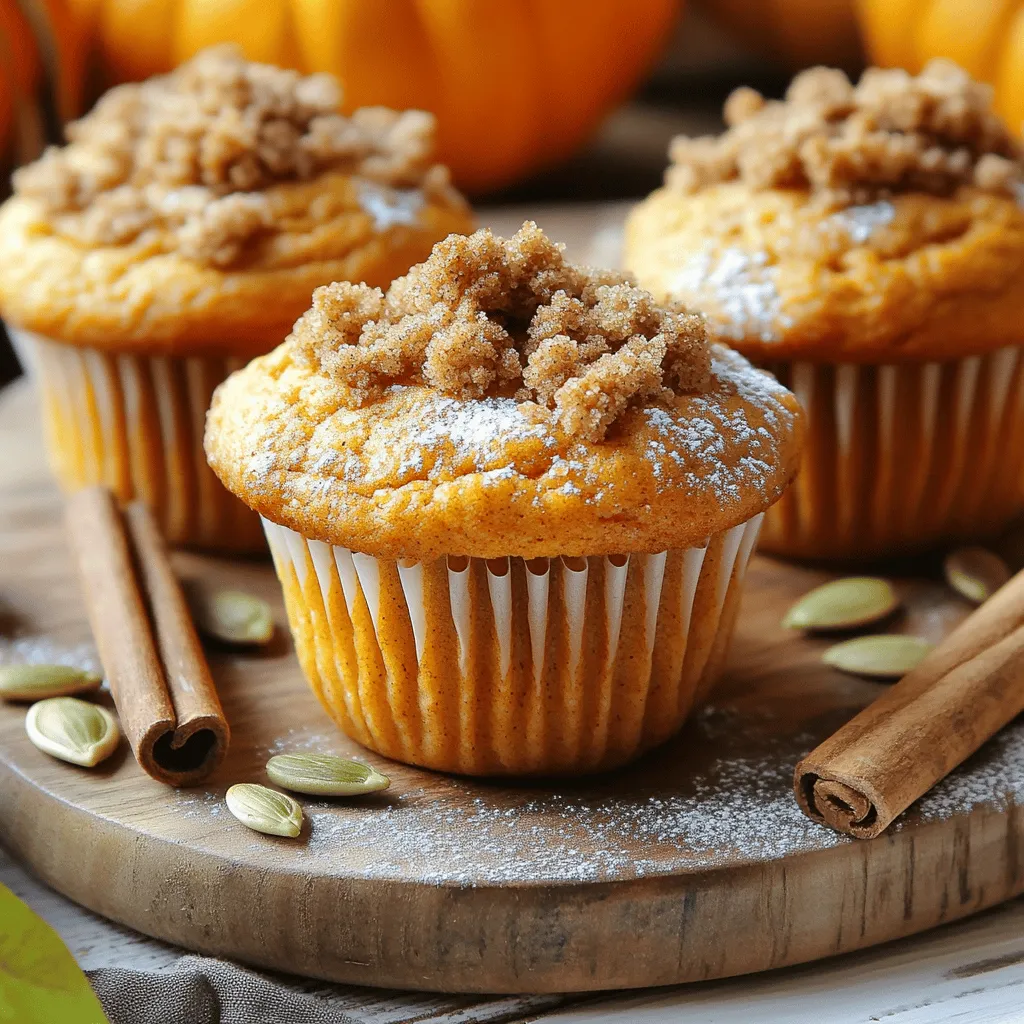
Easy Pumpkin Muffins with Crumb Topping Delight
Are you craving a tasty treat that’s easy to make? Try these Easy Pumpkin Muffins with Crumb Topping! Their warm spices and sweet crumb topping
- 1 ½ cups all-purpose flour - 1 teaspoon baking powder - 1 teaspoon baking soda - ½ teaspoon salt - 1 teaspoon ground cinnamon - ½ teaspoon ground nutmeg - ½ teaspoon ground ginger - ½ cup unsalted butter, softened - 1 cup granulated sugar - 2 large eggs - 1 cup pure pumpkin puree - ½ cup buttermilk - 1 teaspoon vanilla extract - ½ cup chopped pecans (optional) - ½ cup cream cheese, softened (for frosting) - 1 cup powdered sugar (for frosting) - 2 tablespoons maple syrup (for frosting) I love using these simple ingredients. They combine to create a lovely fall flavor. The pumpkin puree brings moisture and richness, while the spices add warmth. Make sure to use fresh, pure pumpkin puree. It gives the best taste. If you want, you can use canned pumpkin, but check the label for additives. The buttermilk helps keep the cake soft and fluffy. If you don't have buttermilk, you can make your own. Just mix milk with a bit of vinegar or lemon juice. If you like nuts, pecans add a nice crunch. They also pair well with the sweet cream cheese frosting. This frosting is creamy and rich, making the cake even more delicious. Follow the full recipe for clear steps on how to bring this all together. Enjoy the process as you make this lovely cake! 1. Preheating the Oven and Preparing the Cake Pan Start by preheating your oven to 350°F (175°C). This ensures even baking. Grease and flour a 9-inch round cake pan. This will help the cake come out easily. 2. Mixing Dry Ingredients In a medium bowl, whisk together the flour, baking powder, baking soda, salt, cinnamon, nutmeg, and ginger. This step mixes the flavors well. Set this bowl aside for later use. 3. Creaming Butter and Sugar In a large mixing bowl, beat the softened butter and granulated sugar together. Mix until it looks light and fluffy, which should take about 3-4 minutes. This creates a nice base for your cake. 4. Adding Eggs and Wet Ingredients Now, add the eggs one by one. Mix well after each addition. Then, stir in the pumpkin puree, buttermilk, and vanilla extract. Make sure everything is well combined. 5. Incorporating Dry Ingredients into the Pumpkin Mixture Gradually add the dry ingredients to the pumpkin mixture. Stir gently until just combined. If you like, fold in the chopped pecans at this point for added crunch. 6. Pouring the Batter and Baking Time Pour the batter into your prepared cake pan. Make sure to smooth the top with a spatula. Bake for 30-35 minutes. A toothpick inserted in the center should come out clean. 7. Cooling and Frosting Preparation Allow the cake to cool in the pan for 10 minutes. After that, transfer it to a wire rack to cool completely. For the frosting, beat together the cream cheese, powdered sugar, and maple syrup until smooth. Once the cake is cool, frost the top evenly. Check out the Full Recipe for more details on serving and presentation tips. - Ensuring Perfect Texture and Moisture To achieve a soft, moist cake, use room temperature ingredients. Softened butter and eggs mix better and create air. This adds lightness. Don't overmix your batter. Stir gently until the dry and wet ingredients blend. Overmixing can lead to a tough cake. Adding buttermilk gives a nice richness and moisture too. - Checking for Doneness To check if your cake is ready, insert a toothpick into the center. If it comes out clean, your cake is done. If not, give it a few more minutes. Remember, every oven is different. Keep an eye on it as it bakes. - Achieving Creamy Frosting Consistency For a smooth cream cheese frosting, start with softened cream cheese. Beat it well before adding sugar. Gradually mix in the powdered sugar to avoid lumps. If it's too thick, add a splash of milk or more maple syrup. This will help achieve the perfect consistency. - Creative Presentation Ideas For a beautiful presentation, spread frosting evenly on top. Add a sprinkle of cinnamon or some chopped pecans for color. You can also drizzle extra maple syrup on top for a sweet touch. Use a decorative plate to make it look festive. - Best Pairings with Pumpkin Rum Cake This cake pairs well with coffee or chai tea. The spices in the cake enhance the flavors of these drinks. You can also serve it with whipped cream or a scoop of vanilla ice cream. This adds a creamy contrast to the cake's texture. - Seasonal Serving Ideas for Fall Gatherings For fall gatherings, serve slices with warm apple cider. Arrange the cake with seasonal fruits like pears or figs. This creates a colorful, inviting display. You can also use festive plates and napkins to add to the autumn vibe. {{image_2}} Gluten-Free Options for the Flour If you want a gluten-free cake, use a gluten-free flour blend. Look for one that has xanthan gum. This helps to give the cake a good texture. You can find many blends at stores. Just measure the same amount as regular flour. Dairy-Free Alternatives for Butter and Milk For a dairy-free cake, replace butter with coconut oil or vegan butter. Use almond milk or oat milk instead of buttermilk. These swaps keep the cake moist and tasty. Adding Spices for Improved Flavor Try adding a pinch of cloves or allspice for extra warmth. Mix in some orange zest for a bright twist. These spices can enhance the fall flavor in your cake. Experimenting with Different Frosting Options Instead of cream cheese frosting, you can use whipped cream. A maple frosting could also be a fun twist. Each frosting brings its own taste and style to the cake. Incorporating Chocolate or Caramel You might want to add chocolate chips to the batter for a sweet surprise. Drizzling caramel sauce over the top makes it even more indulgent. Both options add a rich layer of flavor. Creating Mini Pumpkin Rum Cakes or Cupcakes Instead of a large cake, make mini cakes or cupcakes. Bake them in a muffin tin for fun, single servings. This makes them perfect for parties or gifts. For the full recipe, check out the detailed steps to make this delightful cake. Room Temperature Storage You can keep your Pumpkin Rum Cake at room temperature for up to three days. Place it in an airtight container to keep it fresh. If you don't have a container, wrap the cake tightly in plastic wrap. This helps keep moisture in and stops it from drying out. Refrigeration Tips If you want to store the cake for longer, refrigerate it. Wrap it in plastic wrap or place it in a container. It will stay fresh in the fridge for about a week. Just make sure to let it warm up a bit before serving. Cold cake can lose some of its flavor. Best Practices for Freezing Cake To freeze your Pumpkin Rum Cake, wait until it cools completely. Wrap it tightly in plastic wrap, then cover it with aluminum foil. This helps prevent freezer burn. You can freeze it for up to three months. Just remember, freezing can change the texture a bit. Thawing Instructions When you're ready to enjoy your cake, take it out of the freezer. Remove the wrap but leave it in the foil. Let it thaw in the fridge overnight. This helps keep the cake moist. If you're in a hurry, you can thaw it at room temperature for a few hours. Understanding Freshness and Quality Knowing how long your Pumpkin Rum Cake stays fresh is key. At room temperature, expect it to last about three days. In the fridge, it can last up to one week. If frozen, it can last up to three months but is best enjoyed within one month for the best taste. Always check for any signs of spoilage before eating. How to Make Pumpkin Rum Cake from Scratch? Making pumpkin rum cake from scratch is easy. Start by mixing your dry ingredients in one bowl. In another bowl, cream the butter and sugar. Then, add eggs and pumpkin puree. Combine both bowls gently. Bake at 350°F until golden. Can I use canned pumpkin puree instead of fresh? Yes, you can use canned pumpkin puree. It saves time and works well. Just make sure it's pure pumpkin, not pie filling. This keeps the flavors true and fresh. What can I substitute for buttermilk? If you don’t have buttermilk, try using milk with vinegar. Just add one tablespoon of vinegar to one cup of milk. Let it sit for five minutes. This gives you a good buttermilk substitute. Why is my pumpkin cake dense? Your pumpkin cake might be dense due to too much flour or overmixing. Always measure flour properly and mix until just combined. This keeps the cake light and fluffy. Can I add rum to the frosting? Yes, adding rum to the frosting can enhance the flavor! Just mix in a tablespoon or two. It adds a nice kick and pairs well with the pumpkin. What drinks go well with pumpkin cake? Pumpkin cake pairs well with spiced cider or a nice cup of coffee. A warm chai latte also complements the flavors. For adults, a spiced rum cocktail can be a great match. How long is pumpkin cake good for after baking? Pumpkin cake stays fresh for about three to four days at room temperature. If you store it in the fridge, it can last up to a week. Always keep it covered to maintain moisture. This blog post showed you how to make a tasty pumpkin rum cake. You learned the key ingredients, step-by-step instructions, and helpful tips. I shared ideas for serving and storing your cake, plus variations for extra fun. Baking this cake will bring joy to your kitchen and gatherings. Enjoy the warm spices and creamy frosting. Whether for fall or a festive occasion, it’s sure to impress. Now, gather your ingredients and start baking!
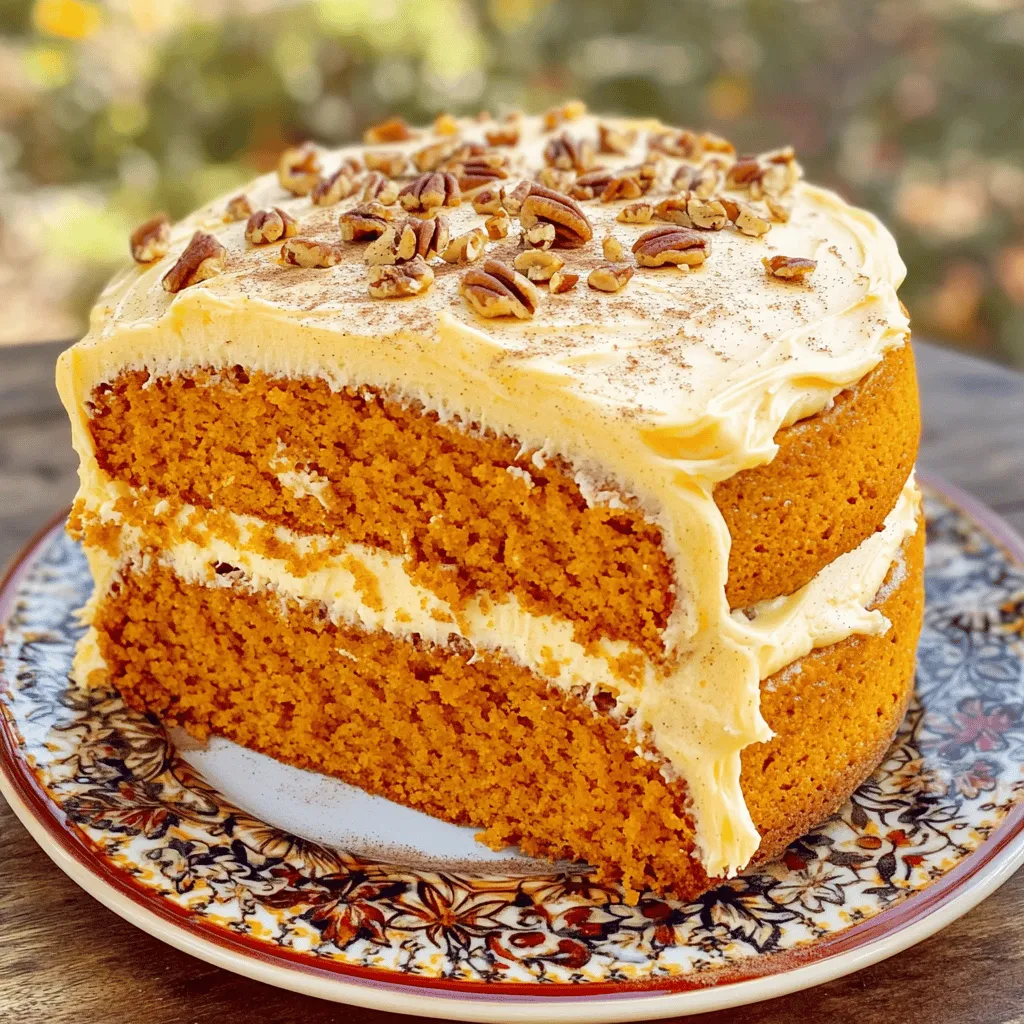
Pumpkin Rum Cake Savory Fall Flavor Delight
Are you ready to whip up a fall treat that will impress everyone? Let me introduce you to the Pumpkin Rum Cake—a dessert that combines
To make these tasty muffins, gather these key ingredients: - 1 cup apple cider - 2 cups all-purpose flour - 1 cup granulated sugar - 1/2 cup brown sugar, packed - 1 tablespoon baking powder - 1/2 teaspoon baking soda - 1 teaspoon ground cinnamon - 1/2 teaspoon ground nutmeg - 1/2 teaspoon salt - 2 large eggs - 1/2 cup unsalted butter, melted and slightly cooled - 1 teaspoon vanilla extract - 1/2 cup buttermilk These ingredients work together to create a rich and flavorful muffin. The apple cider adds sweetness, while spices like cinnamon and nutmeg give warmth. For a twist, consider these optional ingredients: - Chopped apples for added texture - Walnuts or pecans for crunch - A sprinkle of sea salt for contrast Adding these can elevate your muffins. Chopped apples give more fruitiness, while nuts add a nice bite. Accurate measuring is key to great muffins. Use dry measuring cups for flour and sugar. Level off the tops with a knife for precision. For liquids, use a liquid measuring cup. Too much flour can make muffins dry. Too little sugar may make them bland. Following the measurements closely helps ensure your muffins come out just right. You can find the full recipe in the article. Enjoy baking! To start, gather your ingredients. You need apple cider, flour, sugar, eggs, butter, and spices. First, preheat your oven to 350°F (175°C). This step is key. Line a muffin tin with paper liners or grease it. Next, boil the apple cider in a small pot. Reduce it until you have about half a cup. This makes the flavor rich. In a big bowl, mix the dry ingredients: flour, sugars, baking powder, baking soda, cinnamon, nutmeg, and salt. Whisk them together until well combined. In another bowl, whisk the eggs, melted butter, vanilla, buttermilk, and the reduced cider. Pour this mix into the dry ingredients. Stir gently. A few lumps are okay. Now, it’s time to fill the muffin cups. Divide the batter evenly, filling each cup about three-quarters full. This allows room for rising. Place the muffin tin in the oven. Bake for 18 to 22 minutes. Check if they’re done by inserting a toothpick. If it comes out clean, they are ready. Once baked, let the muffins cool in the pan for about five minutes. Then, transfer them to a wire rack. This helps them cool evenly. For a fun twist, roll the warm muffins in a mix of sugar and cinnamon. Serve them warm on a wooden board. Dust with powdered sugar for a nice finish. Pair with fresh apple slices drizzled with caramel for extra flair. Enjoy your delicious apple cider doughnut muffins! For the full recipe, check the details above. Many home bakers make simple mistakes. Here are a few to watch for: - Overmixing the batter: This can make your muffins tough. Mix just until combined. - Using cold ingredients: Cold eggs or buttermilk can affect how the batter mixes. Use them at room temperature for best results. - Not measuring flour correctly: Too much flour can lead to dry muffins. Use the spoon-and-level method for accuracy. To achieve muffin perfection, follow these tips: - Preheat your oven: A hot oven helps muffins rise. Preheat to 350°F (175°C). - Cool the cider: After reducing apple cider, let it cool slightly. Hot liquid can cook the eggs too quickly. - Use a muffin scoop: This helps portion the batter evenly. Fill each cup about 3/4 full for the best rise. You can boost the taste and feel of your muffins with these ideas: - Add spices: Try adding ginger or allspice for a warm flavor. - Swap sugars: Use a mix of white and brown sugar for depth. Brown sugar adds moisture. - Top with glaze: A simple glaze of powdered sugar and cider can enhance sweetness. Drizzle it over warm muffins for a sweet finish. For the full recipe, be sure to check out the detailed steps provided! {{image_2}} You can make these muffins gluten-free easily. Just swap the all-purpose flour for a gluten-free blend. Look for a blend that works well for baking. This change keeps the texture light and fluffy. You may need to add a bit more liquid if the batter seems too thick. Always check your labels for any hidden gluten. Spices can change the flavor of your muffins. Try adding allspice or ginger for a warm twist. A pinch of cloves can add depth too. Mix a teaspoon of your chosen spice into the dry ingredients. This method keeps the muffins exciting and unique. Experiment with what you love to make them your own. You can enhance these muffins by adding fruits or nuts. Consider chopped apples or pears for extra sweetness and texture. Nuts like walnuts or pecans add crunch and flavor. Stir in about a cup of your chosen fruit or nuts into the batter. This creates a fun surprise in every bite. Try different combinations to discover your favorite mix. For the full recipe, check the section above. To keep your Apple Cider Doughnut Muffins fresh, store them in an airtight container. Place them at room temperature for up to three days. If you want to keep them longer, consider refrigeration. Just remember, cold muffins can lose some of their fluffiness. You can also wrap each muffin in plastic wrap for extra protection. When you're ready to enjoy your muffins again, reheating is key. You can use a microwave or an oven. For the microwave, heat one muffin for about 15-20 seconds. This warms it up nicely. For a crispier texture, use the oven. Set it to 350°F (175°C), and heat for about 5-7 minutes. This way, your muffins will taste fresh, just like when you baked them. Freezing is a great way to save muffins for later. First, let the muffins cool completely. Then, wrap each one tightly in plastic wrap. Place the wrapped muffins in a freezer bag or container. They can last up to three months in the freezer. When you're ready to eat, thaw them overnight in the fridge. Reheat them as mentioned above for the best taste. For the full recipe, check out the detailed instructions and enjoy making these delightful treats! Yes, you can make the batter ahead of time. Mix the dry ingredients first, then store them. You can keep the dry mix in an airtight container for up to a week. For the wet ingredients, mix them together and store them in the fridge. Just remember to combine them when ready to bake. This saves time and still tastes fresh. To keep your muffins moist, use fresh ingredients. The apple cider adds great flavor and moisture. Be careful not to overmix the batter. A few lumps are okay. Also, let the muffins cool in the pan for a few minutes. This helps them stay moist. Finally, rolling them in cinnamon sugar adds an extra touch of moisture and flavor. Muffins and doughnuts differ in texture and method. Muffins are denser and use a batter. They are baked, which gives them a soft inside. Doughnuts, on the other hand, are often fried, making them light and airy. They may have a glaze or sugar on top. In this recipe, we get the best of both worlds with the flavors of a doughnut in a muffin form. Try this full recipe for a delicious treat! You learned how to make apple cider doughnut muffins using essential and optional ingredients. I shared tips for preparing the batter, baking, and cooling. Avoid common mistakes for perfect muffins by following these techniques. You can also explore tasty variations with gluten-free options or added fruits. Lastly, I covered the best storage methods to keep them fresh. Enjoy these muffins at any time. They are sure to impress!
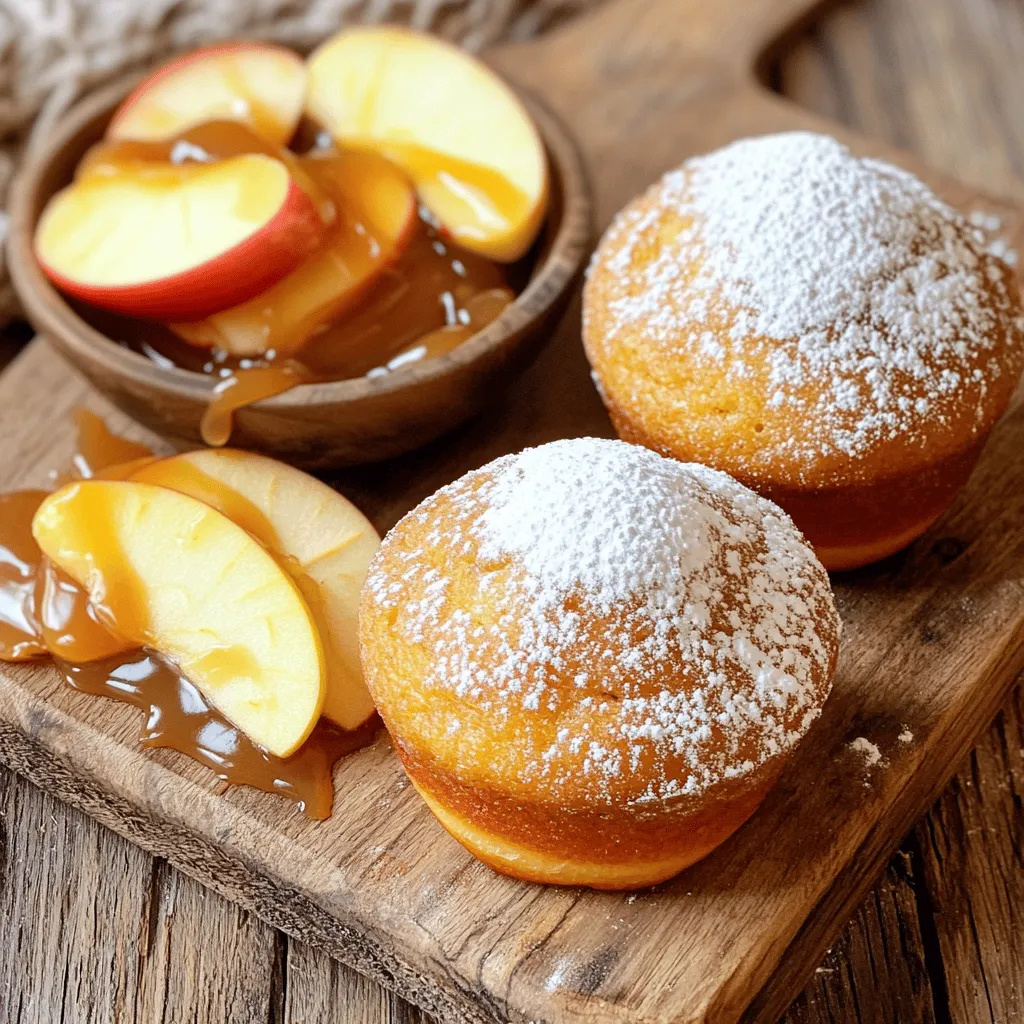
Apple Cider Doughnut Muffins Flavorful and Easy Recipe
If you crave a treat that combines the rich taste of fall and warm spices, you’ll love these Apple Cider Doughnut Muffins! They bring that
To make soft pumpkin cookies, gather these key ingredients: - 2 cups all-purpose flour - 1 teaspoon baking soda - 1 teaspoon baking powder - 1 teaspoon ground cinnamon - 1/2 teaspoon ground nutmeg - 1/4 teaspoon ground ginger - 1/2 teaspoon salt - 1/2 cup unsalted butter, softened - 1 cup brown sugar, packed - 1/2 cup granulated sugar - 1 cup canned pumpkin puree - 1 large egg - 1 teaspoon vanilla extract These ingredients work together to create a soft and flavorful cookie that captures the essence of fall. The pumpkin puree adds moisture and a lovely color, while the spices bring warmth and comfort. Next, let’s prepare the sweet cinnamon frosting. You will need: - 1/2 cup unsalted butter, softened - 2 cups powdered sugar - 1 teaspoon ground cinnamon - 3 tablespoons milk (or as needed) - 1/2 teaspoon vanilla extract This frosting is creamy and sweet, perfect for topping your cookies. The cinnamon adds a delightful kick that pairs beautifully with pumpkin. - Selecting the best pumpkin puree: Use 100% pure pumpkin puree for the best flavor. Check labels to avoid added sugars or spices. - Importance of room temperature ingredients: Make sure your butter and egg are at room temperature. This helps them mix well, resulting in a smoother dough. For the complete recipe, check out the Full Recipe link. 1. Preheat oven and prepare the baking sheet: First, set your oven to 350°F (175°C). This is the perfect temperature for soft cookies. Line a baking sheet with parchment paper. This helps the cookies not stick. 2. Whisk together dry ingredients: In a medium bowl, mix 2 cups of all-purpose flour, 1 teaspoon of baking soda, 1 teaspoon of baking powder, 1 teaspoon of ground cinnamon, 1/2 teaspoon of ground nutmeg, 1/4 teaspoon of ground ginger, and 1/2 teaspoon of salt. Whisk them well. This step helps blend the flavors. 3. Cream butter and sugars until fluffy: In a large bowl, use an electric mixer to cream together 1/2 cup of softened unsalted butter, 1 cup of packed brown sugar, and 1/2 cup of granulated sugar. Mix until it becomes light and fluffy. This process gives your cookies a great texture. 1. Incorporating pumpkin, egg, and vanilla: Add 1 cup of canned pumpkin puree, 1 large egg, and 1 teaspoon of vanilla extract into the butter and sugar mix. Beat until everything is well combined. The pumpkin keeps the cookies moist and tasty. 2. Gradually adding dry mixture: Slowly add the dry mixture to the wet ingredients. Mix just until everything is incorporated. Be careful not to overmix. Overmixing can make the cookies tough. 1. Forming dough balls and spacing on the baking sheet: Use a cookie scoop or two tablespoons to drop rounded balls of dough onto your prepared baking sheet. Leave about 2 inches of space between each ball. This space lets them spread while baking. 2. Recommended baking time and visual cues for doneness: Place the baking sheet in the oven and bake for 12-15 minutes. You want the edges to be set and the tops to be slightly firm. They should stay soft in the center. You can check them by lightly touching the top. If it springs back, they're done. For the full recipe, including the delicious cinnamon frosting, refer to the Full Recipe section. Baking time is key for soft cookies. Bake them for 12 to 15 minutes. The edges should set, but the center stays soft. If you overbake, your cookies will turn hard. Cooling on the baking sheet matters too. Let the cookies cool for about 5 minutes. This helps them firm up without losing that soft texture. After that, transfer them to a wire rack to cool completely. For spreading or piping frosting, use a spatula or a piping bag. A spatula gives a smooth finish. If you pipe, use a star tip for a nice look. To achieve smooth frosting, beat the mixture well. If it feels thick, add a little milk. Just one tablespoon at a time helps keep it fluffy and easy to spread. You can add spices or extracts for more flavor. A dash of nutmeg or cloves can boost the taste. Vanilla extract enhances sweetness, making each bite special. Try using different types of sugar too. Brown sugar gives a caramel flavor, while granulated sugar keeps it sweet. Mixing them can create a balanced taste. {{image_2}} You can easily make these cookies gluten-free. Substitute regular flour with a gluten-free flour blend. Look for blends that include xanthan gum. This helps mimic the texture of all-purpose flour. Follow the same measurements as in the Full Recipe. Your cookies will still be soft and delicious! To make the cookies even more fun, try adding chocolate chips or nuts. A half cup of chocolate chips makes a sweet twist. Walnuts or pecans add a nice crunch. You can also experiment with different frostings. Cream cheese frosting offers a tangy taste. Or try maple frosting for a seasonal flair! Incorporate cranberries or pecans for a festive touch. Dried cranberries add a burst of tartness. Chopped pecans give a lovely nutty flavor. These additions make the cookies perfect for holiday gatherings. Enjoy the blend of flavors and the cozy feeling they bring! To keep your soft pumpkin cookies fresh at room temperature, place them in an airtight container. This helps prevent them from drying out. You can also add a slice of bread inside the container. The bread keeps the cookies moist. If you want to refrigerate or freeze cookies, first, let them cool completely. Wrap each cookie in plastic wrap. Then, place them in a freezer bag or container. Cookies stay fresh in the freezer for up to three months. To keep leftover cinnamon frosting fresh, store it in an airtight container. Make sure to refrigerate it. Use the frosting within one week for best taste. You can reuse leftover frosting on other treats. Spread it on cupcakes, brownies, or even on pancakes. It adds a nice touch of flavor! Soft pumpkin cookies can last about five days at room temperature. If refrigerated, they can last up to a week. Cinnamon frosting lasts about a week in the fridge. Watch for signs of spoilage, like off smells or changes in color. If you see any, it’s best to throw it away. For the full recipe, you can check the link provided. Enjoy your baking! To check if your cookies are done, look for slight firmness. The edges should be set, but the tops may look soft. A little browning is okay, but don’t let them get too dark. The cookies will continue to cook a bit after you take them out. Yes, you can make the dough ahead of time. Just wrap it in plastic wrap and chill it in the fridge. You can keep it there for up to three days. When you're ready, scoop and bake them fresh. This keeps the cookies soft and tasty. If you don’t have pumpkin puree, you can use applesauce. It gives a nice sweetness and moisture. Butternut squash puree is another great option. Both will keep your cookies soft and delicious. If your frosting is too runny, you can thicken it. Add more powdered sugar, a little at a time. Mix it in well until you reach the right thickness. If it’s too thick, add milk slowly until it’s smooth. You can make some swaps for a healthier cookie. Use less sugar or try coconut sugar. You can also replace butter with applesauce or a healthier oil. These changes keep the flavor while making them a bit better for you. For the complete recipe, check out the Full Recipe. It has all the step-by-step details you'll need. In this post, I shared key ingredients for making soft pumpkin cookies and cinnamon frosting. I explained how to prepare the dough, bake the cookies, and keep them fresh. I also covered tips for flavor variations and storage methods. These cookies are a fun treat for any time of year. Experiment with flavors to find your favorite version. Enjoy baking and sharing these delightful cookies with family and friends!
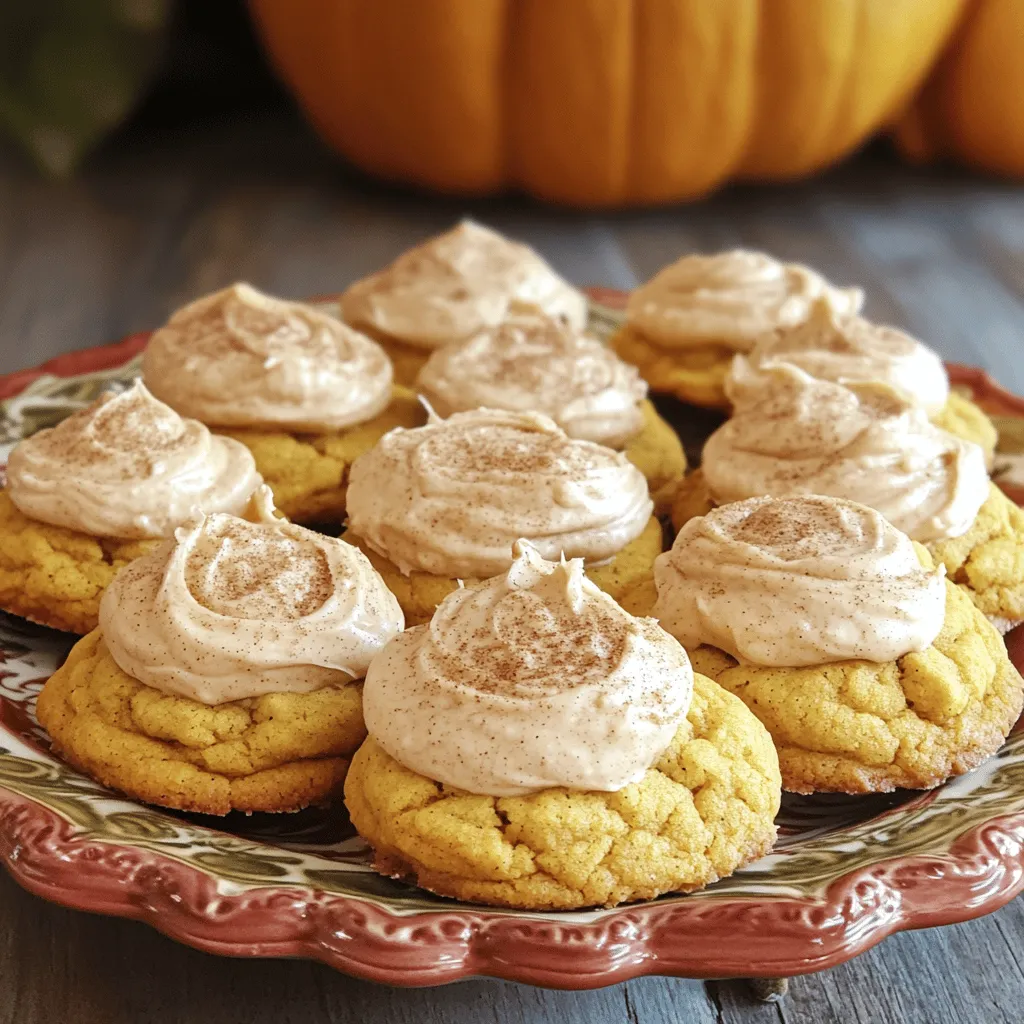
Soft Pumpkin Cookies with Cinnamon Frosting Delight
Get ready to delight your taste buds with the softest pumpkin cookies topped with creamy cinnamon frosting! These cookies are perfect for fall or holiday