Desserts
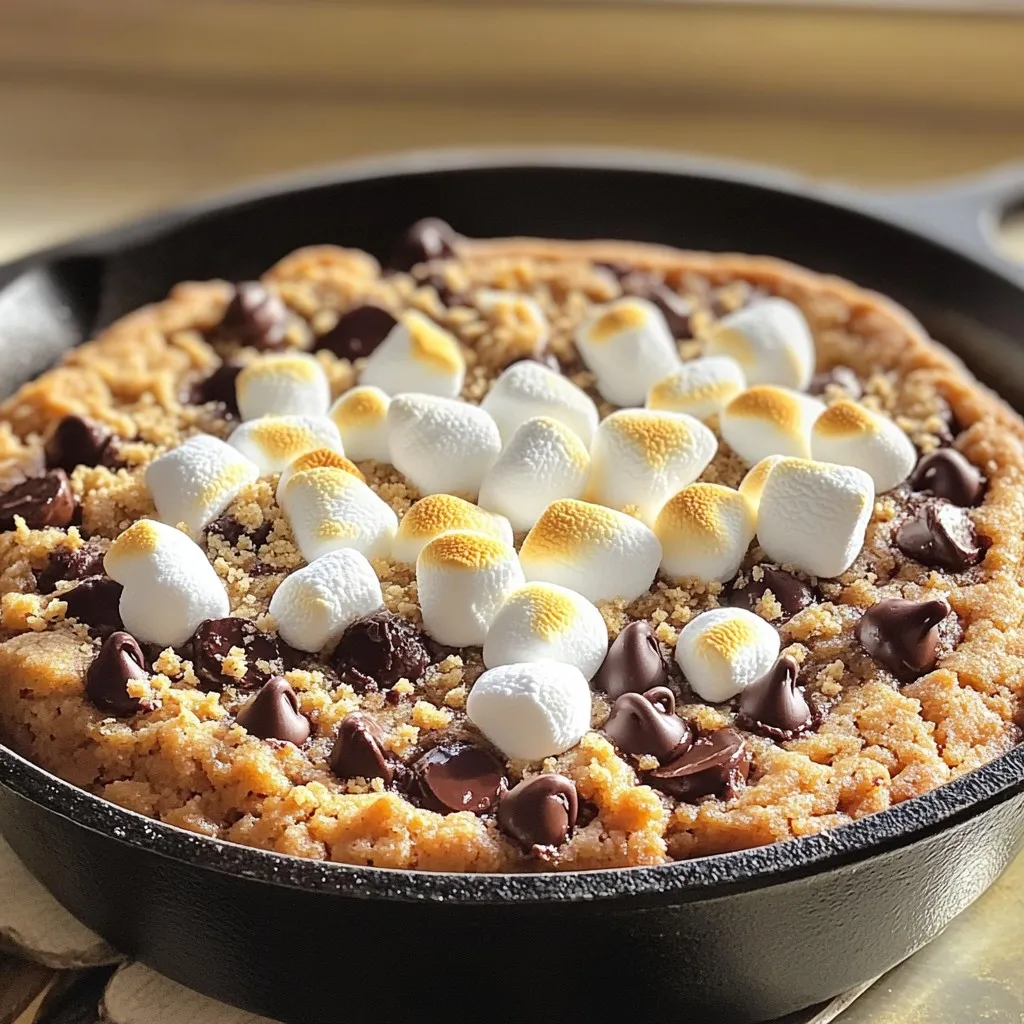
S’mores Skillet Cookie Delightfully Gooey Treat
Get ready to indulge in the ultimate comfort food with my S’mores Skillet Cookie, a delightfully gooey treat! This easy recipe blends rich chocolate, soft
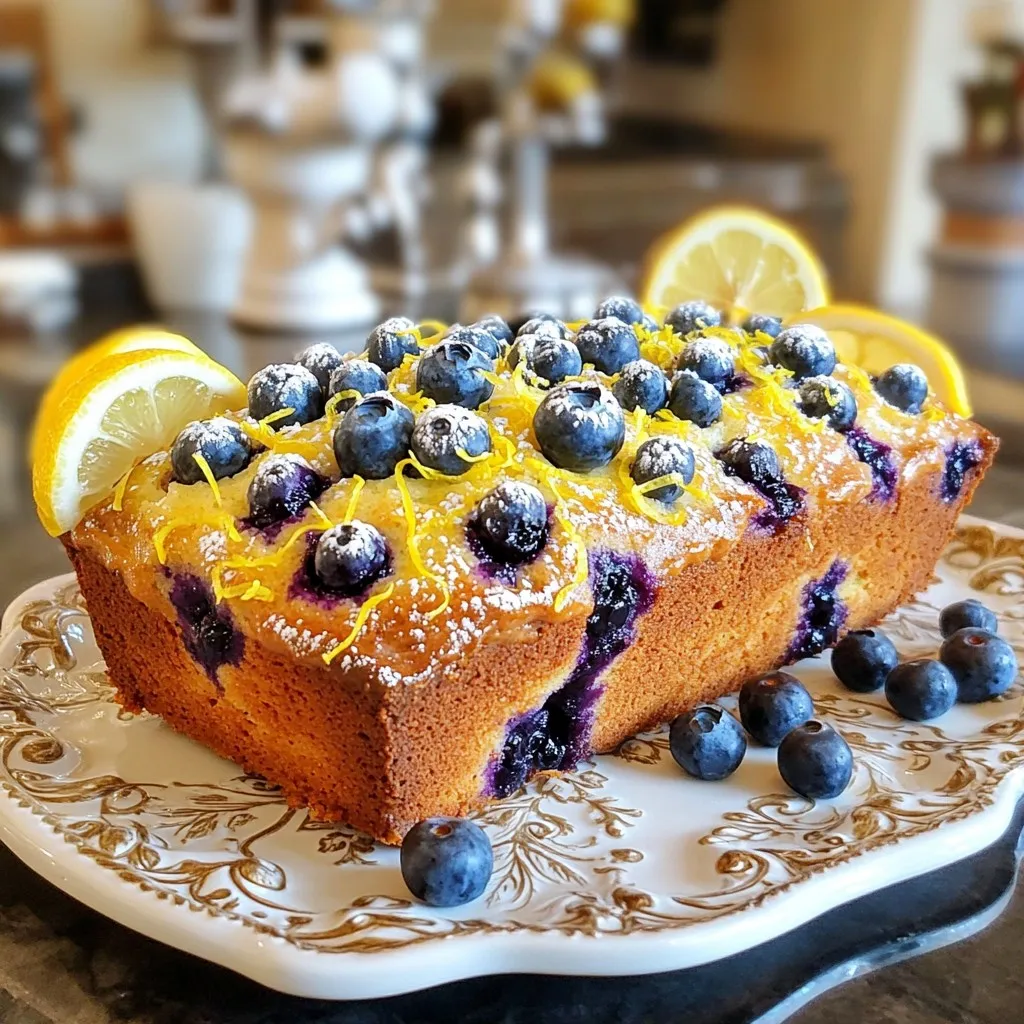
Lemon Blueberry Yogurt Loaf Fresh and Tasty Recipe
Looking for a fresh and tasty treat? This Lemon Blueberry Yogurt Loaf recipe brings together rich flavors with simple ingredients. You’ll love how creamy Greek
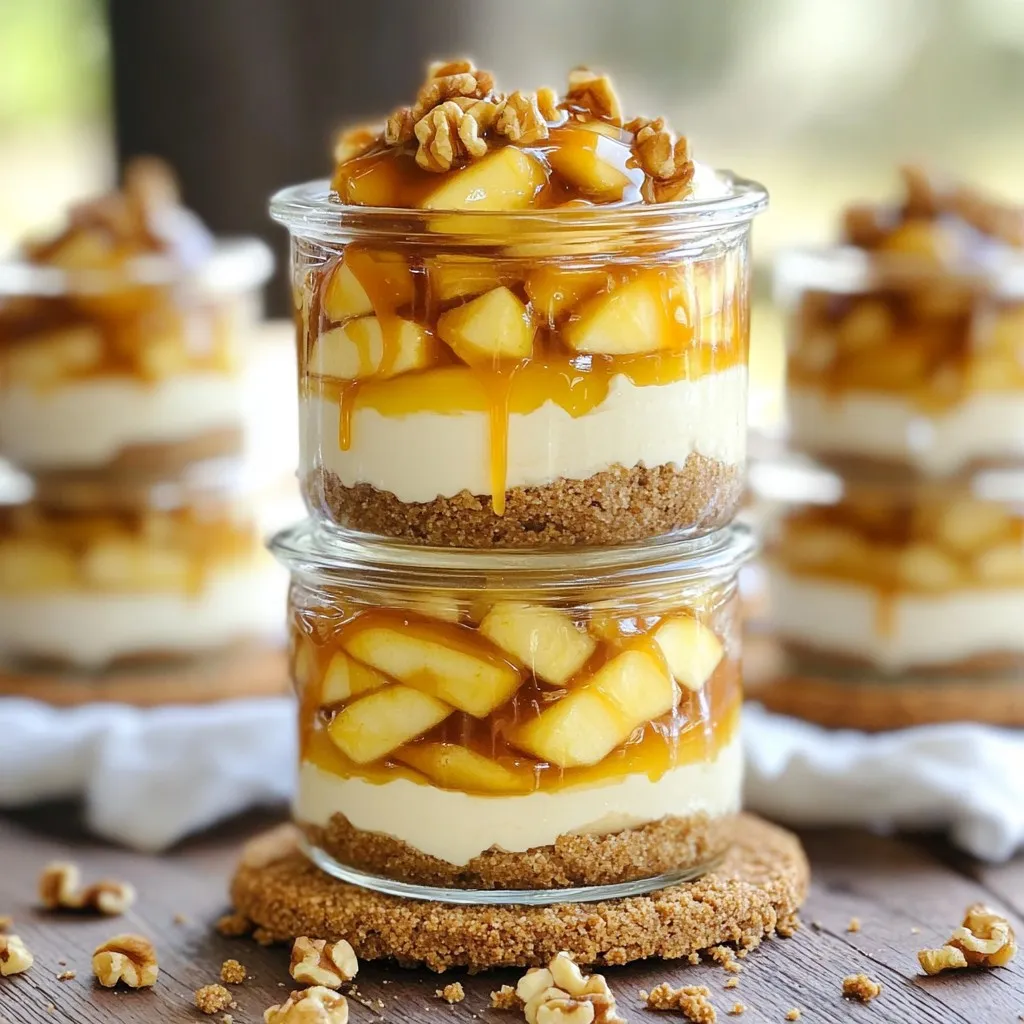
Caramel Apple Cheesecake Parfaits Easy Dessert Recipe
Craving a dessert that’s both easy and delicious? You’re in for a treat! My Caramel Apple Cheesecake Parfaits combine creamy cheesecake, sweet apples, and rich
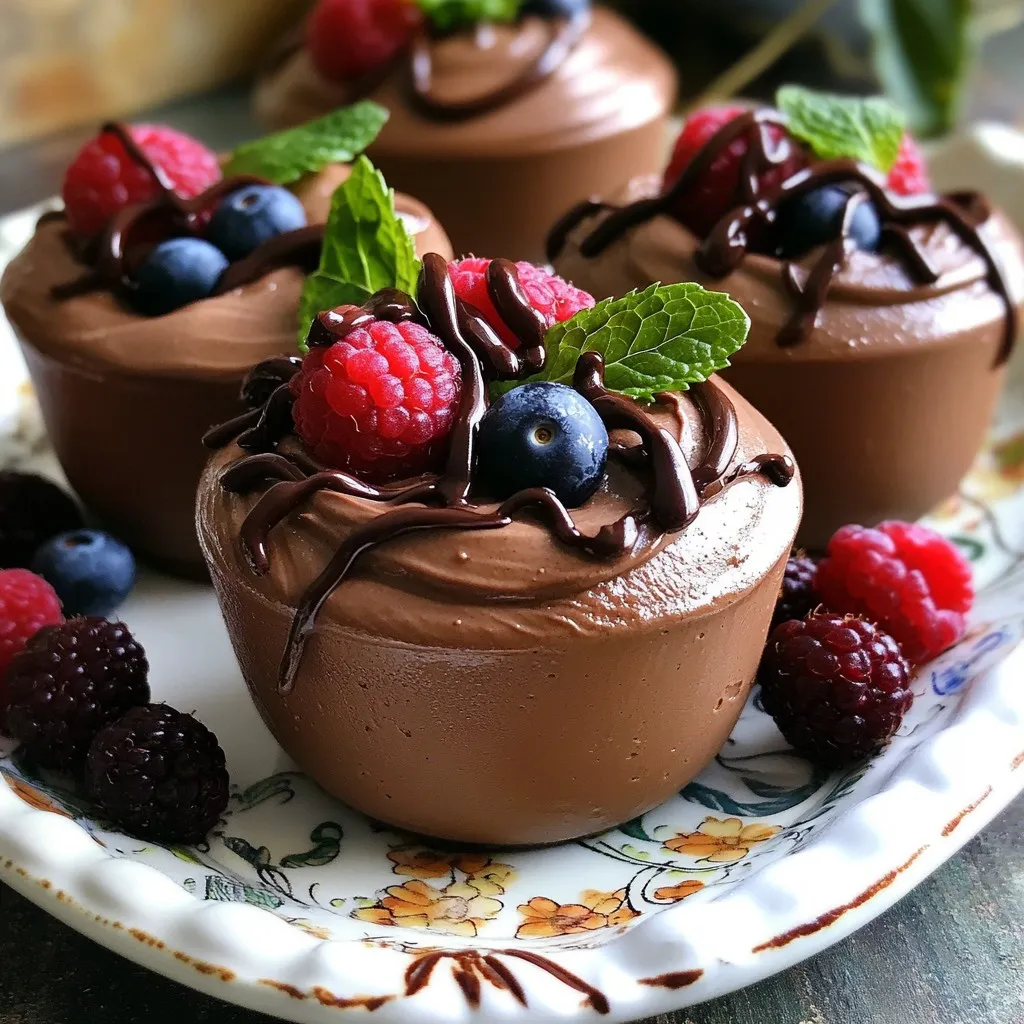
Cottage Cheese Chocolate Mousse Cups Delightfully Simple
Want to impress your friends with a simple yet delicious dessert? These Cottage Cheese Chocolate Mousse Cups are just the treat you need! With a
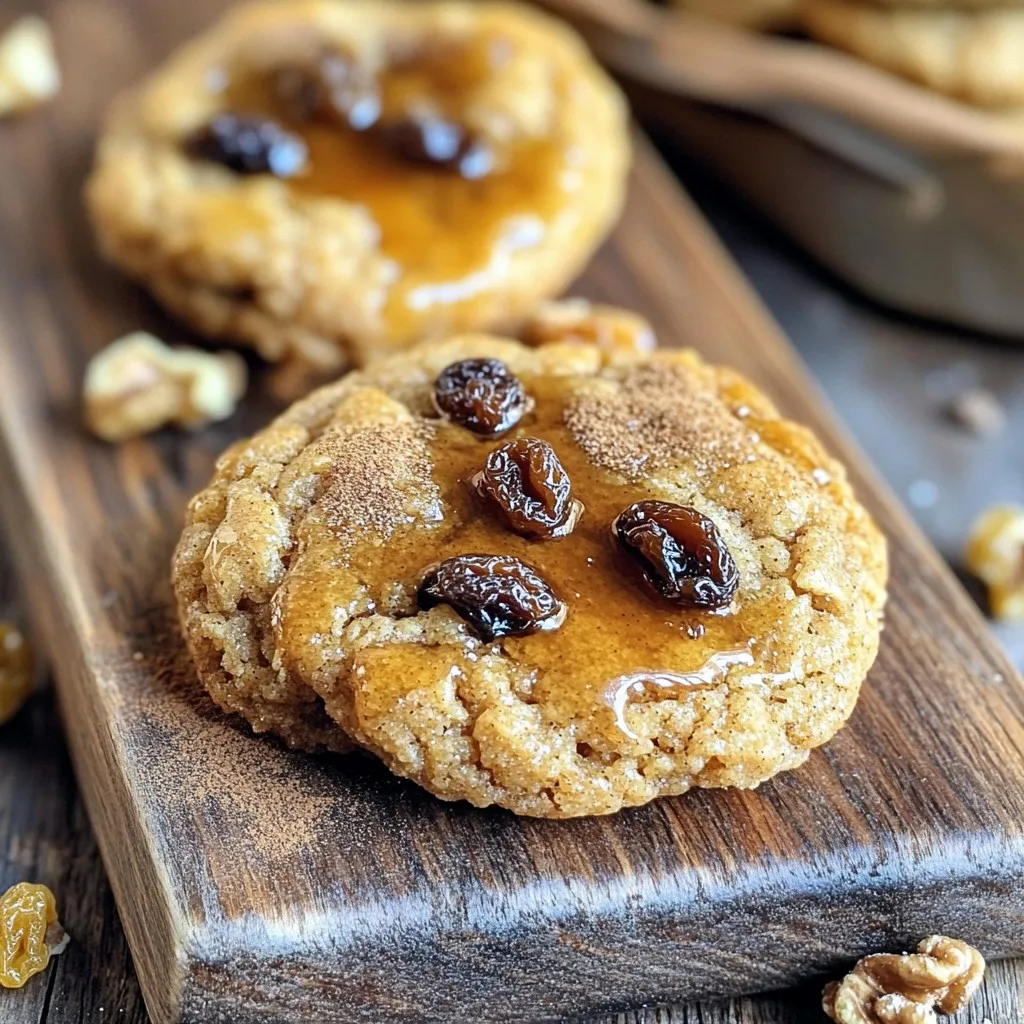
Spiced Maple Brown Sugar Breakfast Cookies Delightful Treat
Are you ready to elevate your breakfast routine? These Spiced Maple Brown Sugar Breakfast Cookies are a delicious way to start your day. With warm
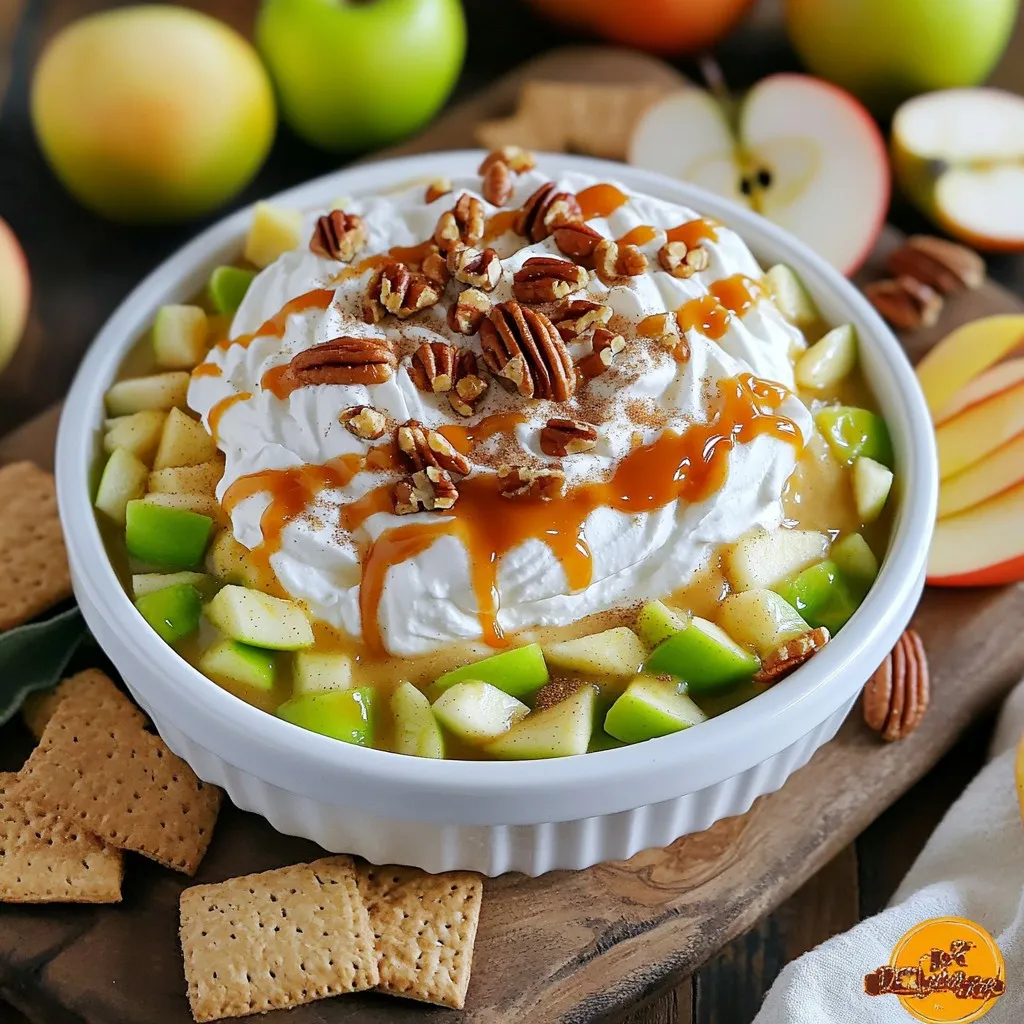
No Bake Caramel Apple Cheesecake Dip Delight
Get ready for a sweet treat with my No Bake Caramel Apple Cheesecake Dip Delight! If you love creamy, rich desserts that are super easy
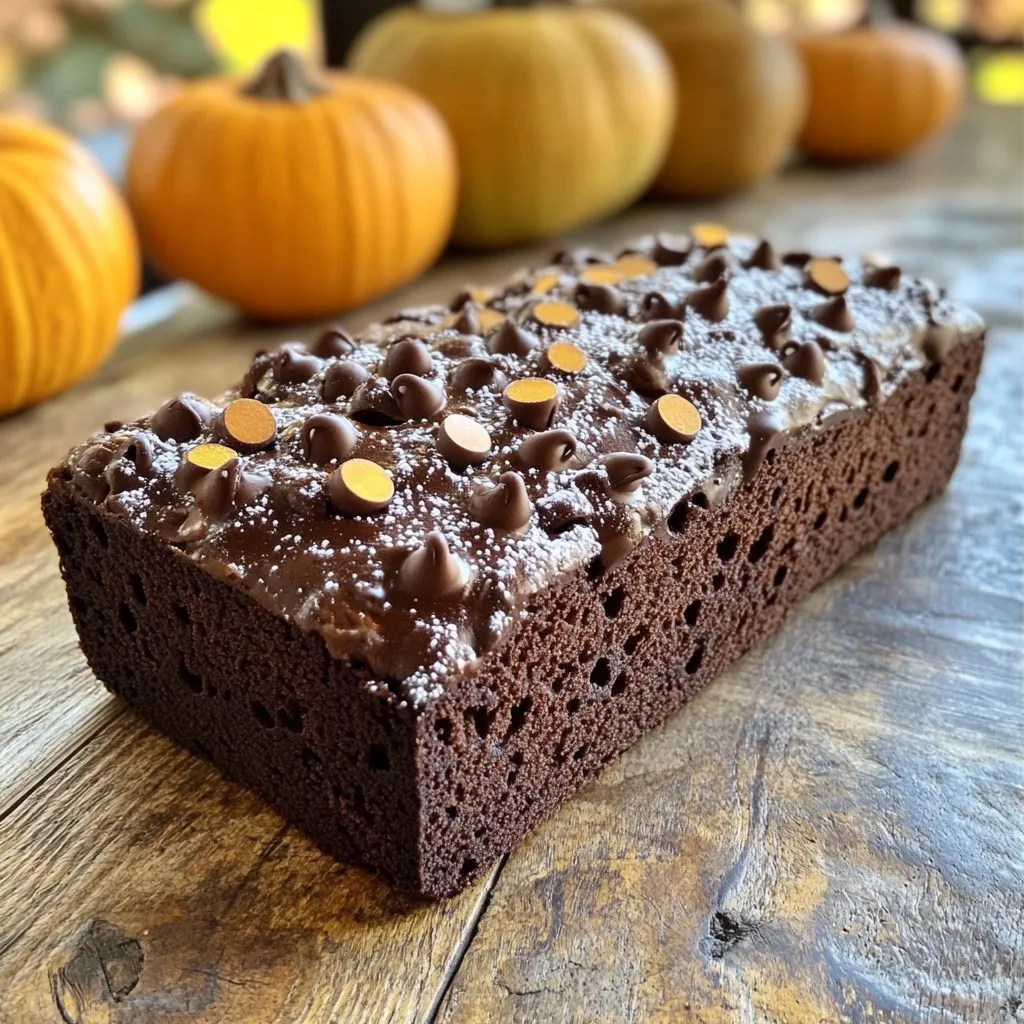
Bakery Style Chocolate Pumpkin Loaf Deliciously Rich
Get ready to bake a treat that combines comforting pumpkin and rich chocolate in one delicious loaf! My Bakery Style Chocolate Pumpkin Loaf is easy
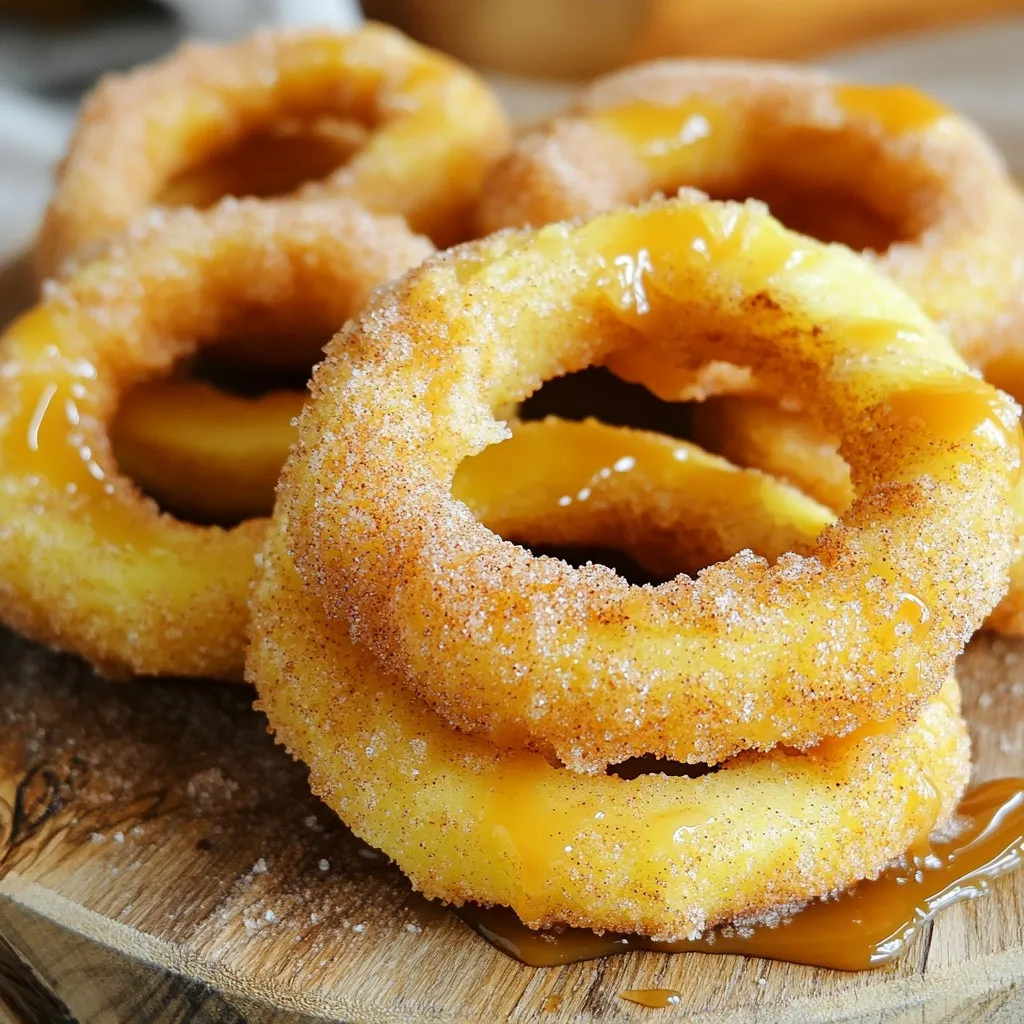
Air Fryer Cinnamon Sugar Apple Rings Delightful Treat
If you’re craving a sweet and crispy treat, look no further than Air Fryer Cinnamon Sugar Apple Rings. These delicious bites are easy to make
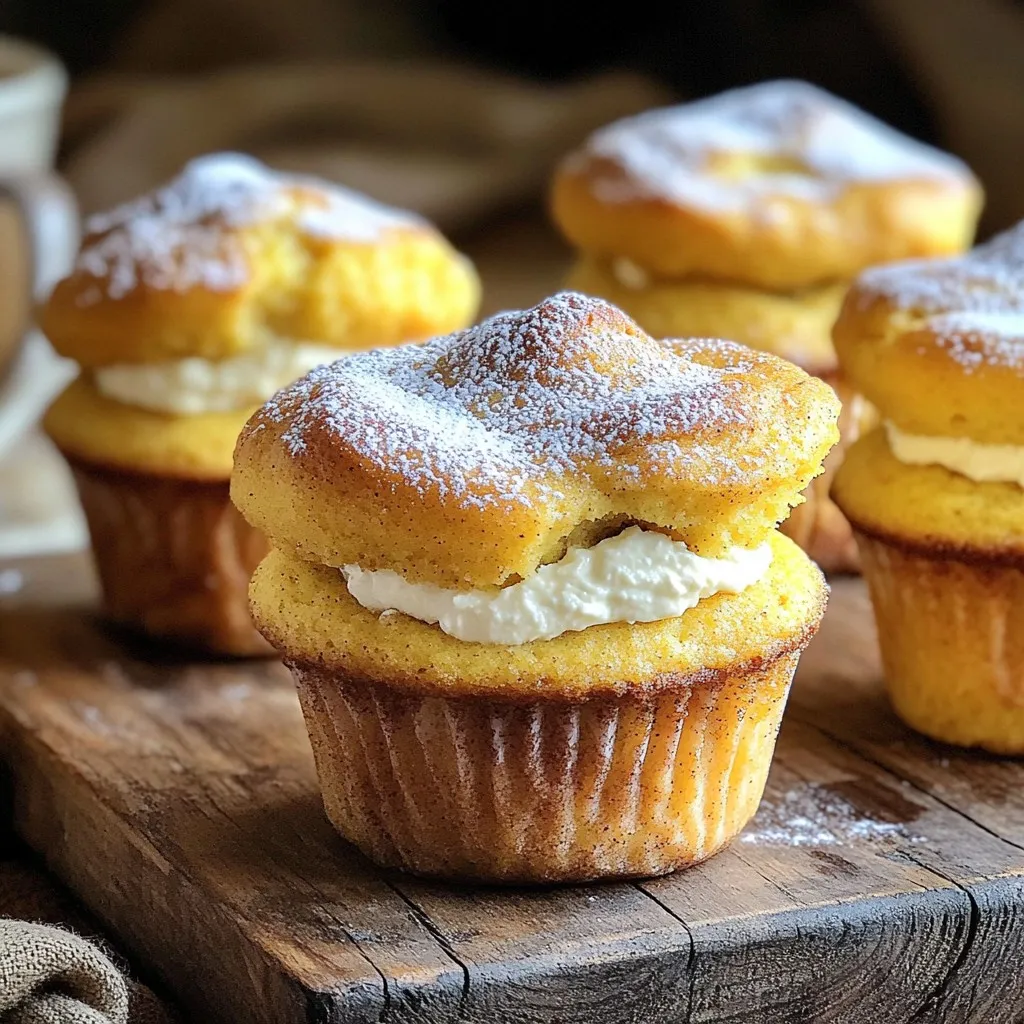
Pumpkin Cream Cheese Muffin Tops Delightful Treats
If you love pumpkin treats, you need to try Pumpkin Cream Cheese Muffin Tops! These delicious bites are soft, creamy, and bursting with flavor. Perfect
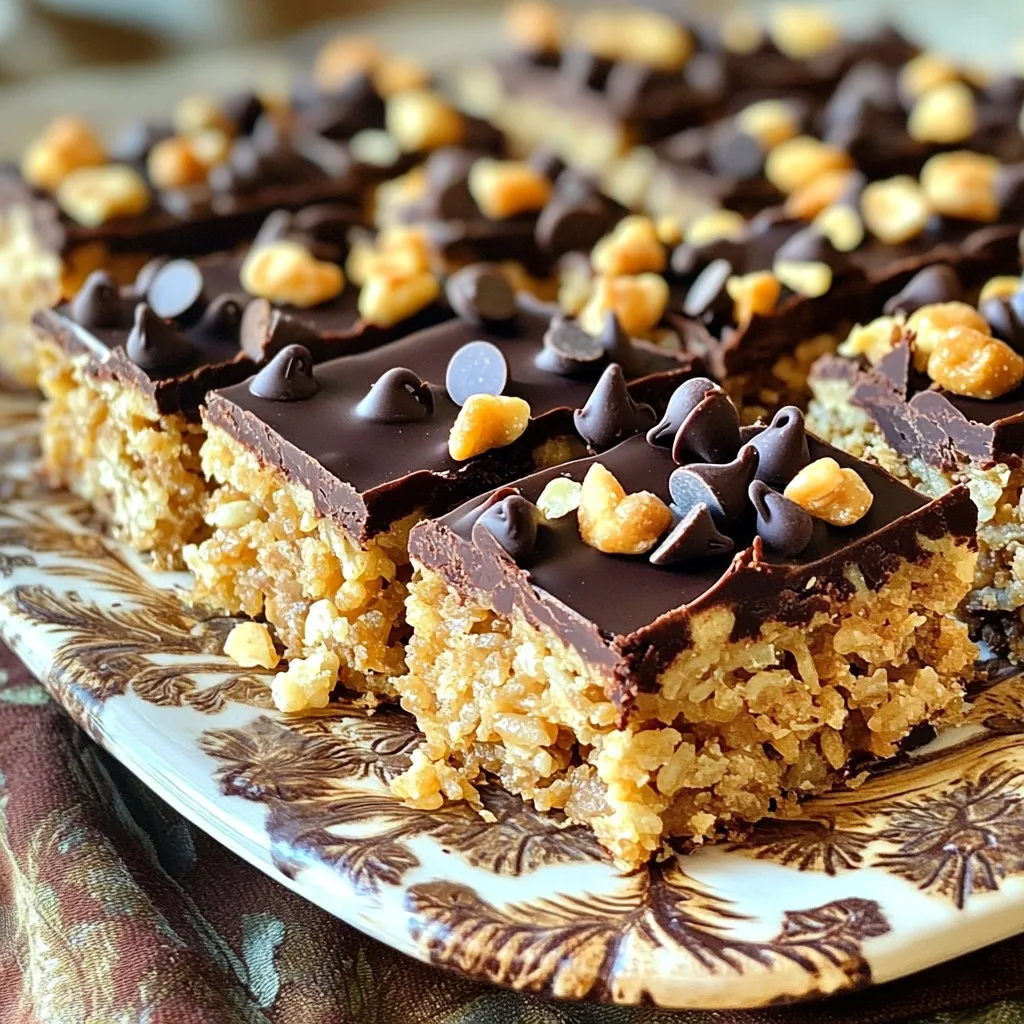
Chocolate Peanut Butter Crunch Bars No Bake Delight
Looking for a sweet treat that’s easy to make? You’ve hit the jackpot with these no-bake Chocolate Peanut Butter Crunch Bars! With creamy peanut butter,