Desserts
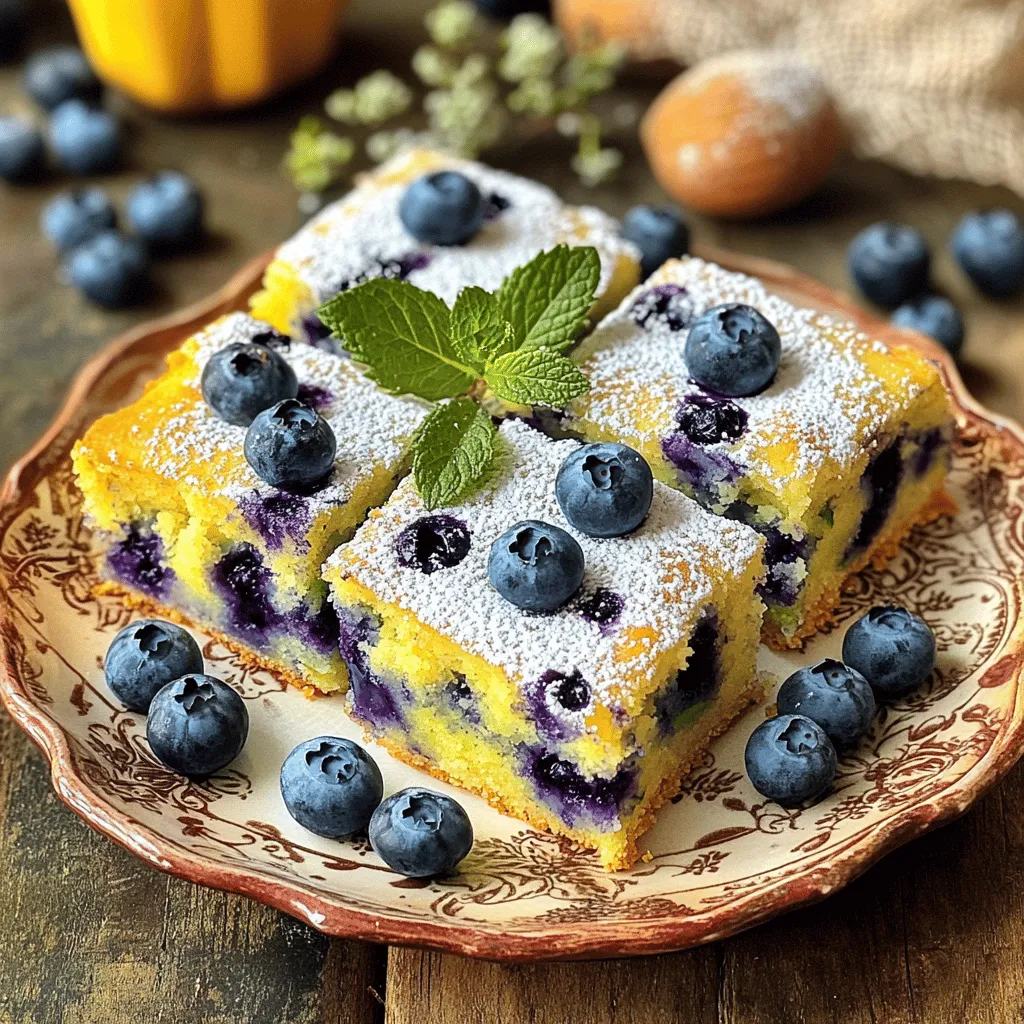
Blueberry Zucchini Squares Delightful and Easy Recipe
If you’re looking for a treat that’s both tasty and healthy, you’re in the right spot! My Blueberry Zucchini Squares are a perfect blend of
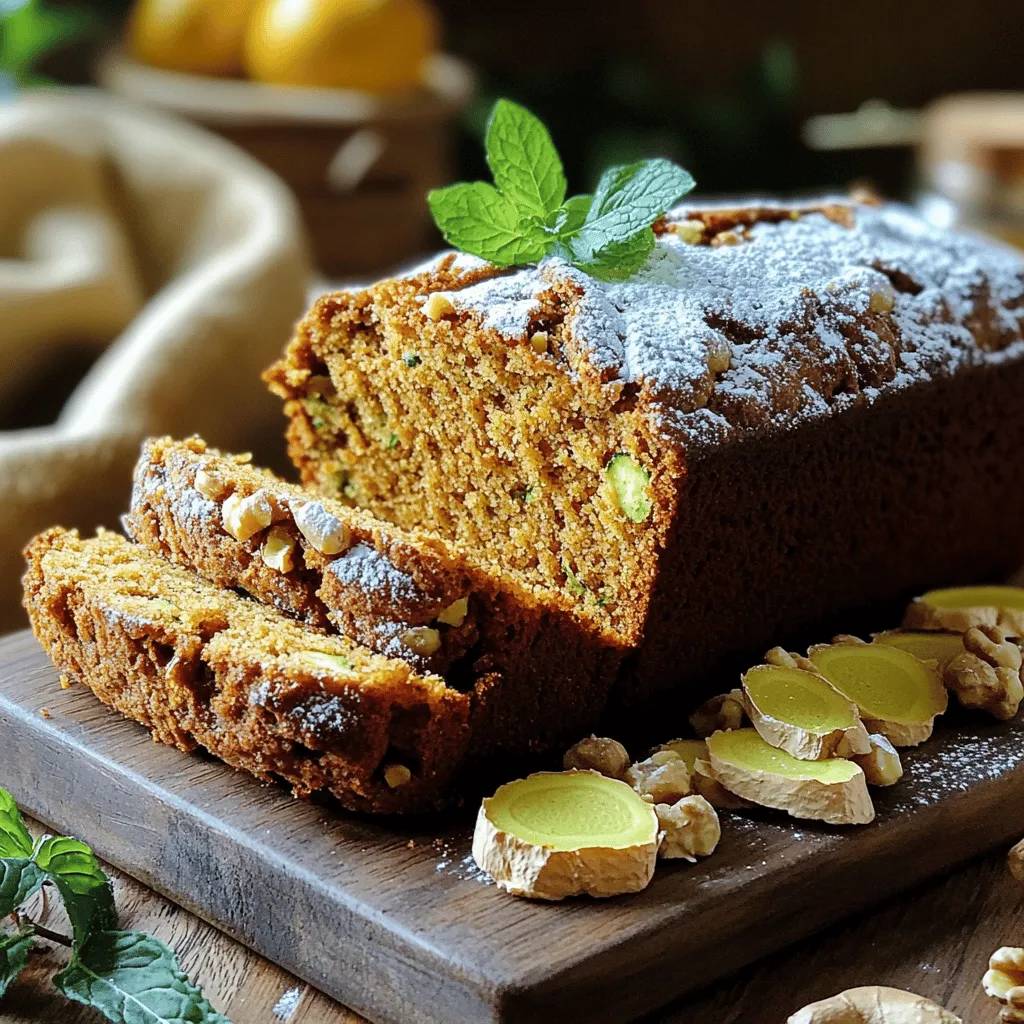
Zucchini Gingerbread Delightful and Wholesome Treat
Do you love a tasty treat that’s both fun and healthy? Zucchini gingerbread is your answer! This delightful and wholesome dessert combines the warm spices
![To make these vegan zucchini brownies, you need simple and healthy ingredients. Here’s the list: - 1 cup finely grated zucchini (about 1 medium zucchini) - 1 cup all-purpose flour - 1/2 cup cocoa powder - 1/2 cup coconut sugar (or brown sugar) - 1/2 teaspoon baking soda - 1/2 teaspoon baking powder - 1/4 teaspoon salt - 1/3 cup unsweetened applesauce - 1/3 cup maple syrup - 1/4 cup almond milk (or any plant-based milk) - 1 teaspoon vanilla extract - 1/2 cup dairy-free chocolate chips (optional) These ingredients work together to create rich and yummy brownies. Each one plays a key role in flavor and texture. You might not have every ingredient on hand. Here are some easy swaps: - Zucchini: You can use finely grated carrots instead. - All-purpose flour: Try whole wheat flour for a nuttier taste. - Coconut sugar: Brown sugar works well, too. - Unsweetened applesauce: Use mashed bananas if you prefer. - Almond milk: Any plant-based milk, like soy or oat, is great. These substitutions keep the recipe vegan and still tasty. Understanding the nutritional value can help you make informed choices. Here's a quick look: - Calories: About 150 per brownie - Fat: 6 grams - Carbohydrates: 24 grams - Fiber: 2 grams - Protein: 2 grams These brownies are lower in fat compared to regular ones. They still satisfy your sweet tooth without guilt. You can find the full recipe for these delicious vegan zucchini brownies to try this healthy treat at home. To make these vegan zucchini brownies, start by gathering all your ingredients. You will need zucchini, flour, cocoa, sugar, baking powder, and more. Prepping is key. Grate your zucchini finely. This helps it mix well and keeps the brownies moist. Measure your dry and wet ingredients separately. This way, you ensure the right balance. 1. Preheat the oven to 350°F (175°C). This step is important for even baking. 2. Grease your pan or line it with parchment paper. This helps with easy removal later. 3. Mix the wet ingredients in a large bowl. Combine grated zucchini, applesauce, maple syrup, almond milk, and vanilla. Stir until it blends well. 4. In a separate bowl, whisk together the flour, cocoa powder, coconut sugar, baking soda, baking powder, and salt. This keeps your dry mix even. 5. Add the dry mix to the wet mix. Use a spatula or wooden spoon. Stir gently until just blended. Overmixing can make the brownies tough. 6. Fold in chocolate chips if you want extra sweetness. This is optional but highly recommended. 7. Pour the batter into the prepared pan. Spread it evenly with the spatula. This helps it bake uniformly. 8. Bake for 25-30 minutes. Check for doneness by inserting a toothpick. It should come out mostly clean, with a few crumbs. 9. Cool in the pan for about 10 minutes. Then transfer to a wire rack. Let them cool completely before cutting. To check if your brownies are done, use a toothpick. Insert it into the center. If it comes out with a few moist crumbs, they are ready. If it comes out wet, they need more time. Remember, baking times can vary with different ovens. Keep an eye on them. Enjoy your rich and yummy vegan zucchini brownies! For the full recipe, refer to the earlier section. To make your brownies moist and chewy, use fresh zucchini. Grate it finely and squeeze out some excess water. This keeps the brownies rich. Applesauce adds moisture too. Use unsweetened applesauce for the best results. Also, don’t overmix the batter. Mix just until combined to avoid tough brownies. One common mistake is using too much flour. Measure it correctly to avoid dry brownies. Another mistake is baking them too long. Always check doneness with a toothpick. If it comes out with a few crumbs, they are ready. Letting them cool in the pan too long can make them soggy. For the perfect texture, use a mix of coconut sugar and maple syrup. This blend provides sweetness without being too heavy. If you want a fudgier brownie, reduce the flour slightly. Adding dairy-free chocolate chips enhances both flavor and texture. Experiment with these tips to find your ideal brownie! For the complete recipe, check out the Full Recipe. {{image_2}} You can customize your vegan zucchini brownies by adding nuts or dried fruits. Chopped walnuts or pecans give a nice crunch. Almonds can also work great. If you like dried fruits, try adding raisins or chopped dates. These add sweetness and texture. Just mix in about 1/2 cup of your choice into the batter. This small change can make a big difference in flavor and fun. If you need gluten-free brownies, I recommend using almond flour or a gluten-free flour blend. These options keep the brownies moist and tasty. You might need to adjust the liquid amounts slightly. Start with the same amount of liquid, then add more if needed. This way, you keep that rich and yummy delight without gluten. Spices and extracts can change the taste of your brownies. Adding a pinch of cinnamon or nutmeg brings warmth. You might also try a splash of almond or peppermint extract. These can add a new layer of flavor that surprises your taste buds. Experiment with different combinations to find your favorite. The options are endless, and it makes baking more exciting! For the complete recipe, check out the [Full Recipe]. To keep your vegan zucchini brownies fresh, store them in an airtight container. Place them at room temperature for up to three days. If you want to store them longer, move them to the fridge. They last about a week when chilled. Always let them cool completely before storing. This helps prevent sogginess. You can freeze these brownies for later enjoyment. First, cut them into squares. Wrap each piece tightly in plastic wrap. Then, place the wrapped brownies in a freezer-safe bag. They will stay fresh for about three months. When you’re ready to eat, just thaw them in the fridge or at room temperature. To reheat, use your oven for the best flavor. Preheat it to 350°F (175°C). Place the brownies on a baking sheet. Heat them for about 5-10 minutes. This warms them up and revives their texture. You can also microwave them for about 30 seconds. Just be careful not to overheat. Enjoy them warm or at room temperature! For the complete recipe, check out the Full Recipe section. No, you cannot taste the zucchini in these brownies. The zucchini adds moisture and keeps them soft. The cocoa powder and sweeteners mask any veggie flavor. You will only enjoy rich, chocolatey goodness. This recipe makes it fun to sneak in some veggies! These brownies last about 3 to 5 days when stored in an airtight container. You can keep them at room temperature. If you want them to last longer, store them in the fridge. Just remember to let them warm up a bit before eating! Yes, you can substitute the applesauce. You can use mashed bananas or even pureed pumpkin. Both options will keep the brownies moist. The flavors will change a little, but they will still taste great. Just stick to the same amount, about 1/3 cup. For the full recipe, you can check out the complete instructions and details. Vegan zucchini brownies are delicious and easy to make. We covered all the essential ingredients you need and suggested great substitutions. I shared detailed steps for preparing and baking, plus tips to check for doneness. You can avoid common mistakes to ensure your brownies are moist and chewy. Don't forget the fun variations to try! Store them well to keep them fresh. You can even freeze extras for later. Now, you’re ready to bake. Enjoy these treats that are both tasty and guilt-free!](https://tossedrecipes.com/wp-content/uploads/2025/07/be3da008-ef75-4a73-94ee-d6f0ebc6426c.webp)
Vegan Zucchini Brownies Rich and Yummy Delight
Are you ready to indulge in a sweet treat that’s both healthy and guilt-free? My Vegan Zucchini Brownies are the perfect blend of rich flavor
Blueberry Zucchini Bread Tasty and Easy Recipe
Are you ready to bake something delicious? This Blueberry Zucchini Bread is both tasty and easy! It’s a perfect way to make use of garden
. {{image_2}} To make this bread gluten-free, swap all-purpose flour for a gluten-free blend. Look for a mix that includes xanthan gum. This will help give the bread structure. You may also need to adjust the liquid slightly. Gluten-free flours absorb more moisture. So, add a little extra applesauce if needed. To create a vegan version, replace eggs with flaxseed meal. Mix one tablespoon of flaxseed meal with three tablespoons of water. Let it sit for five minutes to thicken. You can use coconut oil instead of vegetable oil. Use a plant-based applesauce for added flavor. This keeps the bread moist and tasty. You can boost the flavor of your bread in many ways. Consider adding: - Spices: Try ginger or allspice for warmth. - Add-ins: Toss in raisins or dried cranberries for a sweet twist. - Zest: Add lemon or orange zest for a fresh taste. These simple changes make your carrot apple zucchini bread unique and exciting! Check out the Full Recipe for more ideas. To keep your carrot apple zucchini bread fresh, store it in an airtight container. Place a layer of wax paper between the bread and the lid to absorb moisture. This helps maintain the bread's soft texture. You can also wrap it in plastic wrap first, then place it in the container. Keep it at room temperature for up to three days. Freezing is a great way to save your bread for later. First, let it cool completely. Then, slice the bread for easy thawing. Wrap each slice in plastic wrap, and then place them in a freezer bag. Make sure to remove as much air as possible. You can freeze the bread for up to three months. Carrot apple zucchini bread lasts about three days at room temp. If you freeze it, it can stay fresh for three months. To reheat, simply take a slice and warm it in the microwave for 10-15 seconds. For a lovely crust, toast it in a toaster or oven. Enjoy it warm for the best taste. For more details, check out the Full Recipe. Yes, you can change some ingredients. Use any type of apple you like. If you want to skip sugar, try honey or maple syrup. You can also swap vegetable oil for melted coconut oil. For gluten-free, use a gluten-free flour blend. Just remember, these changes may change the taste a bit. To check if the bread is done, insert a toothpick into the center. If it comes out clean or with just a few crumbs, the bread is ready. If it has wet batter on it, bake a bit longer. The top should be golden brown, and the edges should pull away from the pan. Absolutely! You can make mini loaves. Just fill mini loaf pans about two-thirds full with batter. Bake them for around 25 to 30 minutes. Check them with a toothpick like you would for the large loaf. This is a fun way to share with friends. To store leftover bread, let it cool completely first. Wrap it in plastic wrap or foil. You can keep it at room temperature for up to three days. If you want to keep it longer, place it in the freezer for up to three months. Just thaw it in the fridge when you’re ready to eat. This blog post covered a delightful carrot, apple, and zucchini bread recipe. You learned about ingredients, steps, and variations to make it yours. Remember to store your bread properly for longer freshness. Try different flavors or make it gluten-free or vegan. Follow these tips and tricks for perfect results every time. With practice, you’ll create a tasty treat that everyone will enjoy. Baking should be fun, so experiment and share your results! Enjoy this delicious bread in good company.](https://tossedrecipes.com/wp-content/uploads/2025/07/2bacab0d-553b-4236-9b44-90450d566770.webp)
Carrot Apple Zucchini Bread Simple and Tasty Treat
Are you ready to bake something delicious? This Carrot Apple Zucchini Bread is a simple and tasty treat that will impress everyone. It combines fresh
![- 1 ½ cups all-purpose flour - 1 cup granulated sugar - ½ cup unsweetened cocoa powder - 1 teaspoon baking soda - ½ teaspoon baking powder - ½ teaspoon salt - 2 large eggs - ½ cup vegetable oil - 1 teaspoon vanilla extract - 1 ½ cups grated zucchini (about 1 medium zucchini) - ¾ cup semi-sweet chocolate chips - Optional: powdered sugar for dusting To create a rich and moist chocolate zucchini cake, the ingredients play a key role. Each one adds its own unique flavor and texture. Flour is the base of the cake. It gives structure. Sugar sweetens and helps with browning. Cocoa powder adds that rich chocolate taste. Baking soda and baking powder help the cake rise. Salt enhances the sweetness. The eggs bind the mix and add moisture. Vegetable oil keeps the cake tender. Vanilla extract brings a warm flavor. Grated zucchini is the secret ingredient. It adds moisture without changing the taste. Finally, the chocolate chips add little bursts of chocolate joy. This is a balanced mix. You can trust it will yield a delicious cake. For the full recipe, check the earlier section. - Preheat your oven to 350°F (175°C). - Grease or line a 9x13 inch baking pan with parchment paper. This helps with easy removal later. - In a large bowl, combine: - 1 ½ cups all-purpose flour - 1 cup granulated sugar - ½ cup unsweetened cocoa powder - 1 teaspoon baking soda - ½ teaspoon baking powder - ½ teaspoon salt - Whisk these together until they mix well. - In another bowl, beat 2 large eggs. - Then, mix in: - ½ cup vegetable oil - 1 teaspoon vanilla extract - Stir until the mixture is smooth and blended. - Combine the wet and dry ingredients. - Mix until just blended; do not overbeat. - Gently fold in: - 1 ½ cups grated zucchini - ¾ cup semi-sweet chocolate chips - Make sure everything is evenly mixed. - Pour the batter into your prepared pan. - Spread it out evenly. - Bake for 25-30 minutes. - Check doneness with a toothpick; it should come out clean. - Let the cake cool in the pan for about 10 minutes. - Carefully transfer it to a wire rack to cool completely. - Once cooled, dust the top with powdered sugar if you like. - Slice into squares to serve. Now you can enjoy this moist and rich chocolate zucchini cake! For the full recipe, check the ingredients section. To keep your chocolate zucchini cake moist, avoid overmixing the batter. Overmixing can make the cake dense. Mix until just combined for a light texture. Another great tip is to add more zucchini. The extra moisture from zucchini makes a richer cake. You can use up to two medium zucchinis for an even moister result. You can easily boost the flavor of your cake. Adding spices like cinnamon or nutmeg gives depth. Try a teaspoon of instant coffee for a richer chocolate taste. Vanilla extract adds sweetness, but almond extract can add a nice twist. Feel free to experiment with these variations to find your favorite flavor combination. To make your cake stand out, try decorating it. Dust the top with powdered sugar for a clean look. For a fun touch, add chocolate shavings or fresh berries. You could even drizzle melted chocolate on top. If it's a special occasion, consider adding whipped cream or a scoop of ice cream for serving. These simple touches make your cake visually appealing and delicious. For the full recipe, check out the complete instructions to create this delightful treat. {{image_2}} You can make this cake even better by using whole wheat flour. Whole wheat flour adds fiber and nutrients. You can also swap sugar for natural sweeteners like honey or maple syrup. These alternatives give a different taste and can reduce calories. Mixing in nuts or raisins can add a nice crunch. Try walnuts or pecans for a nutty twist. If you want warmth, add a pinch of cinnamon or nutmeg. These spices enhance the rich chocolate flavor and make each bite special. For a gluten-free cake, use a gluten-free flour blend. Many blends work well, but make sure they have a good balance of ingredients. This option lets everyone enjoy the cake, even those with gluten issues. Just follow the same steps in the Full Recipe. To keep your chocolate zucchini cake fresh, store it at room temperature. Use an airtight container. This will keep the cake moist and tasty. If you live in a hot place, you might want to refrigerate it. Just make sure to cover it well to avoid drying out. You can freeze your chocolate zucchini cake easily. First, let it cool completely. Then, wrap it tightly in plastic wrap. Place it in a freezer-safe bag or container. This way, it stays fresh for up to three months. When you want to enjoy it, take it out. Let it defrost in the fridge overnight for the best taste. If stored properly, your cake can last for about 3 to 4 days at room temperature. In the fridge, it can last up to a week. Check for any signs of spoilage before eating. If it looks or smells off, it's best to toss it. Enjoy the rich flavors of your chocolate zucchini cake while it's fresh! For the complete recipe, refer to [Full Recipe]. Yes, you can use frozen zucchini. Just make sure to thaw it first. Drain off any extra water after thawing. This helps keep the cake moist without making it soggy. Frozen zucchini works well in baked goods. You won’t lose any flavor or texture. If you want to skip eggs, there are great options. You can use 1/4 cup of applesauce for each egg. Another choice is 1/4 cup of mashed bananas. Flaxseed meal is also a good option—mix one tablespoon with three tablespoons of water. Let it sit for five minutes before adding it to your batter. To check if the cake is done, look for a few signs. The edges should pull away from the pan. The top should look set and not shiny. You can also gently press the center. If it springs back, it’s ready. If you want, you can also use a toothpick. Insert it in the center; it should come out clean. Yes, you can make mini cakes! Just use a muffin tin instead of a baking pan. Fill each cup about two-thirds full. Bake for about 15-20 minutes. Keep an eye on them! They bake faster than a full-sized cake. Enjoy these little treats that are easy to share! For the full recipe, check out the details above. You now have a complete guide to making a delicious chocolate zucchini cake. We covered the ingredients, step-by-step instructions, and helpful tips. Remember to mix gently and feel free to explore variations to suit your taste. This cake is moist, flavorful, and perfect for any occasion. With proper storage, it can stay fresh for days. Enjoy baking and sharing this treat with others!](https://tossedrecipes.com/wp-content/uploads/2025/07/a22ba03a-e9b7-408f-84e8-eae90fc27081.webp)
Chocolate Zucchini Cake Moist and Rich Delight Recipe
Are you ready to bake a delightful treat that’s moist, rich, and sneaks in a healthy veggie? This Chocolate Zucchini Cake is your answer! With

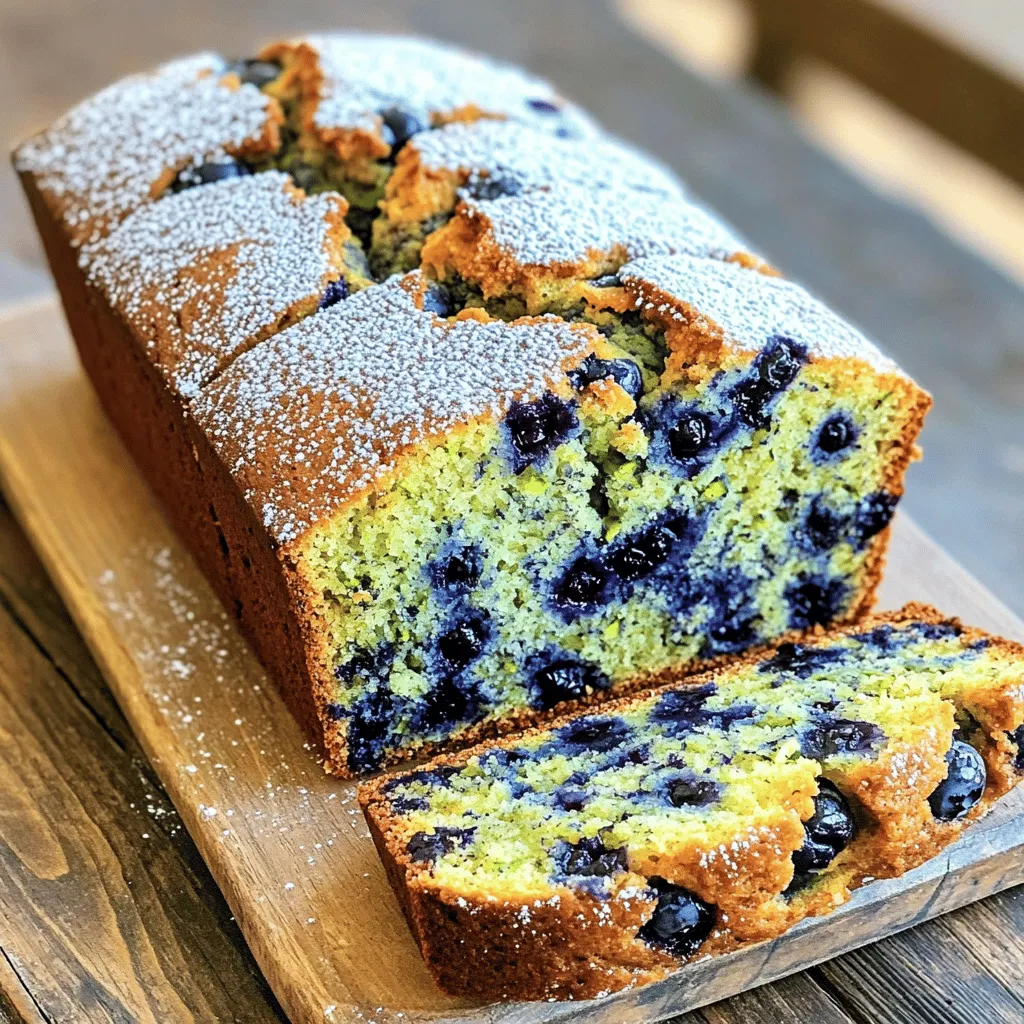
Blueberry Lemon Zucchini Bread Irresistible Recipe
Are you ready for a delightful treat that hits all the right notes? Blueberry Lemon Zucchini Bread is a moist, delicious blend of flavors that
. Start by preheating your oven to 350°F (175°C). This step is vital for even baking. Next, take a 10-inch Bundt pan and grease it well with butter or oil. Then, sprinkle some flour in the pan. This helps the cake slide out easily after baking. In a medium bowl, combine the dry ingredients. Use a sifter to mix together the flour, cocoa powder, baking soda, baking powder, salt, and cinnamon. Sifting prevents lumps and makes the cake light. Set this bowl aside while you move on to the wet ingredients. In a large mixing bowl, add the granulated sugar, brown sugar, vegetable oil, eggs, and vanilla extract. Whisk these together until they are smooth. You want everything well mixed. This mix creates a rich base for your cake. Now, it’s time to add the star of the show: the zucchini! Gently fold in the grated zucchini along with the chocolate chips. Make sure they are evenly spread throughout the batter. This adds moisture and flavor to your cake. Pour your batter into the prepared Bundt pan. Smooth the top with a spatula. Bake for 50-60 minutes. Check if it’s done by inserting a toothpick into the center. If it comes out clean, your cake is ready! After baking, let it cool in the pan for about 15 minutes. Then, turn it out onto a wire rack to cool completely. For a sweet touch, dust it with powdered sugar before serving. Follow the [Full Recipe] for more details! To start, choose firm zucchinis. They should be smooth and free of blemishes. Wash them well and cut off the ends. Use a box grater or a food processor for quick grating. I like to use the large holes on a box grater. Grate the zucchini right before using it to keep it fresh. Zucchini adds moisture to the cake. To get the most moisture, do not squeeze out the liquid. You want that natural moisture to stay in the batter. Use fresh eggs and quality oil for the best texture. A mix of granulated and brown sugar helps keep the cake soft. Also, be careful not to over-mix the batter. This can make the cake dense instead of light. After baking, let the cake cool in the pan for about 15 minutes. This helps it firm up. Then, flip it onto a wire rack to cool completely. For serving, slice the cake into generous pieces. Dust with powdered sugar for a nice touch. You can also add a scoop of vanilla ice cream on the side. This gives a nice contrast to the rich cake. For the full recipe, check out the details above. {{image_2}} You can change up your Chocolate Zucchini Bundt Cake by adding nuts or dried fruits. Chopped walnuts or pecans add a nice crunch. They also bring out the chocolate flavor. If you like dried fruits, try adding raisins or chopped dates. They add sweetness and a chewy texture. Just remember to keep the total mix under one cup to keep the cake balanced. If you need a gluten-free option, you can swap out the all-purpose flour. Use a gluten-free flour blend that you like. Look for one that has xanthan gum in it. This helps keep the cake fluffy. You should also check the baking powder. Some brands contain gluten. Use a gluten-free brand to ensure your cake is safe to eat. Frosting or glaze can make your cake even better. A simple chocolate glaze is easy to make. Just melt chocolate with a little cream and pour it over the cooled cake. For a different taste, try a vanilla glaze. Mix powdered sugar with milk and a splash of vanilla. Drizzle it over the top for a sweet finish. You can also skip the frosting and just dust the top with powdered sugar. It looks nice and tastes great too. To explore the full recipe, check out the complete details [Full Recipe]. To keep your chocolate zucchini Bundt cake fresh, wrap it in plastic wrap. Store it in an airtight container at room temperature. This method helps keep the cake moist. You can also place it in the fridge if your home is warm. It will last for about 3 to 5 days. If you want to save some cake for later, freezing is a great option. First, let the cake cool completely. Then, slice it into pieces. Wrap each slice tightly in plastic wrap. Place the wrapped slices in a freezer bag or an airtight container. This way, your cake can stay good for up to 3 months. When you're ready to enjoy it, just thaw the slices in the fridge overnight. To reheat your chocolate zucchini Bundt cake, preheat your oven to 350°F (175°C). Place the cake on a baking sheet. Cover it with aluminum foil to keep it from drying out. Heat it for about 10 to 15 minutes. You can also use a microwave. Just warm individual slices for 15 to 30 seconds. Enjoy your cake warm for the best taste! For the full recipe, check out the complete instructions provided above. Yes, you can use frozen zucchini. Just thaw and drain it well. This helps avoid extra moisture in the cake. Frozen zucchini is great for baking, so don’t worry if you have it on hand. You can make this cake healthier by using whole wheat flour instead of all-purpose flour. You can also reduce the sugar by half. Try using applesauce or yogurt to replace some oil. These swaps keep the cake moist and tasty. To slice a Bundt cake, use a sharp knife. Start from the center and cut evenly to the outer edge. Make sure to wipe the knife between cuts. This keeps the slices clean and pretty. A sinking cake can happen if you overmix the batter or if the oven is too hot. It can also mean you did not bake it long enough. Make sure to check with a toothpick before taking it out. The cake lasts about three days at room temperature. Store it in an airtight container to keep it fresh. If you want it to last longer, consider refrigerating it. For longer storage, you can freeze it. Check the Full Recipe for more details. You learned about making a tasty chocolate zucchini Bundt cake. We covered key ingredients, step-by-step instructions, and helpful tips. You can add your own twist with variations, and I shared how to store leftovers. Baking can be fun and rewarding. With these tips, you can make a delicious cake that impresses friends and family. Enjoy making it your own!](https://tossedrecipes.com/wp-content/uploads/2025/07/a719897a-554b-4d01-b254-e10aca7c47ab.webp)
Chocolate Zucchini Bundt Cake Simple and Yummy Treat
If you love chocolate and want a treat that’s both delicious and moist, this Chocolate Zucchini Bundt Cake is for you! By adding zucchini, you
![- Zucchini and Its Role in the Recipe Zucchini adds moisture to the cake. It keeps the cake rich and soft. Grate it finely to blend in well. You do not taste the zucchini, but it makes the cake better. Use about 1 medium zucchini, which gives you 1 ½ cups when grated. - Key Baking Ingredients The main ingredients for this cake include: - 1 ½ cups all-purpose flour - 1 cup granulated sugar - ½ cup unsweetened cocoa powder - ½ teaspoon baking soda - ½ teaspoon baking powder - ½ teaspoon salt - ½ cup vegetable oil - 2 large eggs - 1 teaspoon vanilla extract These ingredients work together for a tasty and moist cake. The cocoa powder gives the cake its deep chocolate flavor. Baking soda and powder help it rise well. - Optional Add-ins for Extra Flavor You can add more fun to the cake by using: - 1 cup semi-sweet chocolate chips - ½ cup chopped walnuts or pecans (optional) The chocolate chips melt and create pockets of gooey chocolate. Nuts add a nice crunch. You can mix and match these add-ins based on your taste! For the complete recipe, check out the [Full Recipe]. Prepping the Zucchini Start by washing the zucchini. Then, grate it using a box grater or food processor. You want about 1 ½ cups of grated zucchini. Do not peel it; the skin adds color and nutrients. Squeeze out some moisture using a clean kitchen towel. This helps the cake stay soft. Mixing Wet and Dry Ingredients Separately In a large bowl, mix the grated zucchini with sugar, oil, eggs, and vanilla. Stir until everything blends well. In another bowl, whisk together flour, cocoa powder, baking soda, baking powder, and salt. This keeps the dry ingredients even and helps them mix better. Combining the Mixtures Slowly add the dry mix to the wet mix. Stir gently until just combined. Be careful not to overmix; this keeps the cake light. Finally, fold in chocolate chips and nuts if you want. This adds extra flavor and texture to your cake. Preparing the Baking Dish Preheat your oven to 350°F (175°C). Grease and flour a 9x13 inch baking dish. You can also line it with parchment paper for easy cake removal. This step ensures your cake does not stick. Baking Time and Temperature Pour the batter into the prepared dish. Spread it evenly with a spatula. Bake in the oven for 25 to 30 minutes. To check if it's done, insert a toothpick into the center. If it comes out clean, your cake is ready. Cooling Tips Once baked, let the cake cool in the pan for about 10 minutes. Then, transfer it to a wire rack. Let it cool completely. This helps it set and makes it easier to cut. Best Ways to Serve the Cake You can serve the cake dusted with powdered sugar. Another option is to add whipped cream on top. For a pop of color, add chocolate shavings or a mint sprig. Enjoy every bite of this rich, moist chocolate zucchini cake! For the full recipe, check out the details above. Avoiding Overmixing Overmixing can ruin your cake. It makes it dense and tough instead of light and fluffy. When you mix the wet and dry ingredients, stir just until you see no flour. A few lumps are okay. This keeps the cake tender and moist. Adjusting Cooking Times for Different Pan Sizes The size of your pan affects how long the cake bakes. A larger pan spreads the batter thin. It cooks faster, usually needing about 20-25 minutes. If you use a smaller pan, the batter is thicker. This means a longer bake time, around 30-35 minutes. Always check for doneness with a toothpick. Using Quality Cocoa Powder Cocoa powder makes a big difference in taste. Use a high-quality cocoa for rich flavor. Brands like Valrhona or Ghirardelli give the best results. They add deep chocolate notes that make your cake special. Nut Substitutions and Adds-Ons Nuts add crunch and flavor. Chopped walnuts or pecans work great in this recipe. If you want to switch it up, try almonds or hazelnuts. You can skip the nuts if you prefer a nut-free cake. You might also add chocolate chips for extra sweetness. {{image_2}} You can make this chocolate zucchini cake fit your needs. For a gluten-free version, swap all-purpose flour with gluten-free flour. Make sure to use a blend that works well in baking. This keeps the cake light and moist. If you want to cut down on sugar, use a sugar substitute. Look for ones that measure cup for cup like stevia or erythritol. You can also reduce sugar by 25% without losing flavor. A little trial and error helps find the right balance. To make your cake unique, think about adding spices. A teaspoon of cinnamon or nutmeg boosts warmth and depth. These spices blend well with chocolate, making the cake taste even richer. You can also mix in other fruits or nuts. Chopped apples or pears add a fruity twist. For a nutty crunch, try adding walnuts or pecans. These extras create different textures and flavors that make each bite special. Explore these variations and make the recipe your own. For the full recipe, check [Full Recipe]. Store your chocolate zucchini cake at room temperature for the best taste. Keep it in an airtight container. This will help keep it moist and prevent it from drying out. If your kitchen is warm, you might want to refrigerate it. Just remember to let it cool completely first. You can also freeze this cake for later. Wrap it tightly in plastic wrap and then place it in a freezer bag. This method keeps the cake fresh for a few months. When you’re ready to eat it, let it thaw in the fridge or at room temperature. How long does it last? When stored properly, your chocolate zucchini cake can last about 3 to 5 days at room temperature. If you keep it in the fridge, it may last about a week. Look for signs of spoilage. If the cake smells sour or has a strange texture, it's best to throw it away. Mold is also a clear sign that the cake has gone bad. Enjoy your cake while it’s fresh for the best flavor! Can I use frozen zucchini for this recipe? Yes, you can use frozen zucchini. Just thaw it and drain any excess water. This helps keep the cake moist. Can I make this cake ahead of time? Absolutely! You can bake the cake a day in advance. Store it in an airtight container at room temperature. What are some good frosting options for chocolate zucchini cake? Cream cheese frosting adds a nice tang. You can also try chocolate ganache for a rich flavor. Whipped cream is a lighter choice. Is chocolate zucchini cake healthy? It has some health benefits. Zucchini adds fiber and moisture. However, it does have sugar and oil, so enjoy it in moderation. How to make a vegan version? To make it vegan, replace eggs with flaxseed meal or applesauce. Use plant-based milk and oil instead. What is the best cocoa powder for baking? Look for high-quality unsweetened cocoa powder. Dutch-processed cocoa gives a richer flavor, while natural cocoa adds brightness. Can I make mini chocolate zucchini cakes? Yes! Use a mini muffin tin for smaller cakes. Bake for about 15-20 minutes or until a toothpick comes out clean. How does zucchini affect the cake's moisture? Zucchini adds great moisture. It keeps the cake rich and soft. This is why it’s a key ingredient in this recipe. For the full recipe, check out the Chocolate Zucchini Delight Cake section above. To sum it up, we explored how to make a delicious chocolate zucchini cake. We looked at essential ingredients, from zucchini to key baking items and optional flavors. I shared steps for preparation, baking, and serving. Tips helped you avoid mistakes and enhance flavor. You learned variations for diets and storage tips, too. I hope you feel ready to try this cake. It’s tasty and fun to make! Enjoy your baking journey!](https://tossedrecipes.com/wp-content/uploads/2025/07/b5ad0cca-4161-48bd-86f6-c369f1217bf2.webp)
Chocolate Zucchini Cake Rich and Moist Recipe
Looking for a dessert that’s both rich and moist? You’ve stumbled upon the perfect recipe: Chocolate Zucchini Cake! This delightful treat blends chocolatey goodness with
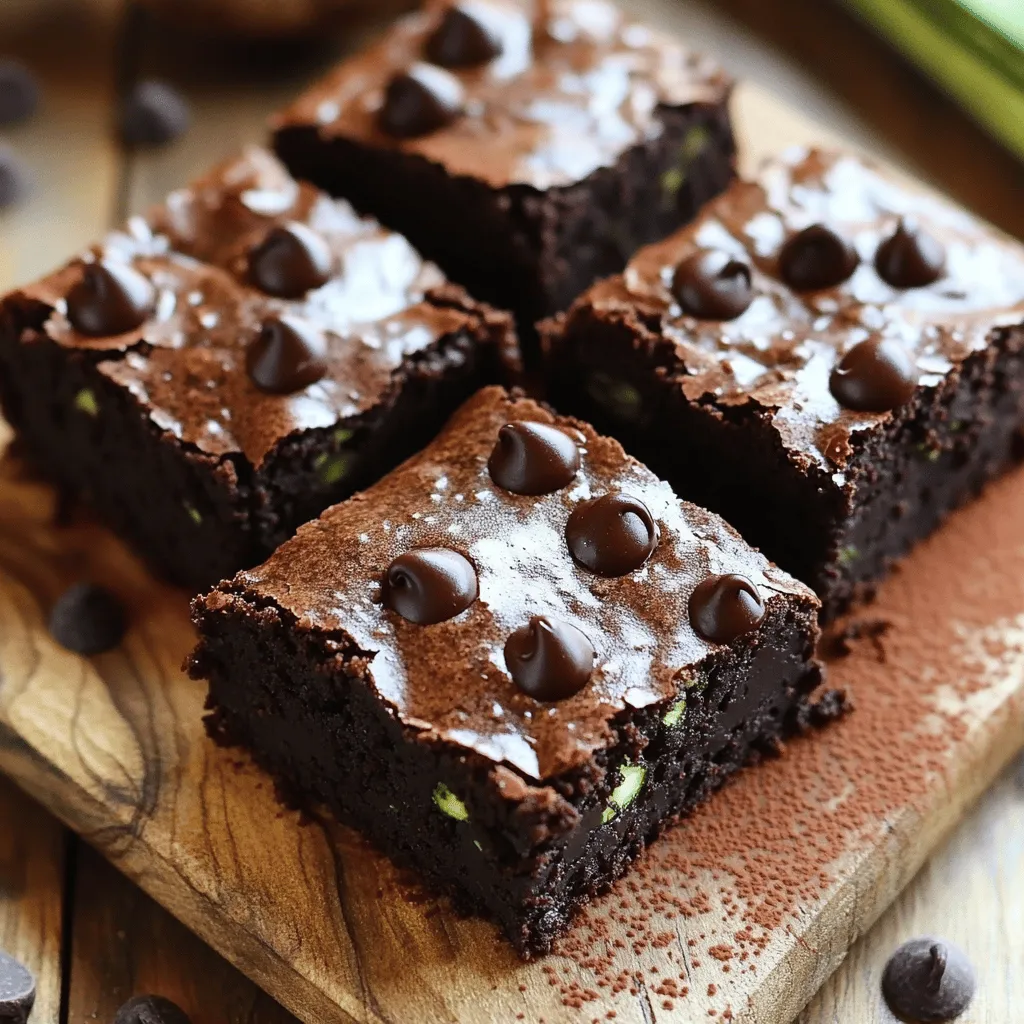
Flourless Chocolate Zucchini Brownies Easy and Delicious
Are you ready to indulge without the guilt? These Flourless Chocolate Zucchini Brownies are not just easy to make; they’re a delicious way to enjoy